
Switch Control is a helpful accessibility feature on Mac. It lets you connect an adaptive device and then interact by entering text, selecting items, and controlling your Mac.
If you want to use Switch Control for you or someone you share your computer with, this tutorial shows you how to enable and customize Switch Control on Mac.
Enable and customize Switch Control
Enable Switch Control
Turning on Switch Control is super easy on your Mac.
1) Open your System Preferences using the icon your Dock or Apple icon > System Preferences from the menu bar.
2) Select Accessibility.
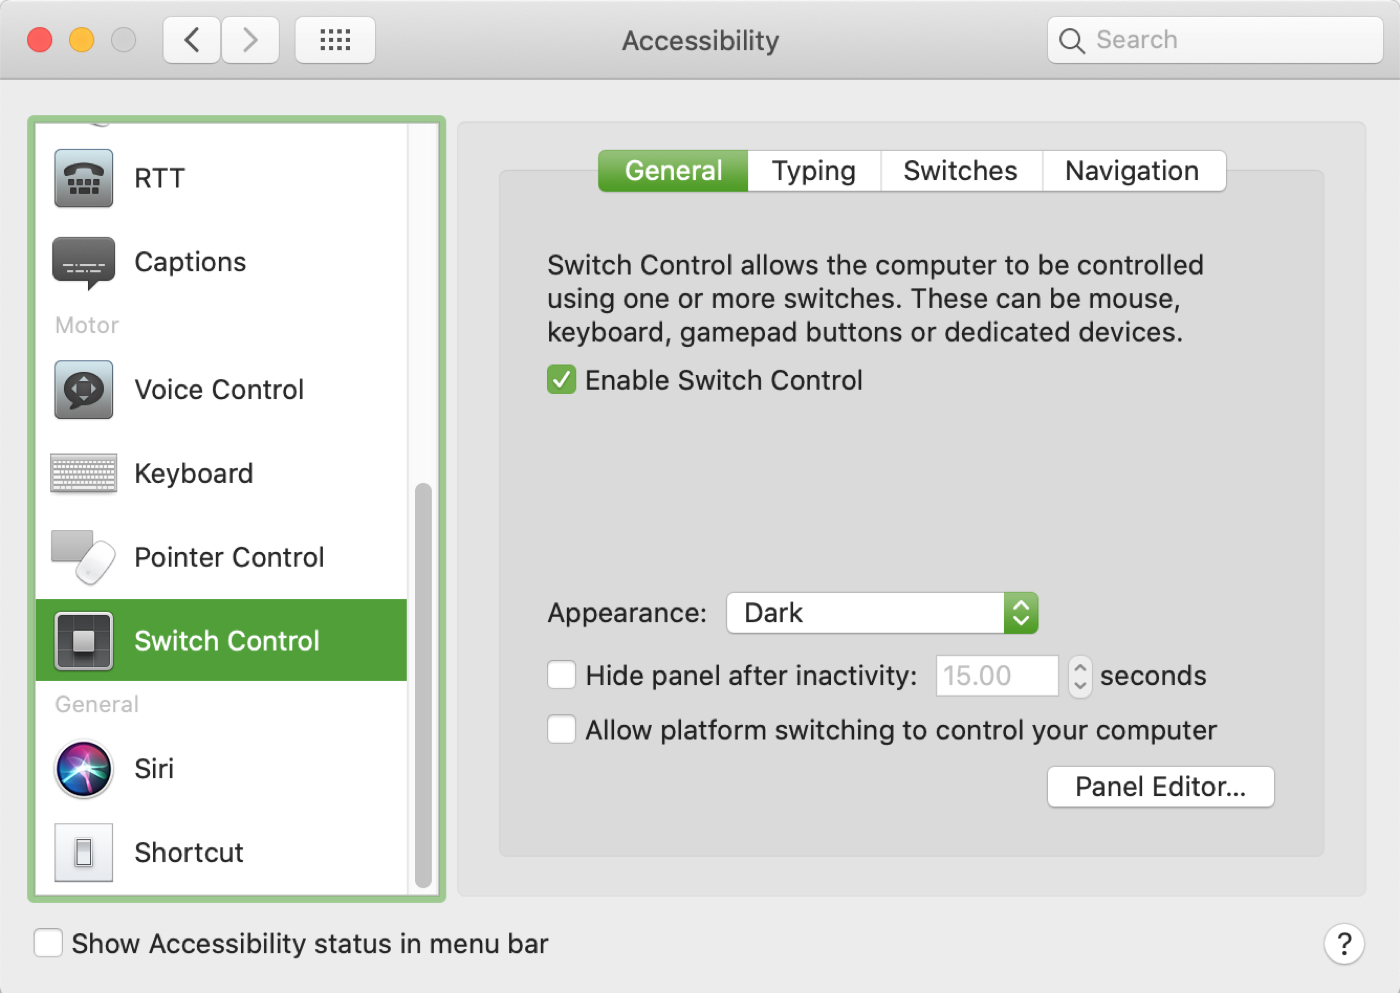
3) On the left, choose Switch Control.
4) On the right, pick General and check the box for Enable Switch Control.

You’ll see the Home – Switch panel appear on your screen.

Customize Switch Control
While in the same Accessibility > Switch Control window, you can take a moment to customize it. You can also disable it to customize the settings if it’s easier, and then simply re-enable it.
General
Appearance: The Switch Control panels are dark with a light background by default, but you can reverse that.
Hide panel after inactivity: You can hide the Switch Control panel after you’re inactive for up to 60 seconds if you like.
Allow platform switching to control your computer: You can use another of your Apple devices that’s already set up to work with your switches to control your Mac. Just make sure the devices are on the same Wi-Fi network and using the same Apple ID.
Typing
You can configure a few settings for when you’re typing using the Switch Control feature. Check or uncheck the boxes for showing the current text in the panel keyboard and automatically inserting and removing spaces and capitalizing sentences.

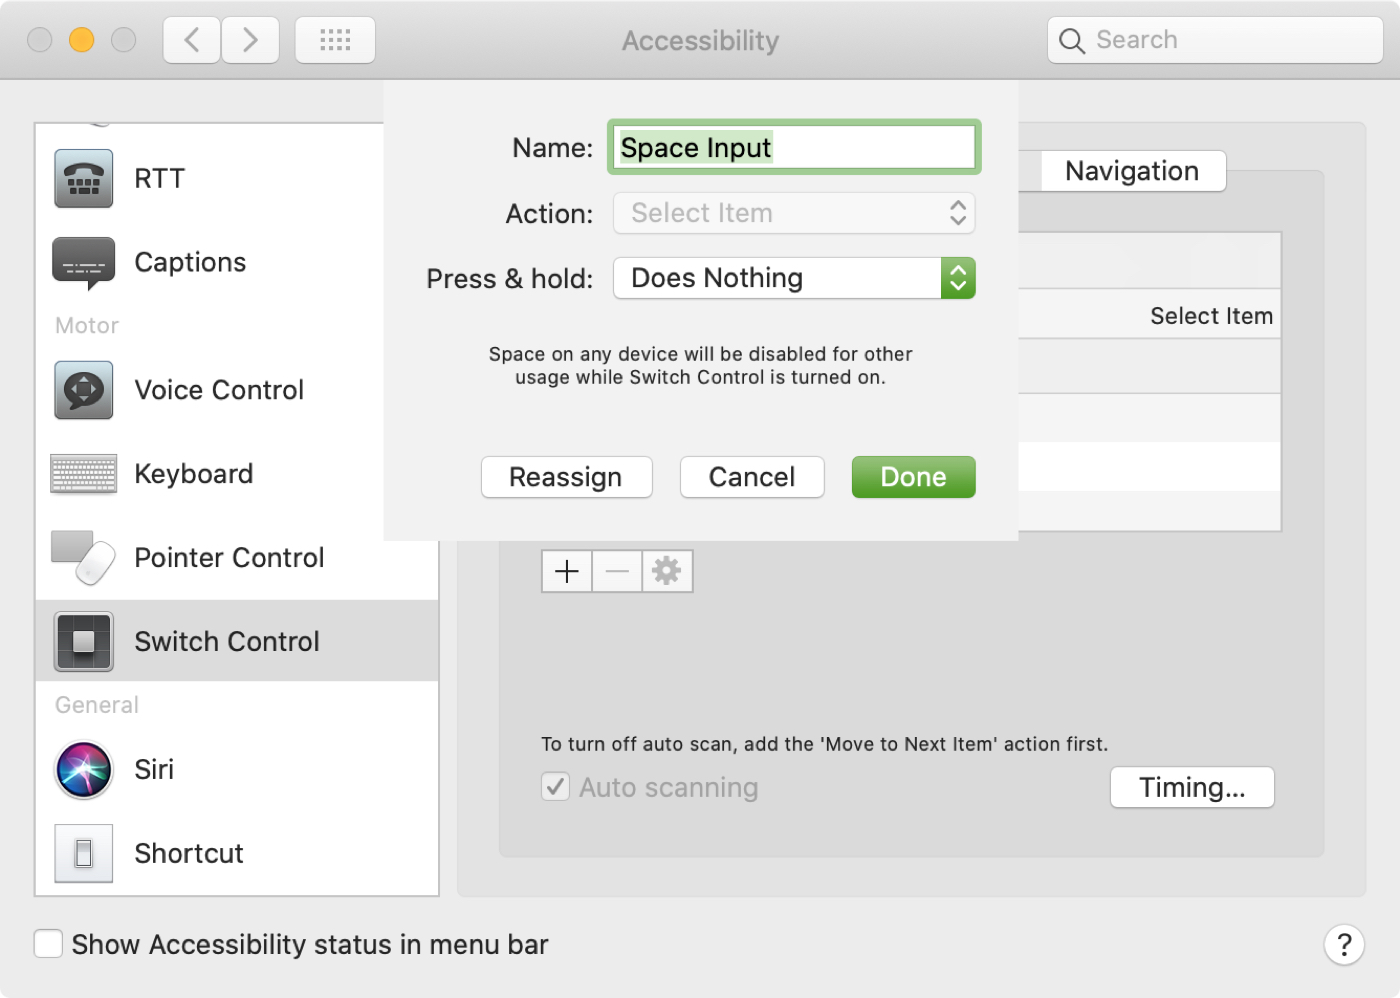
Switches
Here you can add or delete switches, assign actions, and set auto-scan options.
- To add a switch, click the plus sign button and wait for your Mac to detect and connect it.
- To remove a switch, click the minus sign button and confirm.
- To customize a switch’s name and actions, select it in the list and click the settings button (gear icon).
- To change the timing for auto scanning, click the Timing button. You can configure timing for holding before perform duration, ignoring switch repeats, and holding before repeat duration.
The Navigation tab lets you set options for things like what to do while navigating and when the pointer reaches the edge. You can also set the Switch Control cursor size, the number of loops, and the cursor’s restart position.

Change the panel options
While you have the Switch Control panel open, you can make changes to its size and transparency.
After selecting an item, if you see the gear icon on the top right, click it and you’ll see options from left to right to increase or decrease the size and increase or decrease the transparency.
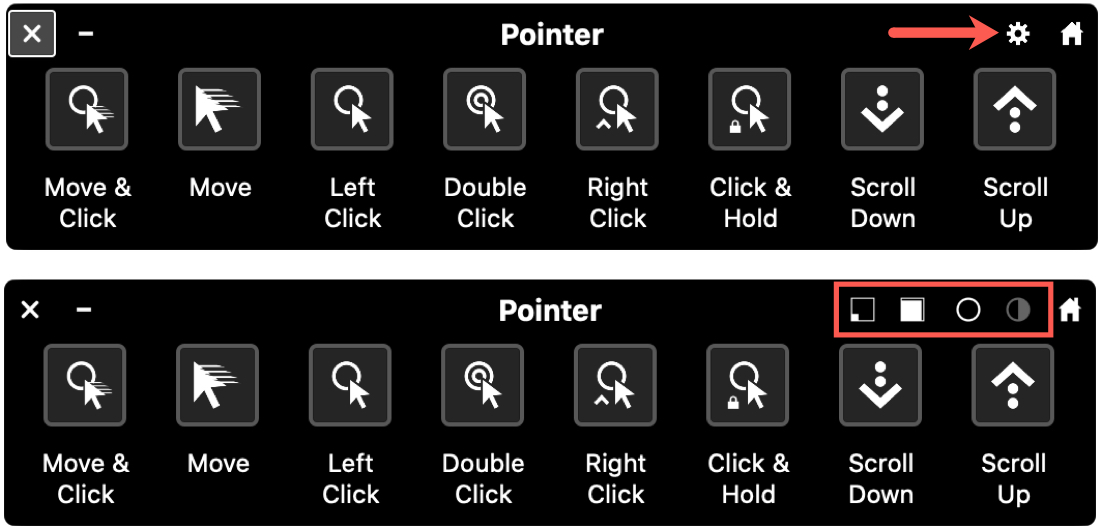
Use the home button in any panel to return to the Home – Switch panel.
Wrapping it up
If you need to set up Switch Control for an adaptive device, it’s easy to enable and customize per your preference.
Is Switch Control something you need to set up for yourself or a loved one? If so and you’d like to share some tips you learn from using it, please leave a comment below!