The macOS High Sierra beta is now well under way and many users have been giving it a test run to see what they make of it. However, it’s still pretty far from ready for mission-critical applications, and many bugs remain. If you’ve had enough of the beta experience for now and want to go back to the standard macOS 10.12 Sierra, then read on!
Unfortunately, it is not possible to simply install Sierra over the top of a High Sierra install, not least because of the switch from HFS+ to APFS filesystems. It will be necessary to wipe the entire drive to reinstall Sierra, so I hope you made a full backup before testing out beta software! I will go through three ways to downgrade, going from easiest to most labour-intensive. Simply pick the one that applies to you.
Option 1: If you have a full bootable clone of your Sierra system with SuperDuper! or Carbon Copy Cloner…
This is by far the easiest option, so hopefully you took the good practice step of making a full Sierra clone before moving to High Sierra. If you did, then:
1) Plug the drive containing your Sierra clone into the Mac you want to downgrade, and shut the machine down.
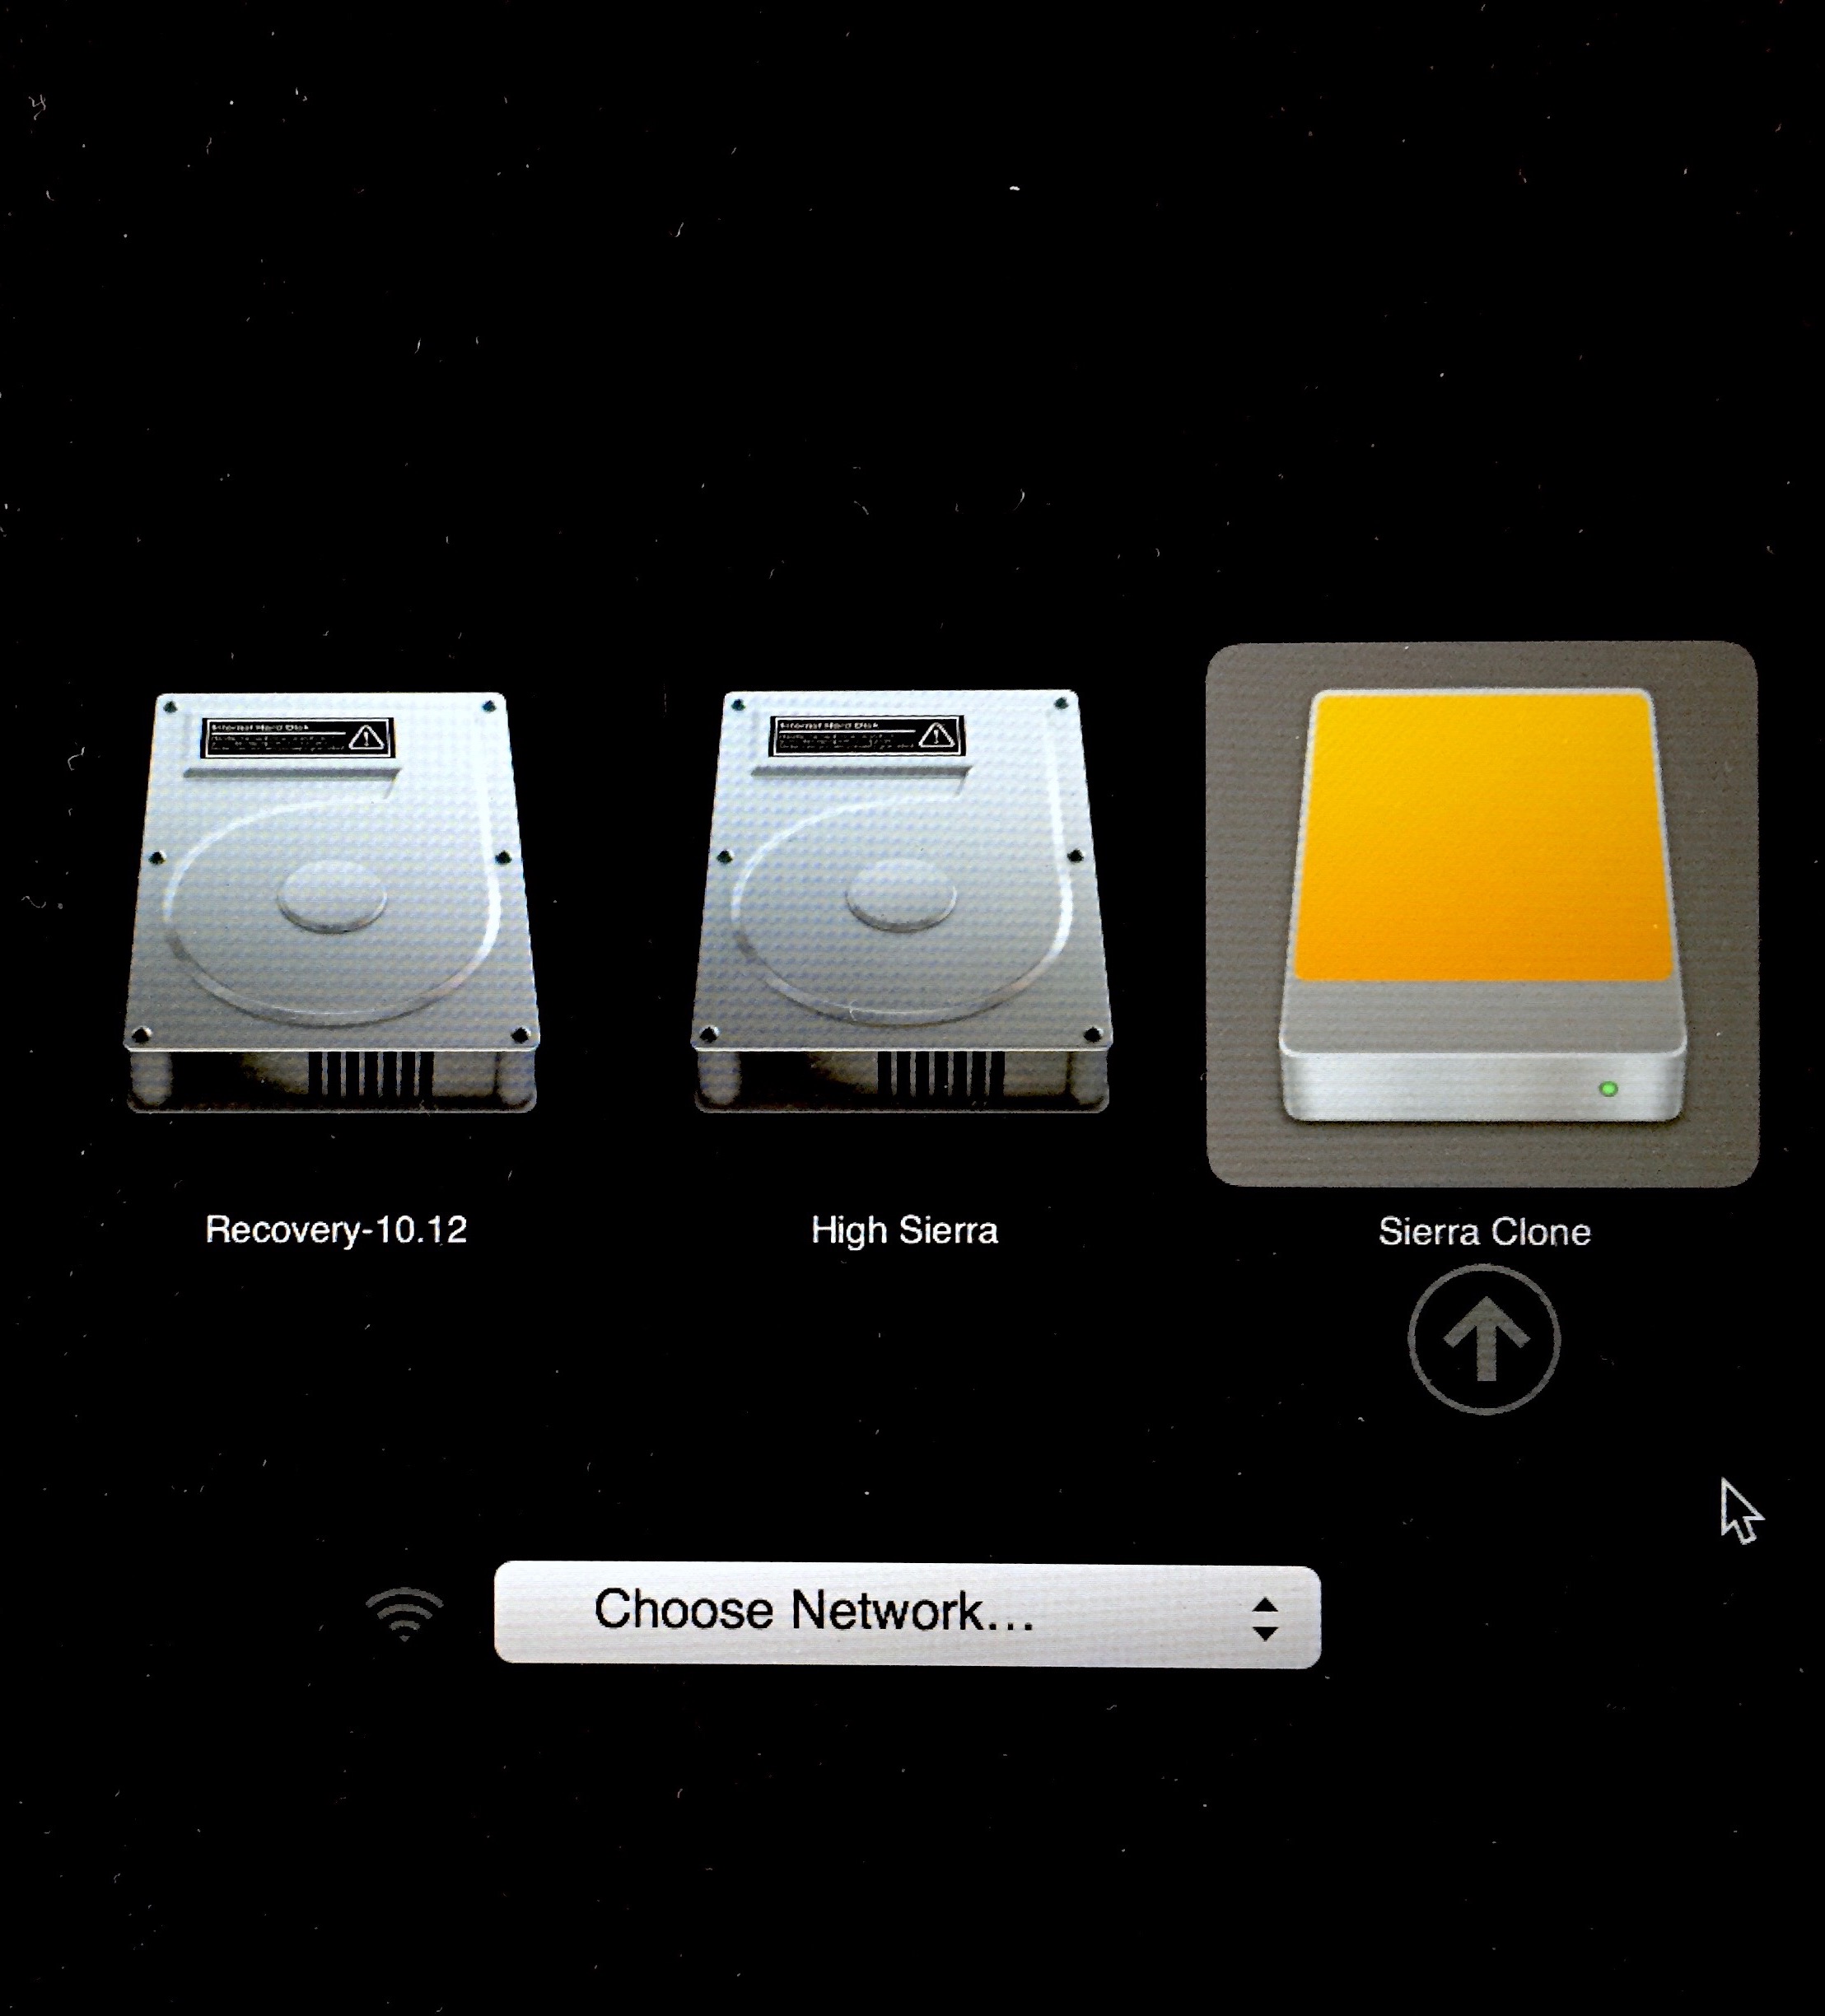
2) Boot the Mac whilst holding down the Option/Alt (⌥) key.
3) At the boot drive selection screen, select your Sierra clone to boot from it.
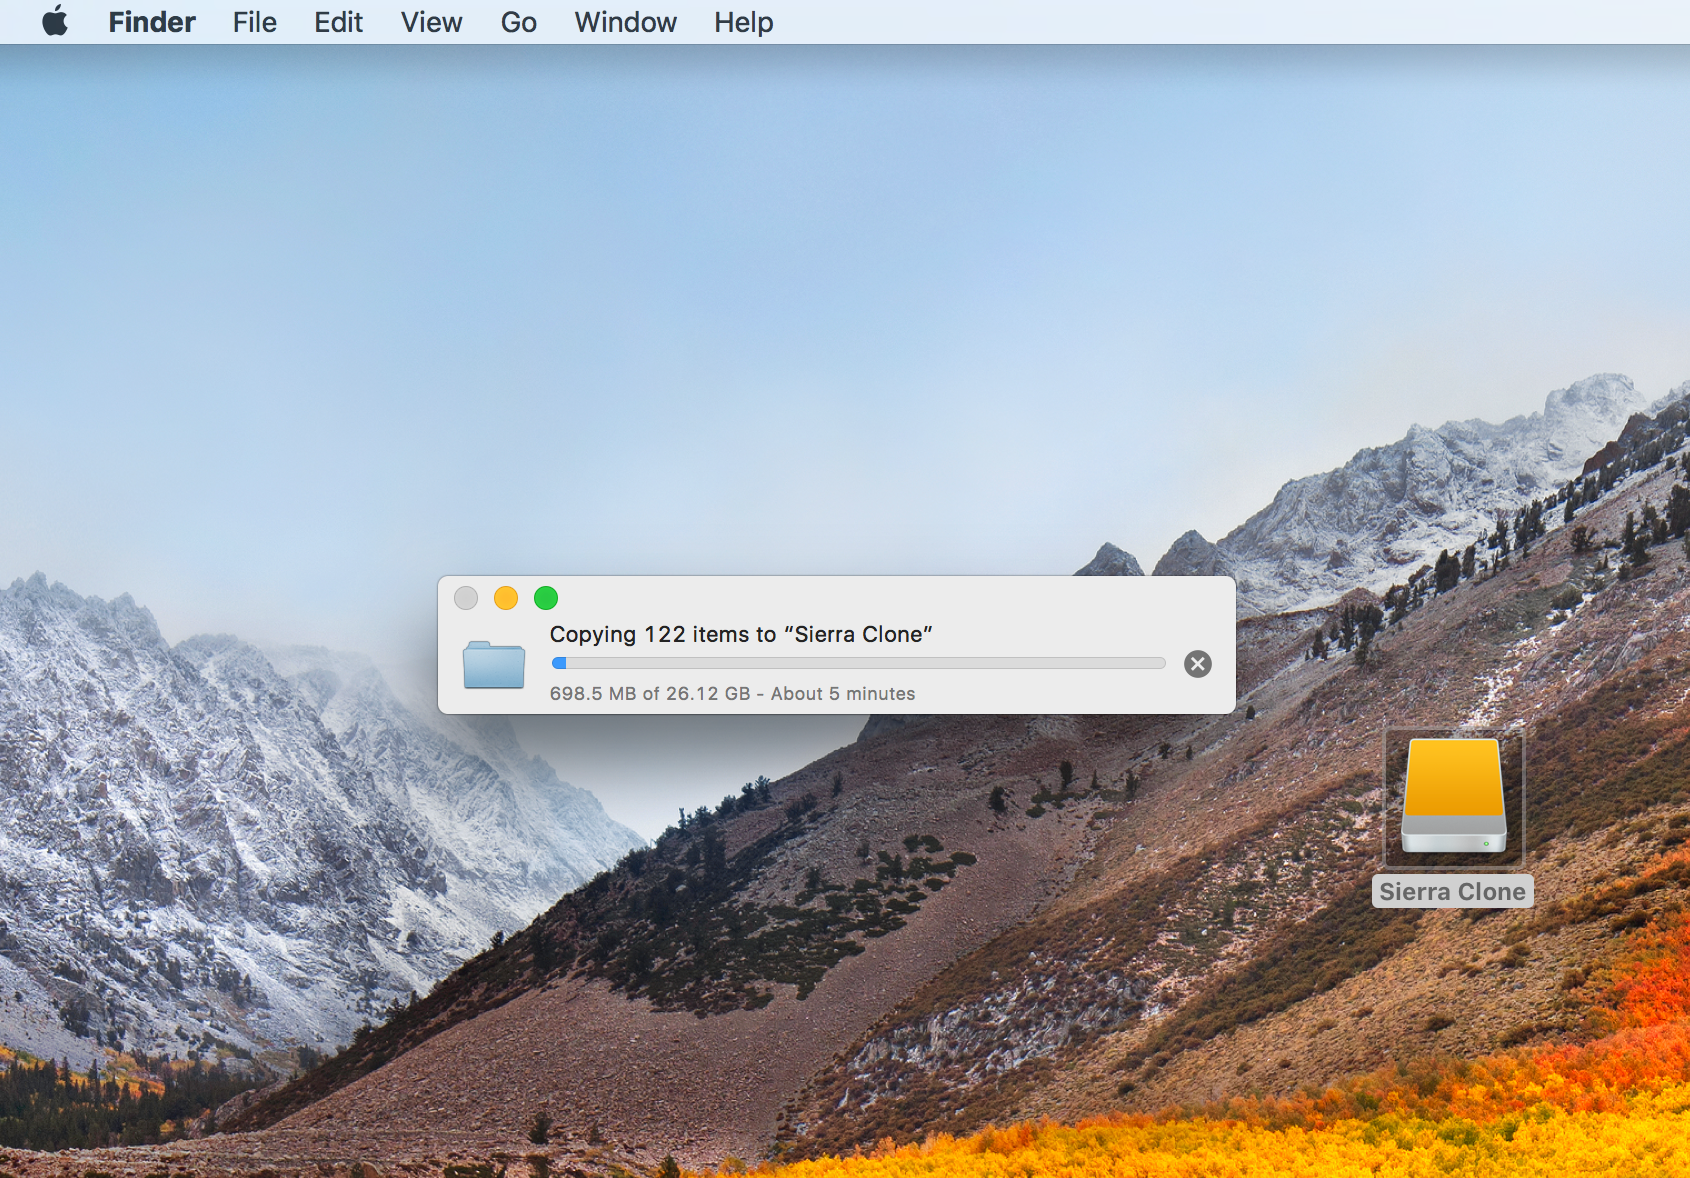
4) Once logged into your Sierra install on the clone, copy any new files you’ve created since making the clone, from the High Sierra drive, onto the Sierra clone.
5) When you have everything you want, fire up Disk Utility.
6) Select the drive with your High Sierra beta install on it, and click the Erase button in the menu bar.
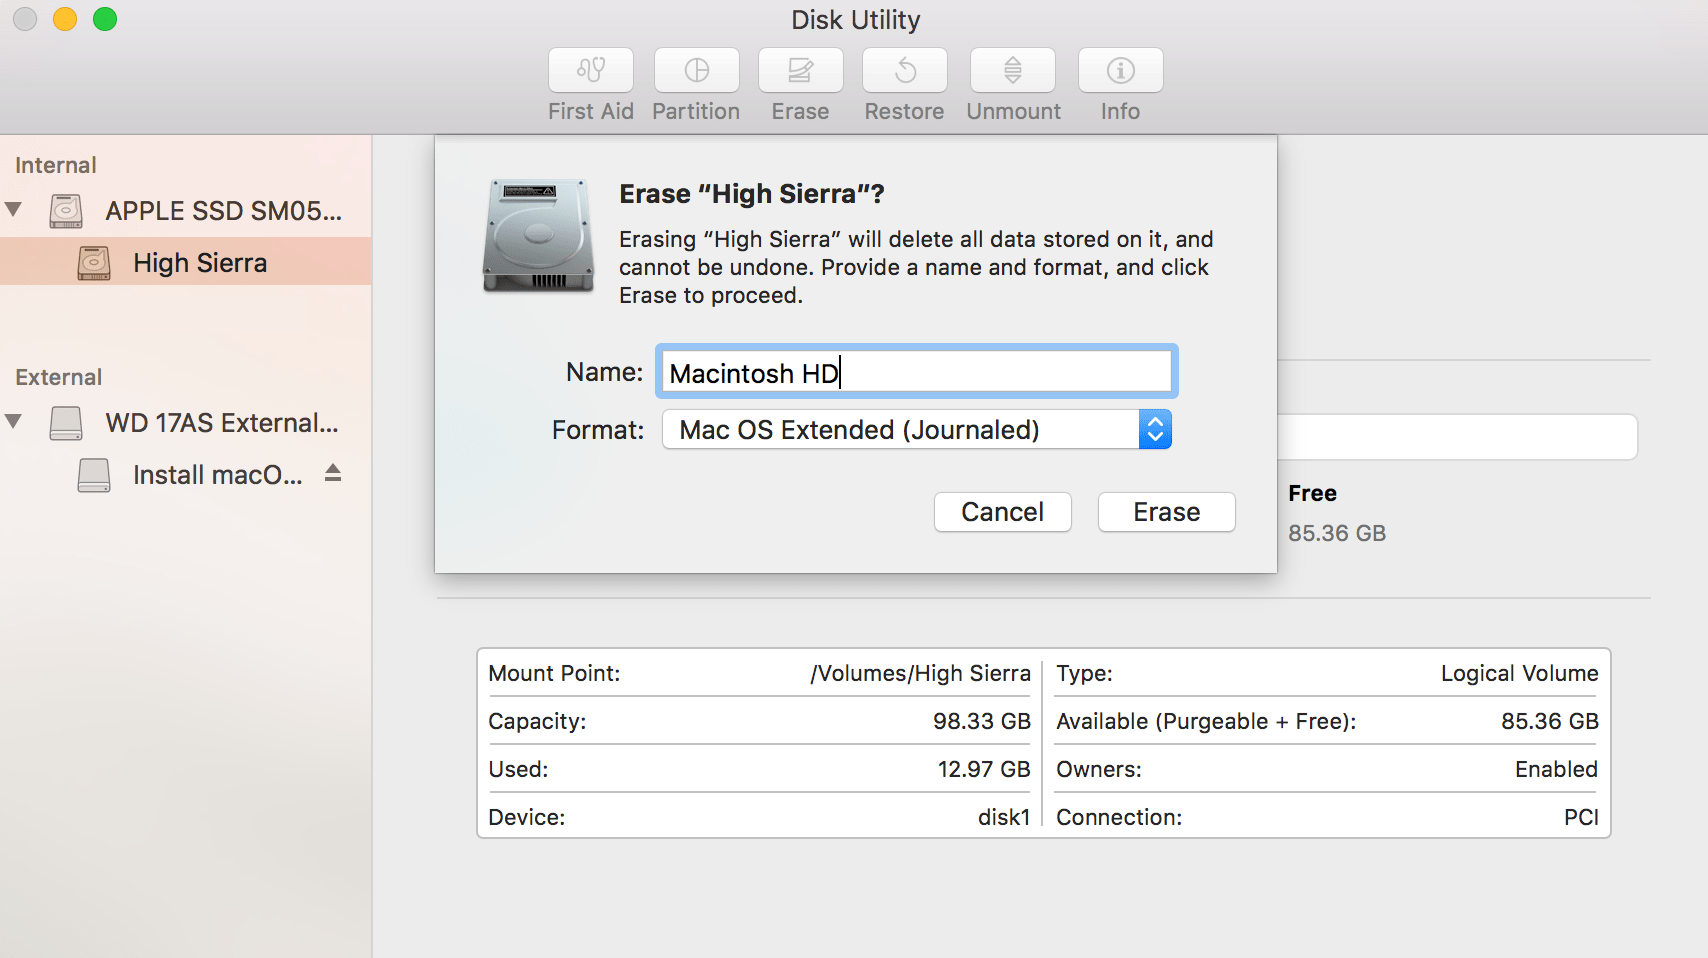
7) Format the drive with a name such as Macintosh HD, and with GUID Partition Table and Mac OS Extended (Journaled) selected.
This step will completely destroy the High Sierra install! Make sure you have copied any files you want off it before completing this step!
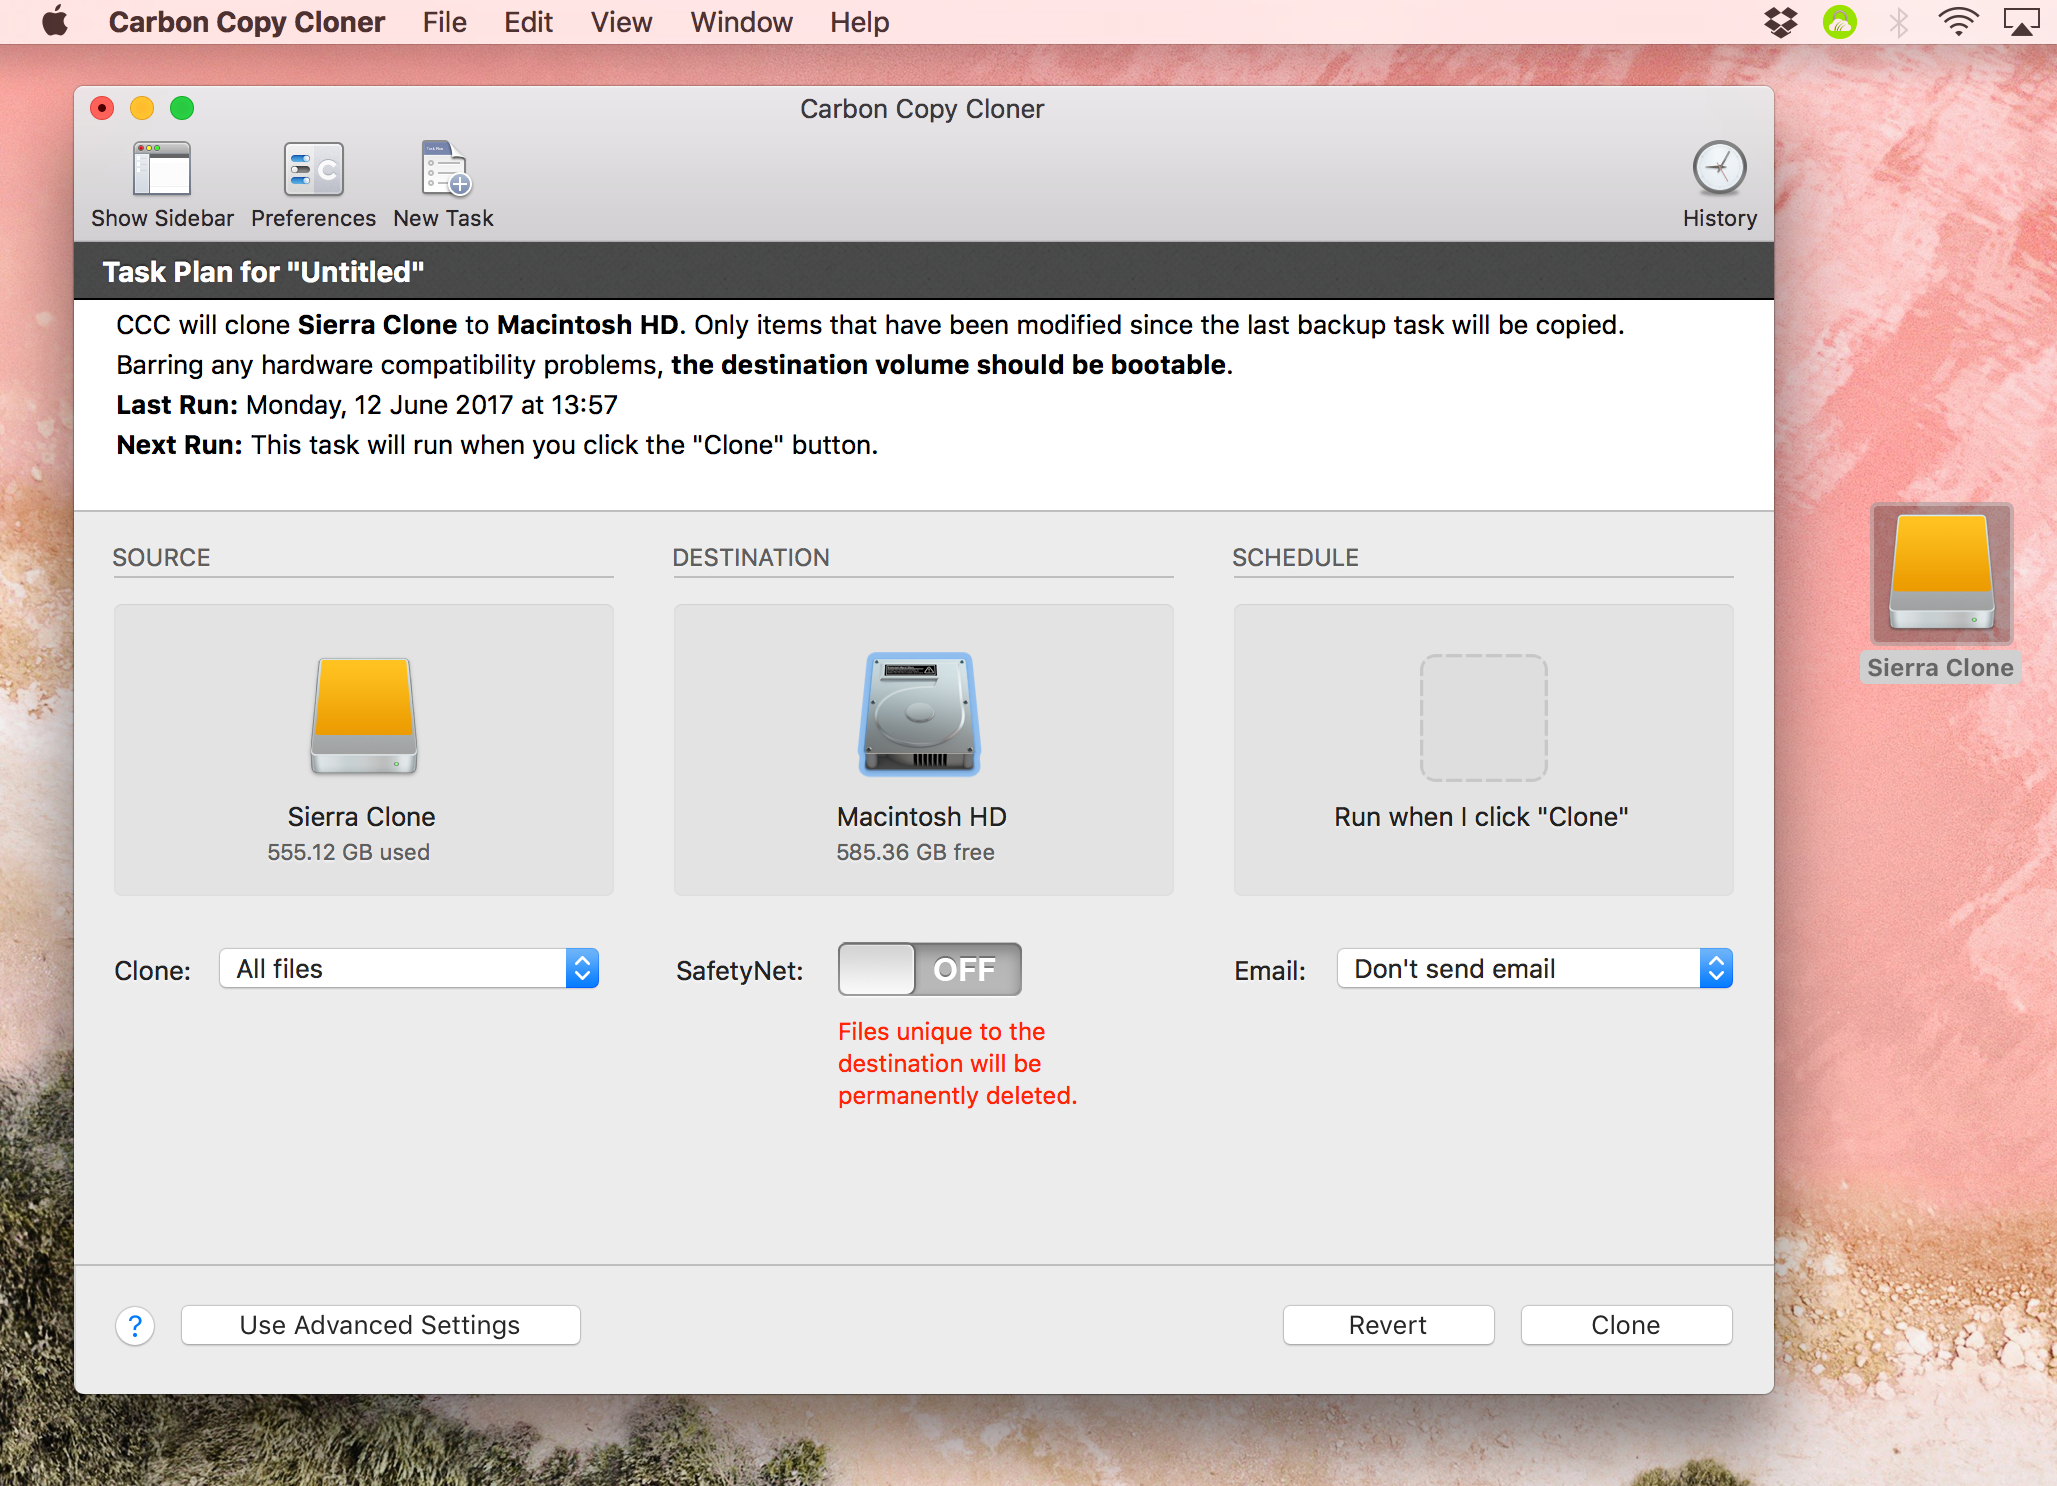
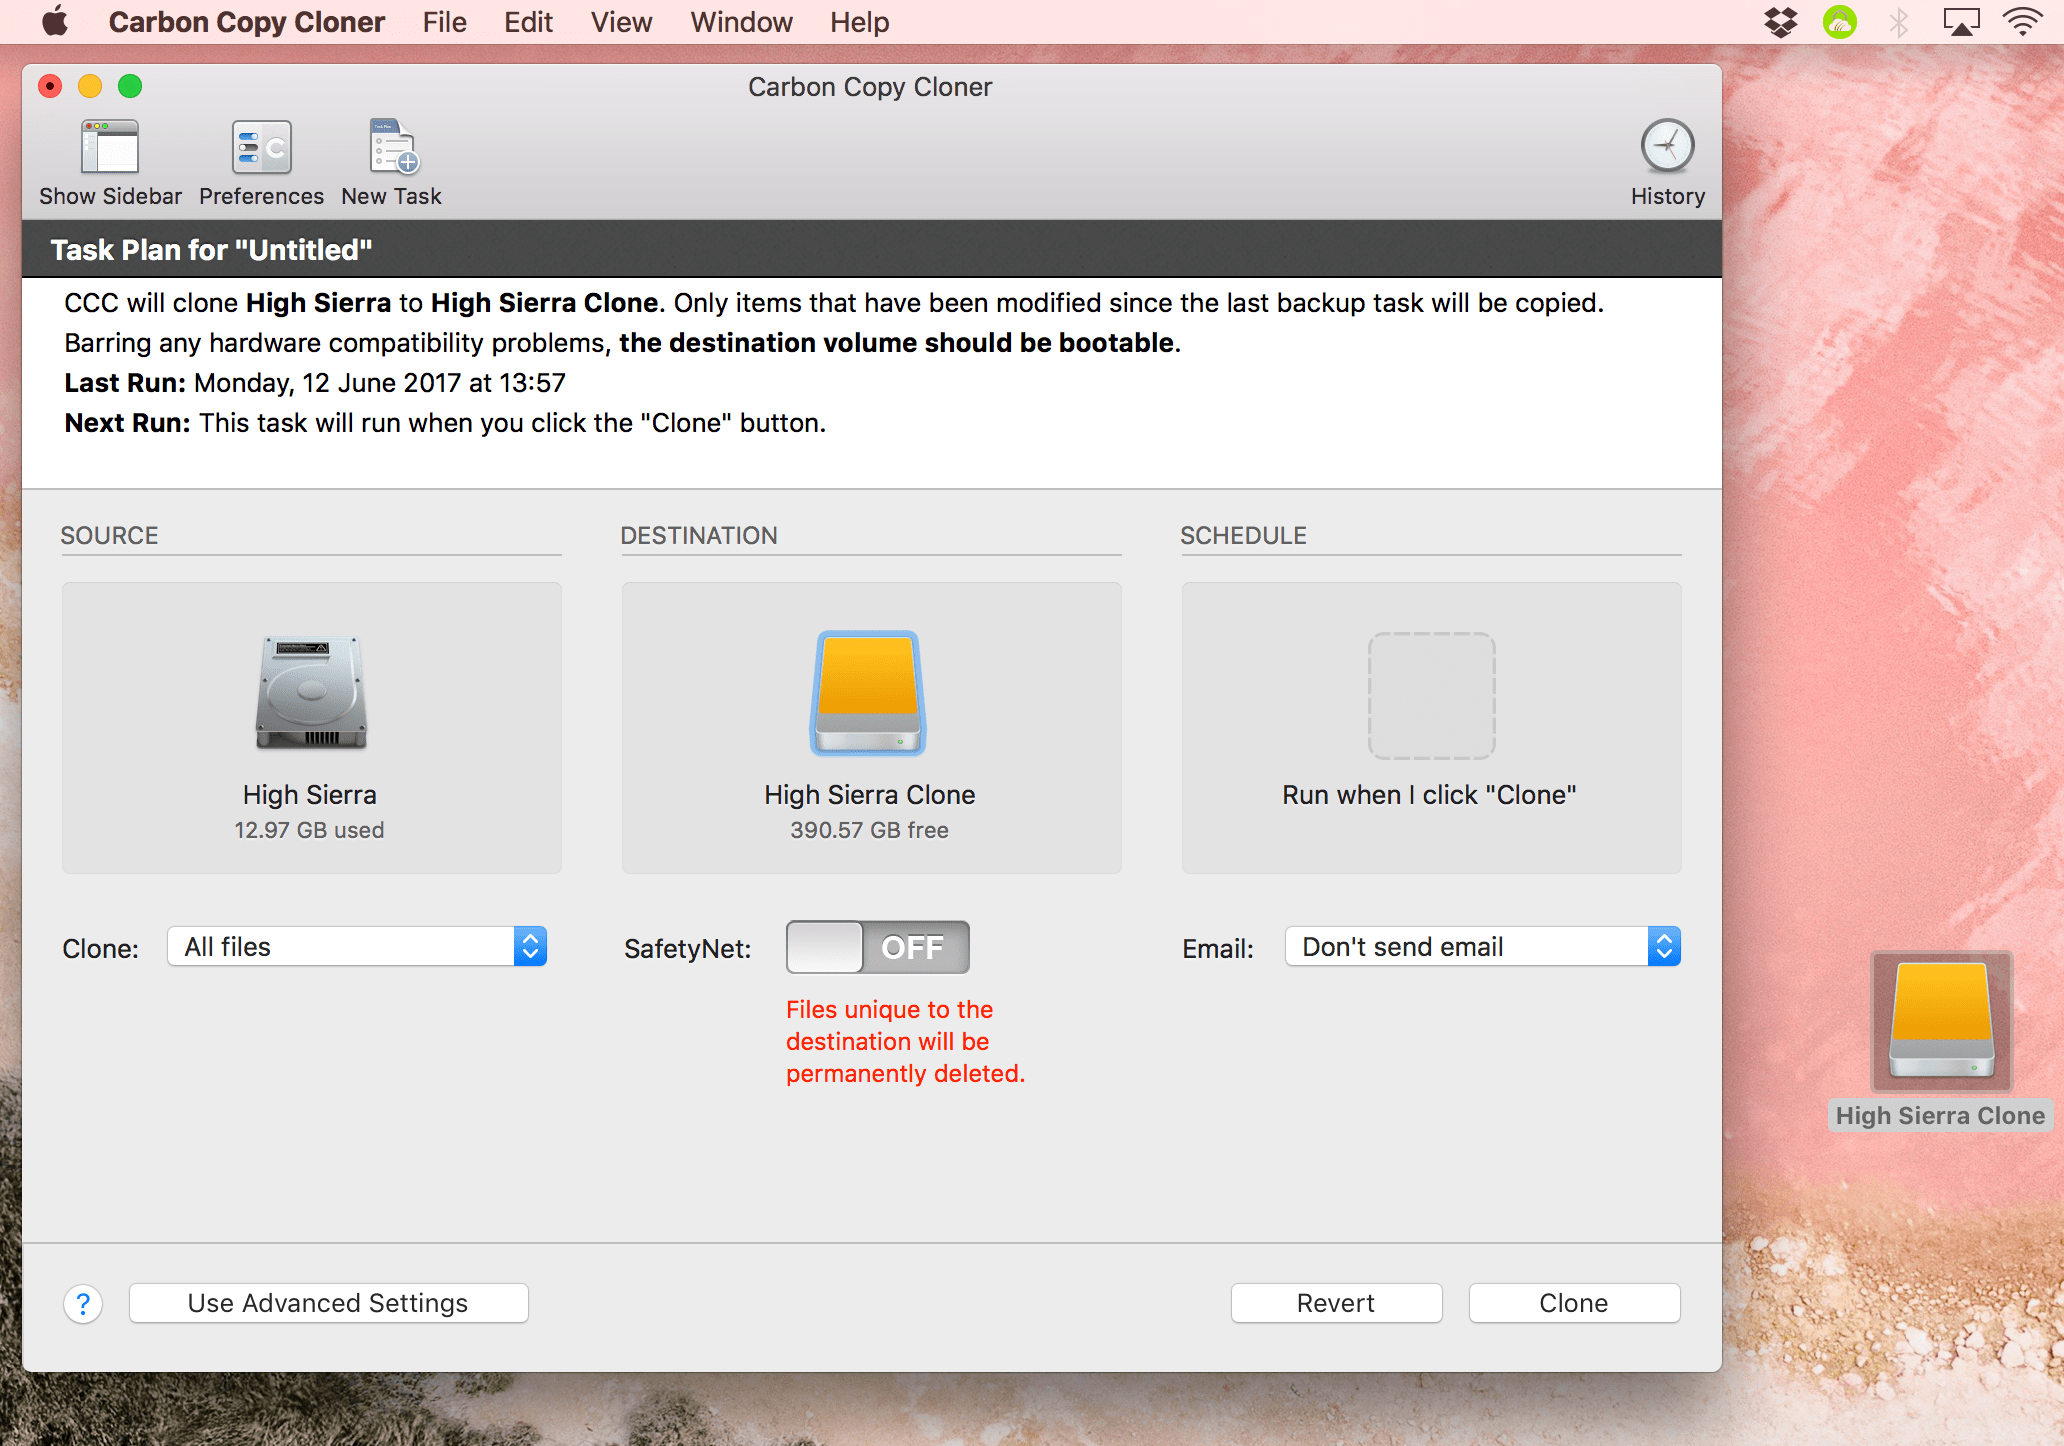
8) Once the drive is wiped and formatted, launch SuperDuper! or Carbon Copy Cloner (or whichever software you used to make your Sierra clone in the first place).
9) Select your currently booted Sierra install as the source, and the newly re-formatted drive (which used to contain High Sierra) as the destination.
10) Clone the booted Sierra install back onto the newly formatted drive.
11) Once the Sierra clone has copied, simply reboot your computer one more time whilst holding the Option/Alt (⌥) key, and at the boot screen, select the Sierra install on your main drive to get back up and running.
Option 2: If you have a Time Machine backup of your Sierra system from before installing High Sierra…
This is also a fairly painless process, so if you have your Sierra Time Machine backups ready, then let’s get started.
1) Back up any files you’ve created since the last Time Machine backup you made on macOS 10.12 Sierra. Copy them off of your High Sierra installation onto a spare drive.
2) Shut down your Mac and connect the drive containing your Sierra Time Machine backups.
3) Boot your Mac whilst holding down the cmd (⌘) and r keys to enter Recovery.
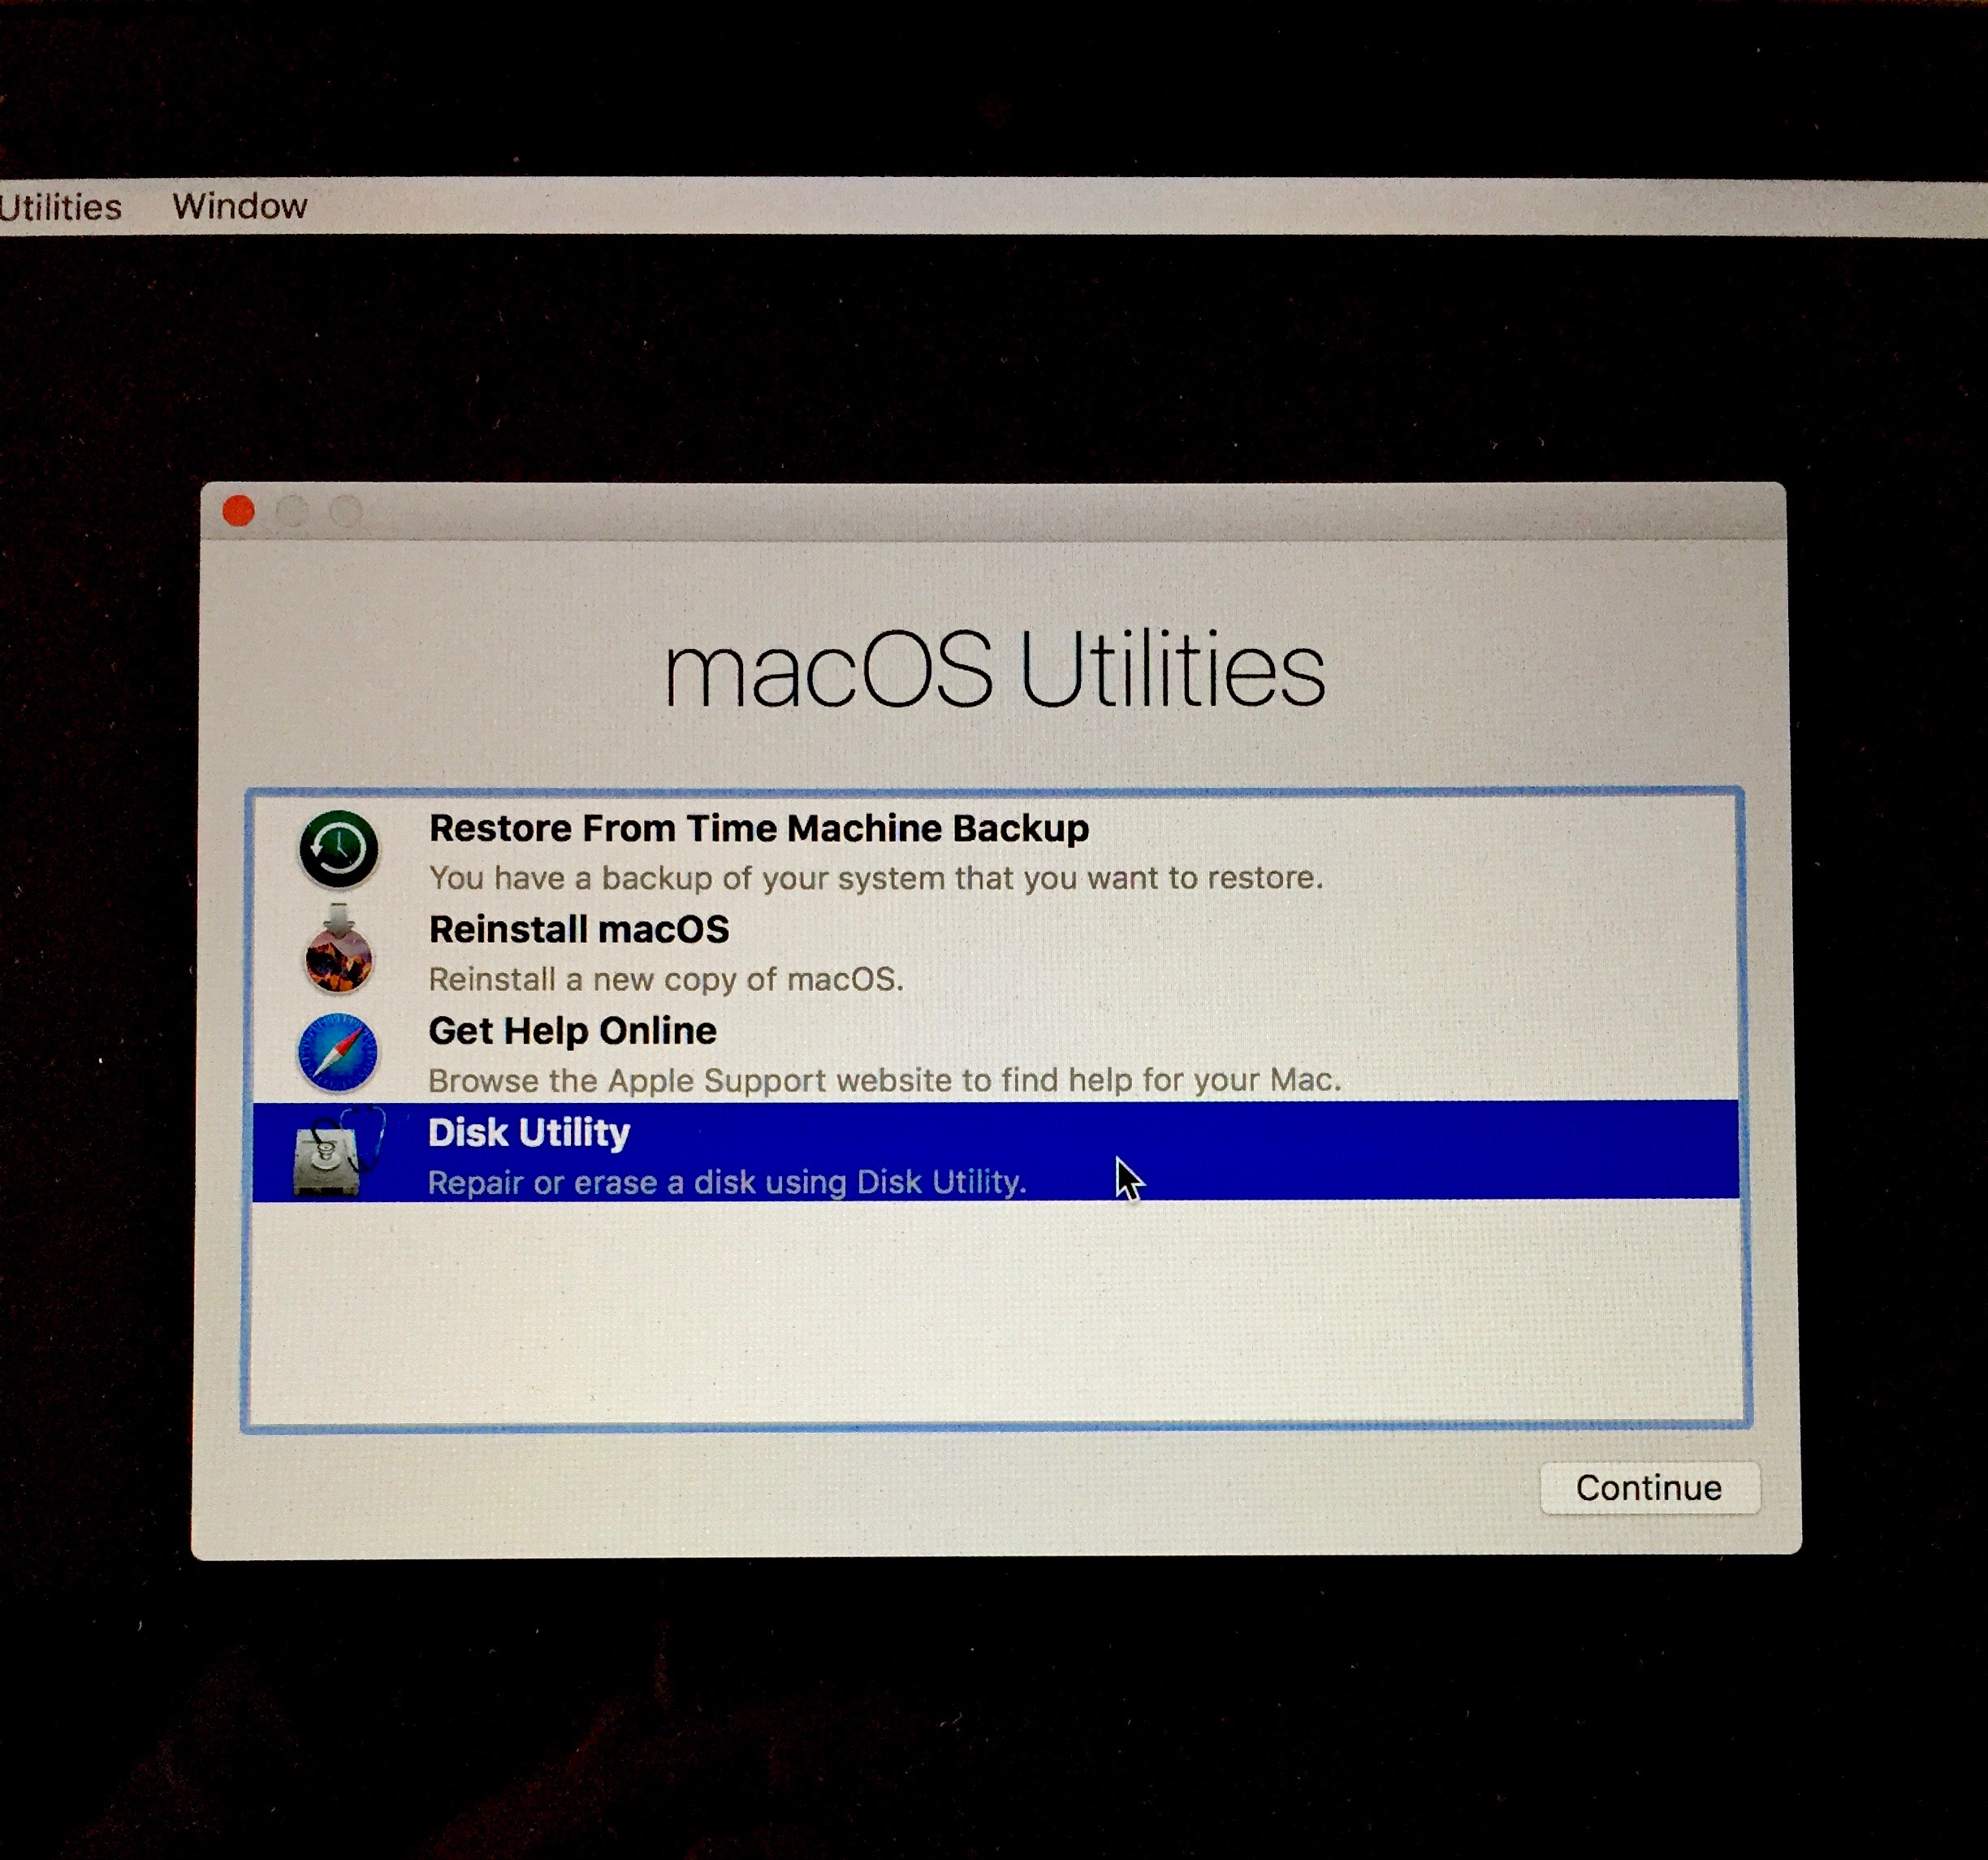
4) Once booted to the utilities menu, select Disk Utility.
5) Select the drive with your High Sierra beta install on it, and click the Erase button in the menu bar.
6) Format the drive with a name such as Macintosh HD, and with GUID Partition Table and Mac OS Extended (Journaled) selected.
This step will completely destroy the High Sierra install! Make sure you have copied any files you want off it before completing this step!
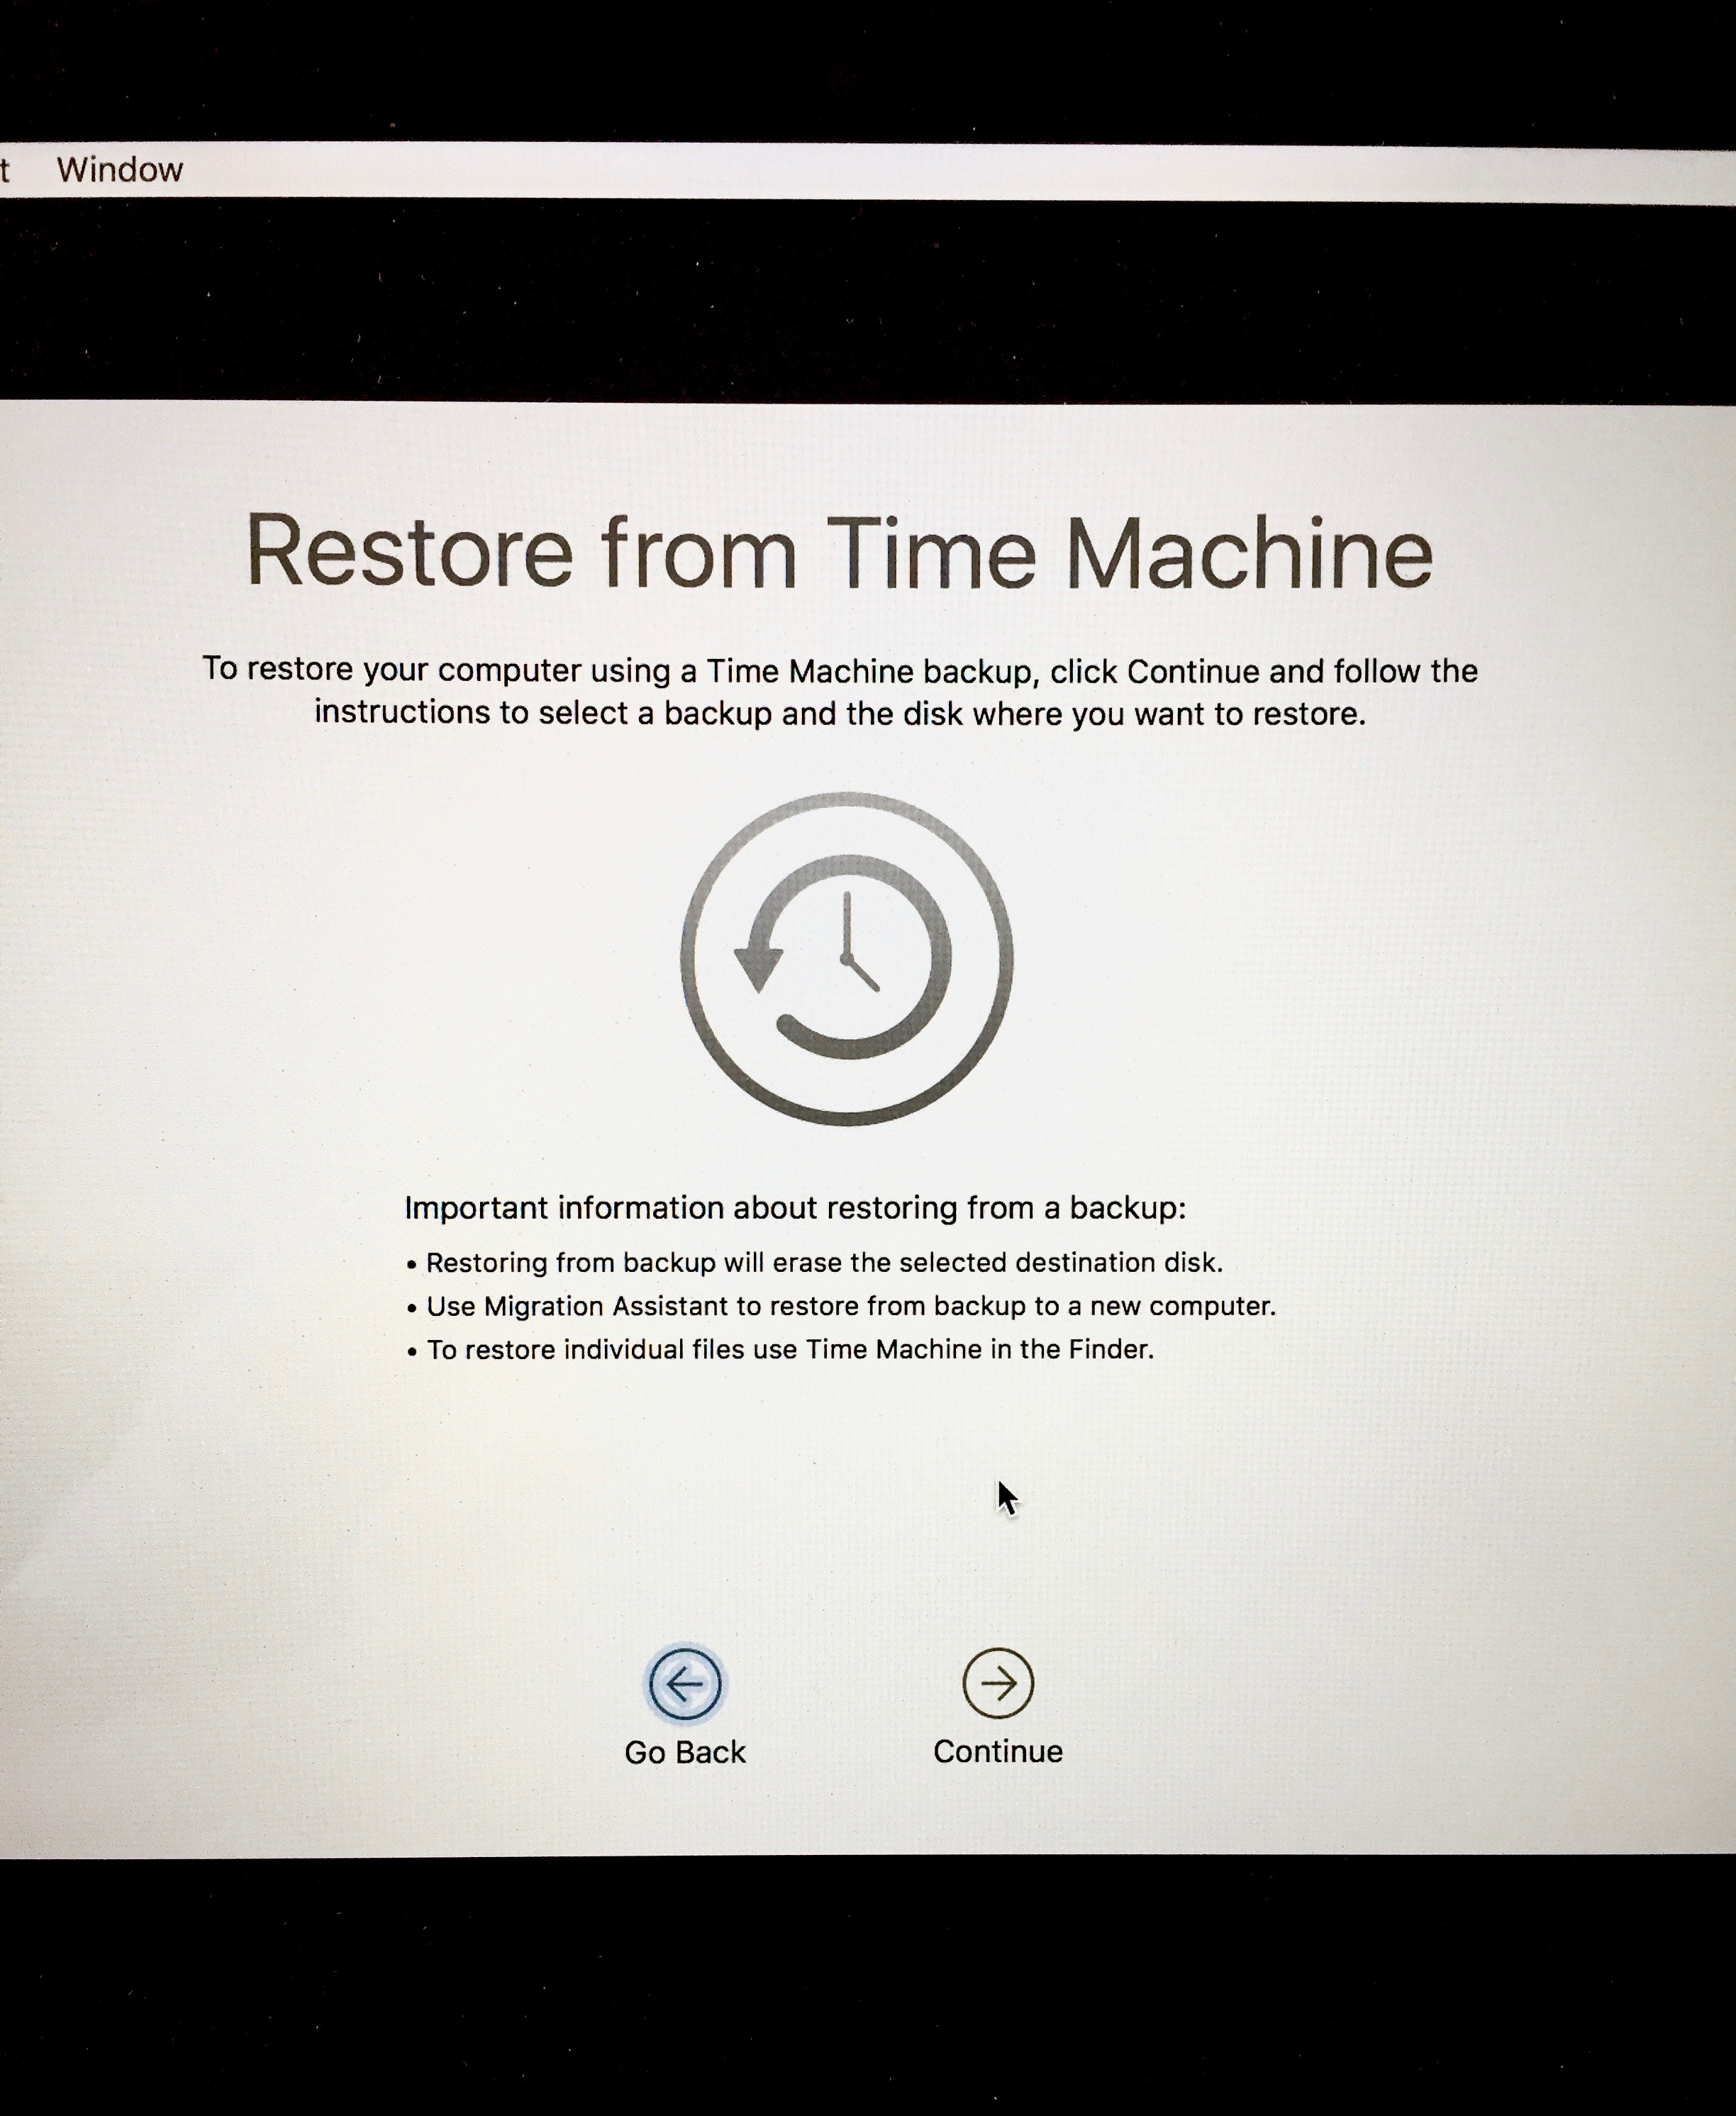
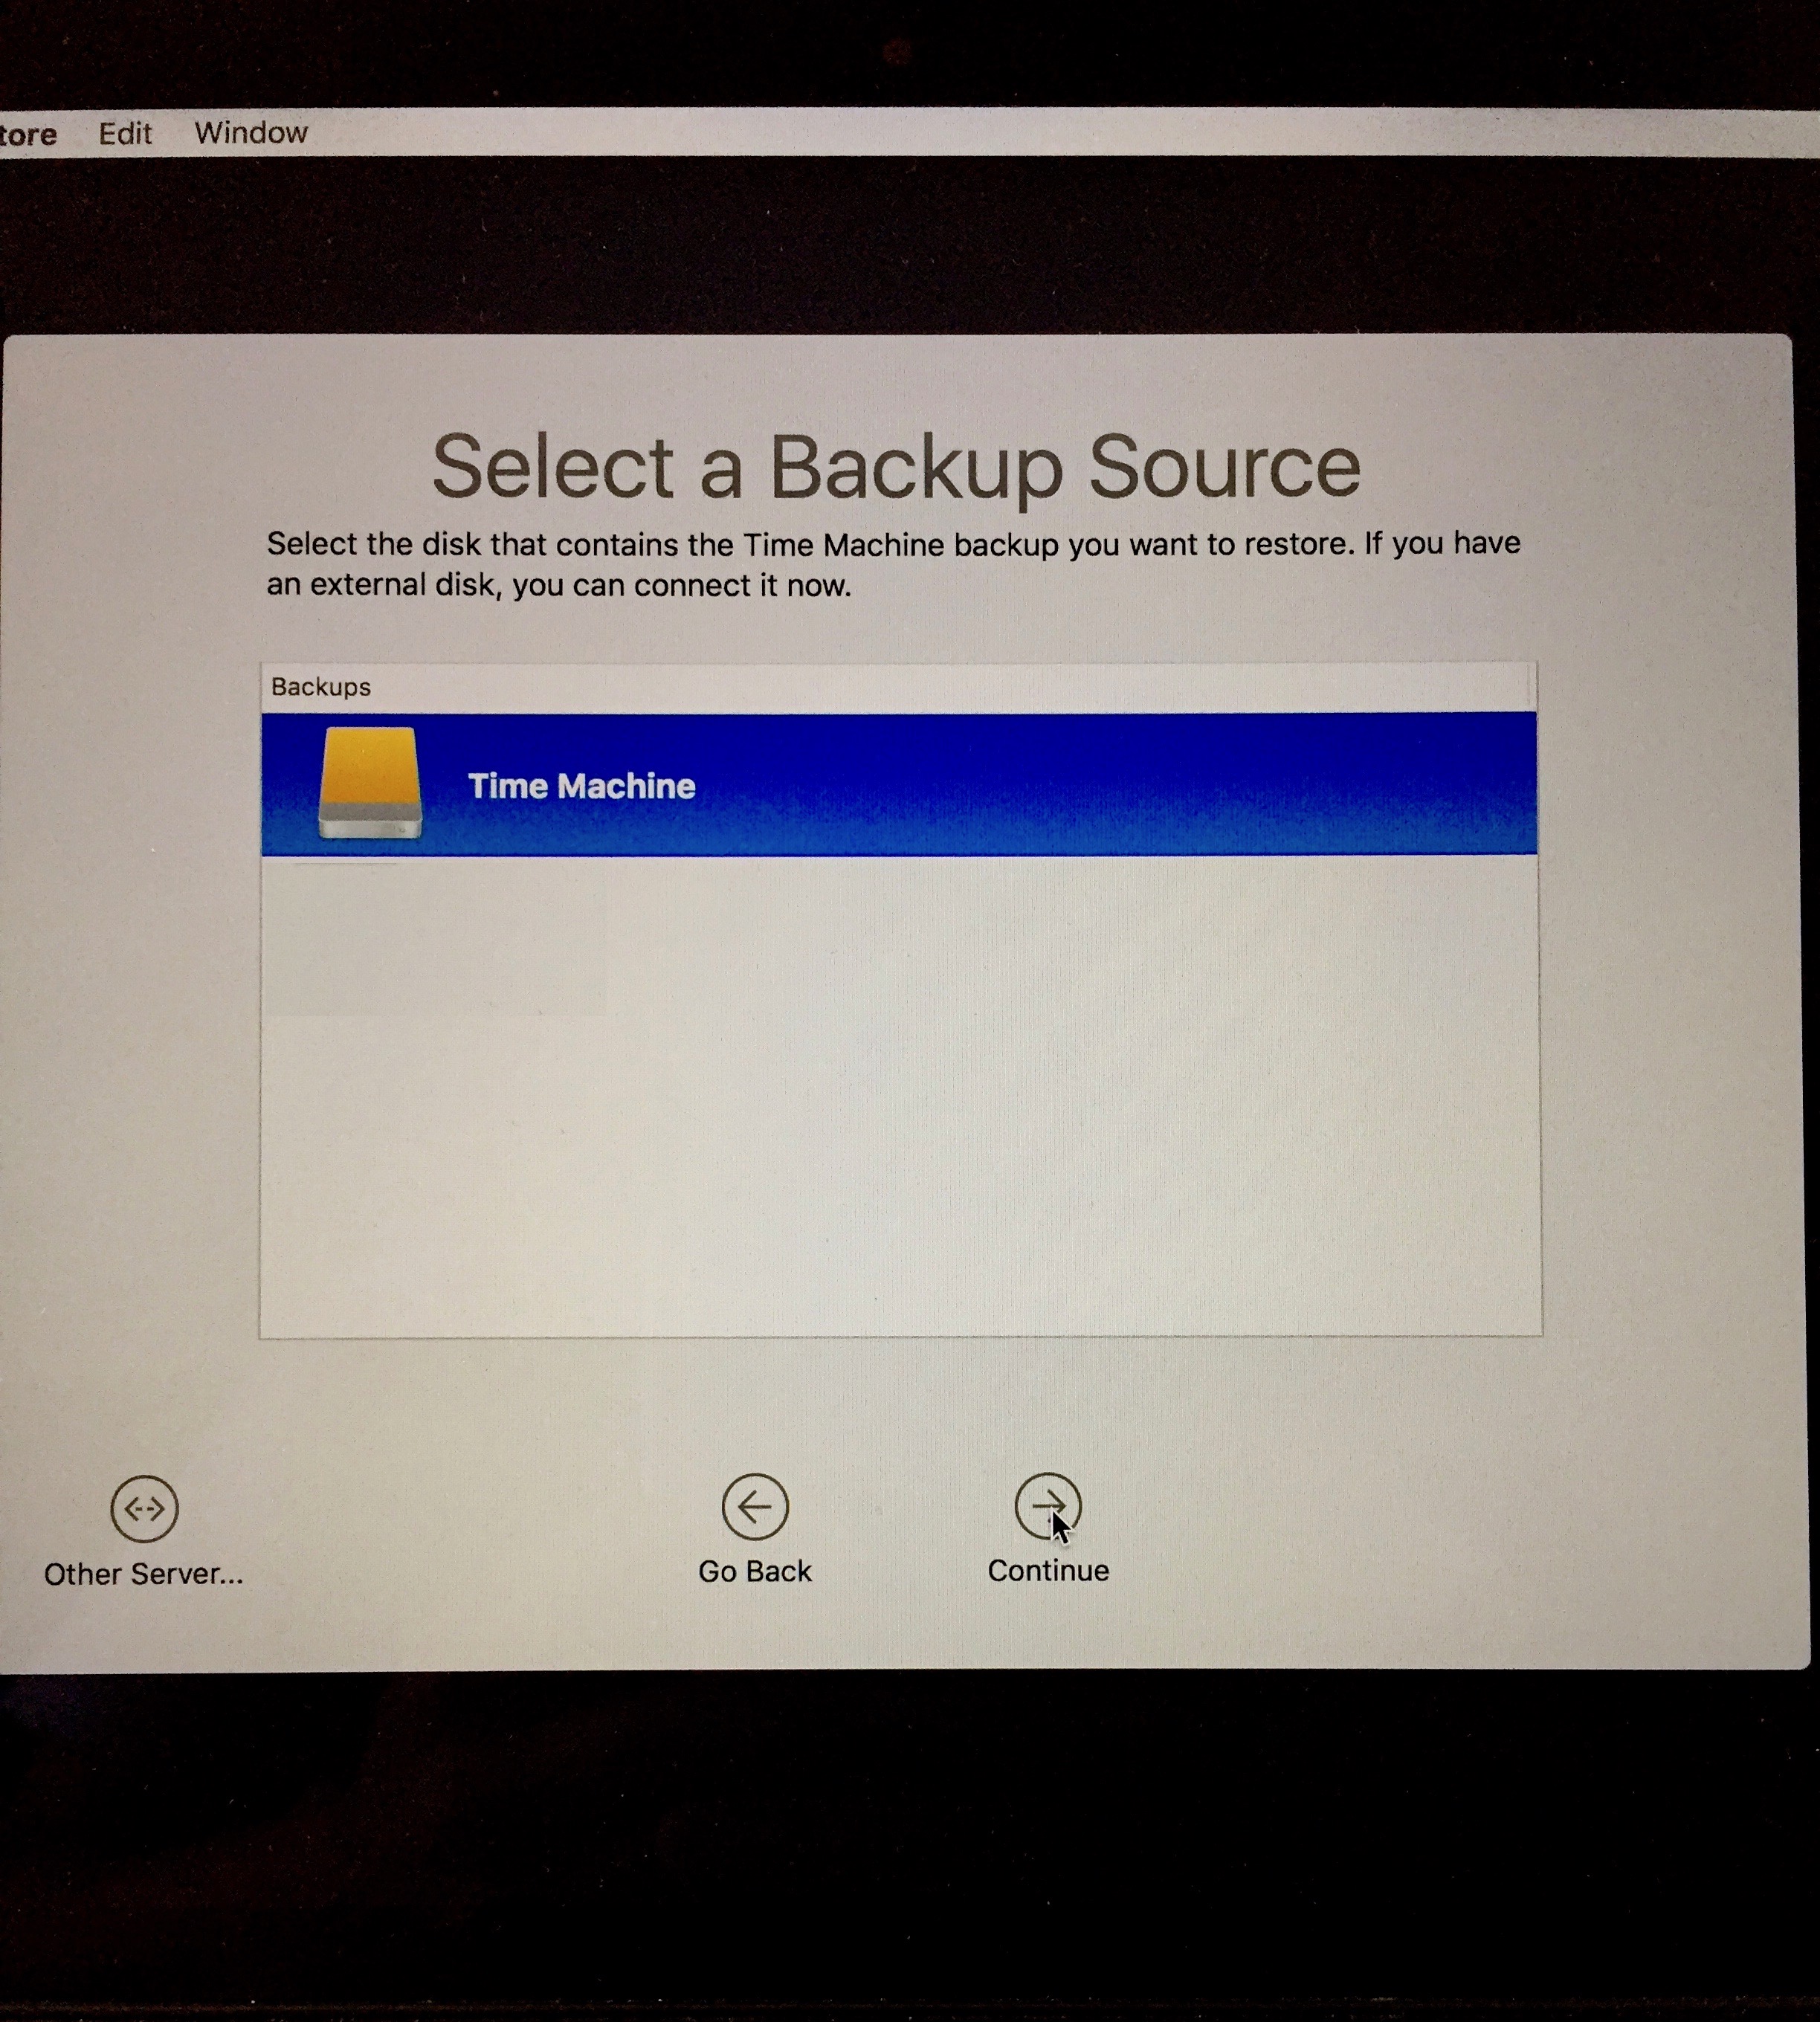
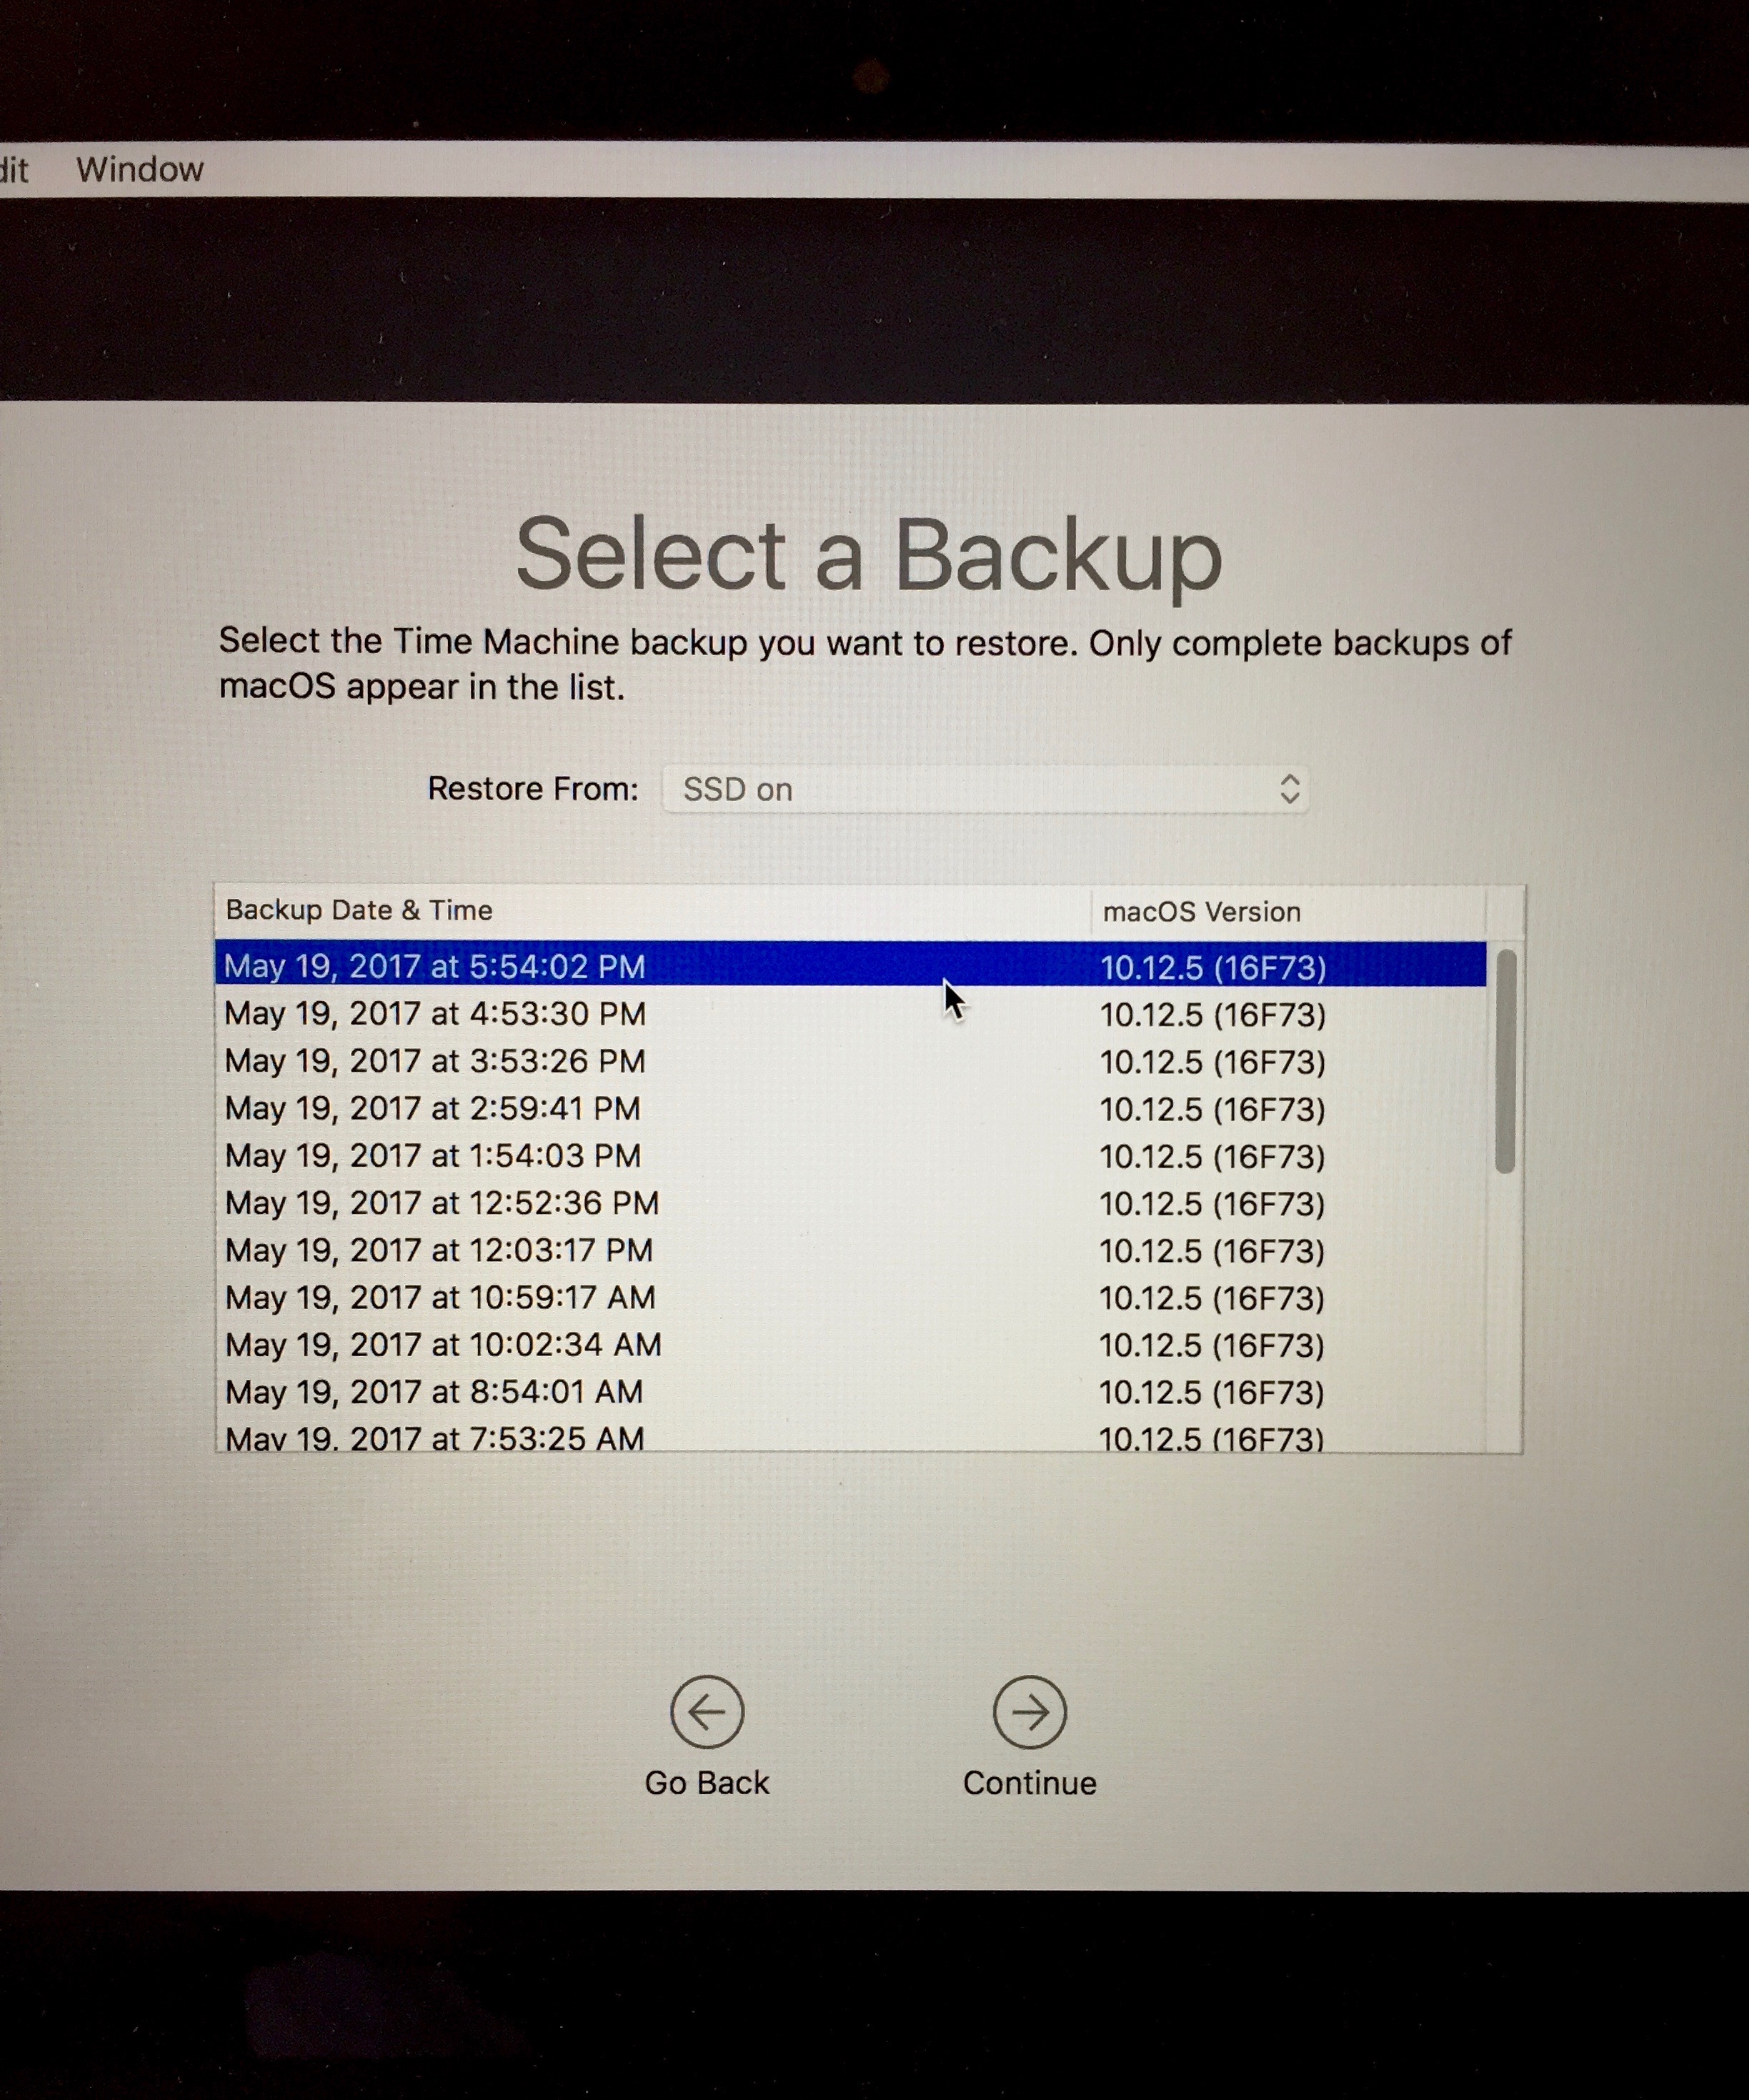
7) Once formatted, quit Disk Utility. Back at the main menu, select Restore from Time Machine Backup. Select the most recent Sierra backup to restore to it. Remember, this must be a Sierra backup. If you select a High Sierra backup then your system will restore to High Sierra, not Sierra. You can see in the third picture I have selected the most recent backup with the OS version 10.12.5 (Sierra).
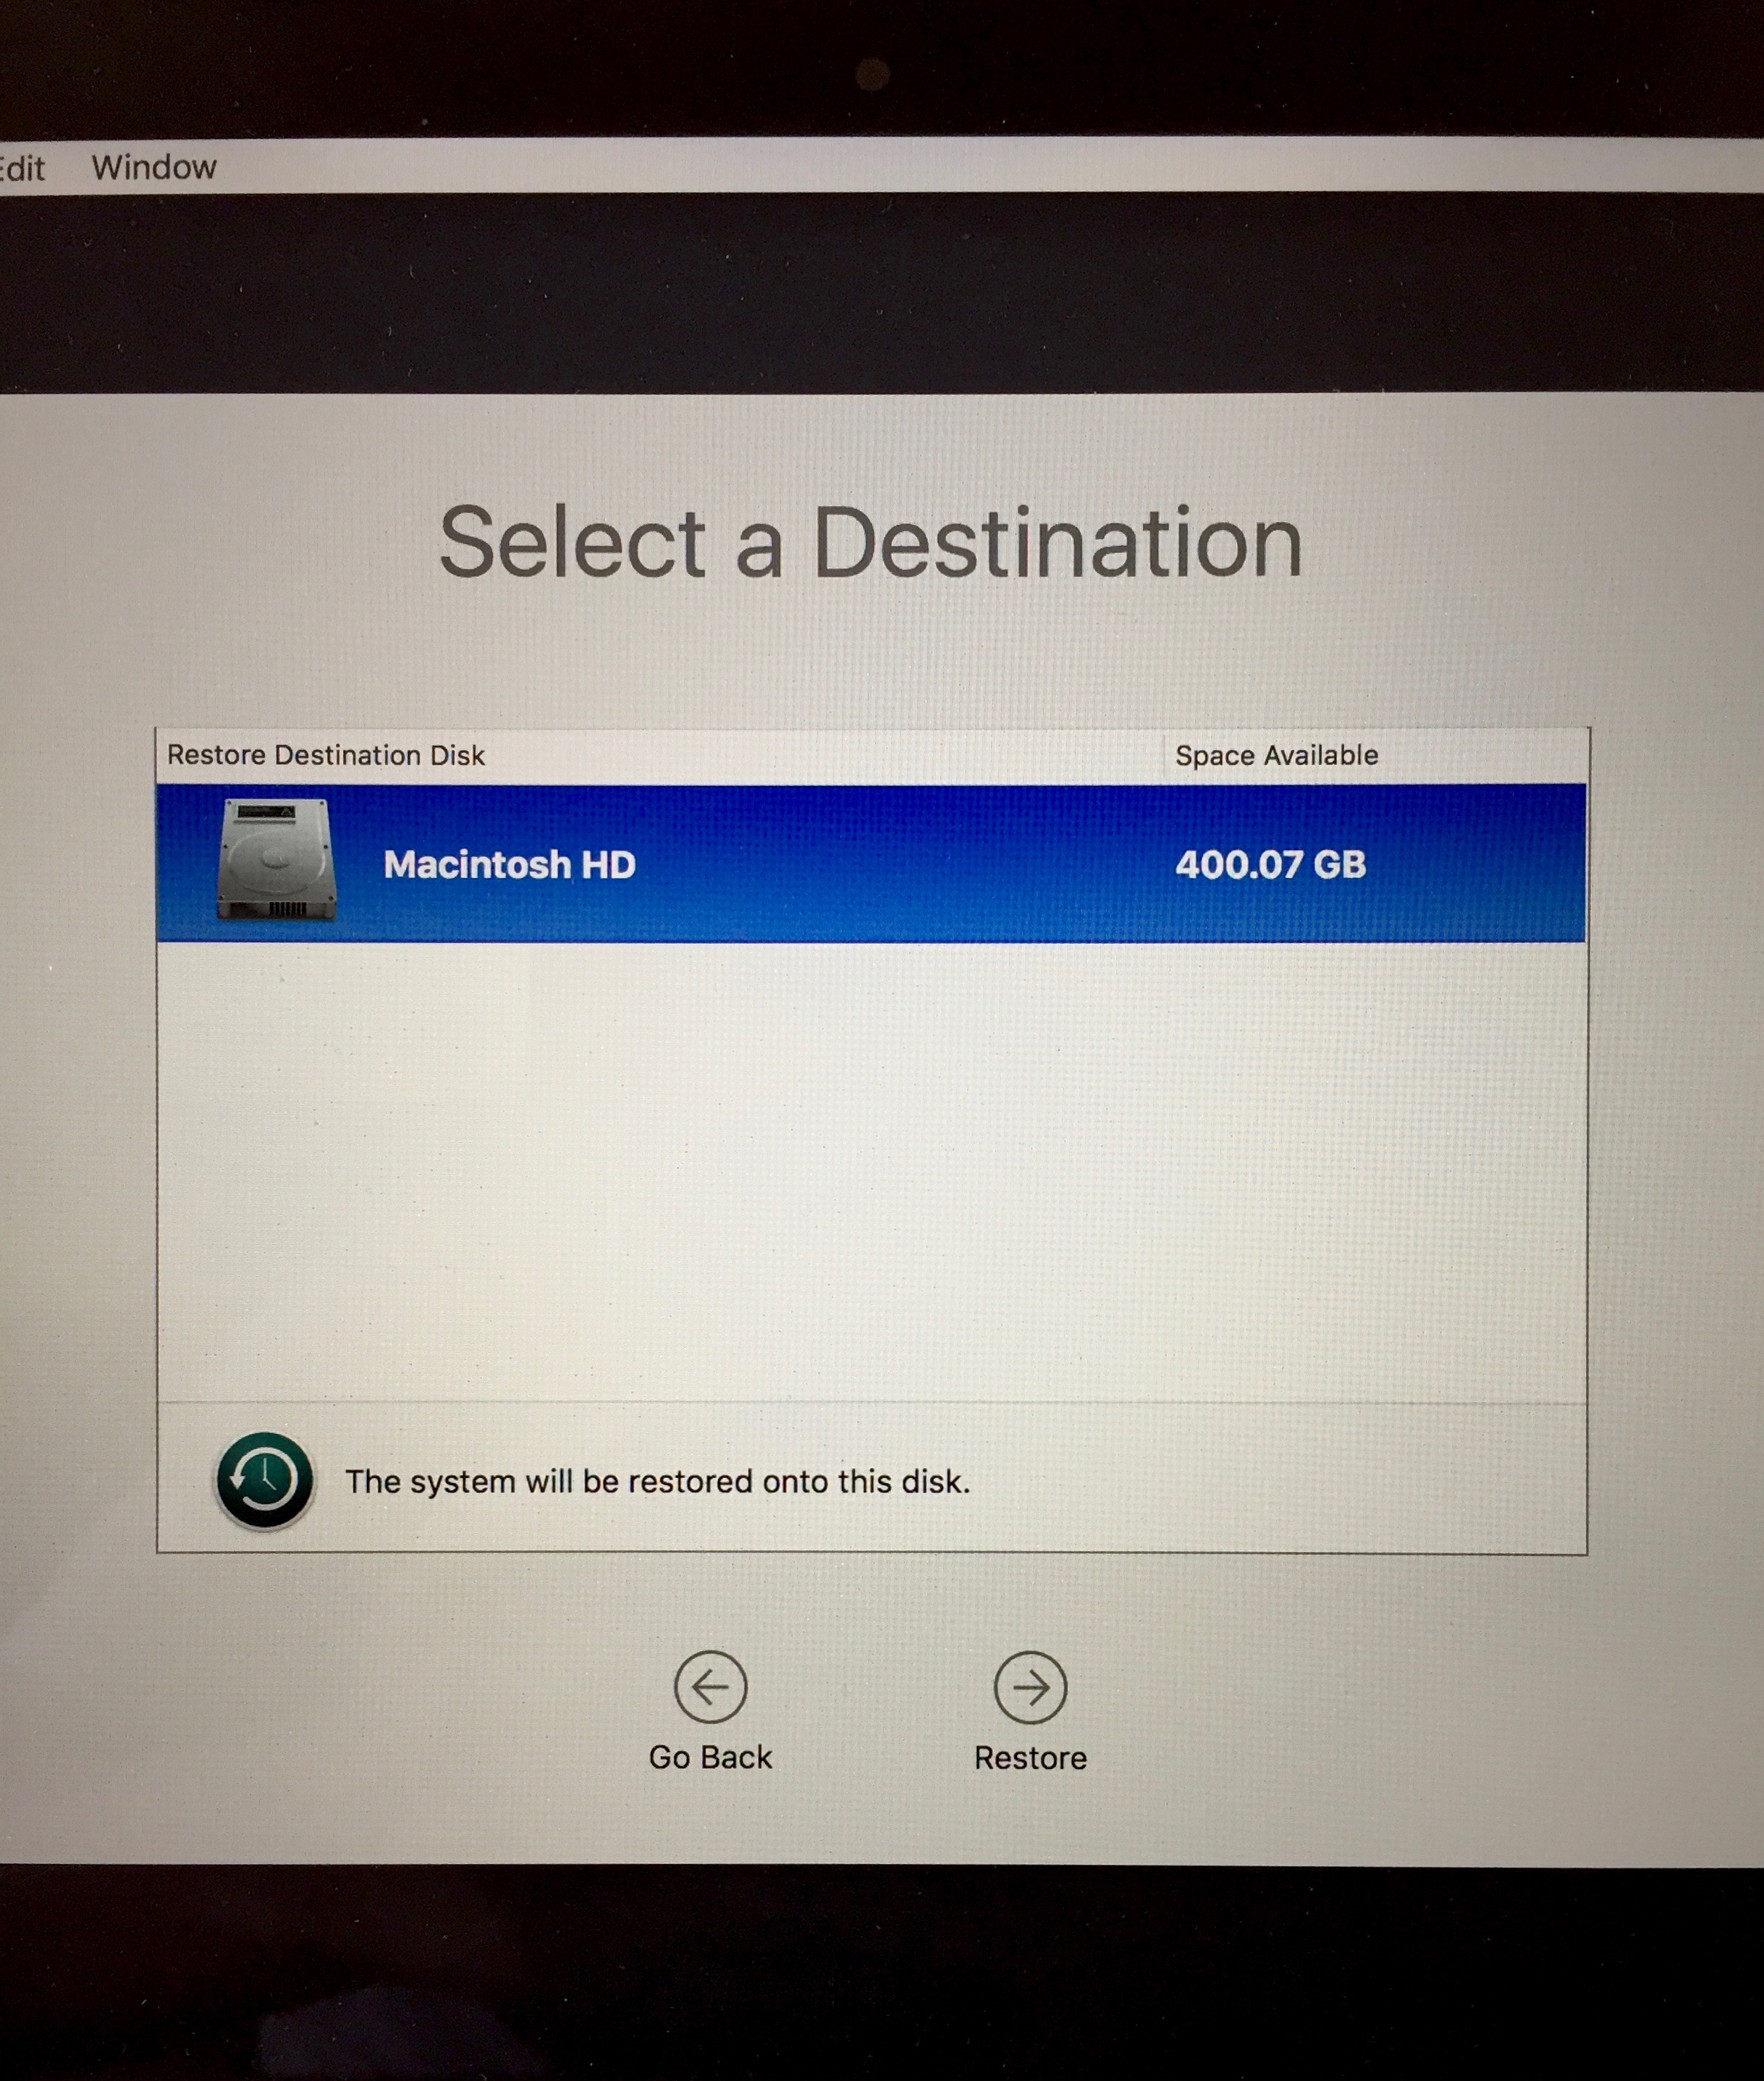
8) Select your boot drive (the one you formatted in Steps 3-4) as the destination for the restore, and set it going.
9) Once the restore is complete, reboot your Mac to its old Sierra glory. If you copied newer files off to a spare disk in Step 1, copy them back onto your main drive now.
Option 3: I have no backups! All my files are on my High Sierra installation…
This one is a bit of a pain, as you cannot do a wholesale restore. Instead, you will have to do a clean install of Sierra, and then manually copy across your files from the High Sierra install. You will also have to reinstall your programs. This is why it’s always a good idea to have a Time Machine backup, or better yet, a full system clone before trying out beta releases. Let’s go!
1) Create a full backup of your High Sierra system to a spare drive, using Carbon Copy Cloner or a backup tool of your choice. (You can do it manually if you’re sure you won’t miss anything, or use another program like SuperDuper!). We will use this backup to copy all our files back onto our Sierra install at the end.
2) Optional! Create a 10.12 Sierra install USB. Boot from it by holding the Option/Alt (⌥) key whilst starting up your computer, and selecting the Sierra install USB at the boot menu.
Doing this means you don’t have to re-download Sierra as part of the install process. I find it easier to do it this way, but it is not necessary if you don’t have a USB drive or don’t want to. If you’ve made a Sierra install USB, skip to Step 4 of the guide. If you haven’t, continue to Step 3.
3) Boot your Mac whilst holding down the cmd ⌘ and r keys to enter Recovery.
4) Once booted to the utilities menu, select Disk Utility.
5) Select View in the top menu bar, and click Show All Devices. Then select the hard drive with your High Sierra beta install on it, (the whole physical drive, not just the APFS container) and click the Erase button in the menu bar.
6) Format the drive with a name such as Macintosh HD, and with GUID Partition Table and Mac OS Extended (Journaled) selected.
This step will completely destroy the High Sierra install! Make sure you have copied any files you want off it before completing this step!
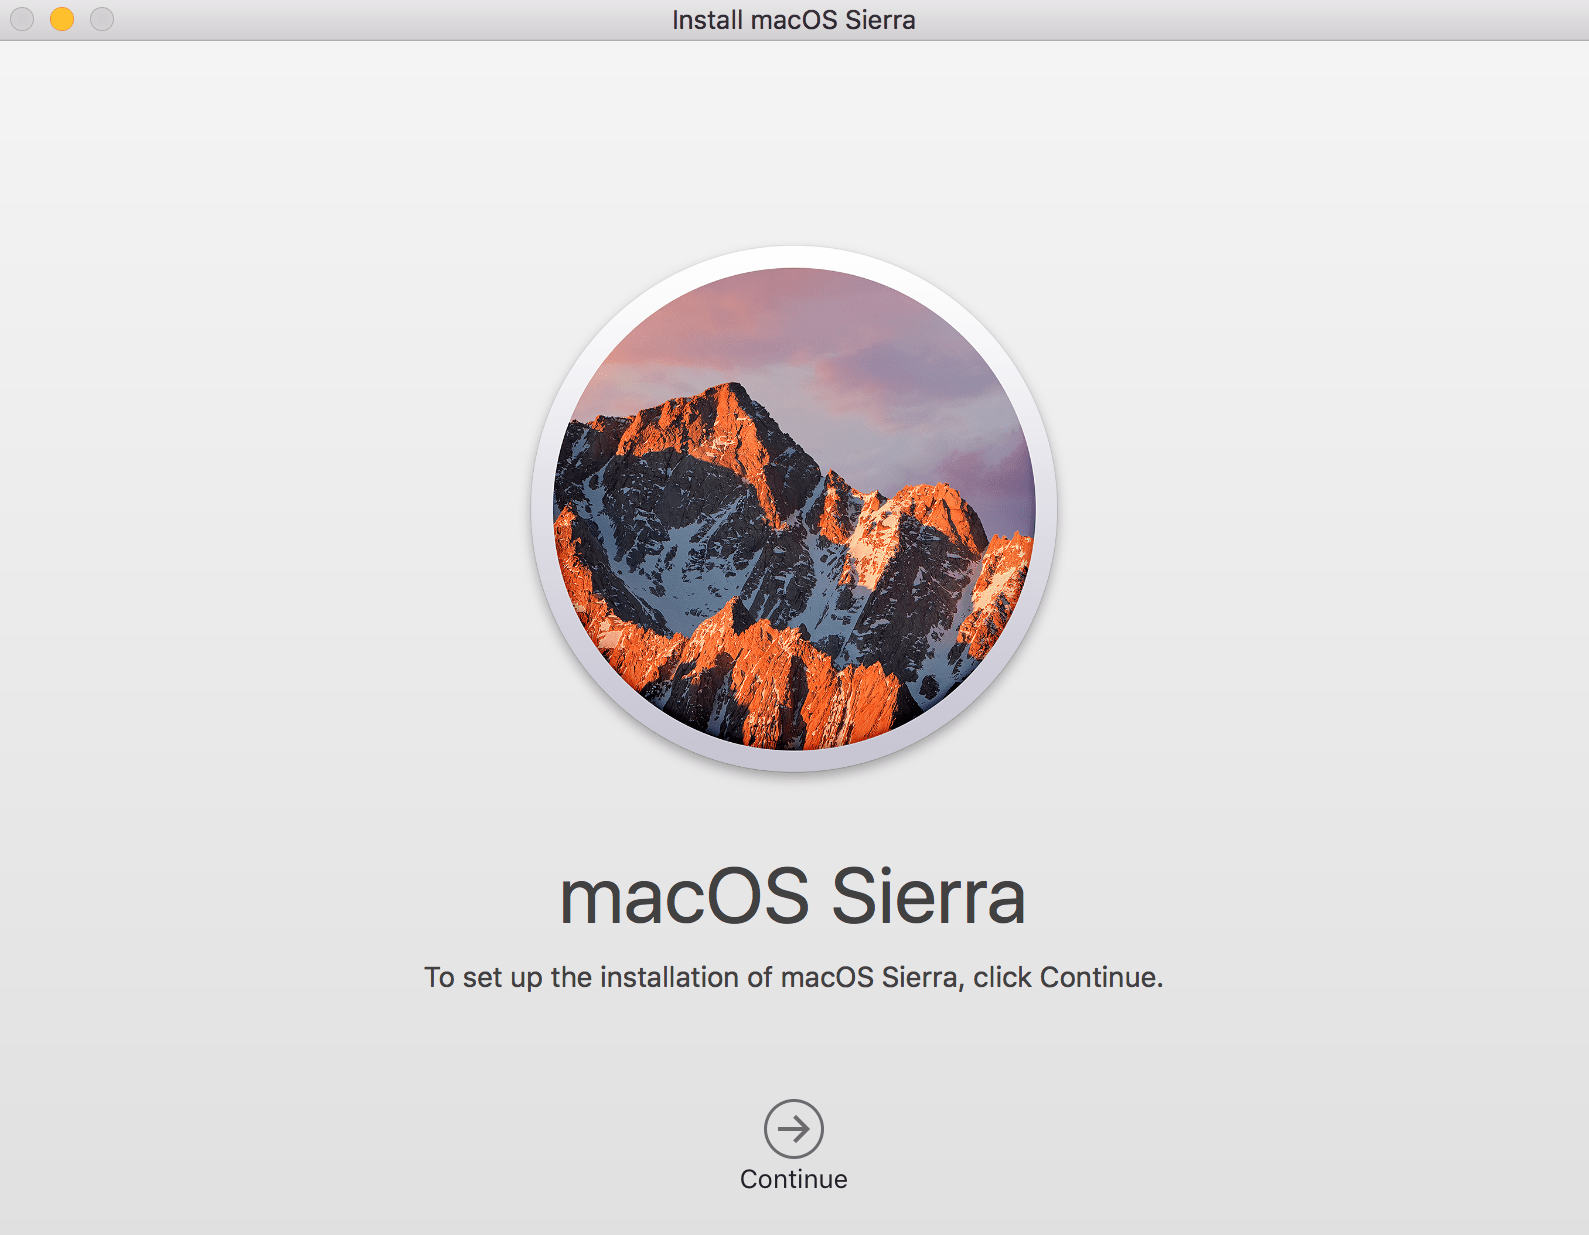
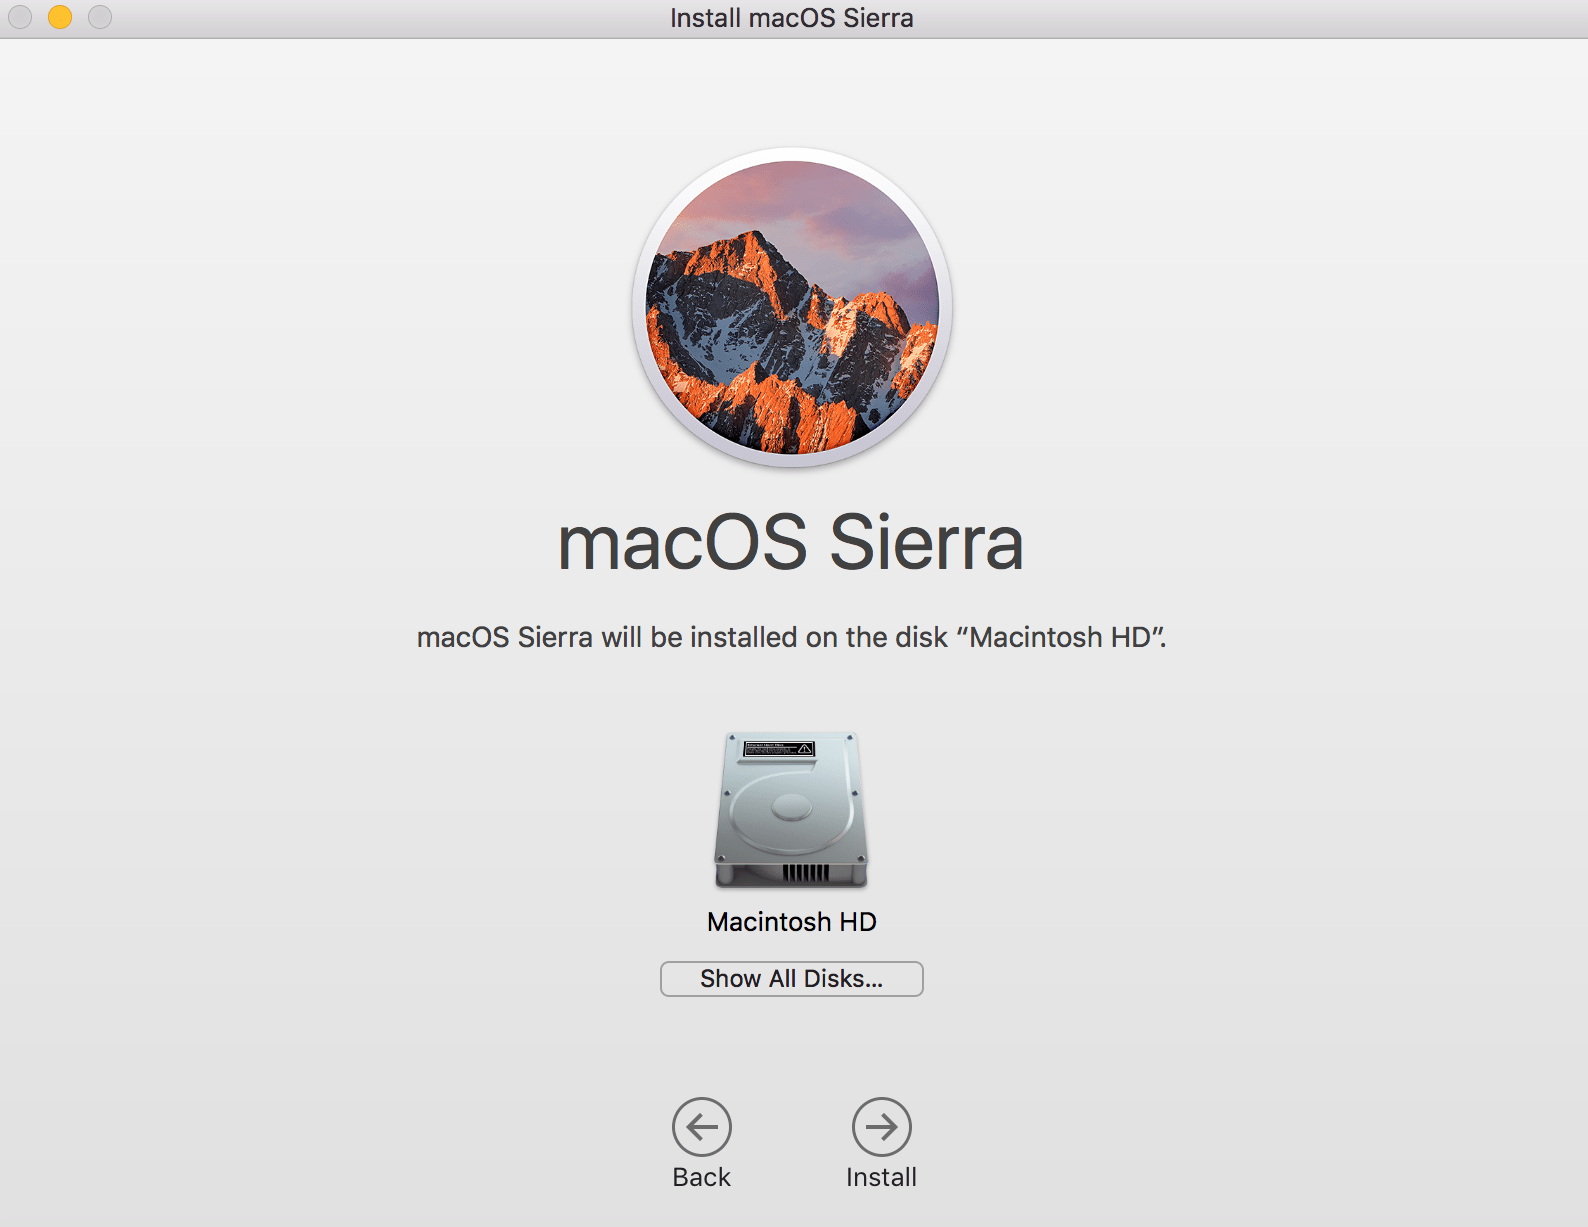
7) Once formatted, quit Disk Utility. Back at the main menu, select Install macOS Sierra. If you are using the install USB the installation will begin immediately. If you are working from Recovery without an install USB then Sierra will be downloaded first. This will take longer and requires an internet connection.
8) Select your boot drive (the one you formatted in Steps 5-6) as the destination for the install, and set it going.
9) Once the installation is complete, set up your Mac and reach your desktop.
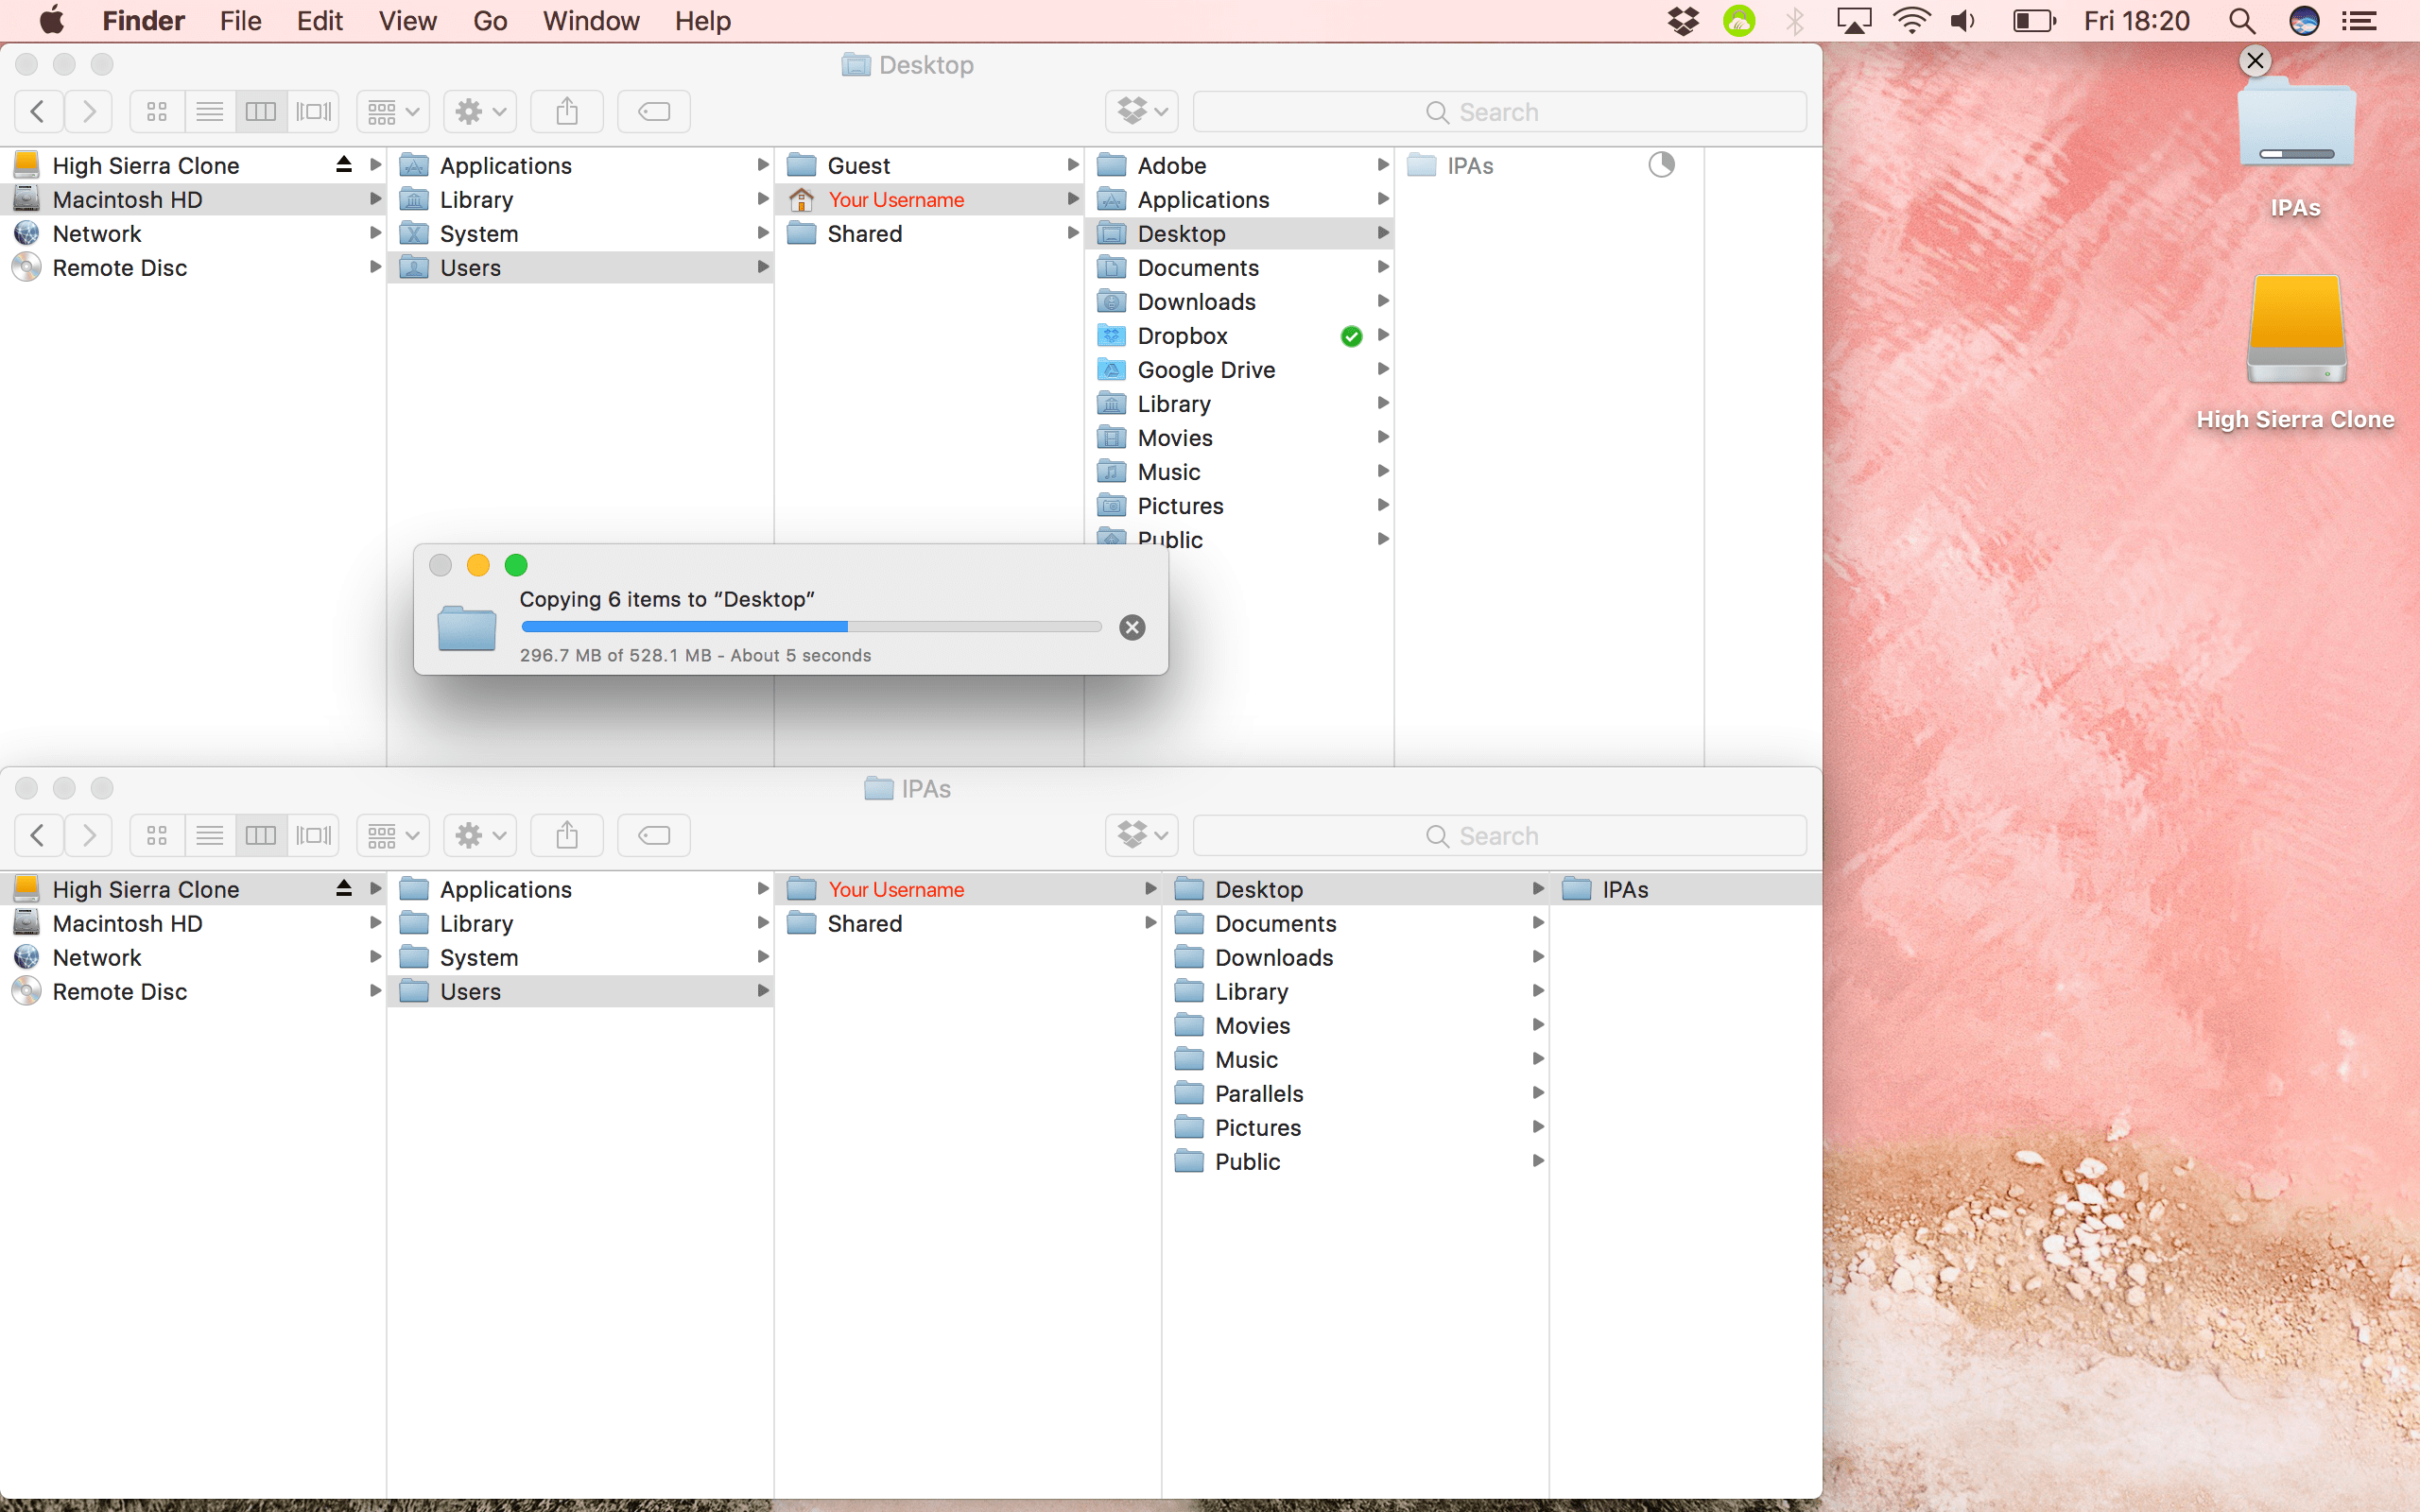
10) Connect your full High Sierra backup, which we made in Step 1. Manually copy over the contents of all your Users/YOUR_USERNAME/* folders from the High Sierra backup to our new Sierra install. For example, copy the contents of ~/Desktop to your Sierra Desktop, ~/Documents, ~/Downloads, ~/Music, etc. Don’t forget any other files which you have stored elsewhere, such as ~/Library/Application Support, and any /Applications which you cannot just re-download and reinstall.
This will take a while, as it is essentially setting the computer up as new, but once you’ve finished, you should be happily back on your Sierra install.
Do you need any help with these guides? Have you tried the High Sierra and come back again? Are there other tutorials you’d like to see us put up on the site for you? Let me know in the comments.