With macOS Sierra, Apple dropped support for some of its hardware models for the first time in several years. Citing various incompatibilities and hardware deficiencies, they cut out a large swathe of machines from running Sierra. However, many Mac owners have questioned their motives, observing that some machines have made the cut whilst their more powerful contemporaries (such as the MacBook Pro) have mysteriously been left behind.
This led some to conclude that Apple is simply raising the bar to encourage hardware upgrades, and that there is often no incontrovertible hardware reason which dictates the unsupported machines. In many cases this turned out to be true, and with a few tweaks and amendments many of the “unsupported” machines have been brought back into the fold by a tool by dosdude1, called macOS Sierra Patcher. In this guide, we’ll walk you through how to use the tool to install macOS 10.12 Sierra on older Mac hardware, which claims not to support it.
Apple’s hardware requirements for macOS 10.12 Sierra are now as follows:
- MacBook (Late 2009) onwards
- iMac (Late 2009) onwards
- MacBook Air (2010) onwards
- MacBook Pro (2010) onwards
- Mac Mini (2010) onwards
- Mac Pro (2010) onwards
Contrast this with the table below, which shows the additional machines on which Sierra can be installed with the help of macOS Sierra Patcher:
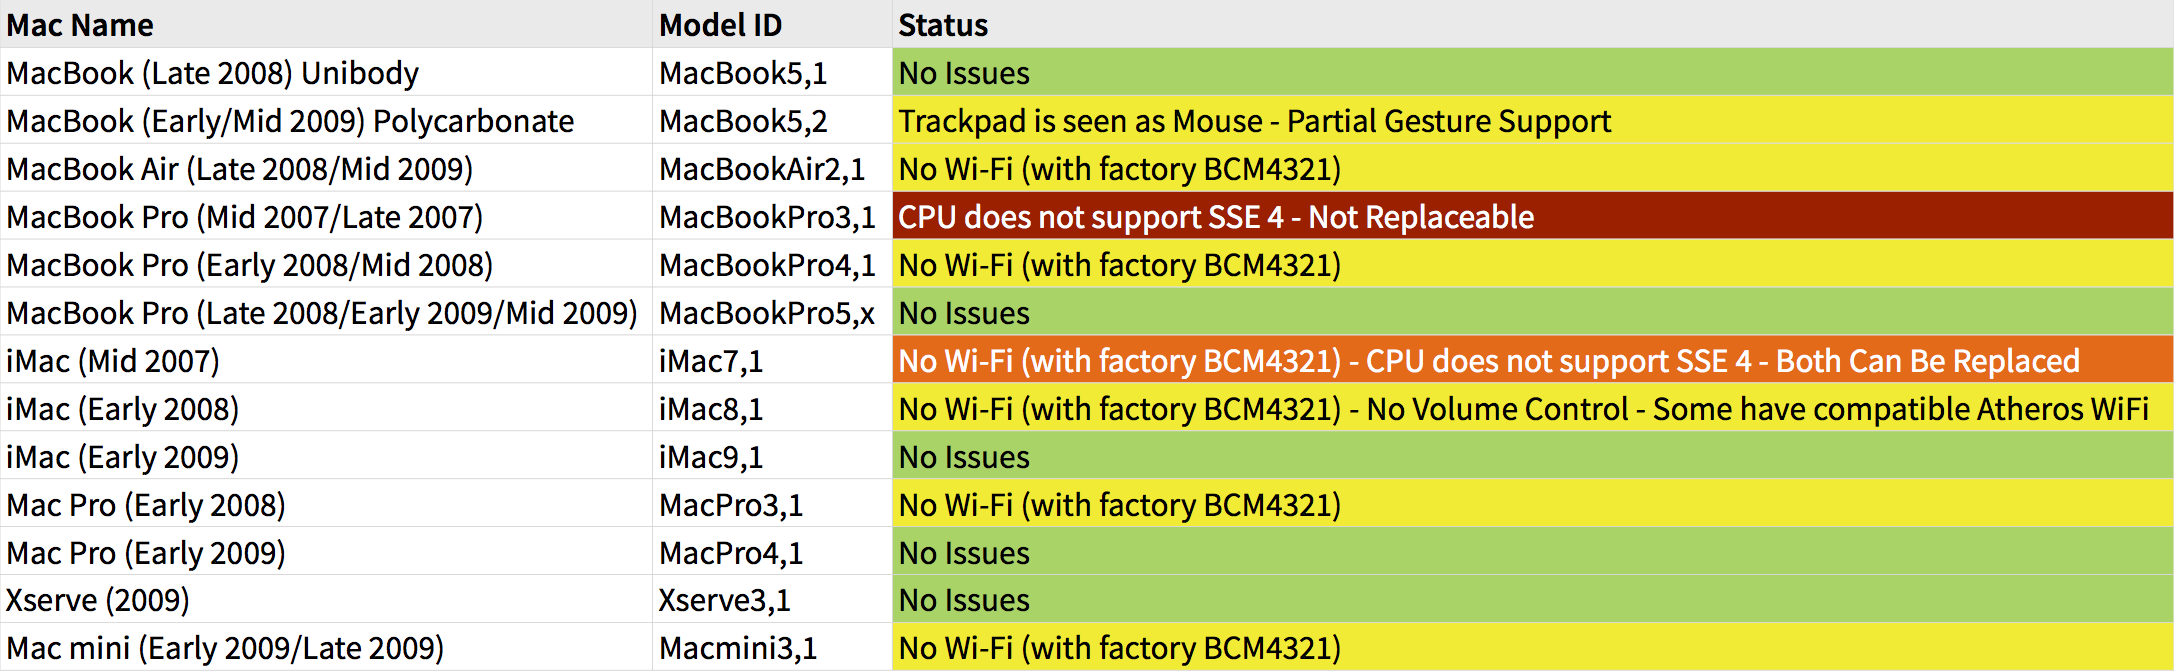
Please note, some machines have issues, as the table reports. The most common is a lack of Wi-Fi due to the unsupported BCM4321 card in some machines, but this can often be replaced. Some machines, such as the MacBook Pro (2008/9), work perfectly with no modifications, leaving you to wonder why Apple thought it necessary to drop them at all.
If you have one of the models listed above and want to give Sierra a try, follow our instructions below to make a modified Sierra installer with Sierra Patcher.
Instructions to install macOS Sierra on older Macs
1) Find yourself an 8GB or larger USB drive or external hard drive partition.
2) Format it as GUID Partition Map, Mac OS Extended (Journaled) using the Disk Utility application.
Related tutorial: How to use Disk Utility to format drives on your Mac
3) Download a copy of macOS Sierra 10.12. To download this via the Mac App Store you will need access to a supported machine. However, a direct download or a download inside a macOS VM can circumvent this requirement.
4) Ensure the Install macOS Sierra app which you downloaded is in your /Applications folder.
5) Download dosdude’s tool, macOS Sierra Patcher.
6) Disable SIP on the machine you want to install Sierra on. SIP must remain disabled at all times for this method to work, even after initial installation. Do not be alarmed by this. Whilst it does lessen security somewhat, it is not the end of the world, and OS versions prior to El Capitan do not include it anyway.
Related tutorial: How to disable System Integrity Protection
7) Once everything is ready, launch the macOS Sierra Patcher application.
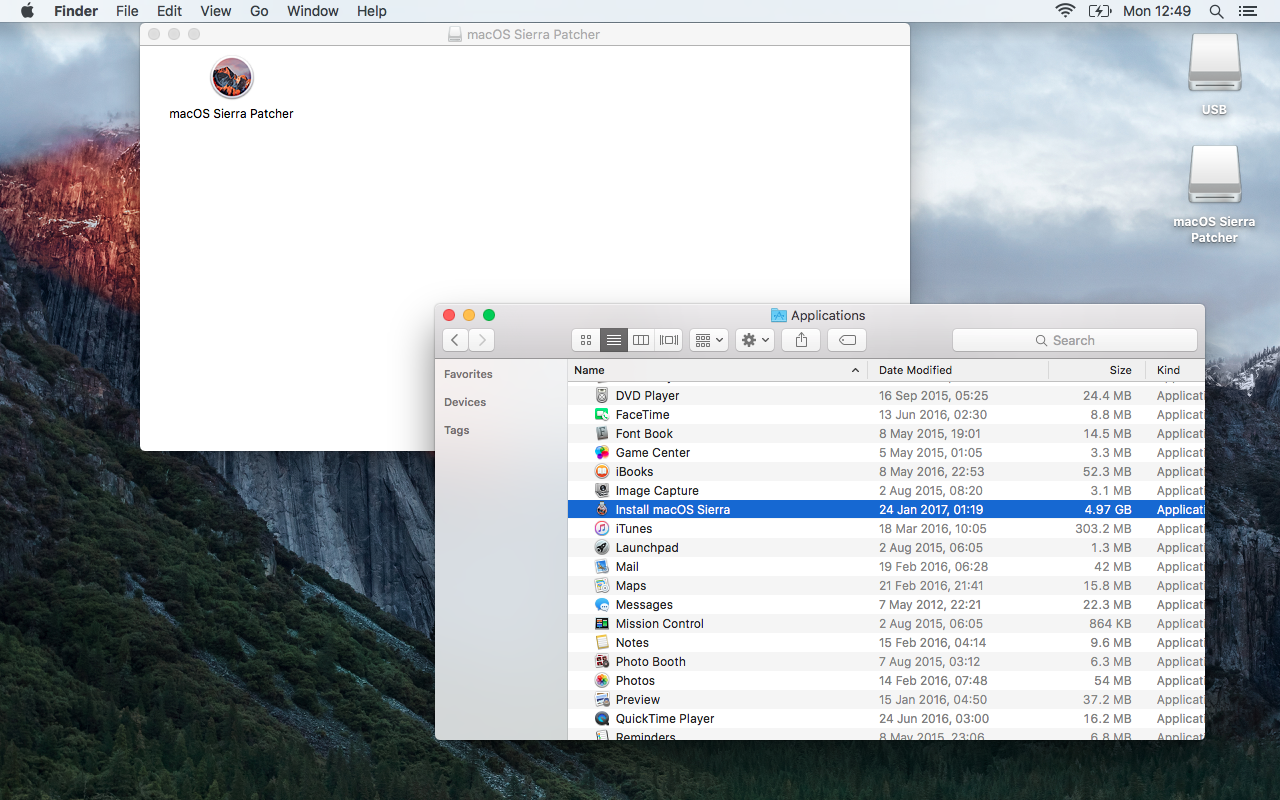
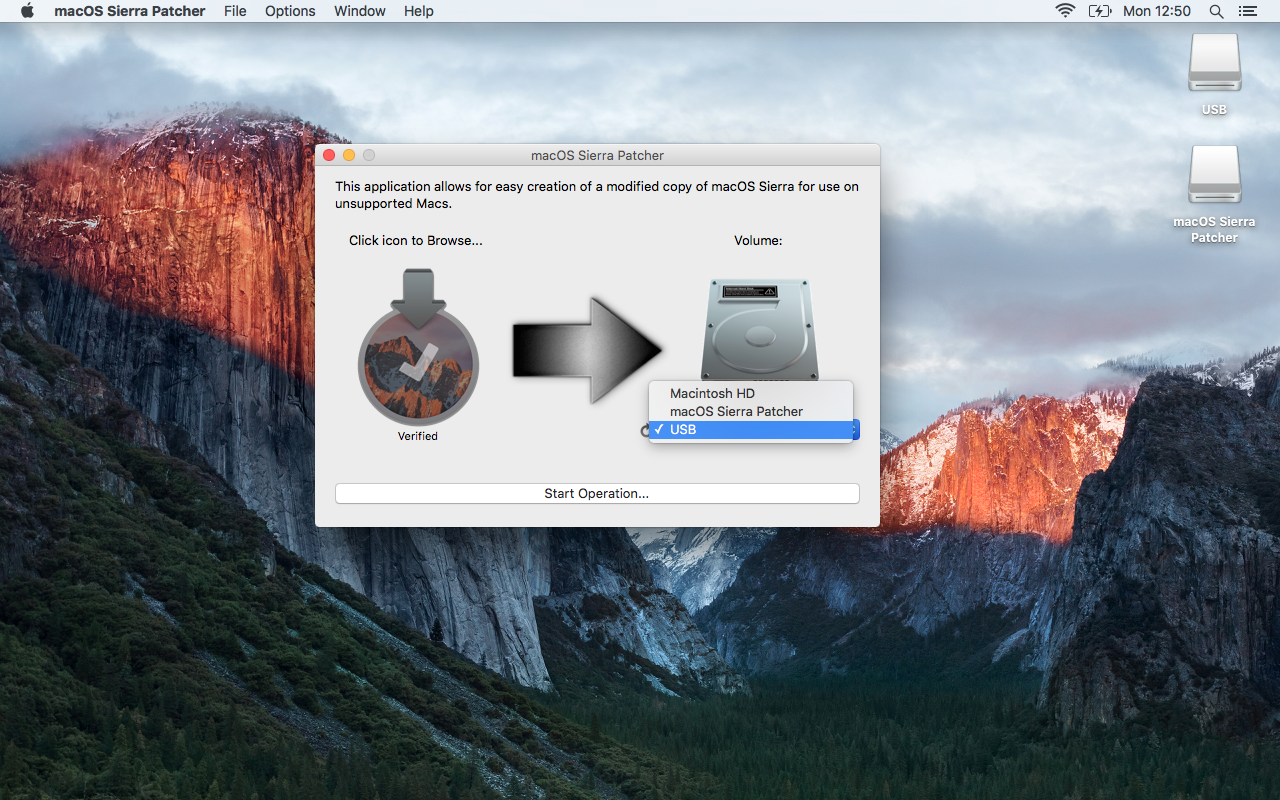
8) In the patcher application, click on the Sierra installer icon to select your copy of macOS Sierra. Navigate to your Applications folder and select it.
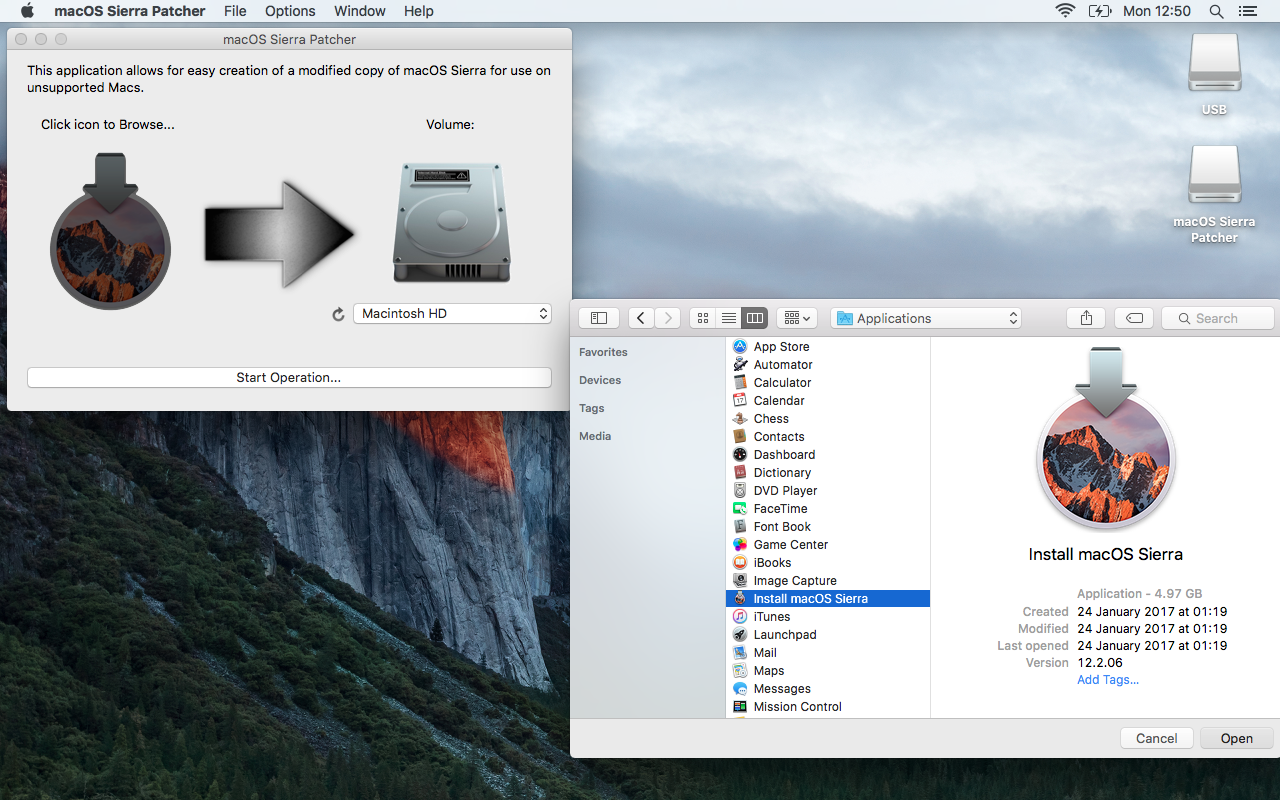
9) Click the Volume icon to select the drive to create our modified Sierra installer on. Mine is an 8GB USB drive, called USB.
10) When ready, click Start Operation… to begin. Enter your password when prompted. Sierra Patcher will now create a macOS installer on the drive you selected, making edits on the fly so that the resulting installer can be used on unsupported machines.
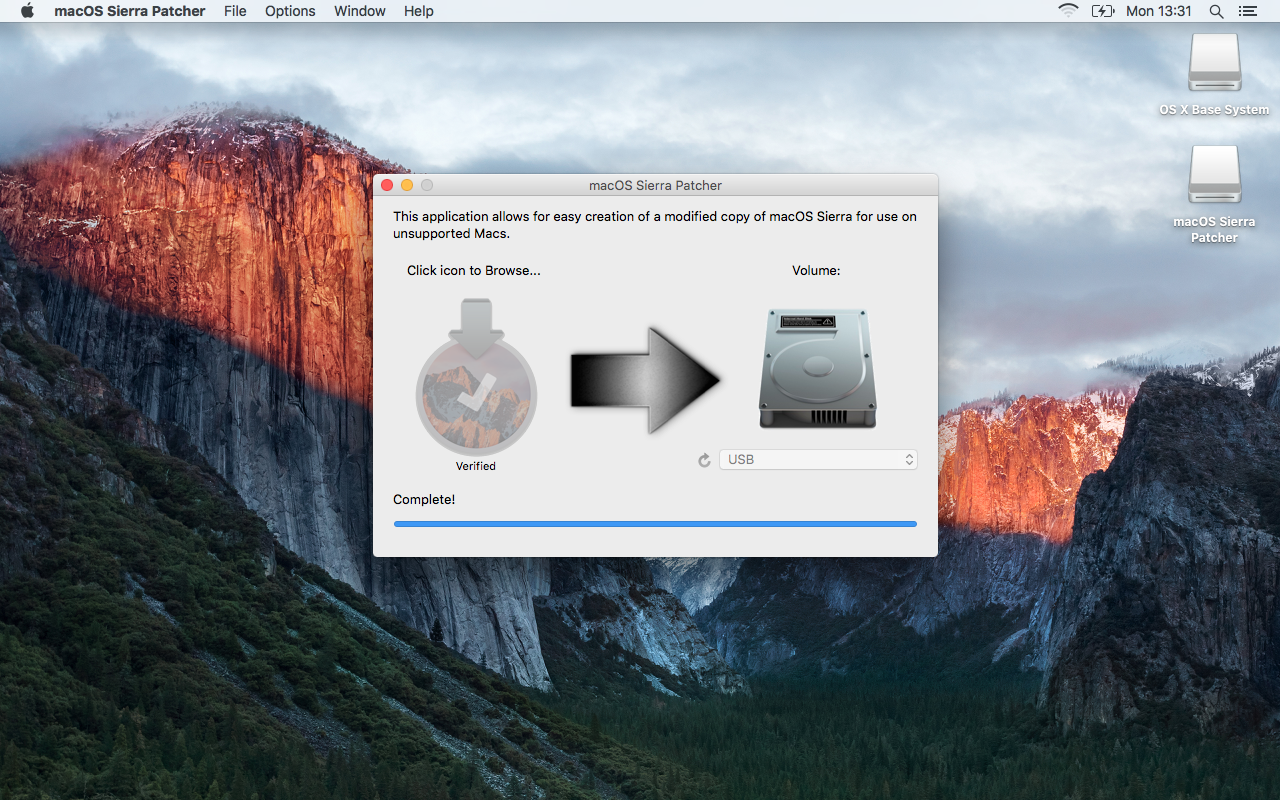
Once the installer is created, Sierra Patcher will say Complete! and your USB drive should now show as OS X Base System instead of its previous name.
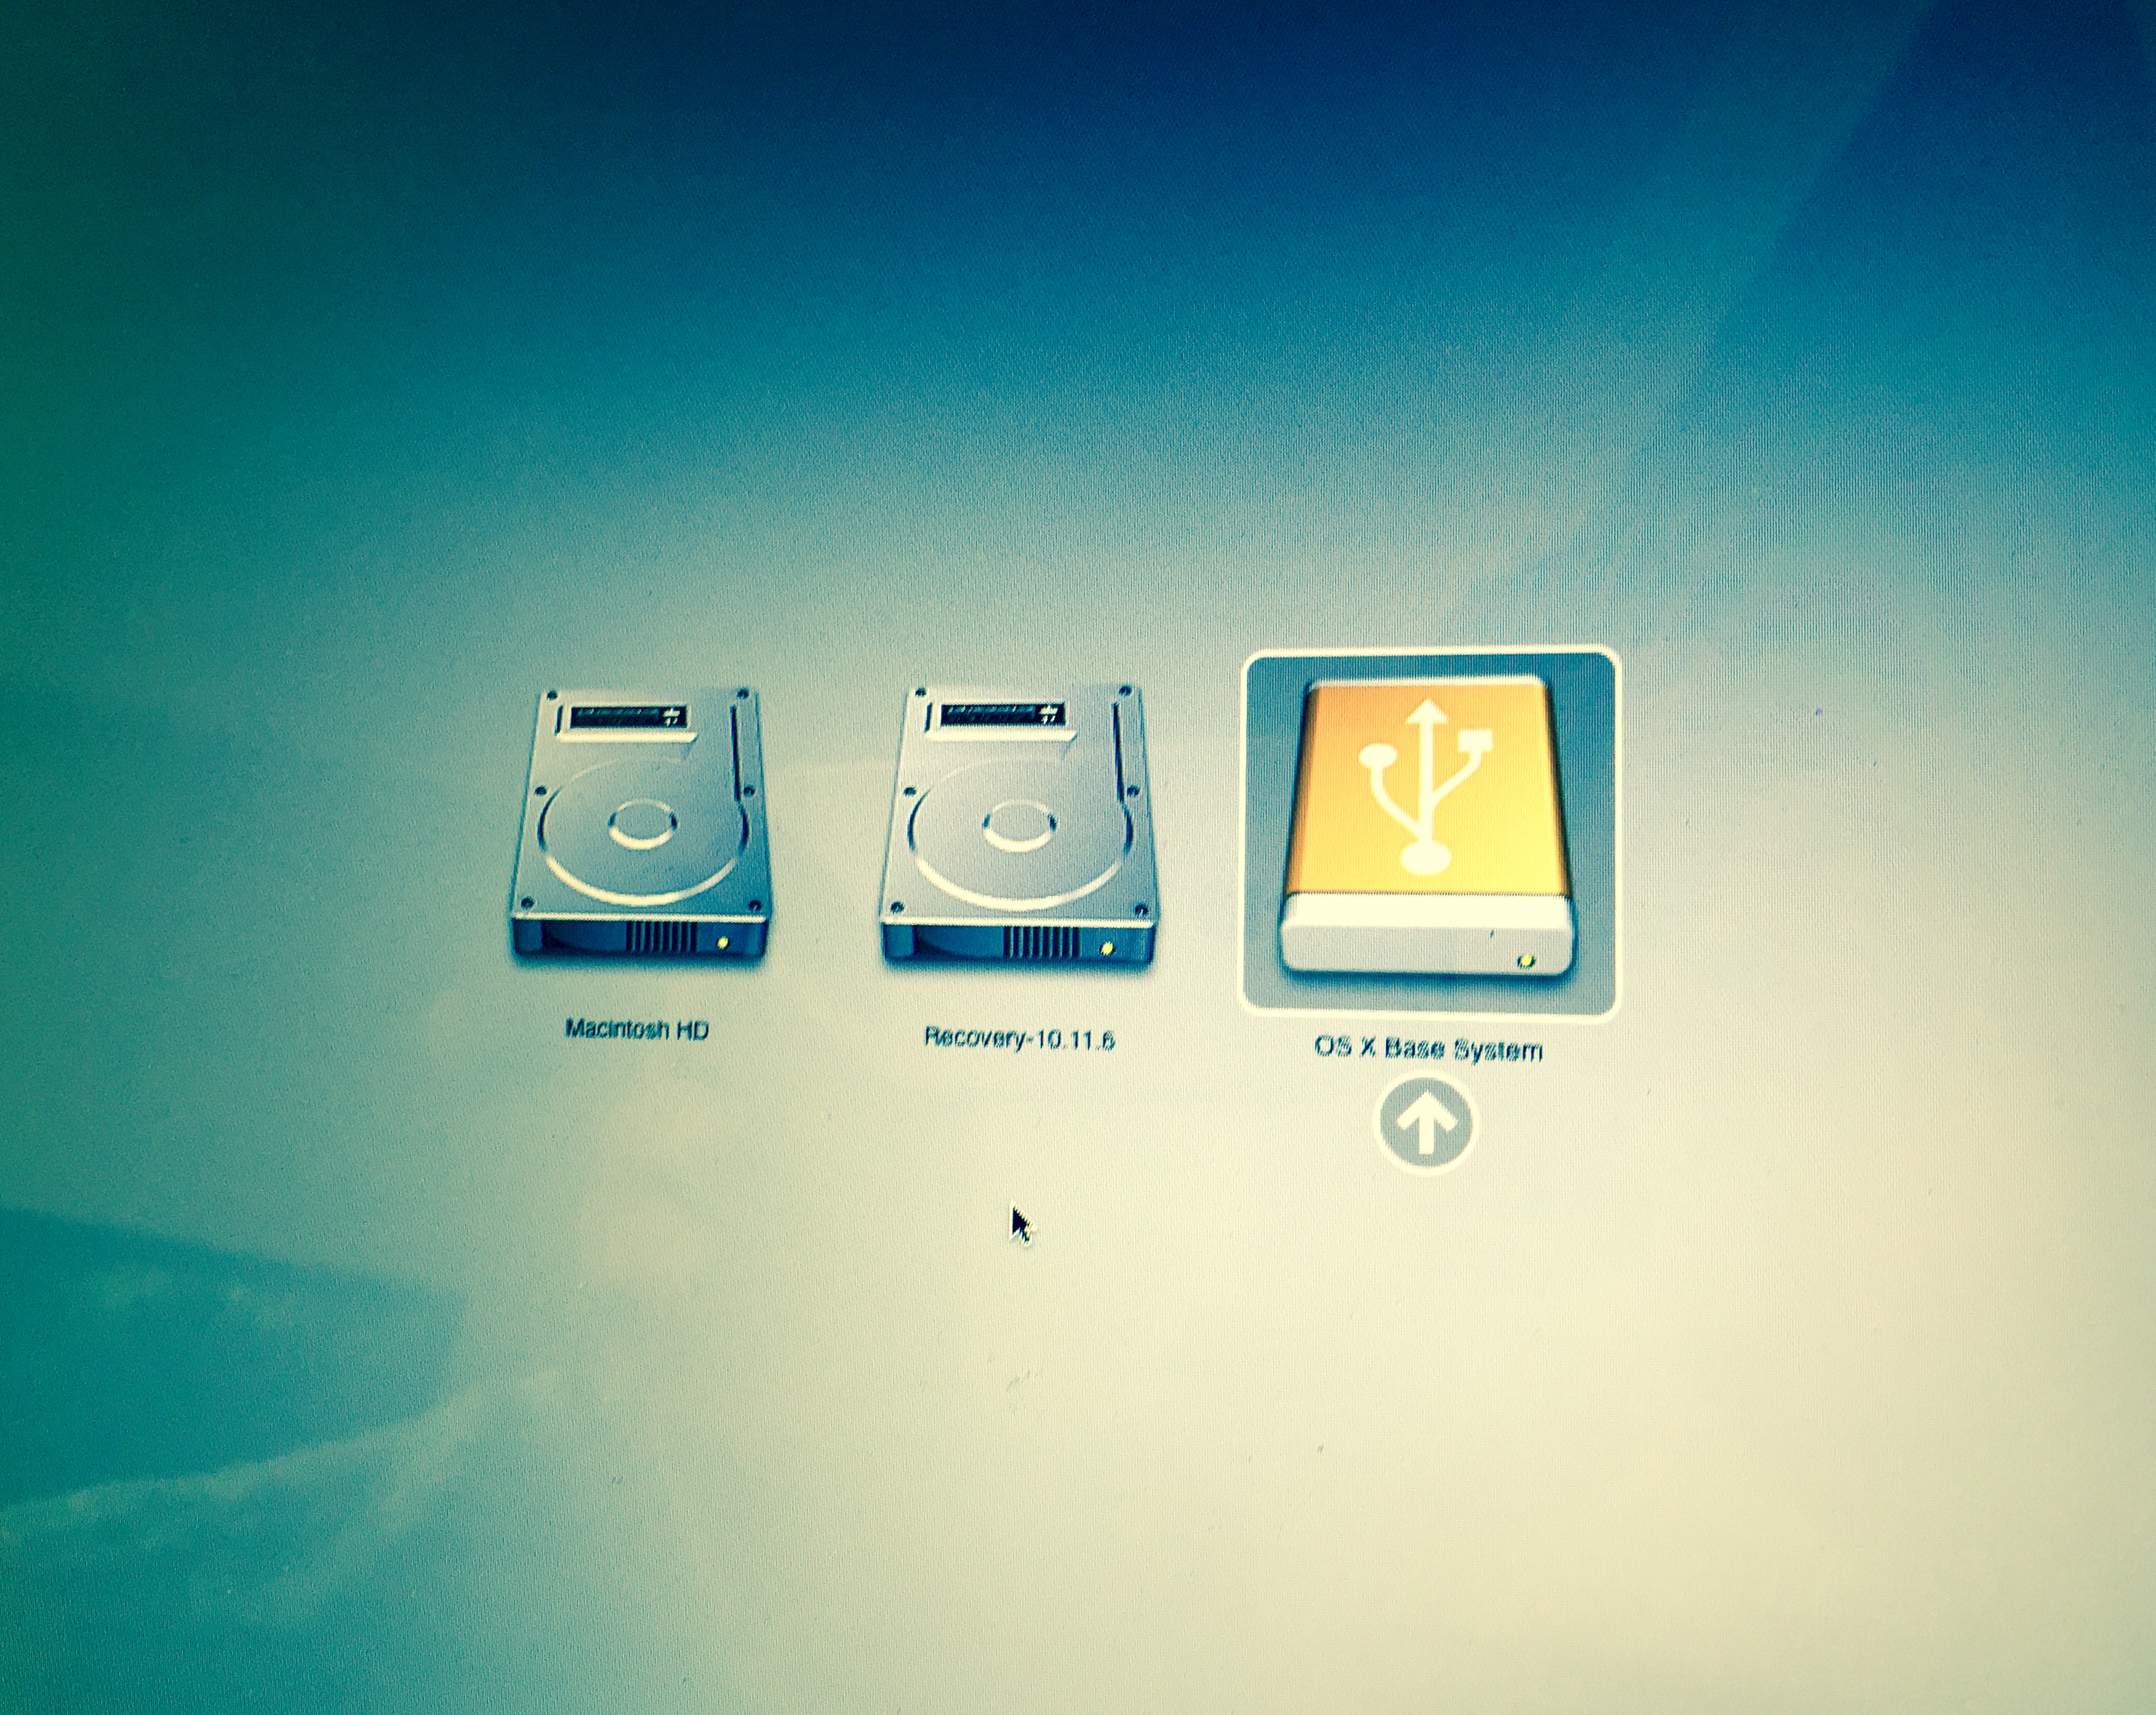
11) Plug the USB installer we just created into the unsupported machine. Turn on the unsupported machine whilst holding down the alt/option key. This makes the machine search for other drives to boot from, in this case, our USB drive.
12) Select the USB installer from the list of drives which appears, to boot from it.
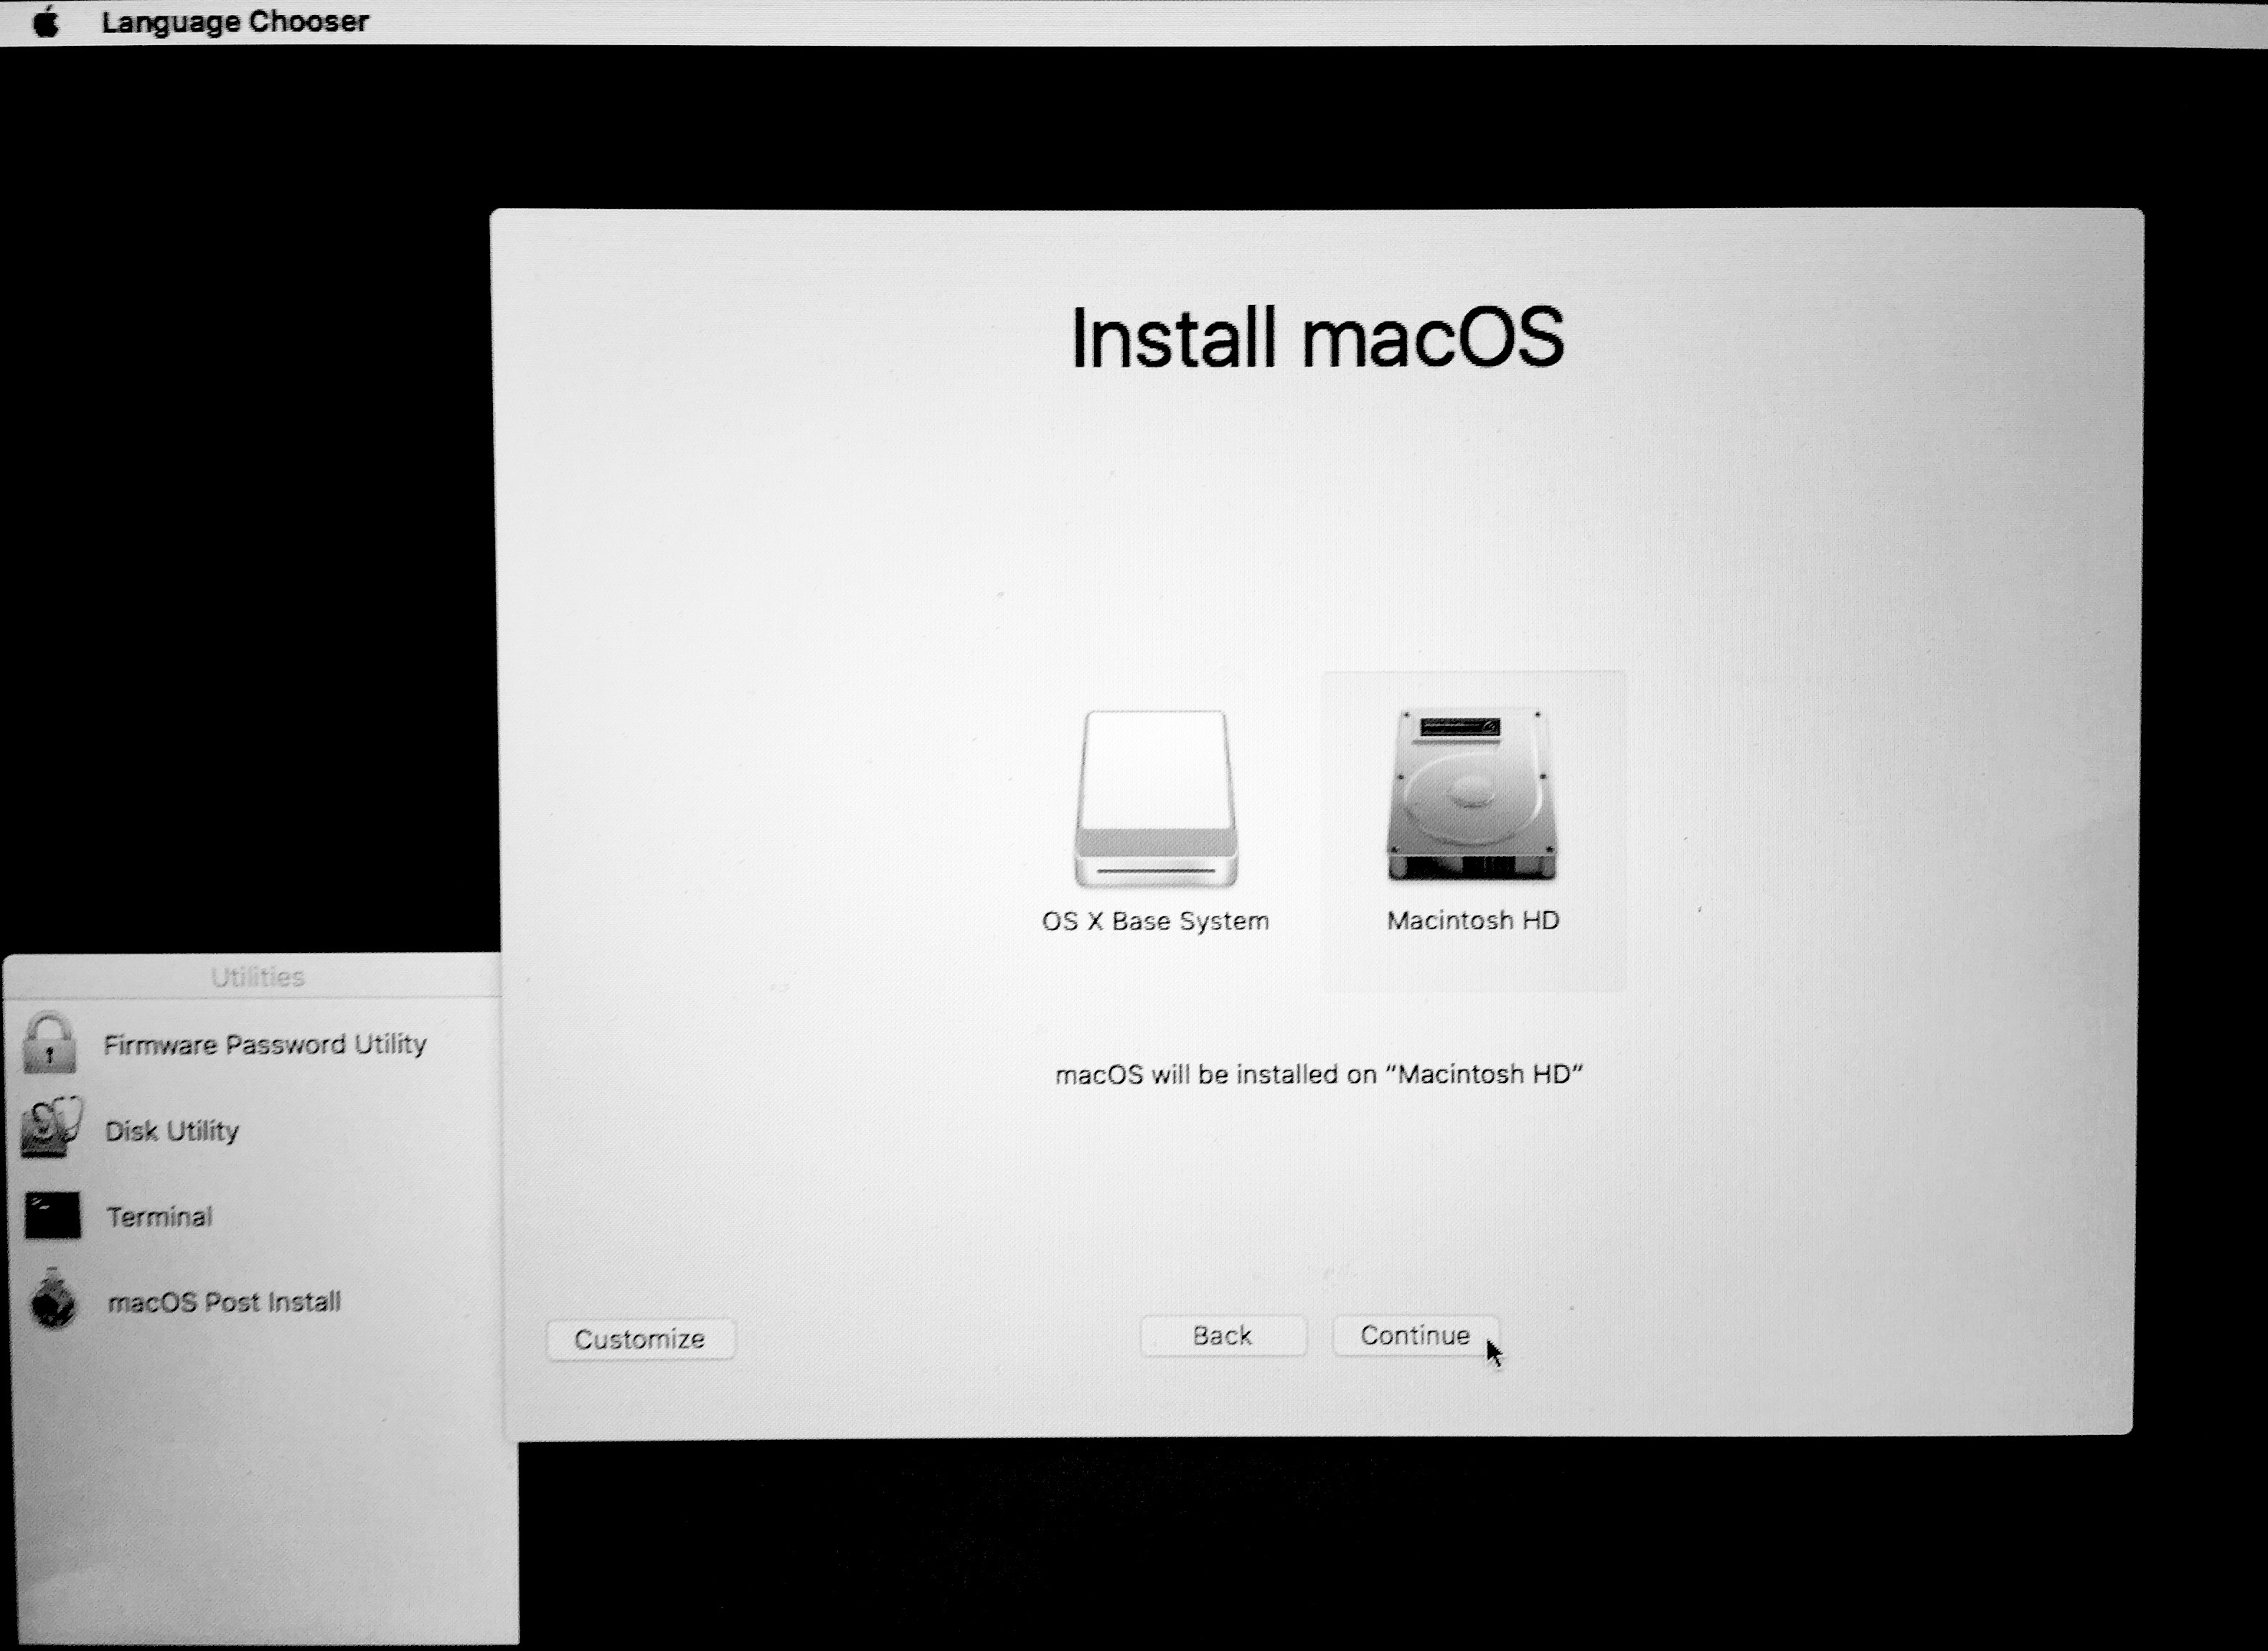
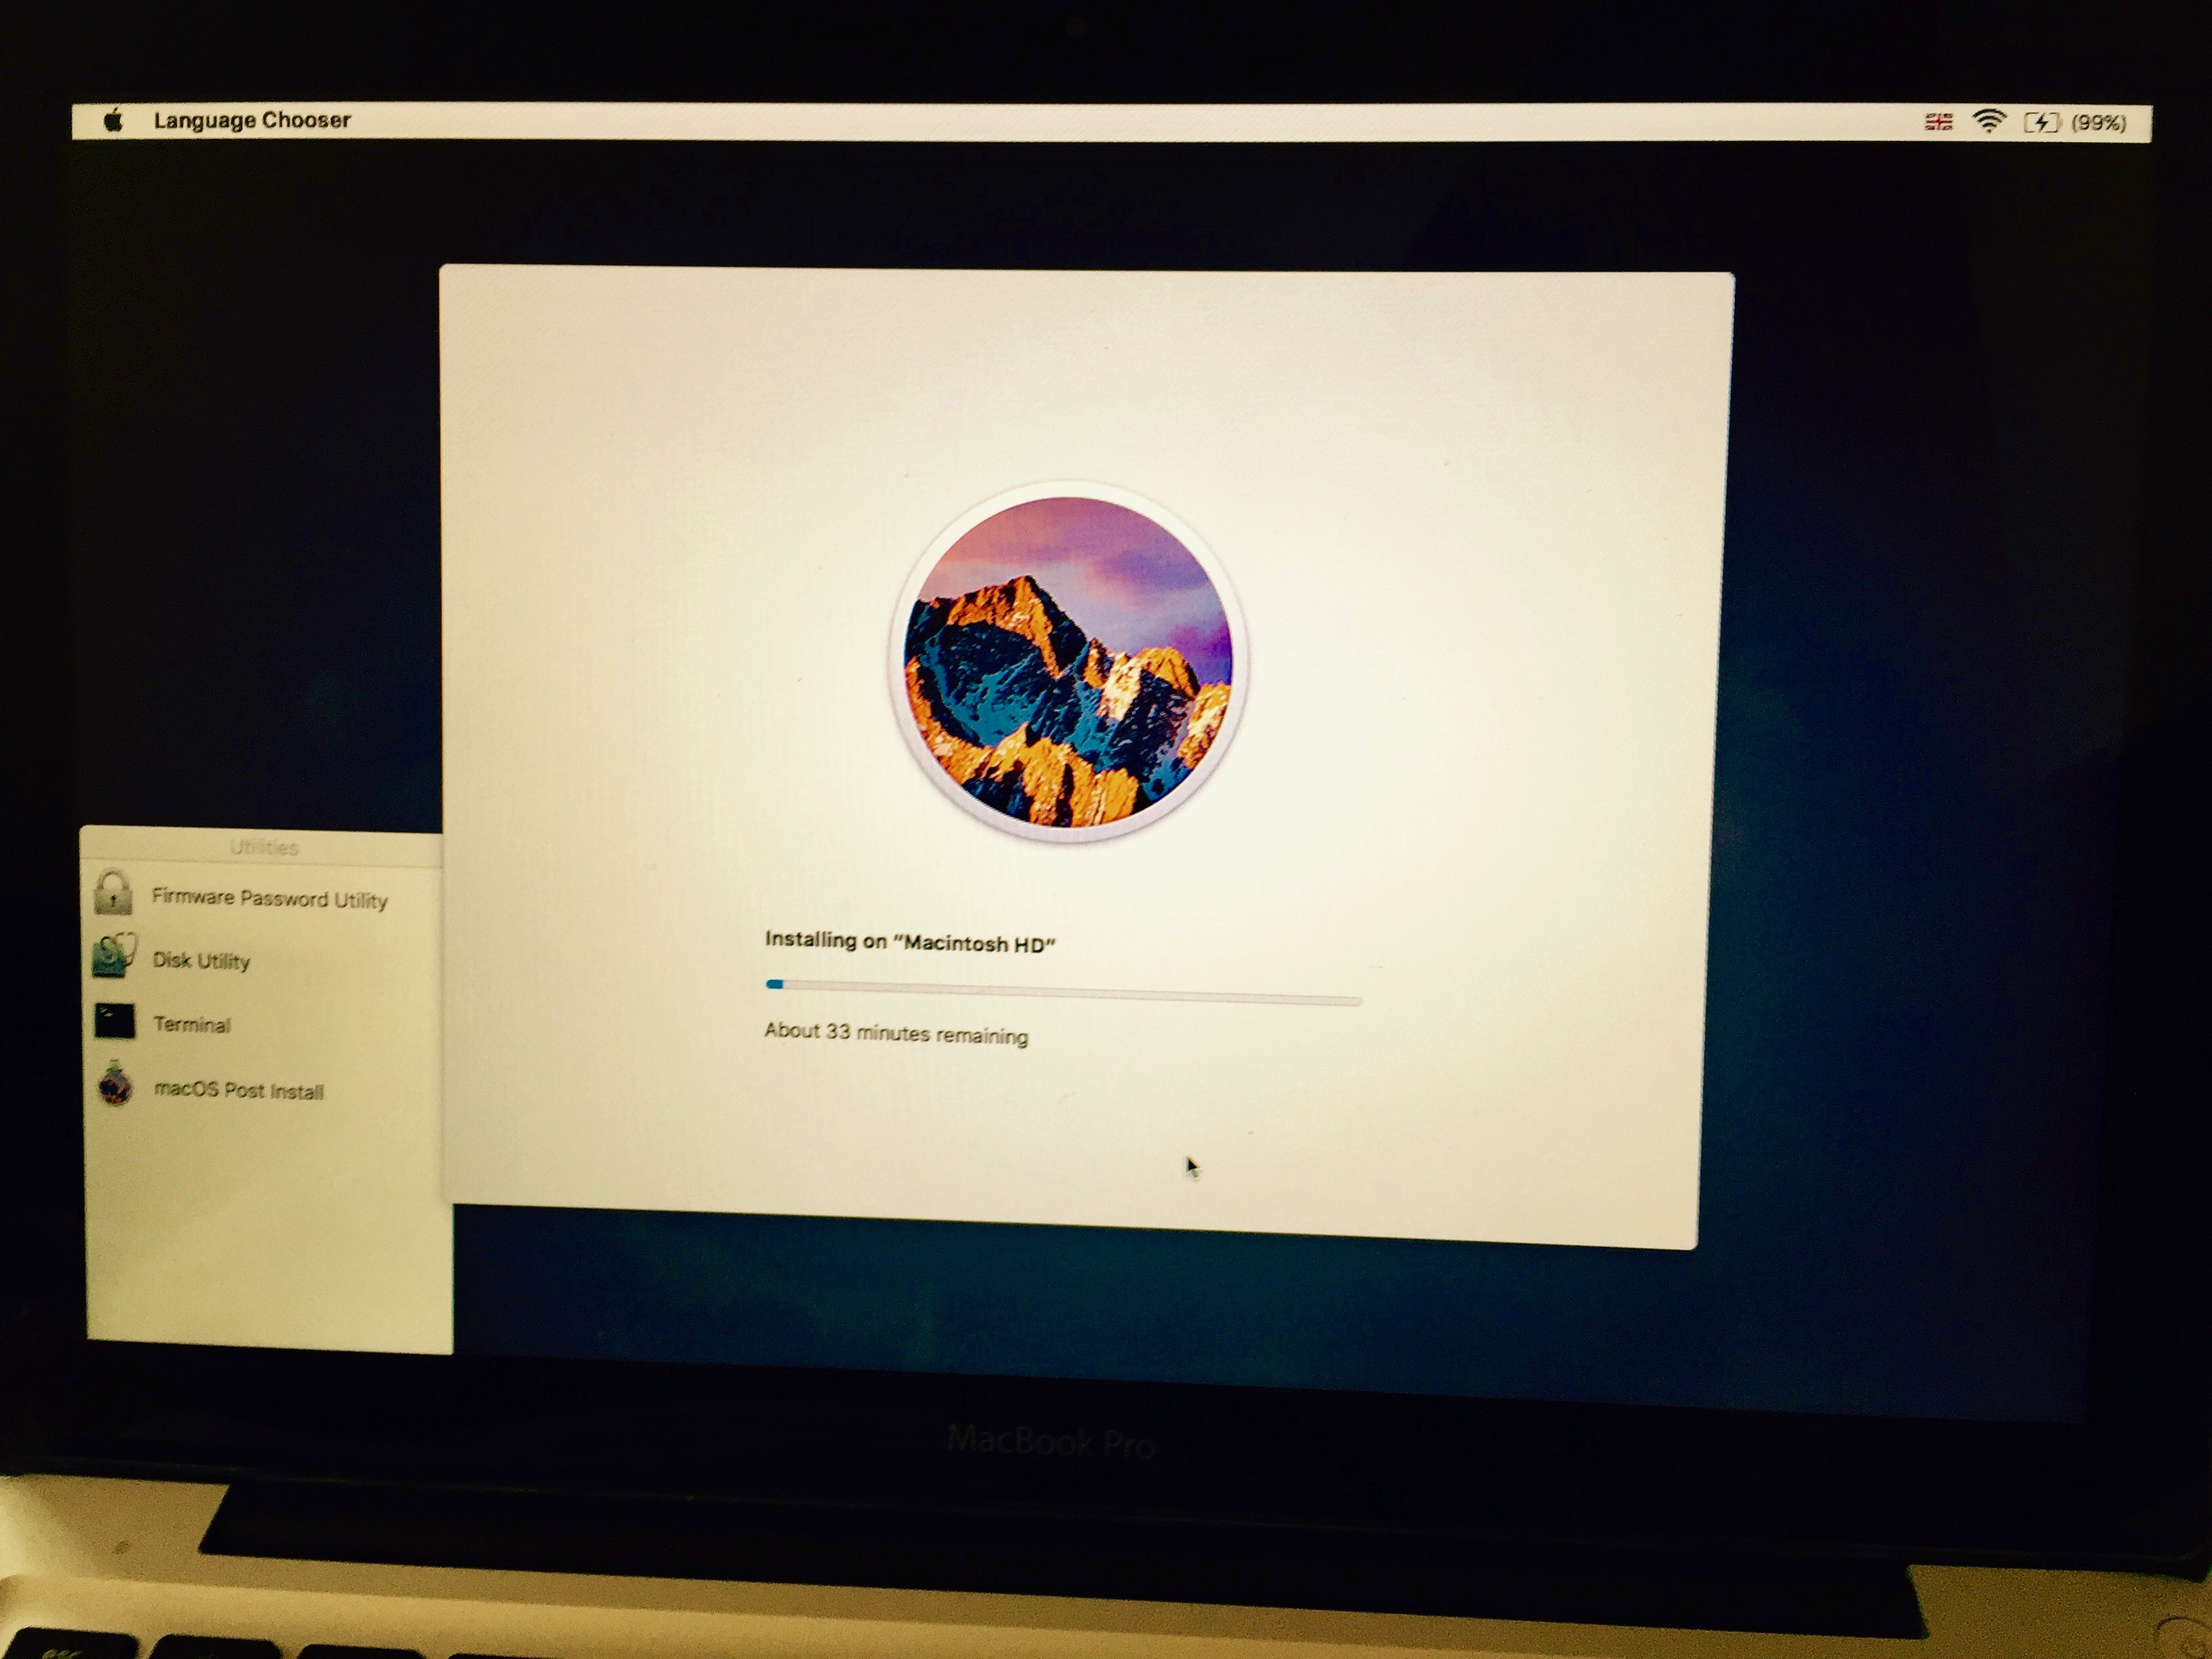
13) Once at the macOS installer, install the OS on your unsupported machine by going through the installer screens and selecting the hard drive in your unsupported machine as the destination. If you’re doing a clean install, use Disk Utility (included in the installer Utilities section) to erase the destination drive first. I recommend doing this for a fresh start. However, if you want to keep the existing installation on the unsupported machine and simply upgrade, run the installer without erasing the drive first.
The installation will now begin. Keep an eye on it, as it will reboot halfway through to complete the installation and you must be ready when it does.
14) When the machine reboots to complete the installation, hold down the alt/option key again to return to the screen pictured in Step 12. If you miss the restart, don’t worry. The machine will try to boot up and fail. Simply hold the power button down until it turns off, then turn it on again. This time, make sure you hold the alt/option key as it boots to get the screen pictured in Step 12.
15) At the boot drive selection screen select the USB installer again (OS X Base System).
16) Once it has booted to the USB installer, we will install the patches we need to make our Sierra installation bootable. This time, instead of launching the Install Sierra utility, launch the utility called macOS Post Install.
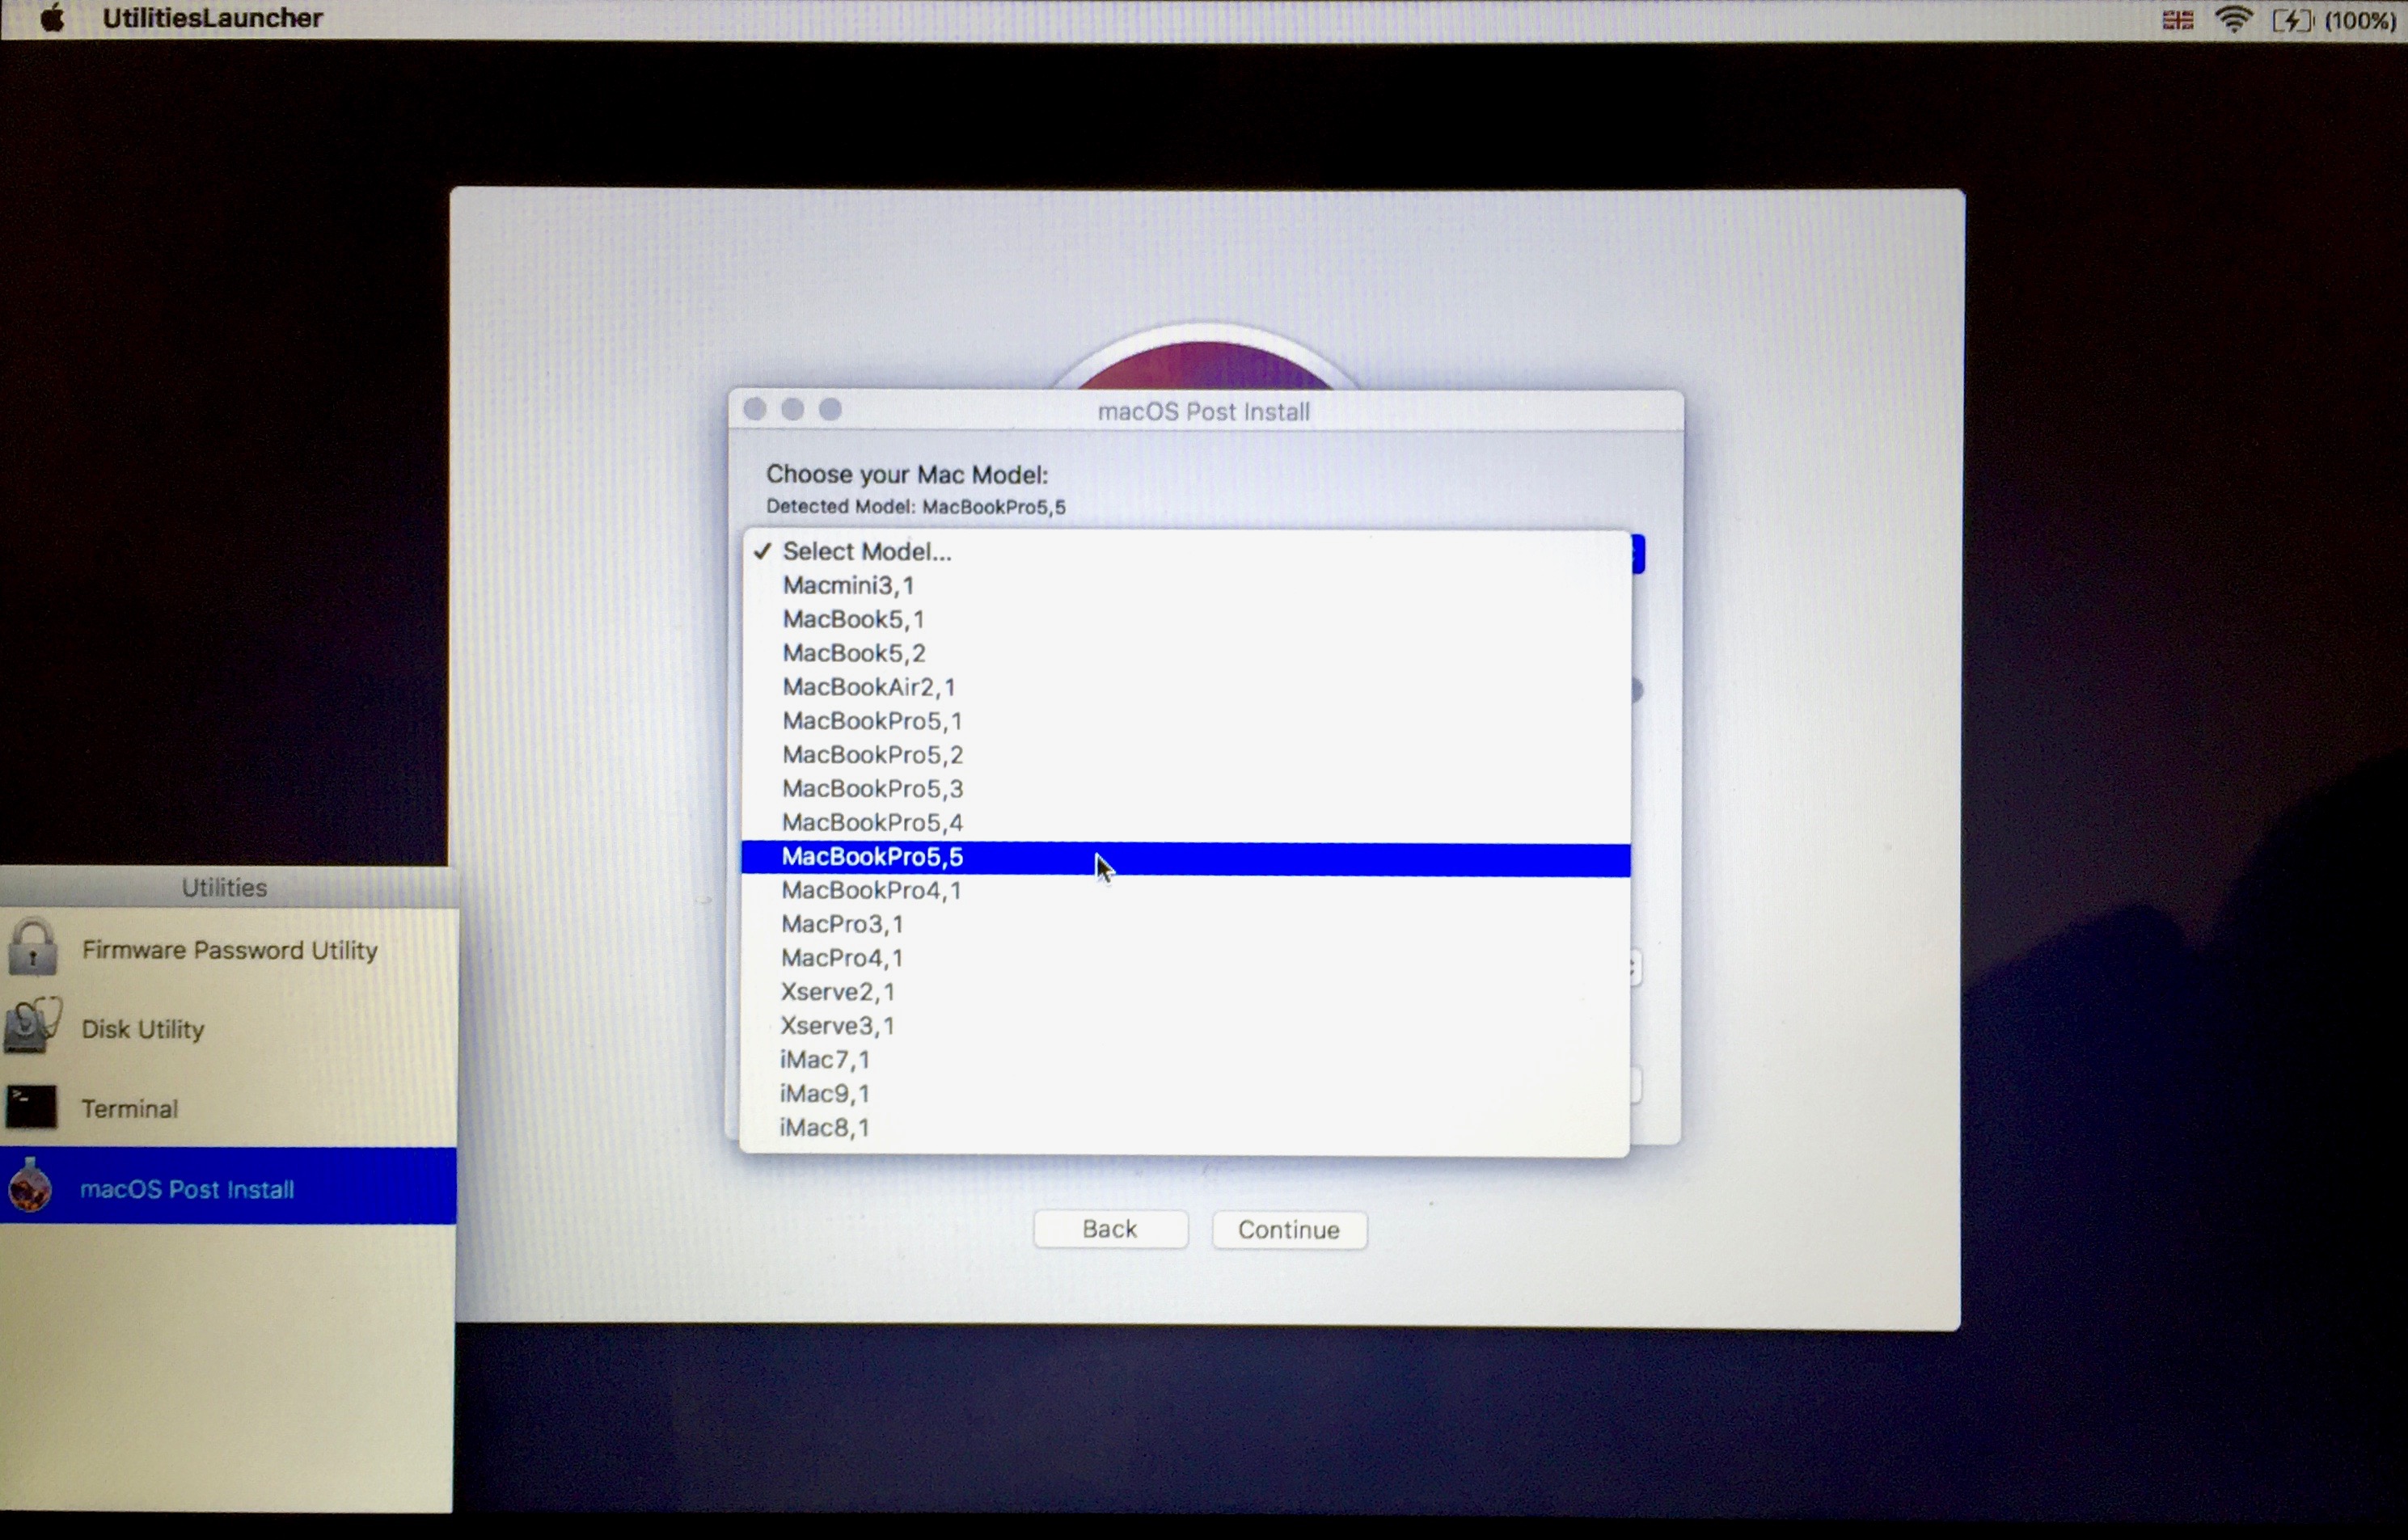
17) The Post Install utility should auto-detect your Mac model. Check that it’s correct, and then select it from the drop-down list. The utility correctly identified my machine as a MacBookPro5,5 so that is what I selected from the list. If you’re not sure what model your machine is, search its name and production year to find out, or use the helpful utility Mactracker for Mac or for iOS.
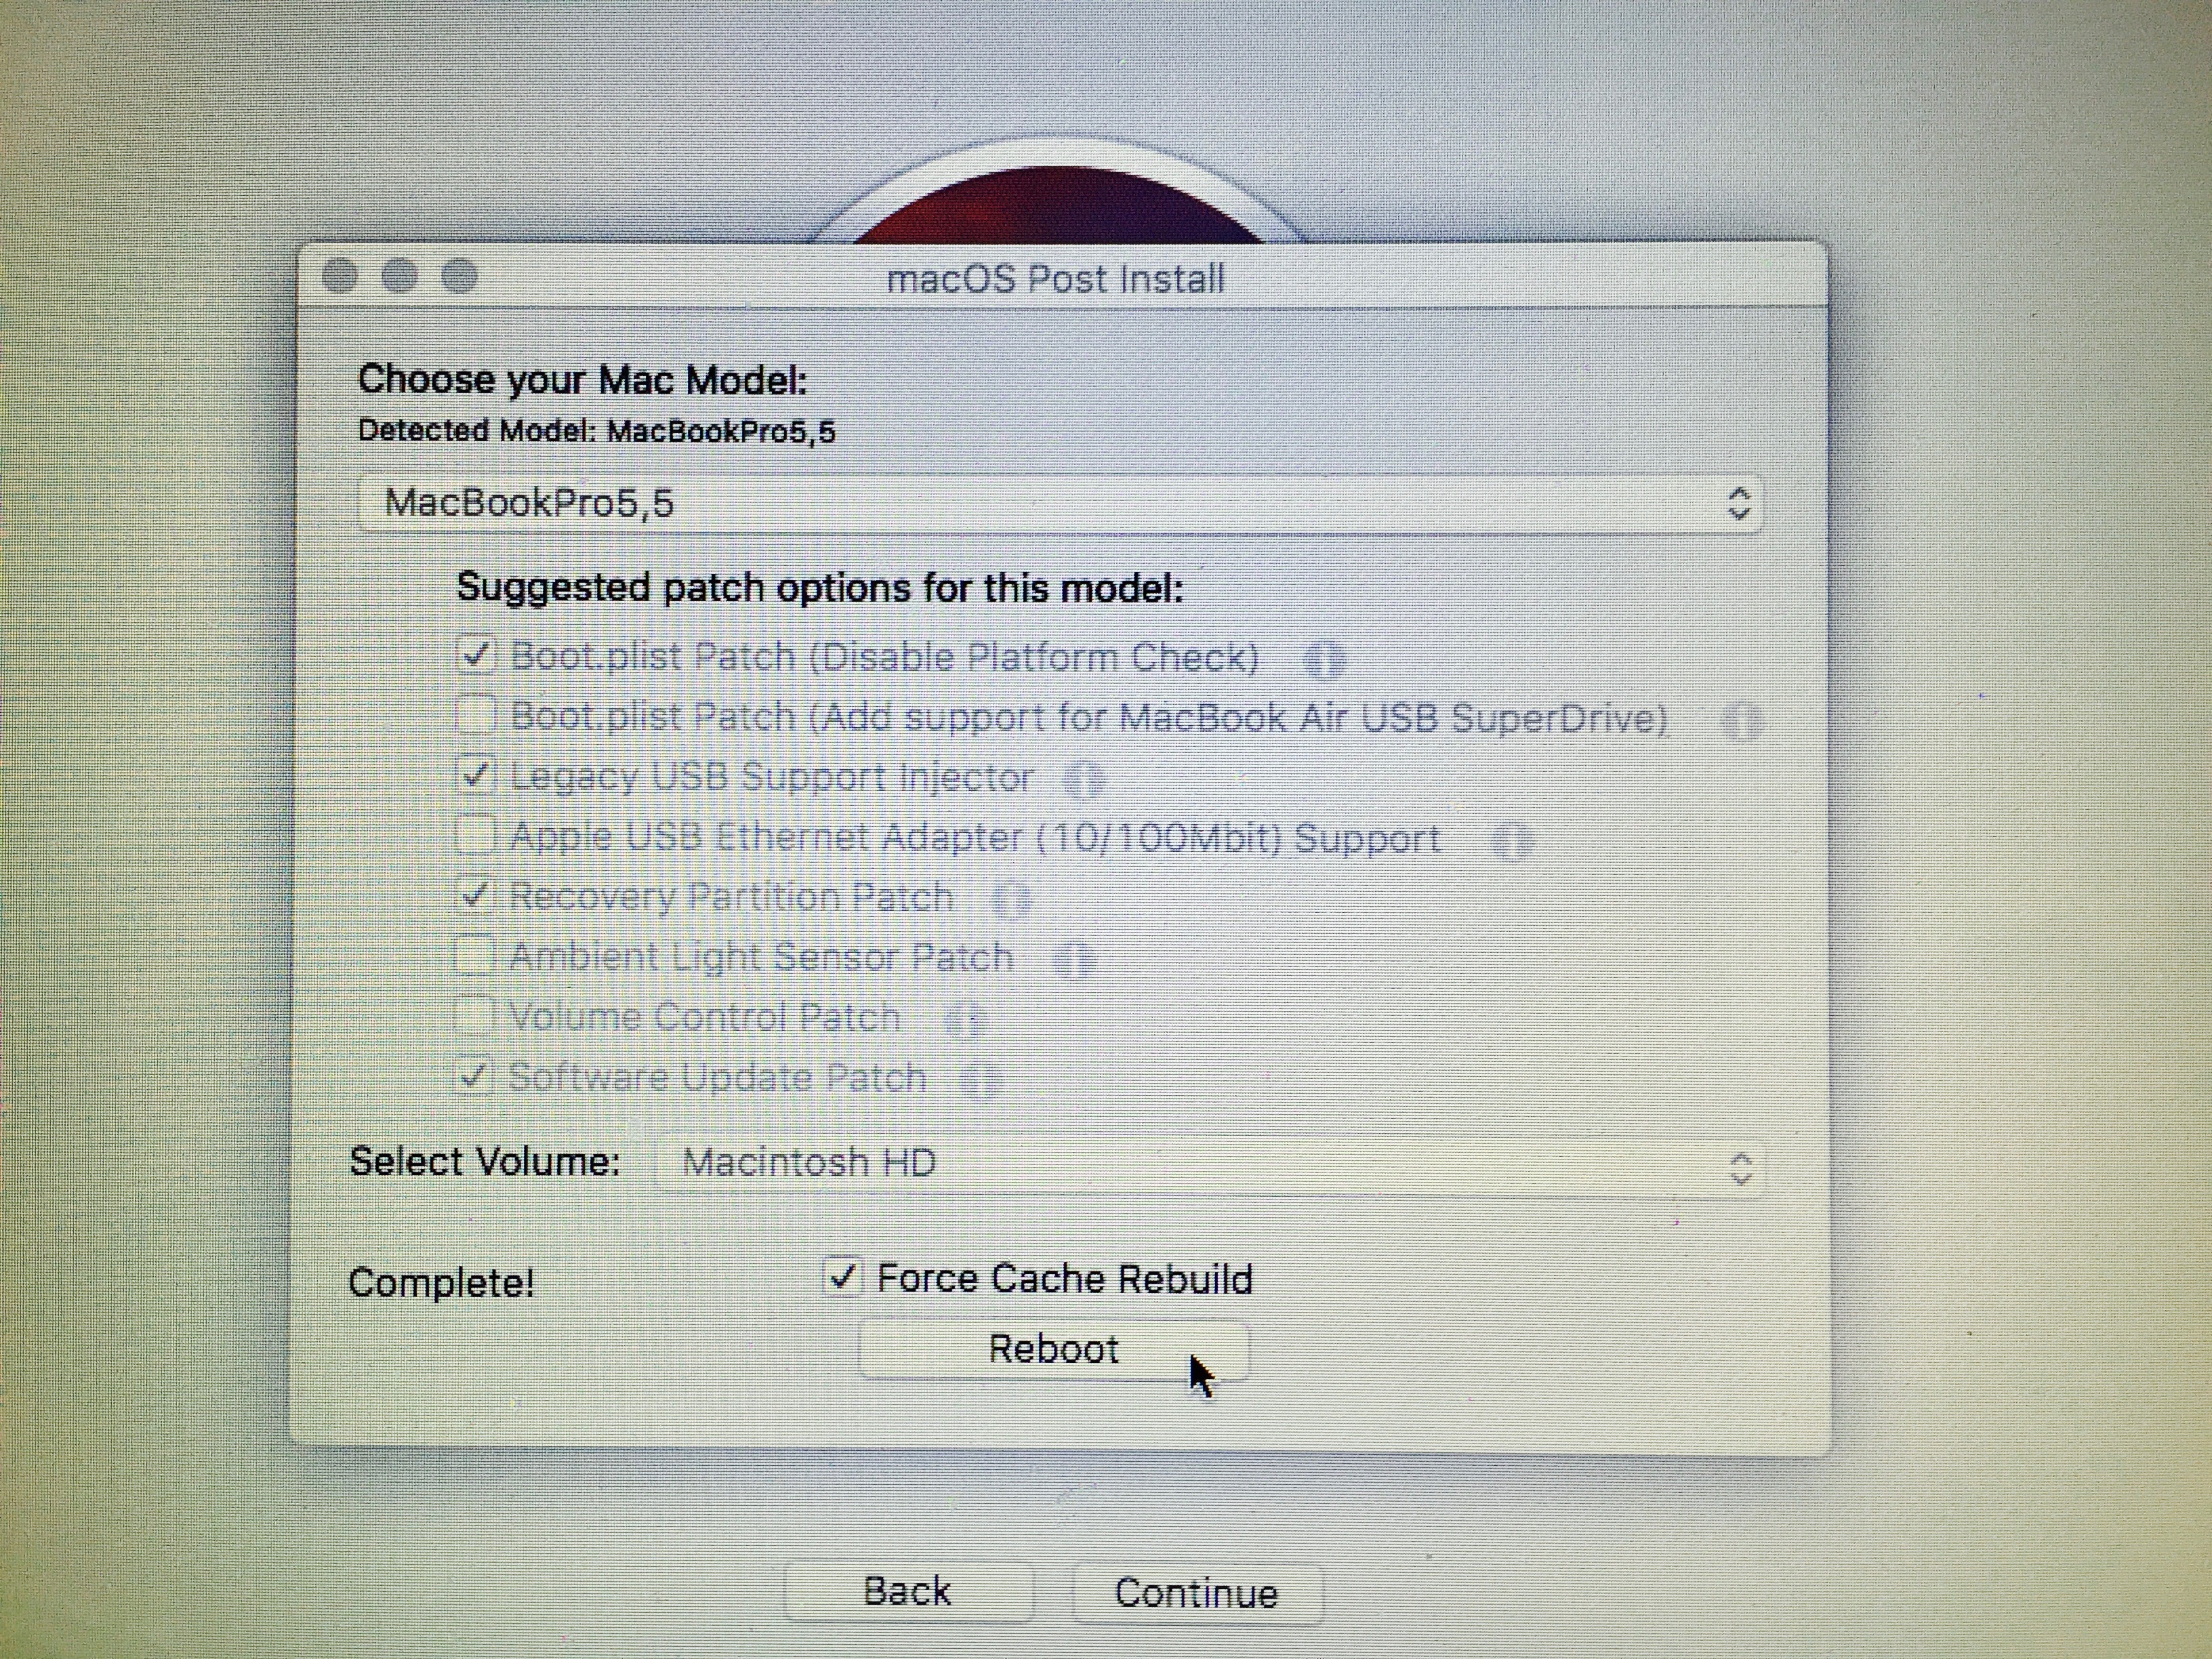
18) Once you’ve selected your model the utility will automatically select most of the relevant patches for your machine. Unless you know what you’re doing I’d leave the rest of it as it is, with one exception. I recommend ticking Recovery Partition Patch as this will make your recovery partition bootable. This is the only must-have patch which is not enabled by default.
19) Make sure the disk to install the patches to is set to your unsupported machine’s hard drive. Mine was called Macintosh HD. Don’t install them to the USB drive or an external hard drive by mistake! When you’re done, click the button to patch the machine and reboot. Please note, you don’t need to select the “Force Cache Rebuild” option which is shown in my picture. This is only useful if your patches do not seem to have taken hold for any reason.
20) As the machine reboots, hold down alt/option one final time. This time, at the boot drive selection screen, do not select the USB drive, select the hard drive of your unsupported machine to boot from. Mine was called Macintosh HD.
The machine will now boot up and finish the installation. Allow it to complete and it should take you into your new Sierra installation on your (supposedly) unsupported Mac. If any of your features such as Wi-Fi or USB are not working after the installation completes, simply reboot to the USB drive again and re-apply your patches once more.
And that’s all she wrote!
The patcher is still being updated so you can expect support to continue through future versions of Sierra too. It seems that most users who were running El Capitan will now be able to upgrade after all; everything works perfectly for me on a Mid-2009 MacBook Pro 13″, including features such as Siri. A recent update to the tool also enabled macOS updates to be received through the Mac App Store, so even that aspect is vanilla now.
Please note that if you are using a Hackintosh and not a real Mac then this tool is not needed. All that is required is that you no longer use the SMBIOS of an unsupported machine (for example Mac Pro 3,1). By changing the SMBIOS value the machine will be considered supported, and this tool therefore unnecessary. The patcher is only required for genuine Mac hardware.
Got a machine which was cruelly shunned by macOS Sierra? Let me know whether this guide breathes new life into it.