
Now that a 32-bit jailbreak for iOS 9.3.5 is finally available a lot of legacy device owners will be looking to try it out on their devices, whether as an end of life plan, or to downgrade them to an unsigned firmware which runs more smoothly. In this guide, we’ll show you how to use the Phœnix jailbreak, as well as how to move correctly from the first version to any later ones.
For those jailbreaking with Version 2 or later, the How to jailbreak with Phœnix instructions below are all you need to follow; you do not need to follow the second set of instructions at the end of the article.
Users moving from Version 1 to Version 2 or later should follow the How to move from version 1 to later versions instructions at the bottom of the article first, and then return to the How to jailbreak with Phœnix instructions afterward.
How to jailbreak with Phœnix
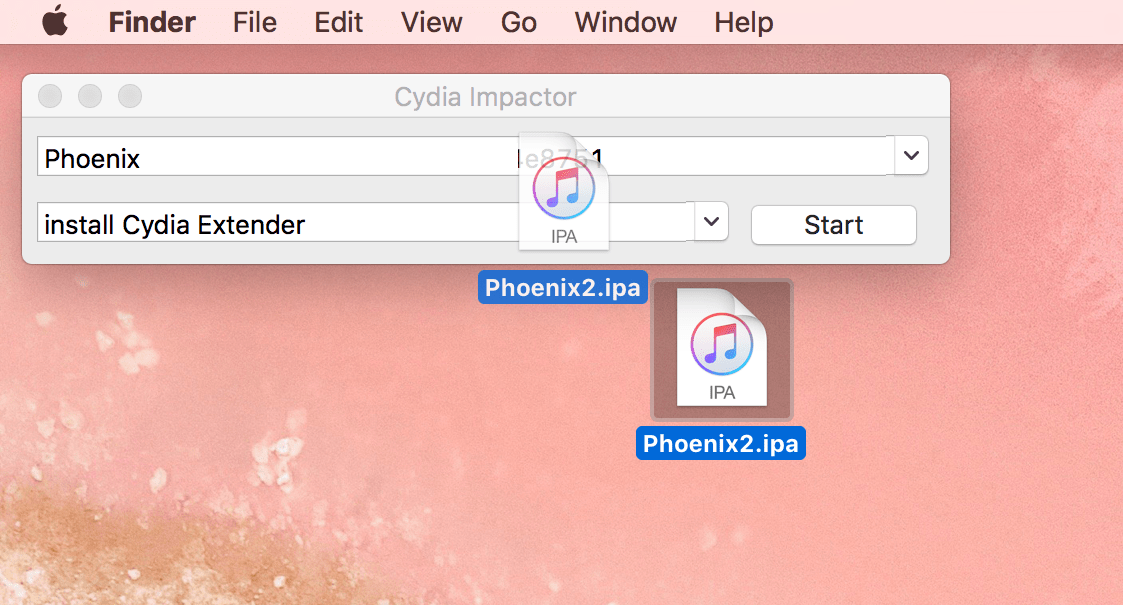
1) Download Cydia Impactor to your computer.
2) Download Phœnix to your computer.
3) Launch Impactor and connect your device to your computer. Make sure your device is shown connected.
4) Drag the Phoenix.ipa onto Cydia Impactor.
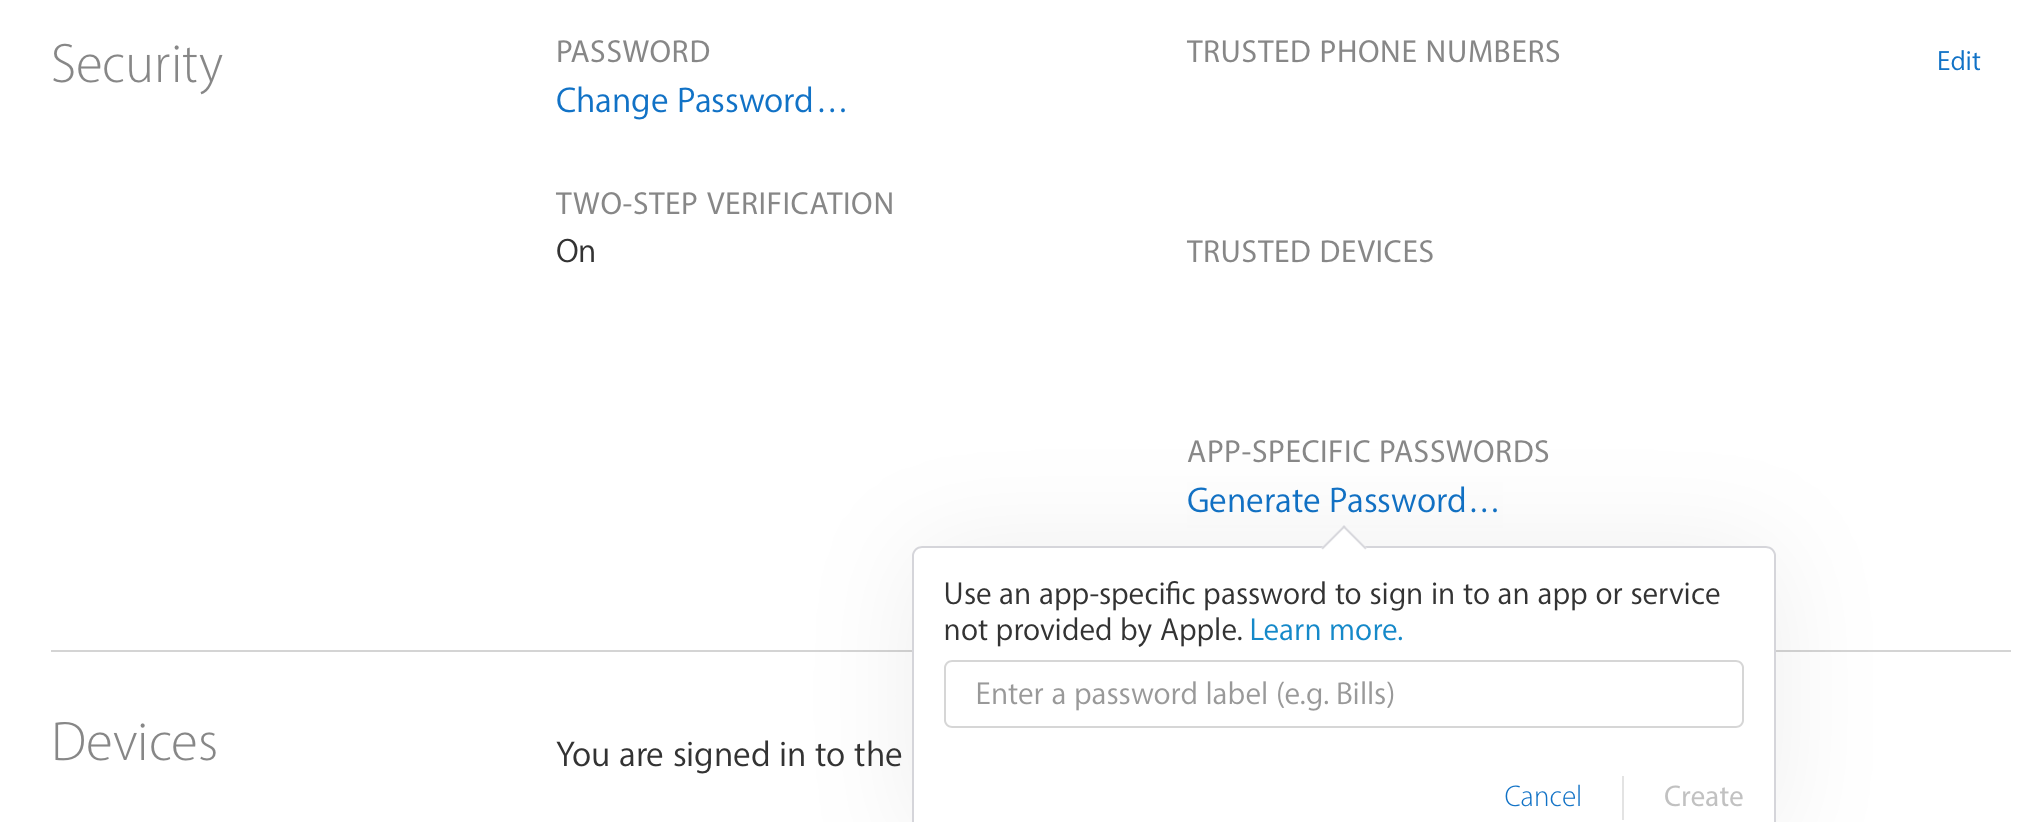
5) Enter your Apple ID at the prompt.
6)a) If you don’t have two-step verification turned on for your Apple ID, enter your Apple ID password.
6)b) If you have two-step verification turned on, you must log in to the Apple ID website, create an app-specific password, and enter that into Impactor instead of your normal password.
7) When Impactor has installed the .ipa, check that the Phœnix app has appeared on your Home screen.
8) Open Settings on your device and navigate to General – Device Management.
9) Select the profile named after the Apple ID you entered into Impactor. Press the Trust button to trust the jailbreak app on your device.
10) Once you have trusted Phœnix, launch it from the Home Screen.
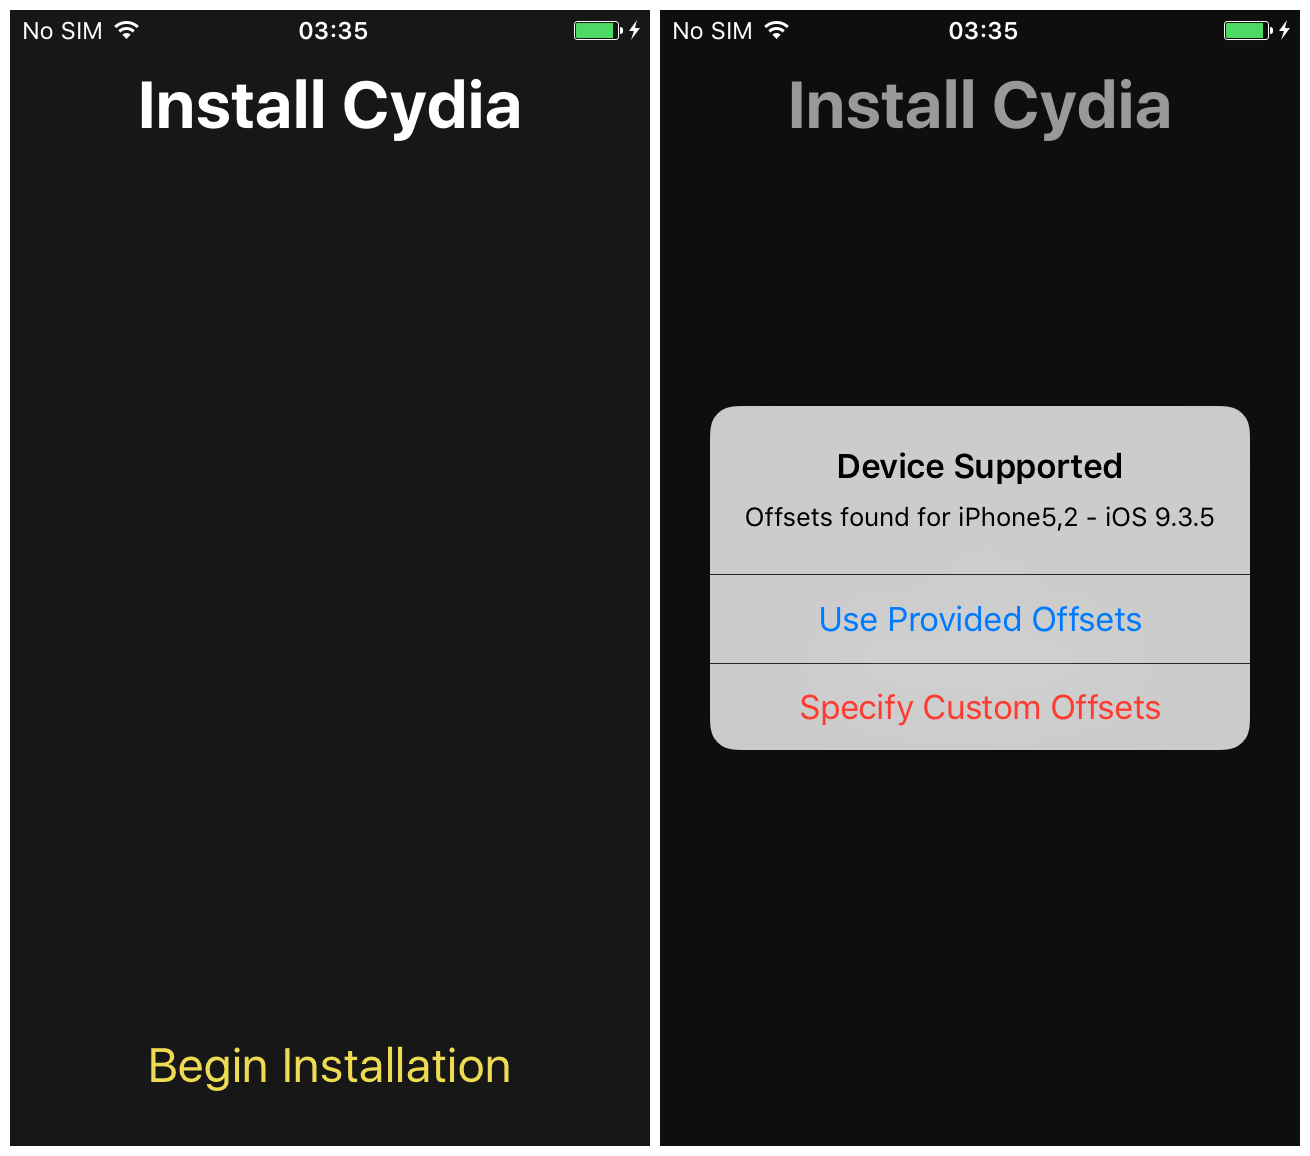
11) Press the Prepare for Jailbreak button, then Begin Installation, then Use Provided Offsets, and wait.
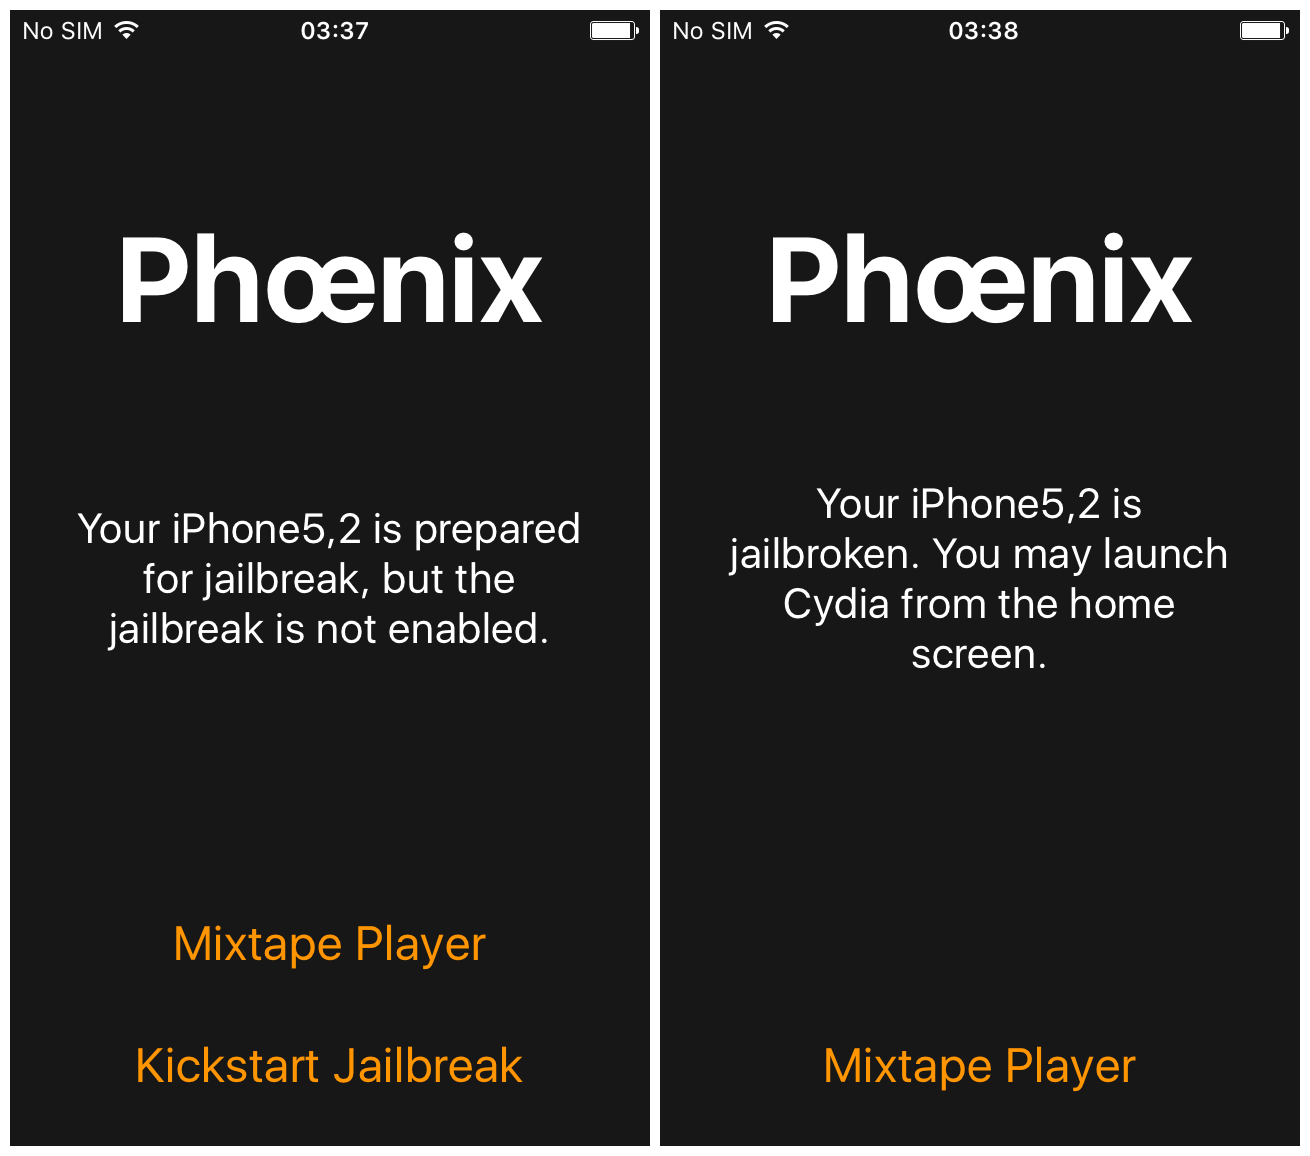
12) Your device should respring, and the Cydia app should have appeared on your Home screen. If it doesn’t launch, re-open the jailbreak app and press Kickstart Jailbreak to enable it. This may take several tries to work. You will know it has worked when the app reports Your device is jailbroken, and not Your device is prepared for jailbreak, but the jailbreak is not enabled.
13) In future, you will only have to go through the Kickstart Jailbreak screen, not the other installation screens. You will have to run the app once after every reboot. The app may take several tries to successfully jailbreak.
How to move from Phœnix version 1 to later versions
1) Make sure your device on Phœnix Version 1 is in a jailbroken state.
2) Open Cydia and install MTerminal.
3) Launch MTerminal and enter the following command at the prompt:
rm /usr/bin/sed && /usr/libexec/cydia/firmware.sh
Take your time and type carefully. Copy and paste if necessary. Hit Enter to issue the command.
4) Once that is done, return to the Home Screen and delete the Phœnix Version 1 app by holding it and then pressing the cross in the top corner of the icon.
5) Reboot your device.
6) Now return to the start of this article and follow the Instructions on How to jailbreak with Phœnix, making sure to use the newest version from the link provided, not the original version 1 download.