It’s a new year, and as such, I wanted a fresh start. Over the past few months I had become increasingly frustrated with the sluggishness of my MacBook Pro. My laziness over the summer left me behind on OS X Yosemite betas – and the smoothness and flow of the SSD on my work machine was absolutely in terror.
I took this weekend to wipe the slate clean on my MacBook Pro, and it was such a liberating feeling. Not only did I rid of files and applications that I absolutely never used or would need again, but I brought back the speed my Mac once had. As such, I challenge you to take back your Mac this weekend.
It’s actually easy to do. If you’re like me you’ll get anxiety about losing files, but don’t worry. I left my external hard drive in my dorm room back at college with my Mac Mini, so I had to resort to some crafty measures.
I’m not a subscriber to Carbonite (I will be now), an online service that will allow you to backup all of your files to the cloud for $10/month. So for this little project, I signed up for a free no-commitment trial to backup all of my files. The trial won’t allow you to backup music and movie files, but I use Spotify so that didn’t really matter.
I downloaded the Carbonite Mac app, and backed up all the important stuff like my documents and what was left on my desktop. Now that everything is in order, it’s time to erase your hard drive and start fresh with a clean install of Yosemite. Don’t come back mad at me if you lose an important file. Please make sure everything is backed up somewhere, maybe multiple places for the important stuff.
That being said, pull up the following directions on your iPhone and shut ‘er down.
- Make sure you’re Mac is connected to the Internet. Since modern Macs don’t have a disc drive, OS X will pull the files from the magical cloud.
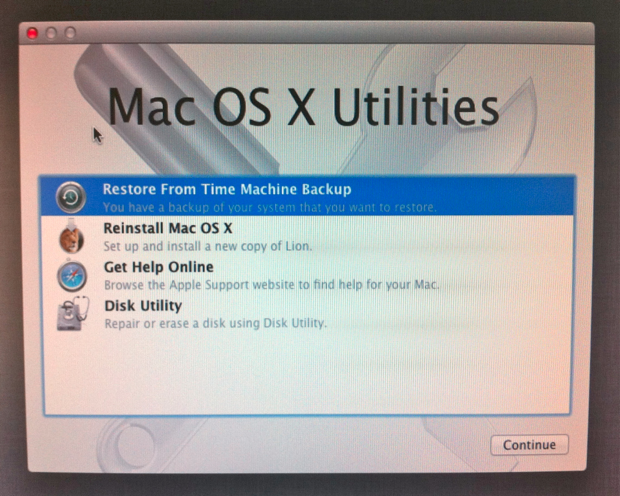
- Turn your Mac back on while holding down the Command and R keys.
- Select Disk Utility, then click Continue.
- Select your startup disk on the left, then click the Erase tab.
- Choose Mac OS Extended (Journaled) from the Format menu, enter a name, then click Erase.
- After the disk is erased, choose Disk Utility > Quit Disk Utility.
- Select Reinstall OS X, click Continue, then follow the onscreen instructions.
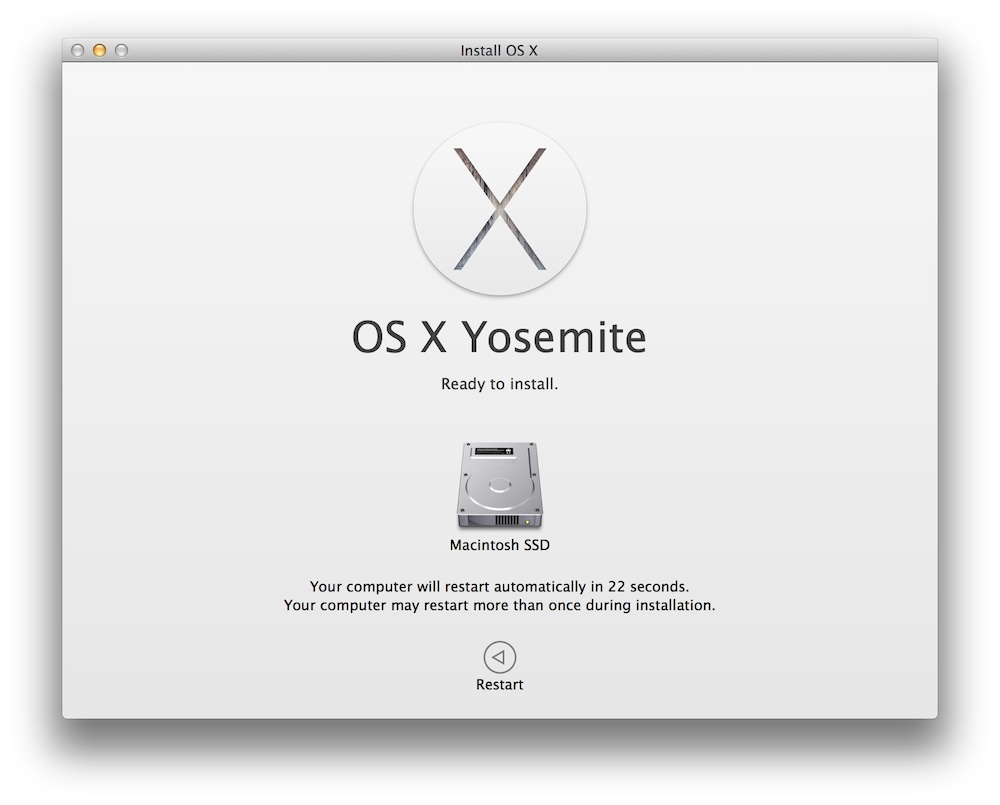
For some reason I had to install OS X Mountain Lion first – that’s what Apple decided to pull down from the Internet for me – and then install OS X Yosemite from the App Store through Mountain Lion. The Yosemite install was seamless – Apple’s really gotten this down.
Once a fresh version of Yosemite is installed, I suggest you take advantage of its features before installing anything else. Make sure you have all your iCloud, iCloud Keychain, Mail, Back to Mac, Find My Mac, and other settings in place, before installing third-party apps.
You’ll then want to go back to Carbonite’s website, where you don’t even have to install the Carbonite app back on your Mac to grab your files. Carbonite simply puts them in a .zip folder, where you can then drag them into the correct folder – nice and organized.
Now wasn’t that easy? Now you have a fresh install of Yosemite, with updated apps, and your important files.
My goal this year is to keep my software updated and not have to run into this problem anytime soon.
Do this on your lazy Sunday. You’ll thank me later.
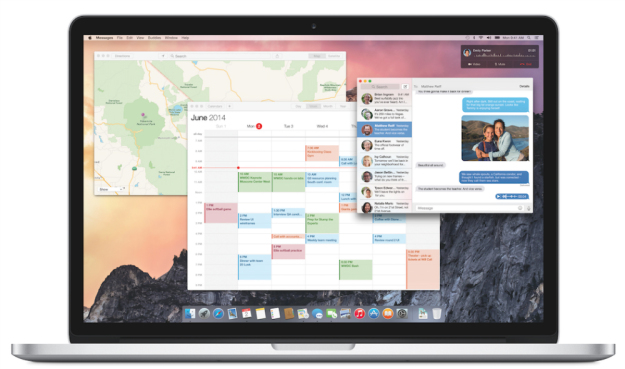
Looking for a a quick way to get up to speed on all of OS X Yosemite’s most outstanding features? Our OS X Yosemite Interactive Starter Guide is a visual tool to help you become quickly acclimated with some of Yosemite’s most notable new additions, improvements, and changes.