This guide tells you the basics of AssistiveTouch on iPhone and iPad, including what it is, when to use it, and how to use it for the average user.
What is AssistiveTouch?
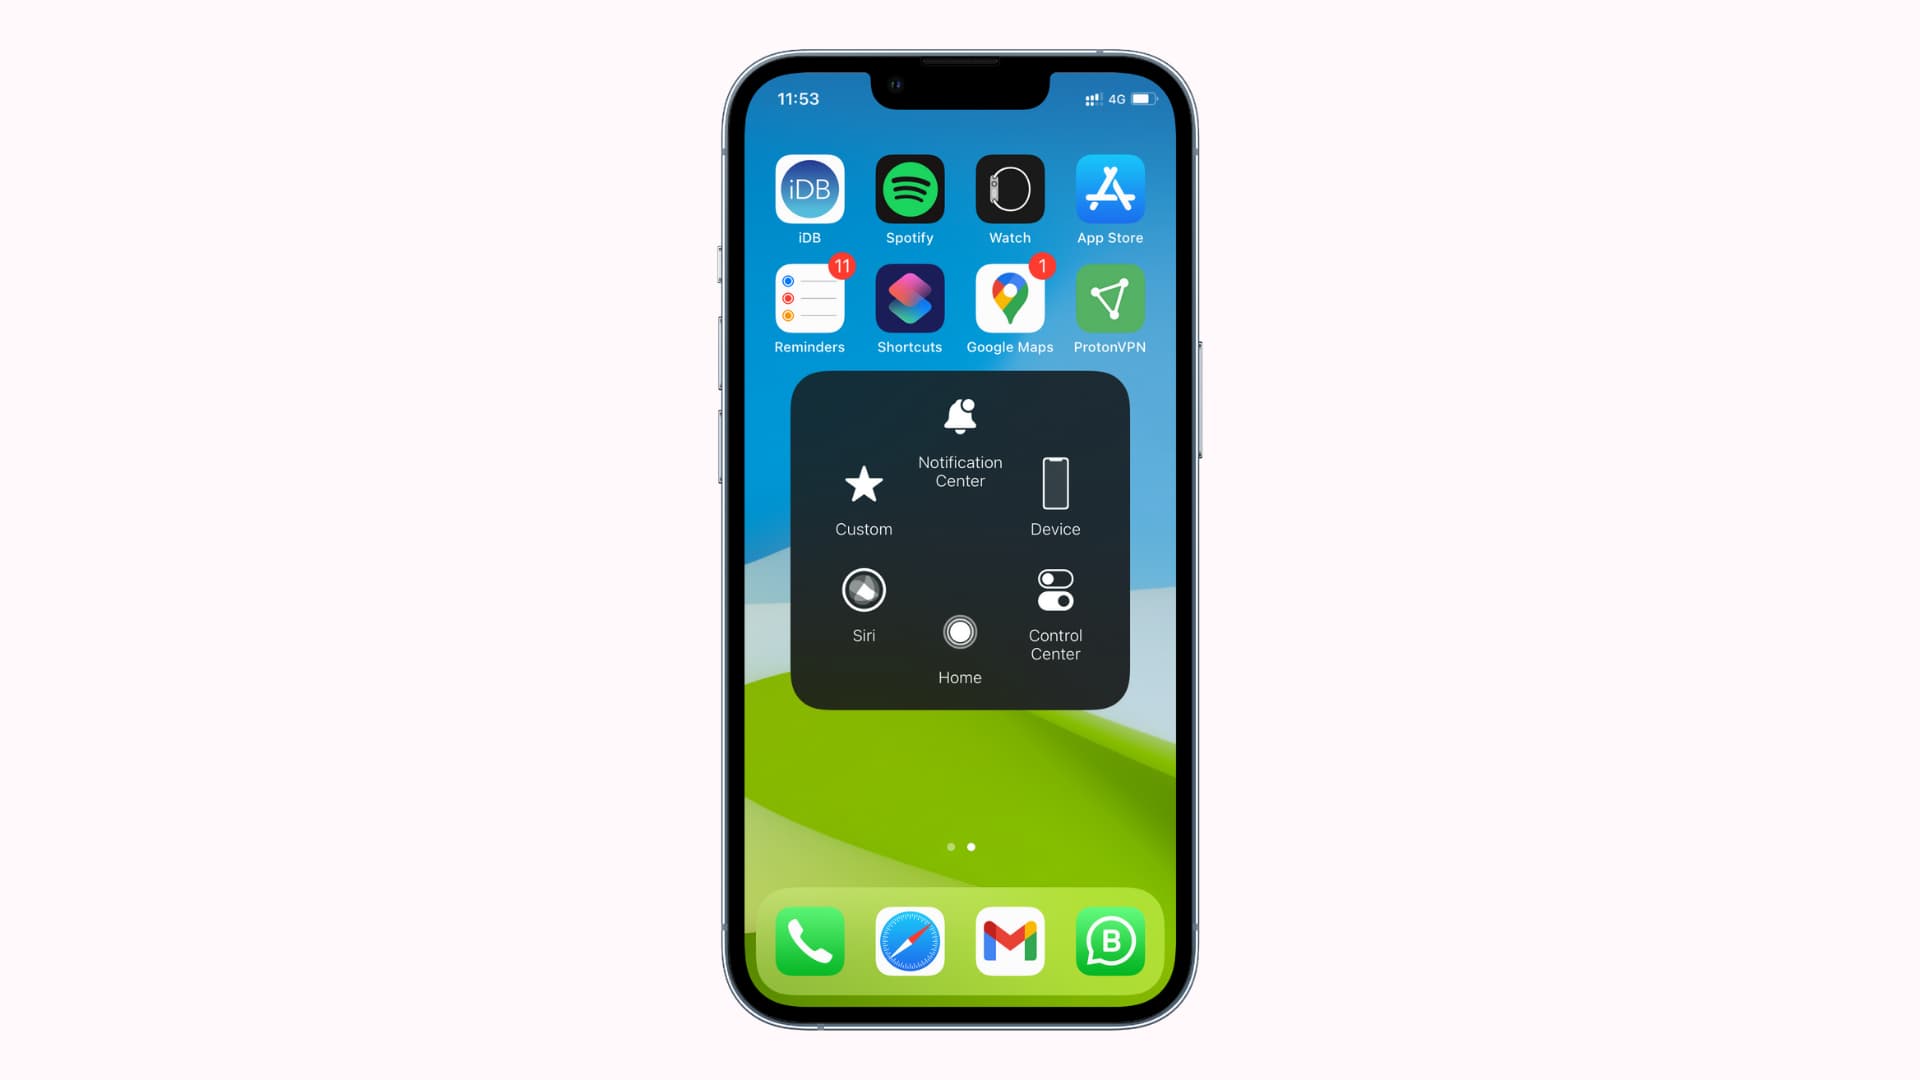
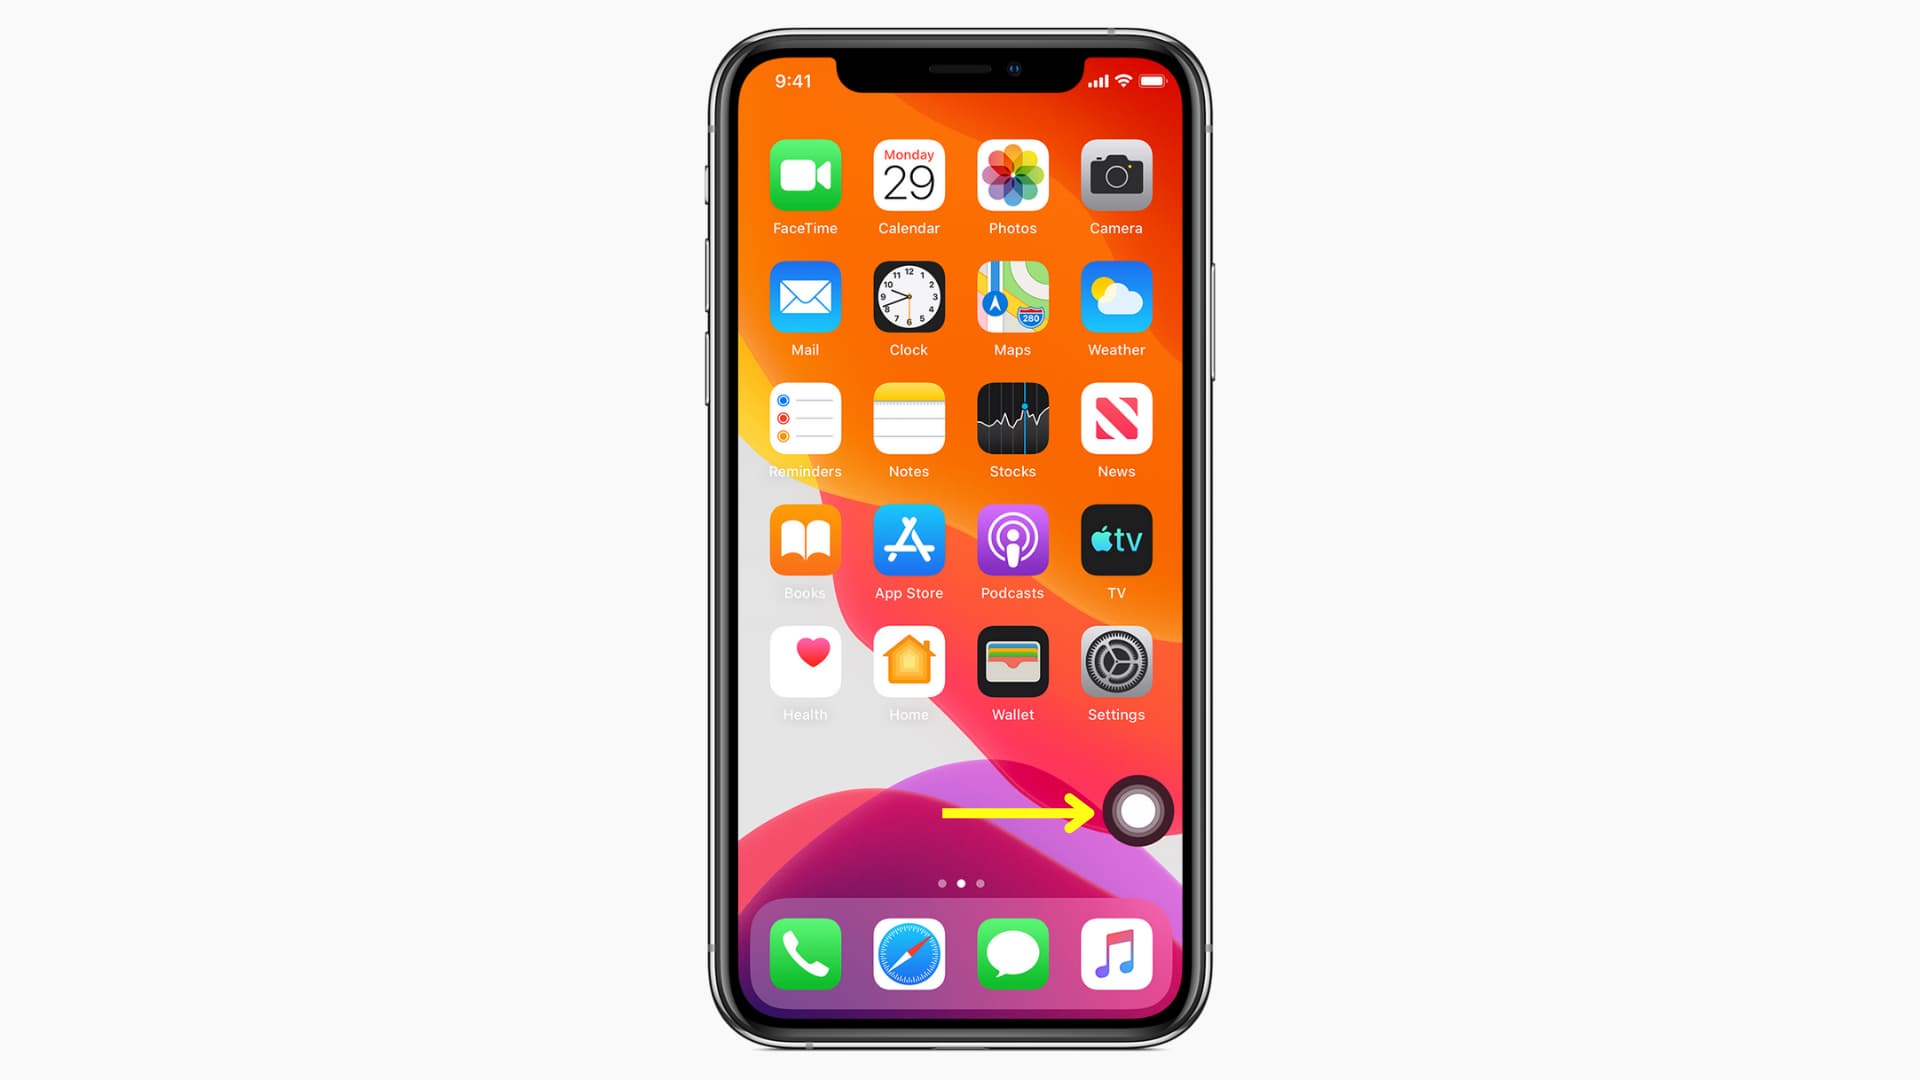
AssistiveTouch is a built-in option that adds a virtual, floating button on your iPhone or iPad screen. Once engaged, it allows you to perform a variety of different handy actions effortlessly. You can drag and keep this translucent button anywhere on the edge of the screen.
Note: When you take a screenshot, the circular AssistiveTouch button isn’t shown in the screenshot image.
Why use AssistiveTouch?
AssistiveTouch is an accessibility feature that helps you if you have difficulty pressing the physical device buttons or touching the screen.
If your iPhone’s physical Home button, Side button, or volume buttons are broken, AssistiveTouch can be your savior. It will let you perform almost all the actions those buttons can do. For example, you can restart your iPhone when the physical buttons are not working!
Secondly, if you have small hands or difficulty pressing the physical buttons due to any reason, you can enable AssistiveTouch and use it to perform basic actions.
How to use AssistiveTouch on iPhone and iPad
Here’s how to turn on, customize, and use AssistiveTouch.
Enable AssistiveTouch
You can invoke Siri and ask it to Turn on AssistiveTouch or activate it from the Settings app:
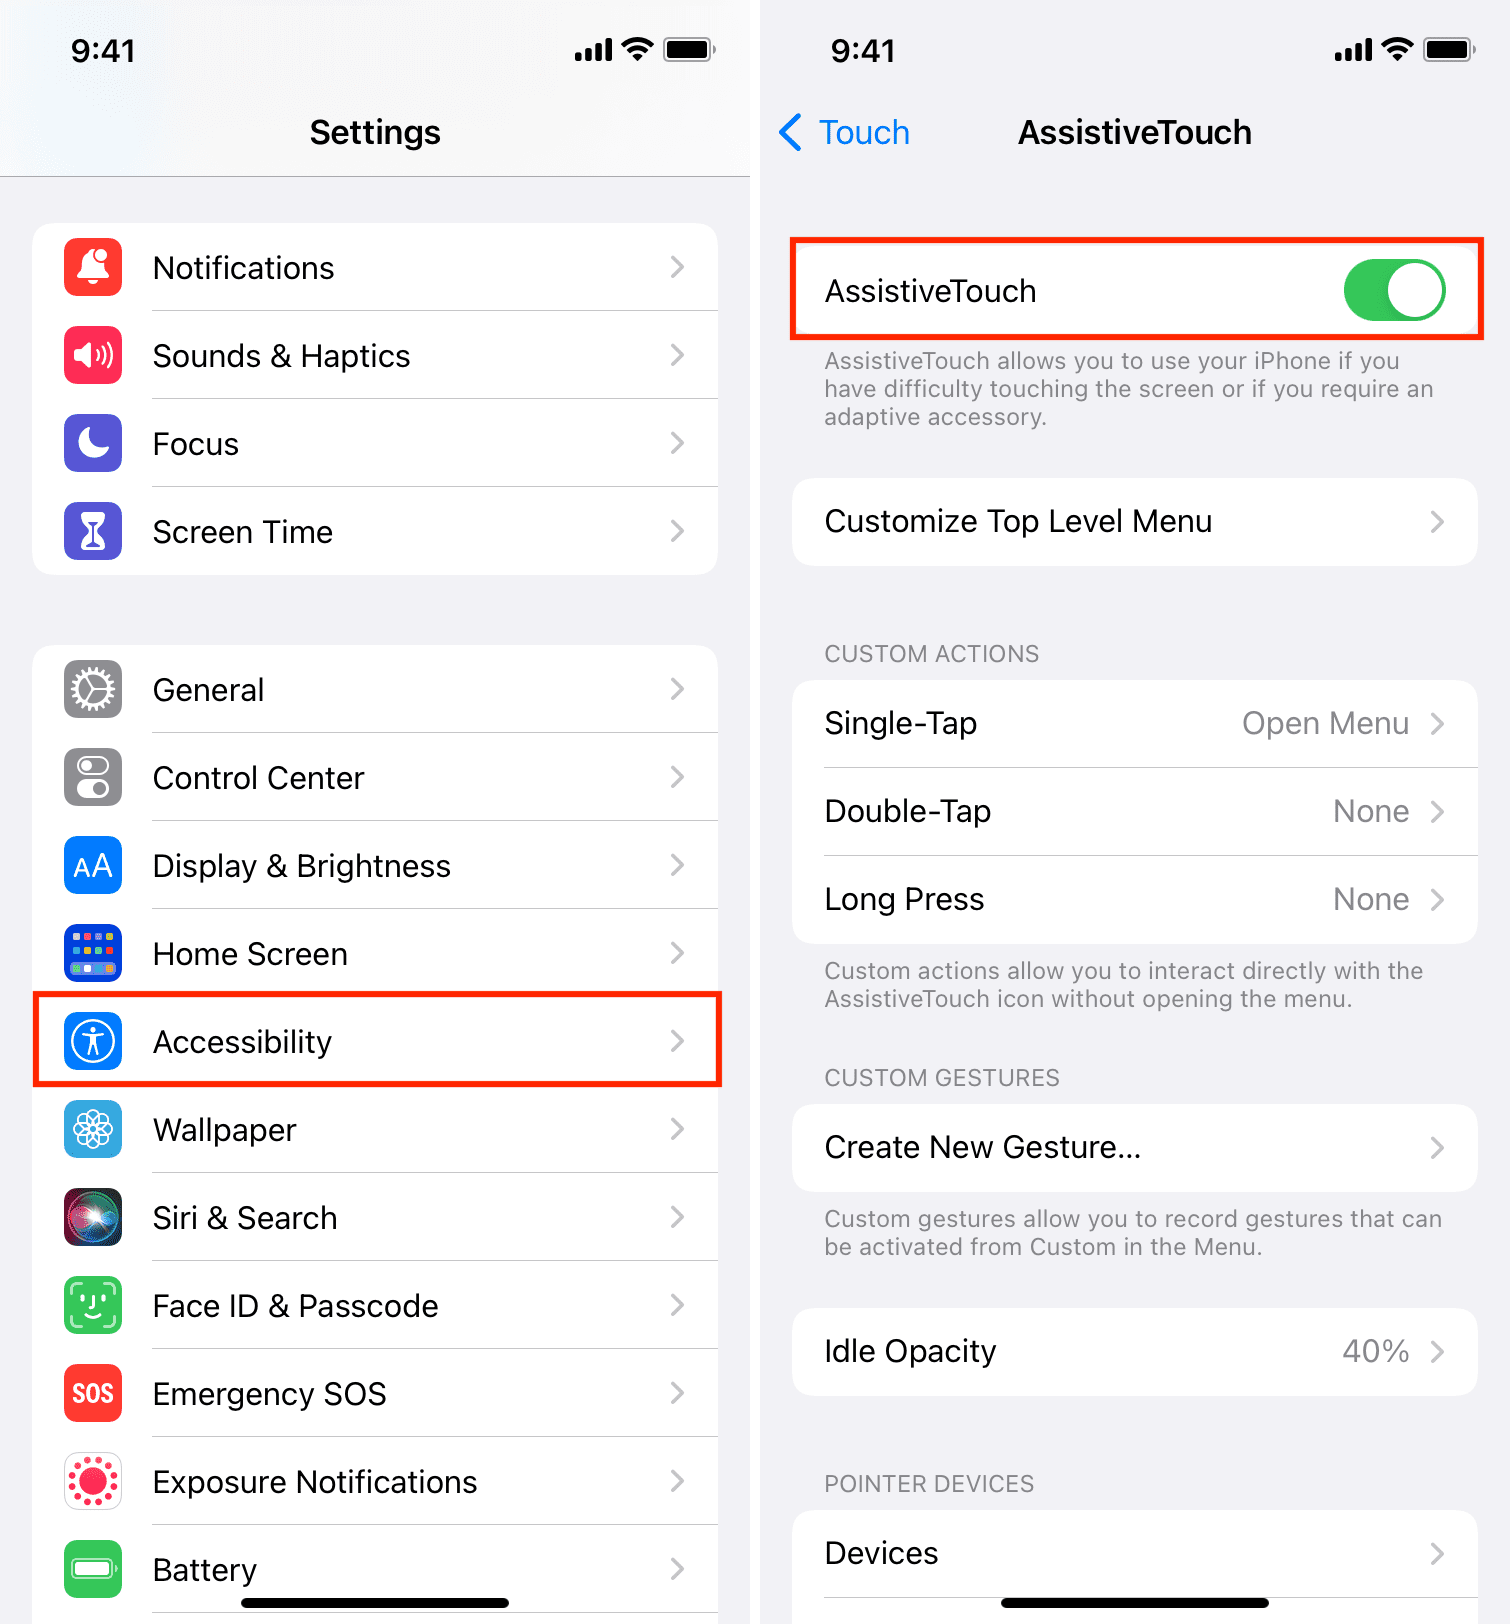
- Open Settings and tap Accessibility.
- Select Touch.
- Choose AssistiveTouch.
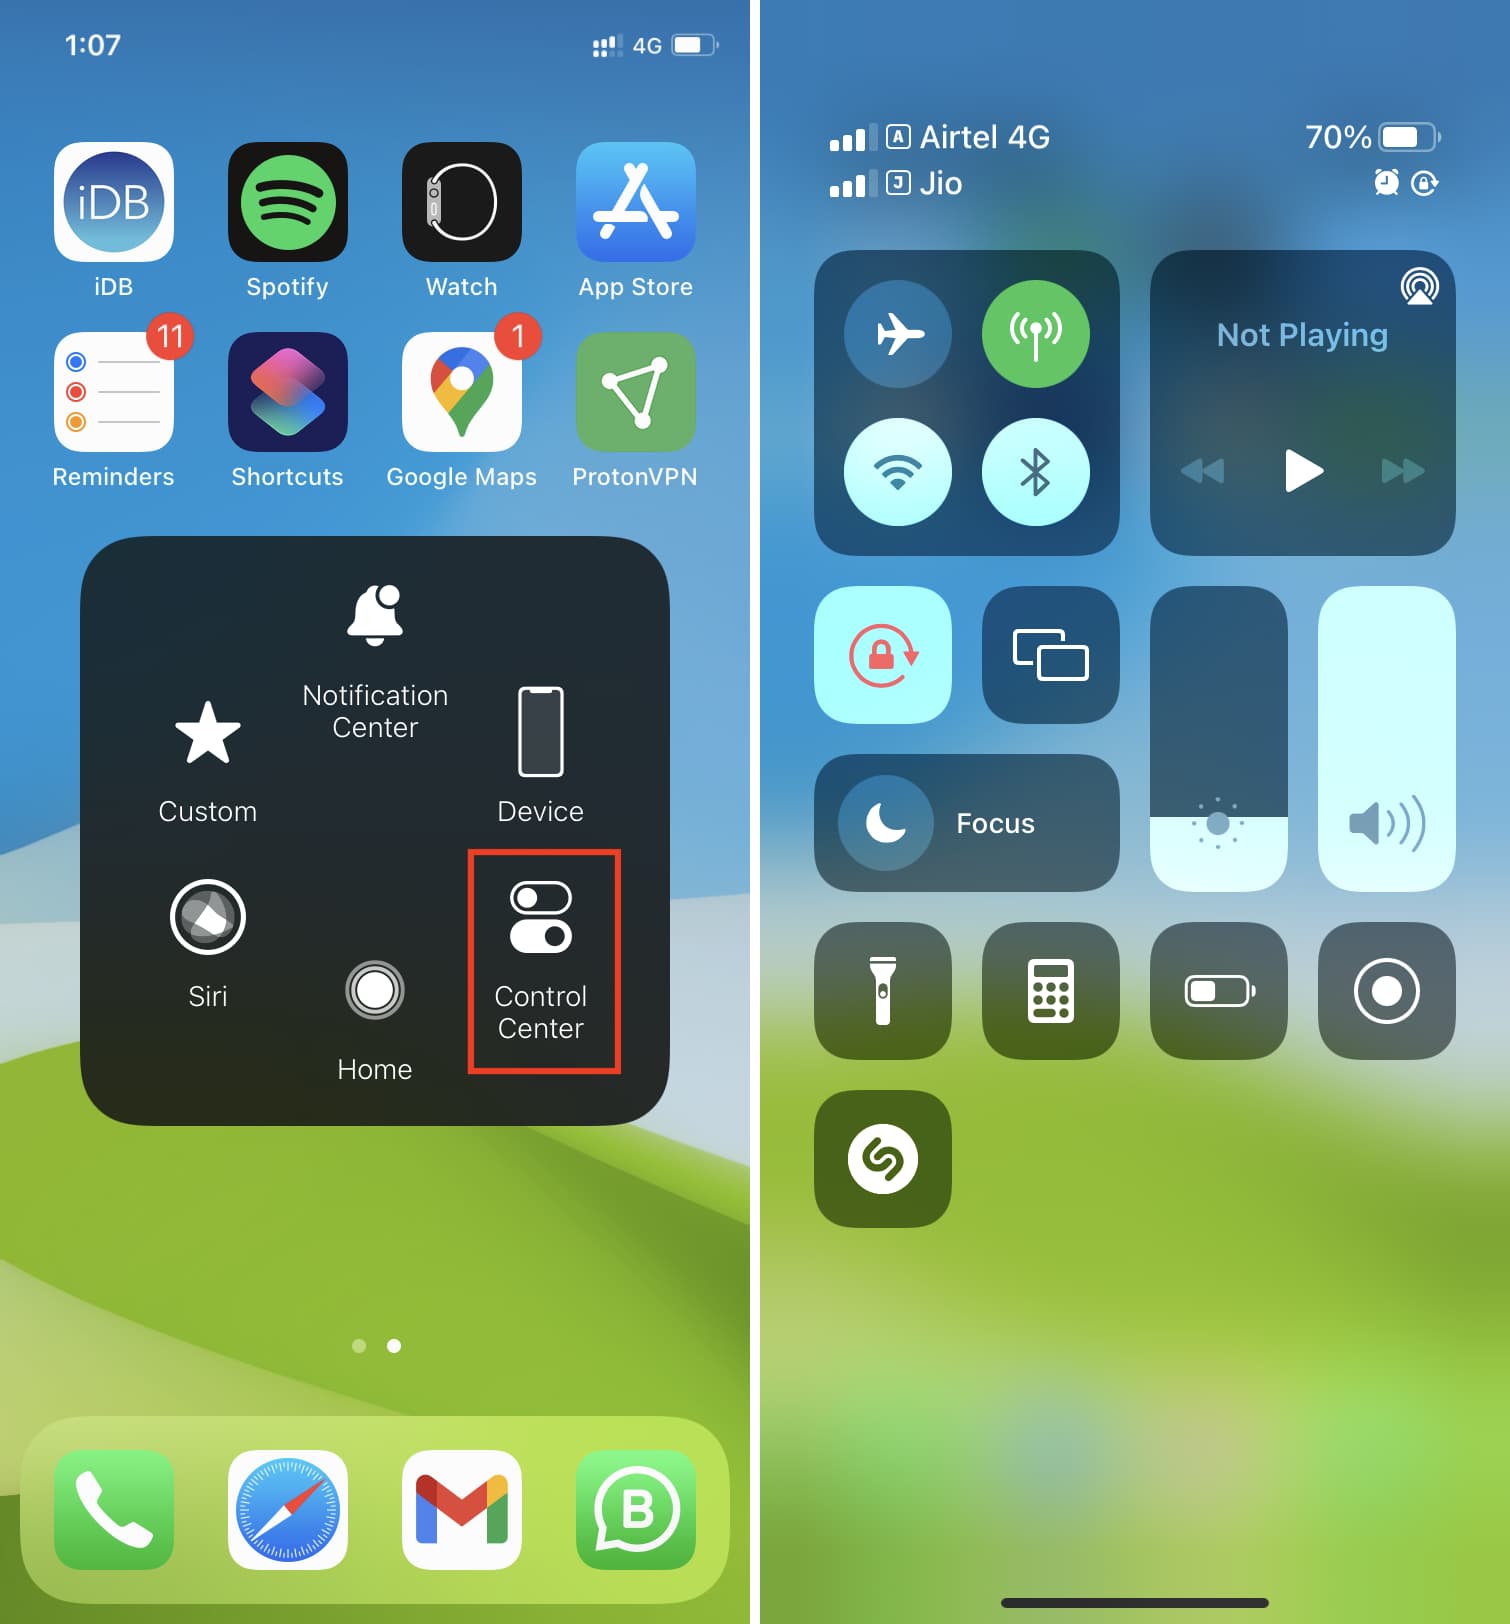
- Enable AssistiveTouch, and you will now see a virtual button on the screen. By default, tapping this button opens the AssistiveTouch menu which has several useful actions like accessing the Notification Center, Control Center, Siri, and more.
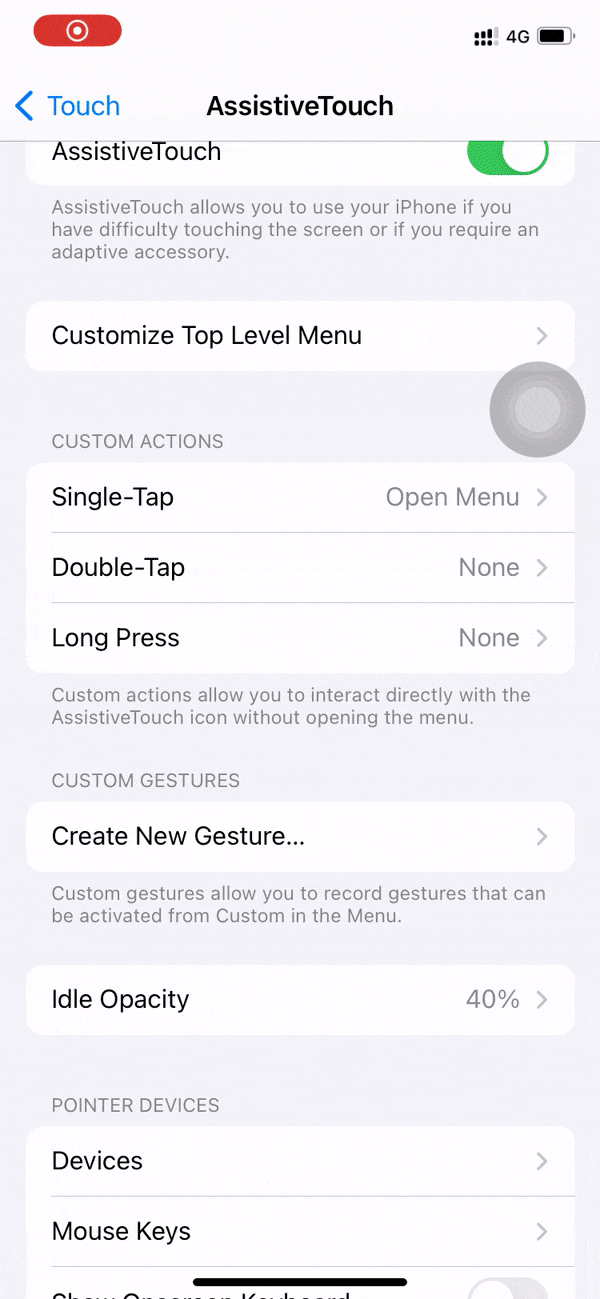
Customize AssistiveTouch actions
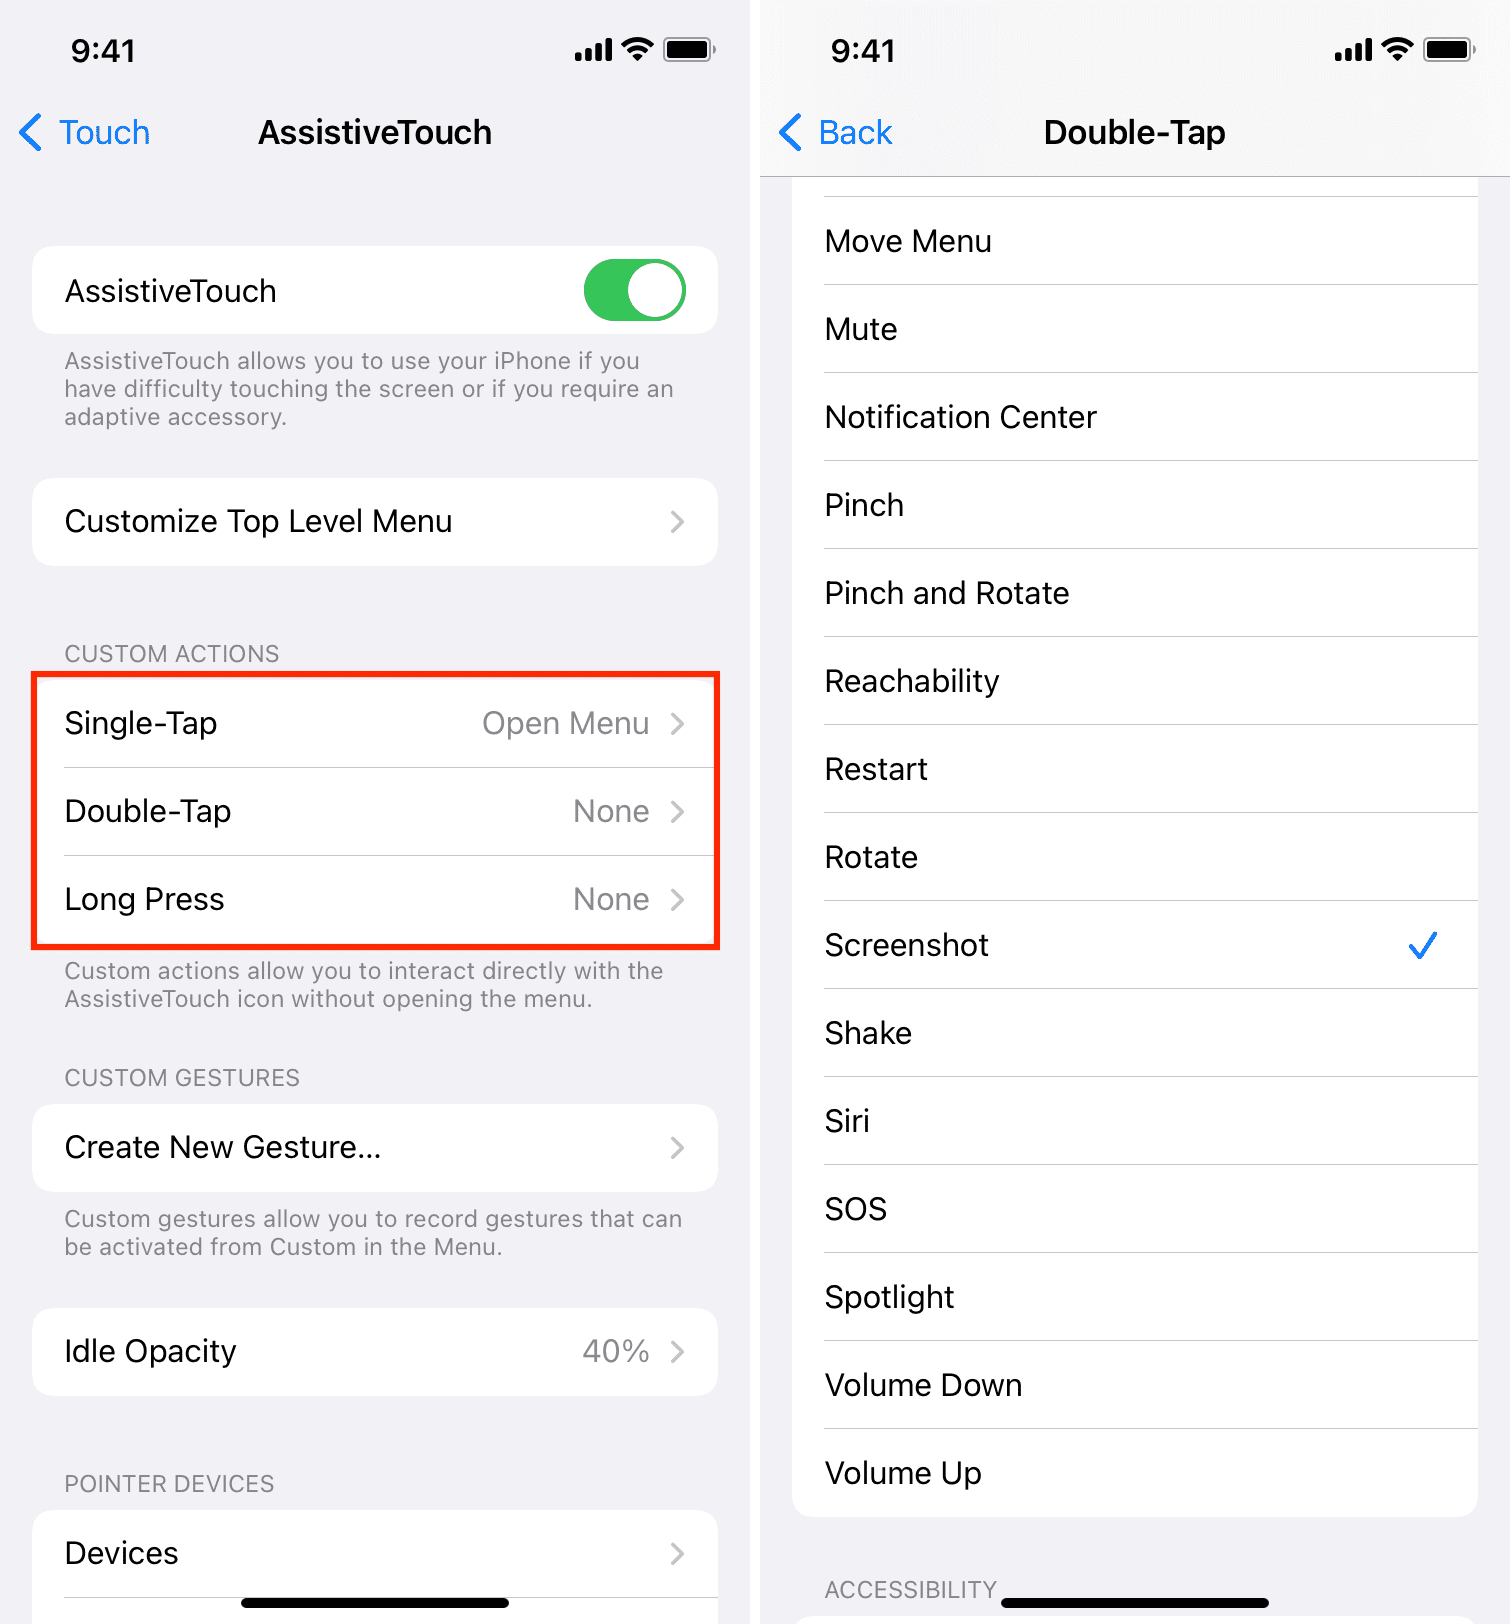
You can interact with the virtual AssistiveTouch button in three ways – single-tap, double-tap, and long-press (or 3D Touch). Doing these will perform one of the set actions. Here’s how to customize it:
- Go to Settings > Accessibility > Touch > AssistiveTouch.
- Tap Single-Tap and select an action. Unless you have a specific action in mind, I would recommend setting it to Open Menu, which will show several options.
- After setting Single Tap, you can do the same for Double-Tap and Long Press. For example, if you take a lot of screenshots, you can set it to do that, and then double-tap the virtual AssistiveTouch button to grab a screenshot.
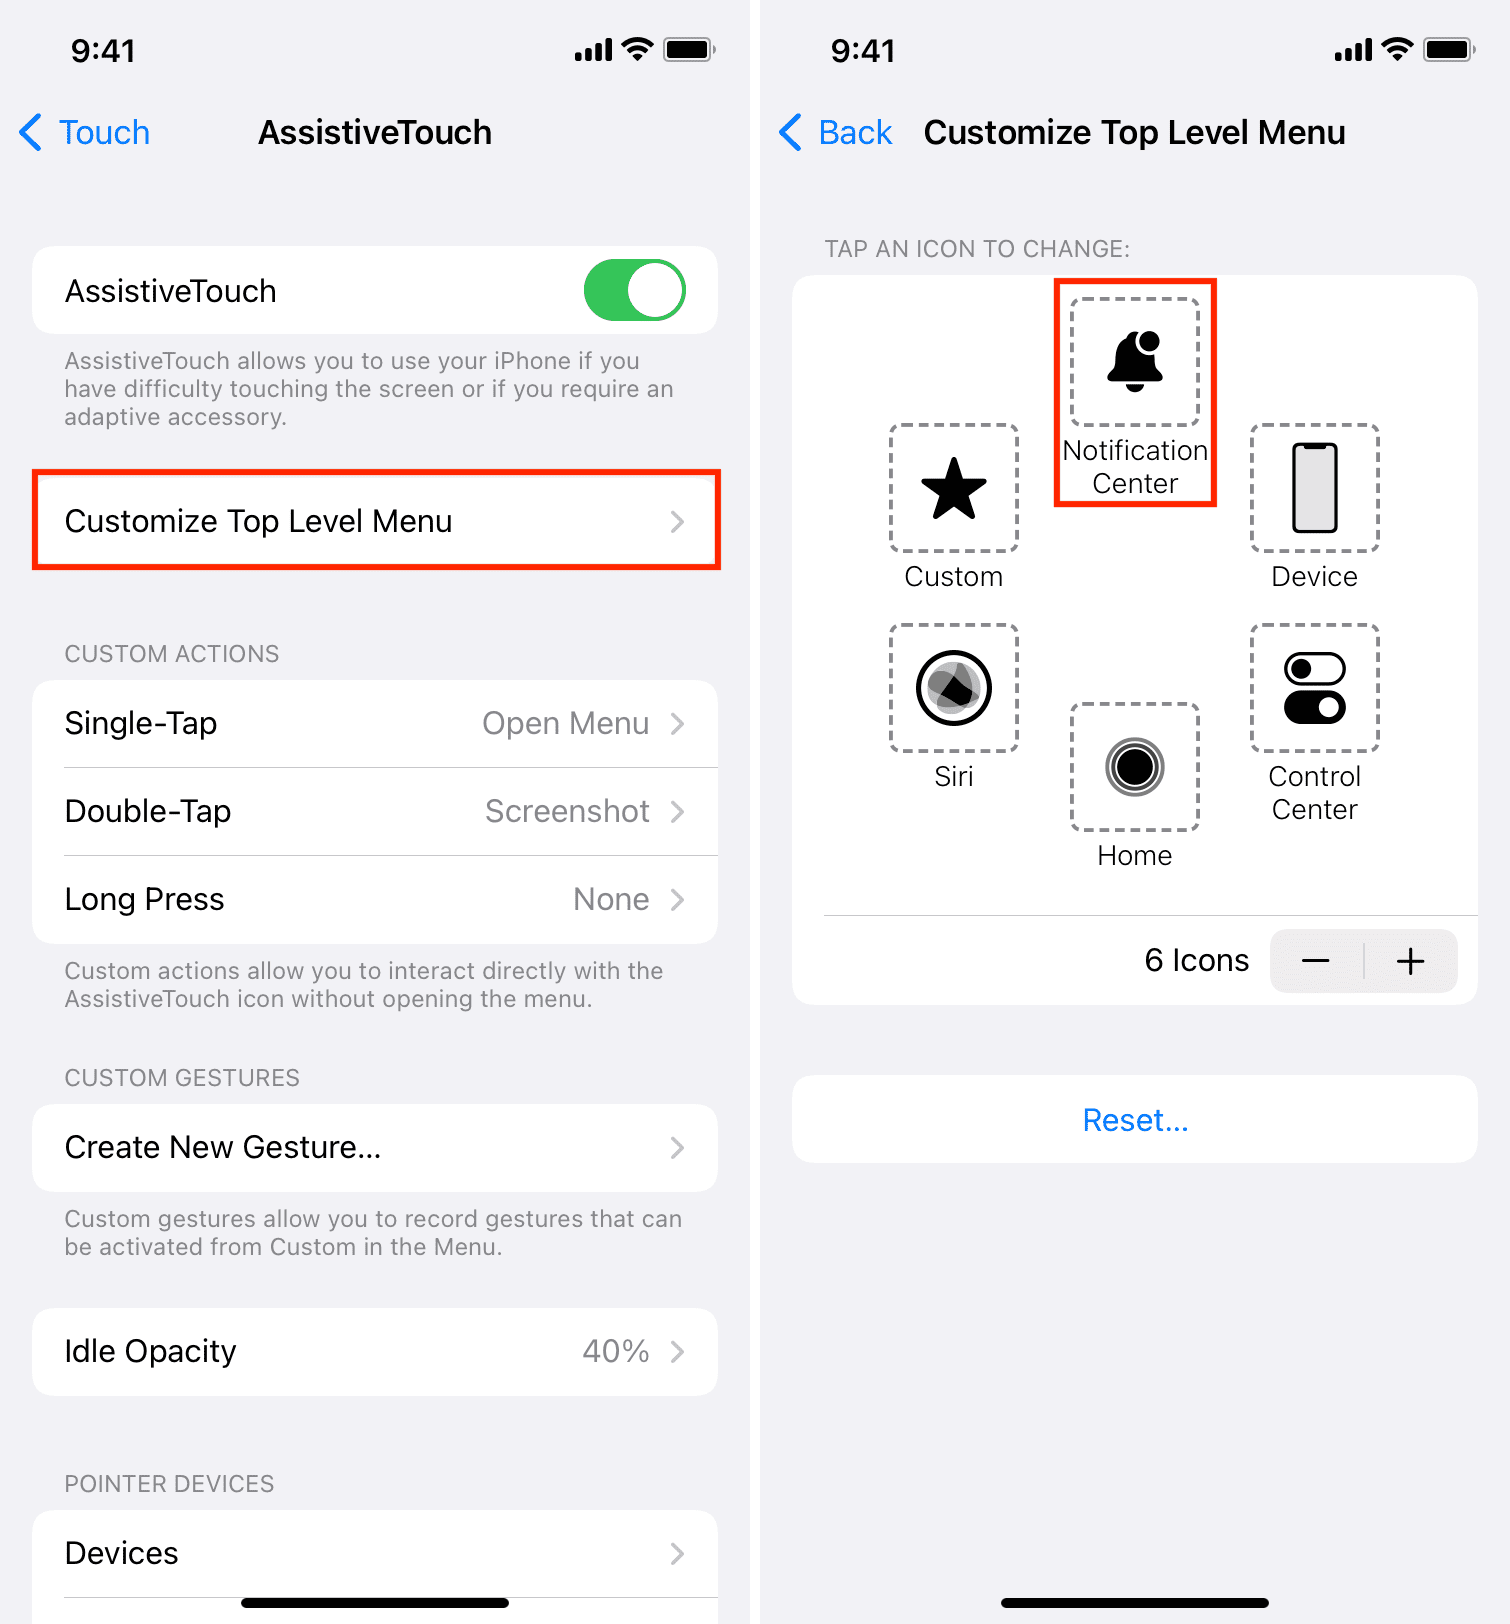
By default, when you tap the AssistiveTouch button, it opens the menu and shows you six options – Notification Center, Device, Control Center, Home, Siri, and Custom. If you like, you can edit these menus.
Here’s how to edit AssistiveTouch top level menu options:
- Go to Settings > Accessibility > Touch > AssistiveTouch.
- Tap Customize Top Level Menu.
- To add or remove icons, tap the plus or minus buttons. You can have anywhere between 1 to 8 icons here.
- To change an icon, tap it, choose any other action and tap Done.
- Finally, you can tap Reset to go back to the default arrangement for this top level menu and also for custom tap and long-press actions.
Use AssistiveTouch gestures
Let us start with a simple example.
In the Notes app or Pages app, you can press the text and then drag your finger to select it. Now, suppose, due to a disability, you can’t perform this finger action all the time. In this situation, you can create a custom gesture and set it to perform via AssistiveTouch. After that, when you select this custom gesture, your iPhone will perform this finger action for you and select the text. Here’s how:
1) Open Settings and go to Accessibility > Touch > AssistiveTouch.
2) Tap Create New Gesture.
3) Press on the screen and then move your finger to the right and then down. This is the same way you select several lines of text. Right. You have to mimic that finger gesture here. Once done, tap Save > give it any appropriate name > Save.
4) Choose Customize Top Level Menu > Custom and choose the custom gesture you created and saved in step 3. After that, tap Done. Alternatively, you can also set this custom gesture to Single-Tap, Double-Tap, or Long Press.
5) Go to the Notes or Page app and open a note or document. You can also go to any other app where you think you need to use this gesture.
6) Tap the virtual AssistiveTouch button and then tap your custom gesture name. You will now see a gray dot on the screen. Place it at the appropriate position (that is, at the beginning of the text), and it will run the gesture.
7) Tap the AssistiveTouch button to dismiss the custom gesture dot from the screen.
Here is a GIF showing how to create the above gesture and run it. Note that I’m not selecting the text in the Notes app. I had lifted my finger after placing the gray dot at the beginning of the text, and from there, the iPhone automatically ran the custom gesture and selected the text for me.
This was just an example. You can create all sorts of custom gestures.
A while back, we showed you how to unlock your iPhone with your voice. And in this tutorial, we followed a similar approach to create a gesture that mimics entering the password on the iPhone Lock screen.
Other AssistiveTouch options
On the AssistiveTouch settings screen, you will see some other options like Idle Opacity, which lets you adjust the visibility of the virtual floating button. By default, it’s set at 40%. But if you can’t see that, you can increase it up to 100%. On the other hand, if you’re disturbed by it, you can turn it down to about 15%.
While making a payment or confirming a purchase, you have to authenticate by double-clicking the Side button. But if you can’t do that, you can enable Confirm with AssistiveTouch.
Similarly, there are additional options like using AssistiveTouch with external devices and Dwell Control. Once you pair an external pointer device like a mouse with your iPhone and iPad, you can use Dwell Control which will let you perform an action when you hold (not click) the cursor on an element or a specific area of the screen.
To start, from under Pointer Devices, tap Devices > Bluetooth Devices and pair your mouse. Now, enable Dwell Control. You can also tweak the settings here as per your liking. The best thing are the Hot Corners. You can set a custom action for each of the four corners of the screen, and after that, when you just place (and wait) the cursor on that corner, it will automatically perform the said action like take a screenshot, open the camera, go to the Control Center, or whatever you set.
So, if you use a mouse with your iPhone or iPad, Dwell Control is a handy accessibility feature that you should explore.
You can learn more about these on the official Apple Support page.
Using AssistiveTouch
This is how you can use AssistiveTouch to take screenshots, open Notification Center or Control Center, lock the screen, rotate the screen, change volume, restart your device, and more. Just tap the virtual gray floating button and choose an option!
AssistiveTouch comes in handy when you can’t press the buttons or don’t want to. Plus, it also lets you interact with the screen in different ways.
Turn off AssistiveTouch
You can easily disable AssistiveTouch if you don’t find it very useful for you or are bothered by the virtual button occupying your iPhone screen. For that, ask Siri to turn off AssistiveTouch or go to the Settings app > Accessibility > Touch > AssistiveTouch and turn off the toggle for AssistiveTouch.
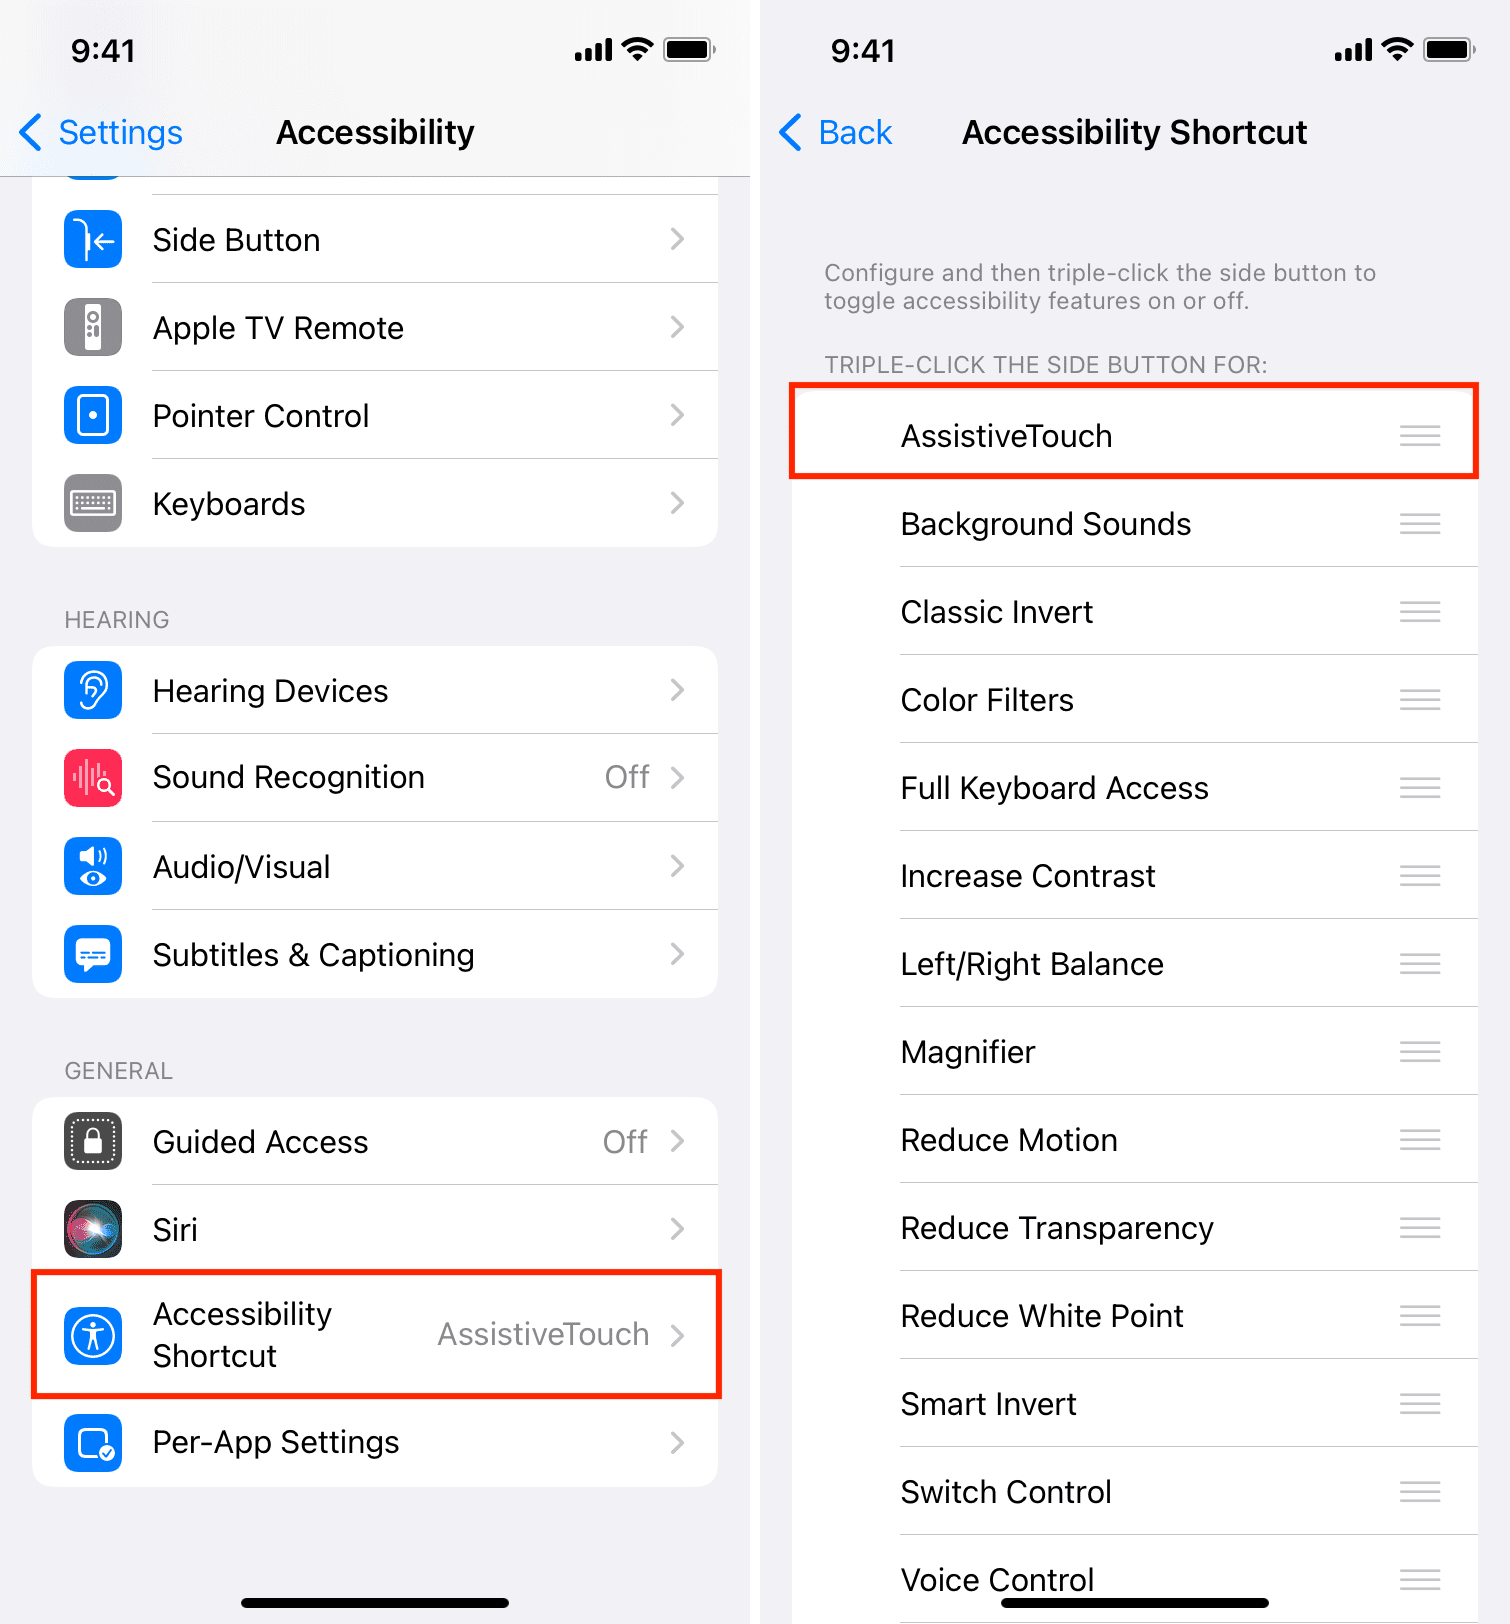
In case you accidentally enable AssistiveTouch while pressing the Side or Home button, do the following:
- Go to Settings > Accessibility.
- Scroll down and tap Accessibility Shortcut.
- Uncheck AssistiveTouch, and now it won’t be enabled or disabled while triple-clicking the Side button or Home button.
Read next: