When you’re creating a Keynote slideshow, you might consider using a table for a nice way to format your data. Your presentation may be for an organization where you want to show financial data or a company where you want to display product sales. Whatever it is, using tables in Keynote is just as easy as using them in Pages, and just as beneficial.
Here’s how to work with tables in Keynote including inserting, formatting, and adjusting them.
Tables in Keynote
Insert a table in Keynote on Mac
You can insert your table into Keynote on Mac one of two ways. So open your presentation and select the slide where you want the table.
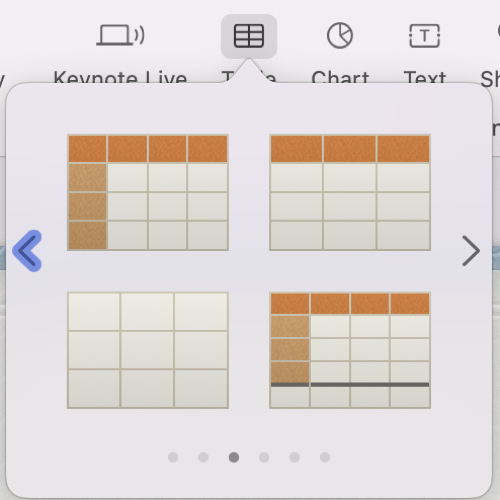
The best option is to use the Table button in the toolbar. When you click the button, you have a neat little drop-down box that lets you select the style and color scheme. The color schemes available for table are determined by the theme you’re using.
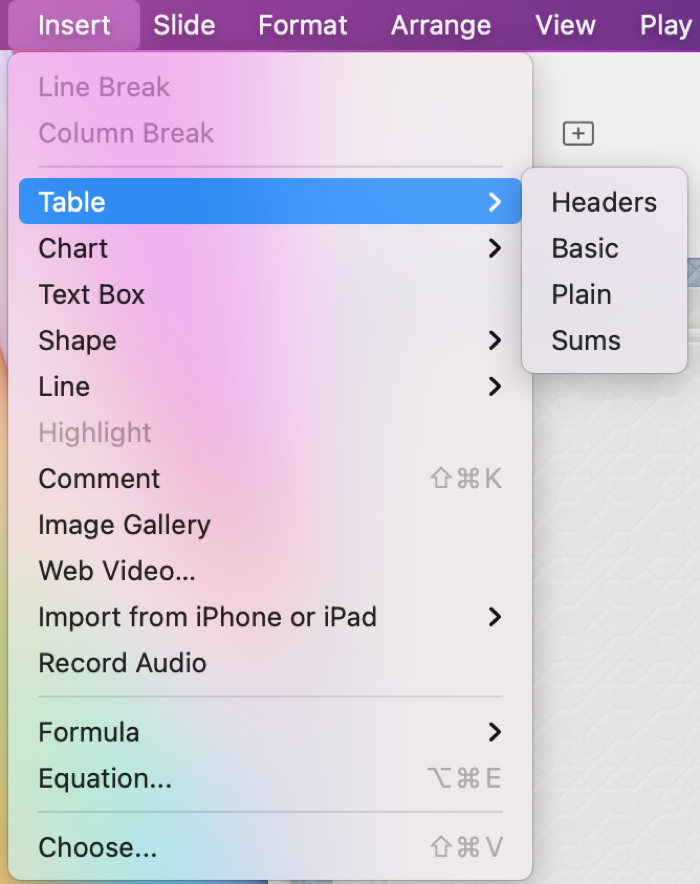
You can also use the menu bar to insert a table by clicking Insert > Table. You have the same options in the pop-out menu for the style of table you want, except they’re listed as text instead of visually. So, select from Headers, Basic, Plain, or Sums.
Regardless of how you choose to insert the table, you can format it afterwards.
Format a table in Keynote on Mac
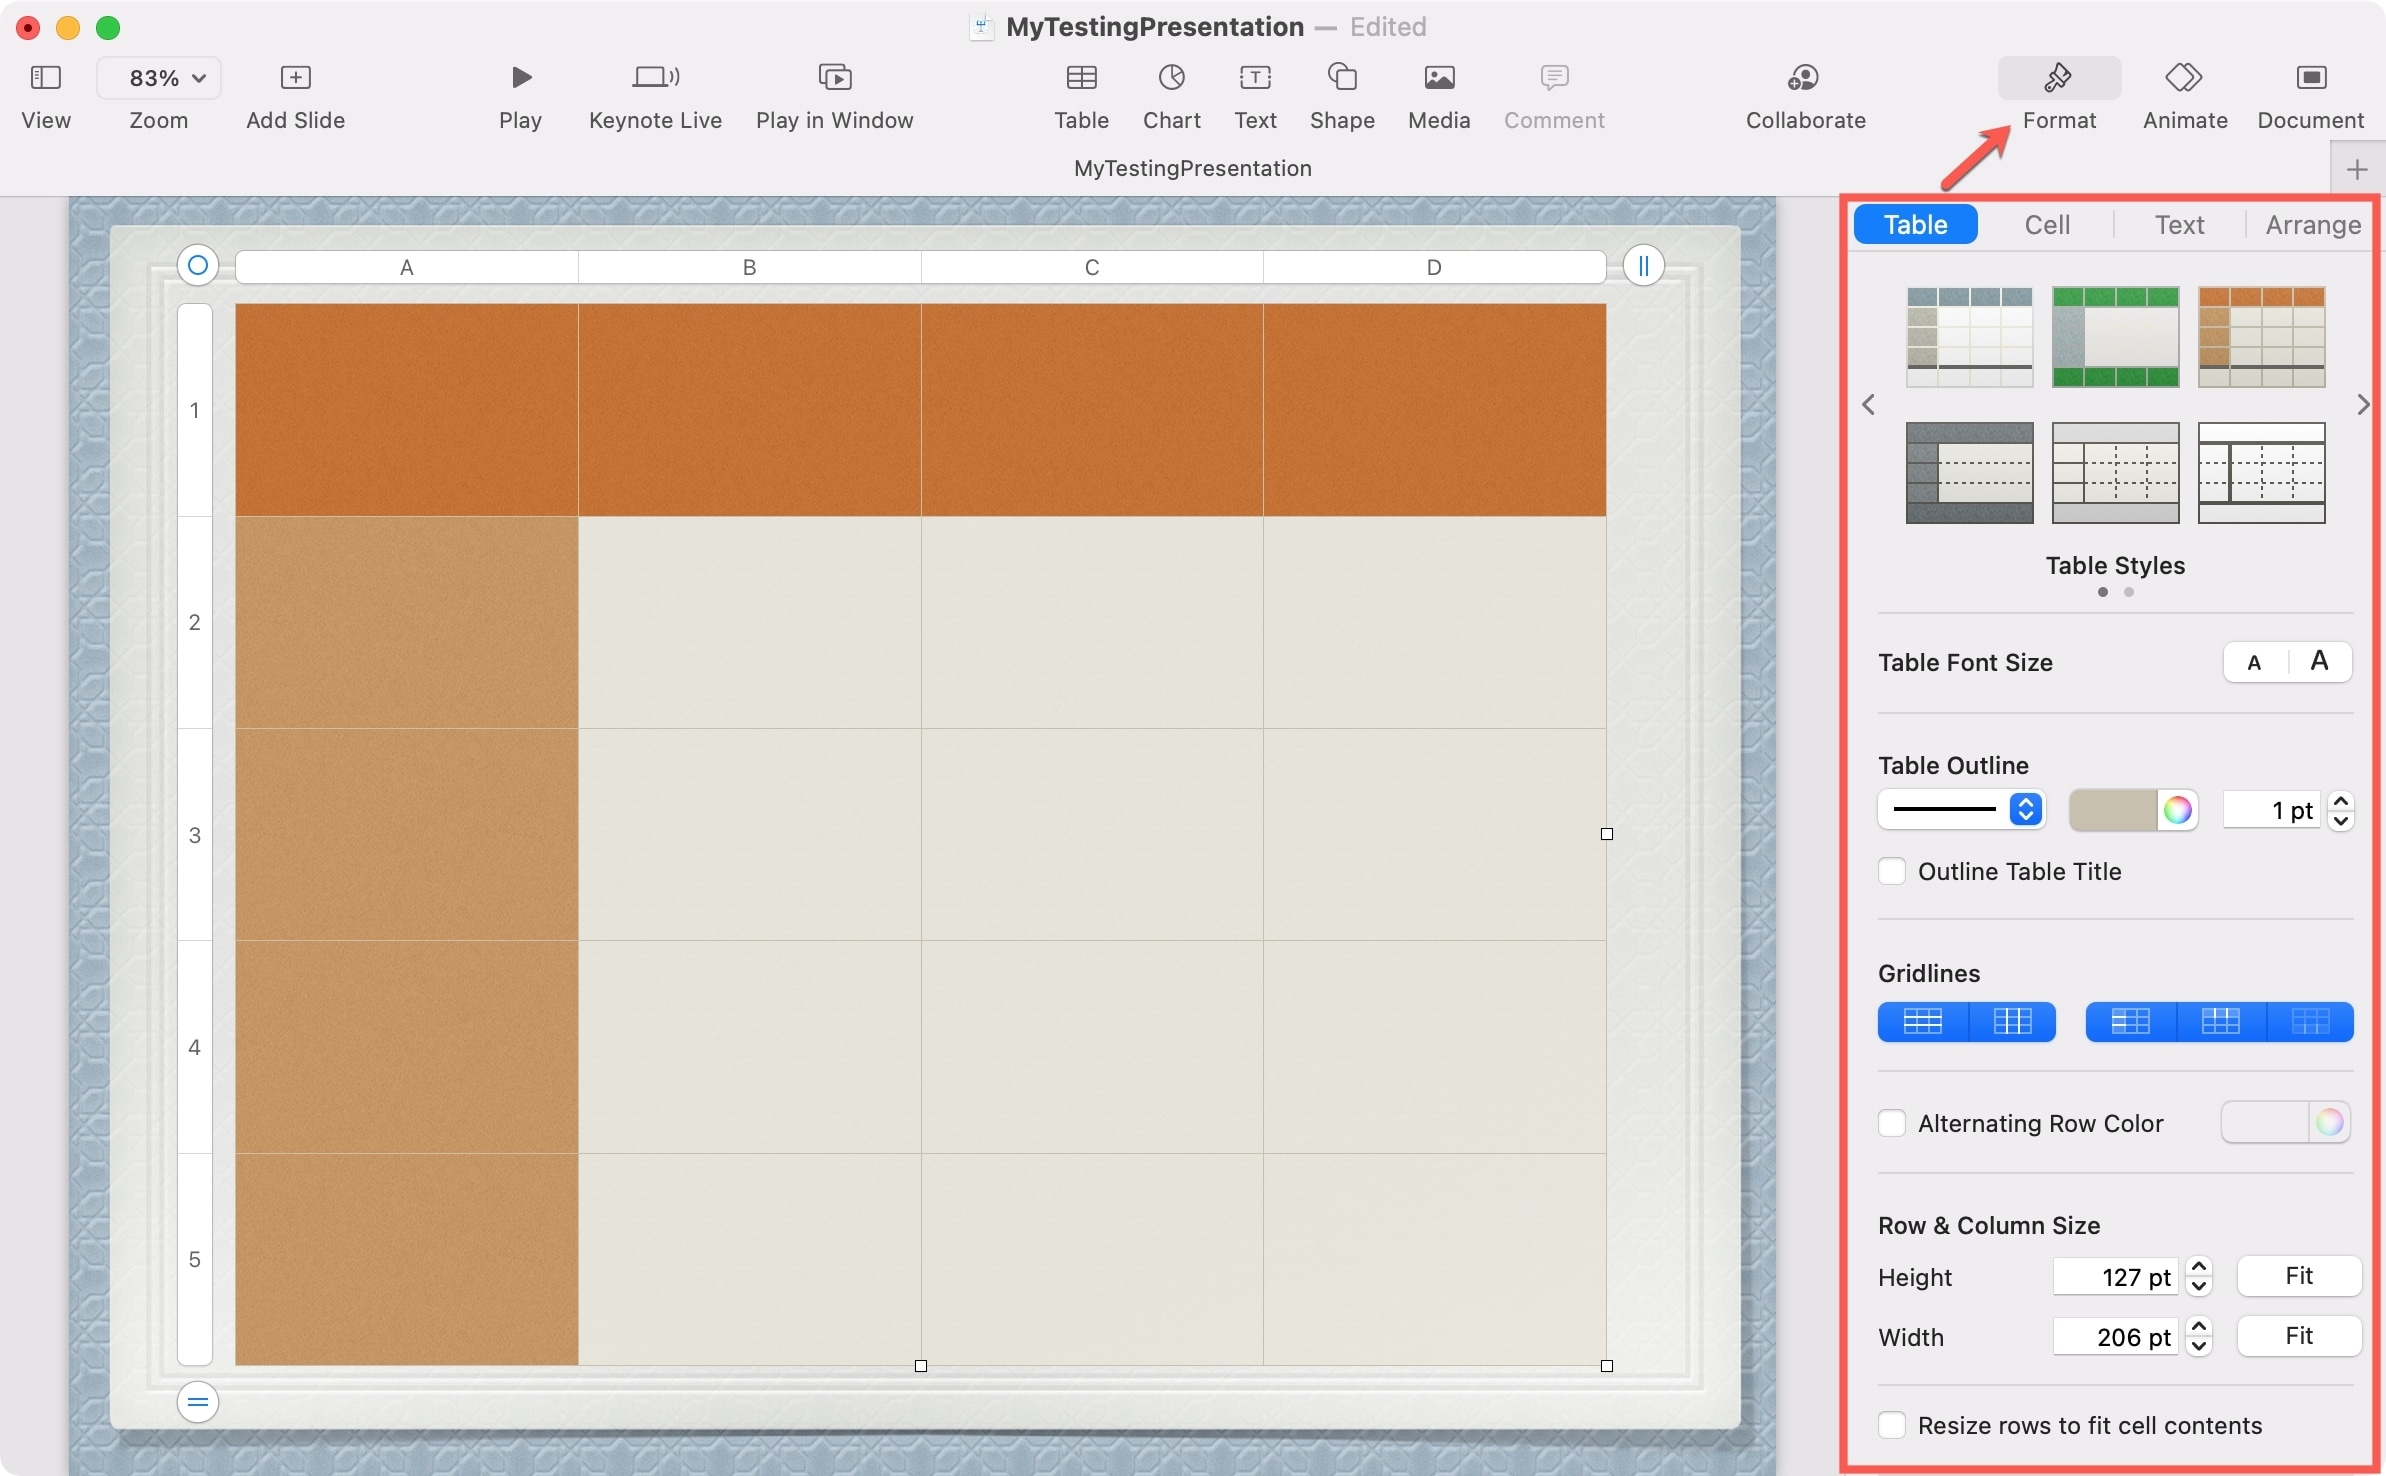
Select the table you added to your presentation, click the Format button on the top right, and choose the Table tab at the top of the sidebar. You’ll see your formatting options for the table.
You can choose a different style, add a title and caption, select shaded rows and columns for headers and footers, change the font, and more. You’ll see your table update immediately with any changes you make.
Add or remove columns and rows
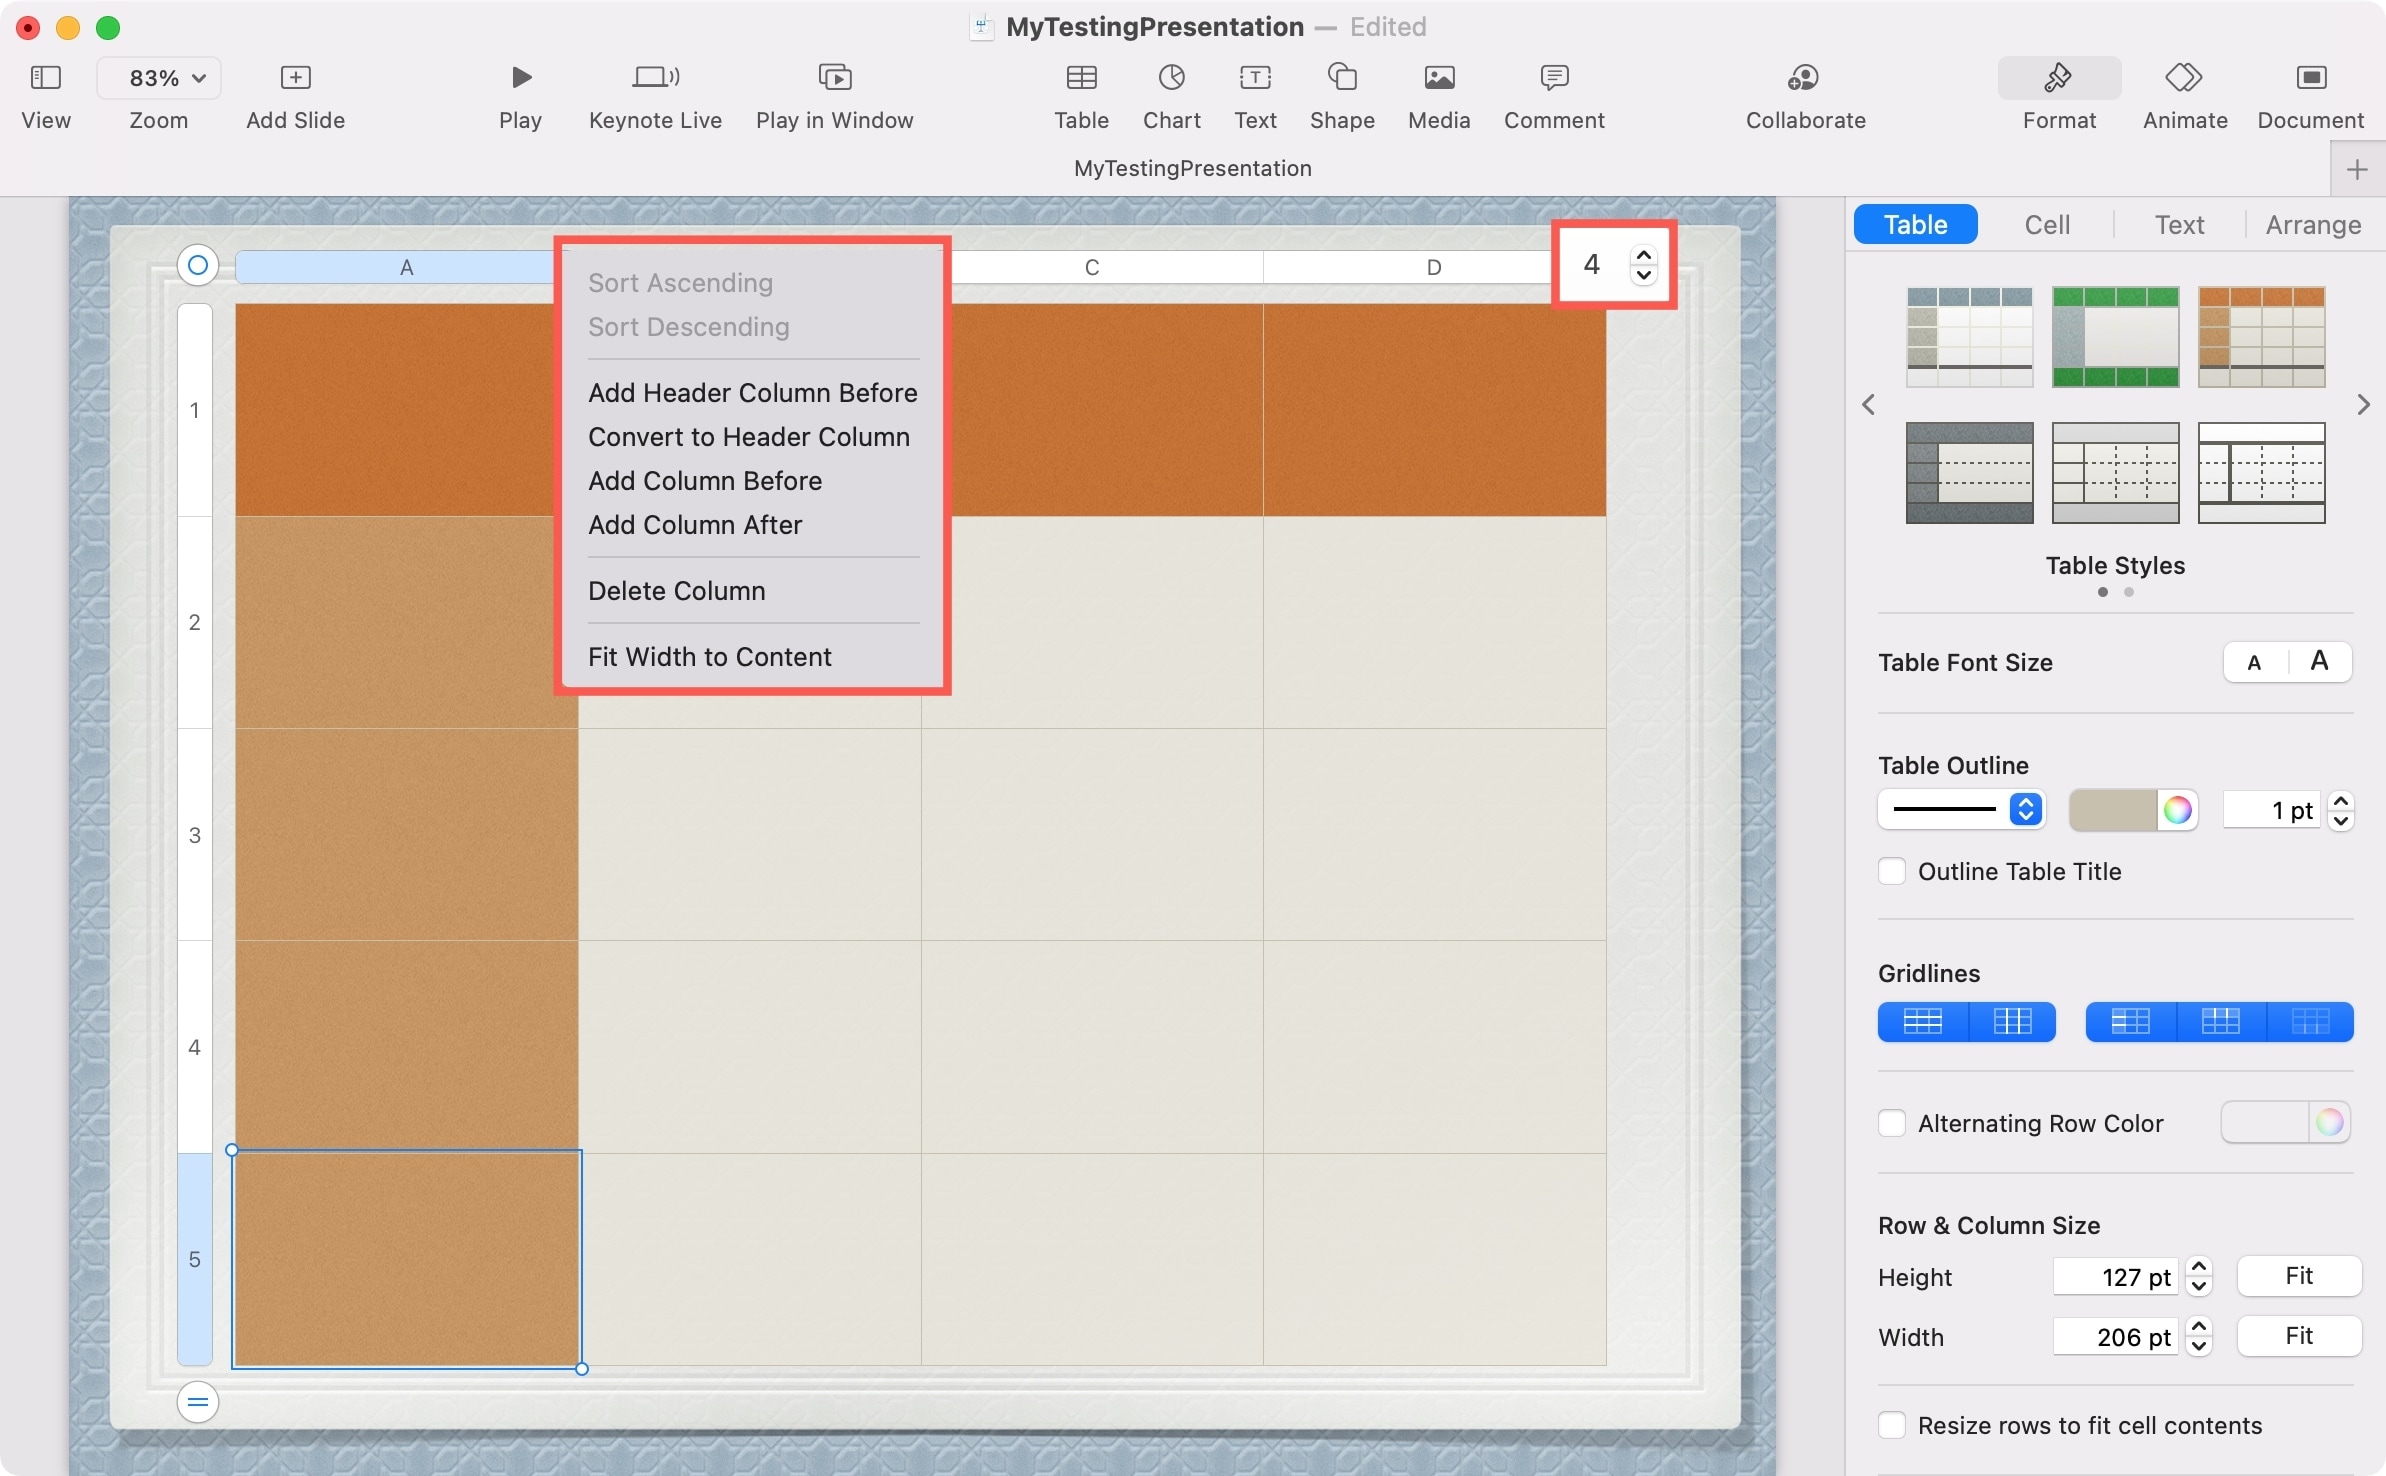
Along with the options in the Format sidebar, you can adjust your table directly on the slide. While you can add or remove columns and rows in the sidebar as well, it can be more convenient to do this on the table itself. And you have a couple of ways to do this too.
Click the lined button on the far right at the top or bottom left. This changes to a tiny drop-down where you can use the arrows to add or remove a column or row. You can also click a column or row header arrow to insert or delete a column or row.
Resize, move, or delete a table
You’ll notice that when you insert a table onto a slide in Keynote, it covers the entire slide. This may not be the look you want, so you can resize and move the table.
To resize an entire table, drag the white square on the bottom right of the table inward or outward. If you drag a white square on the right or bottom border instead, this will increase or decrease the size of the columns or rows.
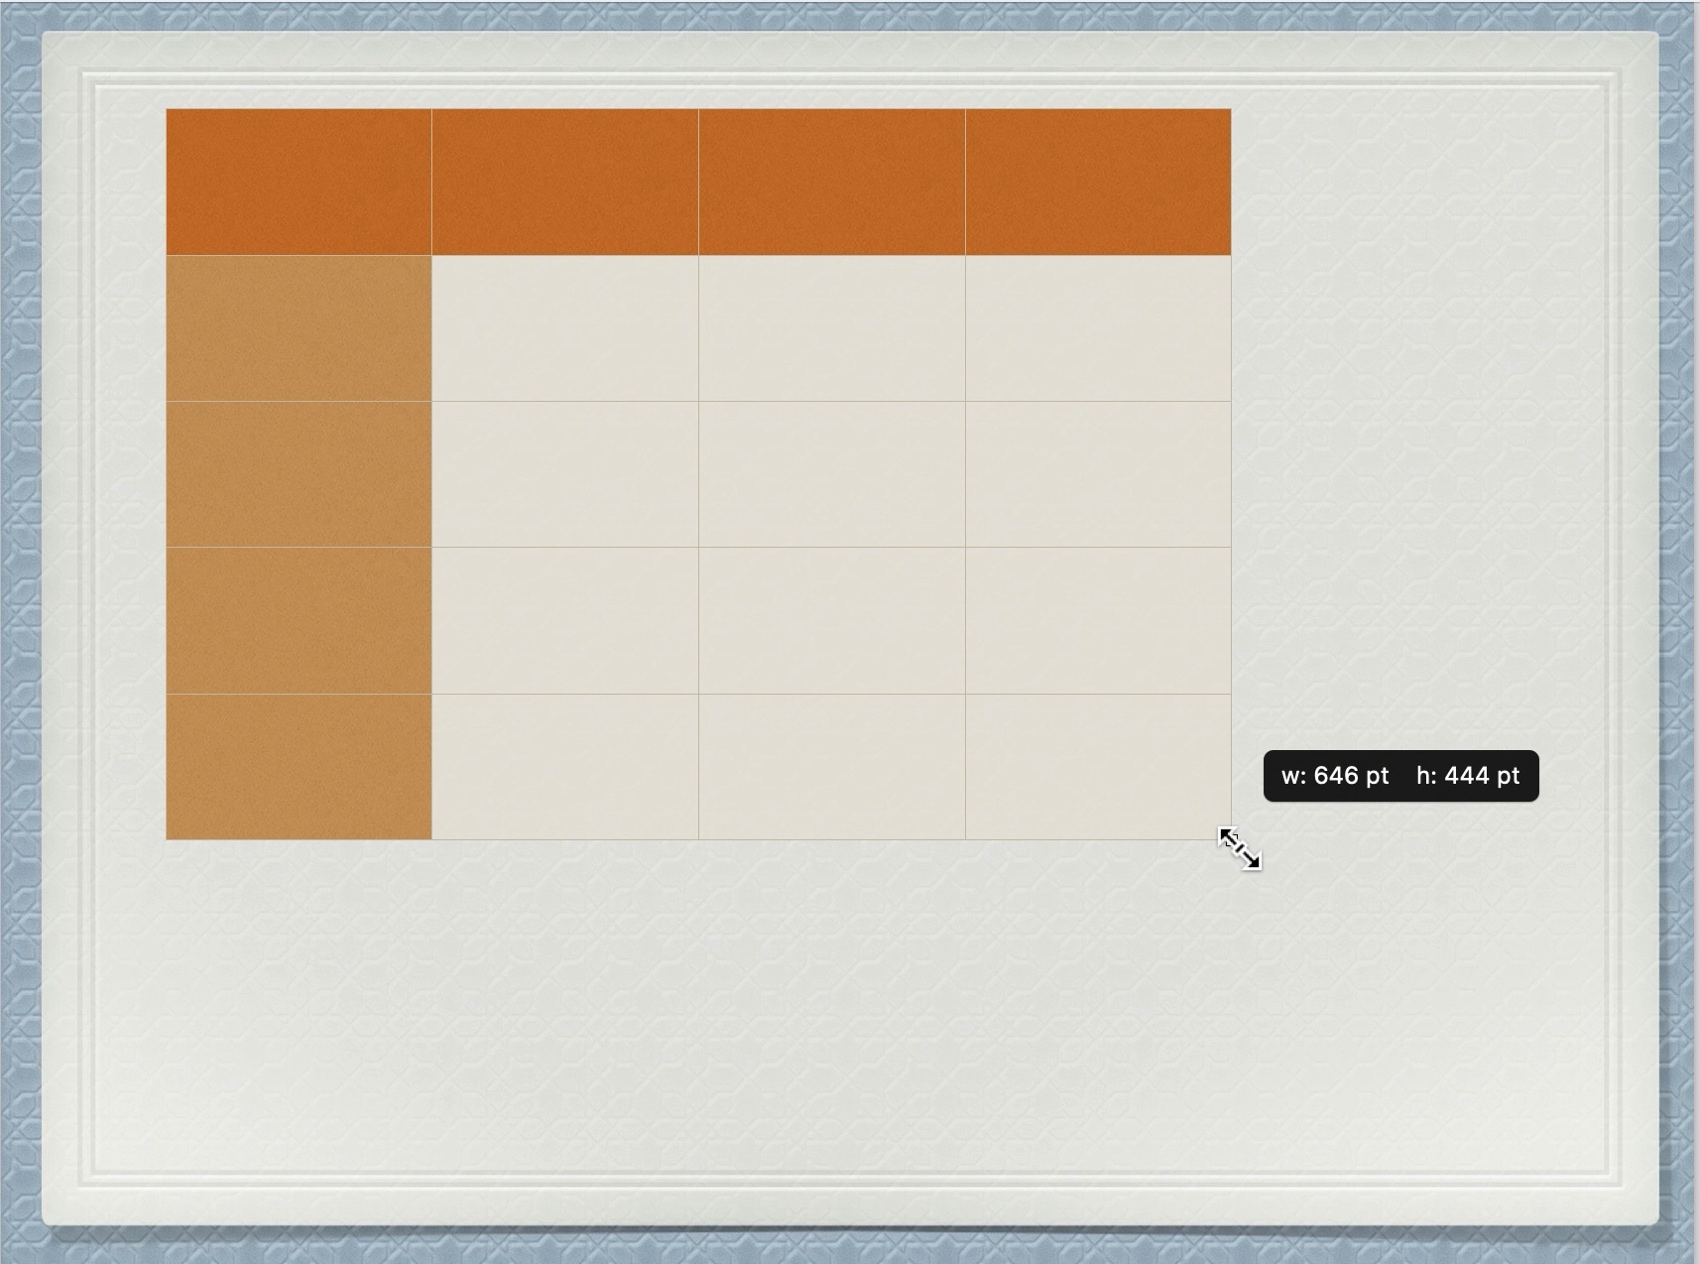
To move a table, select and drag it where you want it. You may have to drag from the circle on the top left of the table the first time you move it. But after that, you can just select the table and drag it.
To delete a table, select it and hit your Delete key or right-click the circle on the top left of the table and choose Cut.
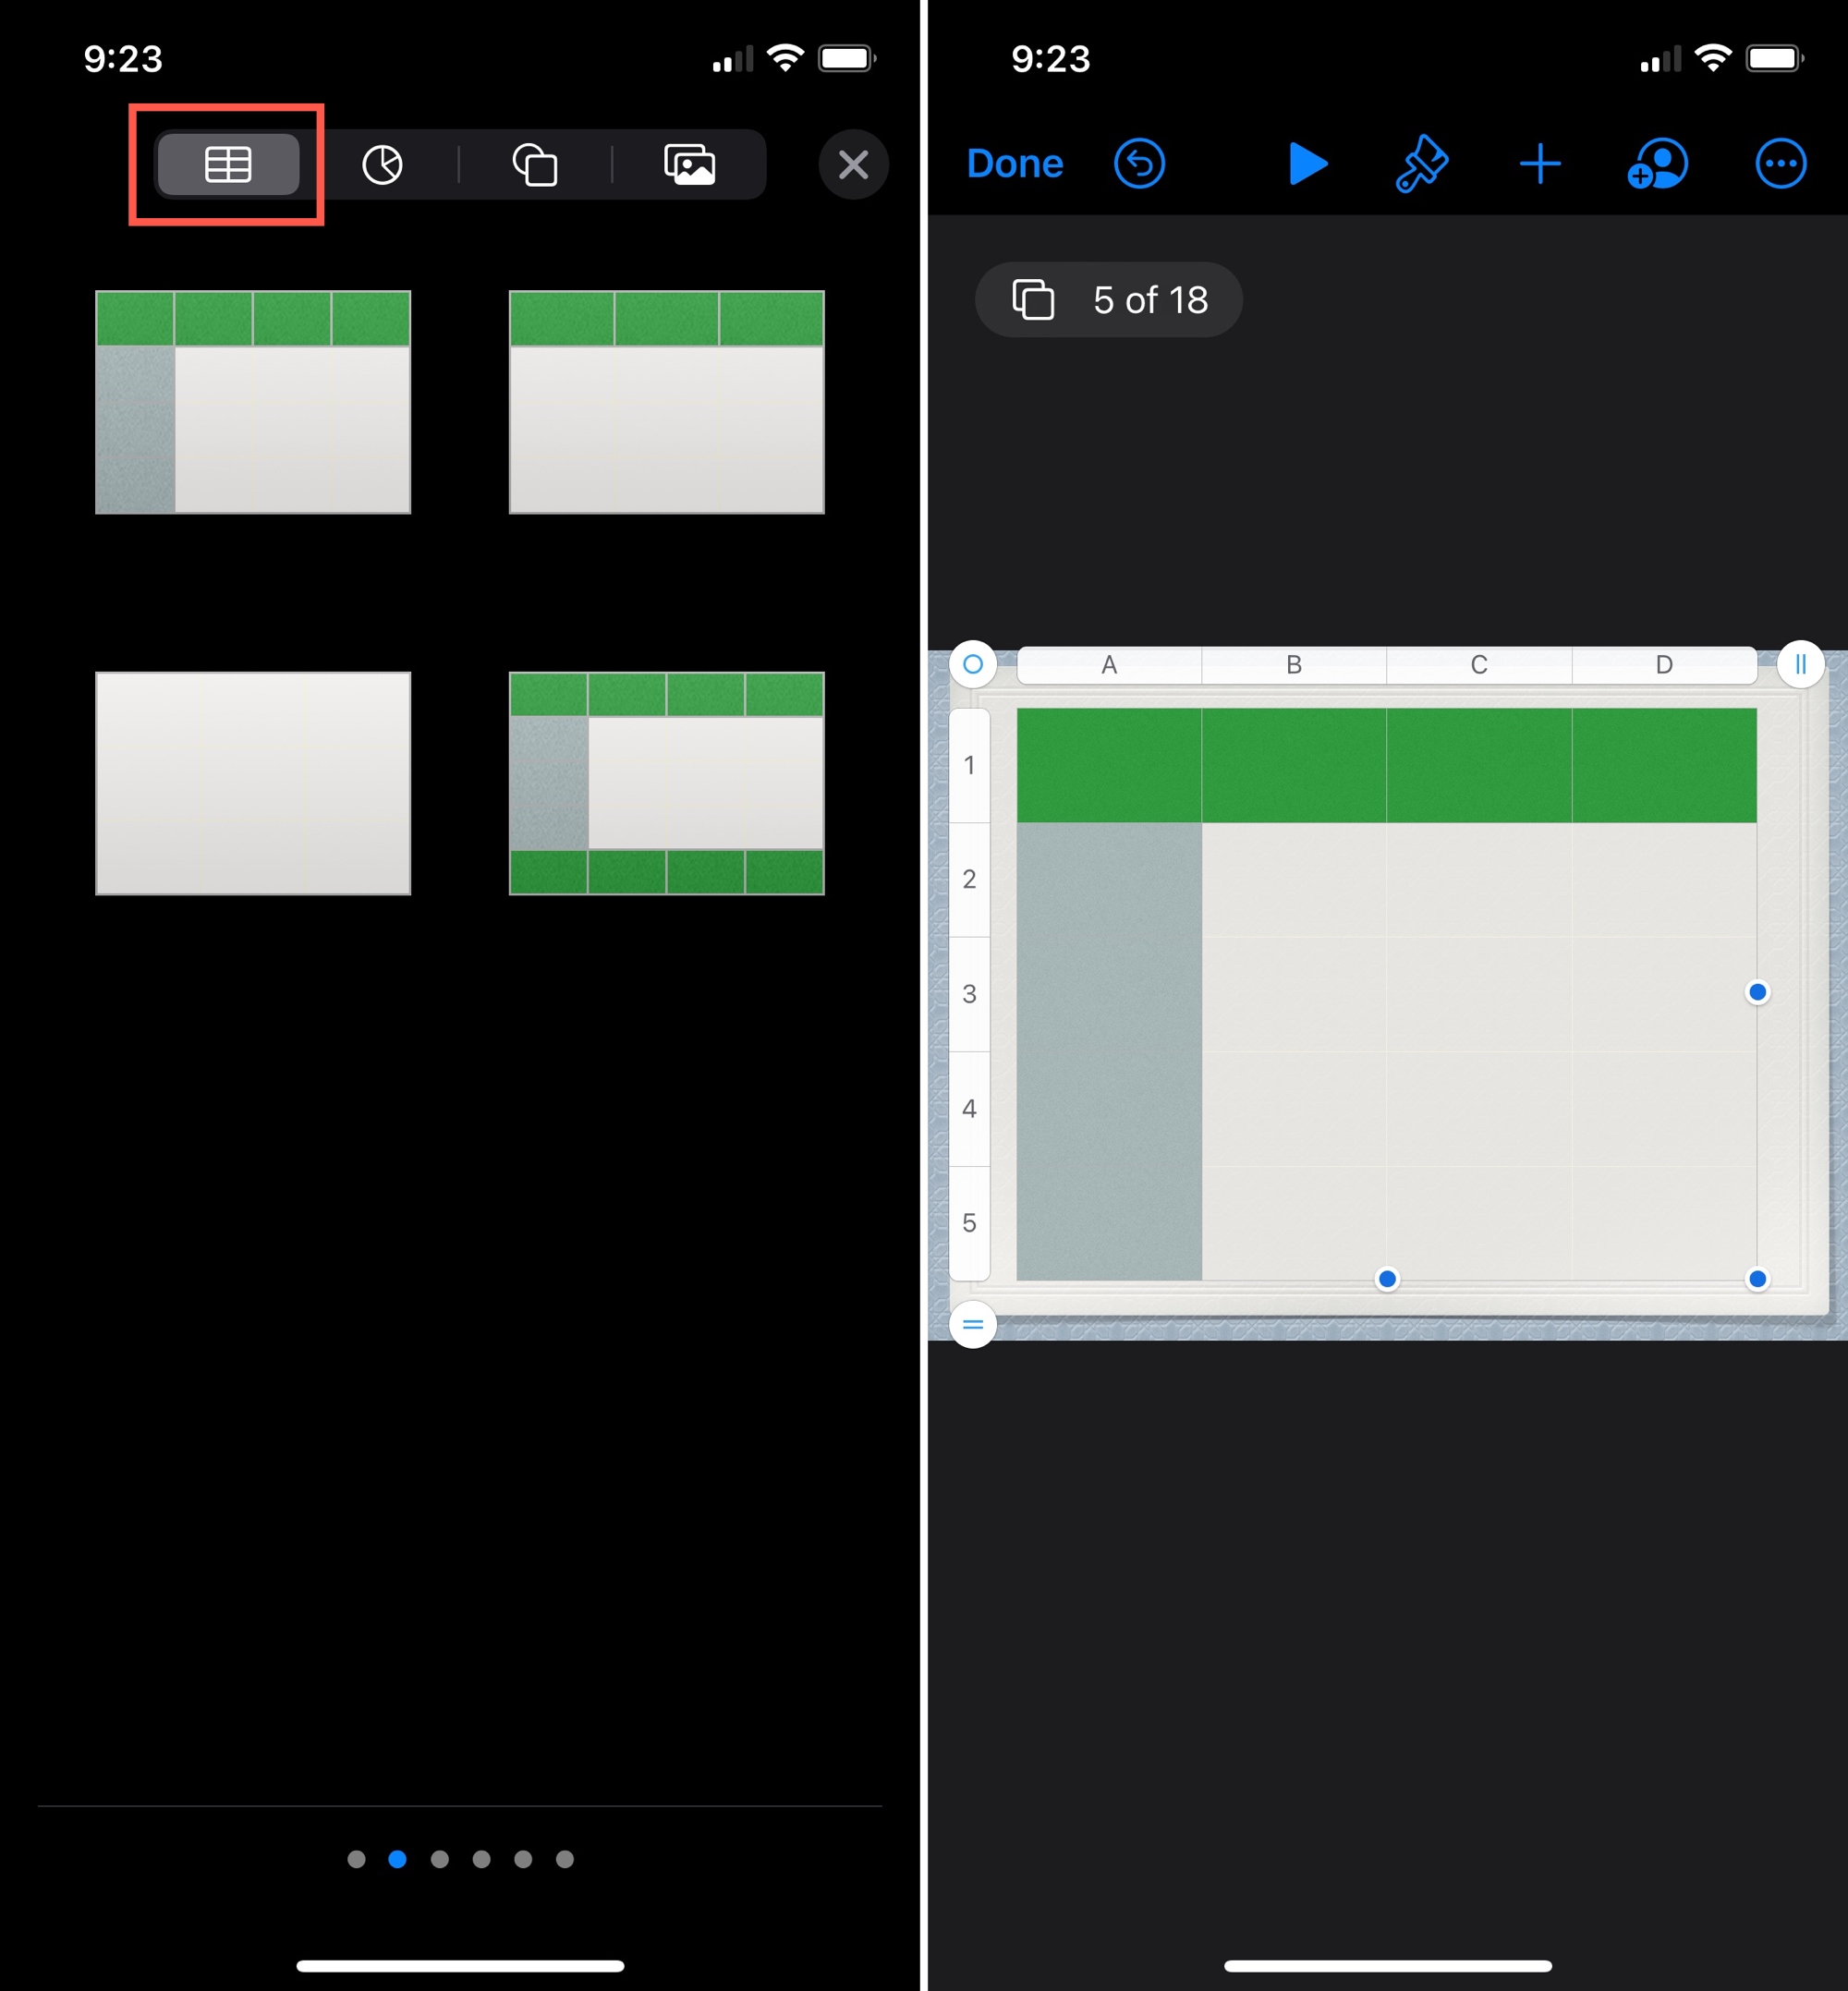
Insert a table in Keynote on iPhone and iPad
It’s just as easy to insert a table in Keynote on iPhone and iPad. So, open your presentation and do the following.
1) Select the slide where you want the table.
2) Tap the plus sign at the top.
3) Select the Table tab which is on the far left.
4) Swipe right to view all styles and colors. Tap the one you want to use.
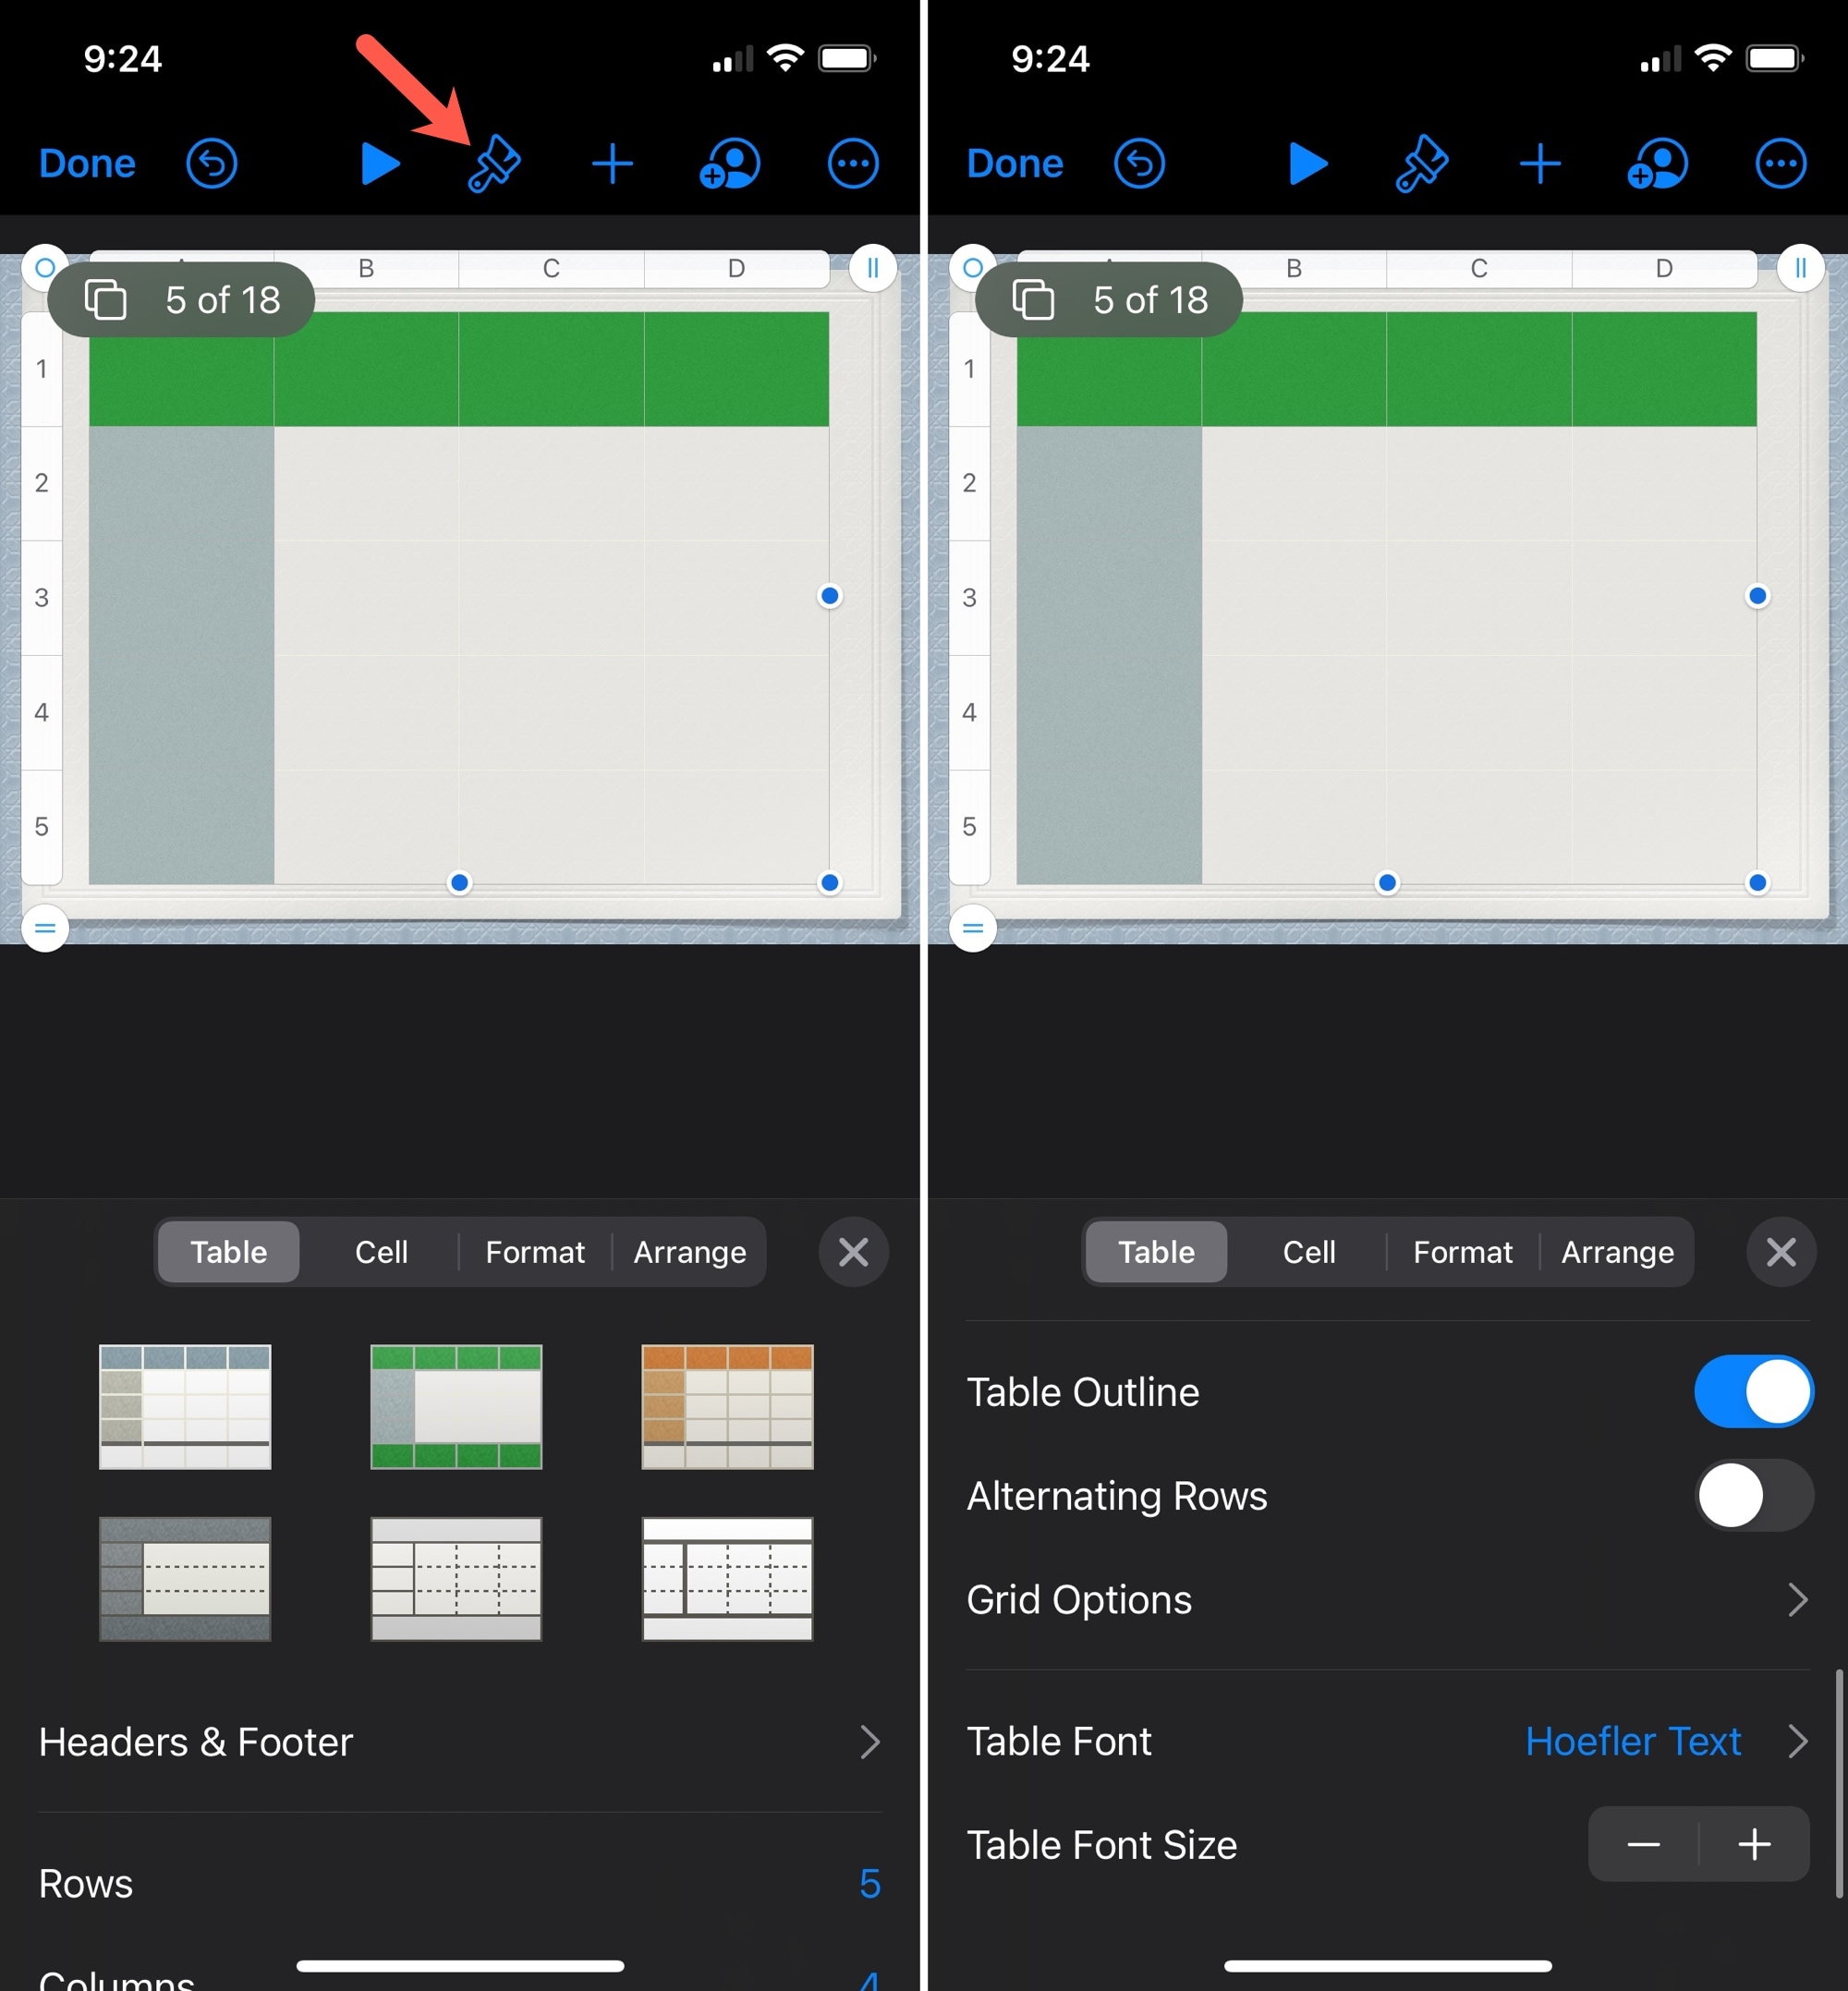
Format a table in Keynote on iPhone and iPad
Select the table, tap the Format icon (paintbrush) at the top, and choose the Table tab in the pop-up area. You can make the same types of change for the table as on Mac.
Pick a new style or color scheme, select a different font style or size, outline the table, color alternating rows, and more.
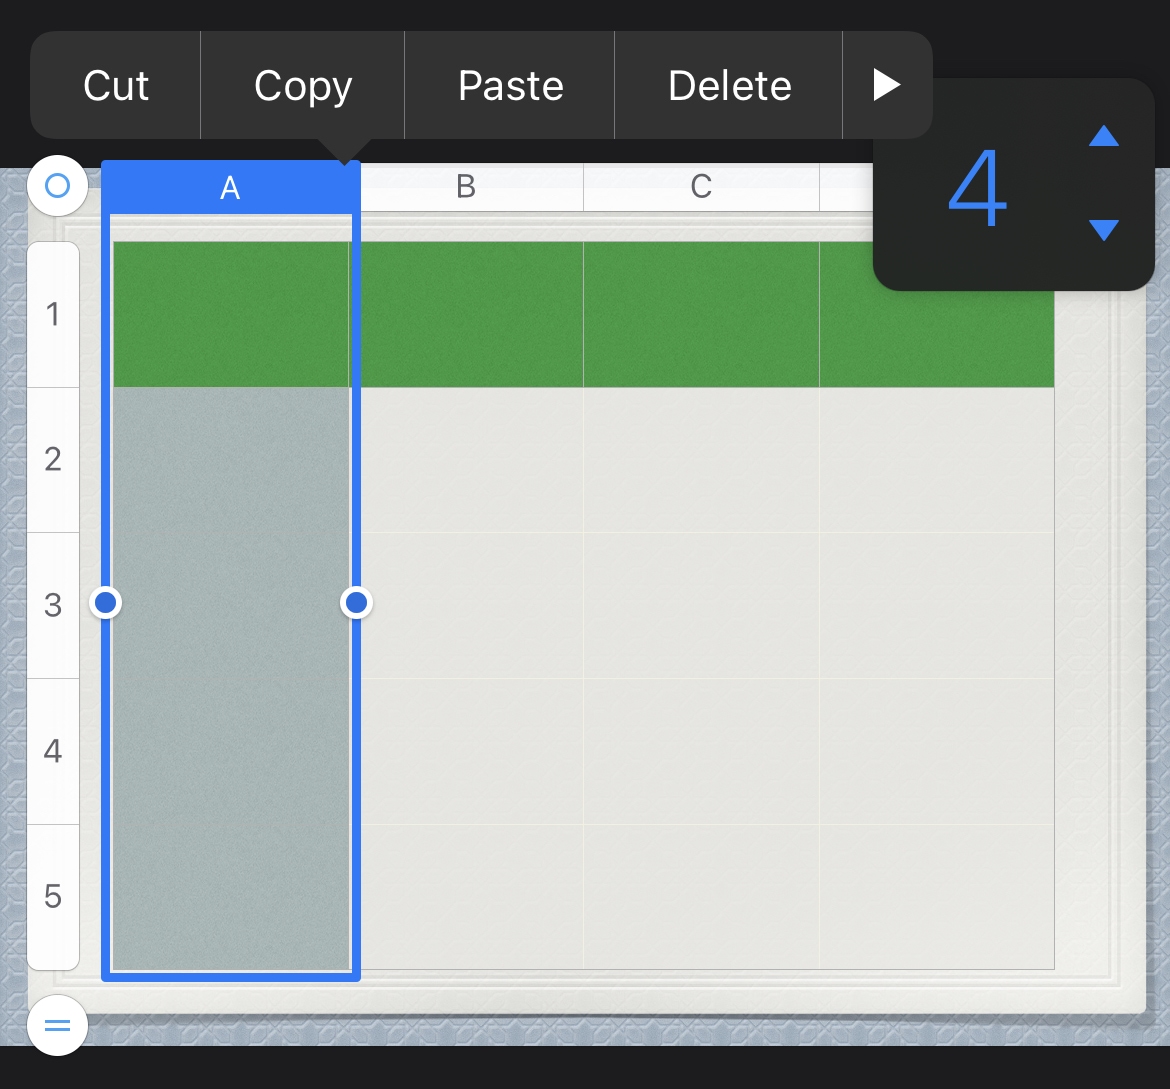
Add or remove columns and rows
You can tap a row or column header to insert or delete one. You can also tap the lined button on the far right at the top or bottom left. Like on Mac, this displays a drop-down to adjust the number of columns or rows.
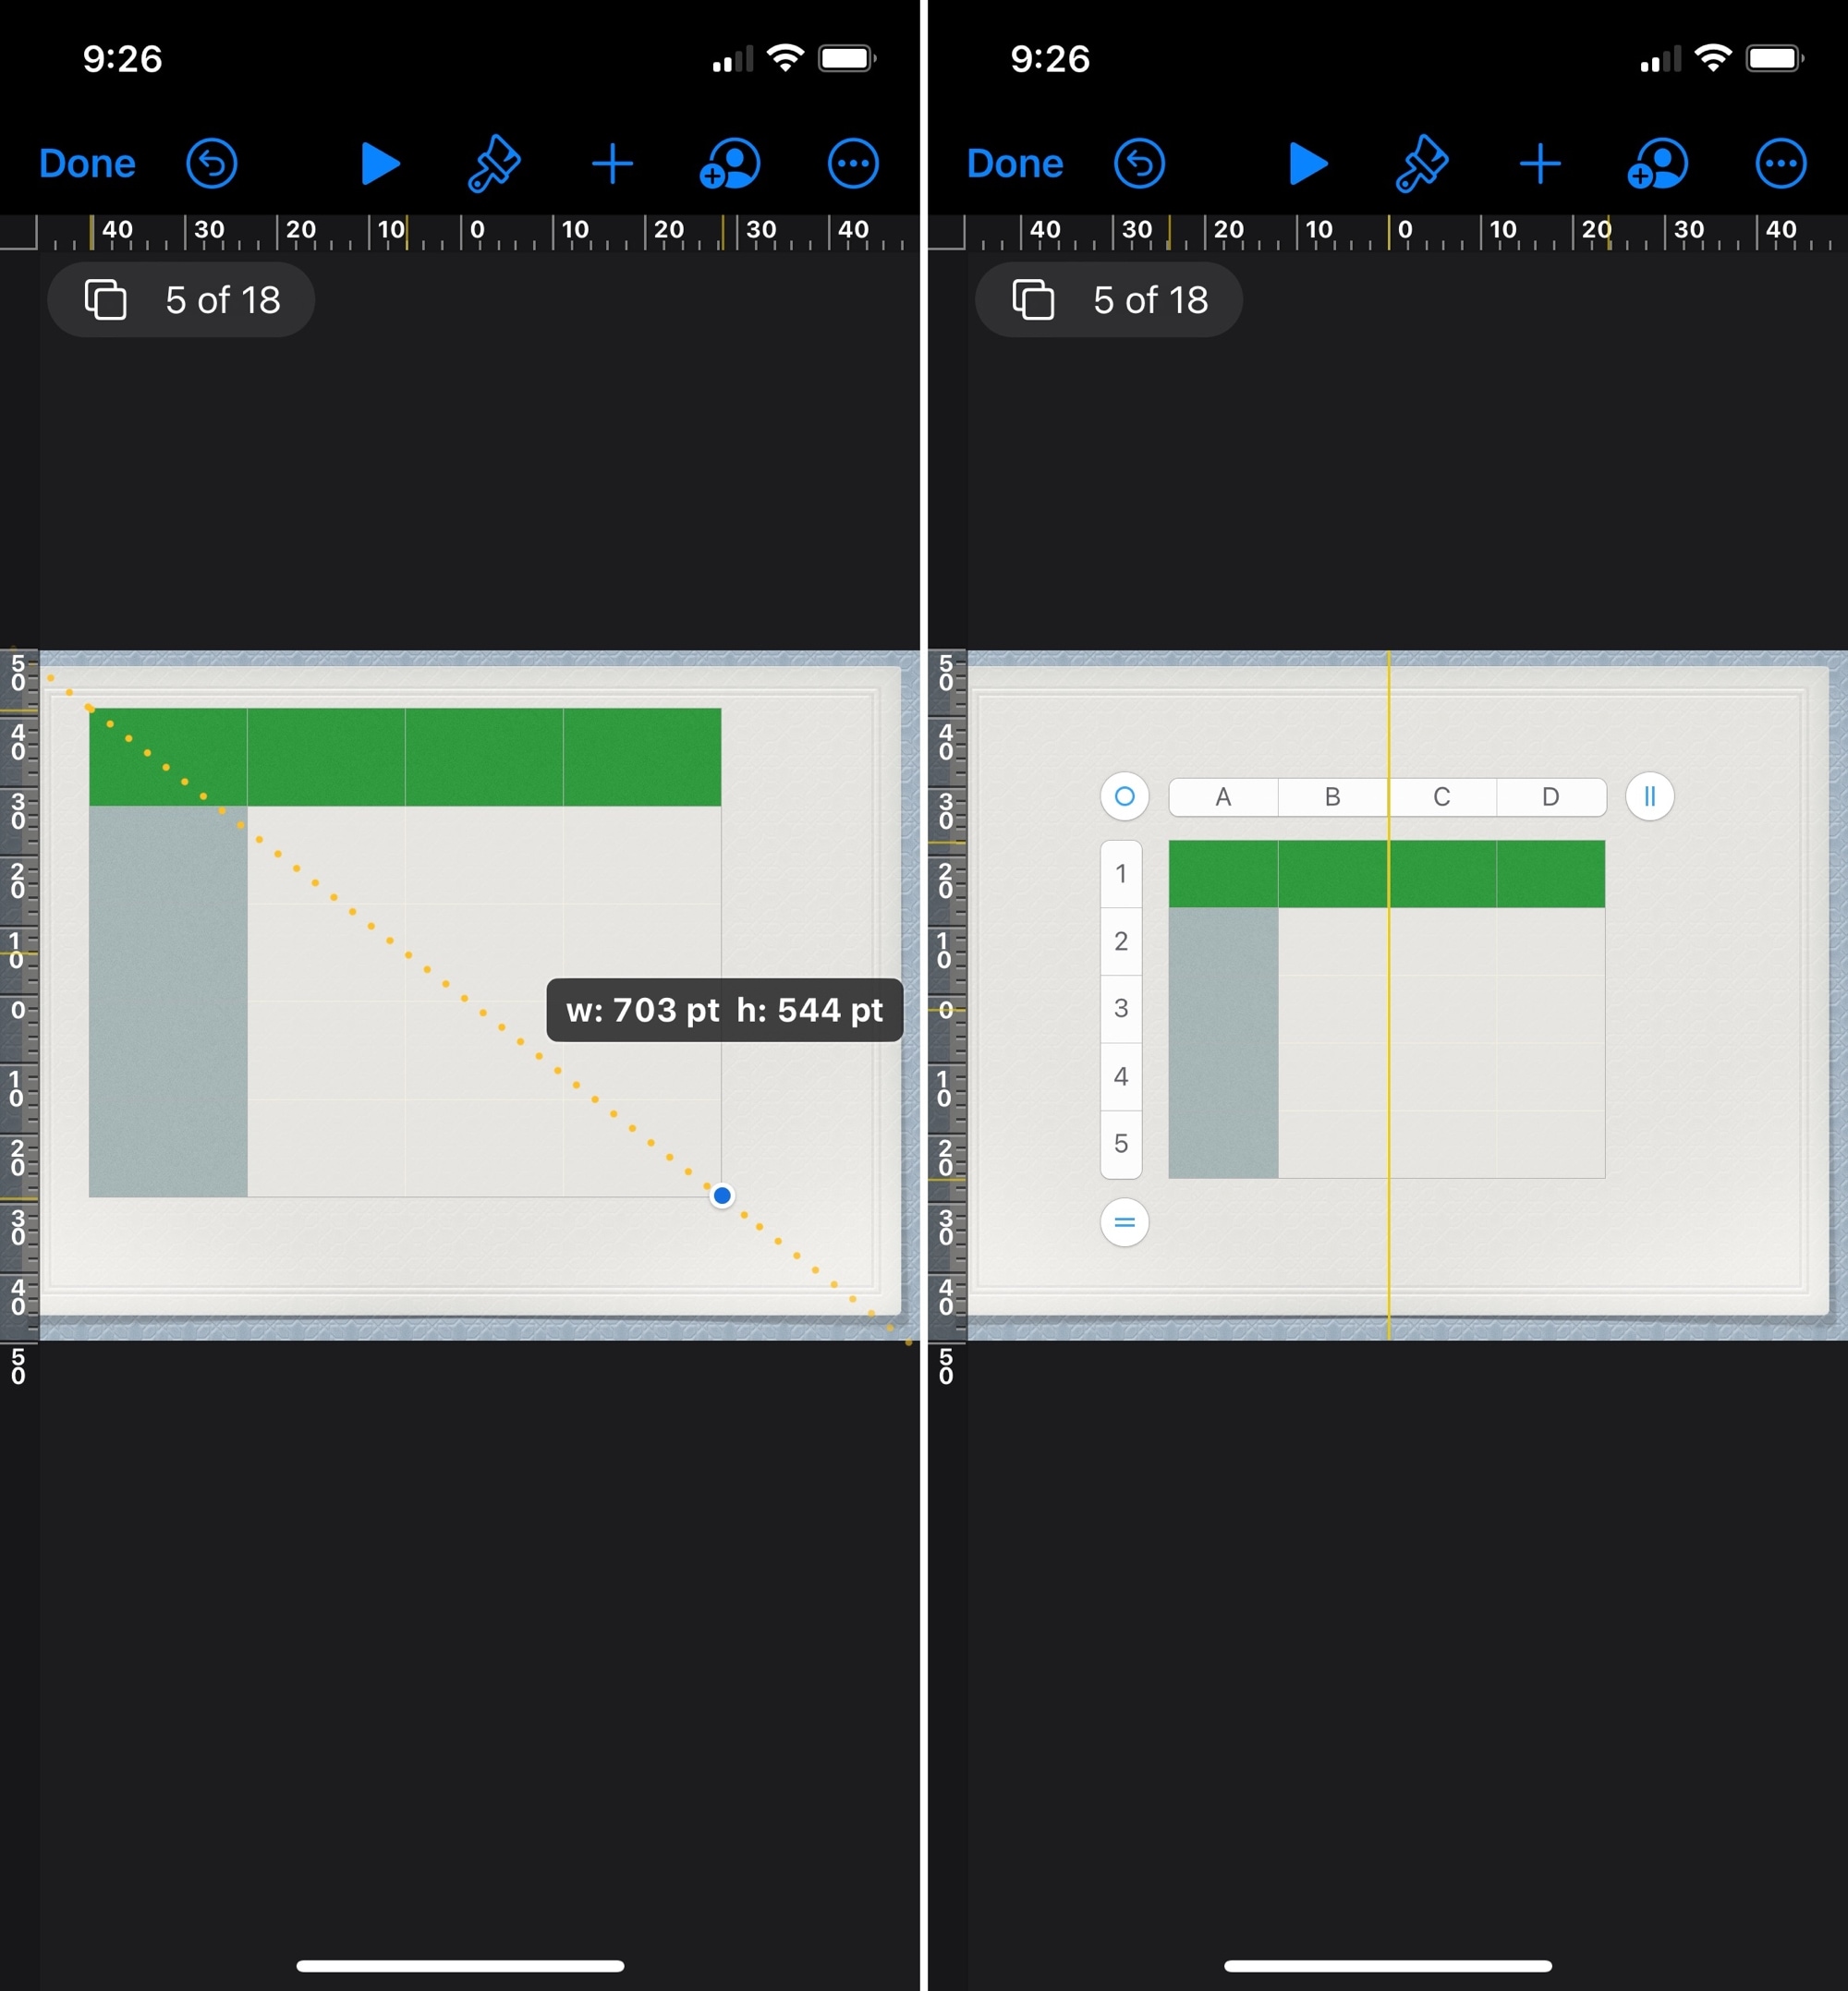
Resize, move, or delete a table
- To resize a table, just drag the bottom right corner and to resize columns or rows, drag from the bottom or right border.
- To move a table, tap the circle on the top left and drag the table.
- To delete a table, tap the circle on the top left of the table and select Cut from the shortcut menu.
Wrapping it up
Tables can be convenient tools not only for including data in your slideshow but also arranging items like images or objects neatly. Are you going to give tables a try in your next Keynote slideshow?
For more on using Keynote, take a look at how to add slide transitions or use the outline view.