If you’ve ever seen or used Conditional Formatting in Microsoft Excel, Apple Numbers offers the same type of feature. While labeled Conditional Highlighting, the feature works the same way. Based on the rules you set up, cells in your sheet will automatically format a certain way.
So if you want all dollar values above a specific amount, dates between a certain range, or cells with missing data to appear highlighted, this is the feature you’ll use. Once you set up the conditions to look for, your sheet takes over to automatically format the data you specify.
This can be an extremely easy way to call out particular data or even locate errors in your spreadsheet. And because of the flexibility, the possibilities are almost endless for what you can automatically highlight. Here, we’ll show you how to apply conditional highlighting in Numbers on Mac, iPhone, and iPad.

Conditional Highlighting in Numbers on Mac
Open your workbook and select the sheet you want to use in Numbers on your Mac. You’ll be working with the Format sidebar for this, so click the Format button on the top right, and let’s get started:
1) Select the cells you want to apply conditional highlighting to, keeping in mind that if you select an entire table that uses column and row headers, it can affect the results. This is usually only an issue if you’ll be using text for your rules.
2) In the Cell tab of the Format sidebar, click the Conditional Highlighting button.
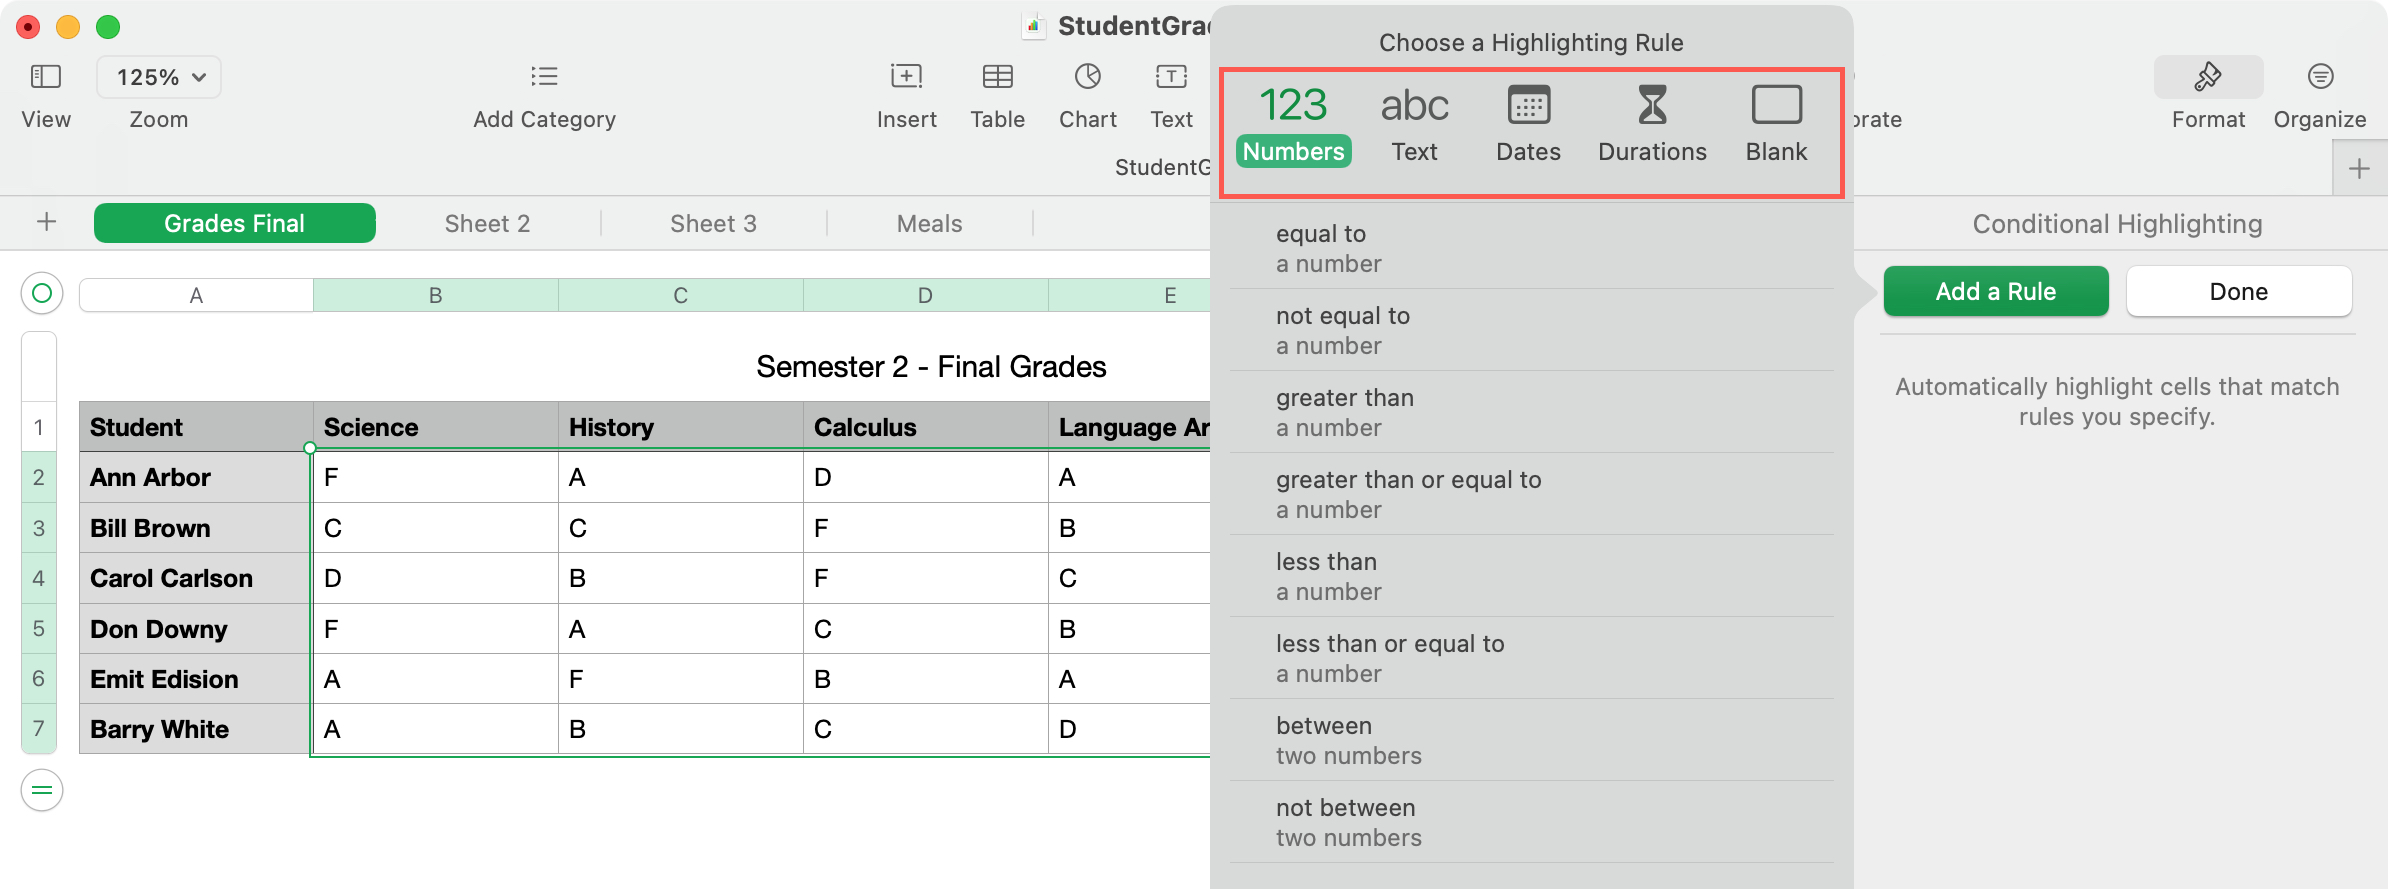
3) Click Add a Rule, and you’ll see the options in a pop-up window. You can set up rules for numbers, text, dates, durations, and blank cells.
Choose what you want to format, and you’ll see options for that item. For instance, you can have Numbers > Equal To, Text > Contains, and Dates > After.
4) After you select the type of rule, complete the information in the sidebar. This is where you’ll add values, text, or dates pertaining to the type you picked.
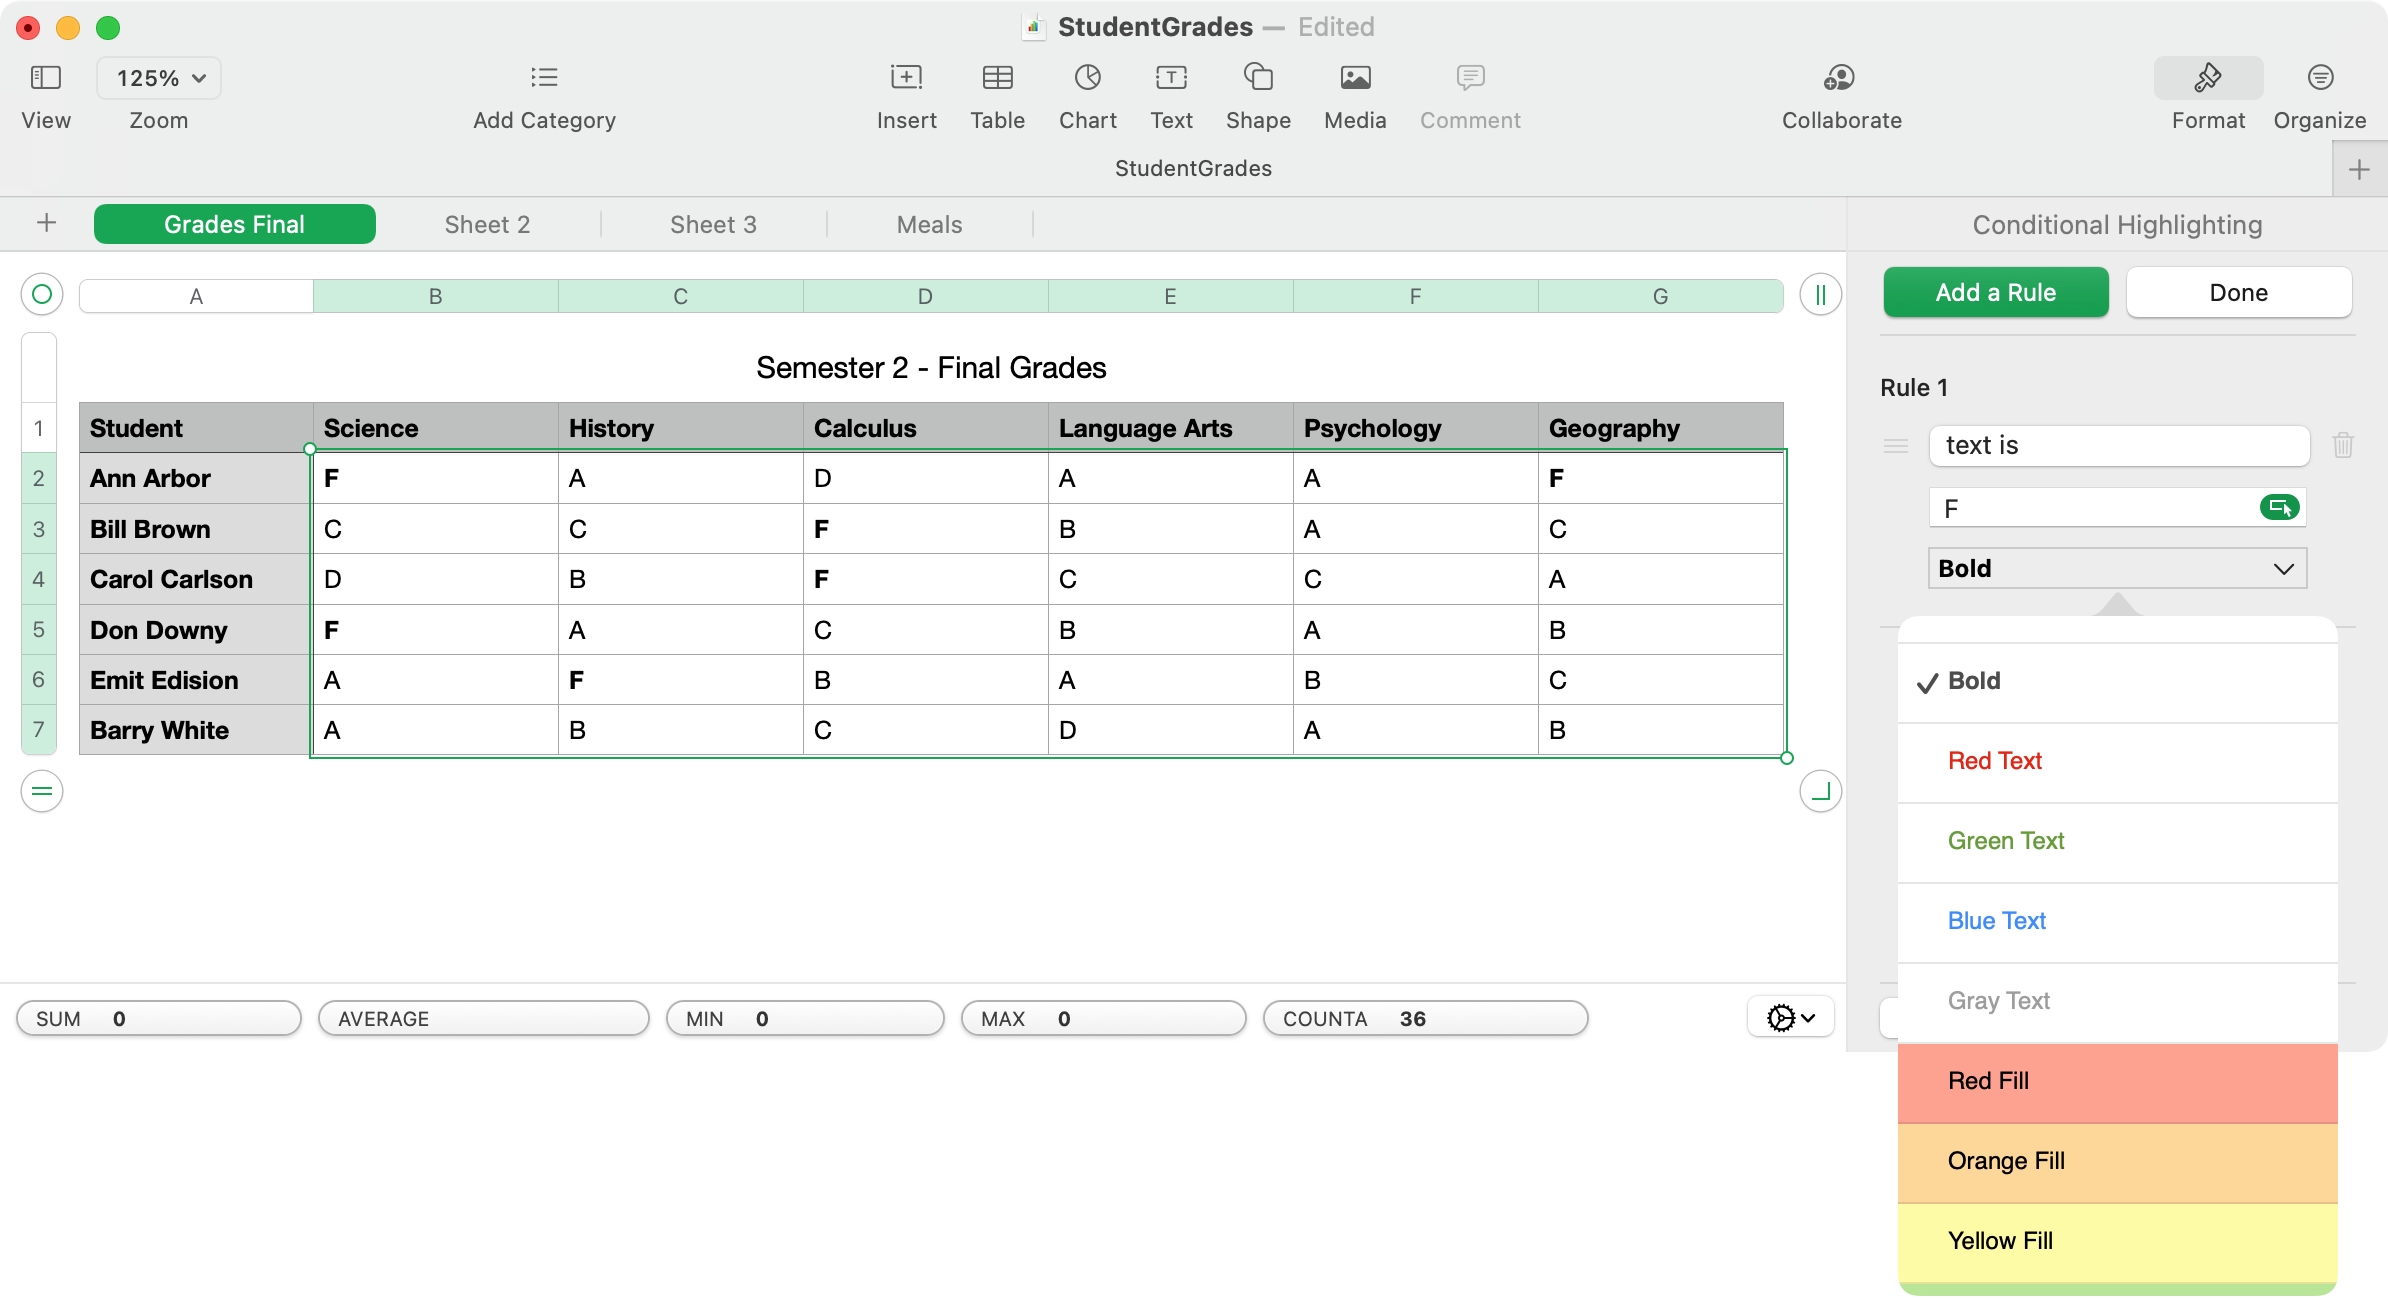
5) Select the type of formatting to apply to cells that match your rule. You can format the data within the cells using bold, italics, or fill the cells with a certain color.
6) Click Done when you finish.
We’ll use a Student Grades sheet as an example. We want to fill cells with red for all F grades that our students received. Here’s how to set that up:
- In the Add a Rule pop-up, pick Text and select Is.
- In the sidebar, enter “F” into the value box.
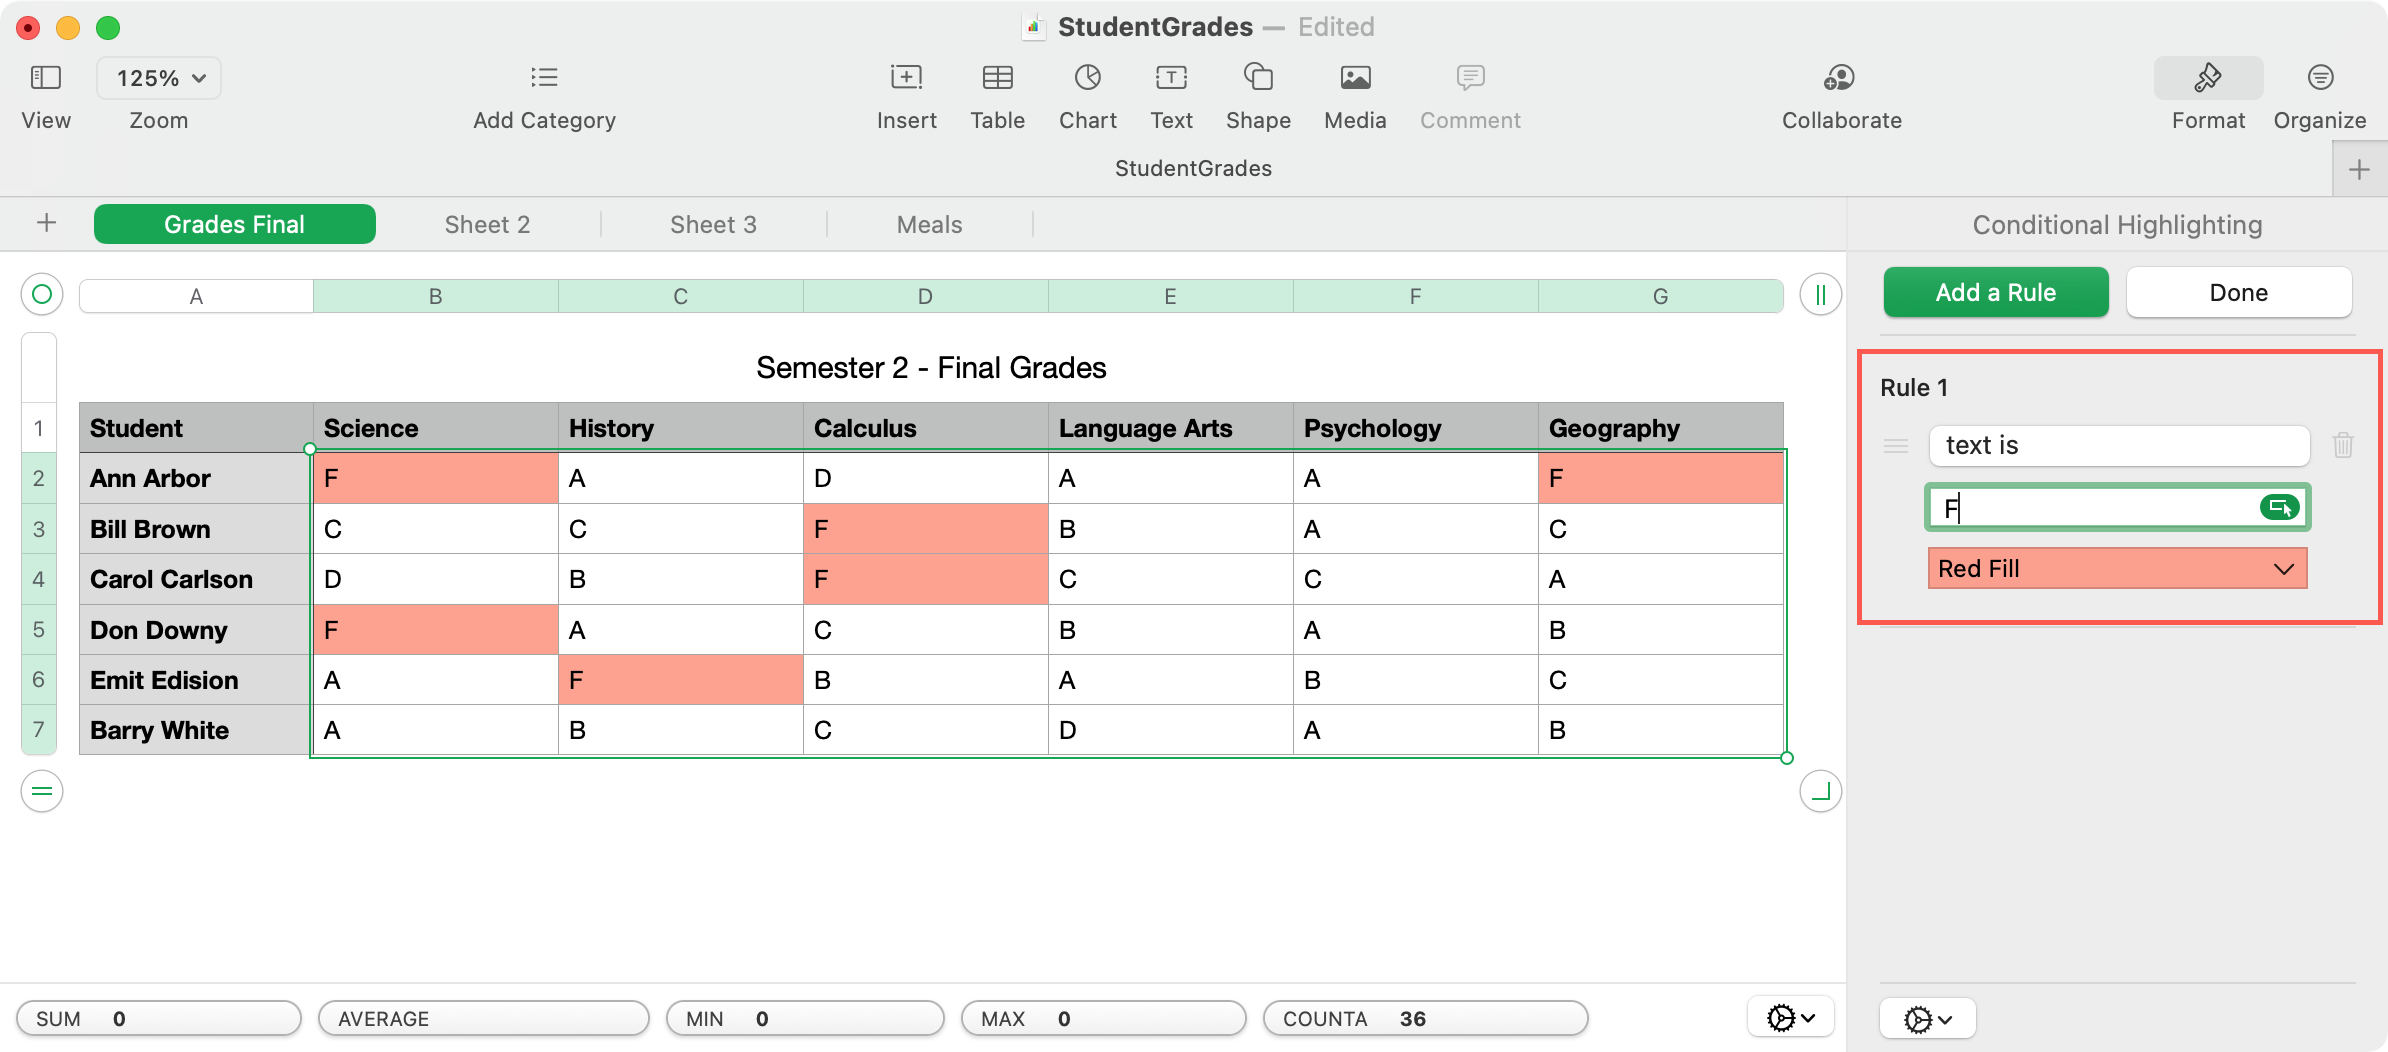
- From the formatting drop-down list, pick Red Fill.
You’ll see the sheet instantly update to fill all cells just as we instructed. Click Done to save the rule.
Edit, Add, or Remove Conditional Formatting
After you add a rule in Numbers, that Conditional Highlighting button converts to Show Highlighting Rules. Click it to edit, add, or remove a rule:
- Make edits in the sidebar and click Done.
- Click Add a Rule to create another.
- Hit the trash can icon to delete a rule.

Conditional Highlighting in Numbers on iPhone and iPad
Open your workbook and select the sheet you want to use in Numbers on your iPhone or iPad:
1) Select the cells to which you want to apply conditional highlighting.
2) Tap the Format icon (paintbrush) at the top.
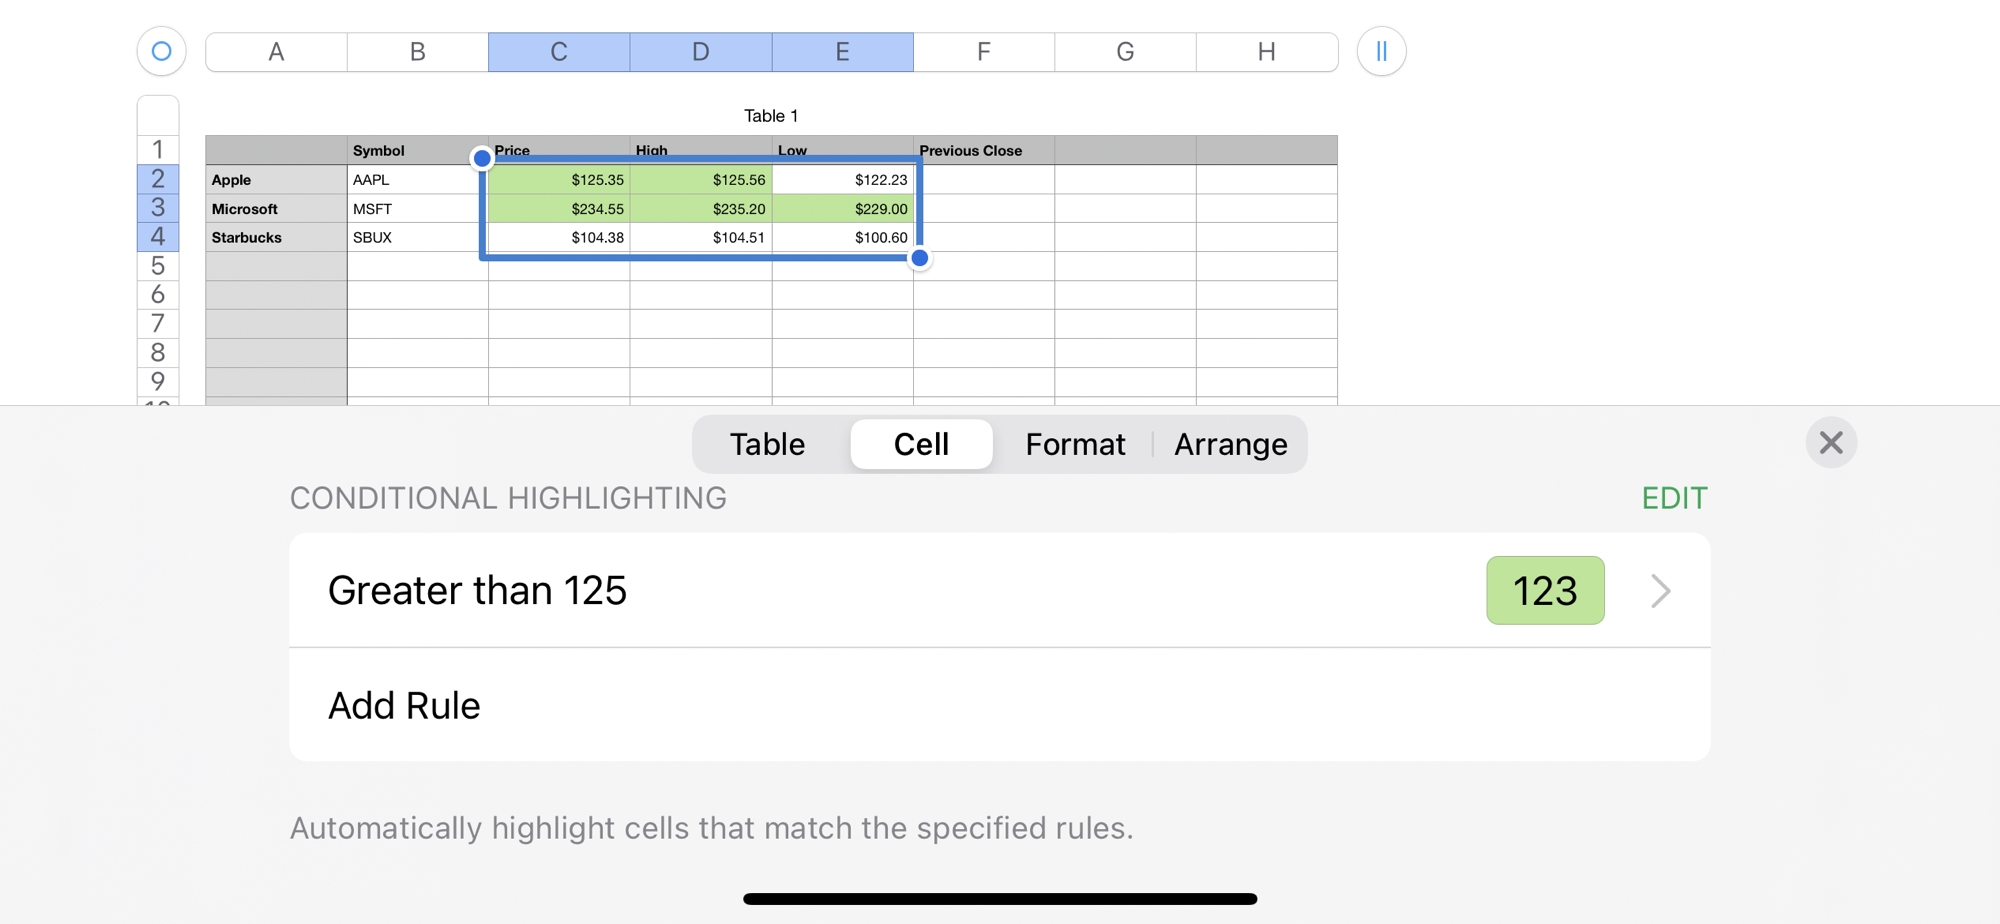
3) Pick Cell and tap Add Conditional Highlighting.
4) Choose the item for the rule and its condition.

5) Add the value for the rule you picked and select the formatting you want to apply.
6) Tap Done.
Your sheet will update, and your highlighting will apply as you set it up.

Edit, Add, or Remove Conditional Formatting
Similar to Mac, the Add Conditional Highlight option changes once you create a rule. To edit, add, or remove a rule, do one of the following:
- Tap the existing rule > paint brush icon > Cell and tap the rule to make changes.
- Pick Add Rule to create another.
- Tap Edit and then the minus sign to delete a rule.
If you want to save time and reduce errors when reviewing your data, consider applying conditional highlighting to make certain data stand out. And if you give this a try and discover some tips you’d like to share, you can comment below.
Numbers tips: