You can compress and bundle several files and folders in a single ZIP file. If you have multiple files you want to send securely for business, financial, or other reasons, you can protect the ZIP file with a password.
Password protection on a ZIP file works irrespective of the operating system on which it’s tried to be opened. So, when you send the password-protected ZIP file created on your Mac to someone using iOS, Android, or Windows, it will still need the right password to unzip and show the contents.
In this tutorial, we show you two free ways to add password protection to ZIP files and lock it.
Use Keka to lock ZIP files with a password
Keka is a tiny app that lets you password-protect ZIP files on your Mac. It is priced affordably on the macOS App Store. However, the app is free if you get it from their website!
1) Download and install Keka on your Mac.
2) Open Keka, and it will show two windows. Close the bigger preferences window.
3) Add a password and repeat it in the smaller Keka window.
4) Drag the folder or files you wish to password protect as a ZIP file on the above Keka window.
5) Choose a location and click Compress.

That’s it!
You have successfully created a ZIP file that’s password-protected (with what you set in step 3 above).
Use macOS Terminal to add password protection to ZIP file
Maybe you’re not big on installing apps that you’ll only use once or twice. And if you don’t mind using Terminal on your Mac, you can use it to password-protect and zip in one fell swoop.
1) Open Terminal from your Utilities folder or using Spotlight.
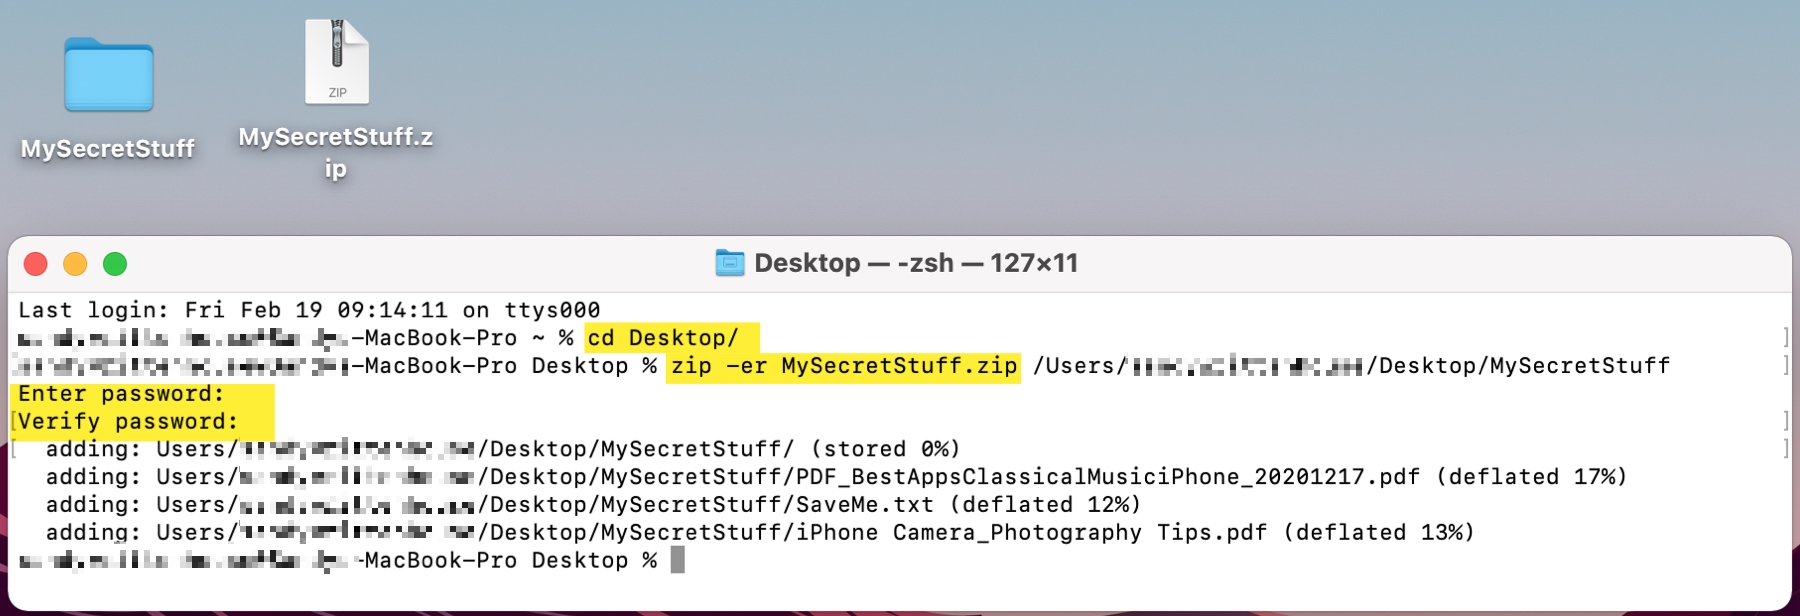
2) If you want to set the directory where you’ll be working with the files, this will save you from hunting down the file once it’s zipped. We’re going to use the Desktop since that’s where our current folder resides. So we’ll enter the following command and hit Return.
cd Desktop/
3) Next, enter the command below and replace FILENAME with the name you want to use for the ZIP file.
zip -er FILENAME.zip
4) Add a space and then drag your file or folder onto the Terminal window and hit Return.
5) You’ll be prompted to enter the password you want to use, so type it in and hit Return. You will not see any characters in the Terminal window.
6) You’ll then be prompted to verify the password, and again, you won’t see any characters in the command line. Hit Return.
You should then see your ZIP file in the directory, in our case it’s our Desktop.
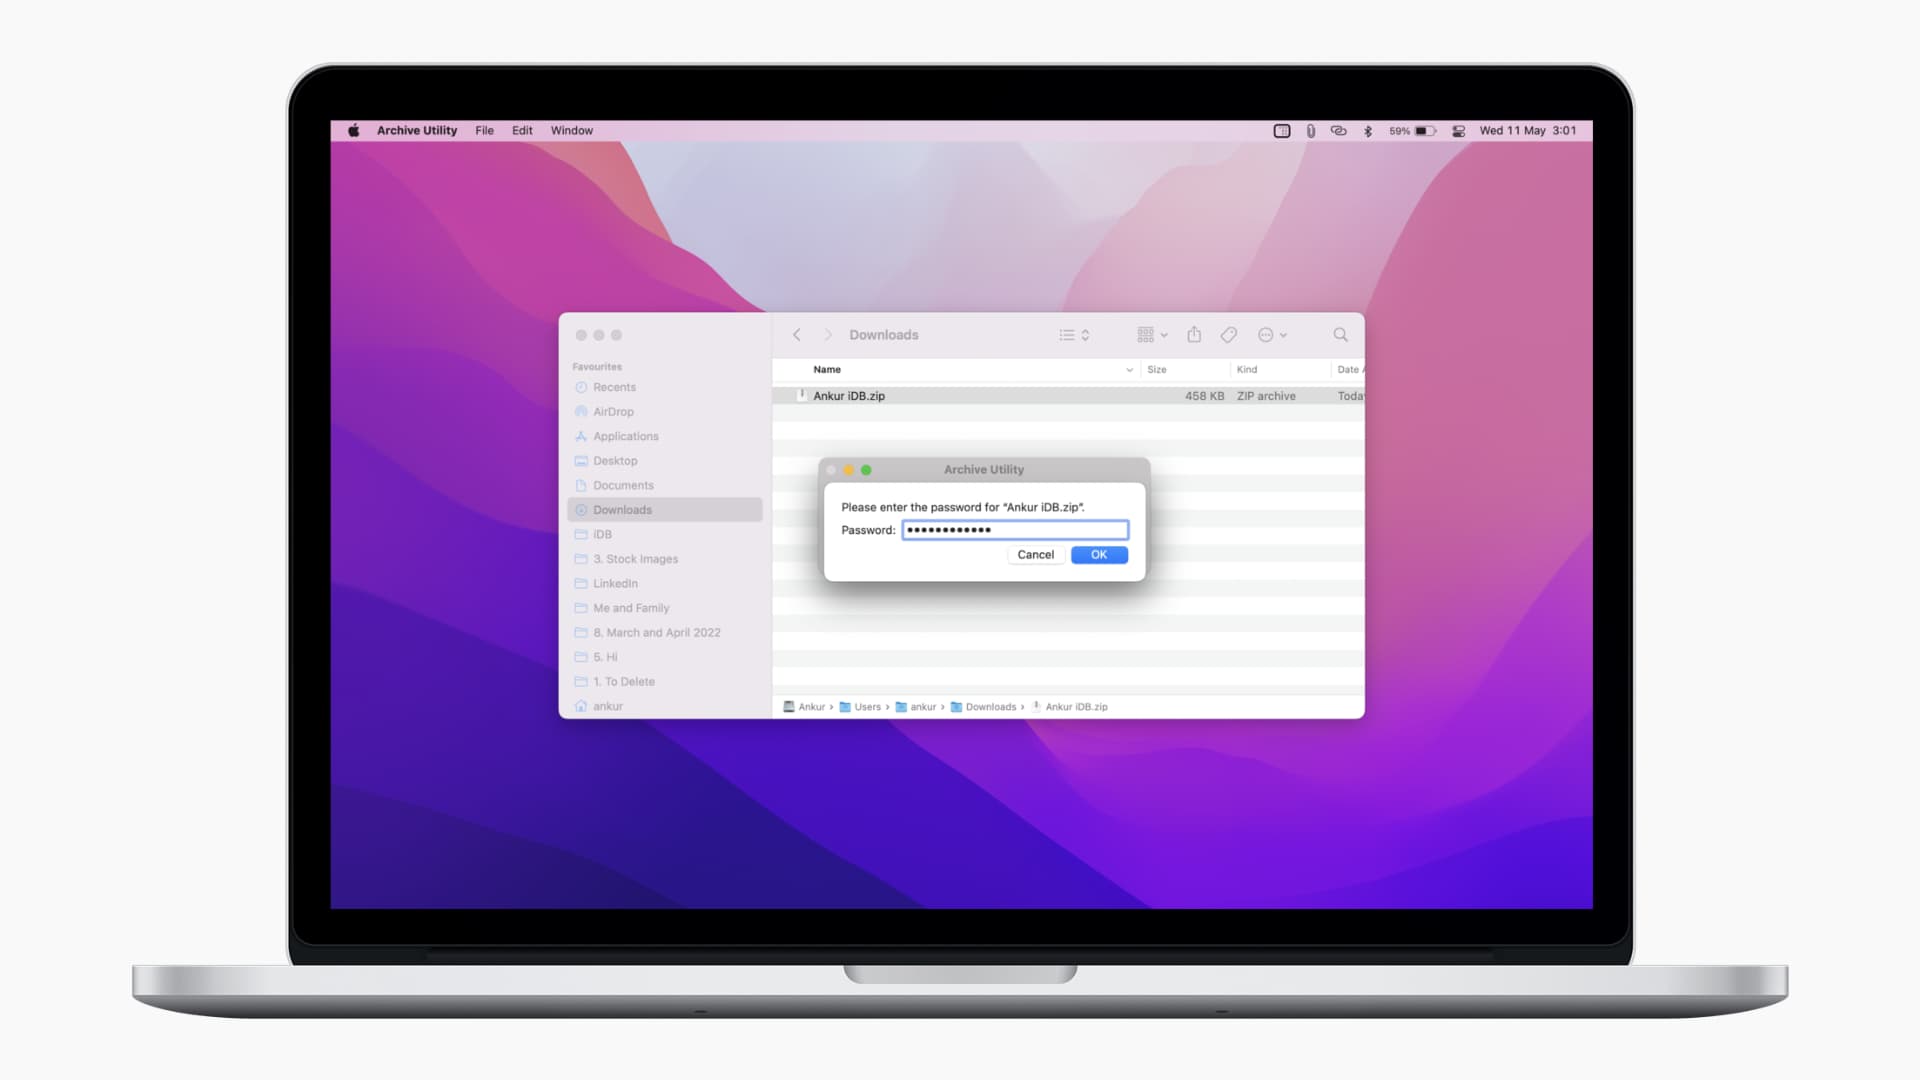
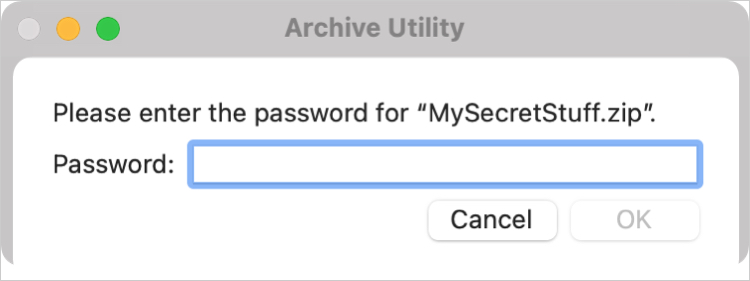
Click to open and unzip the file and you should be prompted for the password.
Whether you decide to go with a free app or use Terminal, you can password-protect a ZIP file on your Mac in no time. Which option will you select or do you have another method you’d like to share?
Check out next: