Learn how to move blocked sender emails to the trash in Apple Mail on iPhone, iPad, and Mac to keep your inbox clean of unwanted emails.
It may seem odd that when you “block” an email sender in the Mail app, you still receive emails from them. How it works is that the email will still land in your inbox but be marked as blocked. You can then do what you like with the email. But most times, you’re going to delete it, right? Otherwise, why block the sender in the first place if you want to see their emails?
Do you want to eliminate the need to take another action to remove those messages from your inbox? If so, here’s how to automatically move blocked Mail to the trash on both iOS and macOS.
Move blocked emails to the trash
This is a simple adjustment that you need to follow separately on each Apple device you own.
On iPhone and iPad
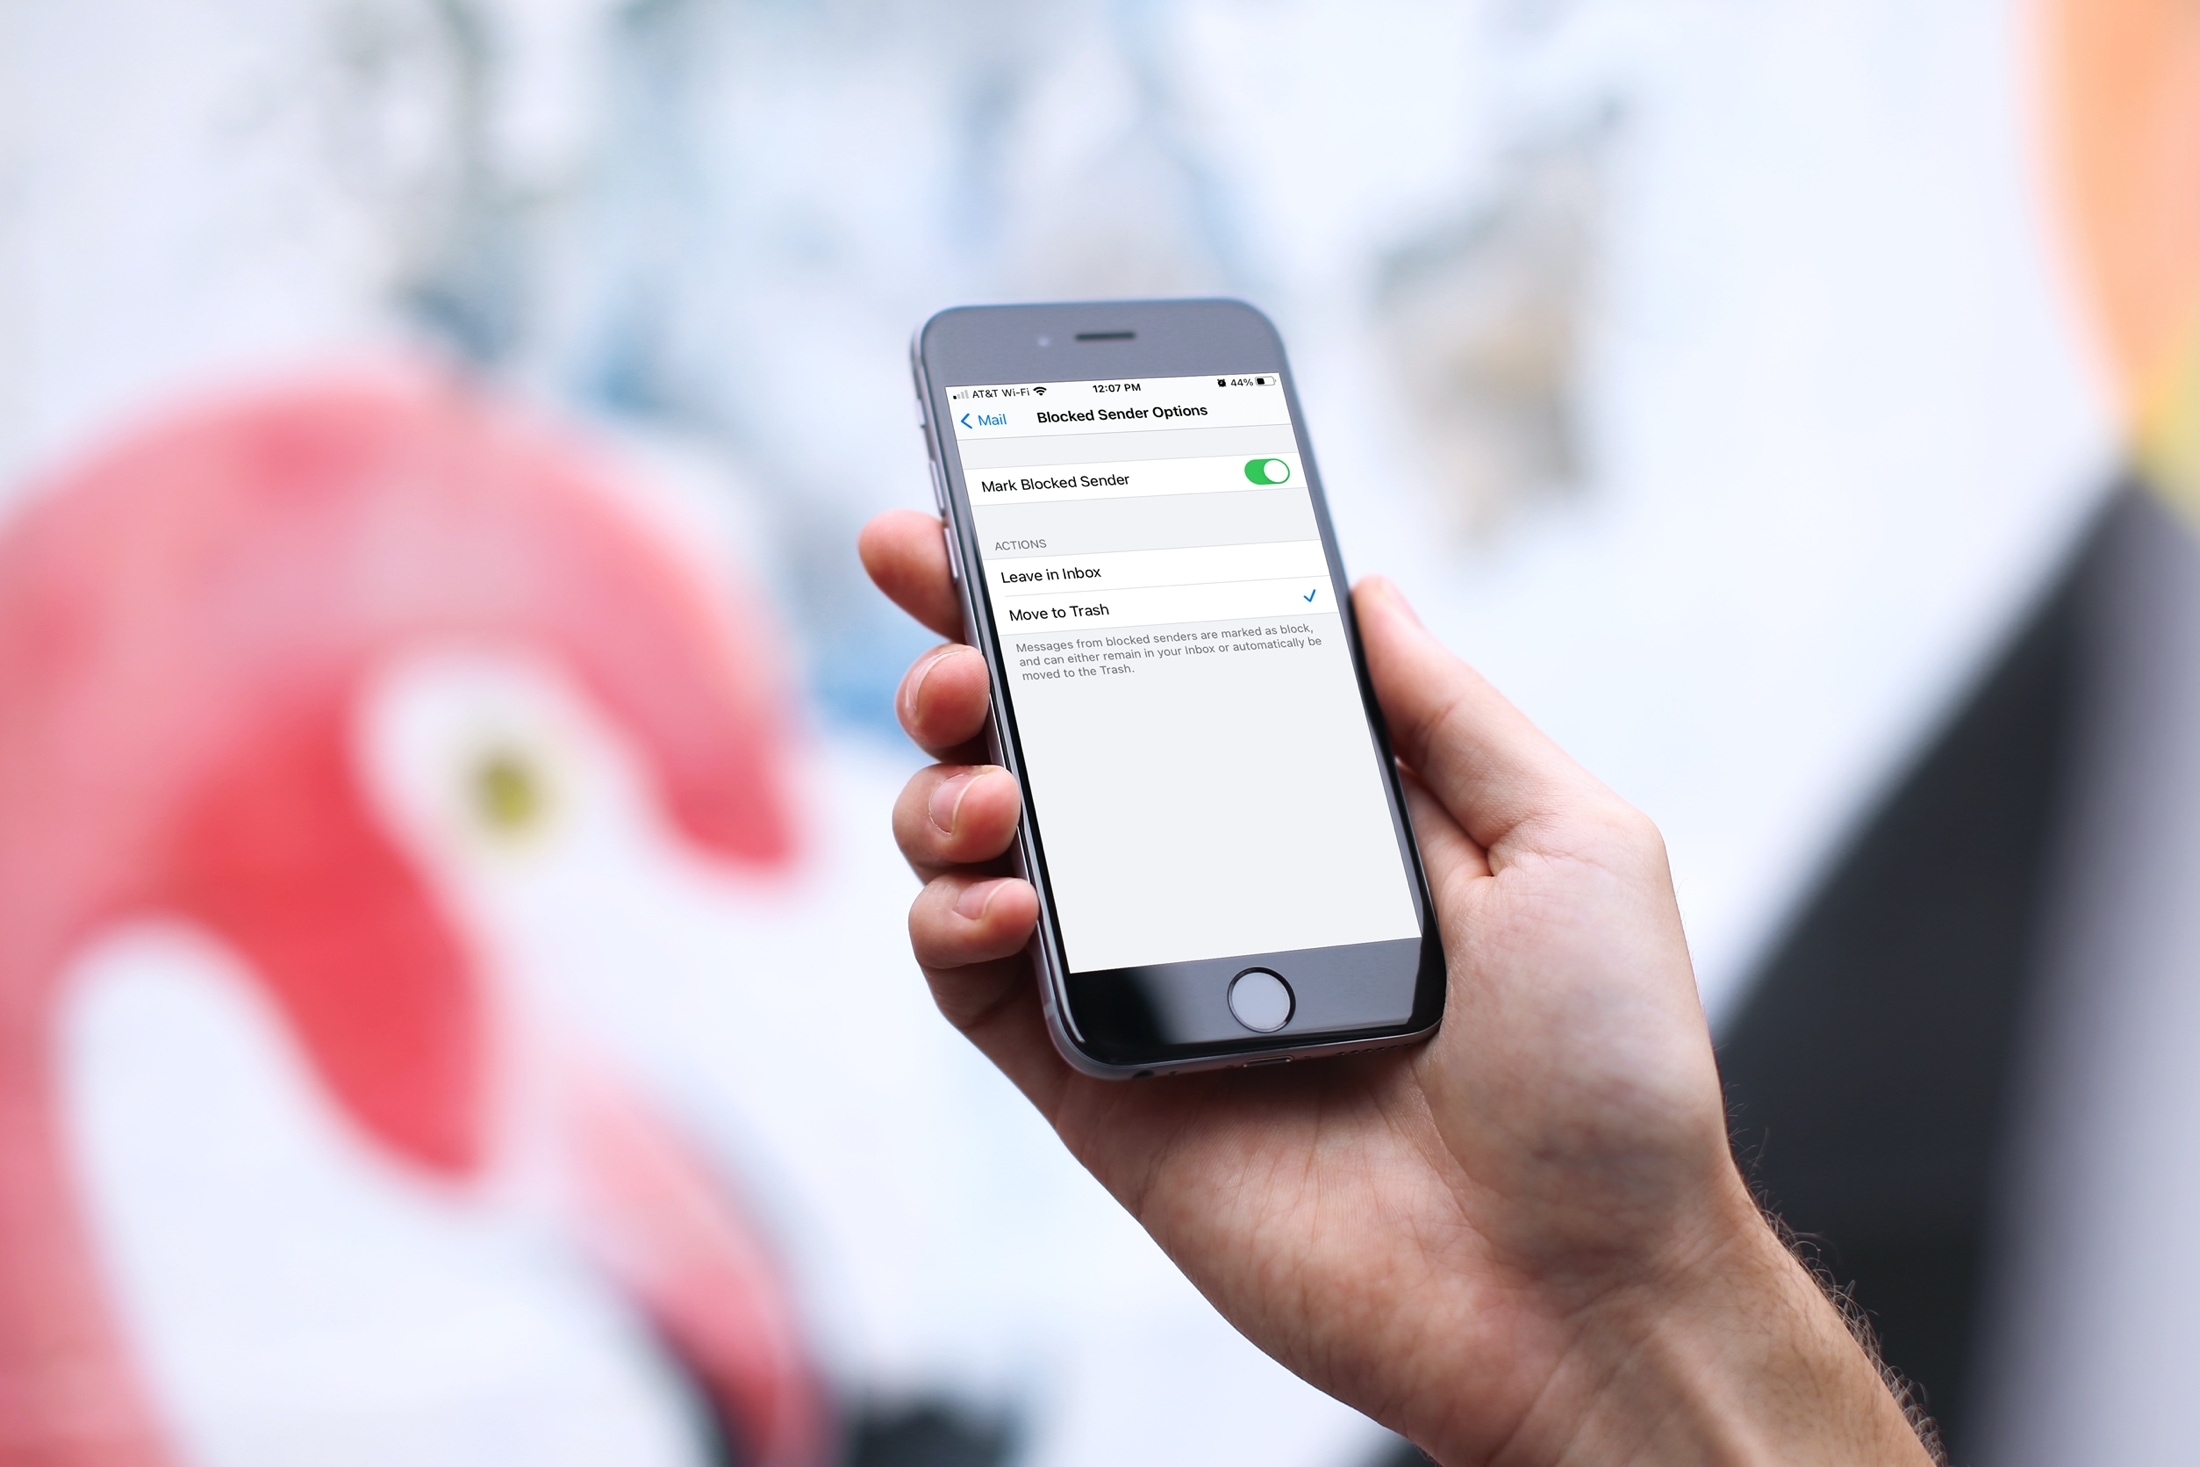
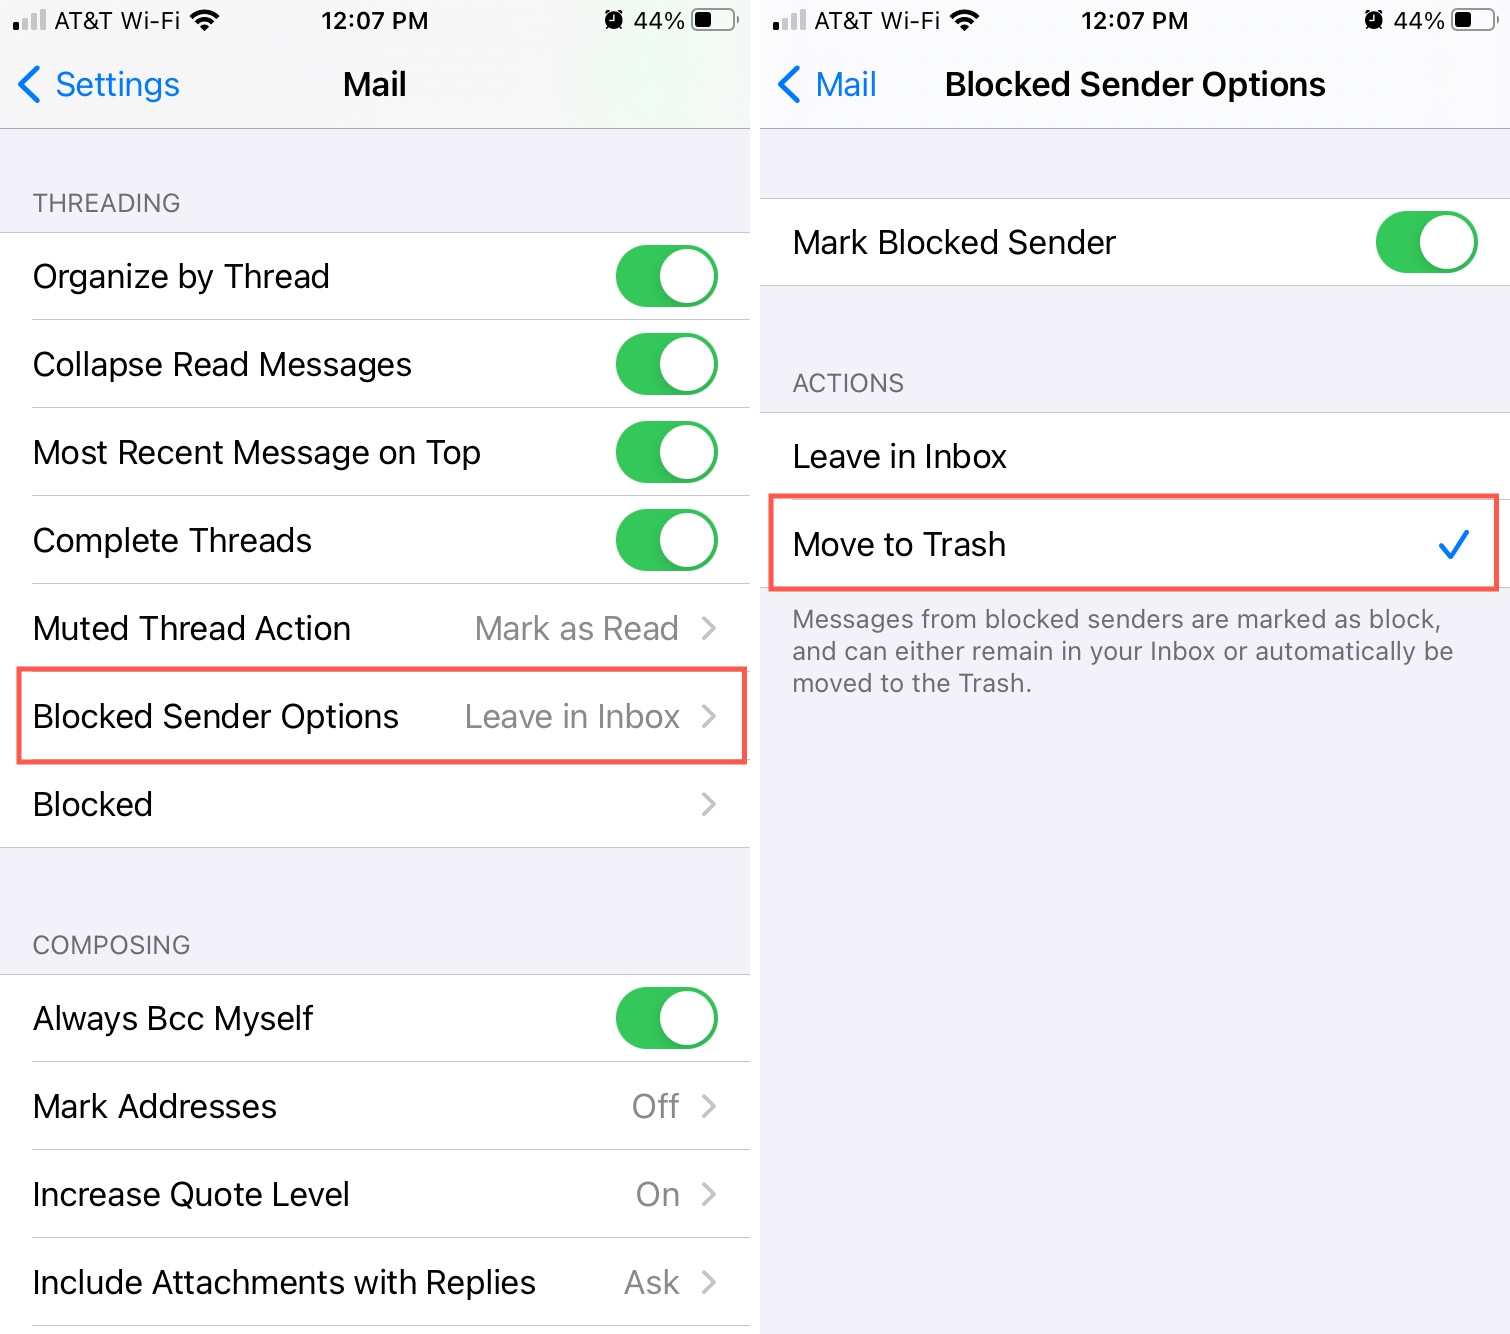
- Open the Settings app and select Mail.
- Scroll down to the Threading section and tap Blocked Sender Options.
- Choose Move to Trash.
- Optionally, you can use the toggle at the top to Mark Blocked Sender if you like. However, this setting is more convenient if you want to leave blocked emails in your inbox.
Tap the arrow at the top to exit these settings and the Mail settings altogether. Or simply close the Settings app.
On Mac
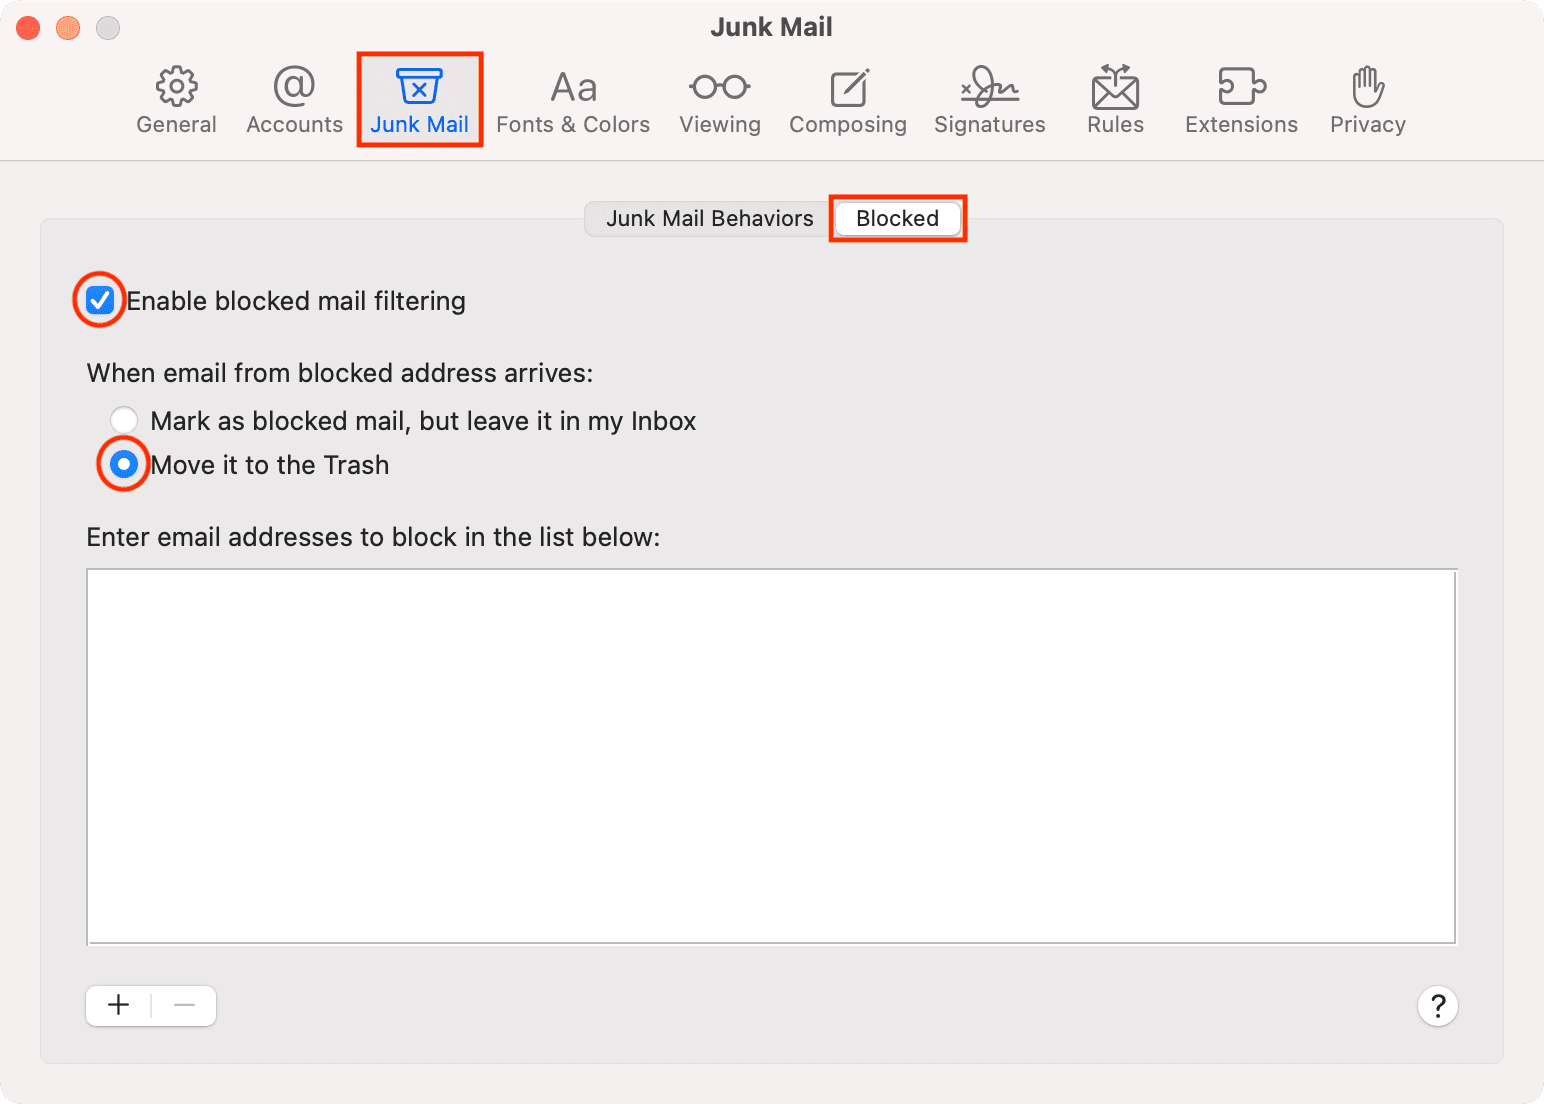
- Open the Apple Mail app and click Mail > Settings or Preferences from the top menu bar.
- Select the Junk Mail tab.
- Go to the Blocked section.
- Check the box for Enable blocked mail filtering if it’s not already.
- Mark the option for Move it to the Trash.
You can then close the Mail Settings window if you’re finished.
Other tips for the Mail app: