This tutorial shows you how to create and use forms in the Numbers app on iPhone and iPad to quickly and easily enter data in your spreadsheets.

Working with a spreadsheet isn’t particularly difficult if you’re just entering data yourself. But if you’re collecting information from other people or just want an even simpler way to input data, you can use a form.
Basically, you create a form, link it to a table, and then use the form for your data entry. And if you use Numbers on iPad with Apple Pencil, you can take advantage of handwriting data in the form, too. So, if you’re ready to make data entry on your device easier, here’s how to create and use forms in Numbers.
Create a form in the Numbers app
So that you get a clear view, we’re going to walk through this tutorial using Numbers on iPad. But the steps are the same if you use the app on your iPhone.
1) Open up the Numbers app and then create a new workbook or open an existing one where you want to set up the form.
Tip: It’s easier to start with a sheet you’ve already created so that you can just link to the table within it.
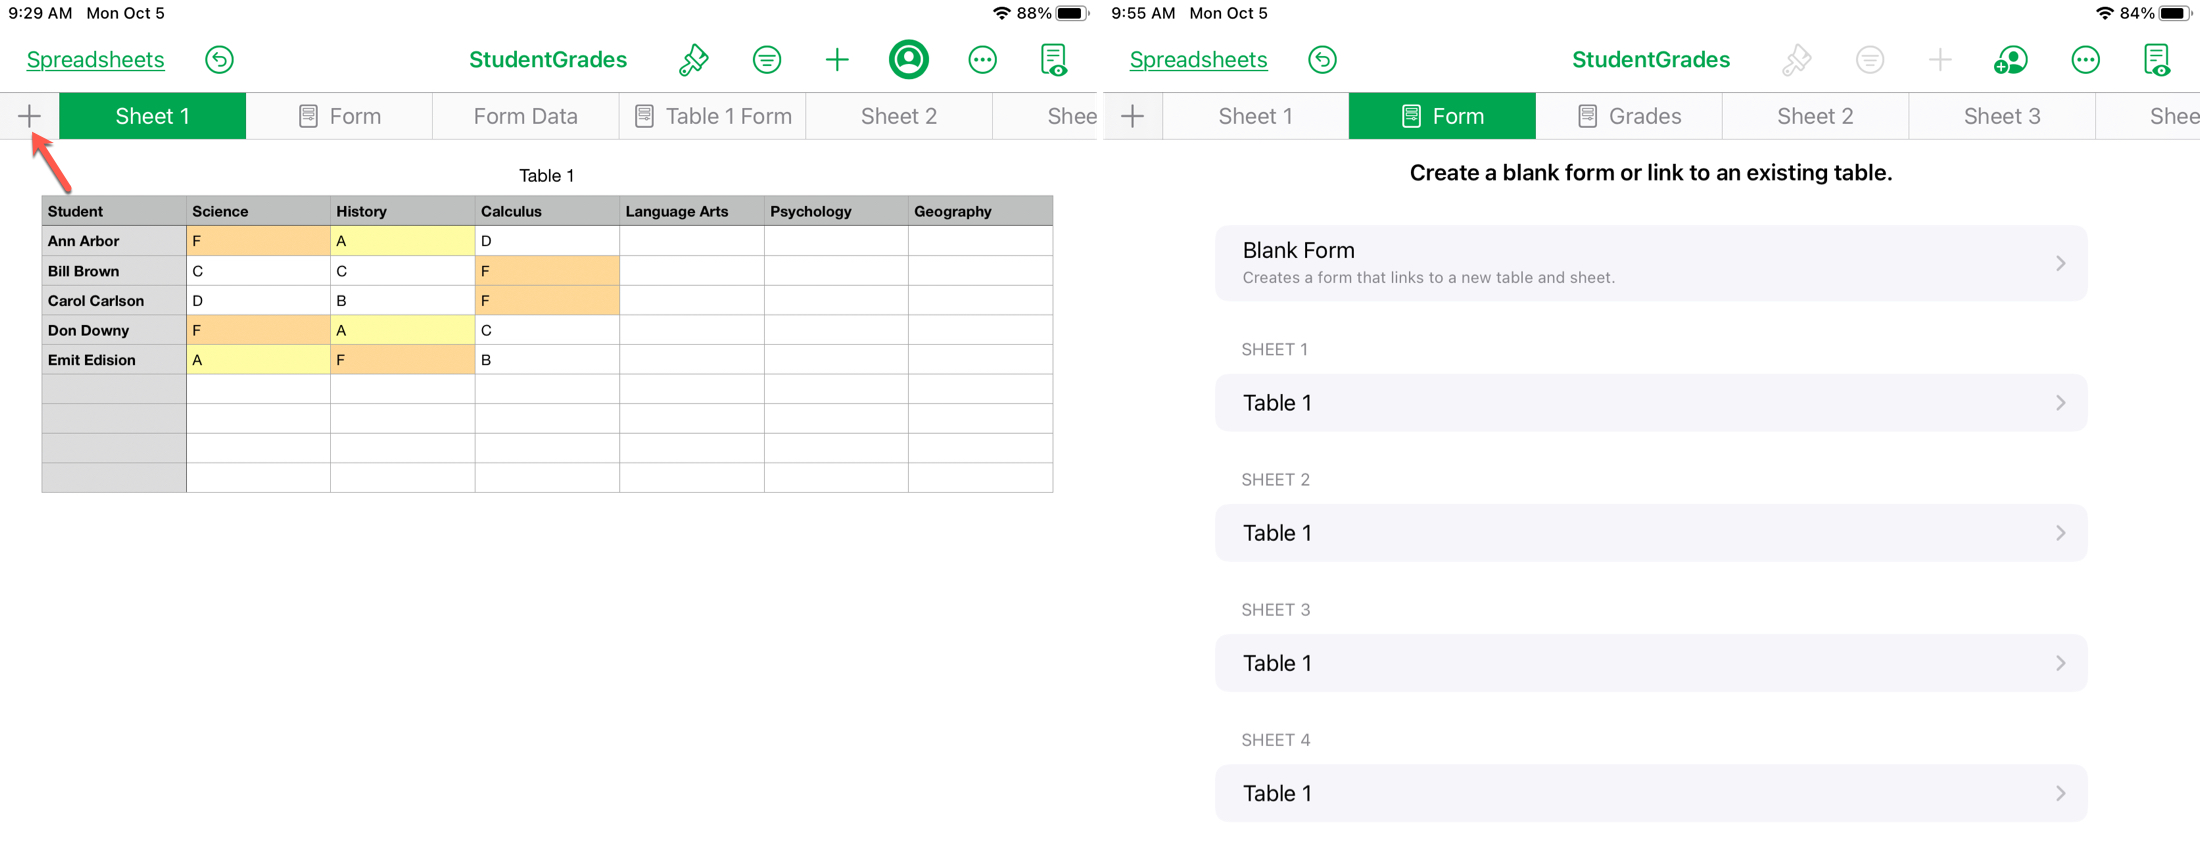
2) On the top left of the sheet, in the tab row, tap the plus sign and select New Form.
3) If you want to create a new table, tap Blank Form. This will create a blank linked table in a new tab labeled Form Data.
If you want to use an existing table, you can choose from the sheets and tables you already have.
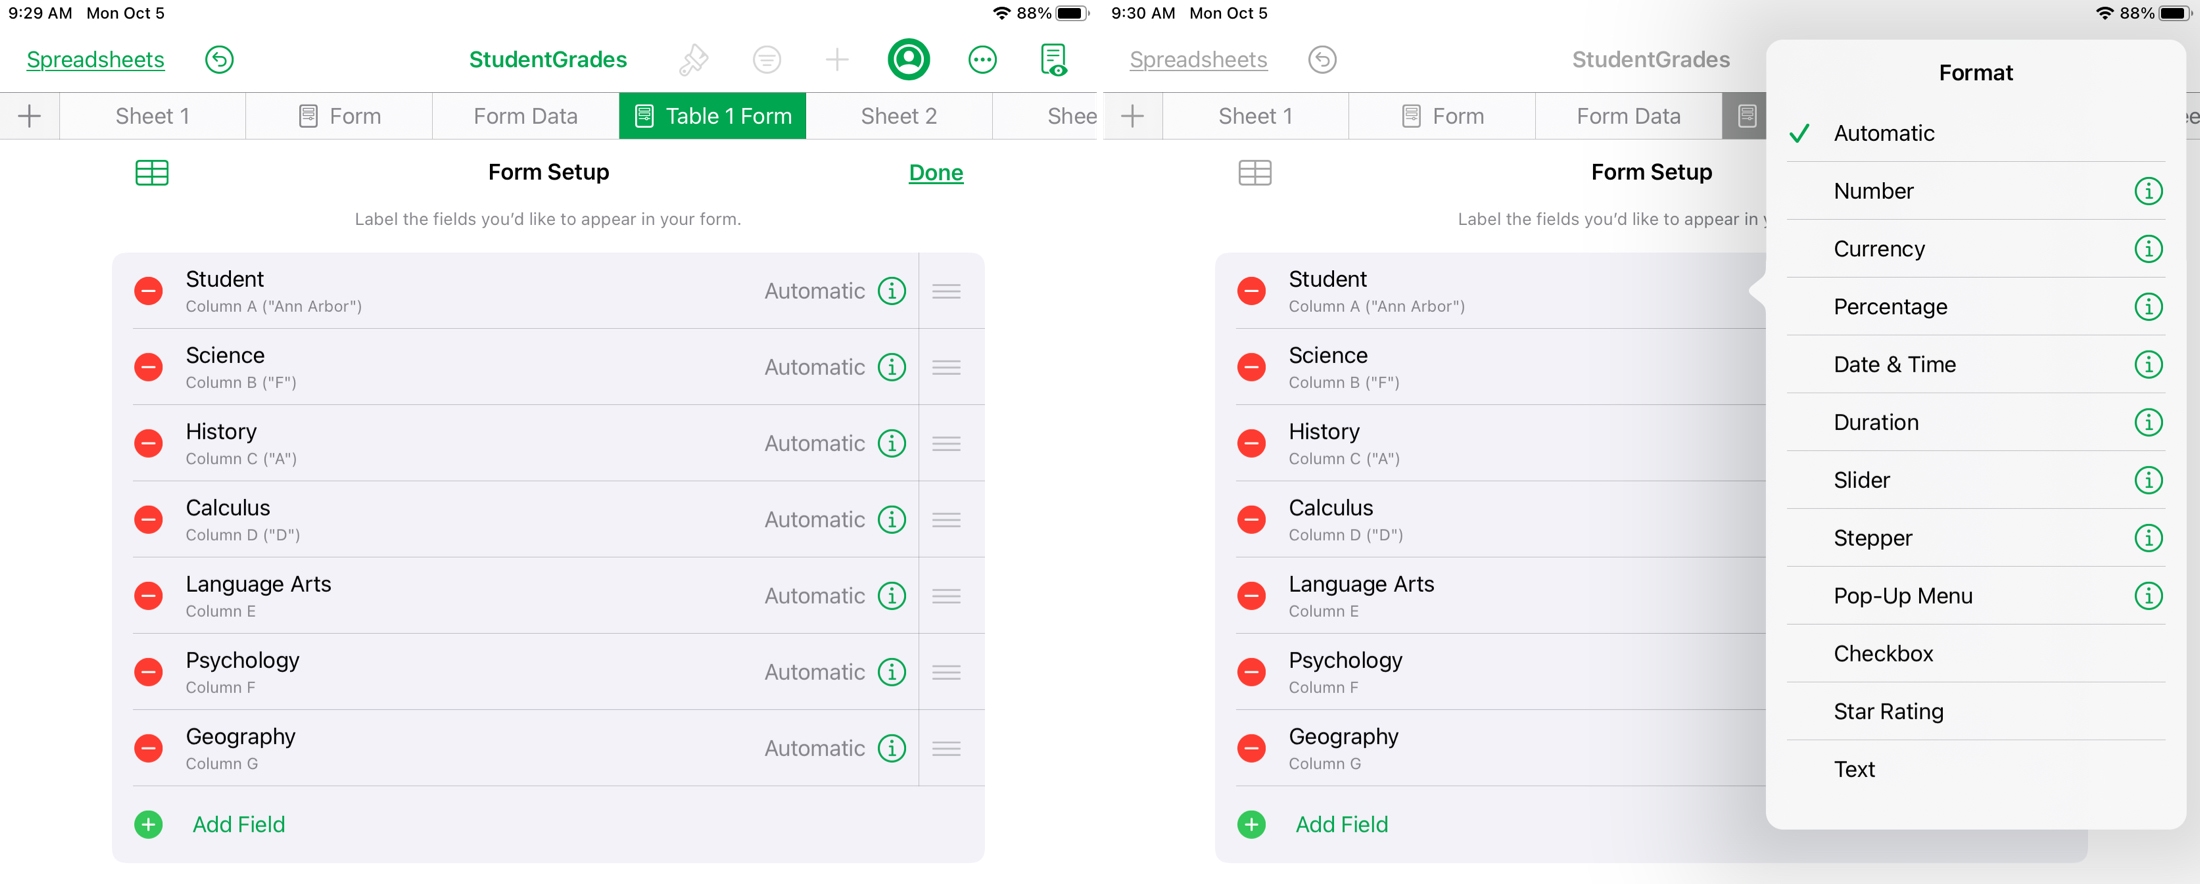
4) Your form will open in a new tab for you to edit and customize with fields and labels. Tap the gear icon to open the Form Setup screen.
5) You will see the rows and columns with their headers. From there, you can:
- Drag to rearrange the order.
- Tap the minus sign to remove one.
- Tap the Info icon to adjust the format.
- Tap a label to change it.
- Add another field. This will also add a new column to your linked table.
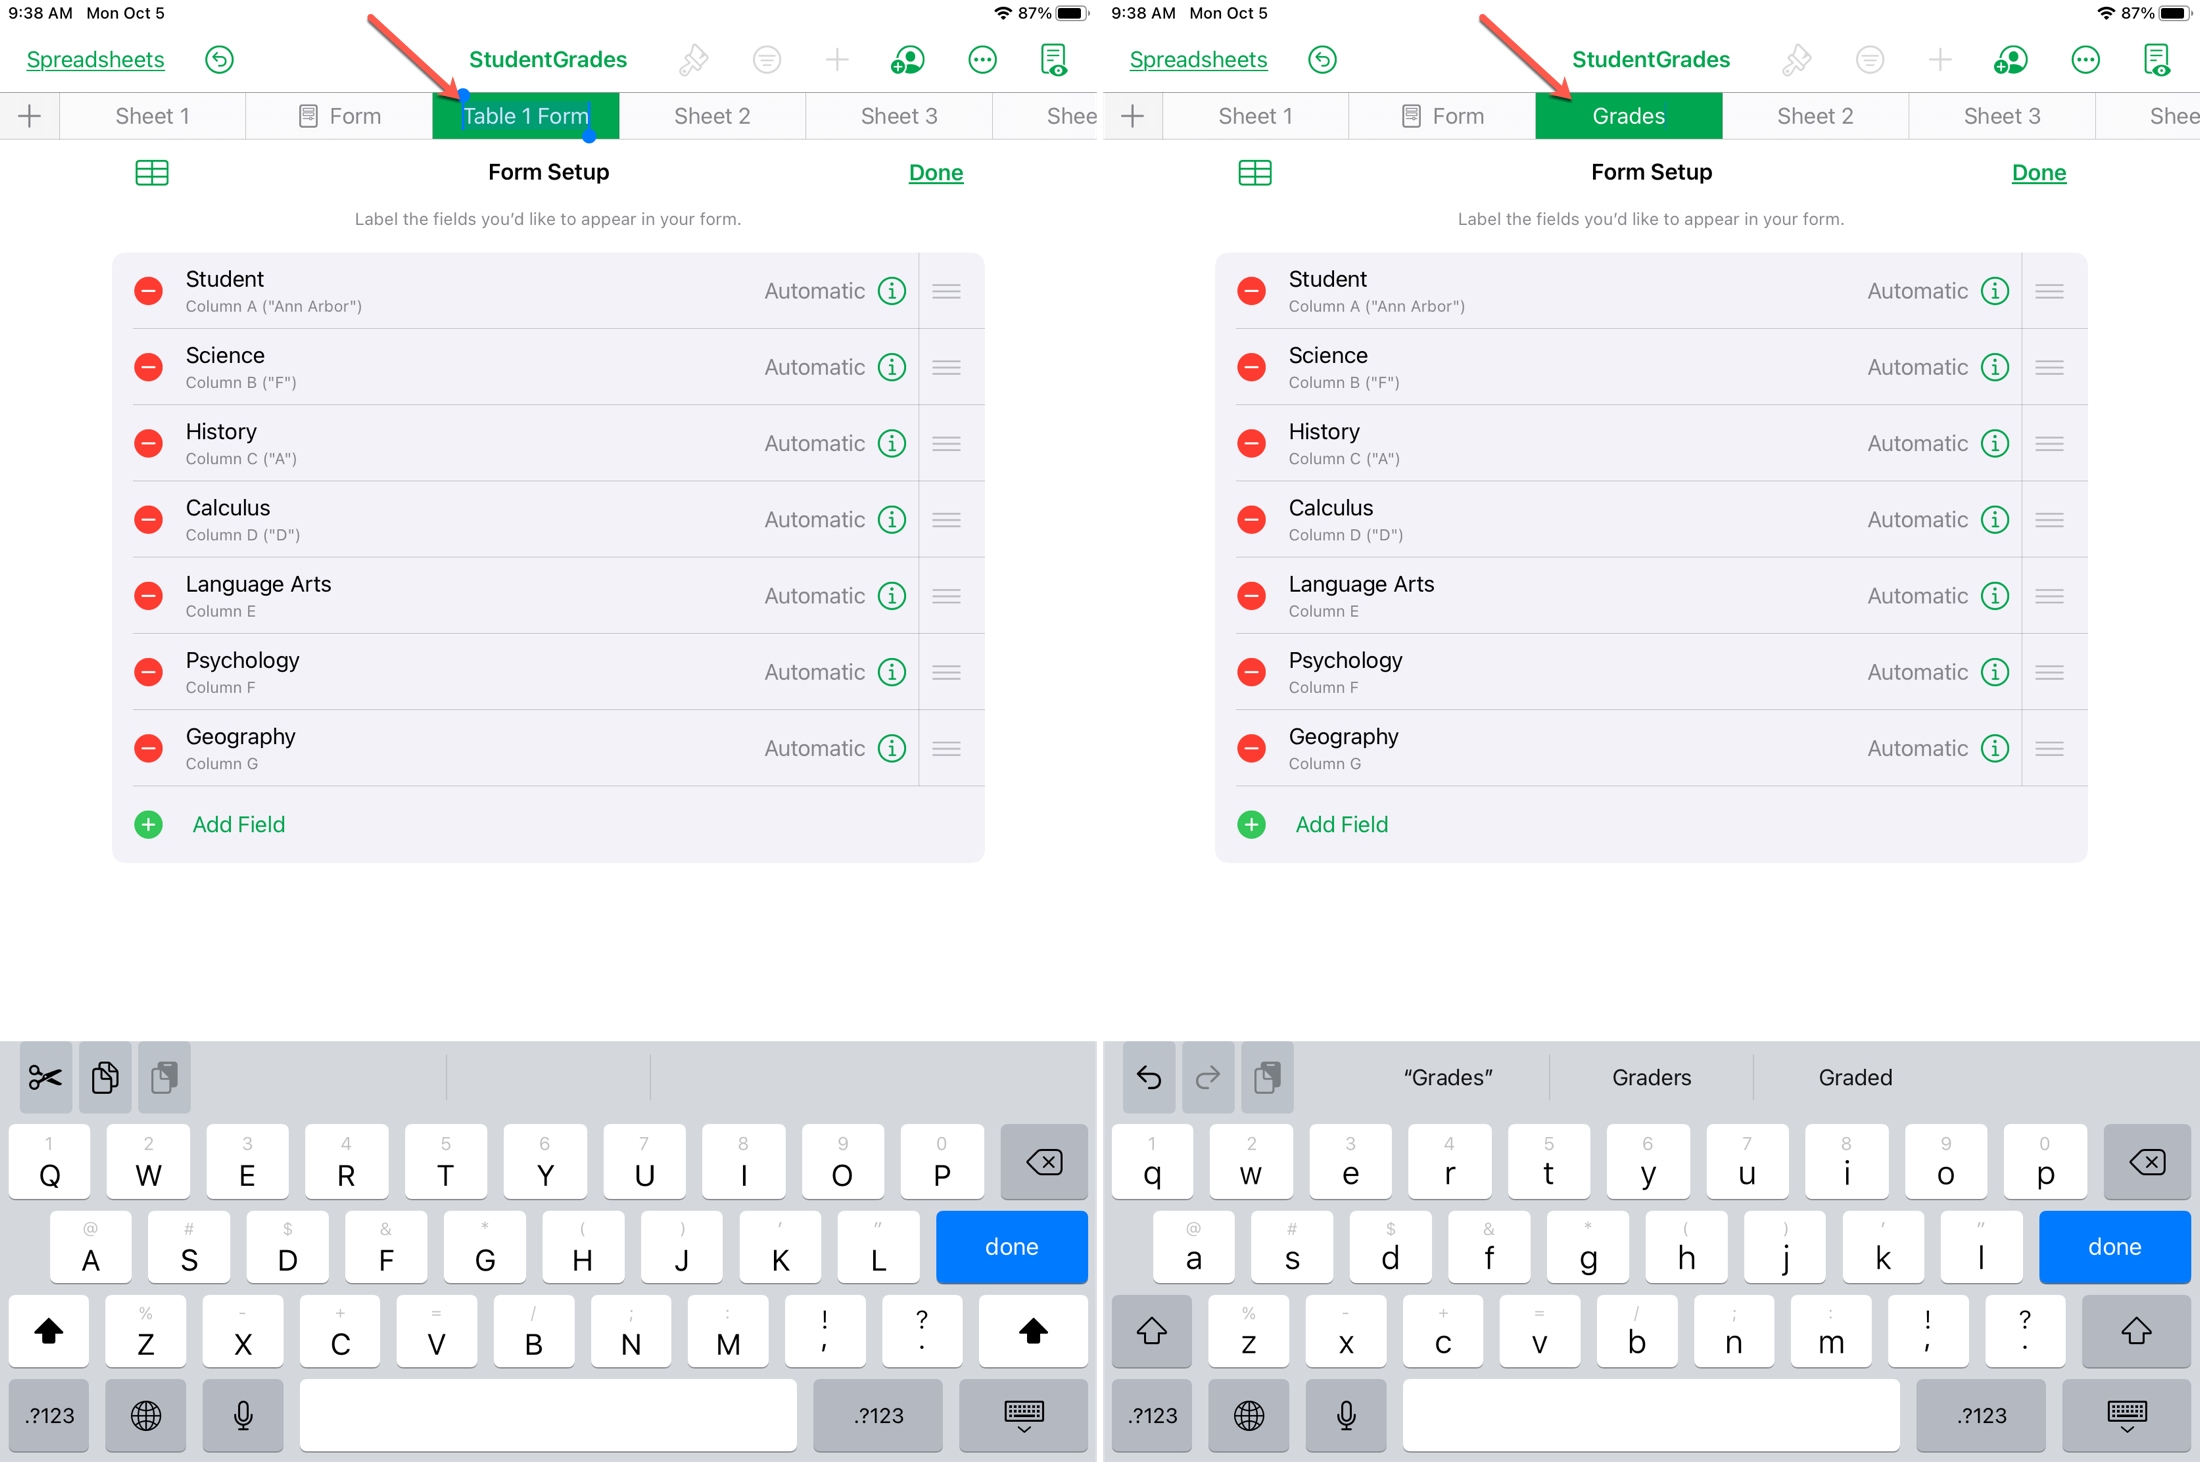
6) When you finish setting up your form, tap Done.
To rename your form, double-tap the name in the tab, give it a new name, and tap Done on the keyboard.
Use your form in Numbers
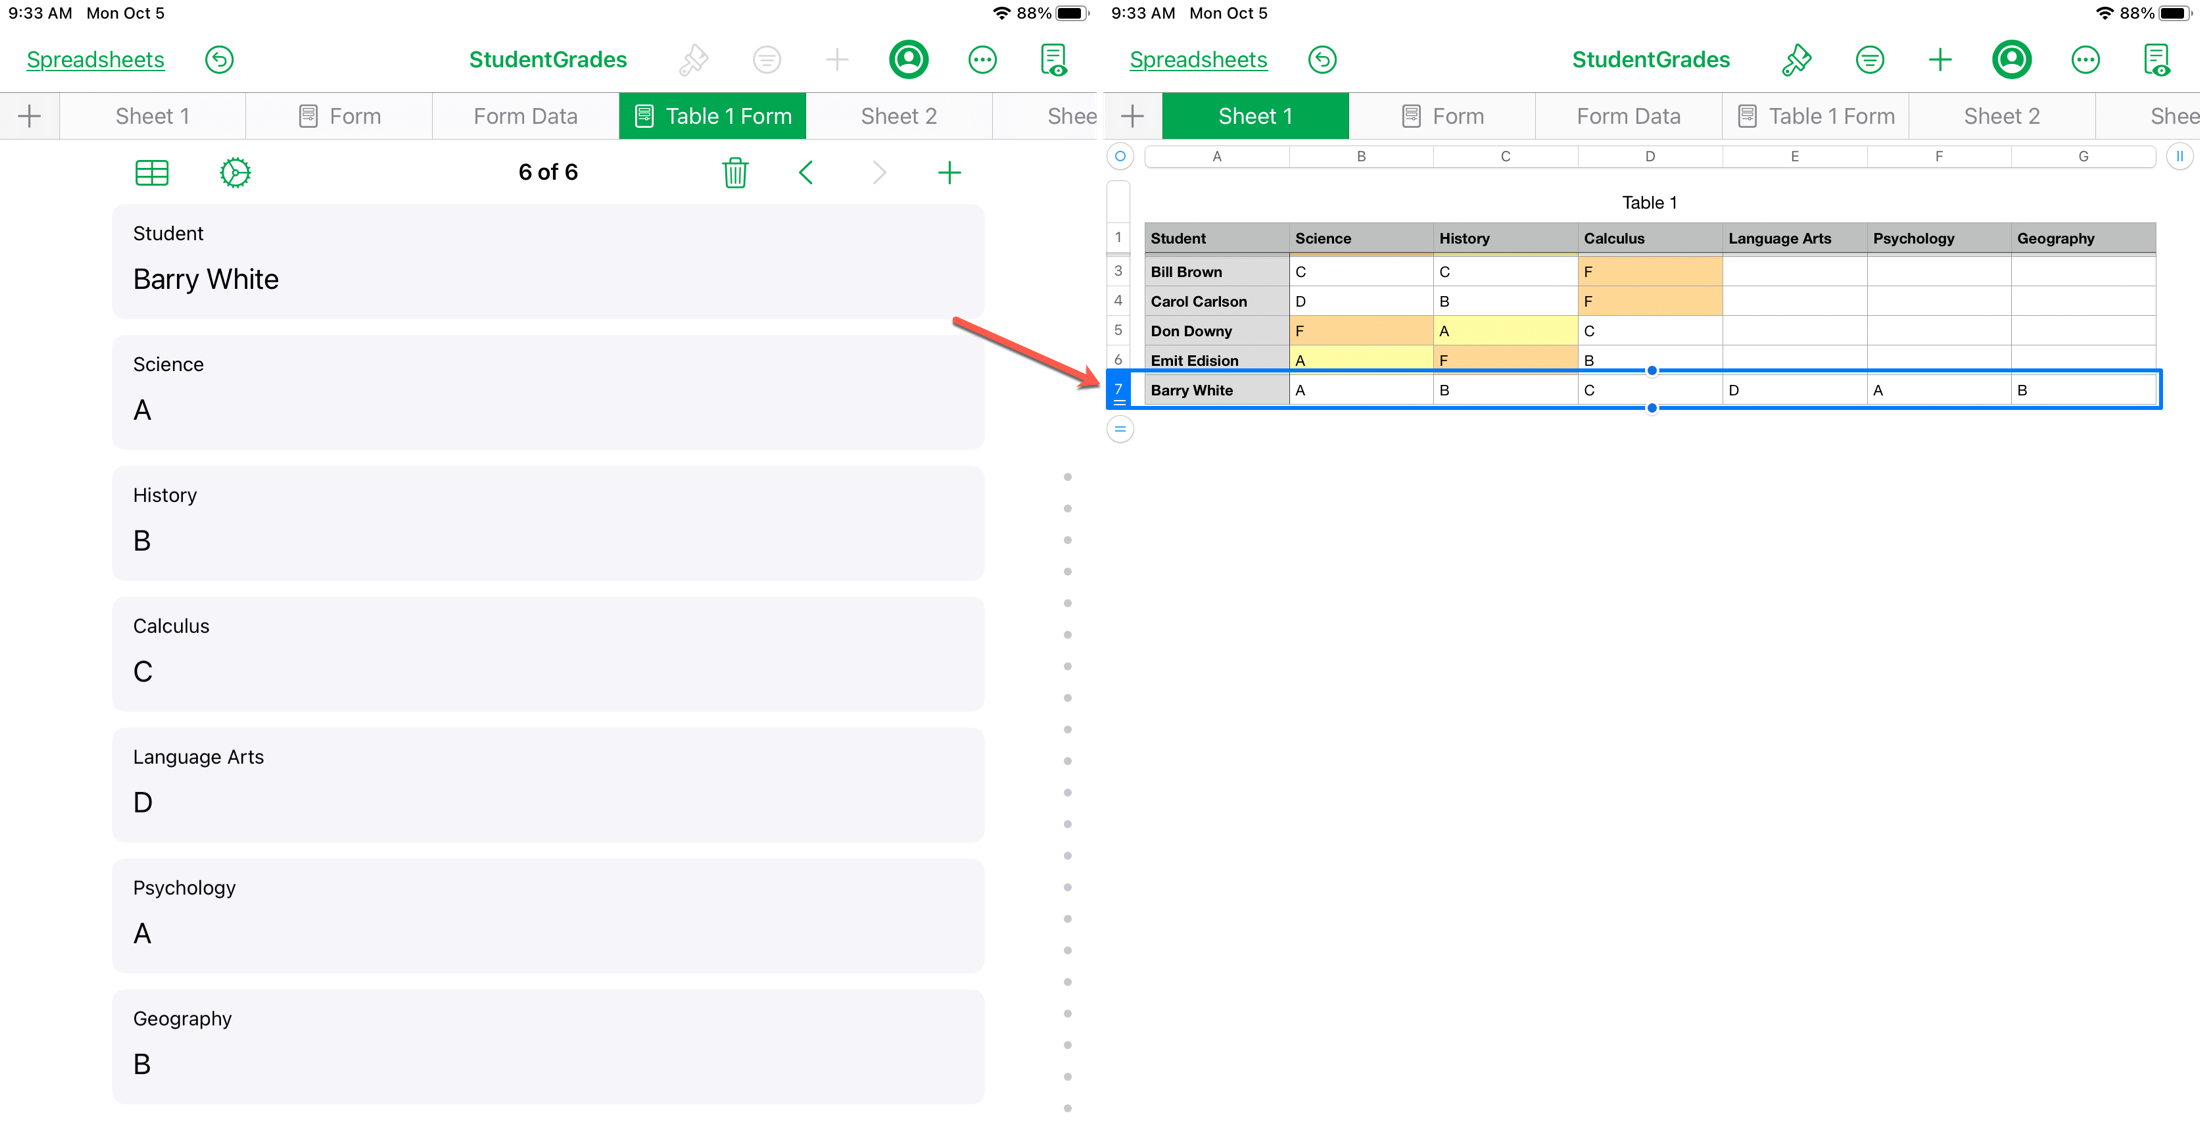
When you want to enter data into your form, just tap the form name in the tab row. You’ll see the first record in the linked table.
- Use the arrows at the top or dots along the right side to move between each record.
- Tap the plus sign to add a record. This will add a record (and table row) right after the previous one. So, if you want the record at the end of the form and the table, use the arrows or dots to move to the last record and then tap the plus sign.
- Tap the trash can icon to delete a record.
The number for each record in your form corresponds to the record number in your linked table. Remember, this is not the row number because your first row is a header row.
To view the data in the linked table, tap the table icon on the top left of the form next to the gear icon.
Note: Here are a few additional notes for using forms in Numbers.
- You can change a form’s setup at any time by tapping the gear icon.
- If you add or edit data directly in the linked table, this will add or edit it in the form as well. So, you can still work with data in the table for that sheet if you like.
- Using an Apple Pencil on iPad? If you handwrite data into the form fields, it will automatically convert it to typed text and fill in your form and table as if you used your keyboard to enter it.
Related: How to use handwriting in text boxes with iPad and Apple Pencil
You can create a form in Numbers and use it for all sorts of data entry. For contact details, finances, weight tracking, customer information, or in our screenshots above, grade tracking, a form lets you quickly and easily add your data.
Will you set up and use a form in your next Numbers task on iPhone or iPad?
Related tips: