Looking for some photo editing tips for Preview on Mac? This tutorial and video will walk you through removing the background and adding a mask or loupe to the image.
To make edits to photos on your Mac, you don’t have to invest in an expensive photo editing app or piece of software. The built-in Preview app provides you with tools for making changes to your photos and other images that you might not even realize.
For performing edits like removing a background, applying a mask, or adding a loupe, Preview has you covered. And our helpful video tutorial shows you how to do all three of these photo editing tips.
1. Remove a background
There might be a time when you want to keep the focus subject in your photo by removing what’s behind it. At the same time, you may want to take that subject and use it elsewhere. Whatever the case may be, you can remove an image background with Preview on Mac.
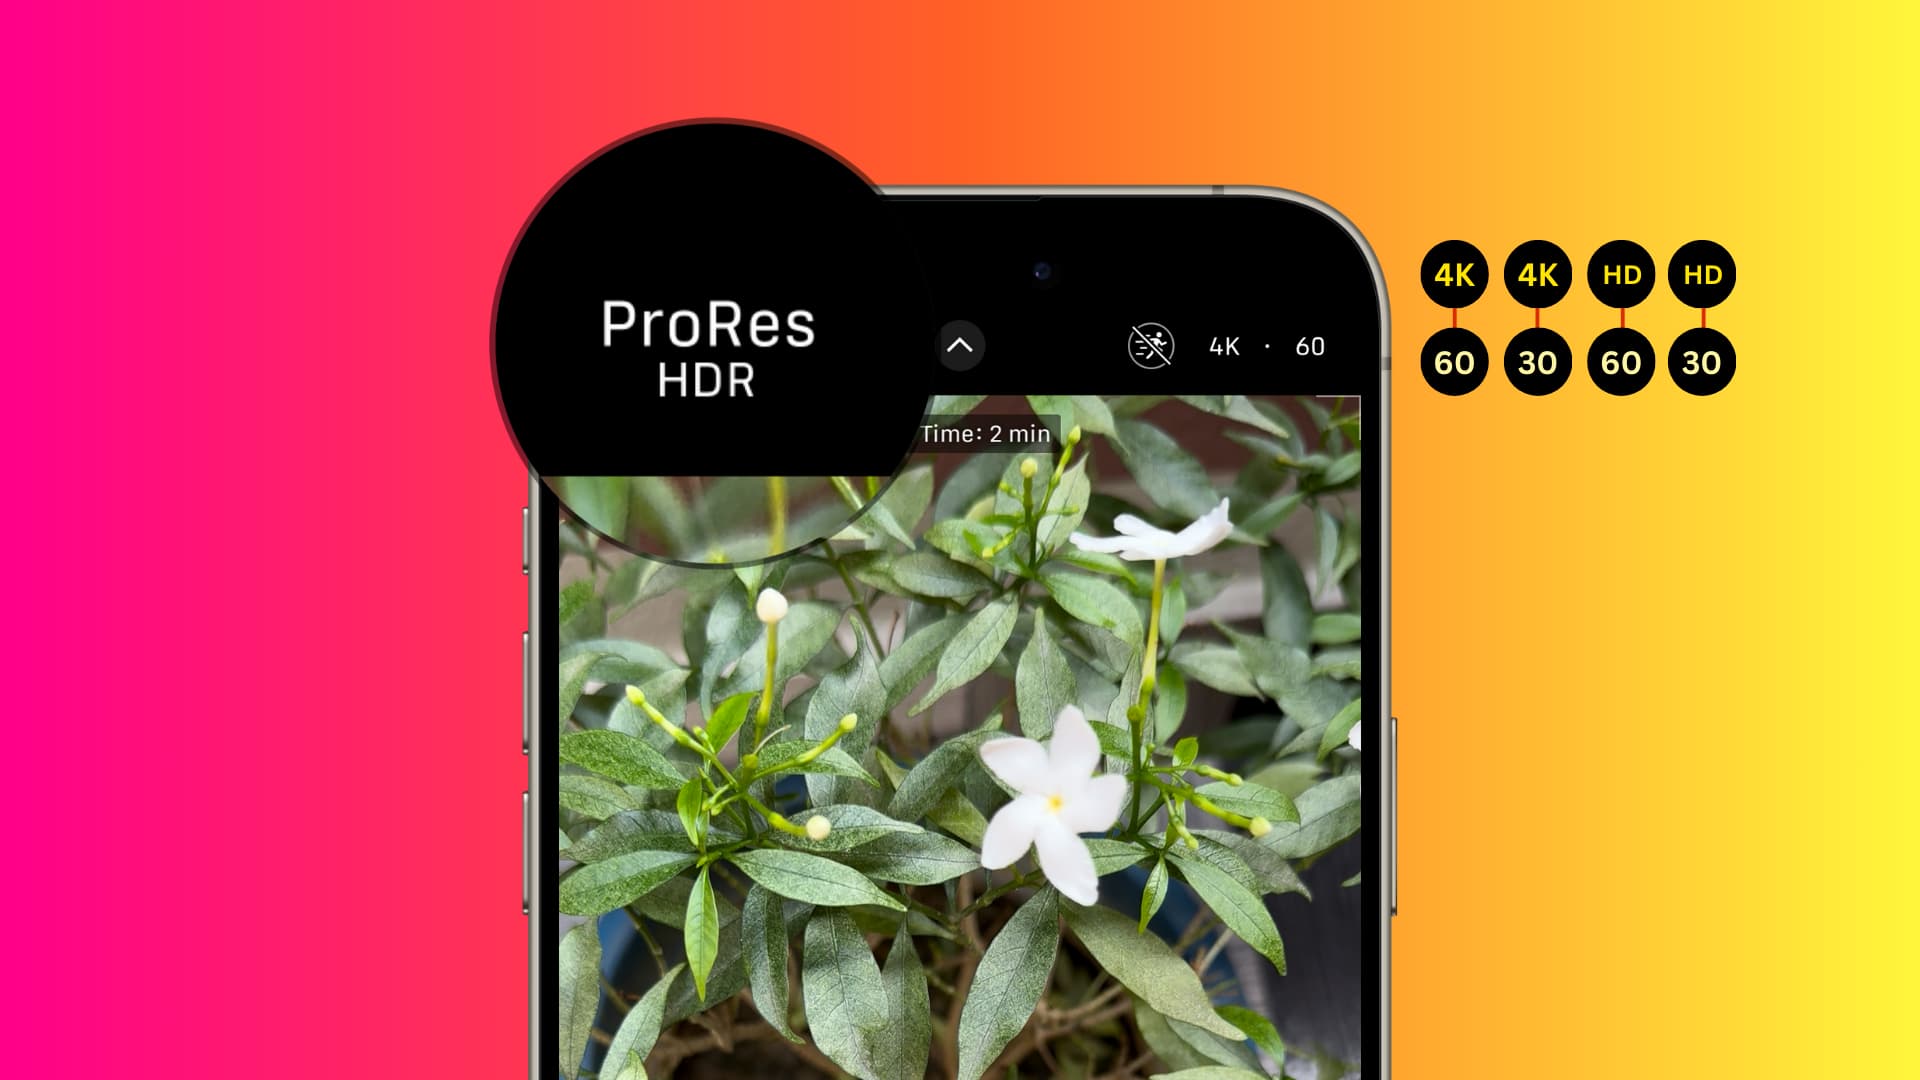
2. Add a loupe
A loupe is super handy for magnifying certain portions of your image. You can resize the loupe and enhance the amount of zoom for the magnification. Plus, you can change the border of the loupe to a color or dotted line. To use this option, click Tools > Annotate > Loupe or press Control + Command + L. For your visual clarity, here’s an image I made using the loupe feature in Preview to enhance the words ProRes HDR in the image.
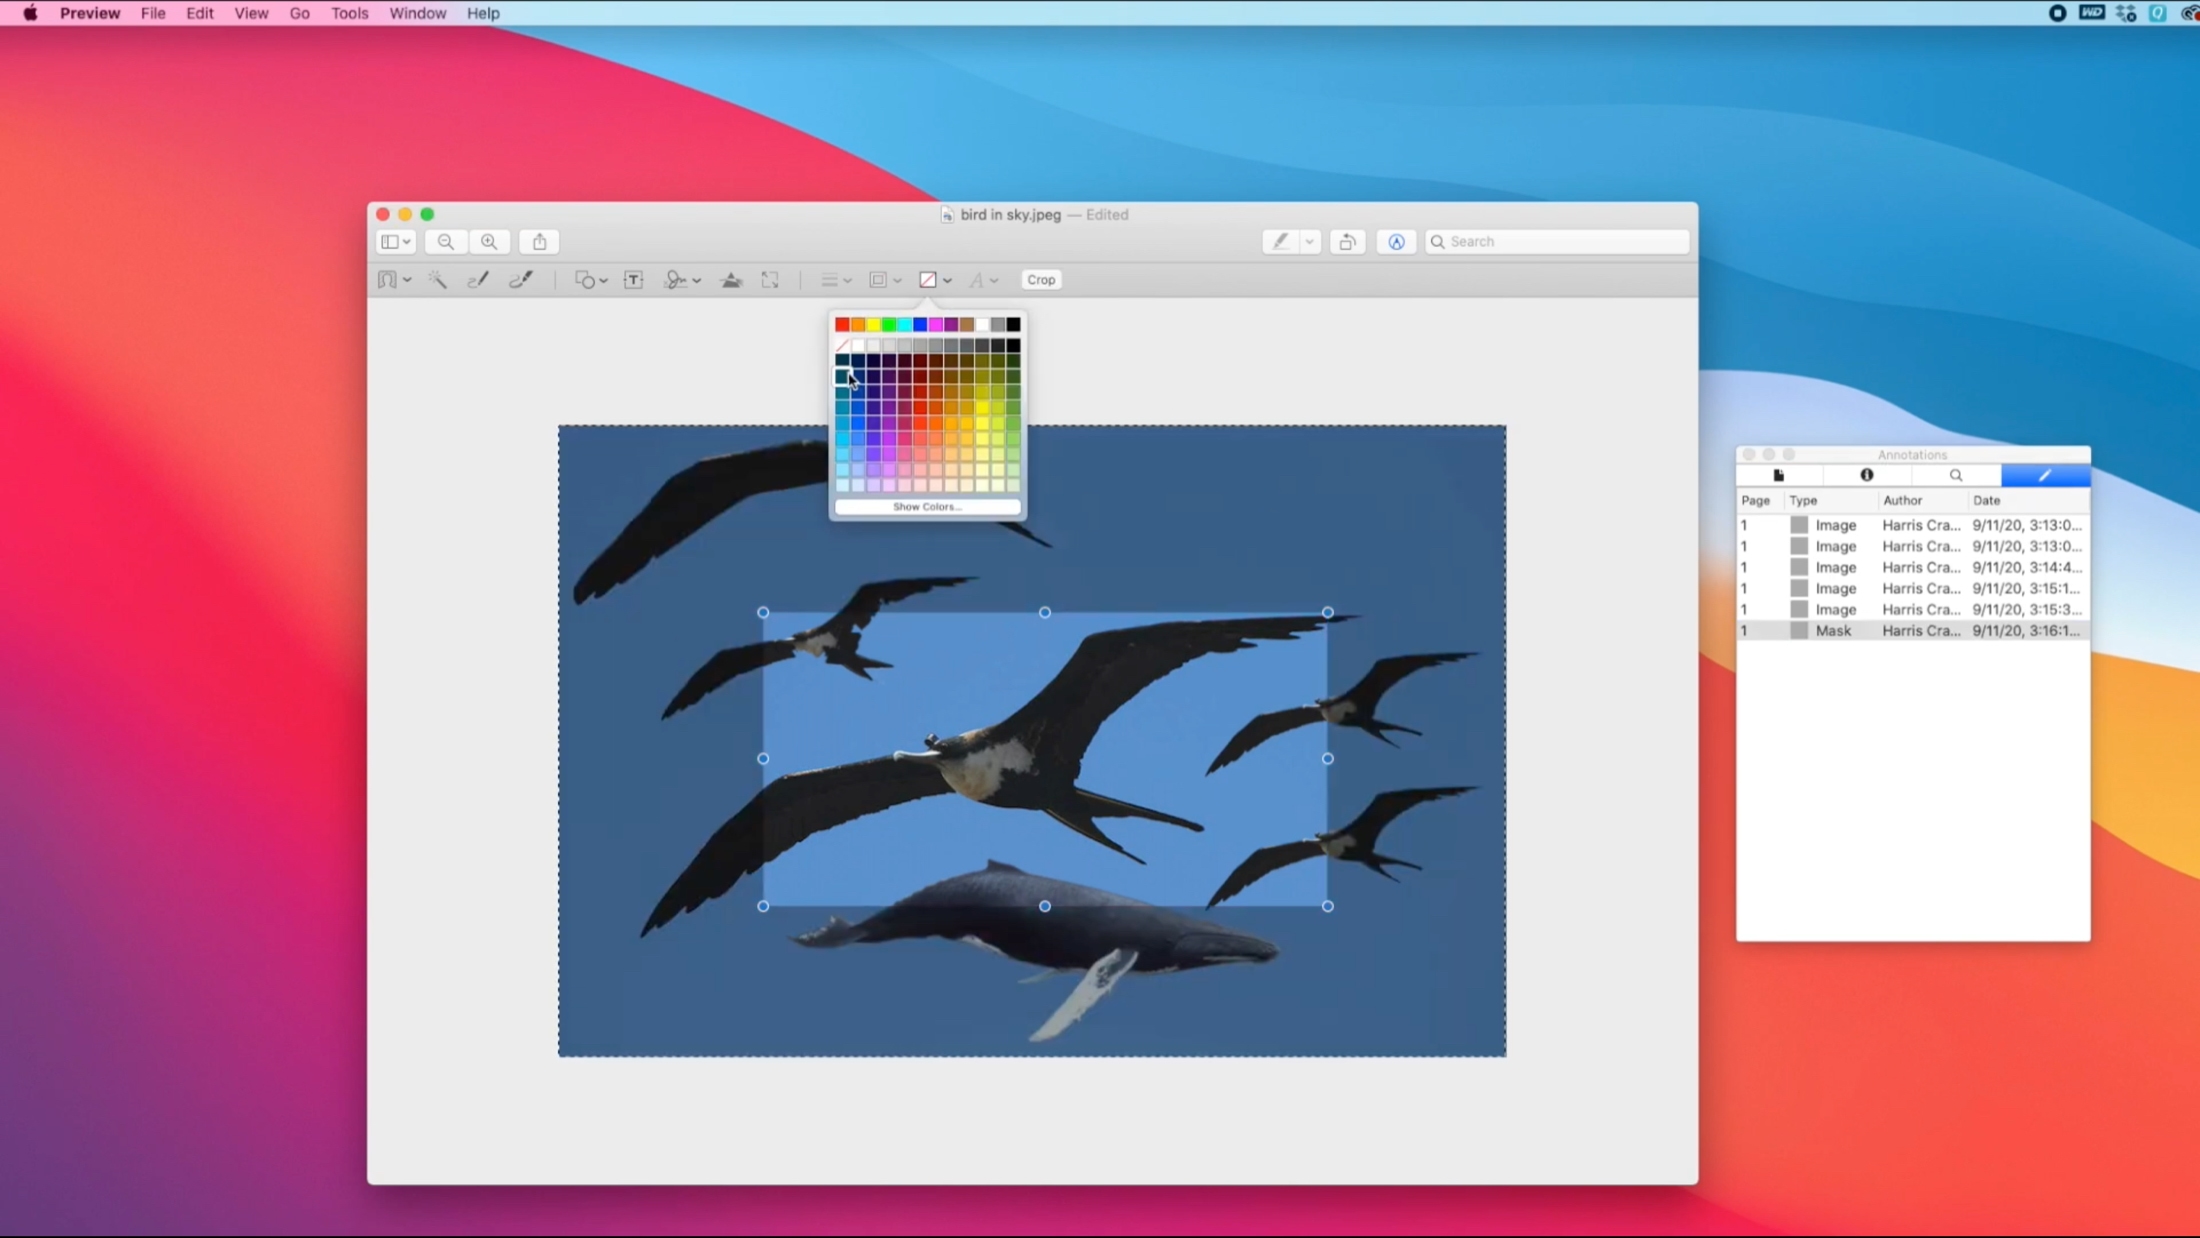
3. Apply a mask
Many people don’t realize the power of a mask when it comes to photo editing. Different than a Photoshop mask, but still useful, you can use this tool to provide emphasis or even create a frame. To use this, from the top menu bar, click Tools > Annotate > Mask. You will also find it under the shapes icon on the Preview app toolbar.
Do you have tips for using Preview on Mac for photo editing? If so, you can leave a comment below!
Other tips for Preview: