You probably do your best to organize your inbox in the Mail app. But there’s bound to be a time when you can’t find the email you’re looking for. Maybe you didn’t move it to the right folder, maybe you deleted or archived it by mistake, or maybe you just aren’t seeing it in your inbox.
Here, we’re going to show you multiple ways to search in the Mail app on Mac as well as save a search so you can use again.
Ways to search Mail on Mac
You have a few handy ways to use keywords when searching for an email in Mail. You can take advantage of suggestions, apply filters, or use your own words. And if you perform a search you want to save, it’s easy.
Search Mail with suggestions
One of the easiest ways to find an email in Apple’s Mail app is with suggestions. You know from other apps and services like Google that suggestions appear as you begin typing. This can make finding what you need much simpler.
With the Mail app open, start typing a keyword into the Search box at the top. With each and every letter you add, the suggestions will adjust. This method can eventually get to the email you need.
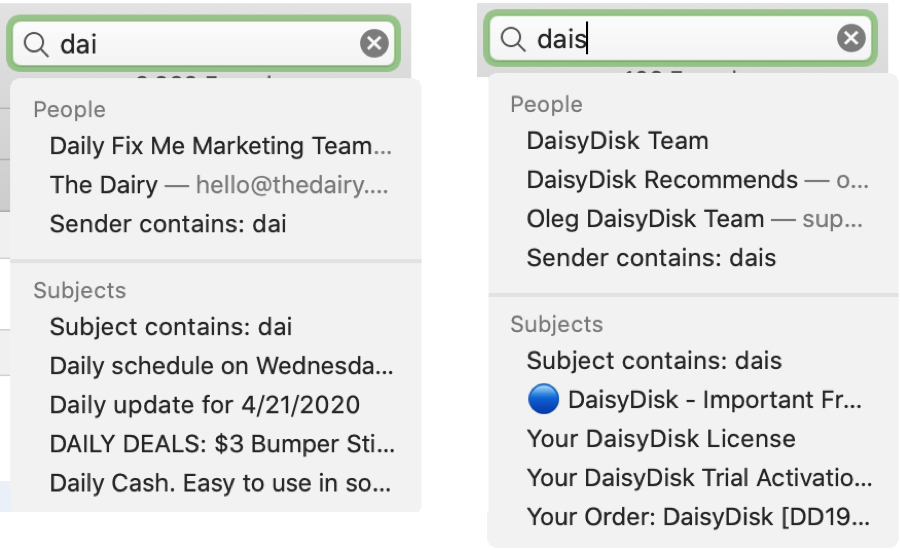
Here’s an example: I wanted to find emails from DaisyDisk, so I began typing “dai” and received a few suggestions. Then, as soon as I added that “s”, I saw many DaisyDisk email options to pick from.
Search Mail with filters
Another convenient way to find emails in Mail is using filters. And these filters can be used in conjunction with the suggestions described above.
Using my DaisyDisk example, I saw suggestions that included emails from People and with Subjects. These are just a couple of the filters you may see. If you click one of the suggestions, that filter will then pop into the search box. And if the filter has an arrow next to it, that means there are more options.
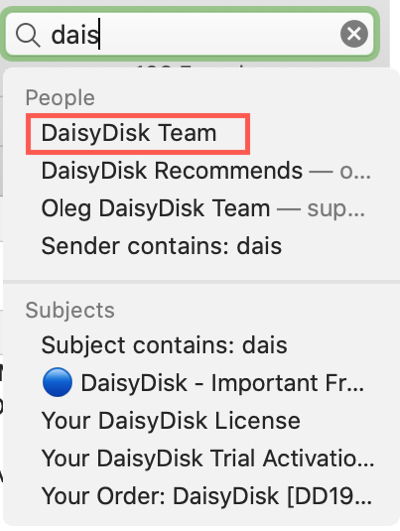
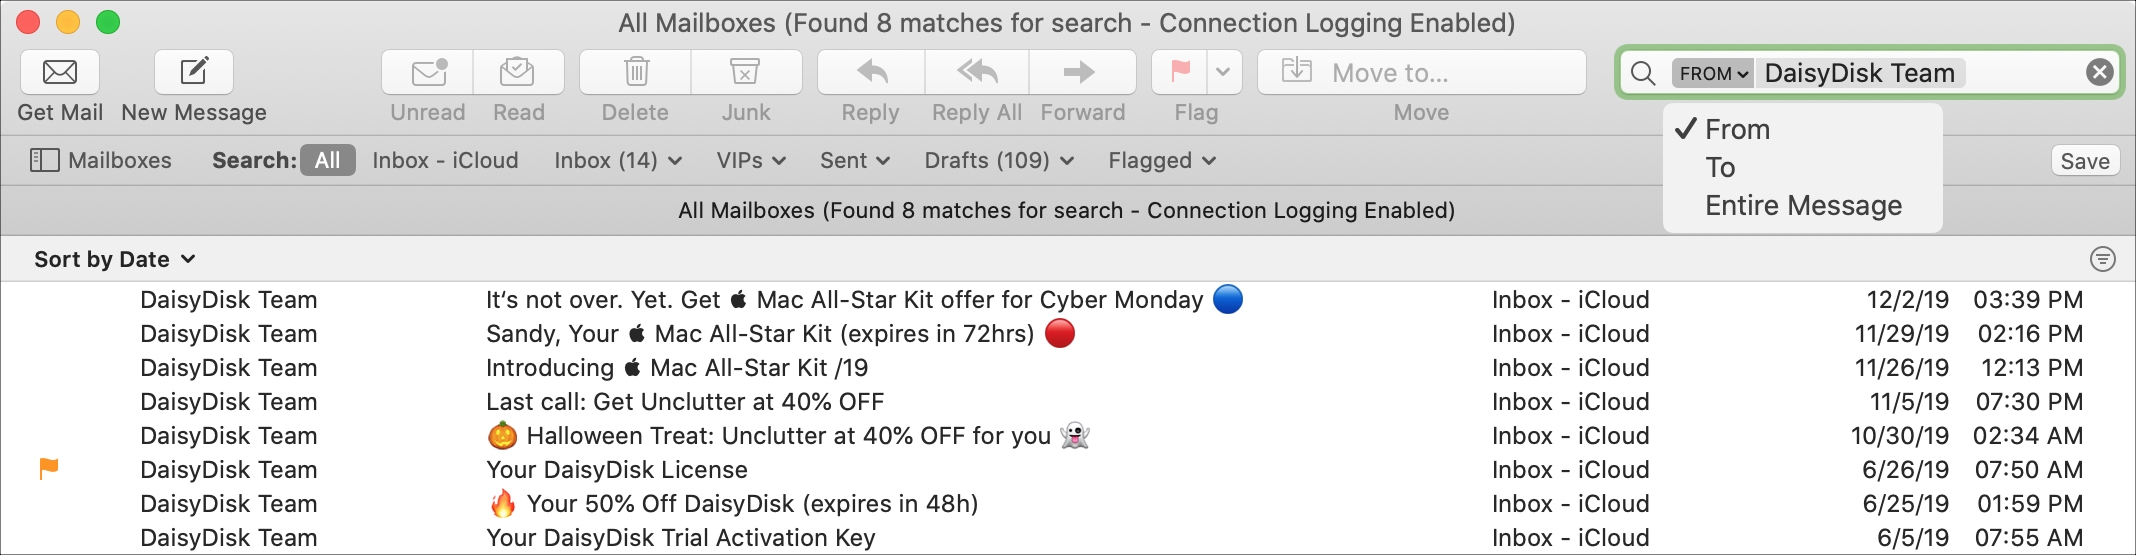
Here, you can see I picked the first suggestion under People for DaisyDisk Team.
That added the From filter into the search box. Using the arrow next to the From filter, you can select To or Entire Message. This will change the results you see per the new filter.
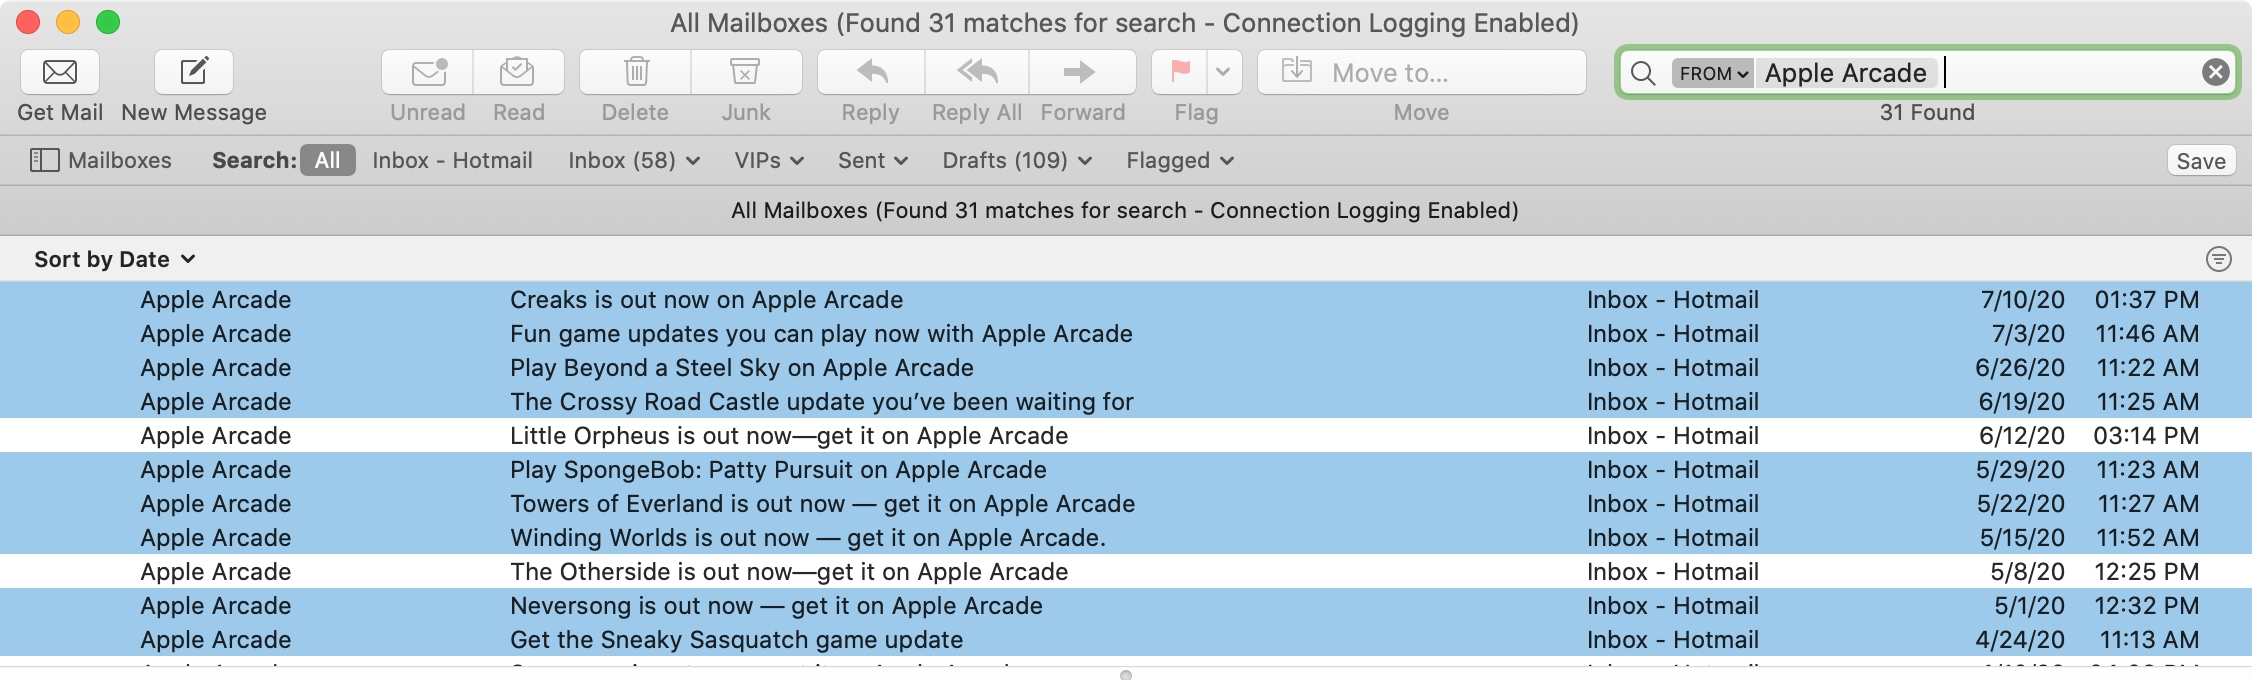
You can also combine filters. Back to our DaisyDisk emails, I left the first filter as From. But added the word “key” to the search and picked the first suggestion again for Subject contains: key.

This placed the Subject filter into the Search box along with my previous search.

You can continue to add more filters to your search which will narrow your results immensely because Mail looks for emails matching all of the filters.
And remember to look for that arrow next to a filter for those additional options.
More filters and search terms
Along with the Mail filters that pop in automatically, you can use your own along with Boolean operators (AND, OR, NOT). So if you’re used to searching on Google, for instance, using this type of key phrase, then you’ll be glad to know it works in Mail too.
Here are some examples:
To find a message from a certain person, type “from: DaisyDisk”.
To find a message from a specific date, type “date: 11/01/19”.
To find a message within a date range, type “date: 11/01/19-11/30/19”
To find a message using a Boolean operator, you can use something like, “DaisyDisk AND key” for messages with both terms. Or, “DaisyDisk NOT key” for messages with the first term but not the second. Finally, you could use “DaisyDisk OR key” for emails containing one or the other.

Search with natural language
Mail is smart enough to recognize and display emails you search for using your own words (natural language).
Try things typing into the Search as if you were talking. Things like this should give you the results you want: “from senator”, “to sandy”, “PDF attached”, or even “to sebastien about invoices”.

Save your search
While you would normally search for one specific email, that doesn’t mean you always will. Like the example above, I searched with “PDF attached” and have decided that this is a search I might need often.
Once you enter the search term and receive your expected results, click the Save button below the search box in the Favorites Bar. This will actually create a Smart Mailbox based on that search.
You’ll be prompted to give the mailbox a name and then you can adjust the search filters if you like. For instance, you might decide to add another filter or have Mail check your Trash.
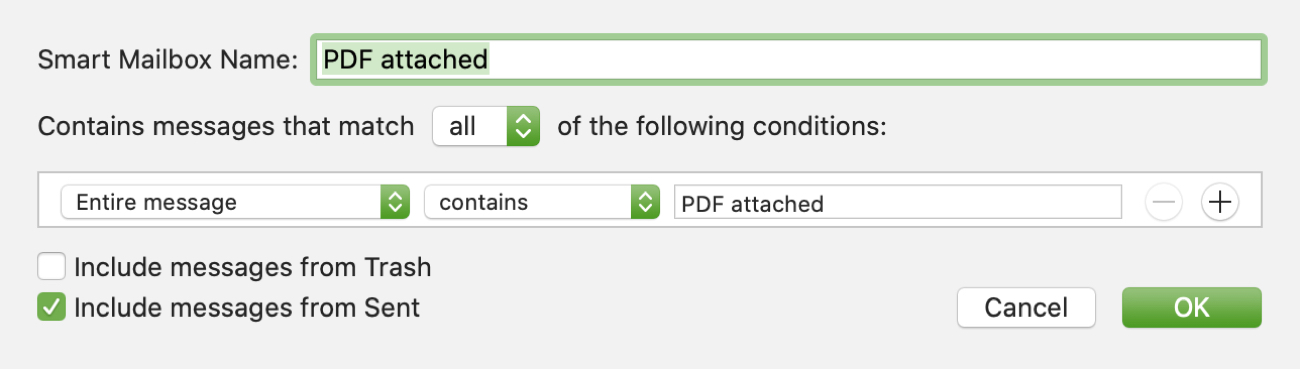
When you finish, click OK. That saved search, which is now a Smart Mailbox, will appear in your Mailbox list in the Smart Mailboxes section.
Mail search troubleshooting tips
If you can’t find the email(s) you’re looking for, try these additional tips in Mail.
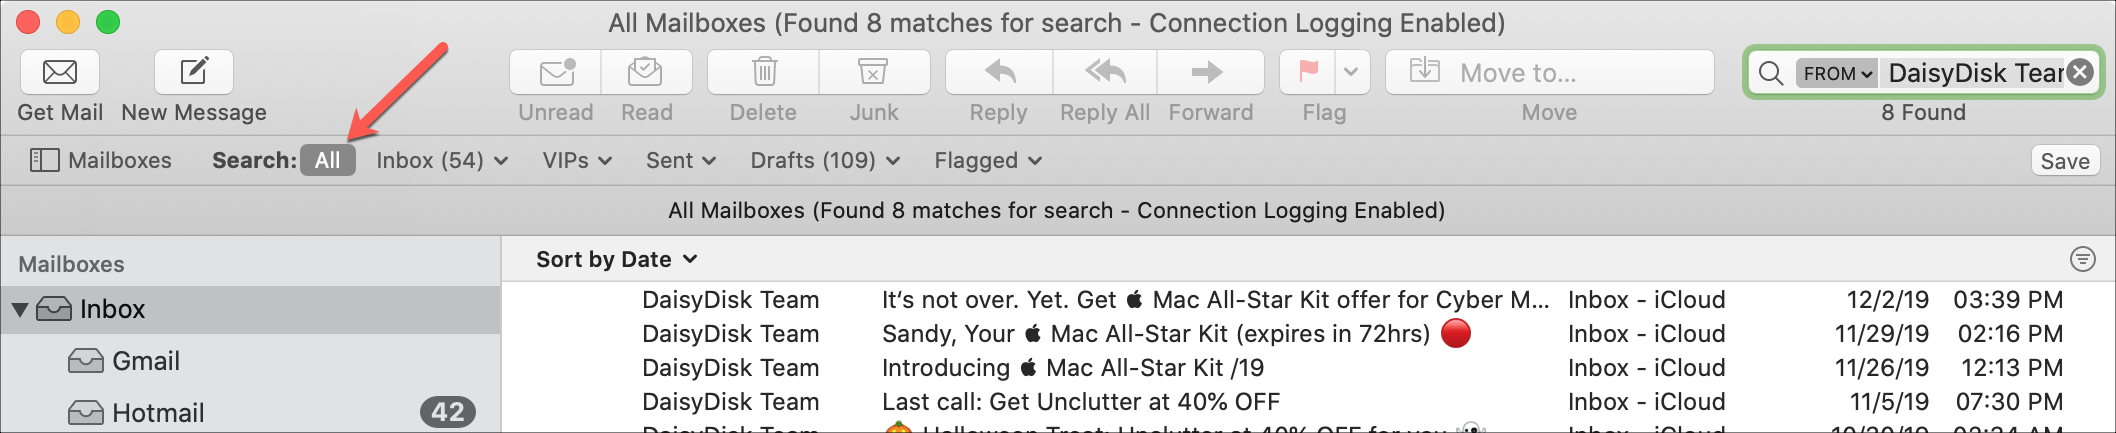
- Make sure that you select All in the Favorites Bar. If you are within a certain mailbox, selecting All will search all mailboxes, not just the current one.
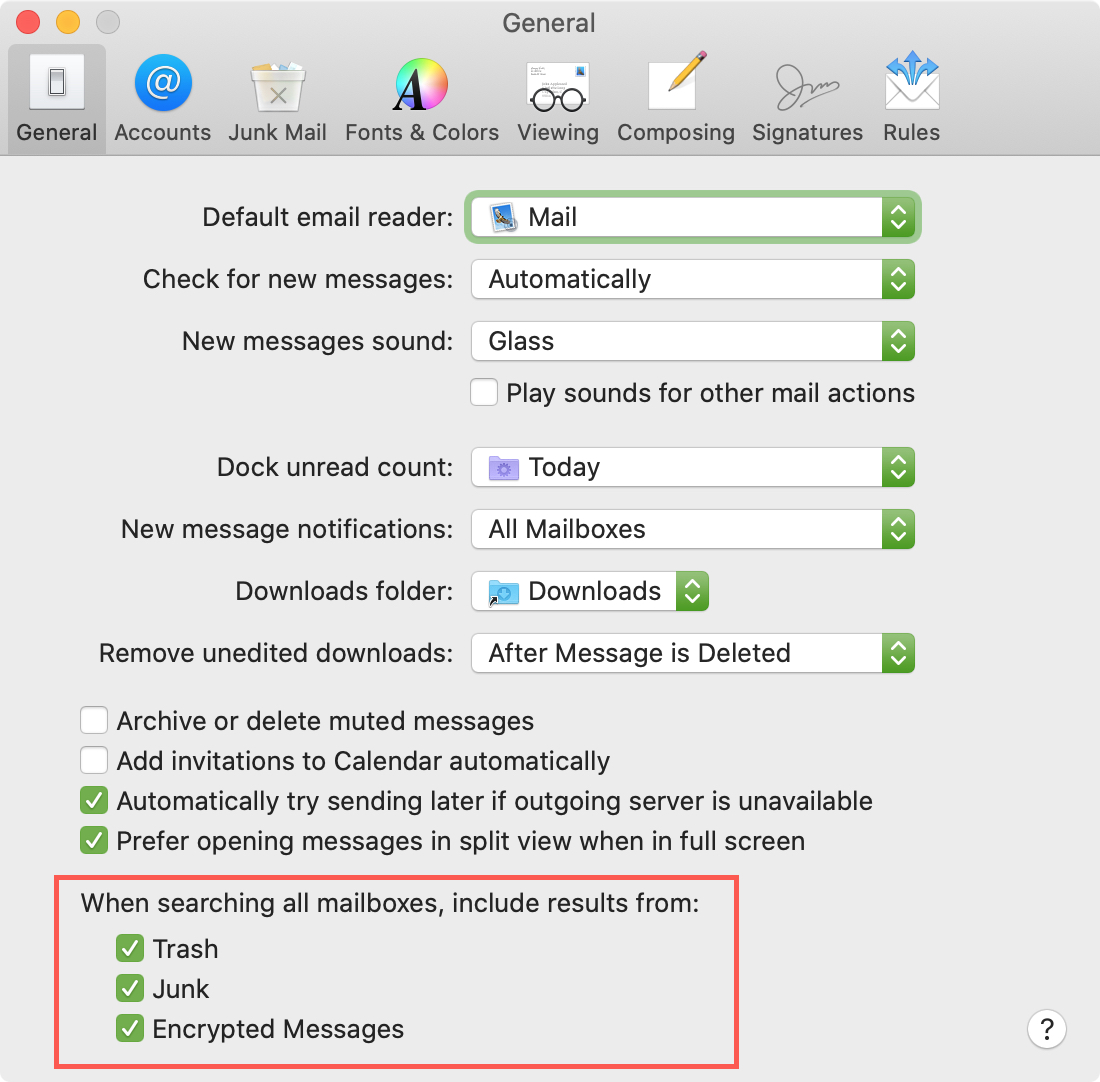
- Check your Preferences to be sure Mail is checking Trash, Junk, and encrypted emails. Go to Mail > Preferences and click the General At the bottom, check the boxes for When searching all mailboxes, include results from.
Wrapping it up
The Mail app on Mac has a flexible and useful search tool. So, take advantage of it and the various ways to use it the next time you need to find an email.
Are there search methods in this tutorial that you haven’t tried before? Or have you tried them and run into problems finding the email you need? Let us know!