Google Photos has a hidden feature for creating collages, and in this tutorial, we will show you how to use this free tool to place selected pictures side by side and turn them into a collage.
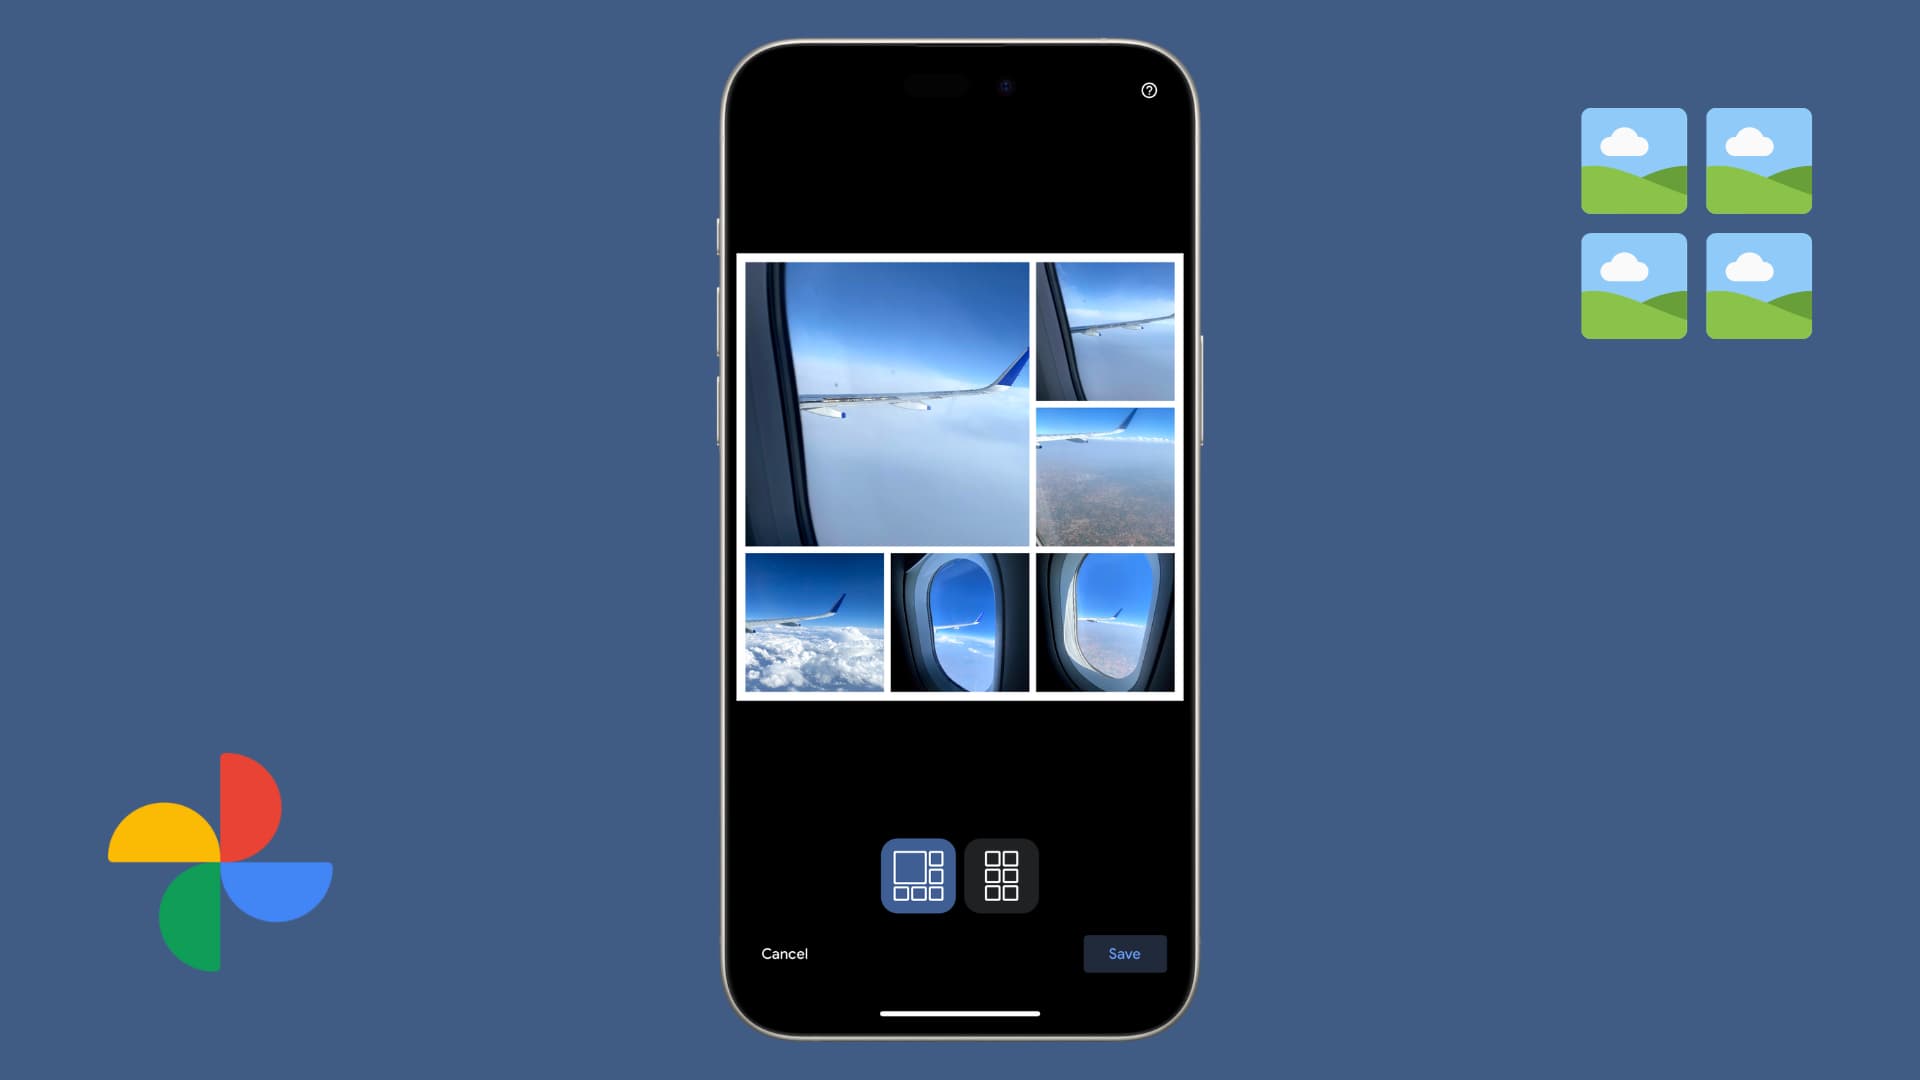
Photo collages are nifty ways to collect related pictures and display them all together in a group. And if you’re a fan of this type of thing, then you may have an app specifically for creating collages. But if not, you should definitely give the Google Photos collage feature a try.
You can create a collage with Google Photos quickly and with very little effort. You can also add some enhancing filters for a different look. If you’re ready to take the collage feature in Google Photos for a spin, we’re here to help!
Before you begin:
- Unlike dedicated picture collage apps, Google Photos does not offer a ton of collage styles to choose from.
- All edits you make after collage creation, like filters or saturation adjustments, are applied to all the pictures of that collage. If you’d rather want a specific look on individual photos, edit each image beforehand and then turn them into a collage.
Create a collage using Google Photos
Here are the steps for its mobile app and web browser.
On iPhone or iPad
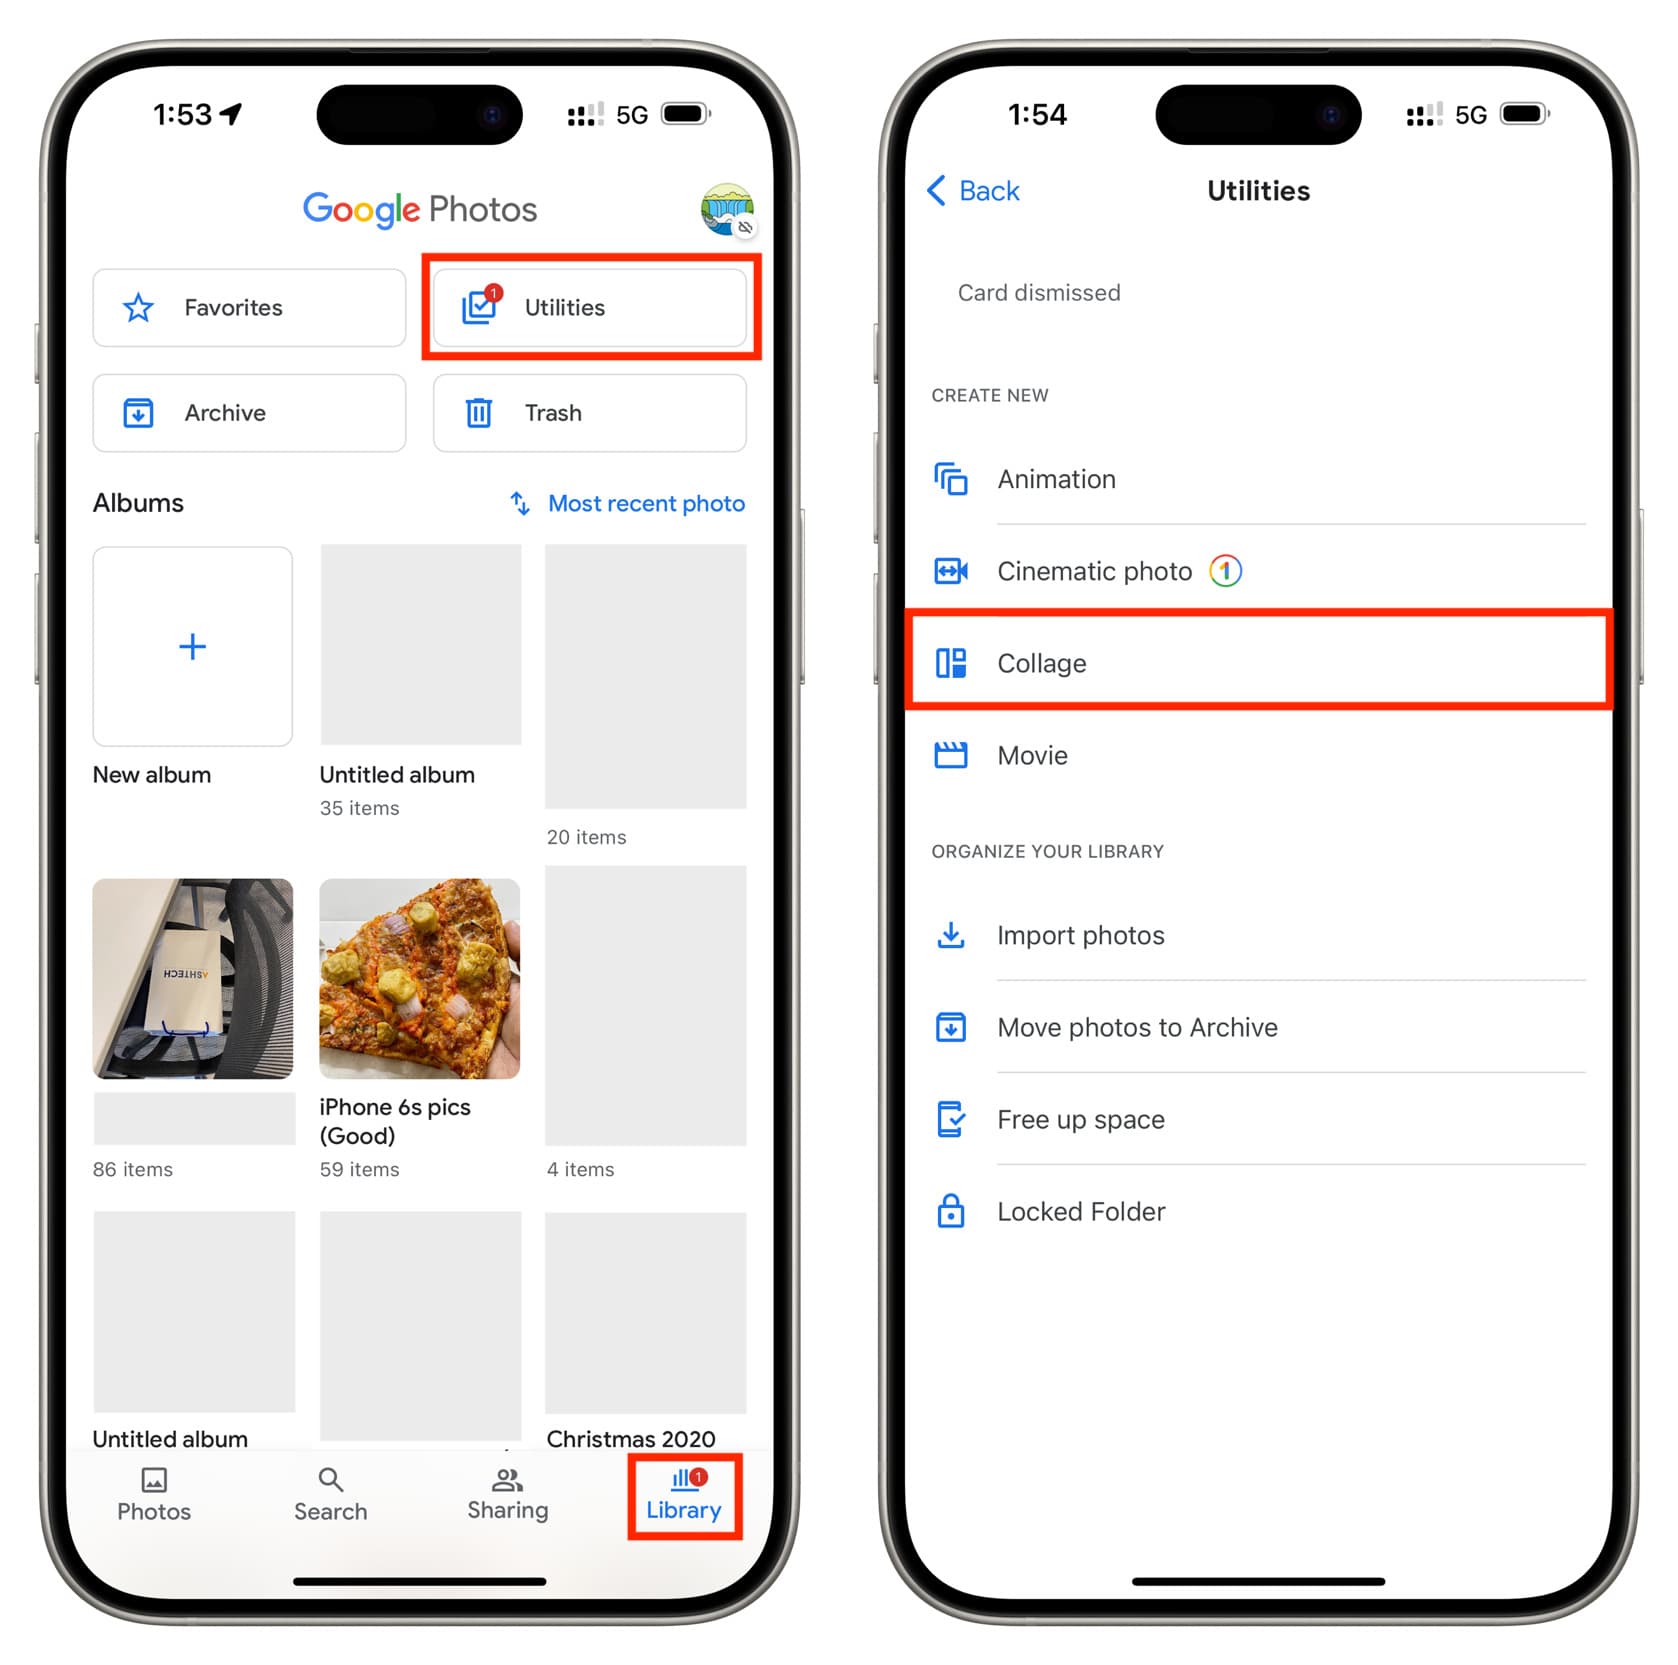
1) Open the Google Photos app and tap Library > Utilities.
2) Tap Collage under the Create New heading.
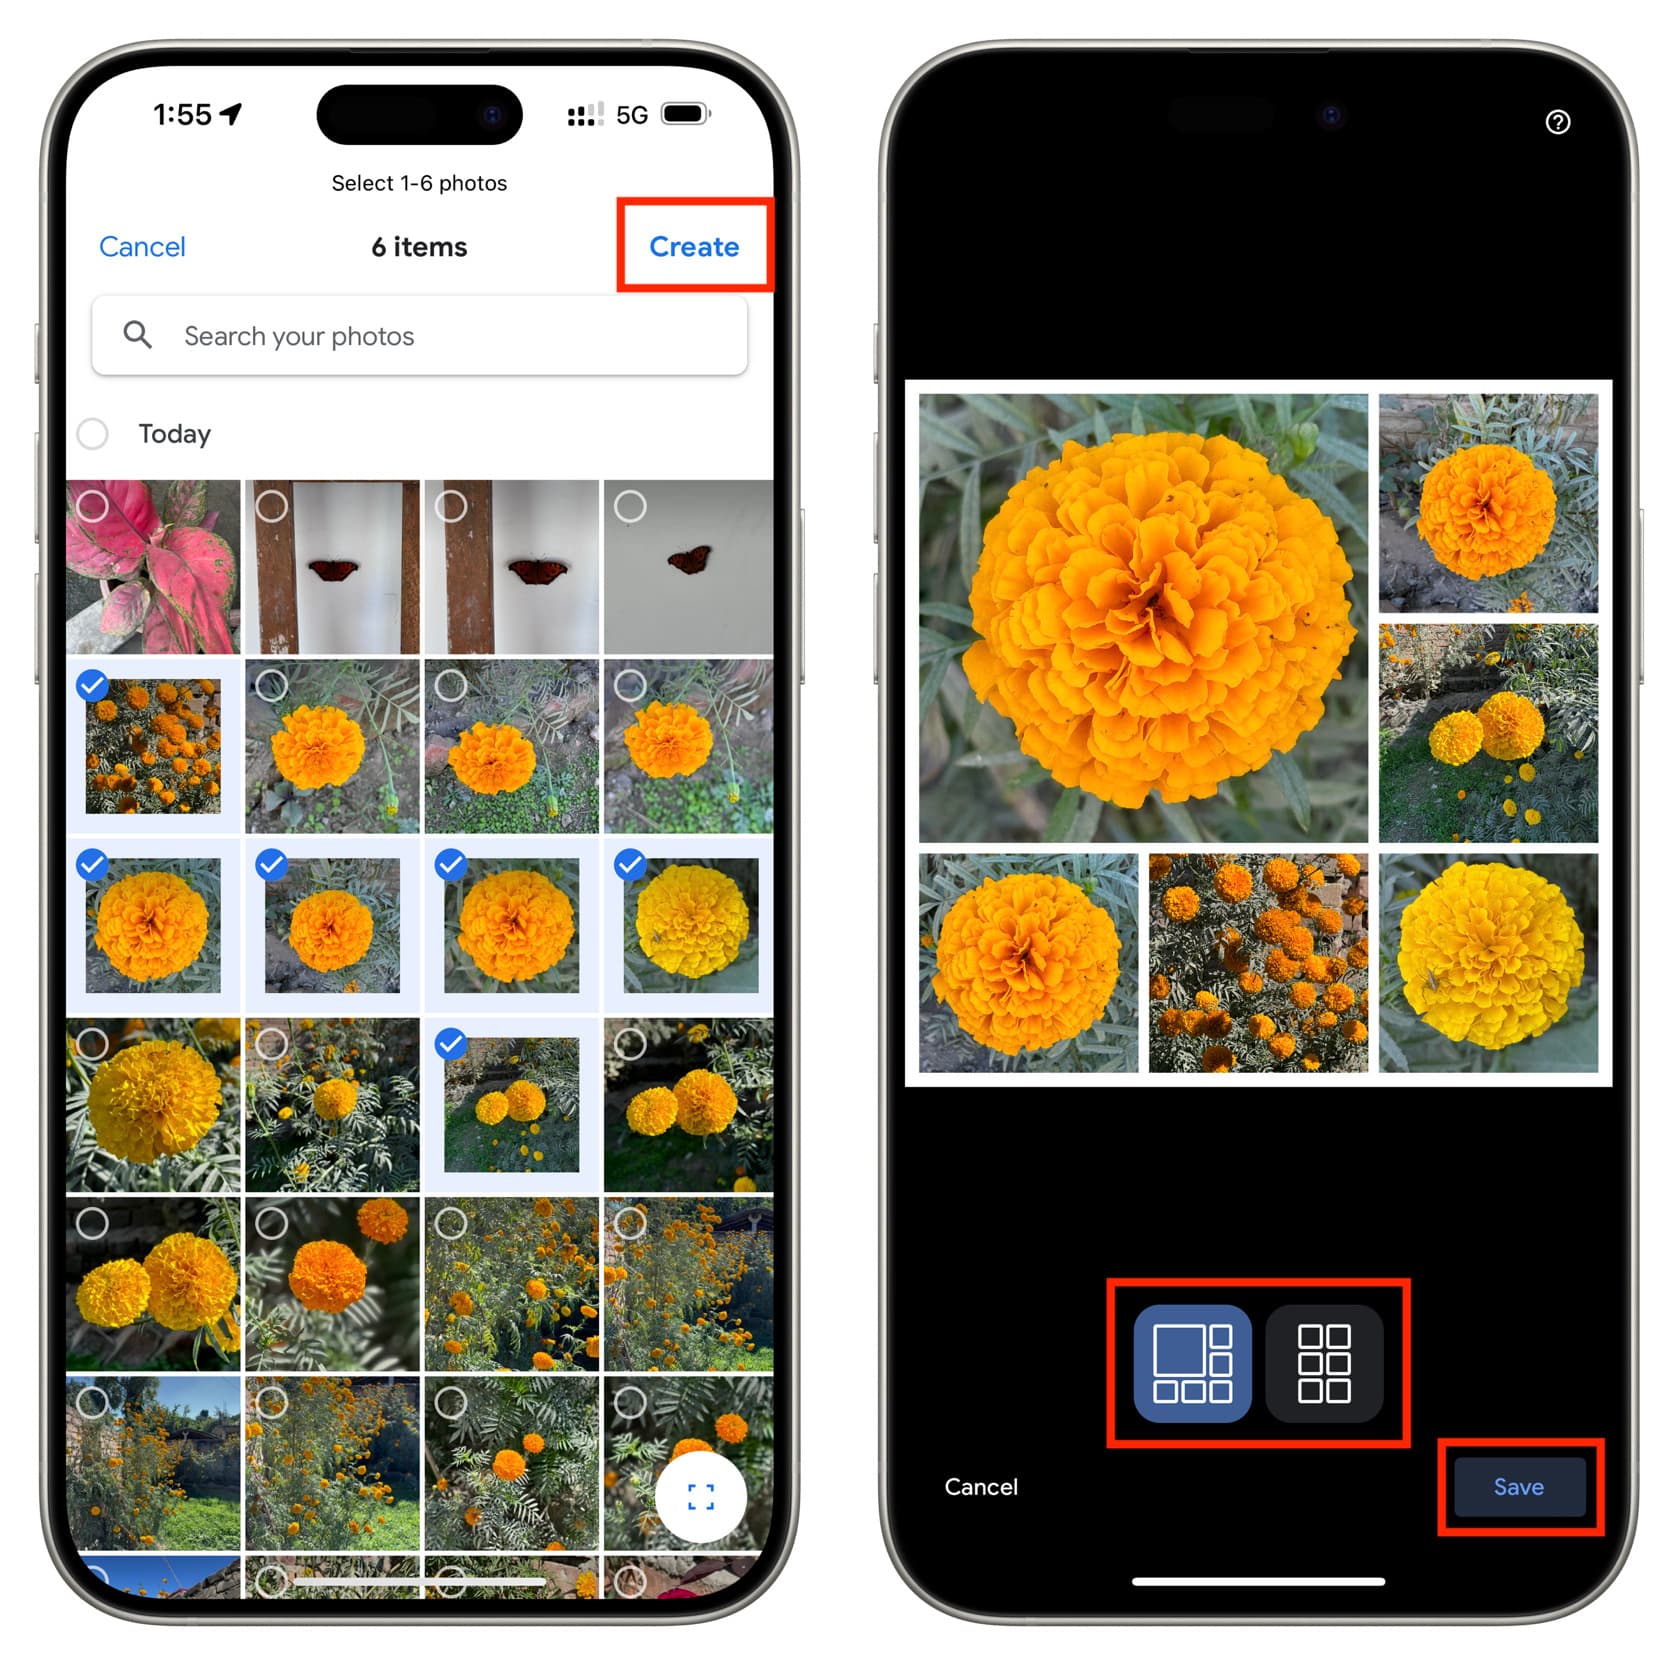
3) Select one to six photographs from your Google Photos or Apple Photos library and tap Create.
4) Pick a collage style if you have at least two photos. The styles here will depend on how many photos you have selected. You can also touch a photo in the collage preview and drag it to a different spot to switch places. Once everything is to your liking, tap Save.
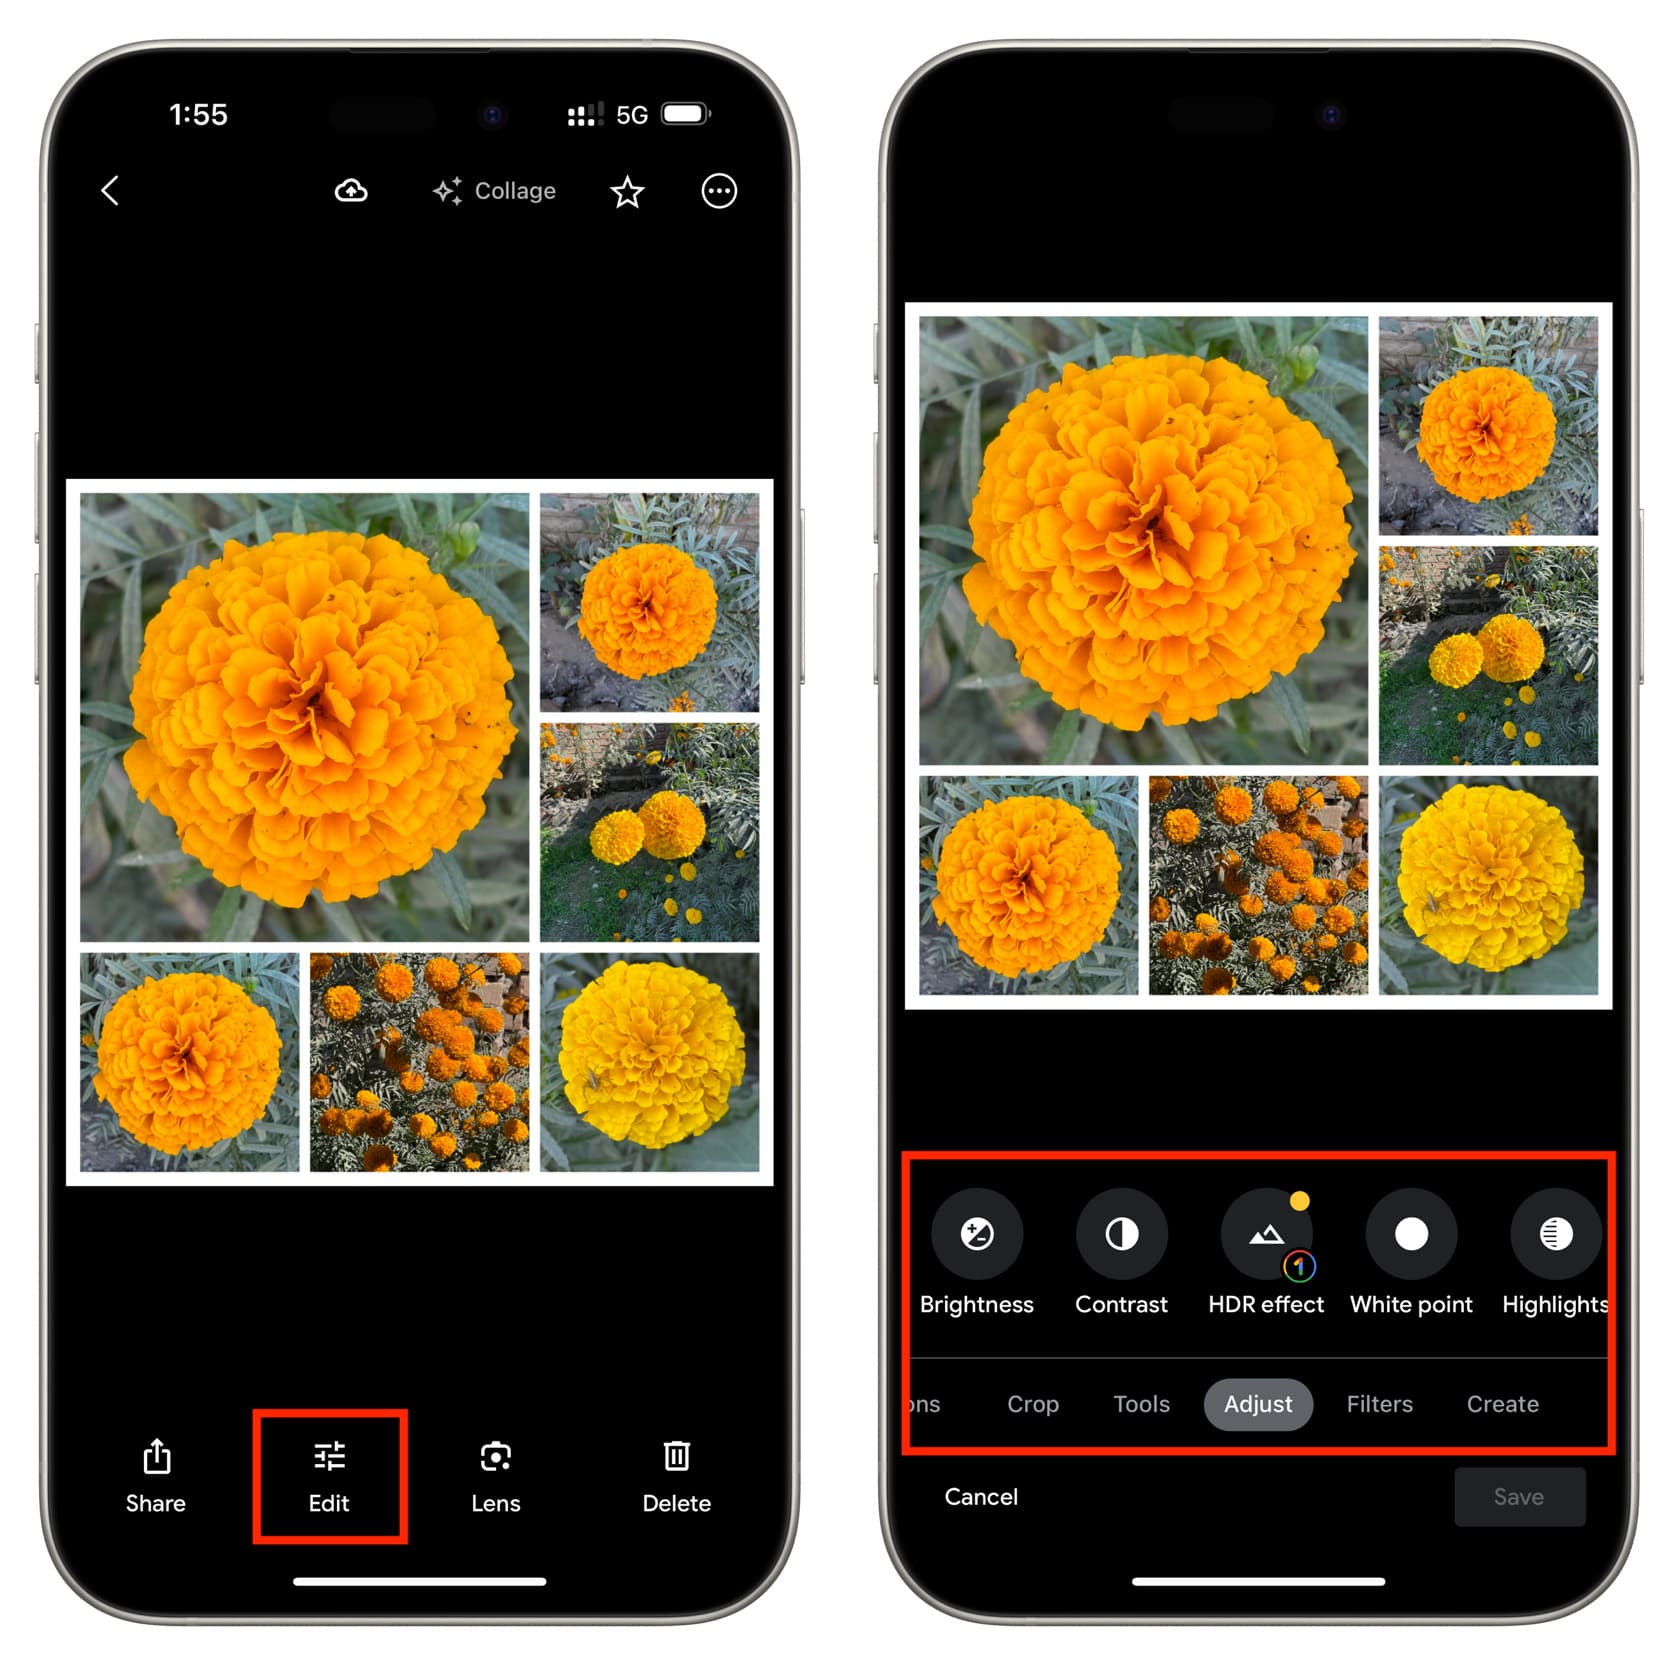
5) The collage is built and saved to your iPhone Photos app as well as Google Photos. But you can further make visual changes to it. To do that, tap Edit and then pick an option:
- Suggestions: Use the suggested filters like Dynamic, Enhance, Warm, or Cool.
- Crop: You can crop the collage or rotate it.
- Tools: Select this to use Google’s Magic eraser to remove or camouflage objects from your photos. This (and a few other options inside Google Photos) will need Wi-Fi or cellular data to install the required editing tools. If this is the first time you are using the Magic eraser, you will have to hit Save and then reopen the collage image to take benefit of the eraser. Note that Magic Eraser is a paid feature that requires a Google One subscription.
- Adjust: Here, you will find toggles to adjust the brightness, contrast, HDR effect, white point, highlights, shadows, black point, saturation, warmth, tint, skin tone, and blue tone, and use pop & vignette styles.
- Filters: Tap this and select one of the twenty filters to apply a premade style to your collage.
6) Tap Save after you finish editing. You can also hit Cancel > Discard or Reset > Discard to start over or remove a paid tool (like Magic eraser) you have experimented with.
On the web
1) Visit photos.google.com in your Mac or Windows PC browser.
2) From the left sidebar, click Utilities and select Collage.
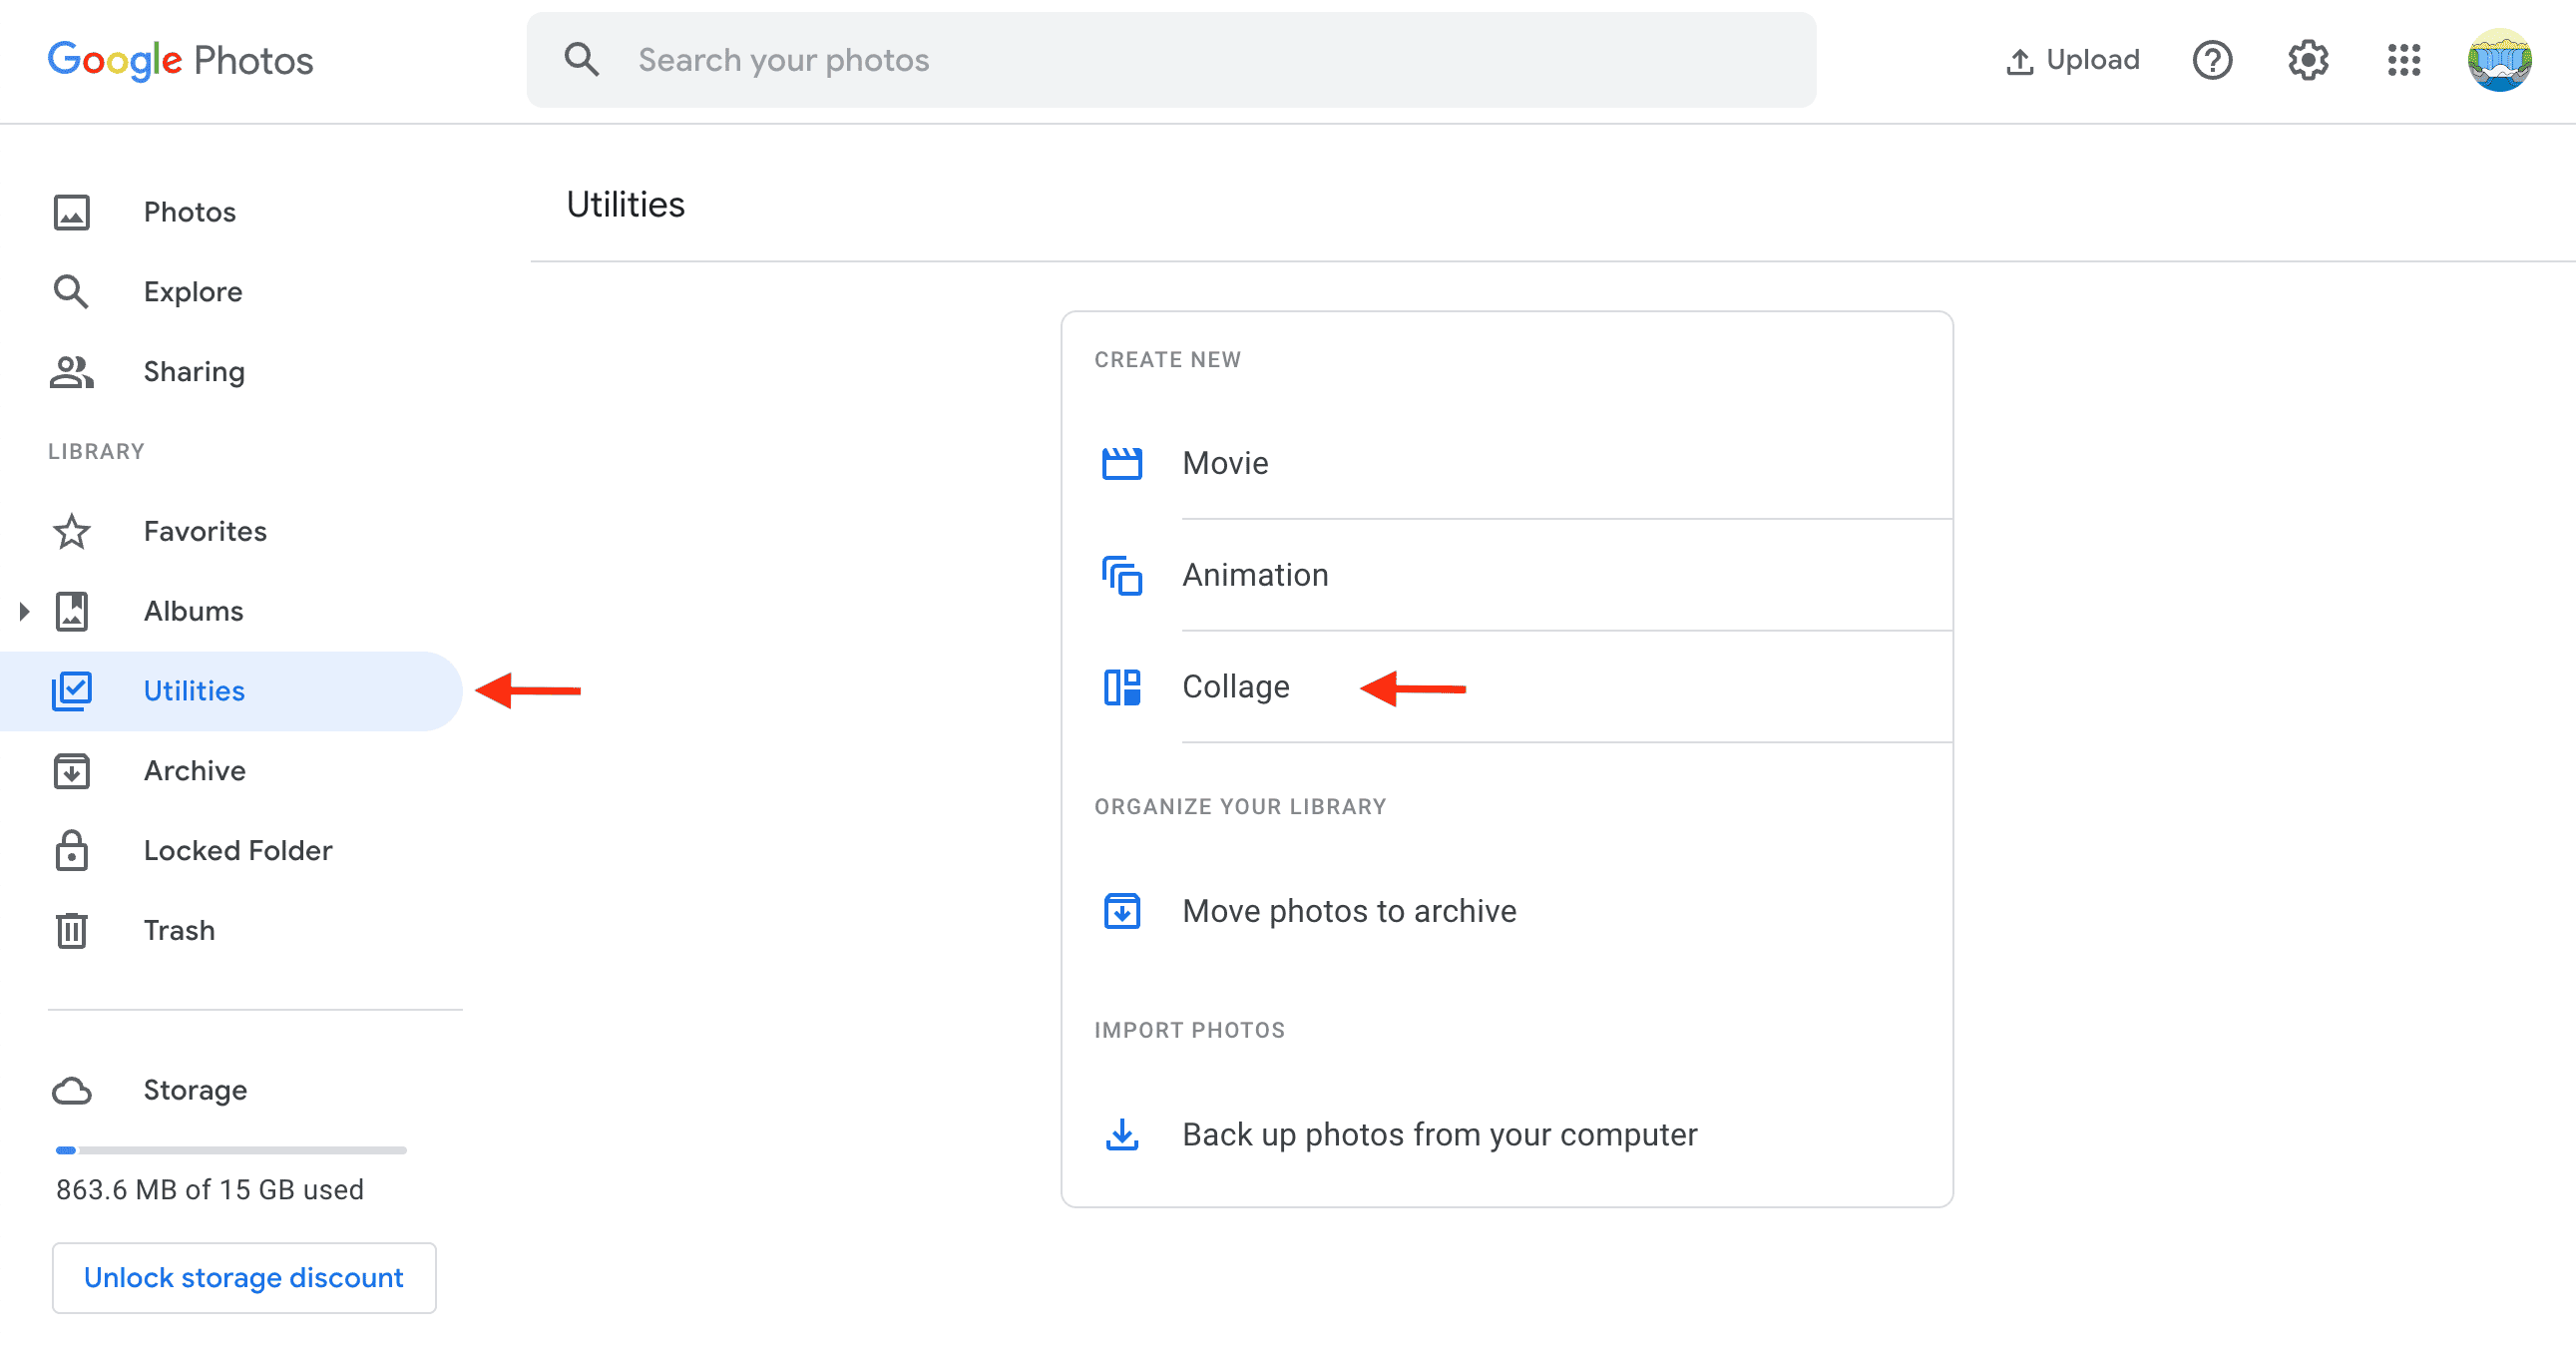
3) Unlike the Google Photos app that limits you to six images, here you can select from two to nine pictures and then hit the Create button.

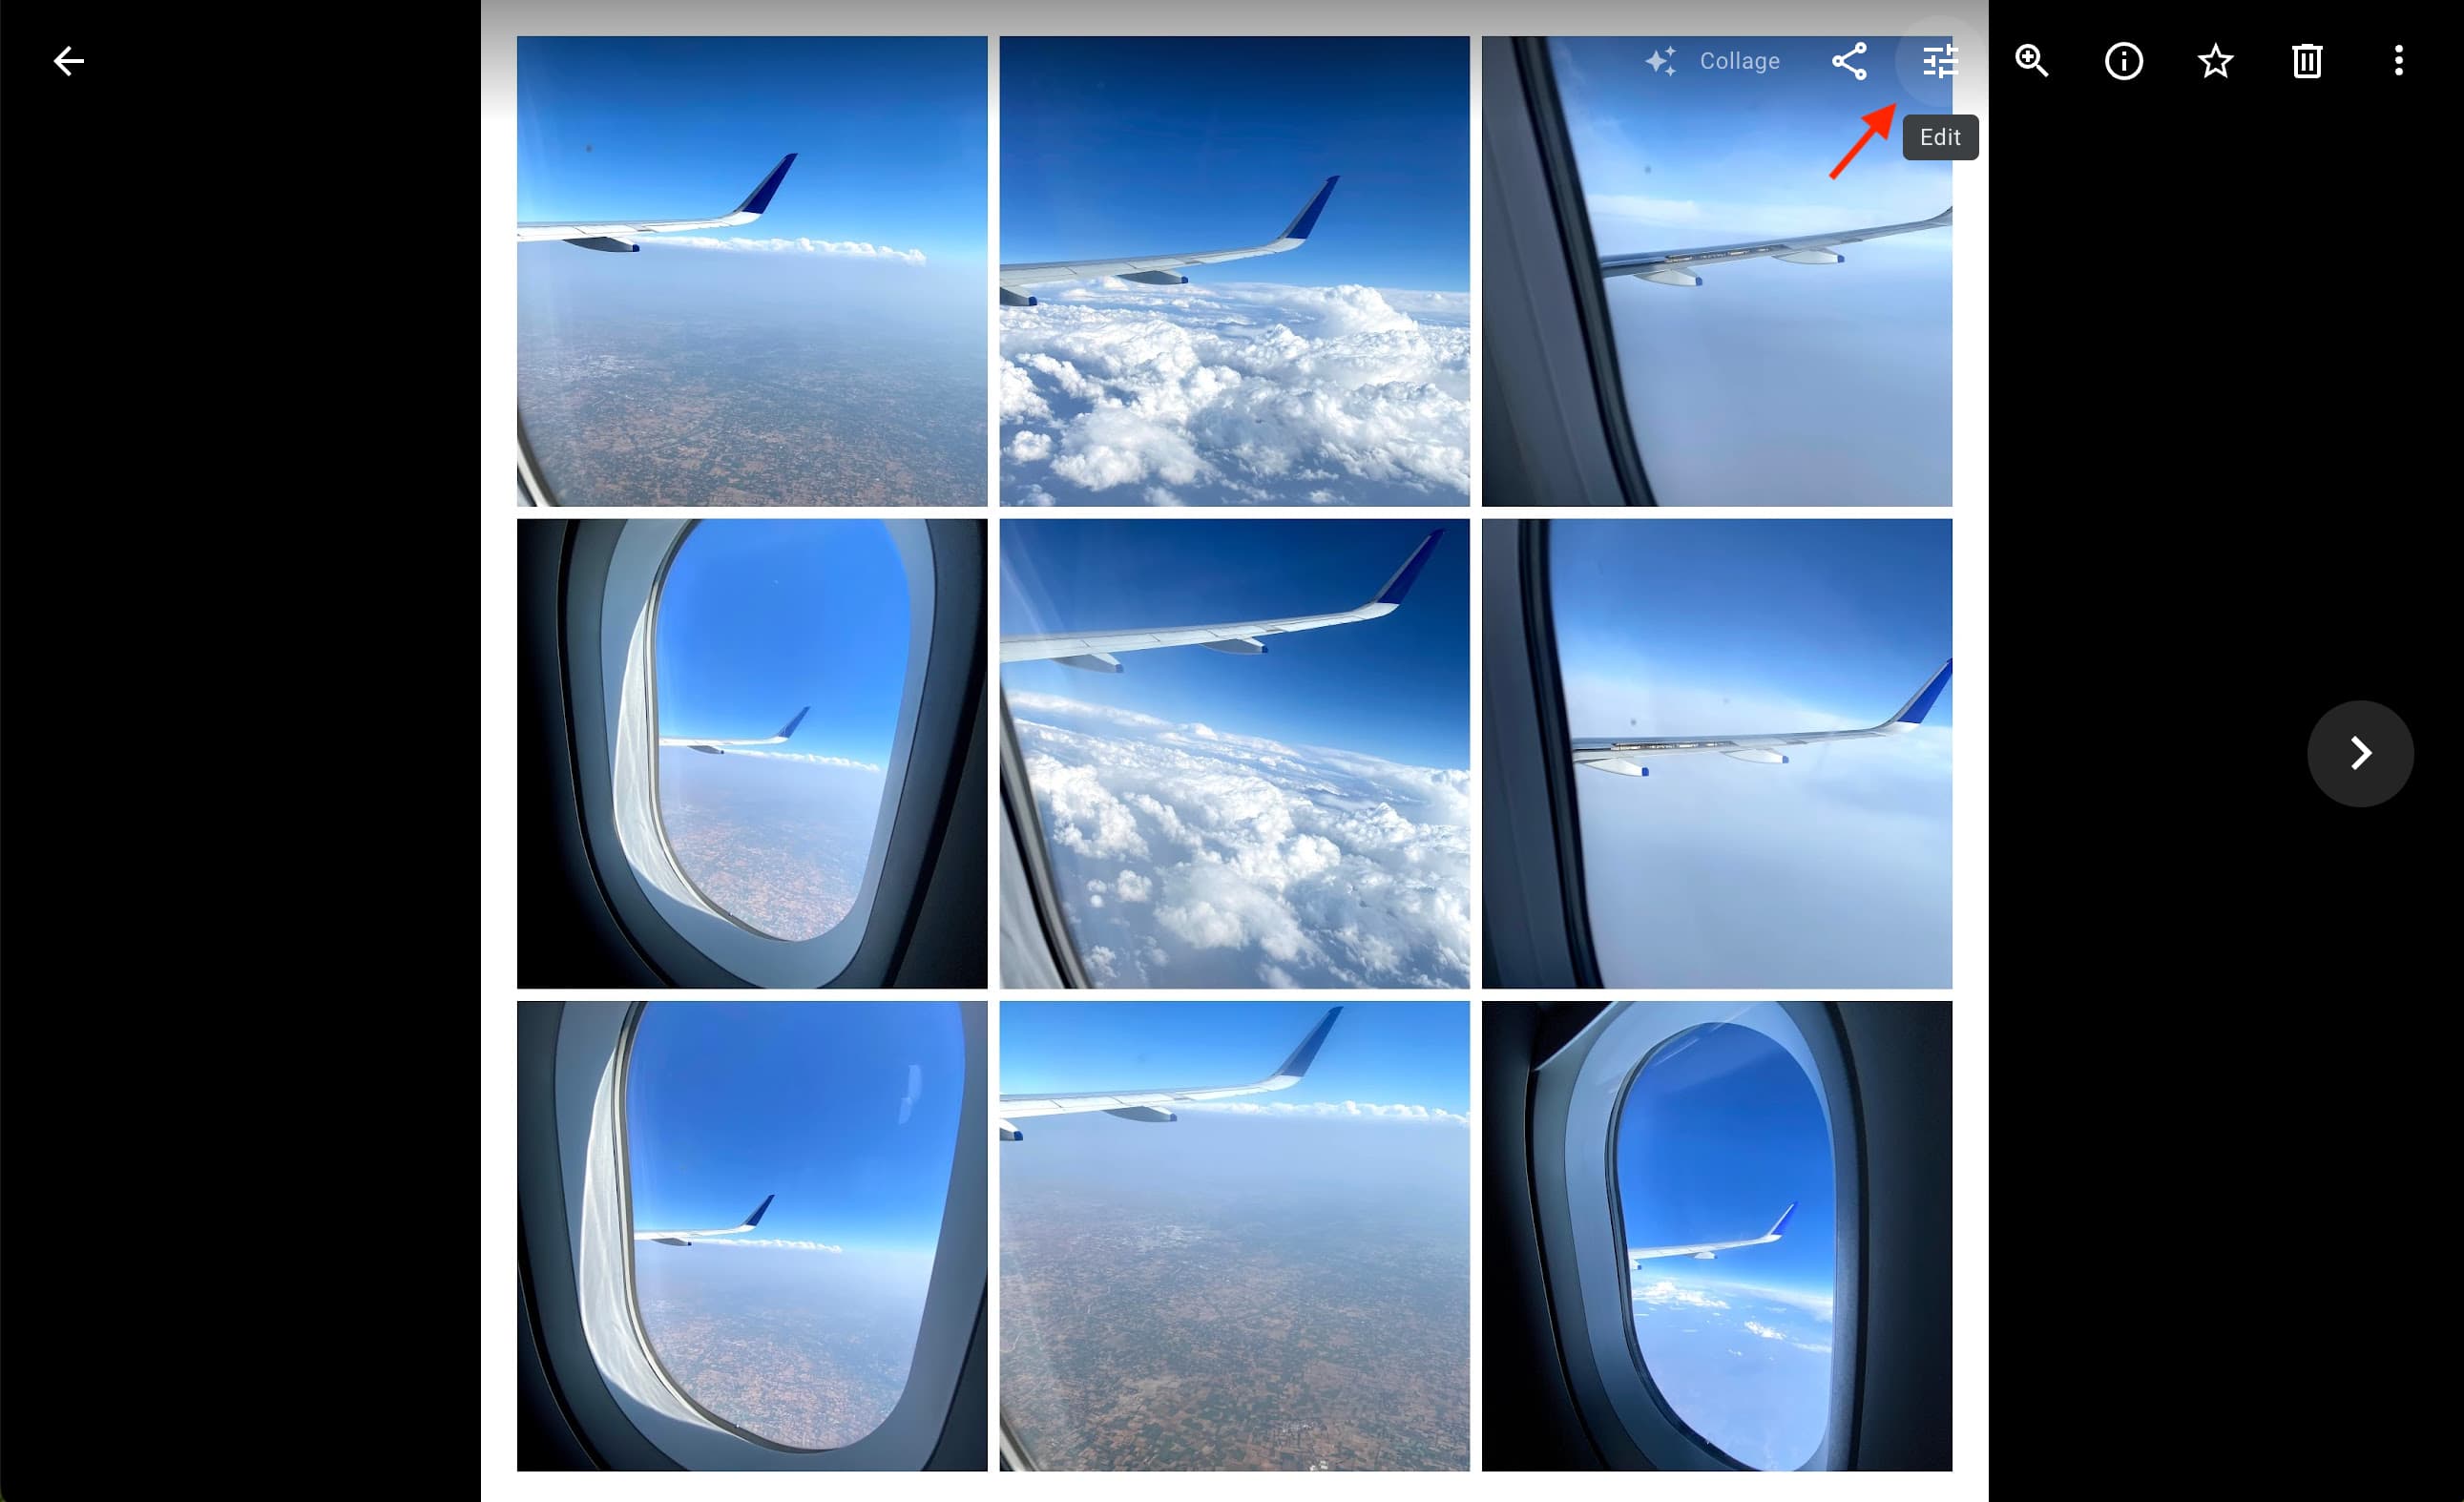
4) Google Photos will automatically build a collage of your selected photos and save it as an image file. You can make further changes to it by clicking the Edits button.
On a related note: