In this tutorial, we will explain what burst mode is on iPhone, how to use it to capture the perfect shot, and then keep the best pictures while getting rid of the rest.

One of the greatest non-communication features of the iPhone is its camera. And if you just got a new iPhone, you’re probably having a lot of fun snapping photos and capturing videos.
Unfortunately, we’re not all experts when it comes to photography. But your iPhone gives you a handy feature that helps you capture the perfect shot. It’s called burst mode.
So, what exactly is burst mode? How does it work, and what types of photos does it take?
What is burst mode?
When you use burst mode on your iPhone or iPad camera, what you’re doing is capturing multiple shots in a row very quickly.
So if you are snapping a photo of a pet or baby who just won’t sit still, for example, burst mode will capture many shots that you can then review. You can keep the one(s) you want that turned out well. Then, just get rid of the rest if you like.
In other words, burst mode gives you an easy way to make sure you get the perfect shot.
How to use burst mode on iPhone
You’ll simply use the shutter button on your iPhone camera to use burst mode. But there are a few various ways to trigger it, depending on the iPhone model:
Method 1: On iPhone 11, iPhone SE 2nd generation, and all other newer iPhone models, slide the shutter button to the left and hold it to take burst photos.
Method 2: You can also press & hold the volume up button when in PHOTO mode to shoot bursts. To enable that, go to iPhone Settings > Camera and make sure the switch for Use Volume Up for Burst is enabled.
Method 3: On iPads and older iPhones, tap and hold the shutter button to take burst photos.
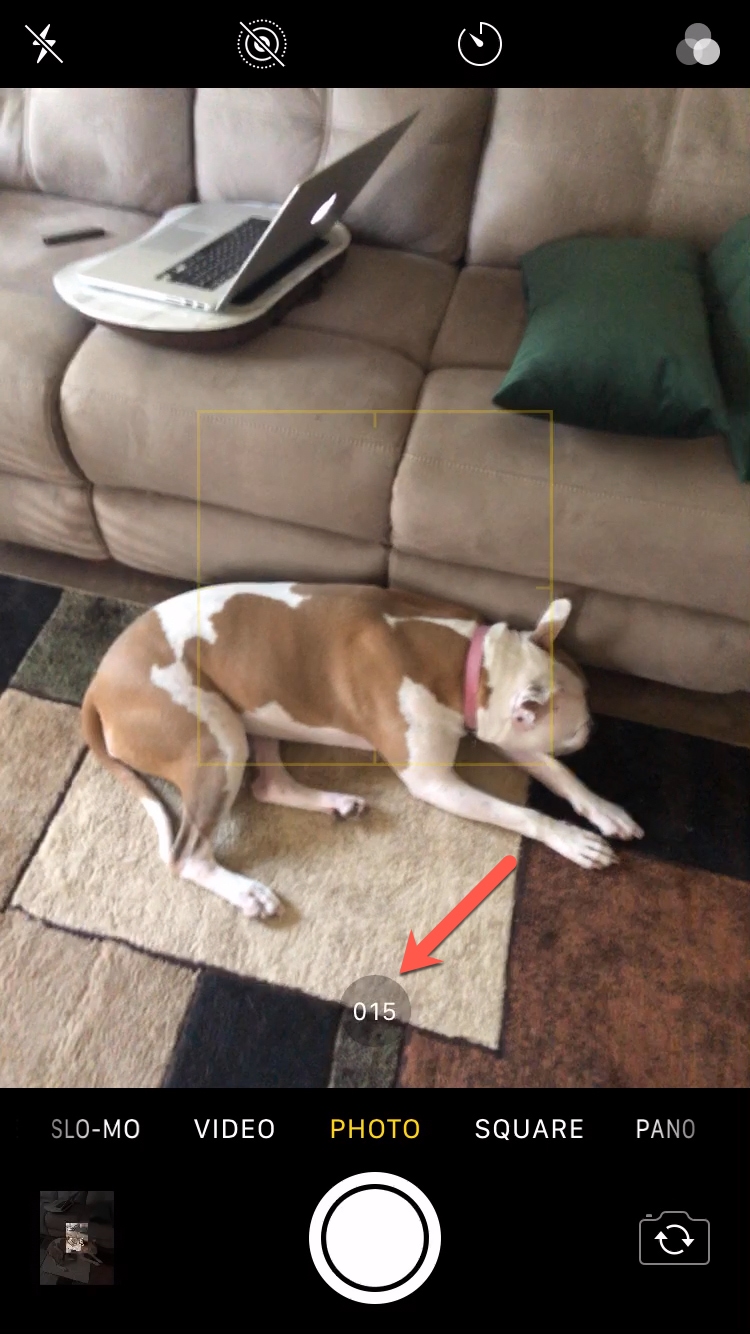
You’ll hear several clicks as the photos are taken and see the number of photos being captured above the shutter button. Release when you want to stop.
Keep in mind that you don’t have to review your burst photos right away. And you can continue capturing more photos with burst mode.
Review, save, and delete burst photos
After you capture your burst of photos, you can check them all out. Then, you can keep what you want and delete those where the subject’s eyes are closed, they are blurred, or you simply don’t like them. Here’s how to do this on iOS and macOS.
Remember that after you make your selection and keep the selected photos, they will appear in your library as any other photo and will no longer appear in your Bursts album.
On iPhone
1) Tap the photo icon on the bottom left of the Camera app or open Photos, and you’ll see the burst photos there.
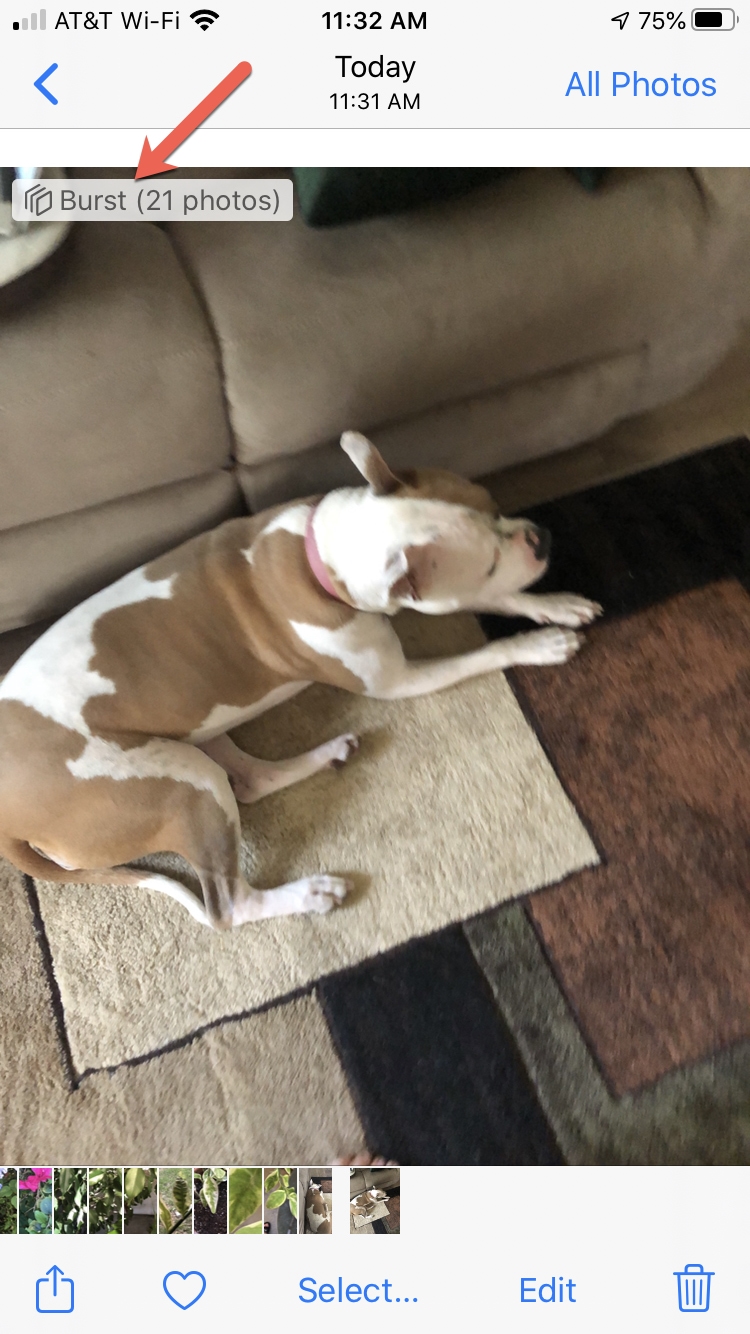
2) Make sure the burst is selected, and then tap Select at the bottom.
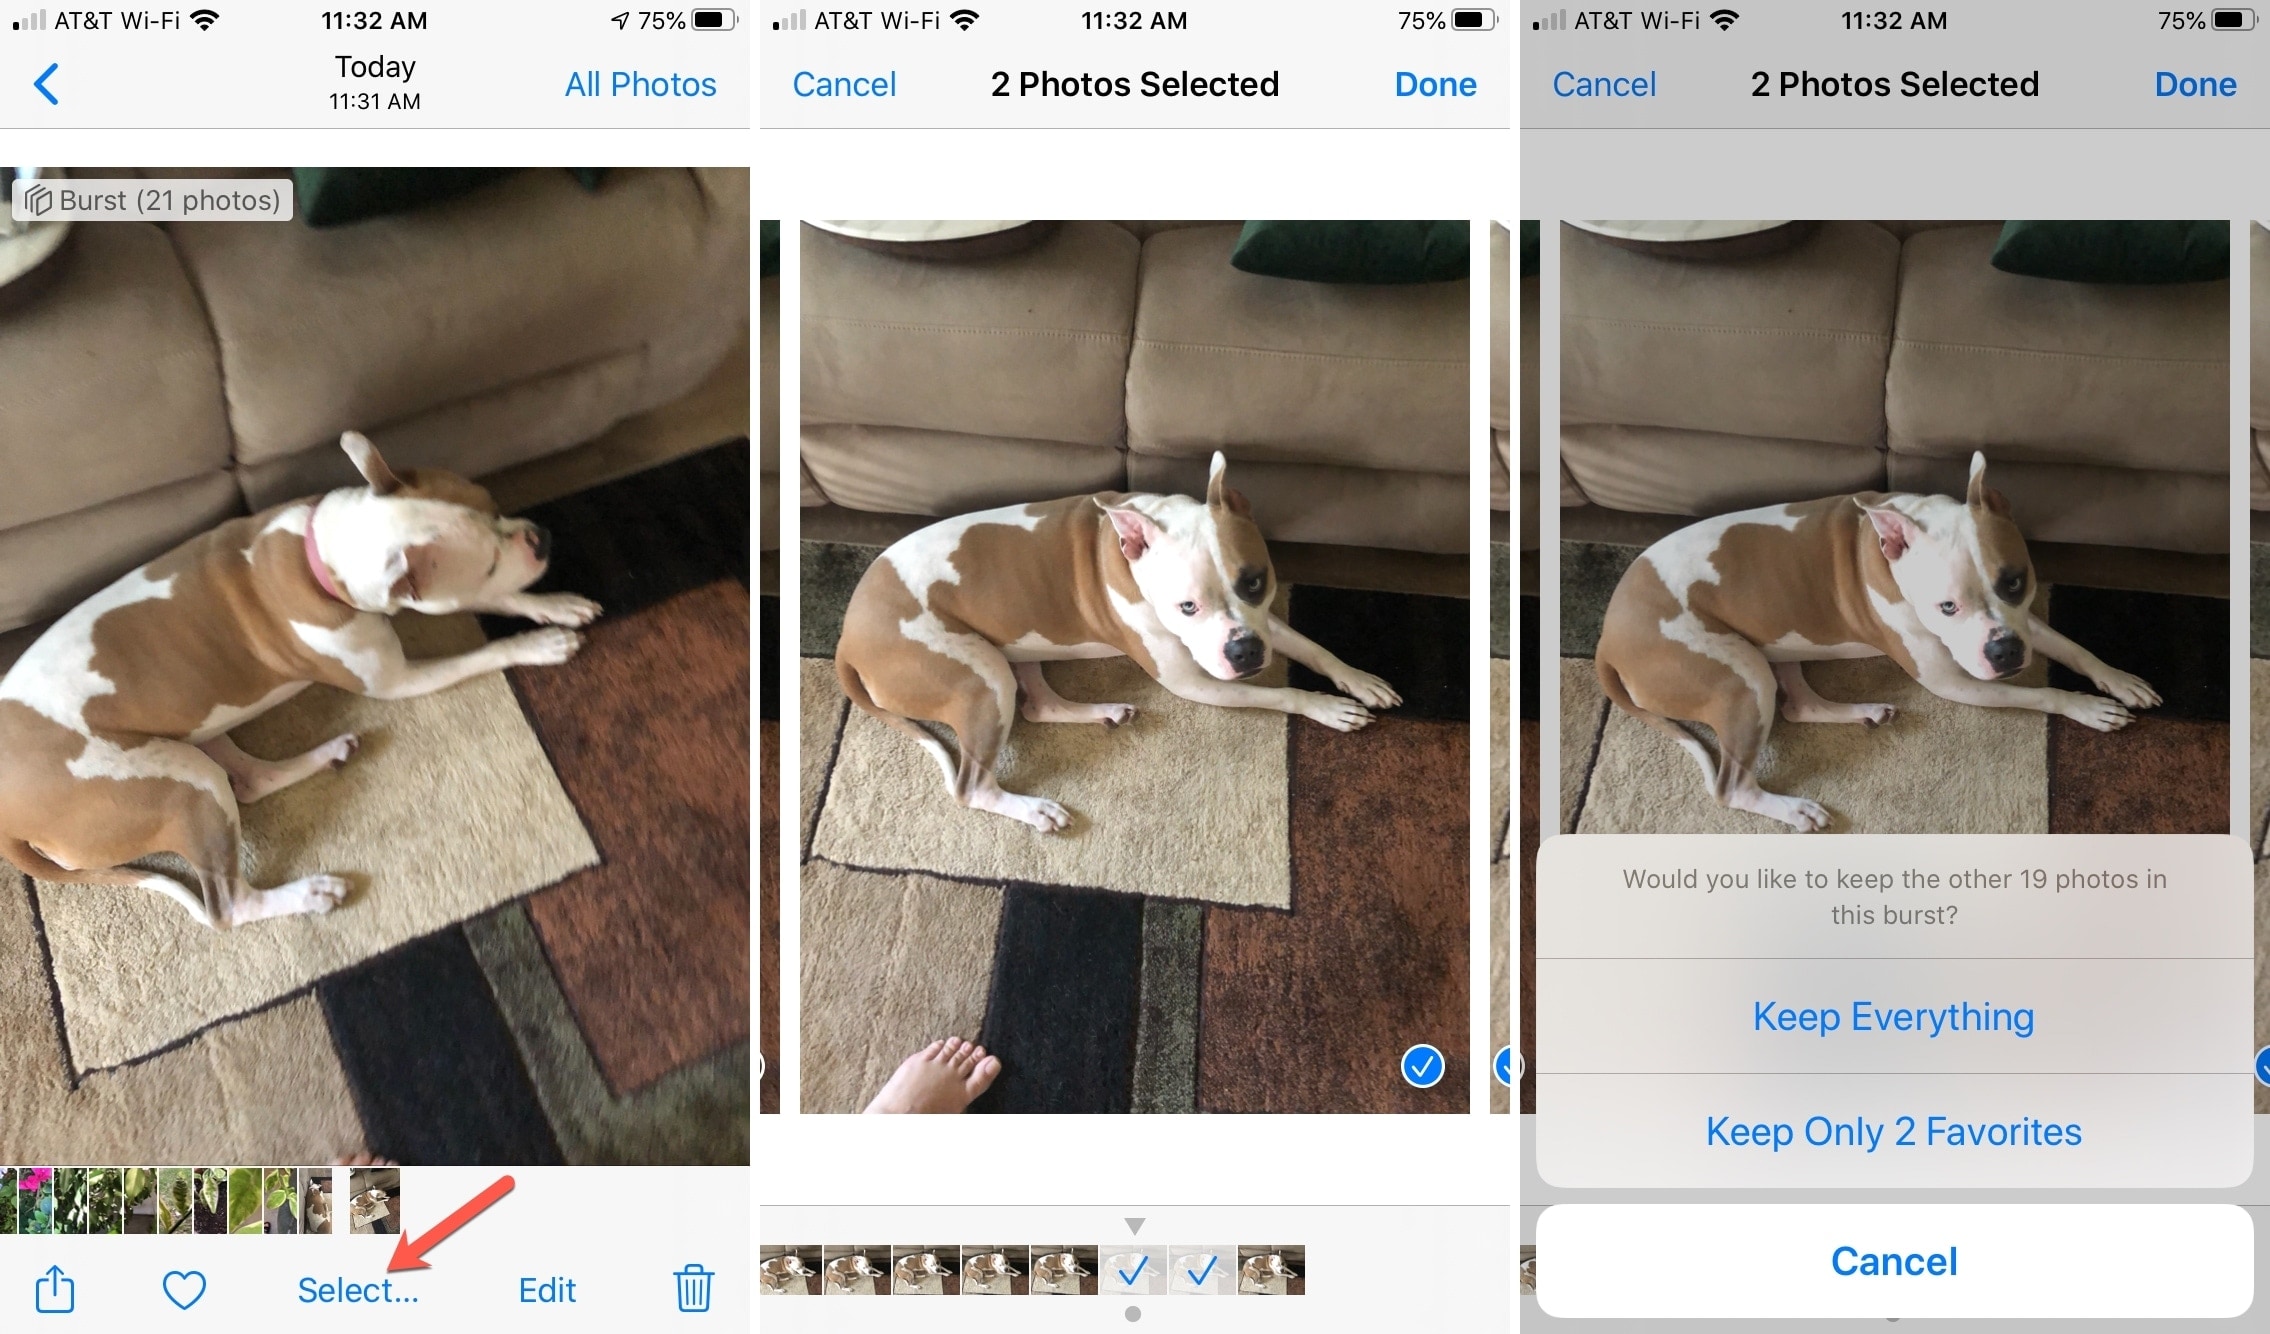
3) You can then scroll through the photos or use the slider at the bottom. Tap to choose the one(s) you want to keep.
4) Tap Done at the top.
5) You’ll then be asked if you want to keep only those photos you selected or everything.
6) Make your selection, and you’re set!
On Mac
Reviewing burst photos on your Mac is convenient because you can see them on a larger screen, gather the family around your computer, and review them together.
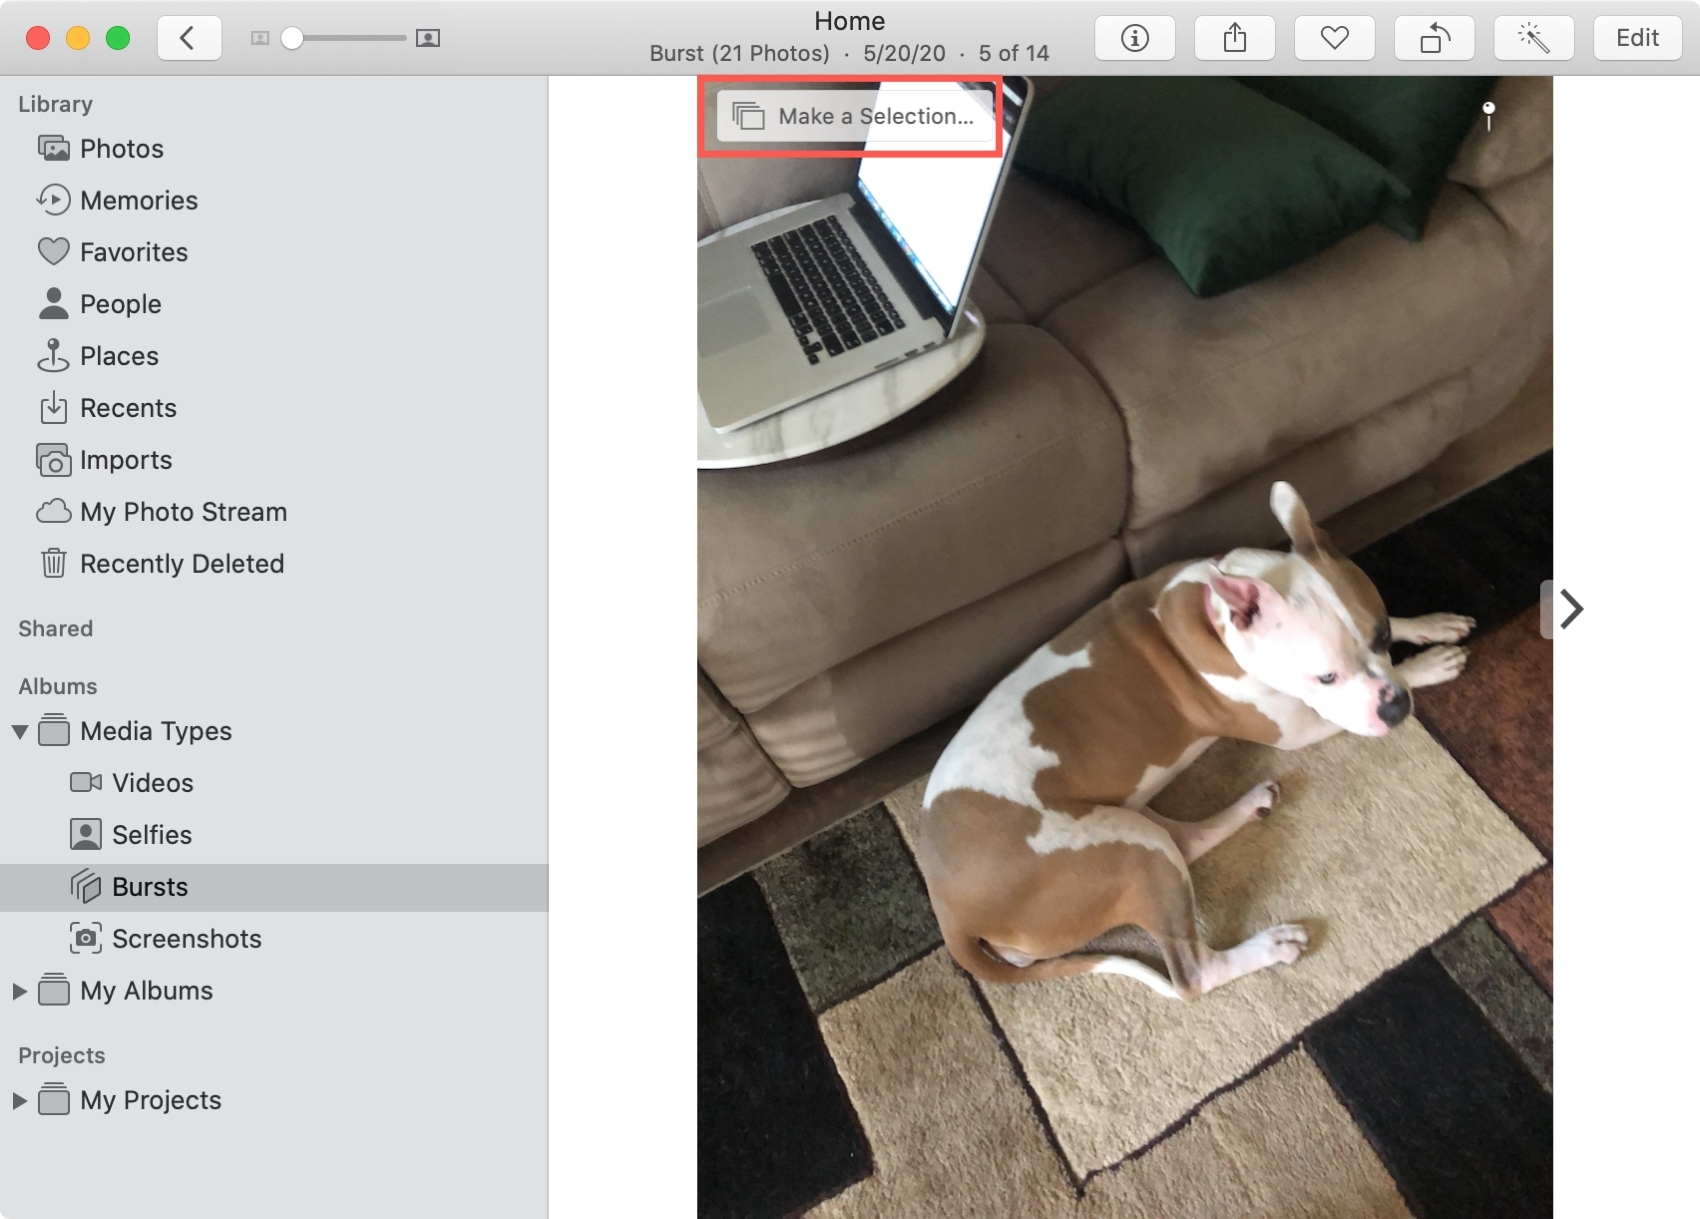
1) Open Photos on your Mac. In the sidebar on the left, click the arrow to expand Albums if necessary and select Bursts under the Media Types sub-heading.
2) Thanks to iCloud Photos, here you’ll see all pictures captured with burst mode on your iOS device.
3) Choose a set of burst photos to review by double-clicking one.
4) Click Make a Selection at the top of the collection.
5) You can swipe directly on the photos or within the strip at the bottom to move through the collection of bursts.
6) Click the photos you want to keep. This will put a checkmark on each one and dim them in the photo strip at the bottom.
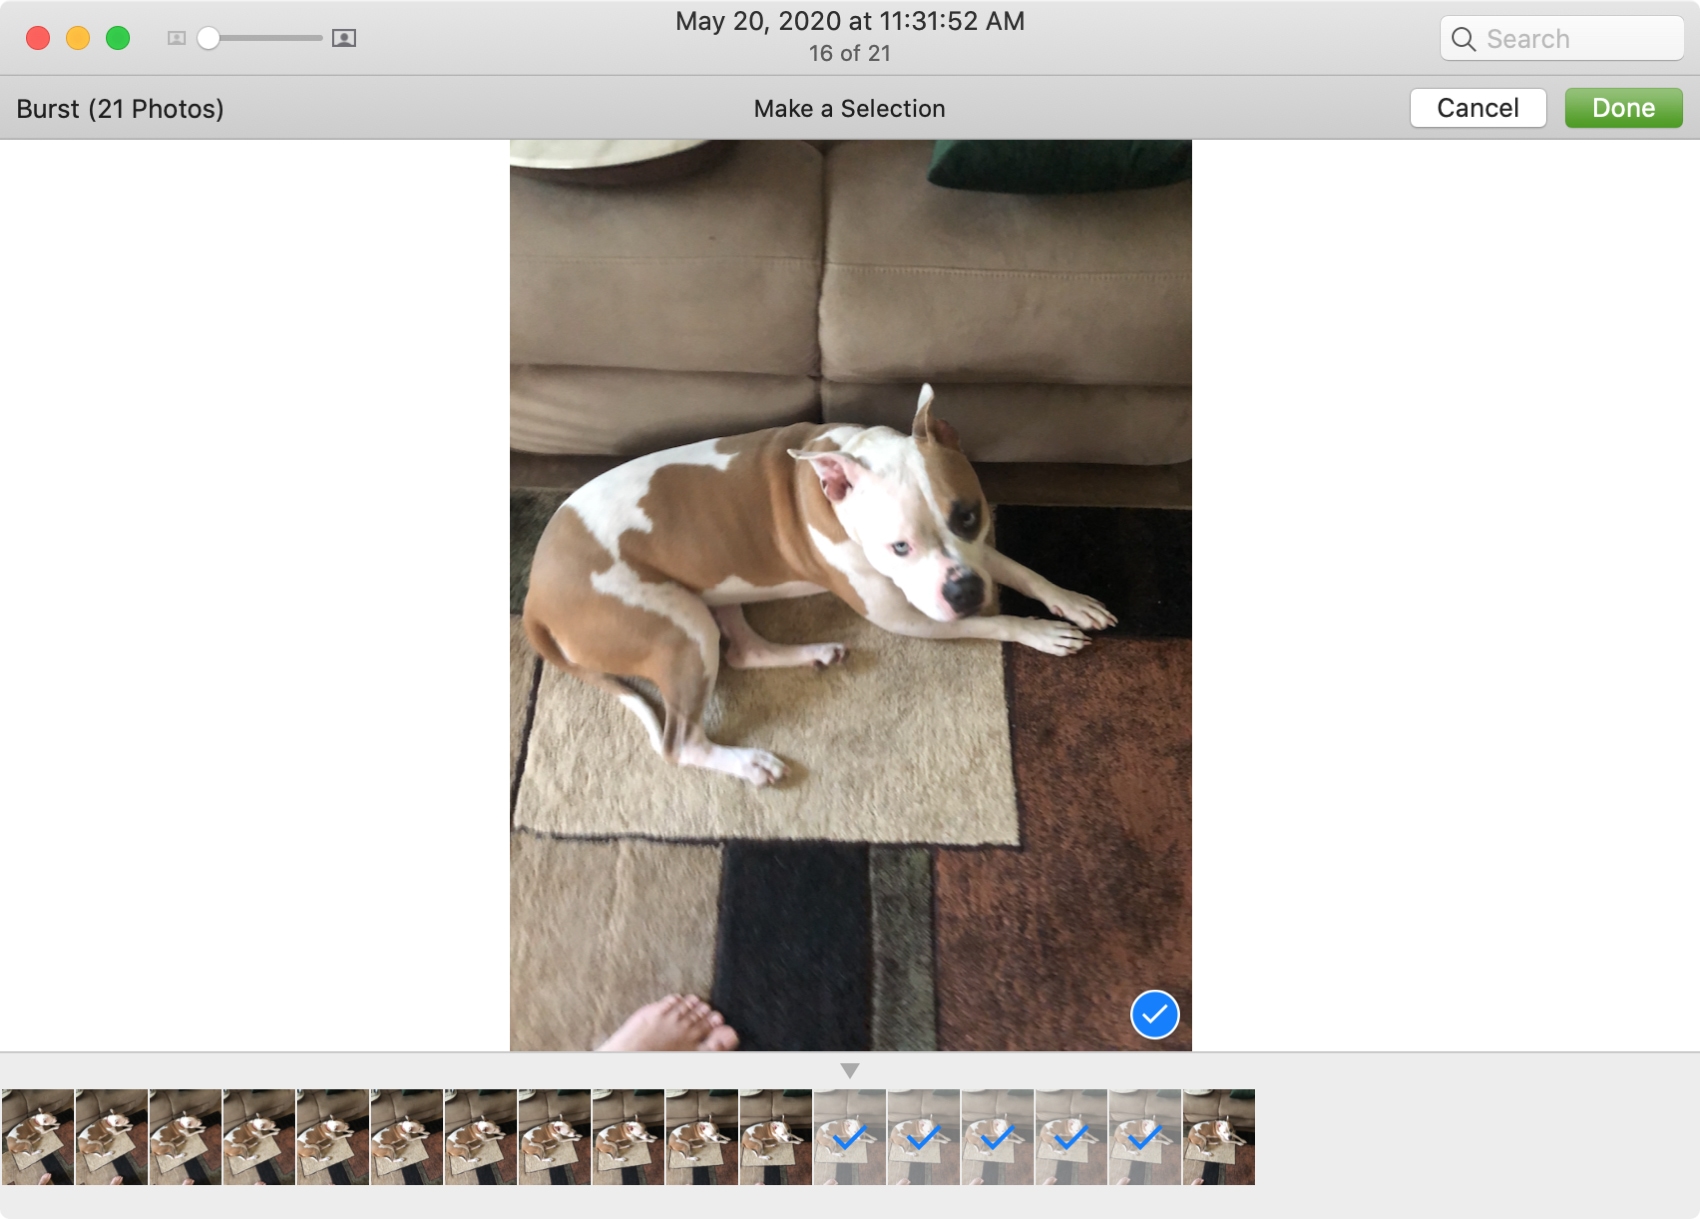
7) When you finish selecting all the photos you want to keep, click Done at the top. And note you can click Cancel anytime to select your burst photos later.
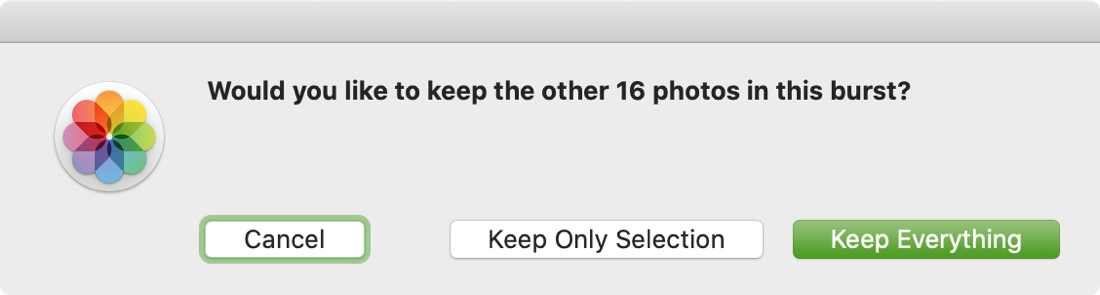
8) You’ll receive a pop-up message asking if you’d like to keep the remaining photos you did not select. Click Keep Only Selection or Keep Everything if you’d rather.
I don’t know about you, but I know there have been plenty of times when I snapped an awesome photo only to discover later that it didn’t turn out as I had hoped. But by using burst mode, you can reduce the chances of that happening!
What are your thoughts? Are you going to give burst mode a try the next time you want to capture some great moments with your iPhone or iPad camera?
Check out next: