Learn how to set up the Dropbox app on your Mac and manage your new and existing files without having to visit Dropbox’s website every time you need to download or upload a file.
Just like you can set up Google Drive on your Mac for seamless file uploads and downloads, you can also add Dropbox to Finder. Once that’s done, you can use this popular cloud storage service inside the Finder on your Mac, like any normal folder.
This local Dropbox folder will have all your existing files. Furthermore, anything you move to this folder will automatically upload to Dropbox and be available on all your computers, phones, and the web.
Set up Dropbox on Mac
1) Download the Dropbox app for Mac using this official link. Or, if you have Dropbox set up on your phone, open it and go to Account > Connect a computer.
2) Install the app by double-clicking the downloaded DropboxInstaller.dmg file and following the simple on-screen instructions.
Note: If the download or the installation gets stuck, click the installer icon from your Mac’s Dock > click its name from the top menu bar > and hit the quit option. After that, restart the installation.
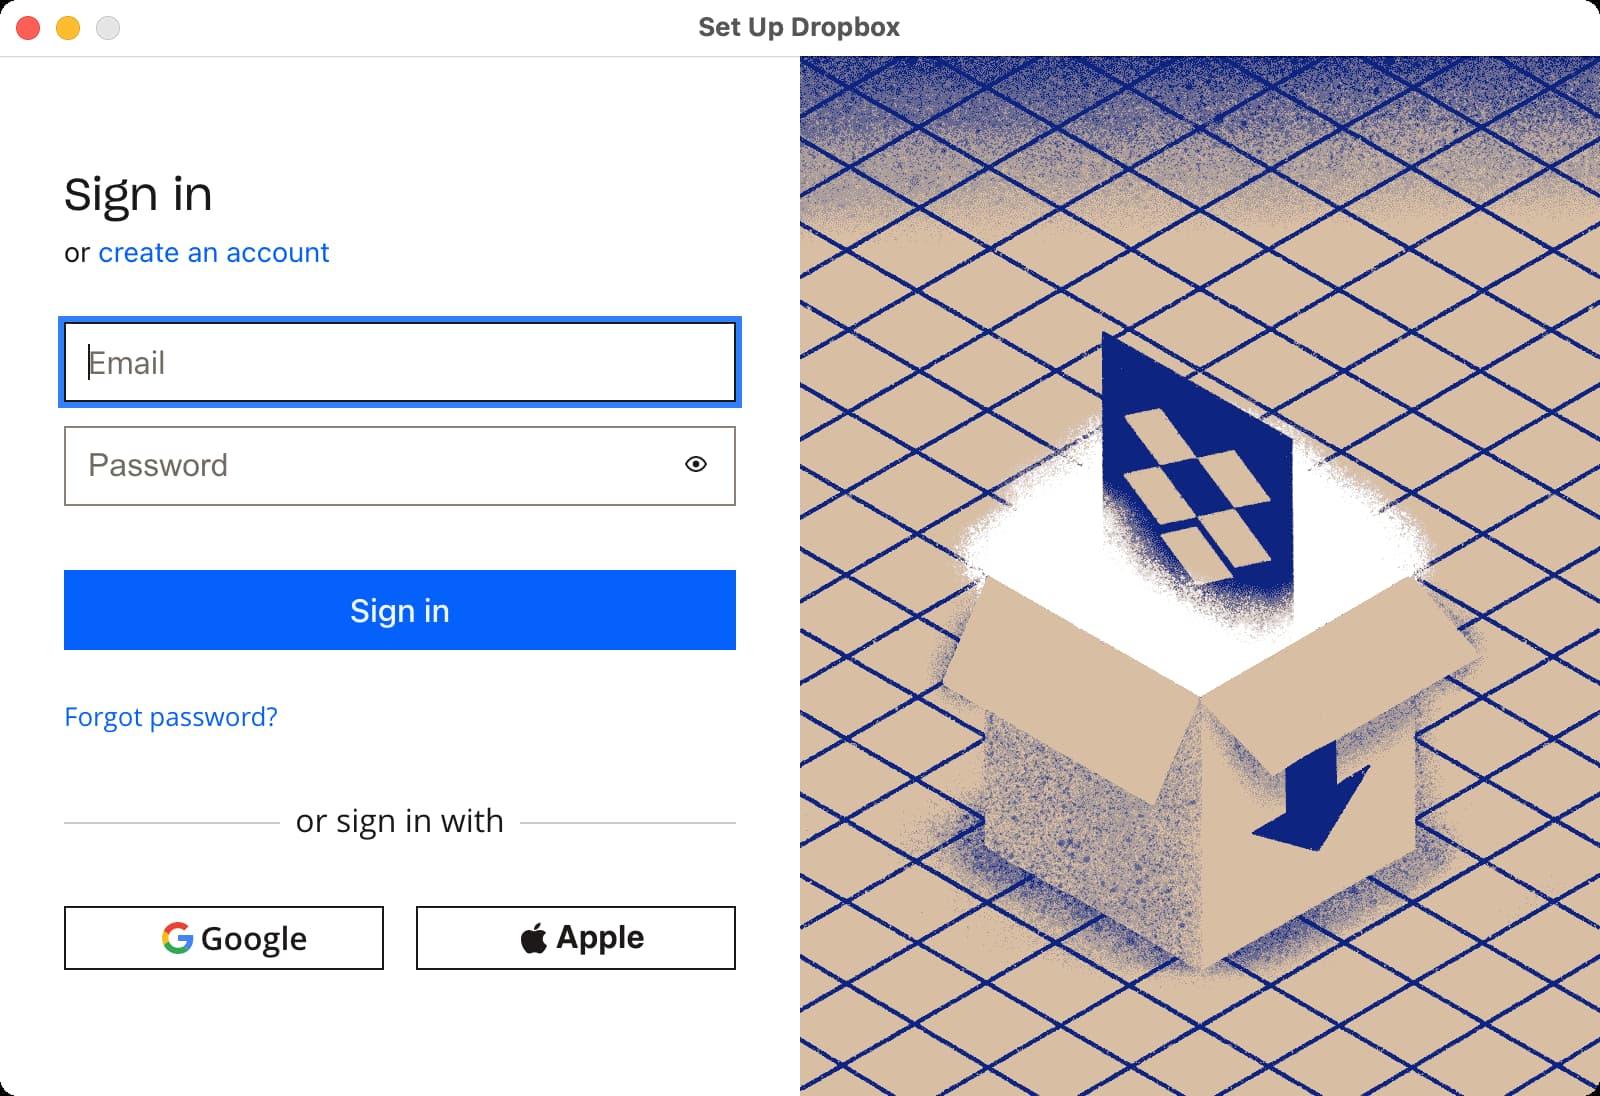
3) Once the installation completes, sign in to your Dropbox account.
Note: Dropbox will ask for multiple permissions, such as accessing your Accessibility settings or offering you the option to share your screenshots in a snap. You can decline all that unless you know what you’re doing or want to use these features.
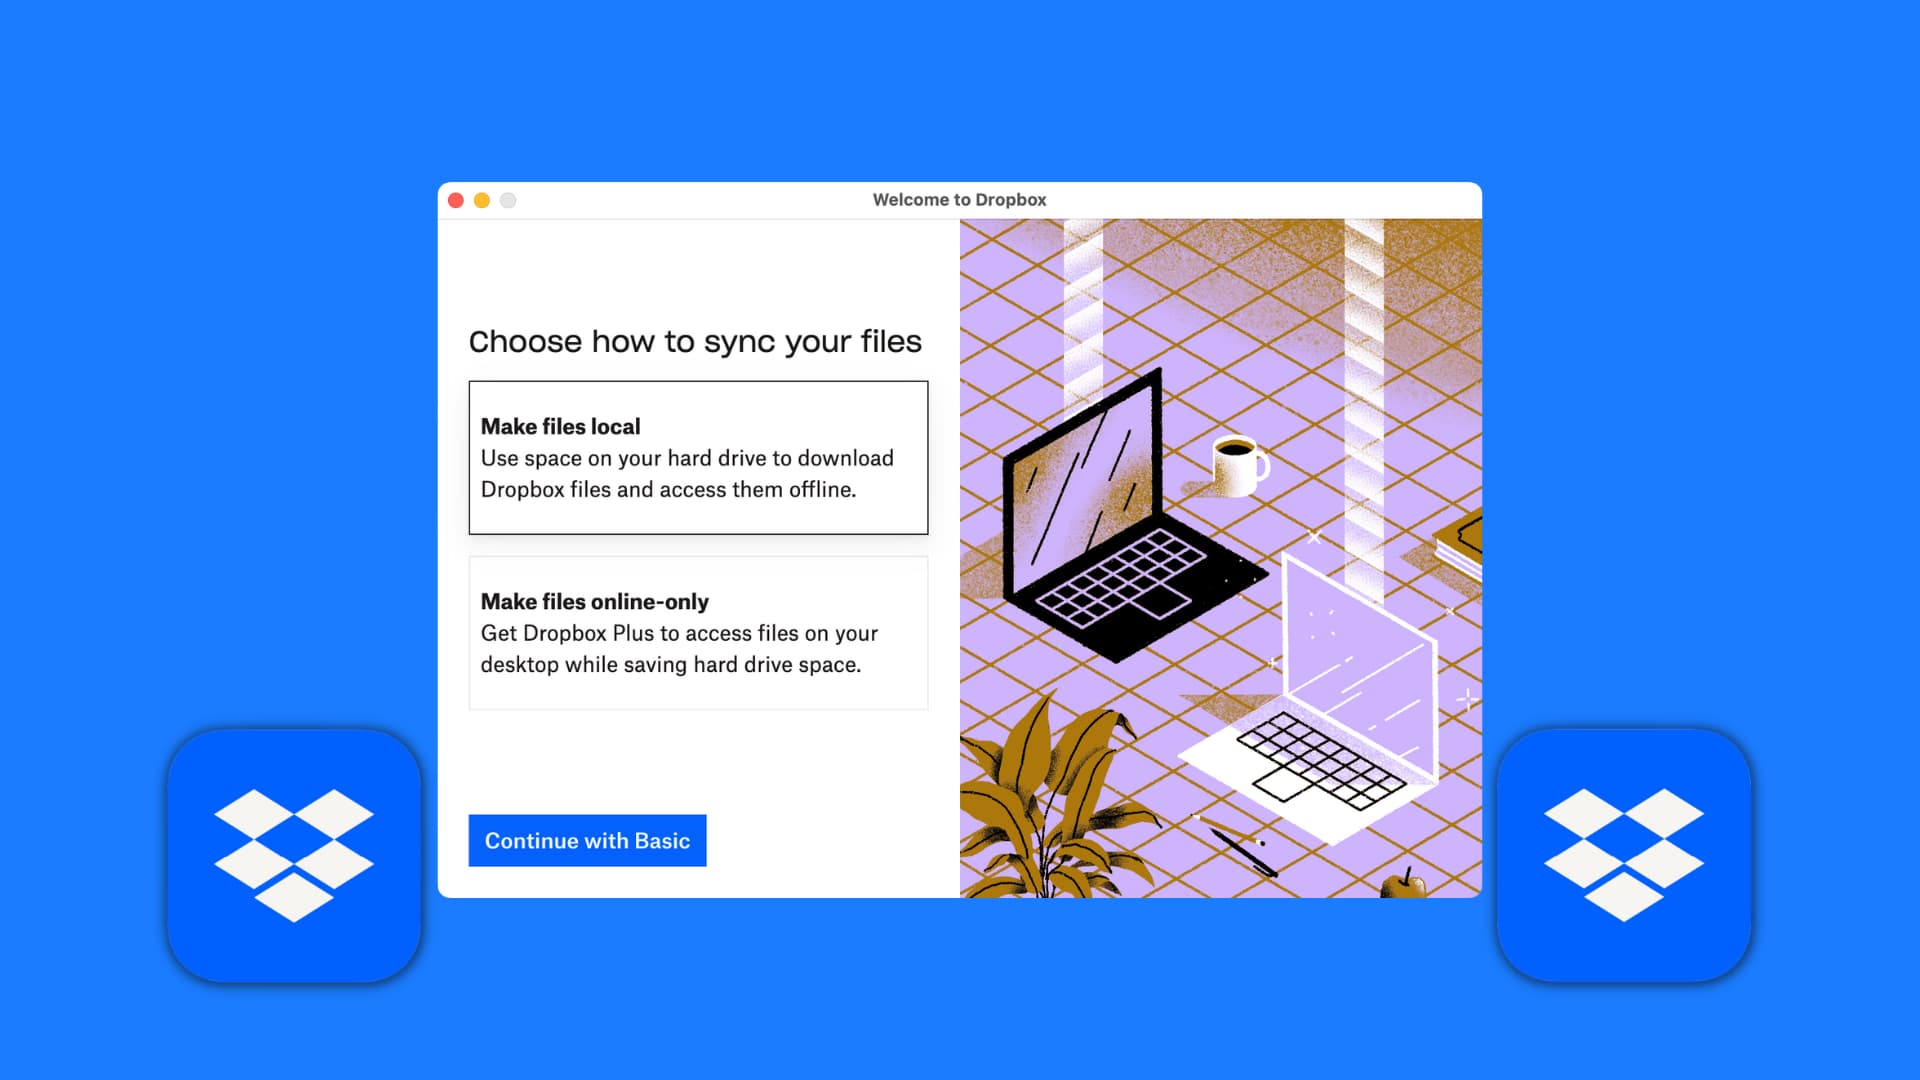
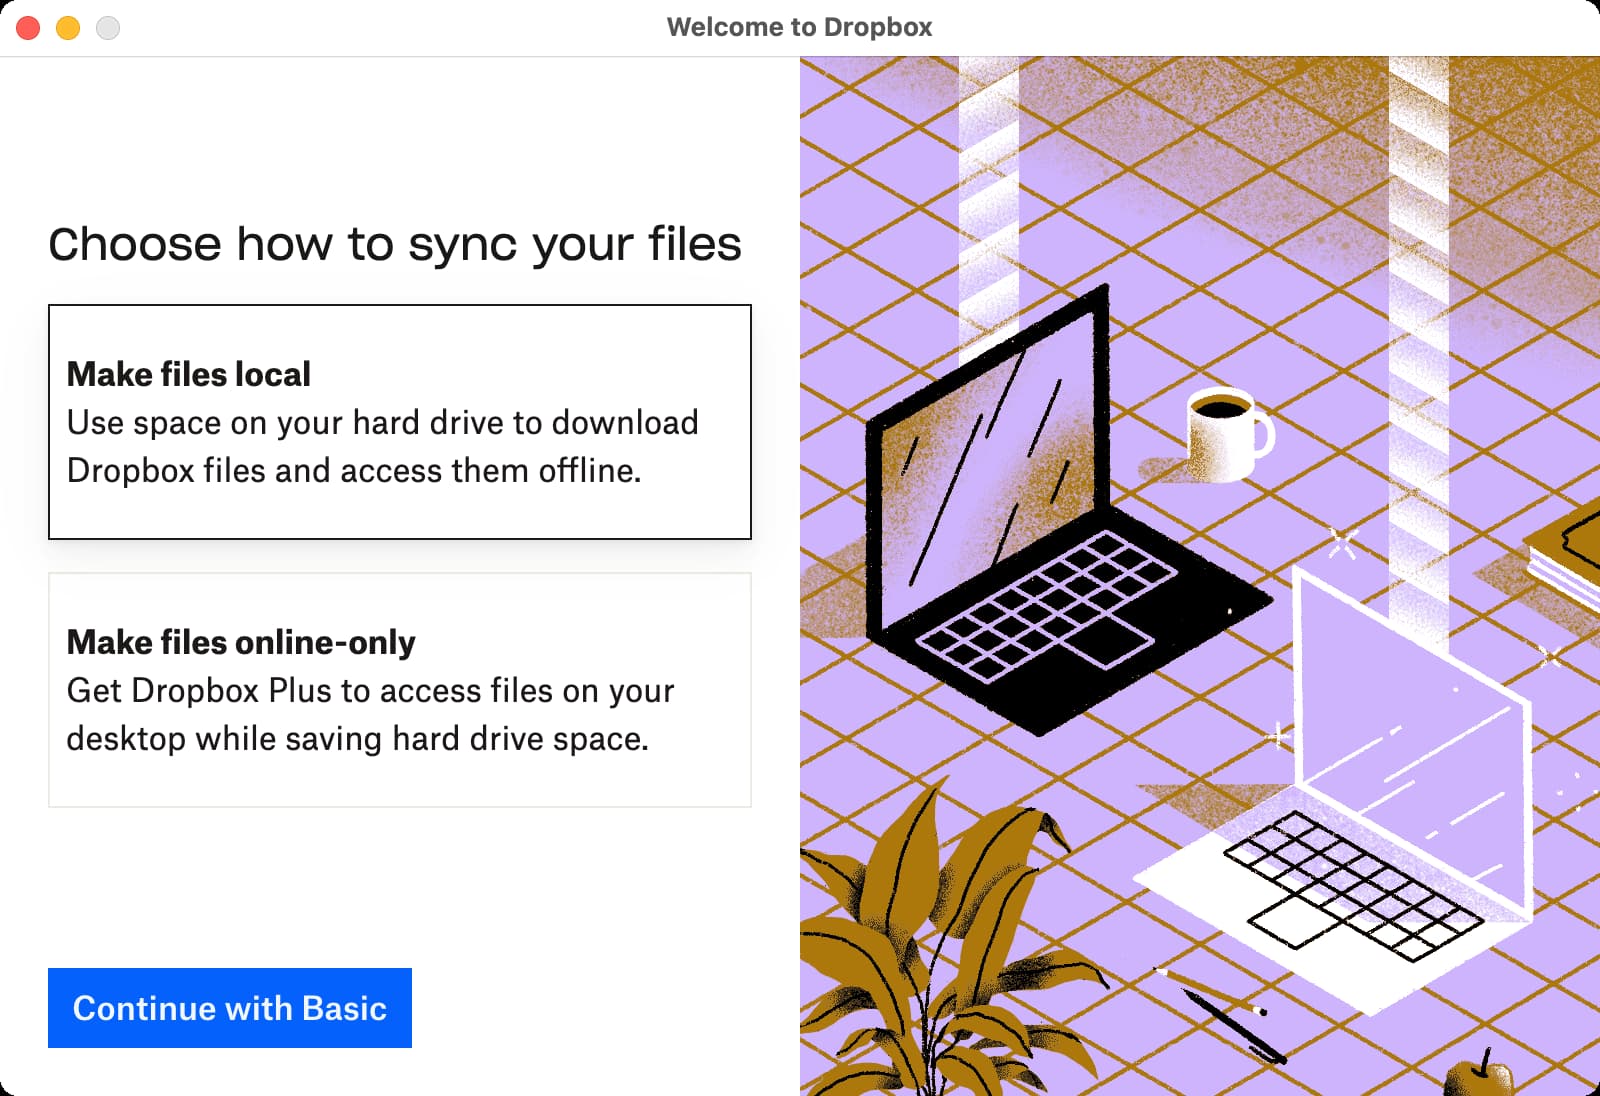
4) Now select how you want to sync files. If you’re on the free, basic plan, your only option is to pick Make files local, which will store all your existing files locally on your Mac’s internal drive.
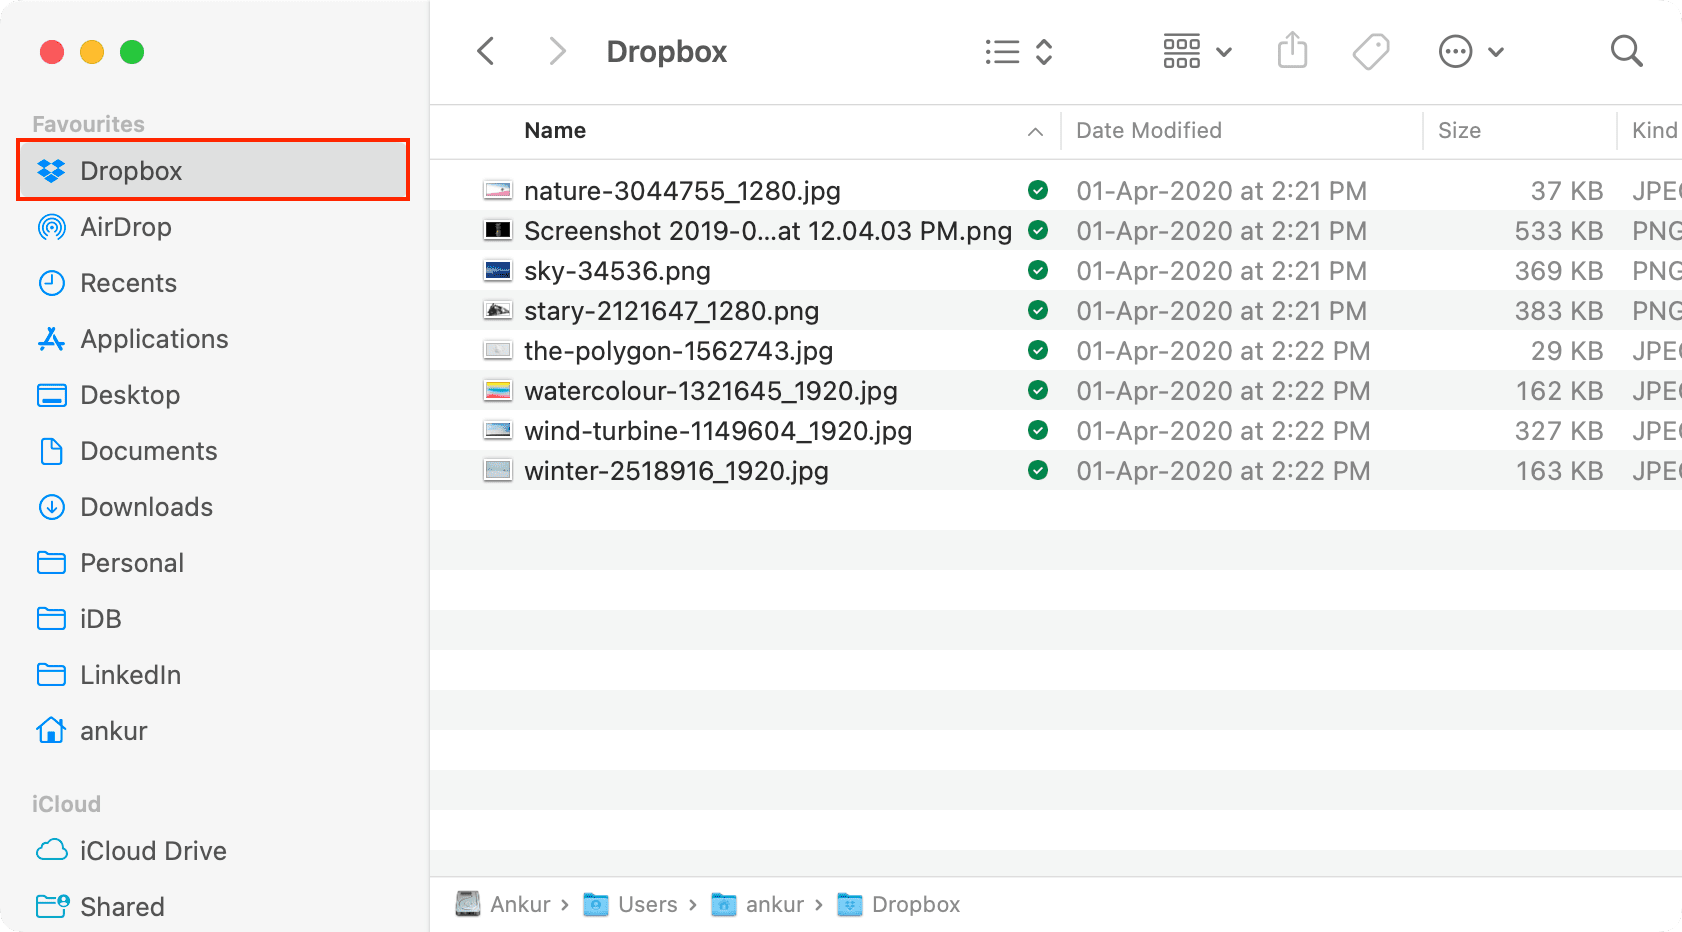
5) Once you finish, the Dropbox section will automatically open in Finder. If not, open Finder, and you should see the Dropbox folder at the top left.
Manage files in Dropbox on Mac
Access: Click the Dropbox folder in Finder, and you will have your existing Dropbox files & folder here. A green check means the file is also saved offline to your computer, and a blue icon signifies the file is syncing.
Upload: All new files you drag/add to this folder will upload to Dropbox.
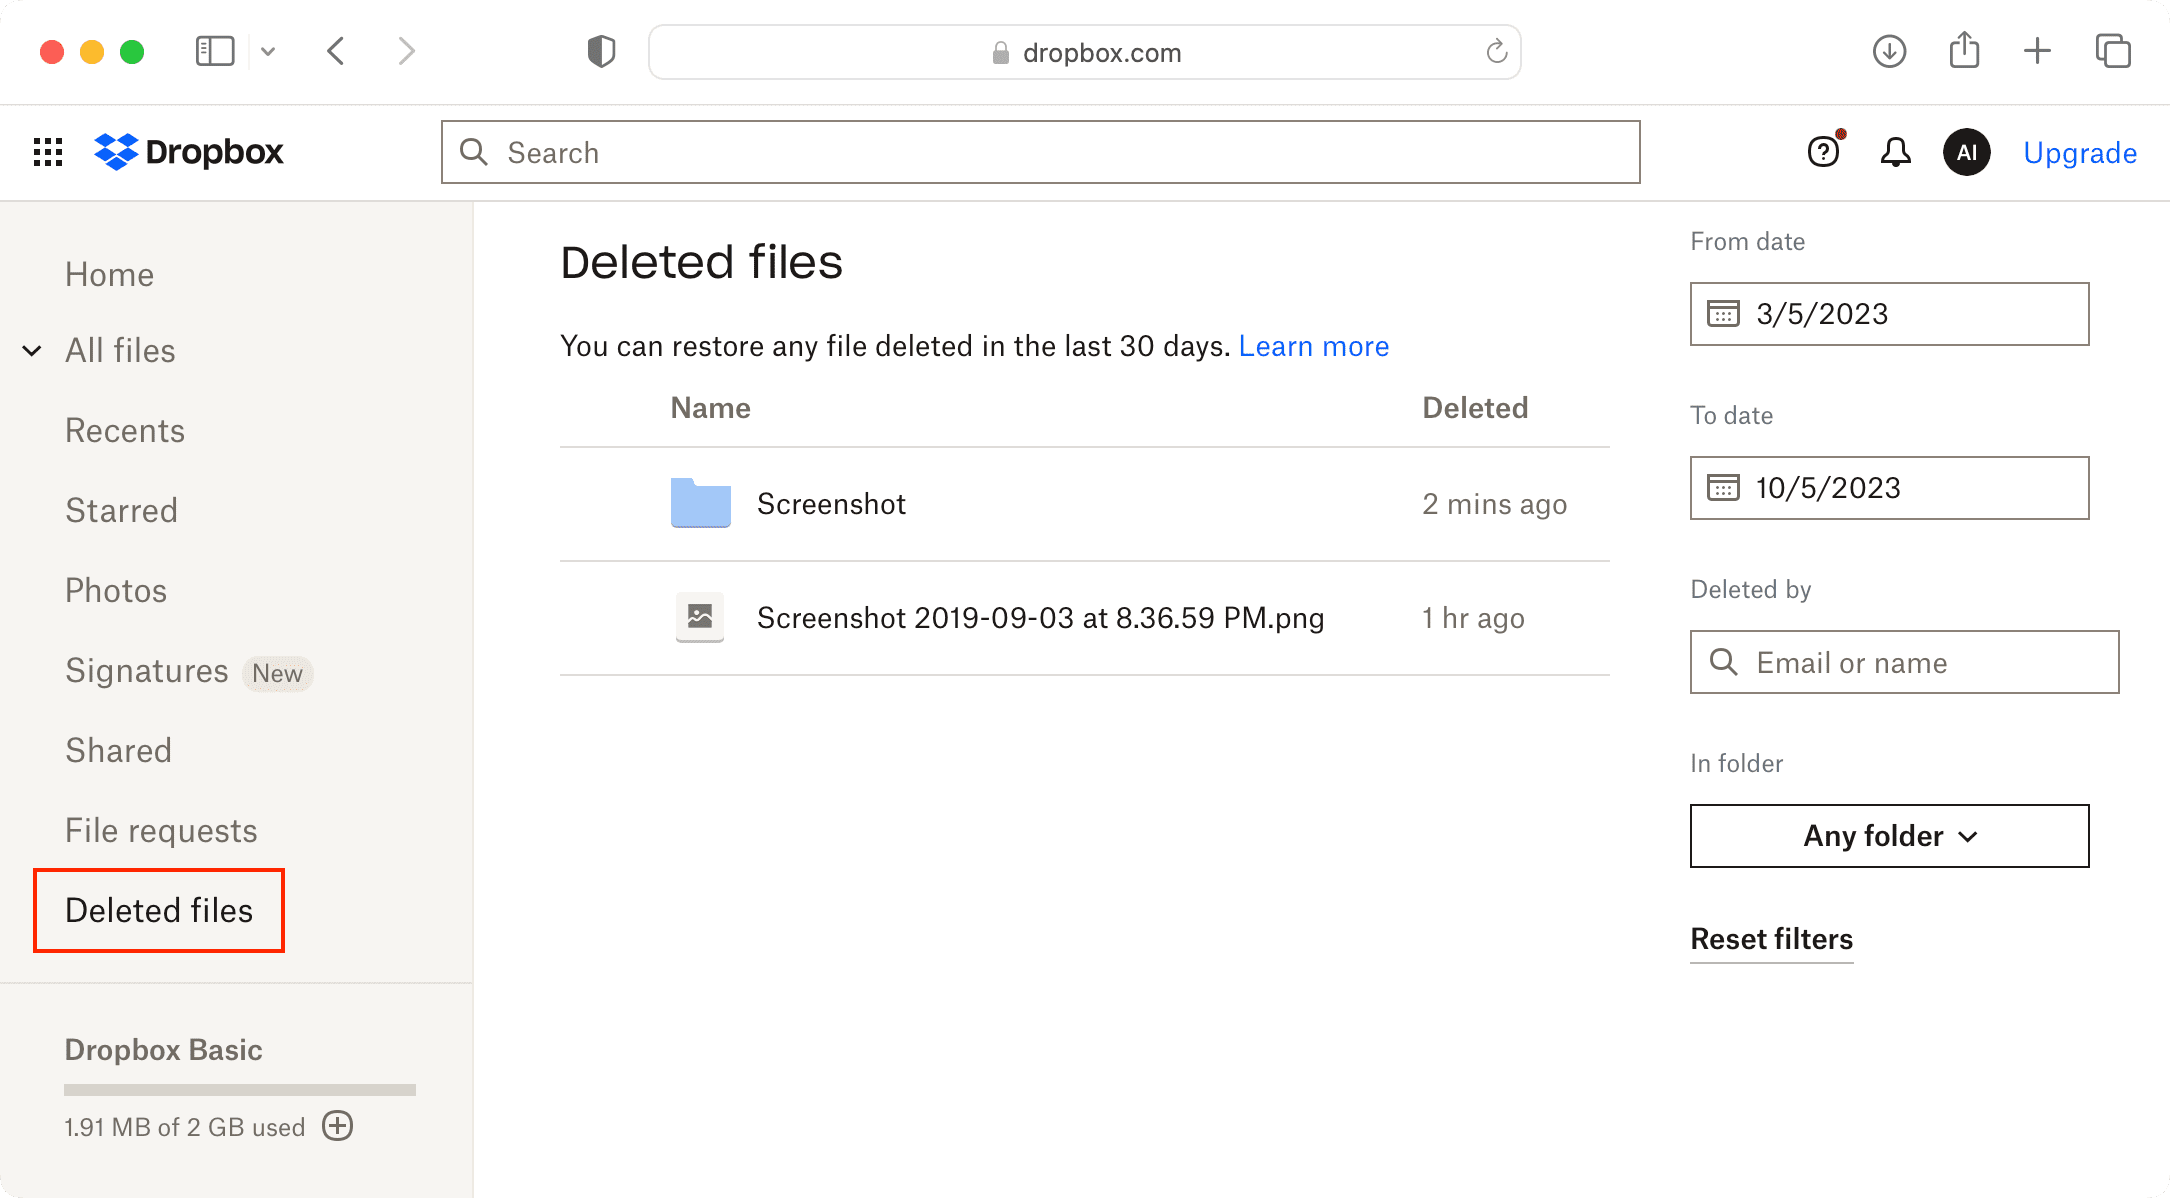
Delete: If you delete something from the Dropbox folder on Mac, it will be removed from Dropbox and all your devices where you’re using this Dropbox account.
You can restore it from your Mac’s Trash or log in to Dropbox.com within 30 days and recover your data from the Deleted files section.
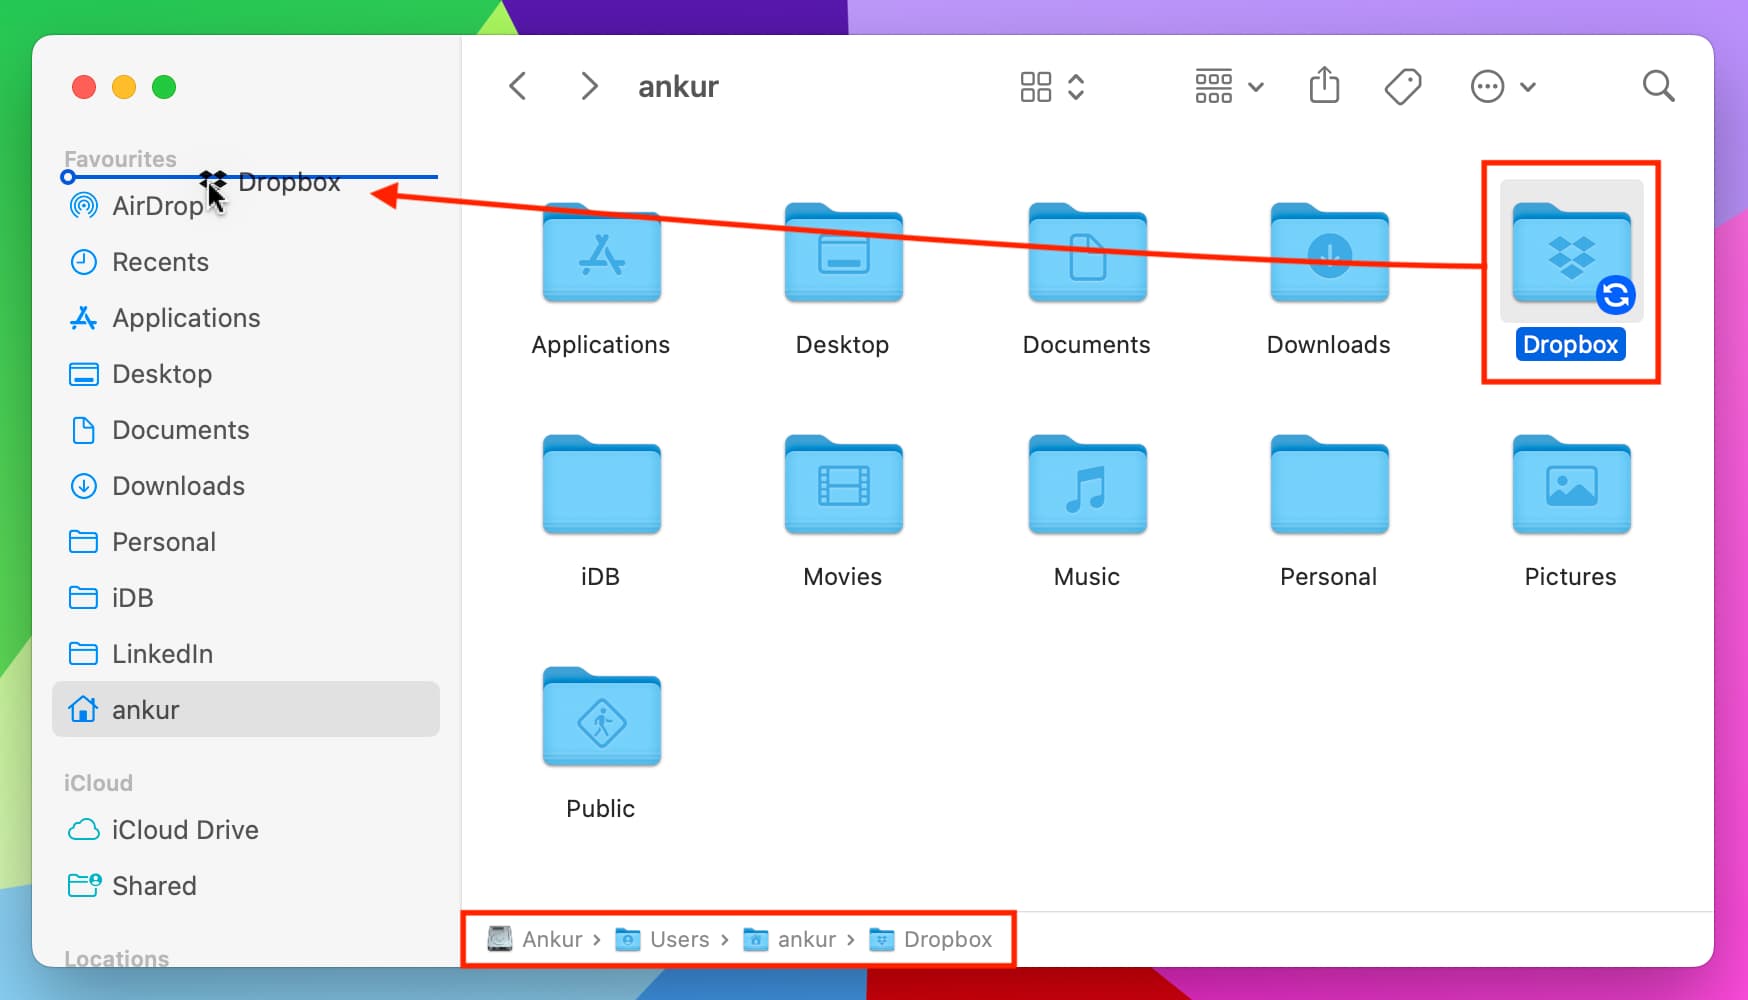
It’s possible that the Dropbox folder is not visible at the top of the Finder sidebar. Instead, it appears under the Locations section of the Finder sidebar. You can drag it from here to any other spot in the sidebar.
But in case you don’t see Dropbox anywhere in the sidebar, follow these steps to add it there:
1) Open a new Finder window and click Go > Go to Folder from the top menu bar.
2) Enter /Users and hit the return key.
3) If you have multiple user accounts on your Mac, select the user.
4) Finally, drag the Dropbox folder to a spot on the left sidebar.
Access Dropbox preferences on Mac
Dropbox settings can be accessed from the menu bar.
1) Click the tiny Dropbox icon from your Mac’s top menu bar.
2) Click the profile icon and choose Preferences.
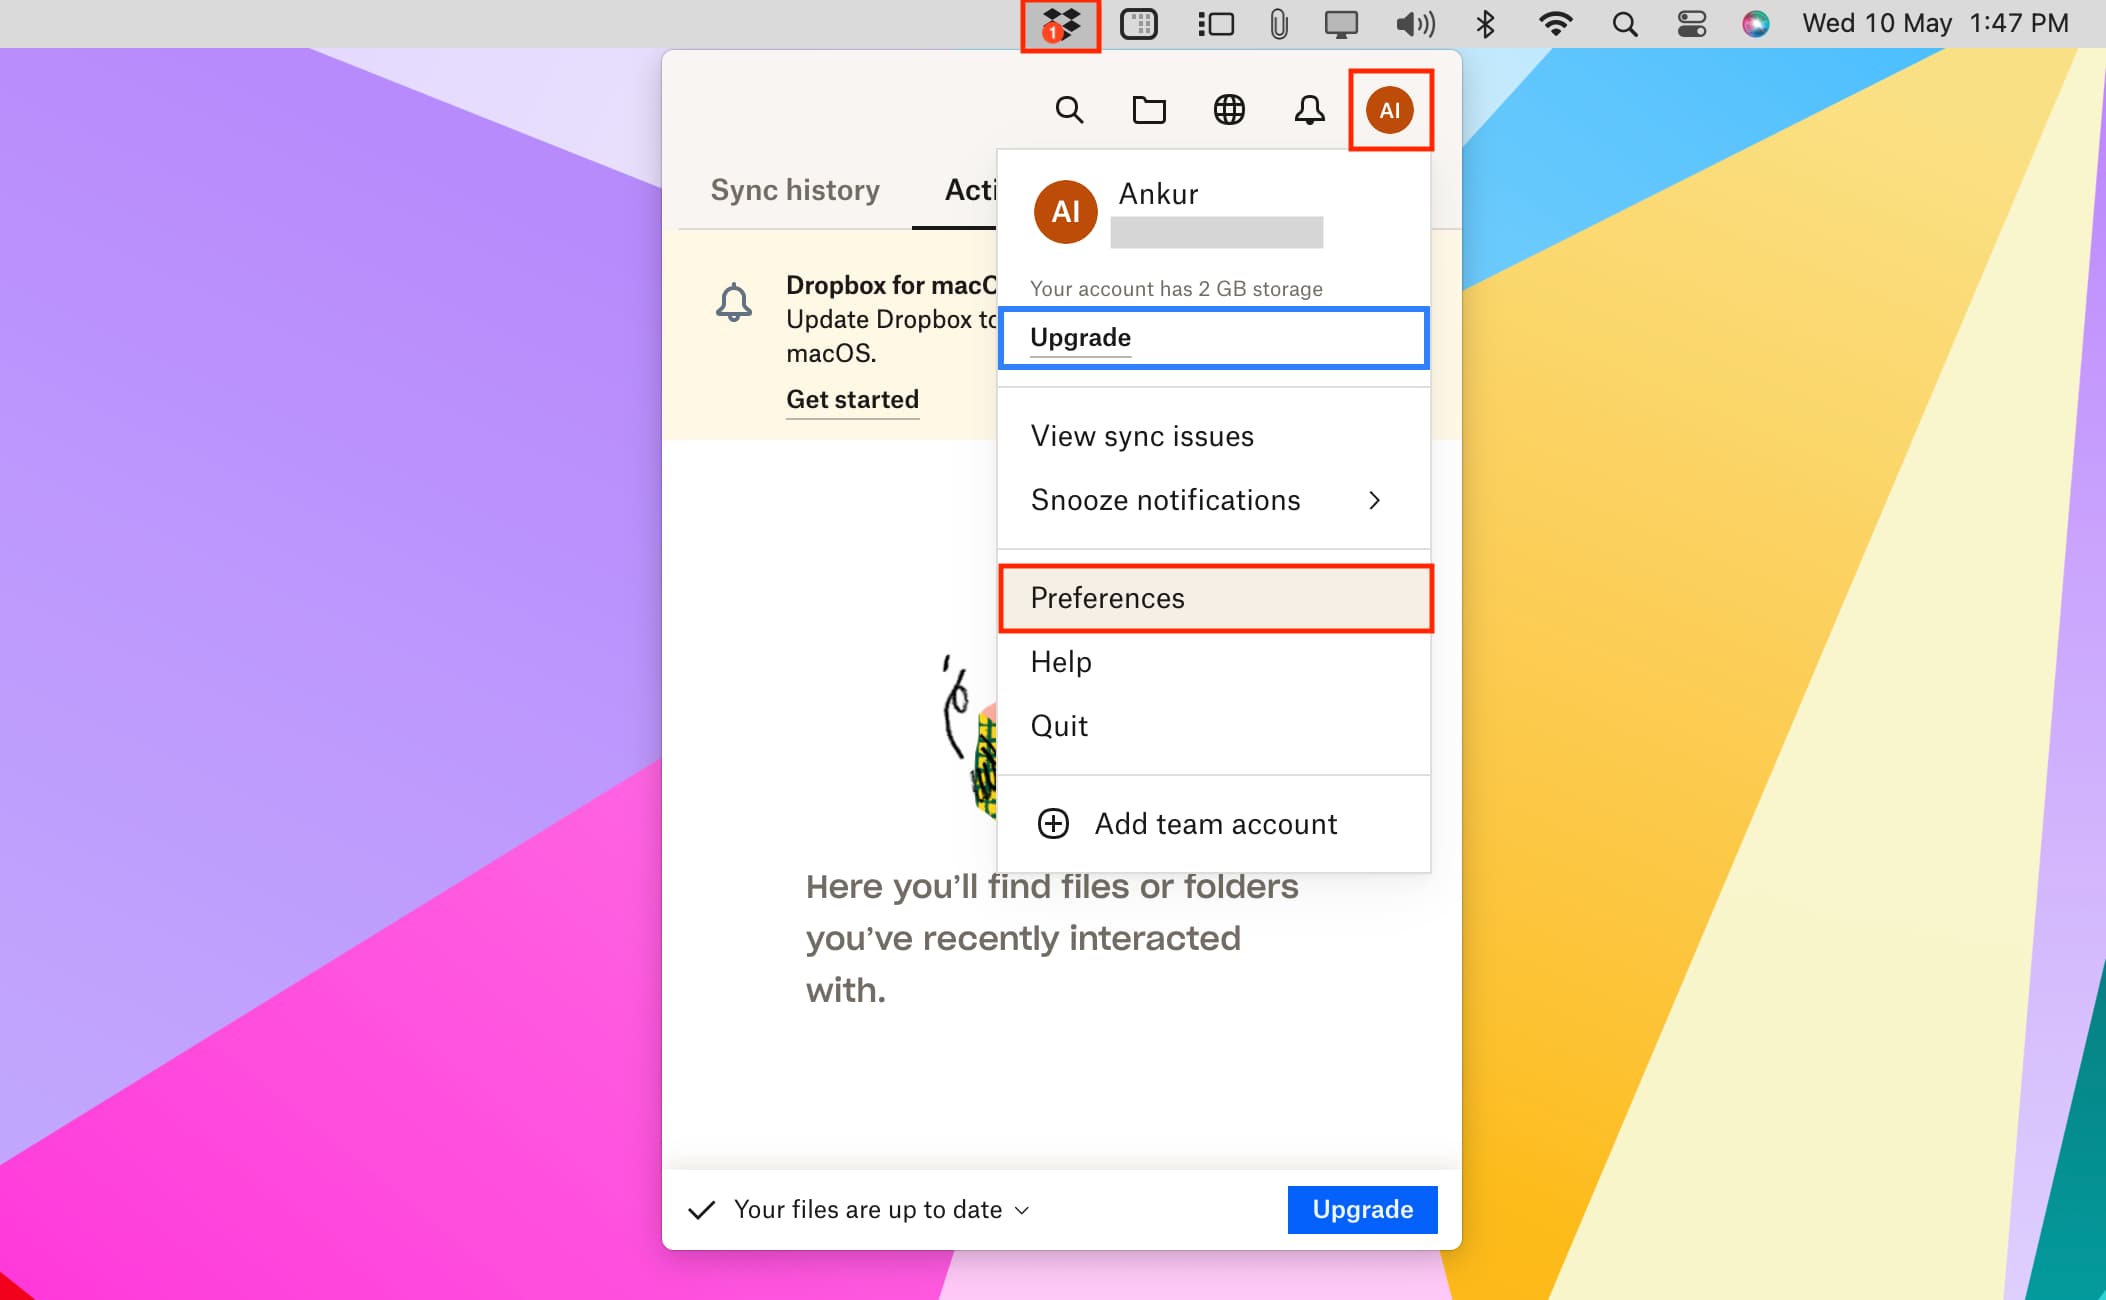
You can also sign out from the Account section of the Preferences screen.
Unable to sign in to Dropbox on computer? Here’s how to fix this
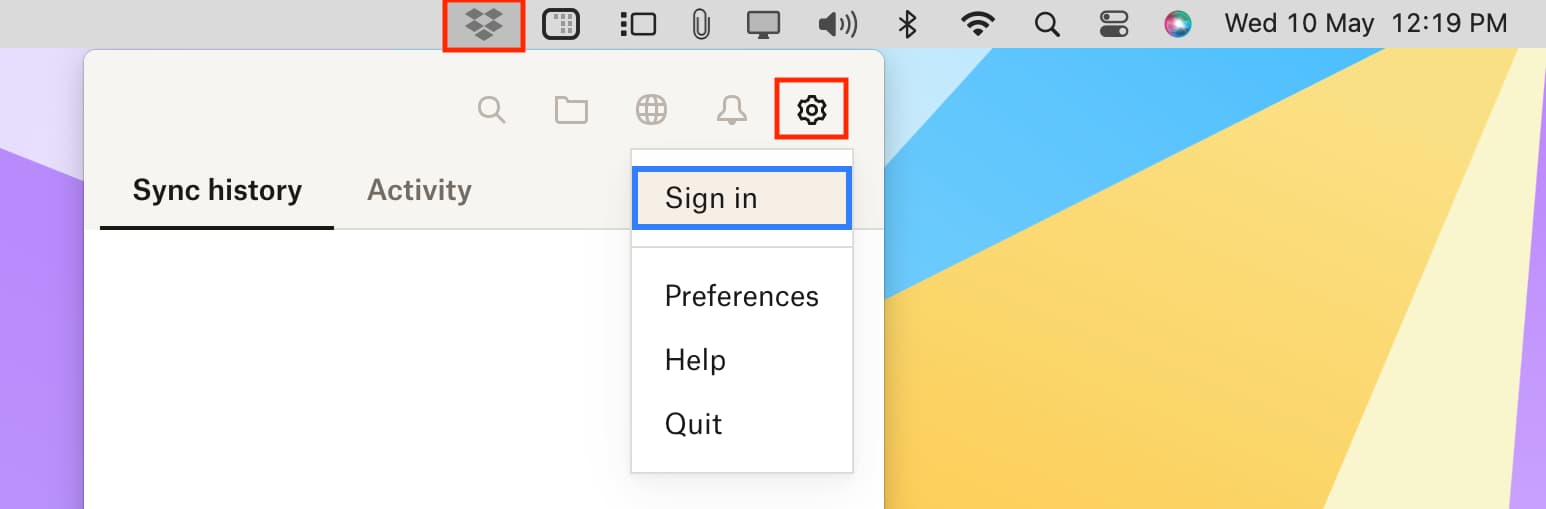
After you finish the installation, you should automatically see the sign-in window. In case you don’t, open the Dropbox app from your Mac’s Launchpad, but it won’t show an app window. Instead, you will see a tiny Dropbox icon in the top menu bar. Click it and follow it up by hitting the gear icon and choosing Sign In.
In rare instances, sign-in may not work if you used the Connect a computer option in Step 1 (while downloading the desktop app), or had previously logged in to the same computer. In this case, the app interface sticking out of the Dropbox menu bar icon will behave as if it’s loading or fetching content. But in most cases, it won’t do anything and keep you hanging there. So, here’s how to fix it:
1) Right-click on the Dropbox app icon in Mac’s menu bar and choose Quit Dropbox.

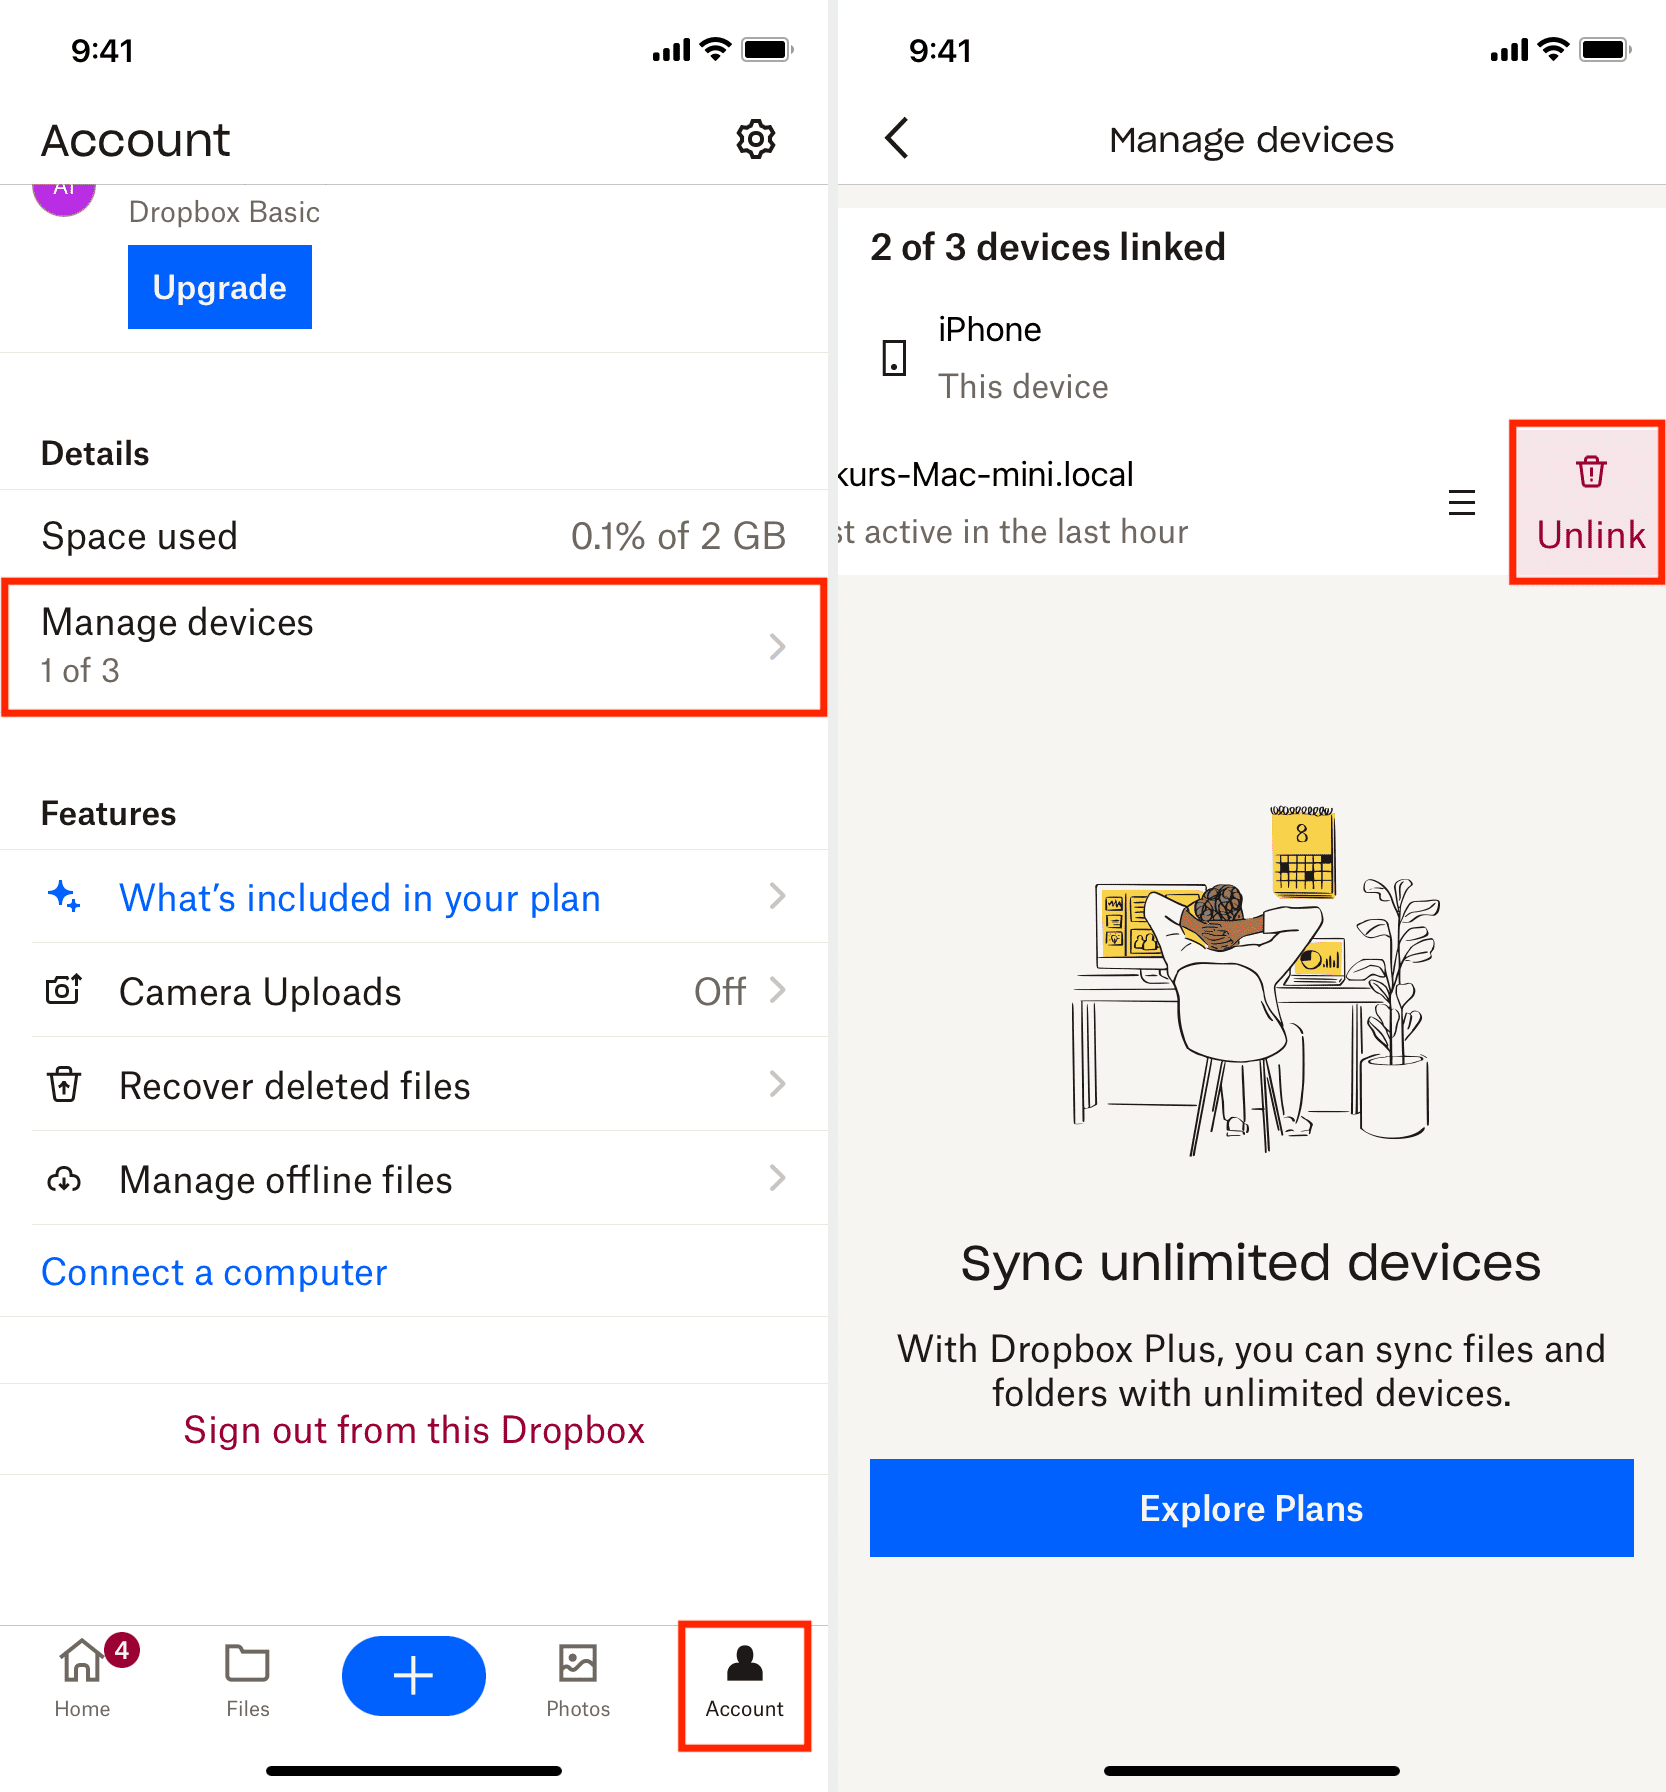
2) Open the Dropbox app on your phone and go to Account > Manage devices.
3) Swipe left on your computer’s name and tap Unlink.
4) Now open the Dropbox app on your Mac and follow the steps explained above to sign in.
Cleanly delete Dropbox from Mac
If you no longer need to use Dropbox, I recommend using an app like AppCleaner to remove all its data.
After uninstalling the app, you may find that your Dropbox files are still on your Mac’s local drive. You can access them by going to the/Users/YourUsername/Dropbox folder. From here, you can delete the files or even the entire Dropbox folder. If you don’t see your files here, go to ~/Library/CloudStorage and they should be there.
Check out next: