Preview on Mac is a terrific app for viewing your images or signing PDF documents. But the Preview app can do much more. For instance, there are a few tools like Loupe and Mask that can help you make parts of your images stand out and really pop.
In addition, Preview has features for customizing the colors in your image along with the size. To help you make the most out of Preview on your Mac, here’s how to use those color and size tools.
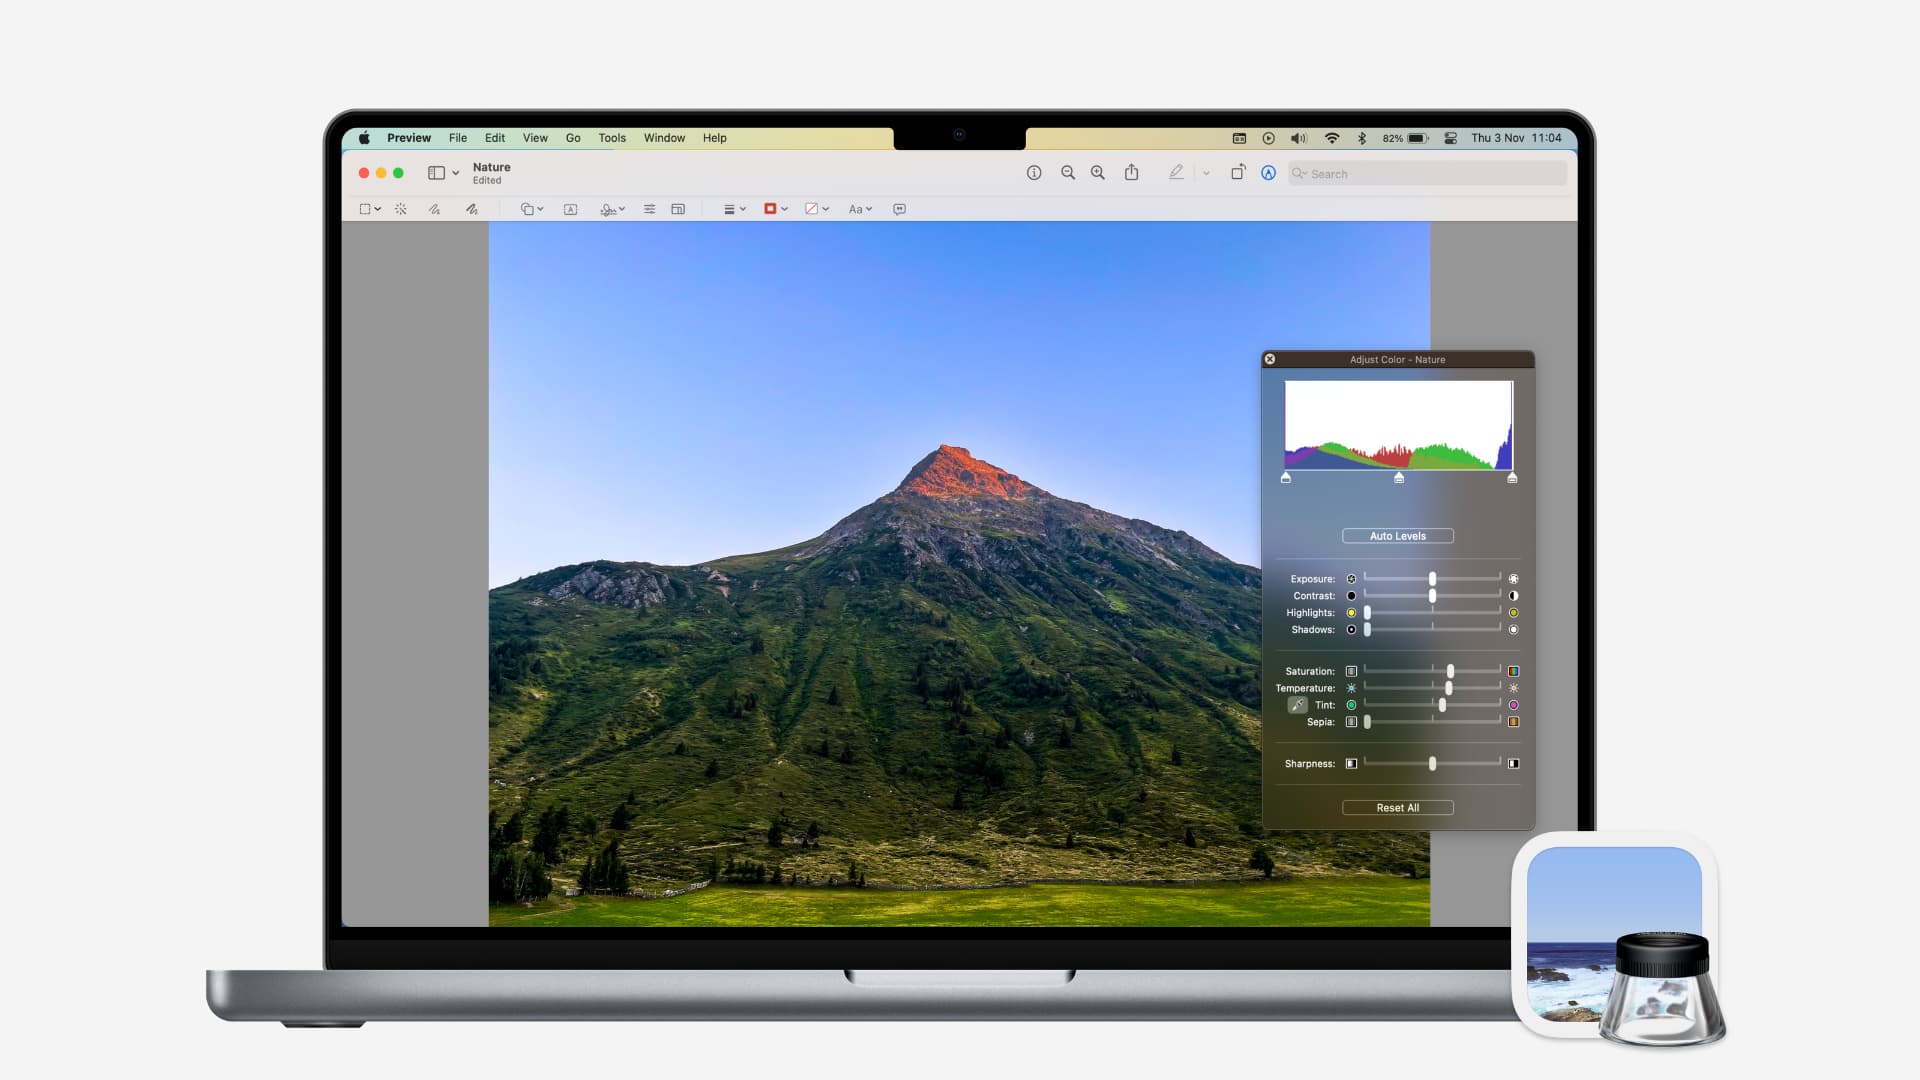
The Preview color tool
The color tool in Preview can help you make adjustments to exposure, contrast, shadows, and more.
Open your image in Preview and click Tools > Adjust Color from the menu bar.
The color adjustment tool will open in its own window, and you’ll see your array of options. This is a terrific way to make small changes to your photos or other images without the need for an expensive editing app.
Move the sliders for each value from exposure to sharpness until you get your image as you want it.
Additionally, you can use the three arrows at the very top to adjust the light balance.
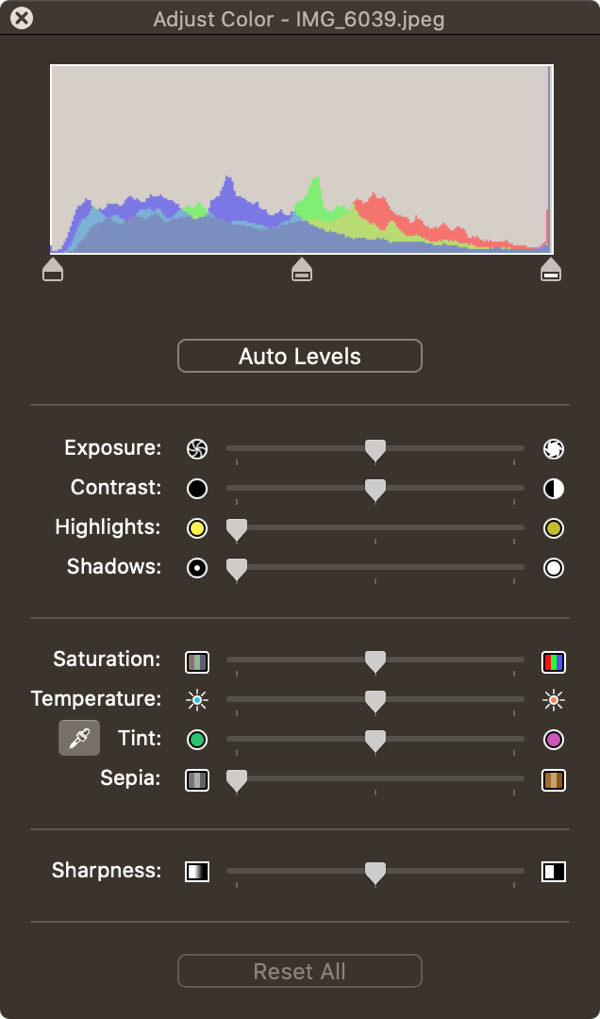
As you make changes to each color adjustment, you’ll see the changes to your image immediately. And if you want to revert your image to its original state, just click the Reset All button at the bottom of the color tool window.
Finally, if you simply want to go with the best settings for each value for your image, click the Auto Levels button at the top.
The Preview size tool
For resizing your images, check out the easy-to-use size tool in Preview.
Open your image in Preview and click Tools > Adjust Size from the menu bar.
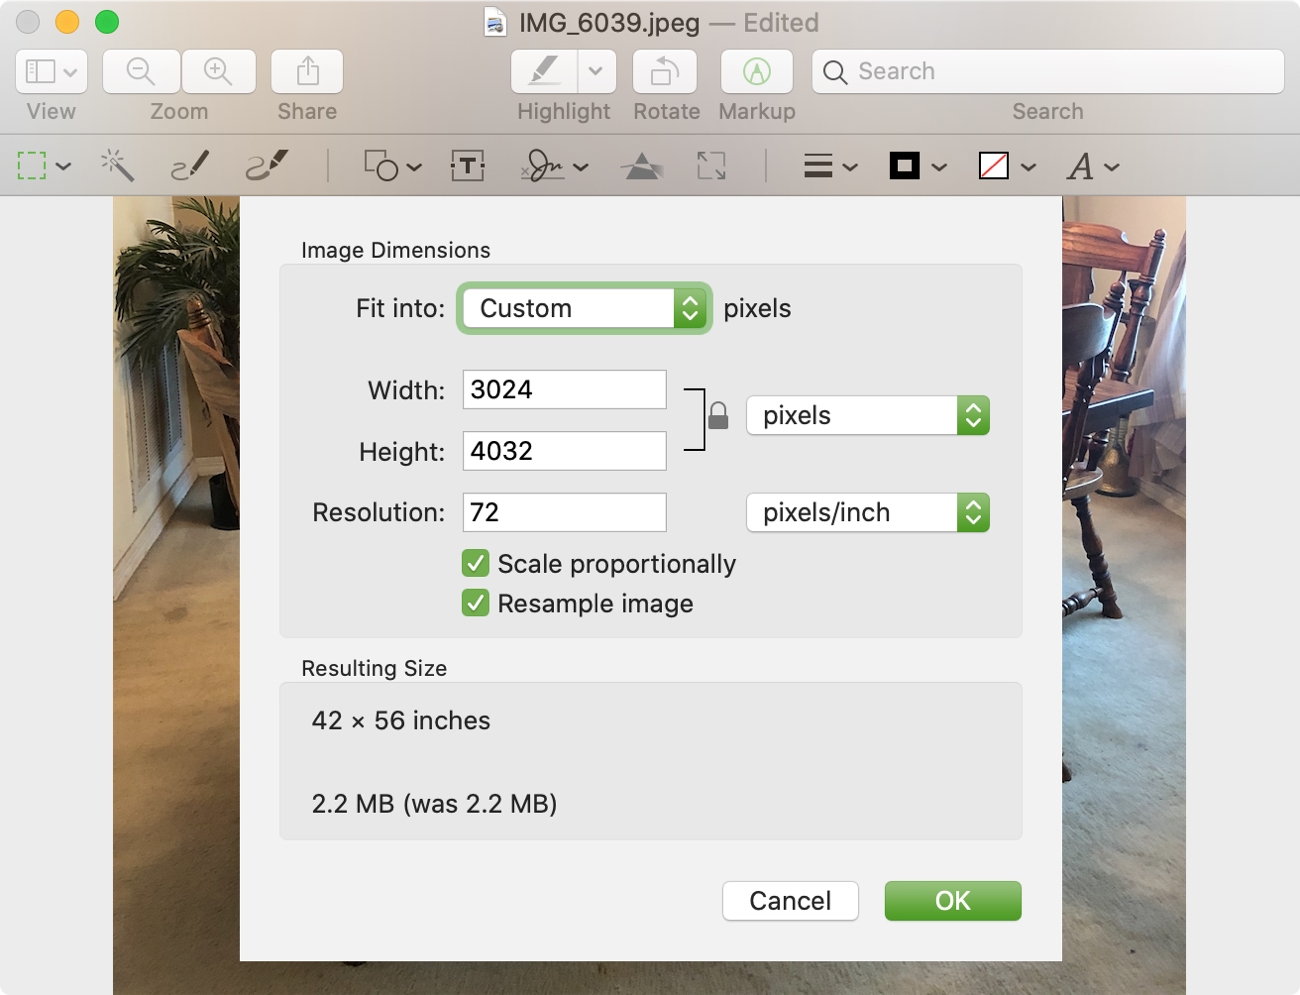
If you want to quickly resize your image to a common set of dimensions in pixels, click the Fit into drop-down box and select an option from 320 by 320 to 1920 by 1920.
You can also adjust the Width and Height to specific dimensions if you prefer. Enter the values and select an option to the right for pixels, percent, inches, or another measurement.
To make sure you scale the image proportionally, either check that box or click the lock icon next to Width and Height.
If you’re making your image smaller and want to be sure not to lose any detail, check the Resample image box before you change the Width and Height.
You can change the Resolution for the image as well. Enter a value in the box and select either pixels/inch or pixels/cm from the drop-down box.
When you finish making your size adjustments, click OK to apply them.
Editing tools in Mac’s Preview
Taking advantage of the features that Preview has to offer can help you quickly edit your images. Whether it’s the contrast for a photo or the resolution for an image, the color and size tools in Preview on Mac are at your service.
Are there specific features or tools in the Preview app that you find particularly helpful? Let us know below.
Useful tips for the Preview app:
- How to remove the background from an image using Preview
- How to change image and PDF display sizes in Preview
- 3 awesome photo editing tips for Preview on Mac
- How to view and recover previous versions of images and PDFs in Preview