Preview on Mac might be one of those tools that you don’t think much about. You might use it just to open images, or maybe you use it to sign PDFs, but for most image work, you likely use something more robust.
But Preview does have some good annotation tools that you let spruce up your images quickly and easily. So you’re unaware of these Preview features, we’ll go over a few handy ones and how to use them. These include the mask, loupe, and speech bubble tools.
The Preview mask tool
Using masks in images can be a little intimidating if you have software like Photoshop, for example. But in Preview, you can use a mask to make part of your image stand out by dimming the rest. Here’s how easy it is to apply a mask in Preview:
- Open the image you want to apply the mask to in Preview.
- Click Tools > Annotate > Mask from the menu bar.
- You’ll immediately see a shape appear on your image. Drag a corner or edge using the blue dots to resize the mask. As you do, you’ll see the section outside of the shape appear dimmer. This is the point of the mask. You can also drag the shape to a different spot in your image if needed.
When you finish, you can continue editing your image or simply save it.
The Preview loupe tool
Another cool annotation feature of the Preview app that you can use to make parts of your image pop is the loupe tool. What the loupe does is magnify a part of your image that you select within a circle. Here’s how to add a loupe in Preview:
- Open the image you want to add the loupe to in Preview.
- Click Tools > Annotate > Loupe from the menu bar.
- This time you’ll see a small circle appear on your image. Drag the blue dot to enlarge the circle, and you’ll see that what’s inside is magnified. You can also drag the circle to a different place in your image.
- Use the green dot on the edge of the circle to change the amount of magnification. Just drag the green dot left or right, and you’ll see the change immediately.

When you’re done, you can keep editing or save your image.
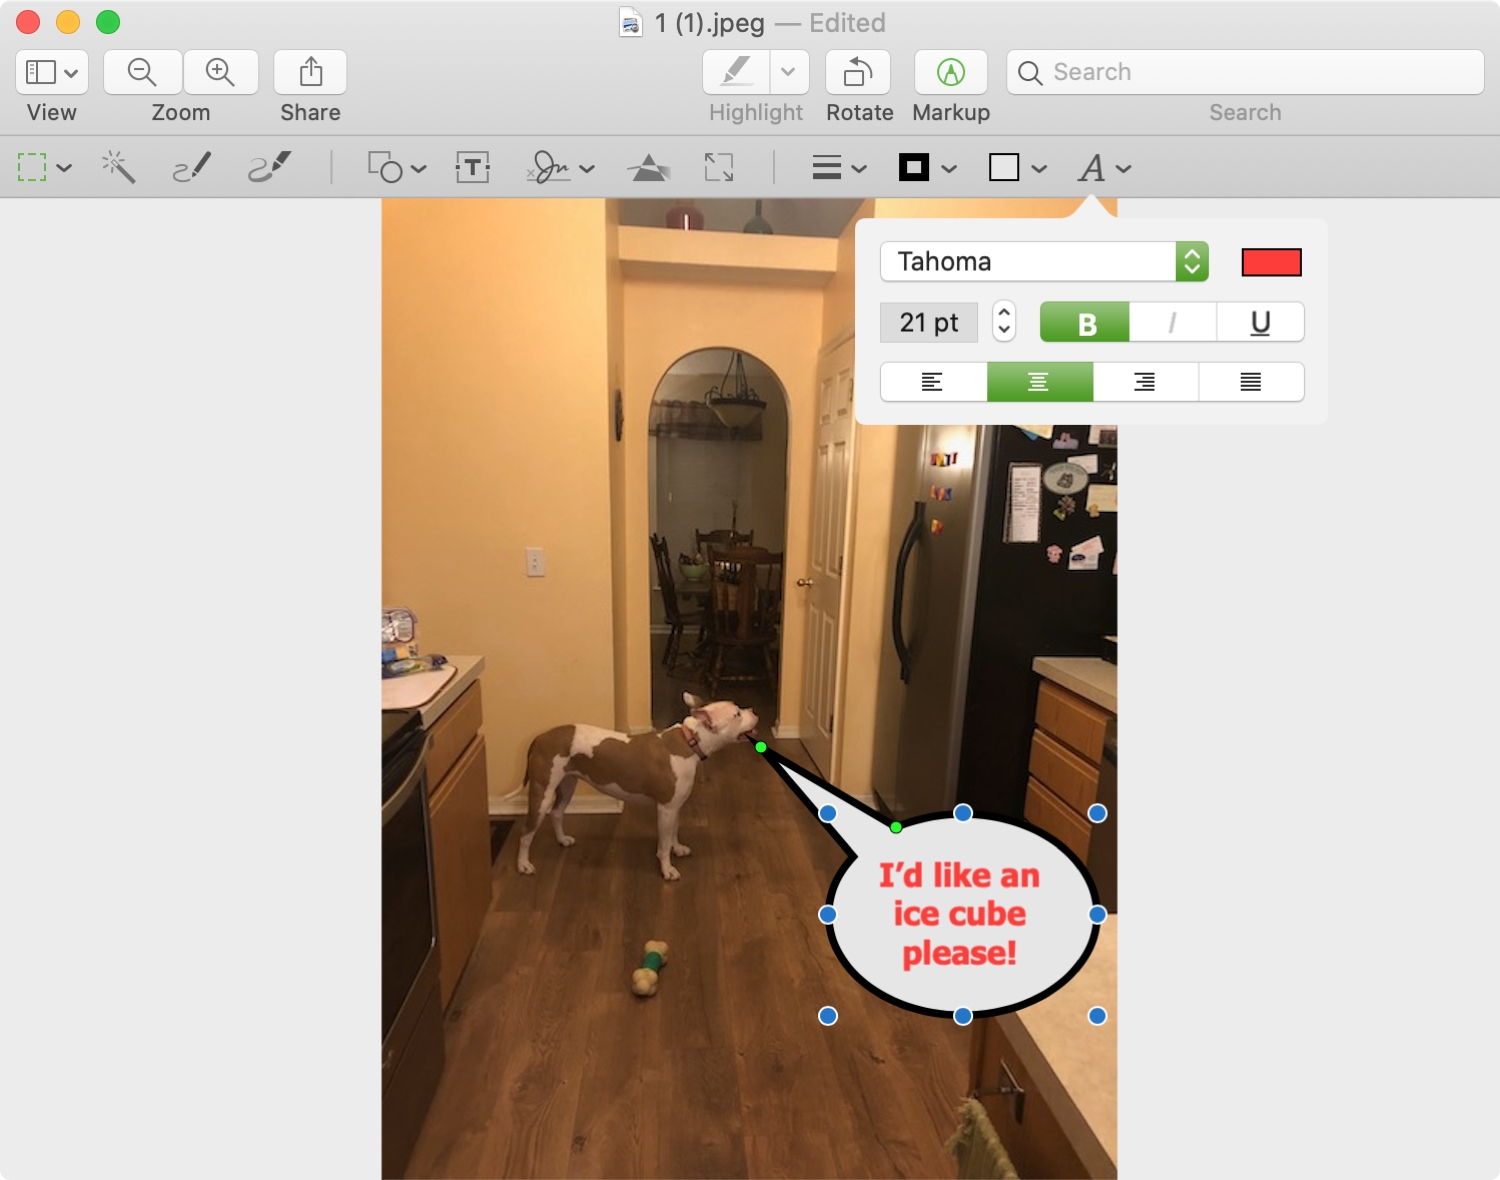
The Preview speech bubble tool
One Preview tool that can make your images fun is the speech bubble. This one is handy if you have photos and want to show what someone might be saying:
- Open the image you want to add the speech bubble to in Preview.
- Click Tools > Annotate > Speech Bubble from the menu bar.
- Similar to the mask and loupe tools, you can drag the blue dots to change the size of the speech bubble.
- Drag the green dot to adjust the direction of the speech bubble pointer.
- Double-click inside the speech bubble to add your text. Use the Text Style button in the toolbar to change the style, color, size, or alignment of the text.
Save your image or keep editing it if you like.
For fast and simple ways to make parts of your images or photos pop, the mask, loupe, and speech bubble tools in Preview can be just what you need.
Are you going to give these Preview annotation tools a try? Are there other features of Preview that you enjoy and have tips for? Feel free to comment below!
Do more with Preview: