A contact card can have lots of information like mobile numbers, email, social media profiles, home address, company name, and more. While sharing a contact, you may not always want to want to share all of this information.
iOS 16 allows you to uncheck some information and filter them out before sharing a contact. Here’s how to include only the selected details when sharing contacts from your iPhone, iPad, and Mac.
Share selected contact details
From iPhone and iPad
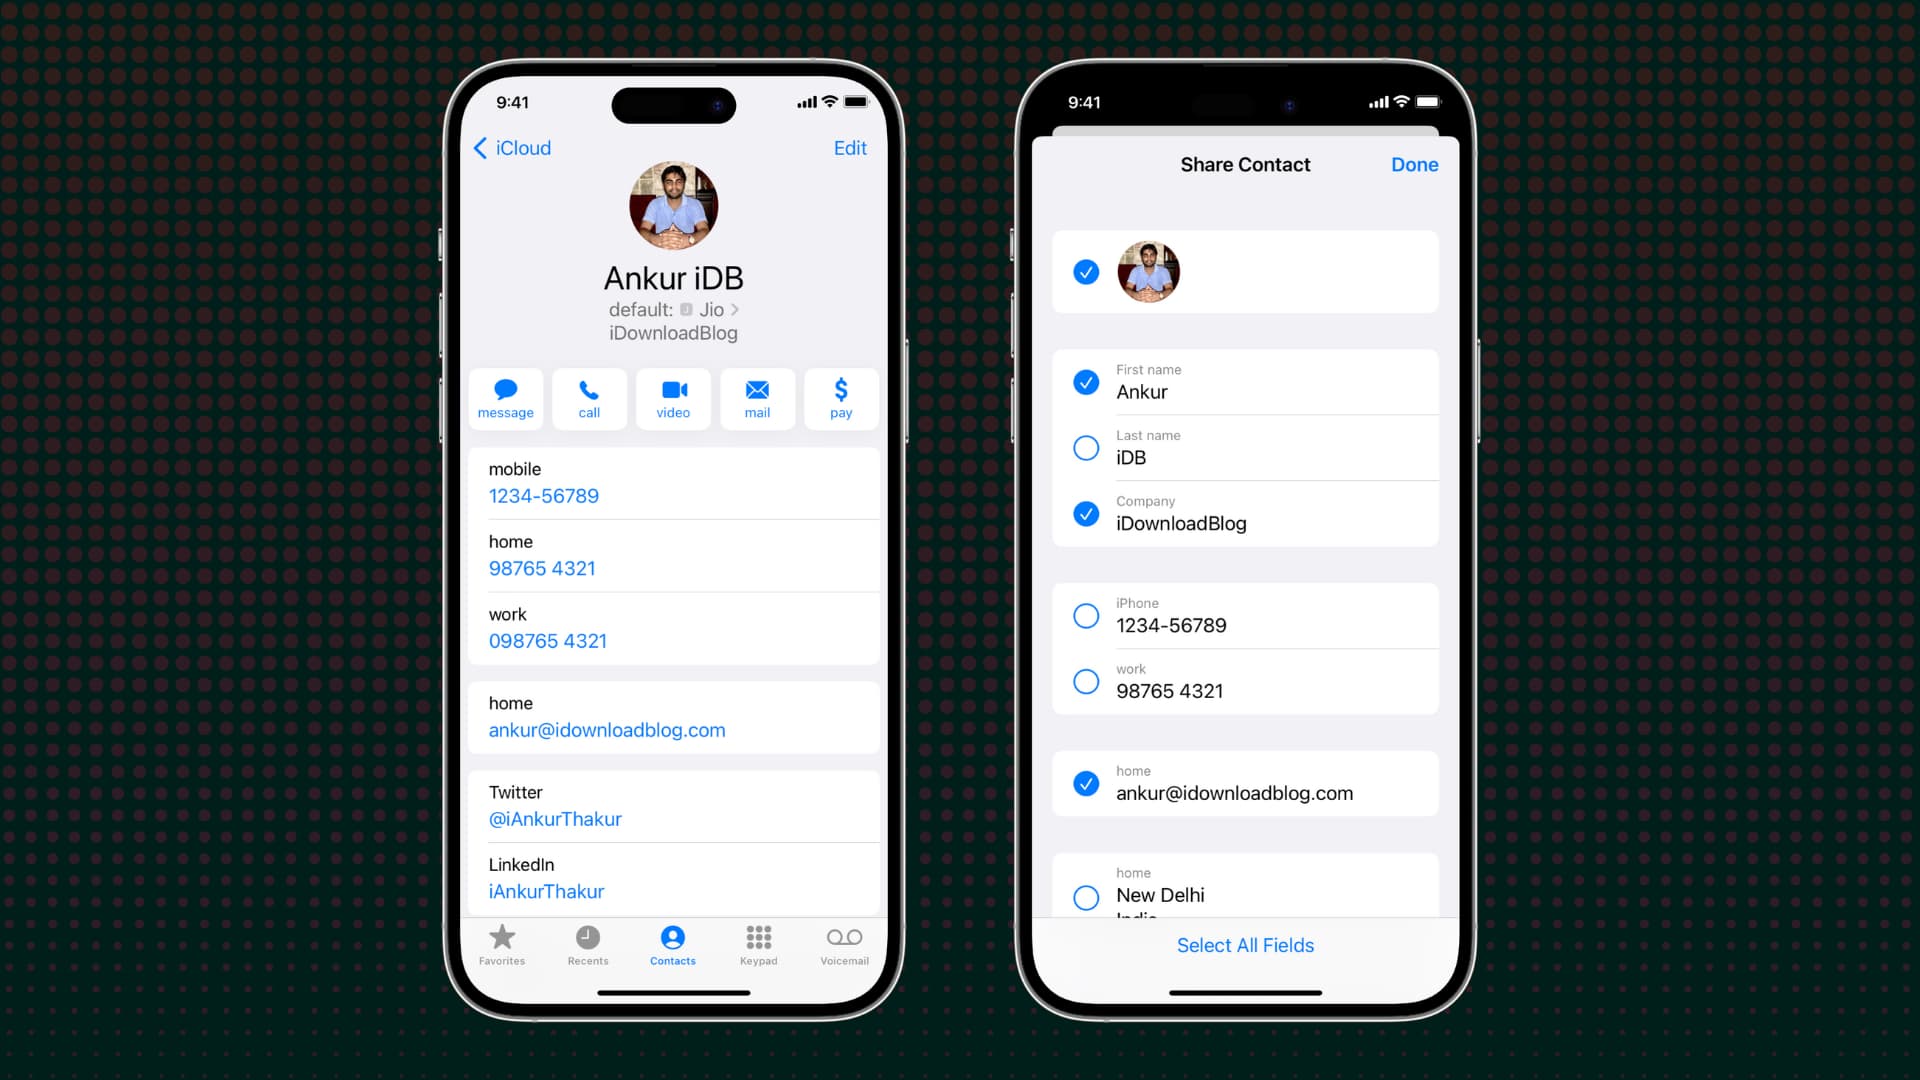
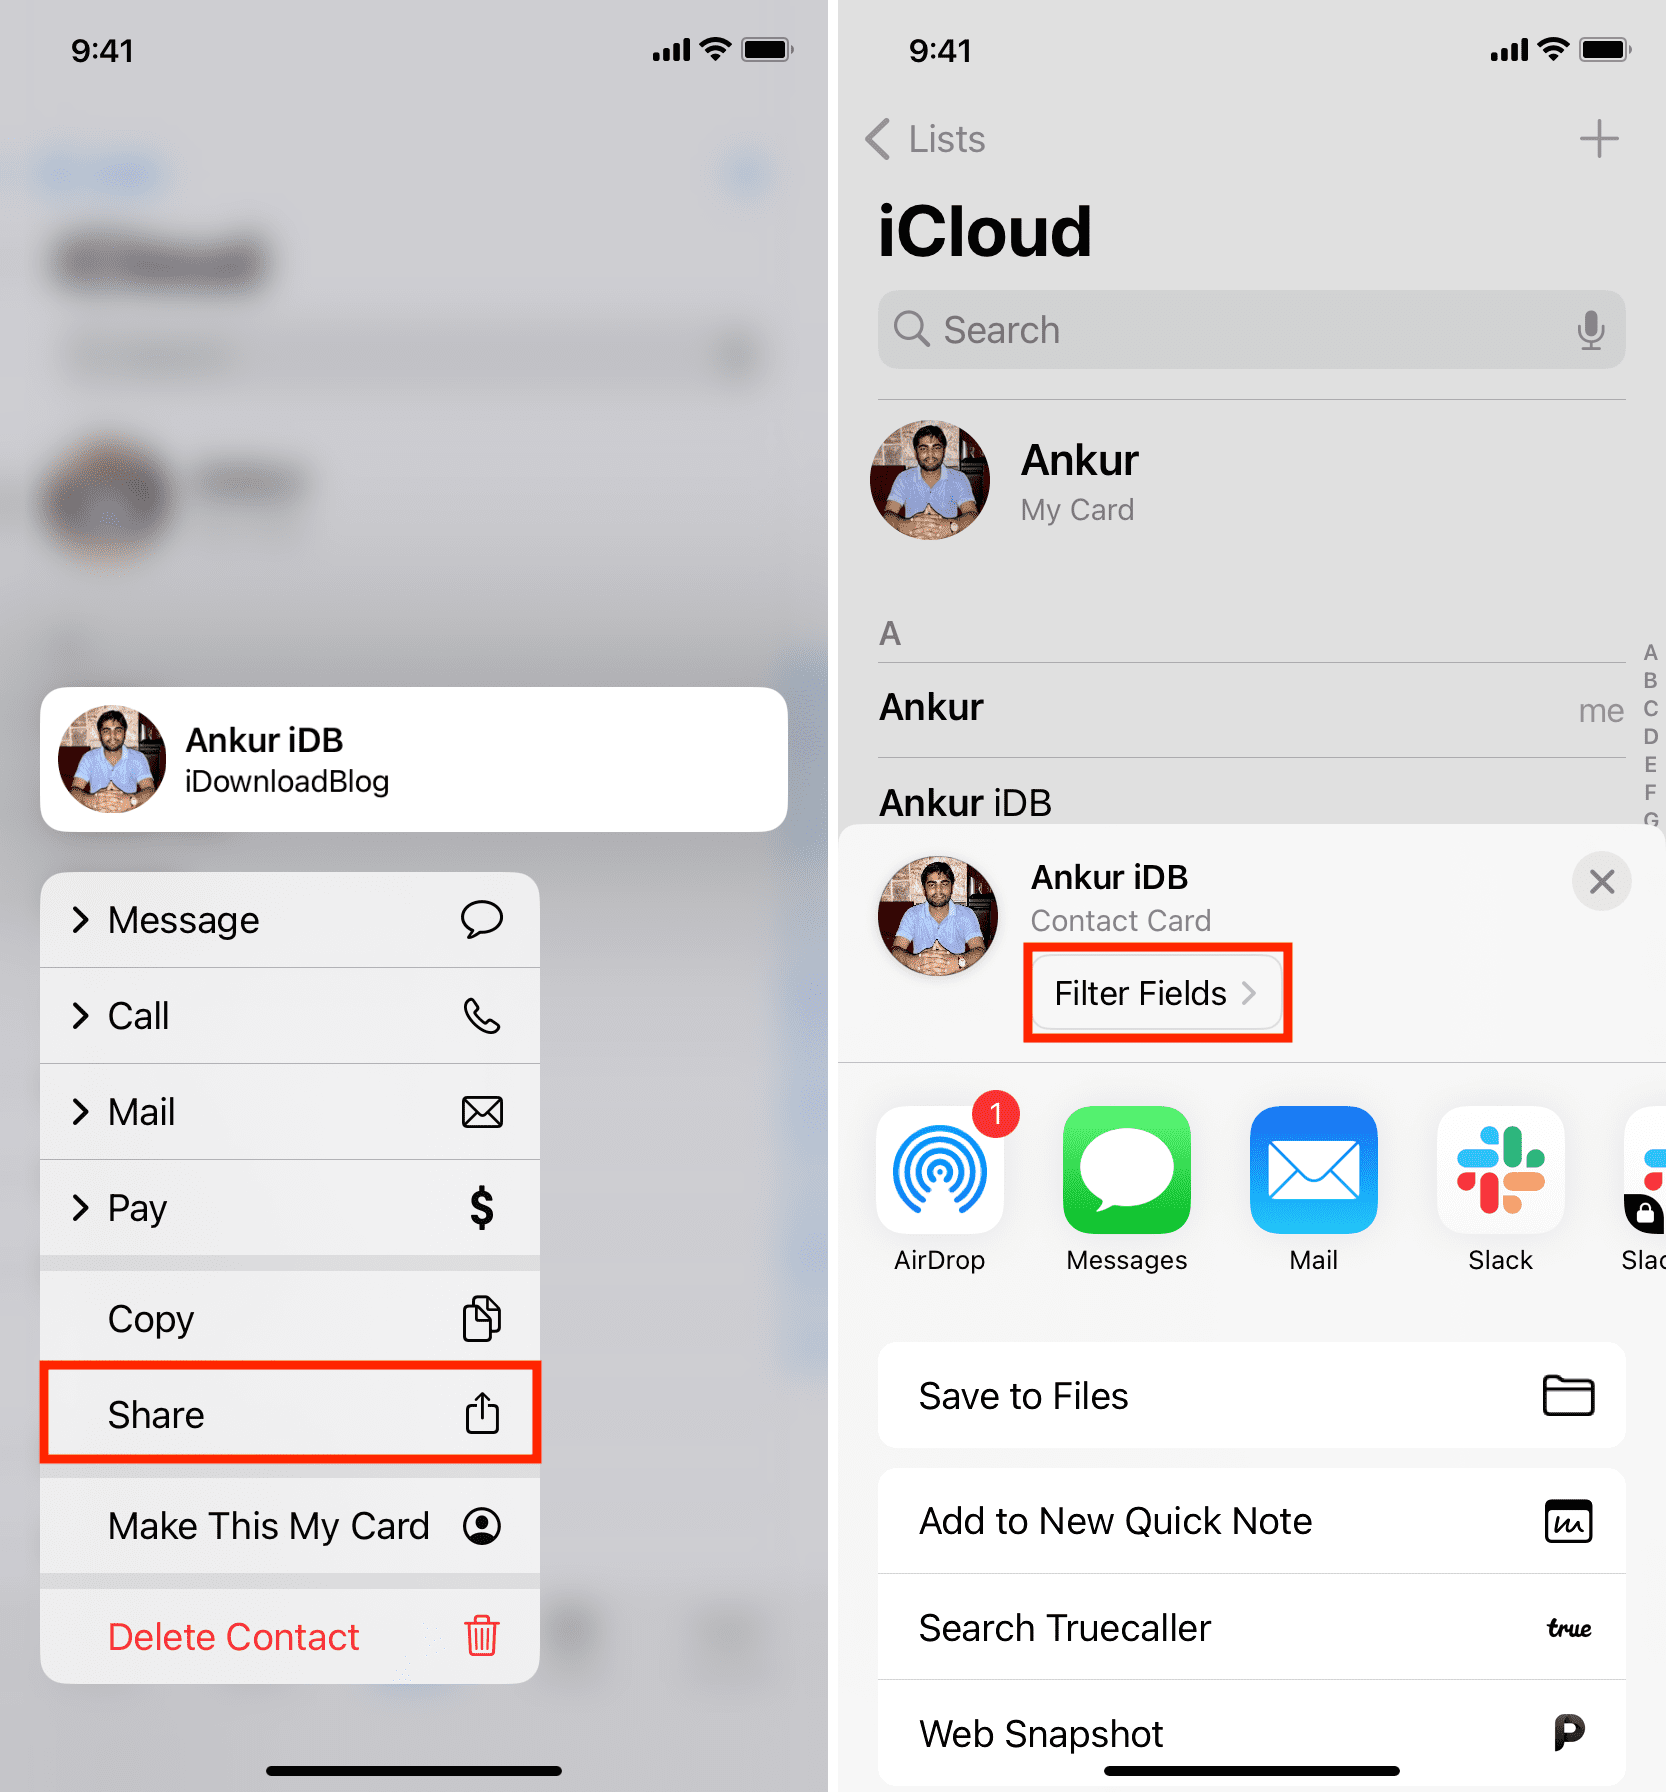
1) Open the Contact app or the Phone app and tap Contacts.
2) Tap and hold the contact you want to share and pick Share from the menu.
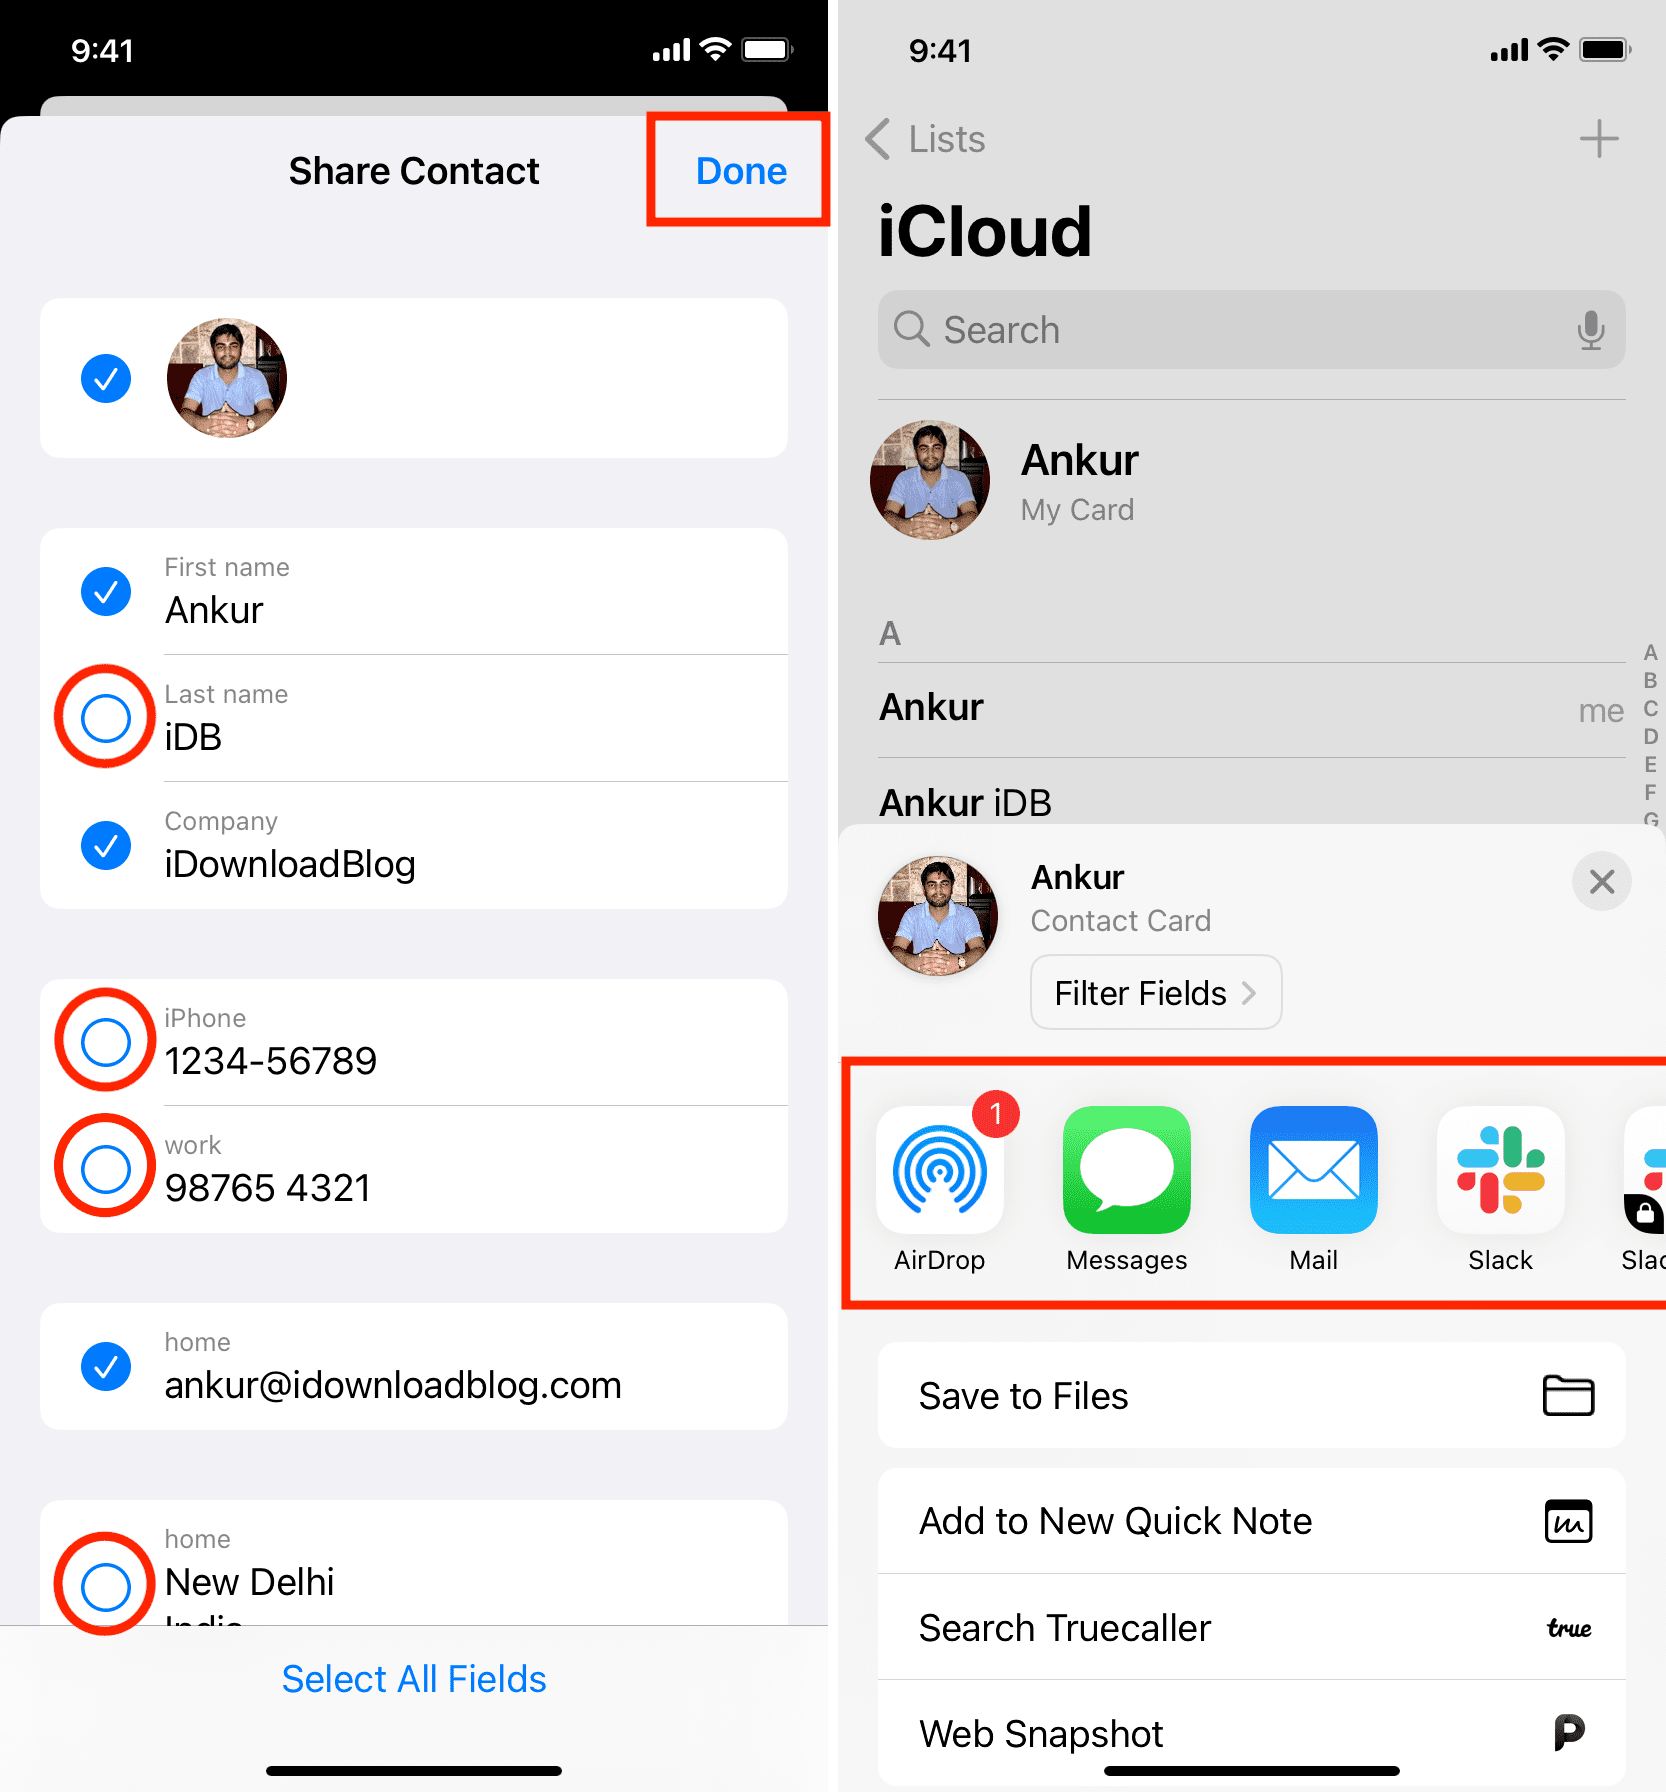
3) Tap Filter Fields.
4) Uncheck the fields you don’t want to share and tap Done.
5) Now, share your contact via your preferred medium like Messages, Mail, WhatsApp, etc., and only the selected details will be shared.
From Mac
Things aren’t as easy on Mac as on iPhone and iPad. For example, even Mac running macOS Ventura doesn’t show the option to filter fields before sharing a contact from the Contacts app. So, you can’t choose what to share while sending someone’s contact saved on your Mac.
However, you can choose to exclude certain fields while sharing your own contact card. Follow along to learn how.
Enable private me card
Open the Contacts app on your Mac and then follow these steps to limit the details you send on your card:
1) Click Contacts > Preferences from the menu bar.
2) Select the vCard tab.
3) Check the box for Enable private me card.
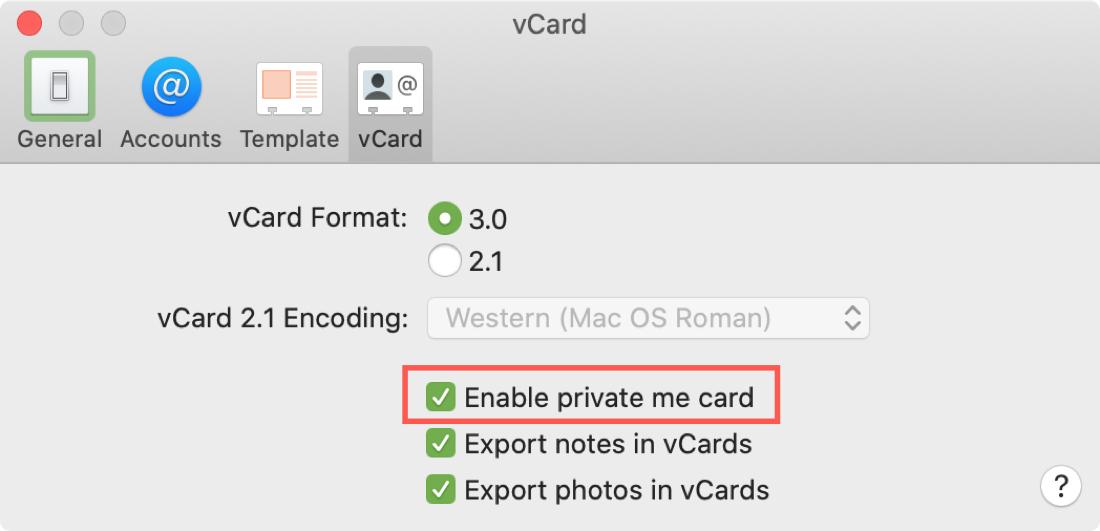
4) Optionally, you can uncheck the next two boxes for Export notes in vCards and Export photos in vCards. If you leave these checked, then obviously any notes or photos you have attached to your card will be sent right along with it. So if you do not want to include those with your card, uncheck those boxes.
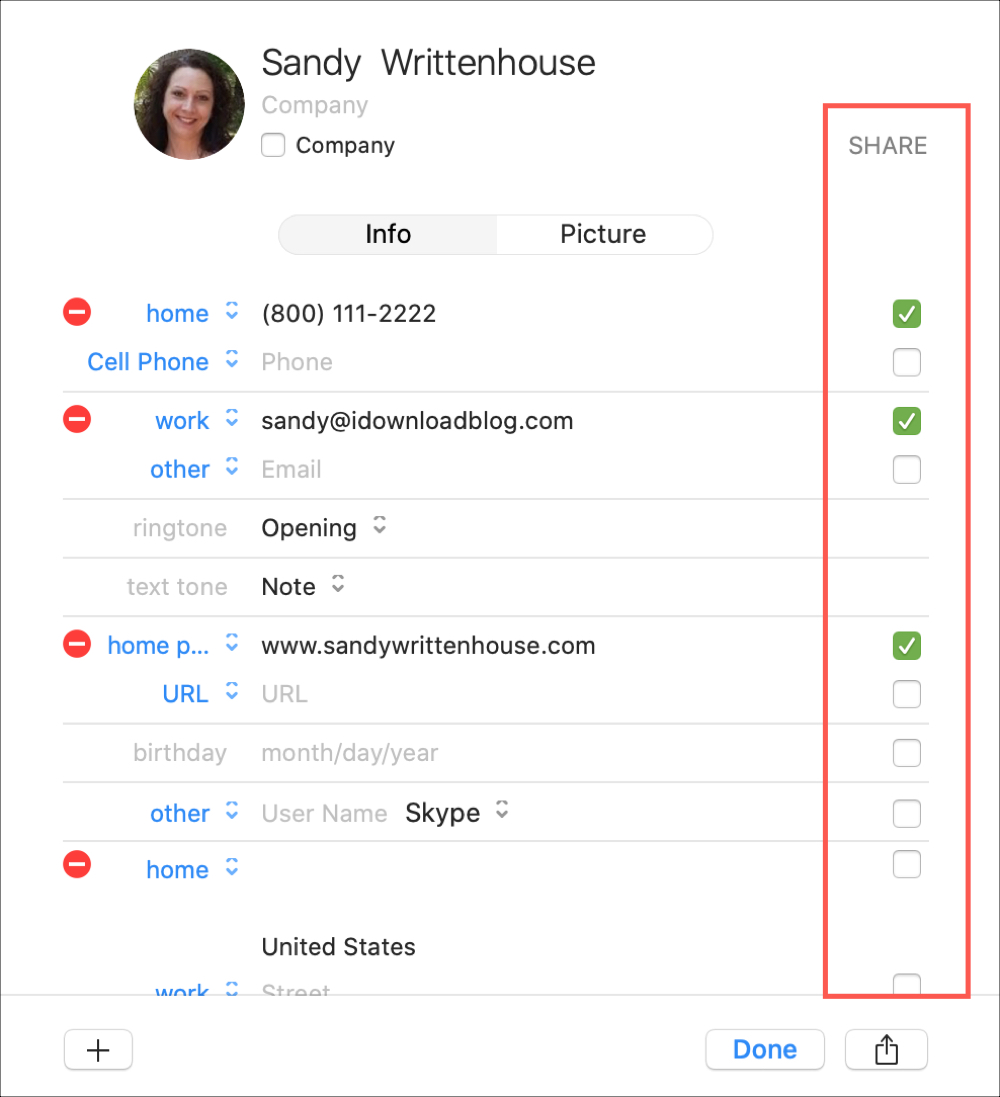
Choose your details
Next, open your Contacts card. You can do this quickly by clicking Card > Go To My Card from the menu bar.
1) When your Contacts card appears, click the Edit button at the bottom.
2) Now you’ll see checkboxes to the right of your information in the Share column. Simply check those that you want to include in your Me Card. You can add, remove, or edit any of the details here as well.
3) Click Done when you finish.
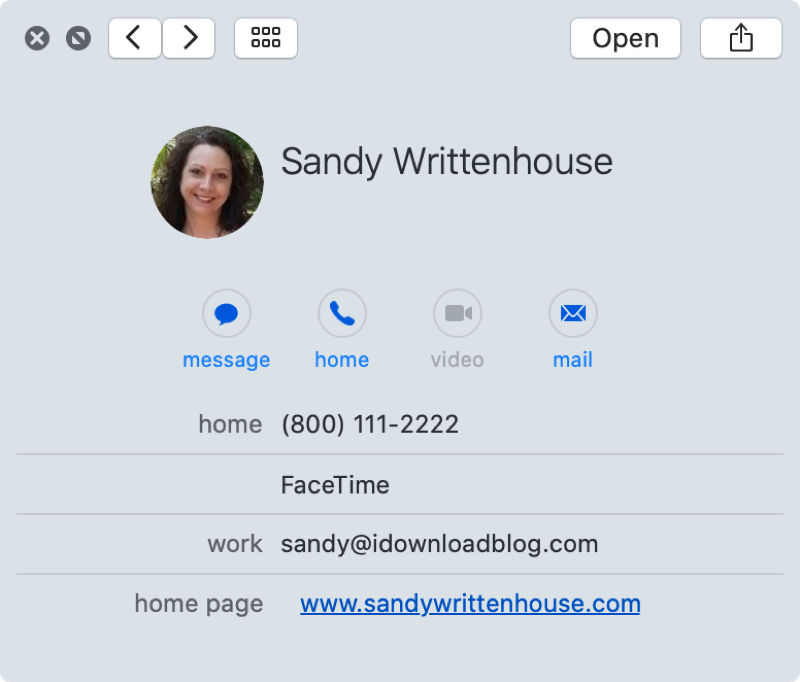
If you want to double-check these changes, share the card with yourself via Messages, Mail, or another option in your Share Menu.
Click the Share button on the bottom right of the window and pick your option.
When you receive and open your Contacts card, it should only contain the details you chose.
You can’t be too careful with your personal information these days. So if you don’t want to set up a separate Contacts card with limited details that you share with others, this Me Card option is another way to go.
Do you have any tips like this you’d like to share for the Contacts app? If so, feel free to comment below!
Check out next: