The Apple Books app (earlier called iBooks) is a terrific tool for reading books. But the app has extra features that you might not know about. For example, you can open PDF files in Books and annotate them. In addition, you can make notes and highlight passages in books. This is awesome for textbooks or references.
The nice thing about making highlights and notes in Books is that those items sync with other devices where you sign in to Books with the same Apple ID. So you can make notes in Books on your iPhone when you’re out and about and then have them handy when you get home to work on your Mac.
If you haven’t used these features before, we’re here to help. Here’s how to use highlights and notes in Apple Books.
Using highlights and notes in Apple Books
Here’s a summary of the sections we’ll cover in this tutorial, so you can jump to a specific spot if you like.
Highlights in Books on iPhone and iPad
Open the book on your iPhone or iPad in the Books app and then follow these steps to add or remove highlights:
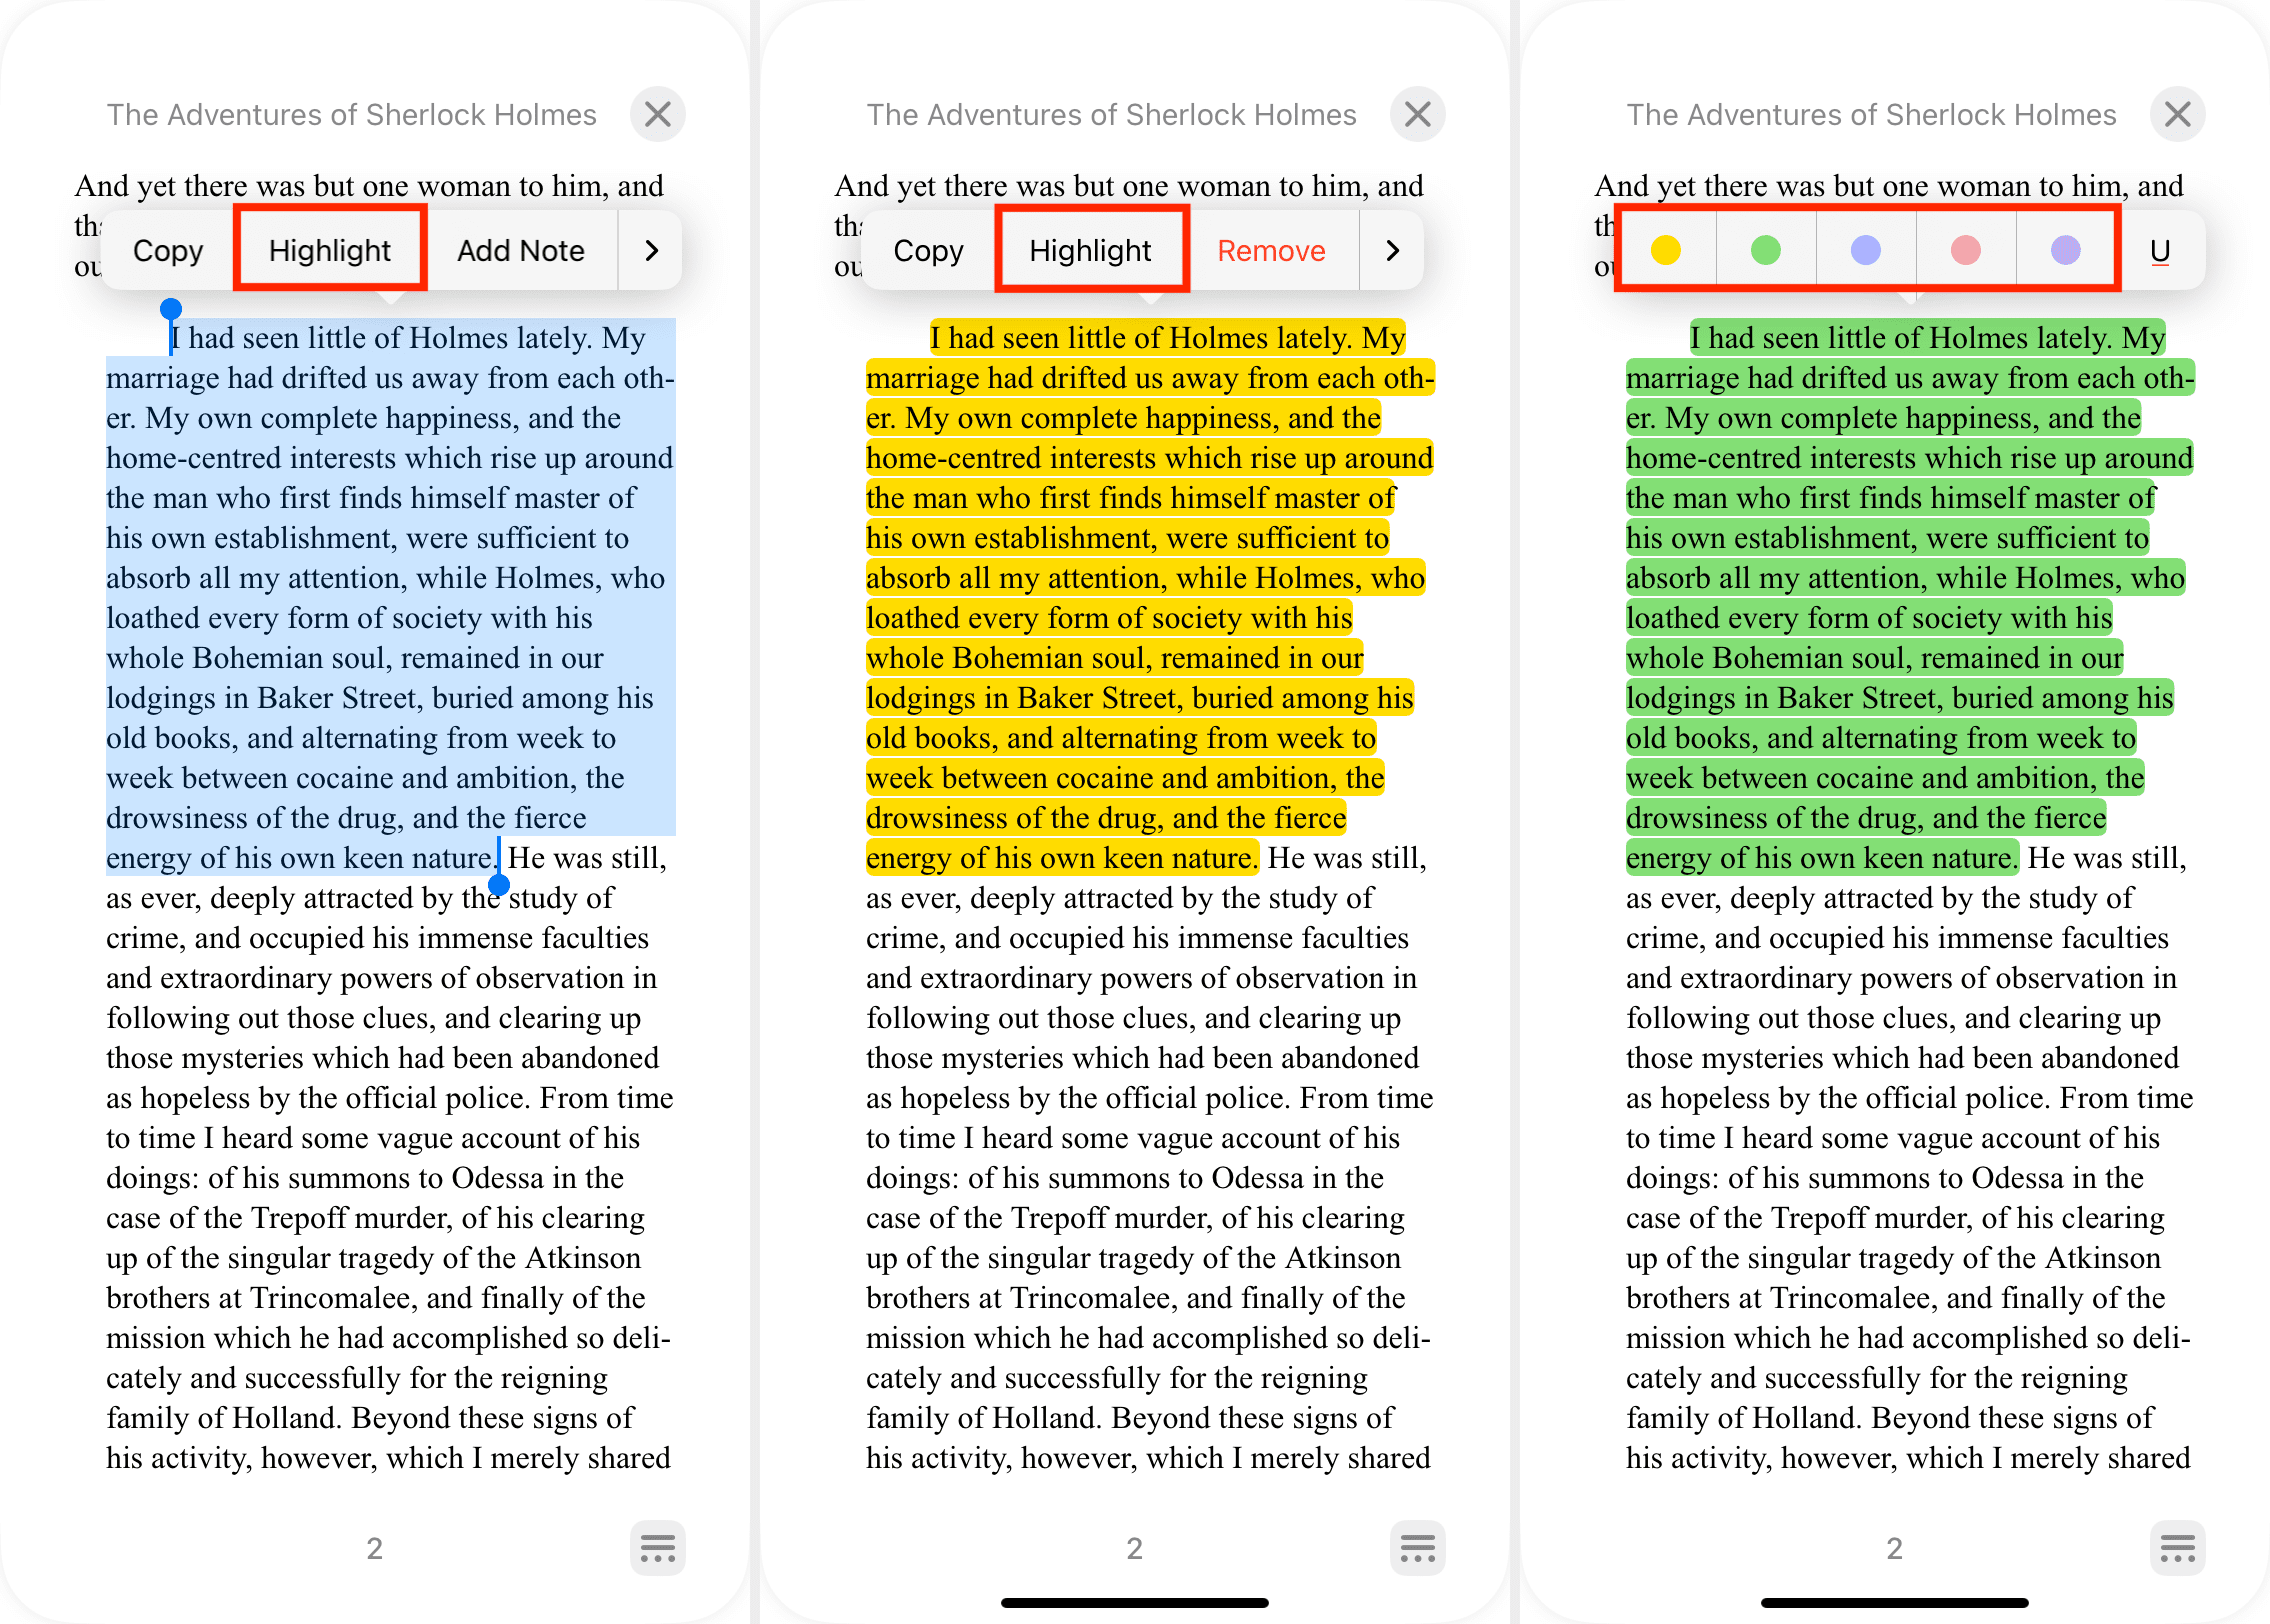
Add a highlight
- Tap and hold to select a word and then drag to capture more text if needed.
- Select Highlight from the shortcut menu.
- To change the highlight color, tap the currently highlighted text, then tap Highlight, and pick a different color.
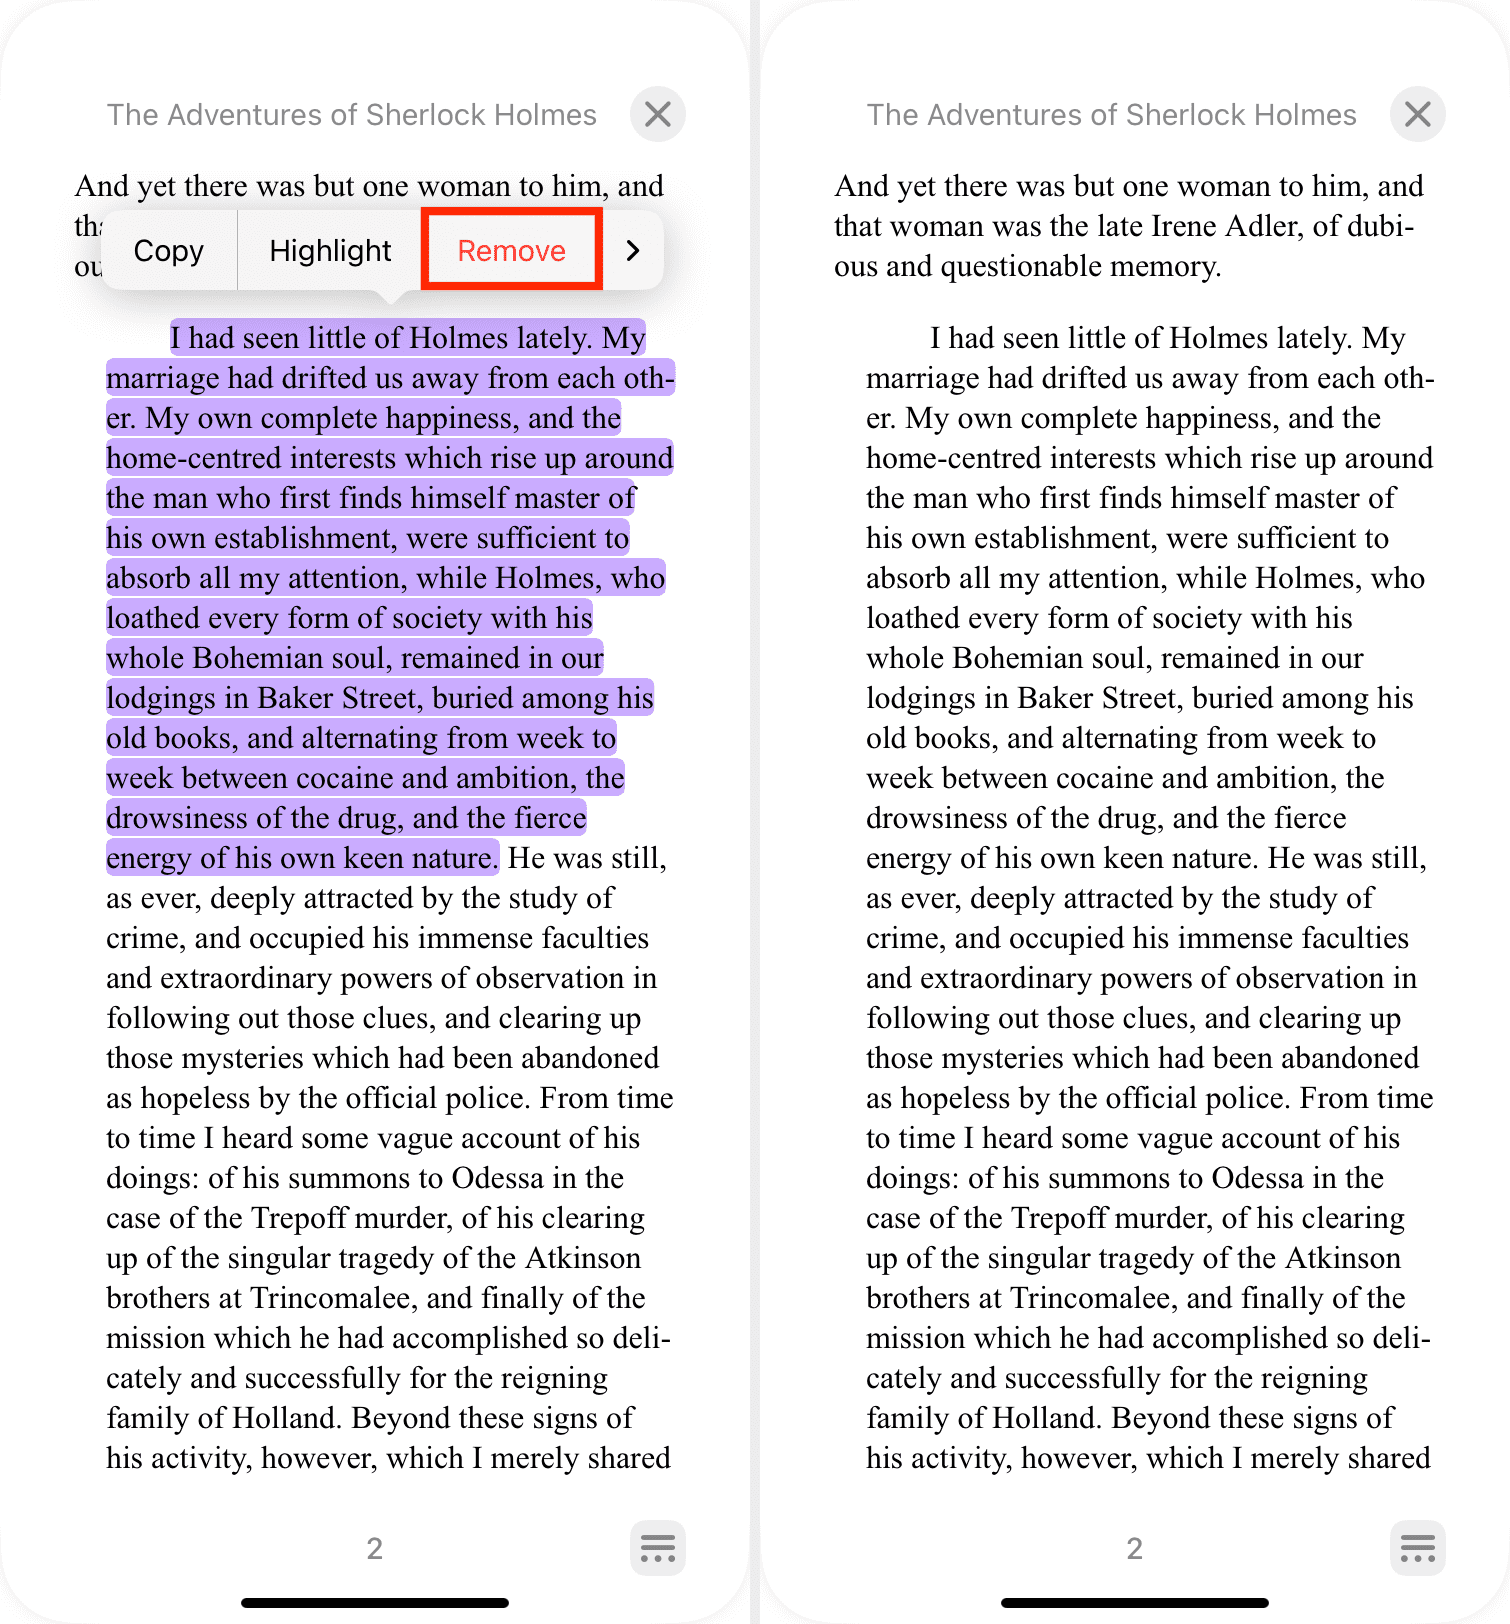
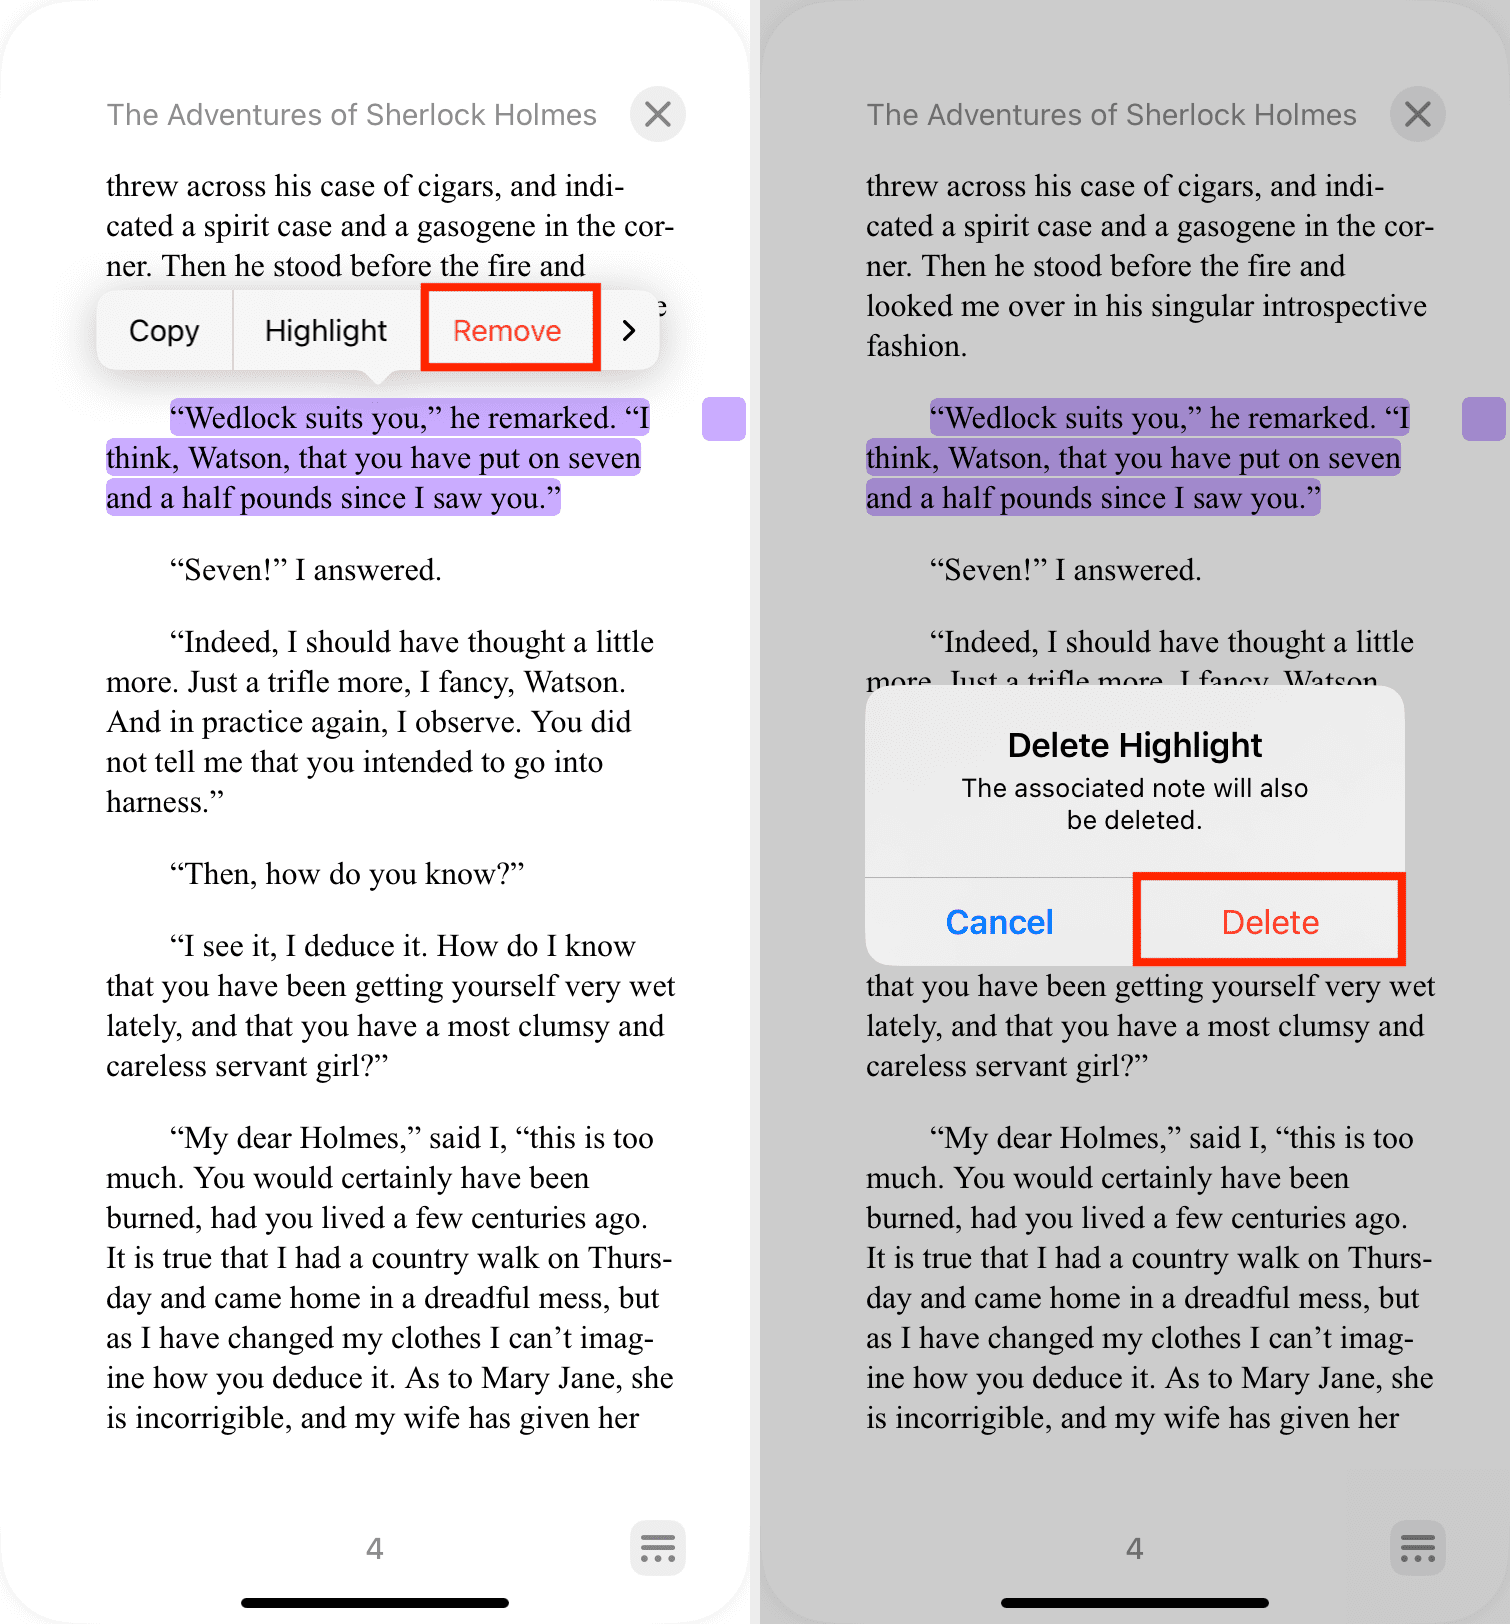
Remove a highlight
- Select the highlighted text.
- Select Remove from the shortcut menu.
Notes in Books on iPhone and iPad
Open the Books app on your iPhone or iPad to the book where you want to add or delete notes and then do one of the following.
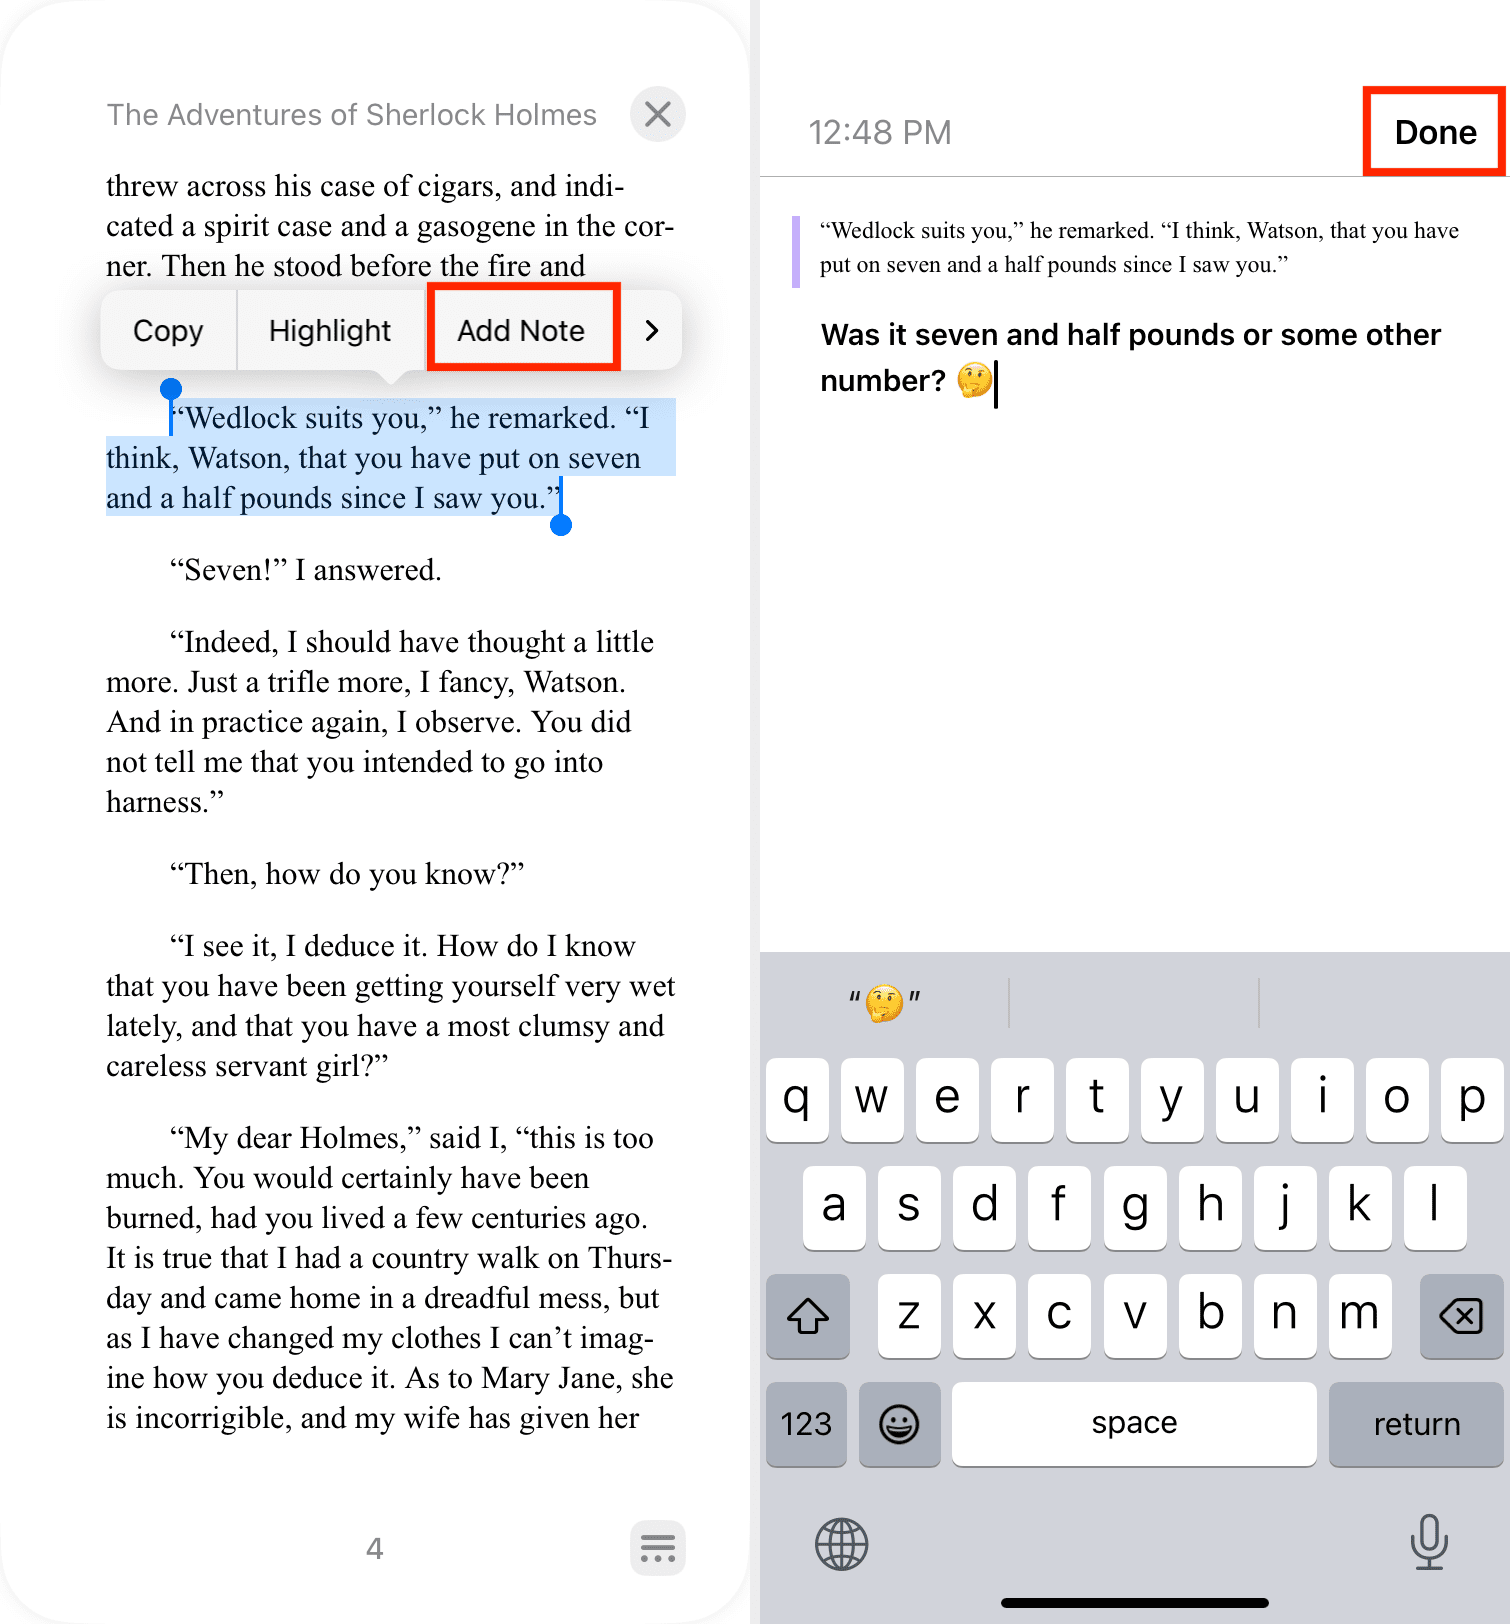
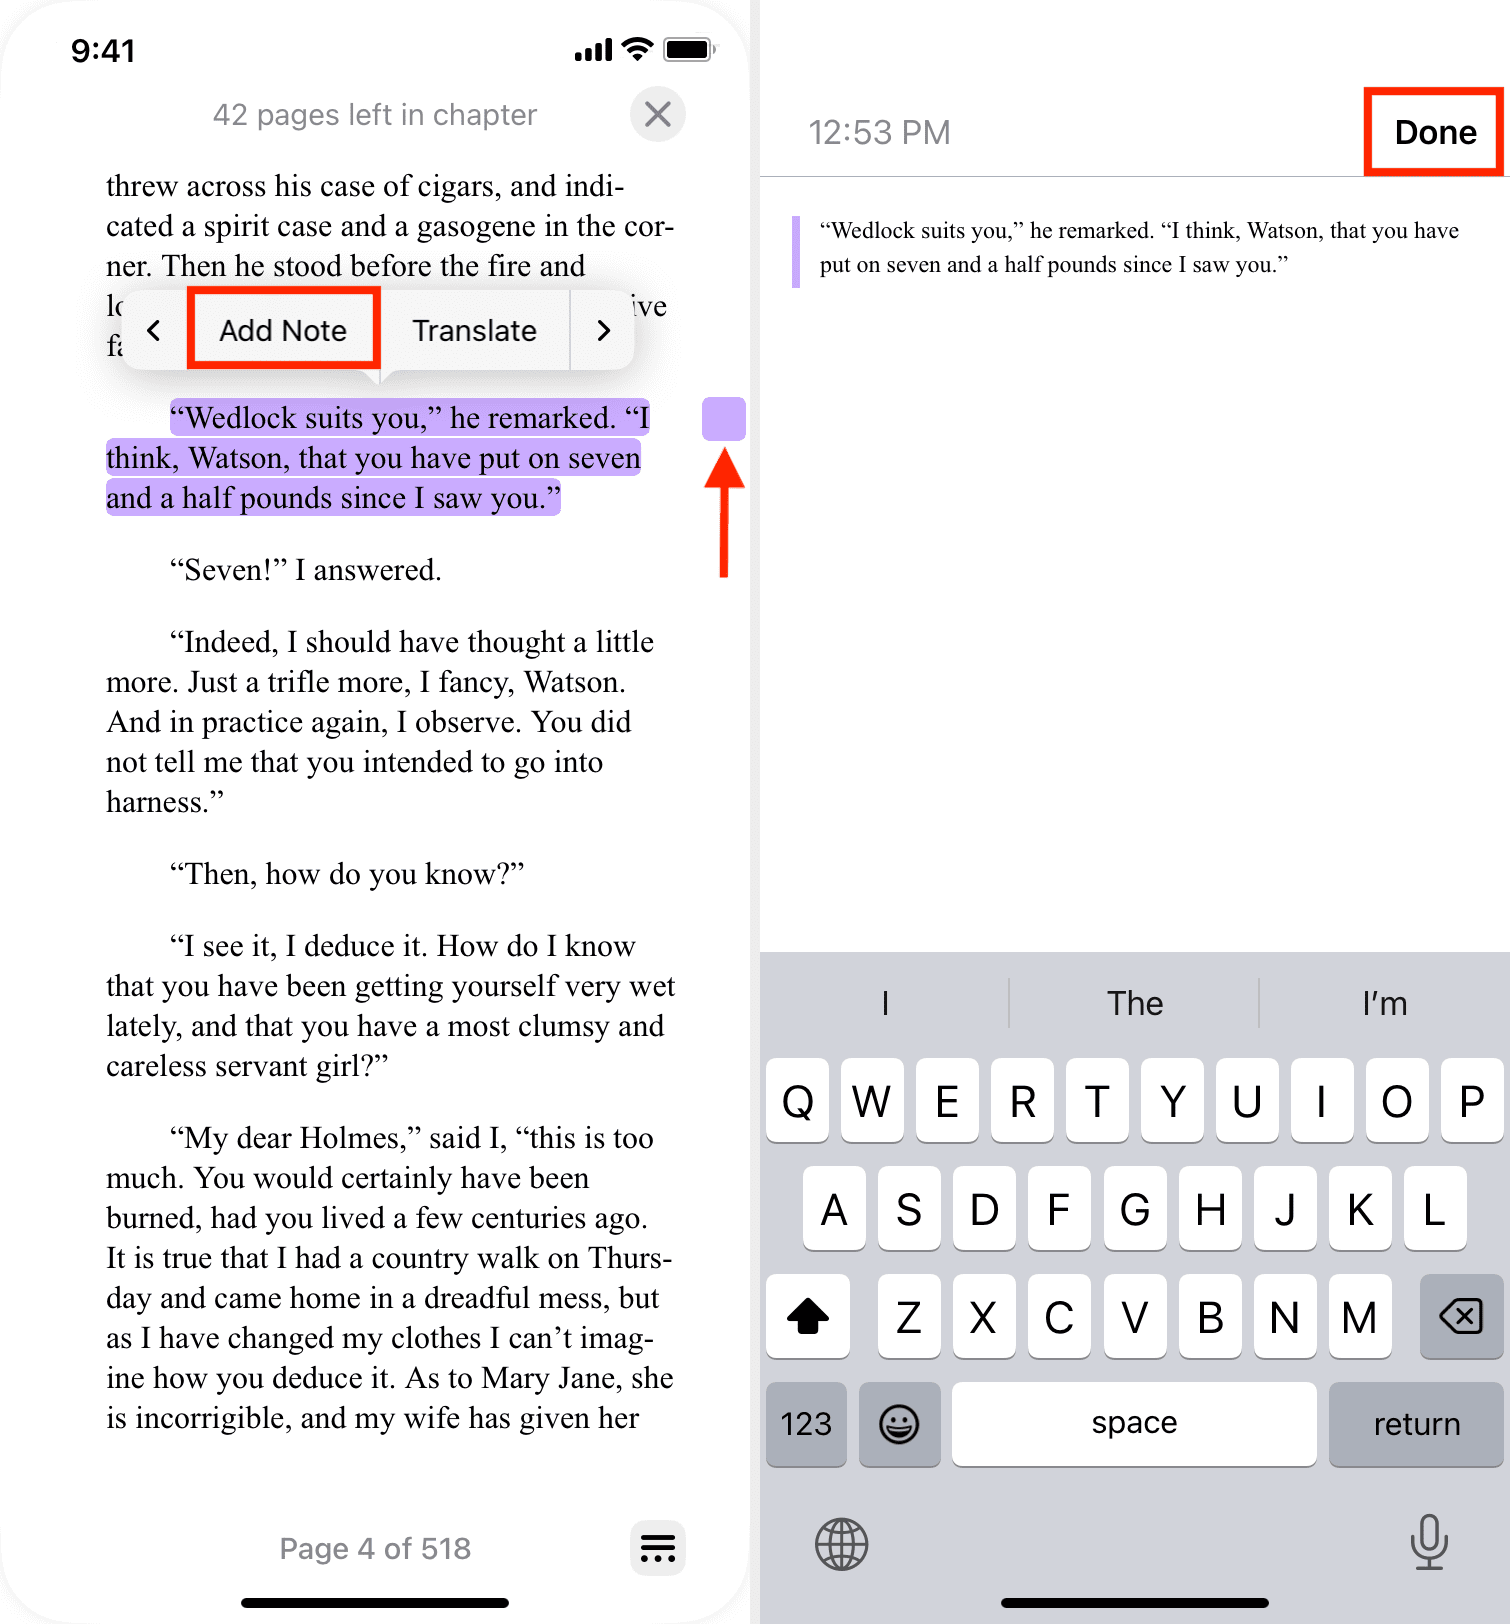
Add a note
- Select the spot in the book where you want to add the note.
- Tap and hold the text to display the shortcut menu and pick Add Note.
- Type your note and tap Done.
Alternatively, you can select Highlight from the shortcut menu, choose Add Note, and type your note.
Remove a note
In Books, notes are associated with highlights. So you can either remove both or just the note itself:
- To remove both, tap the highlighted text for the note.
- Choose Remove and confirm that you want to remove both the note and the highlight by tapping Delete.
- To remove the note only, tap the note marker (tiny square on the edge of the screen) or tap the associated text and pick Add Note from the shortcut menu.
- Delete all of the text in the note and tap Done. You’ll see that your text is still highlighted, but the note and its marker are gone.
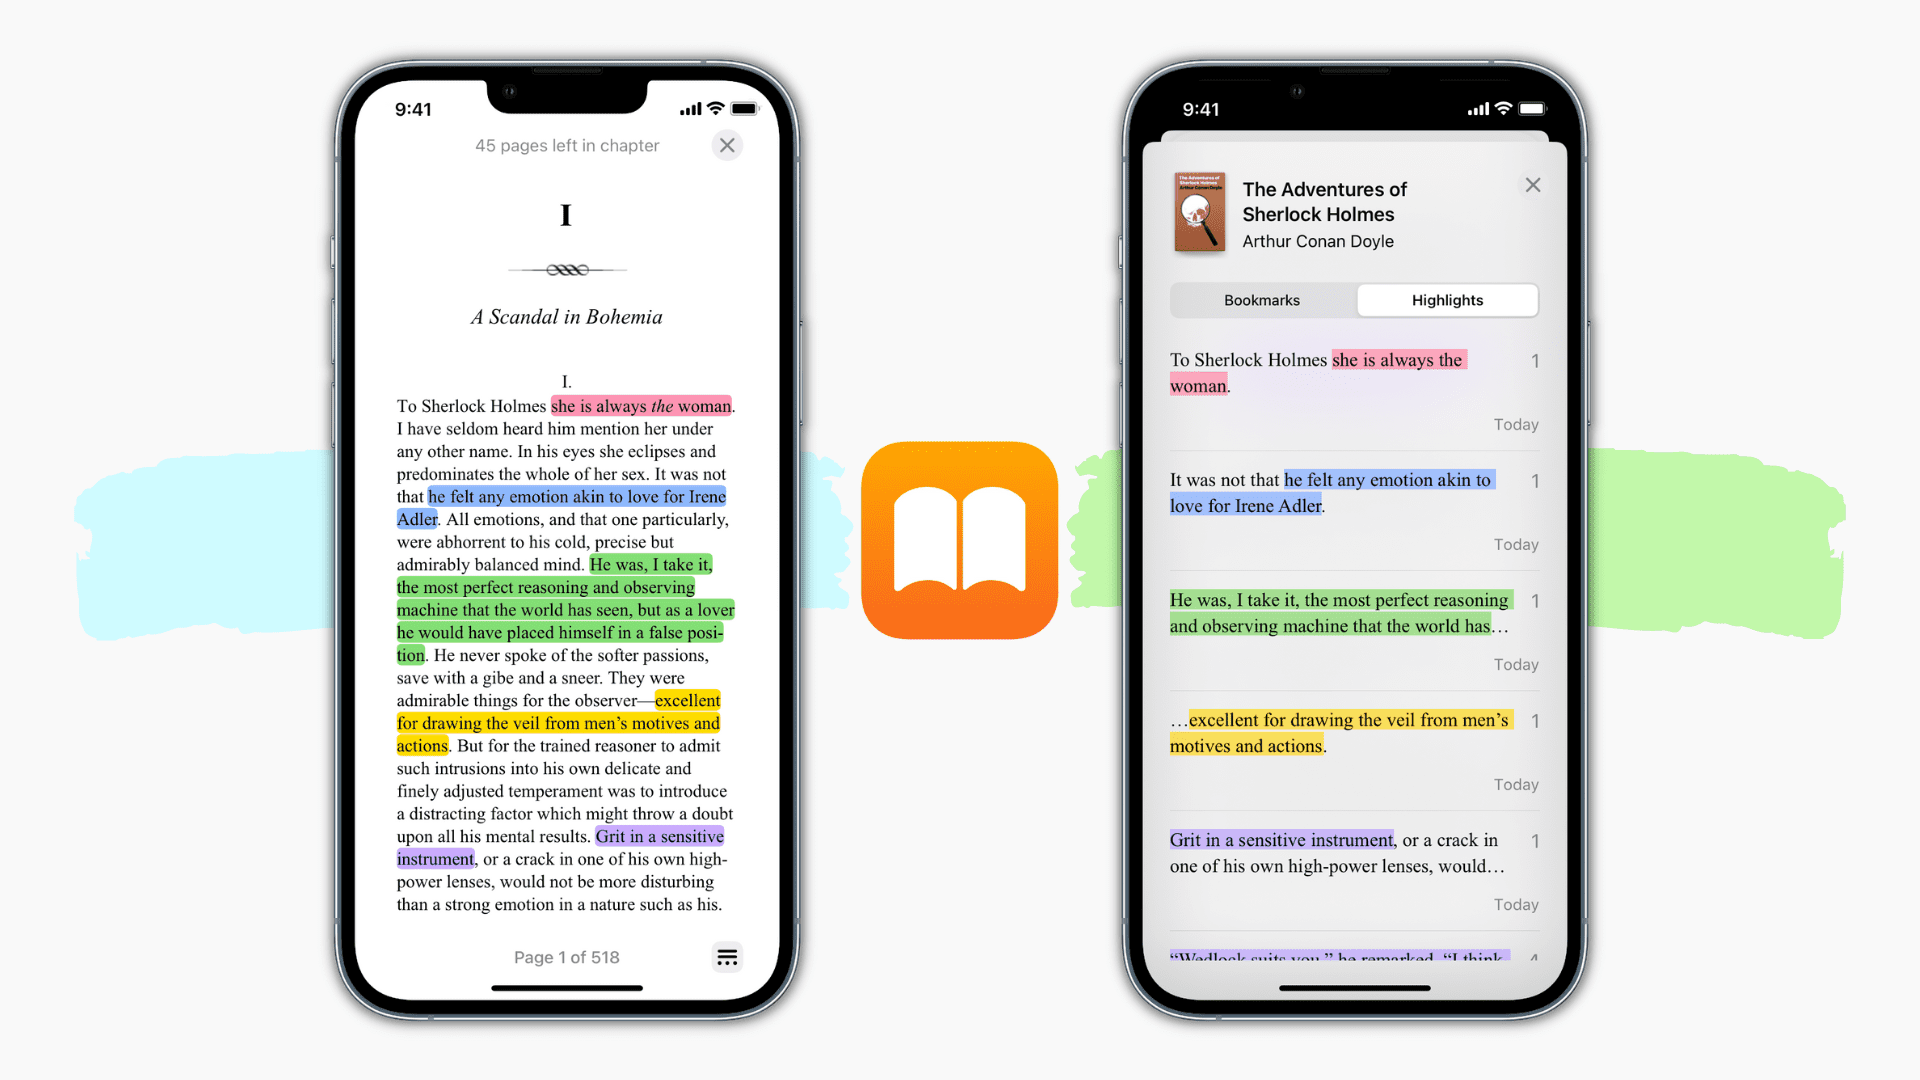
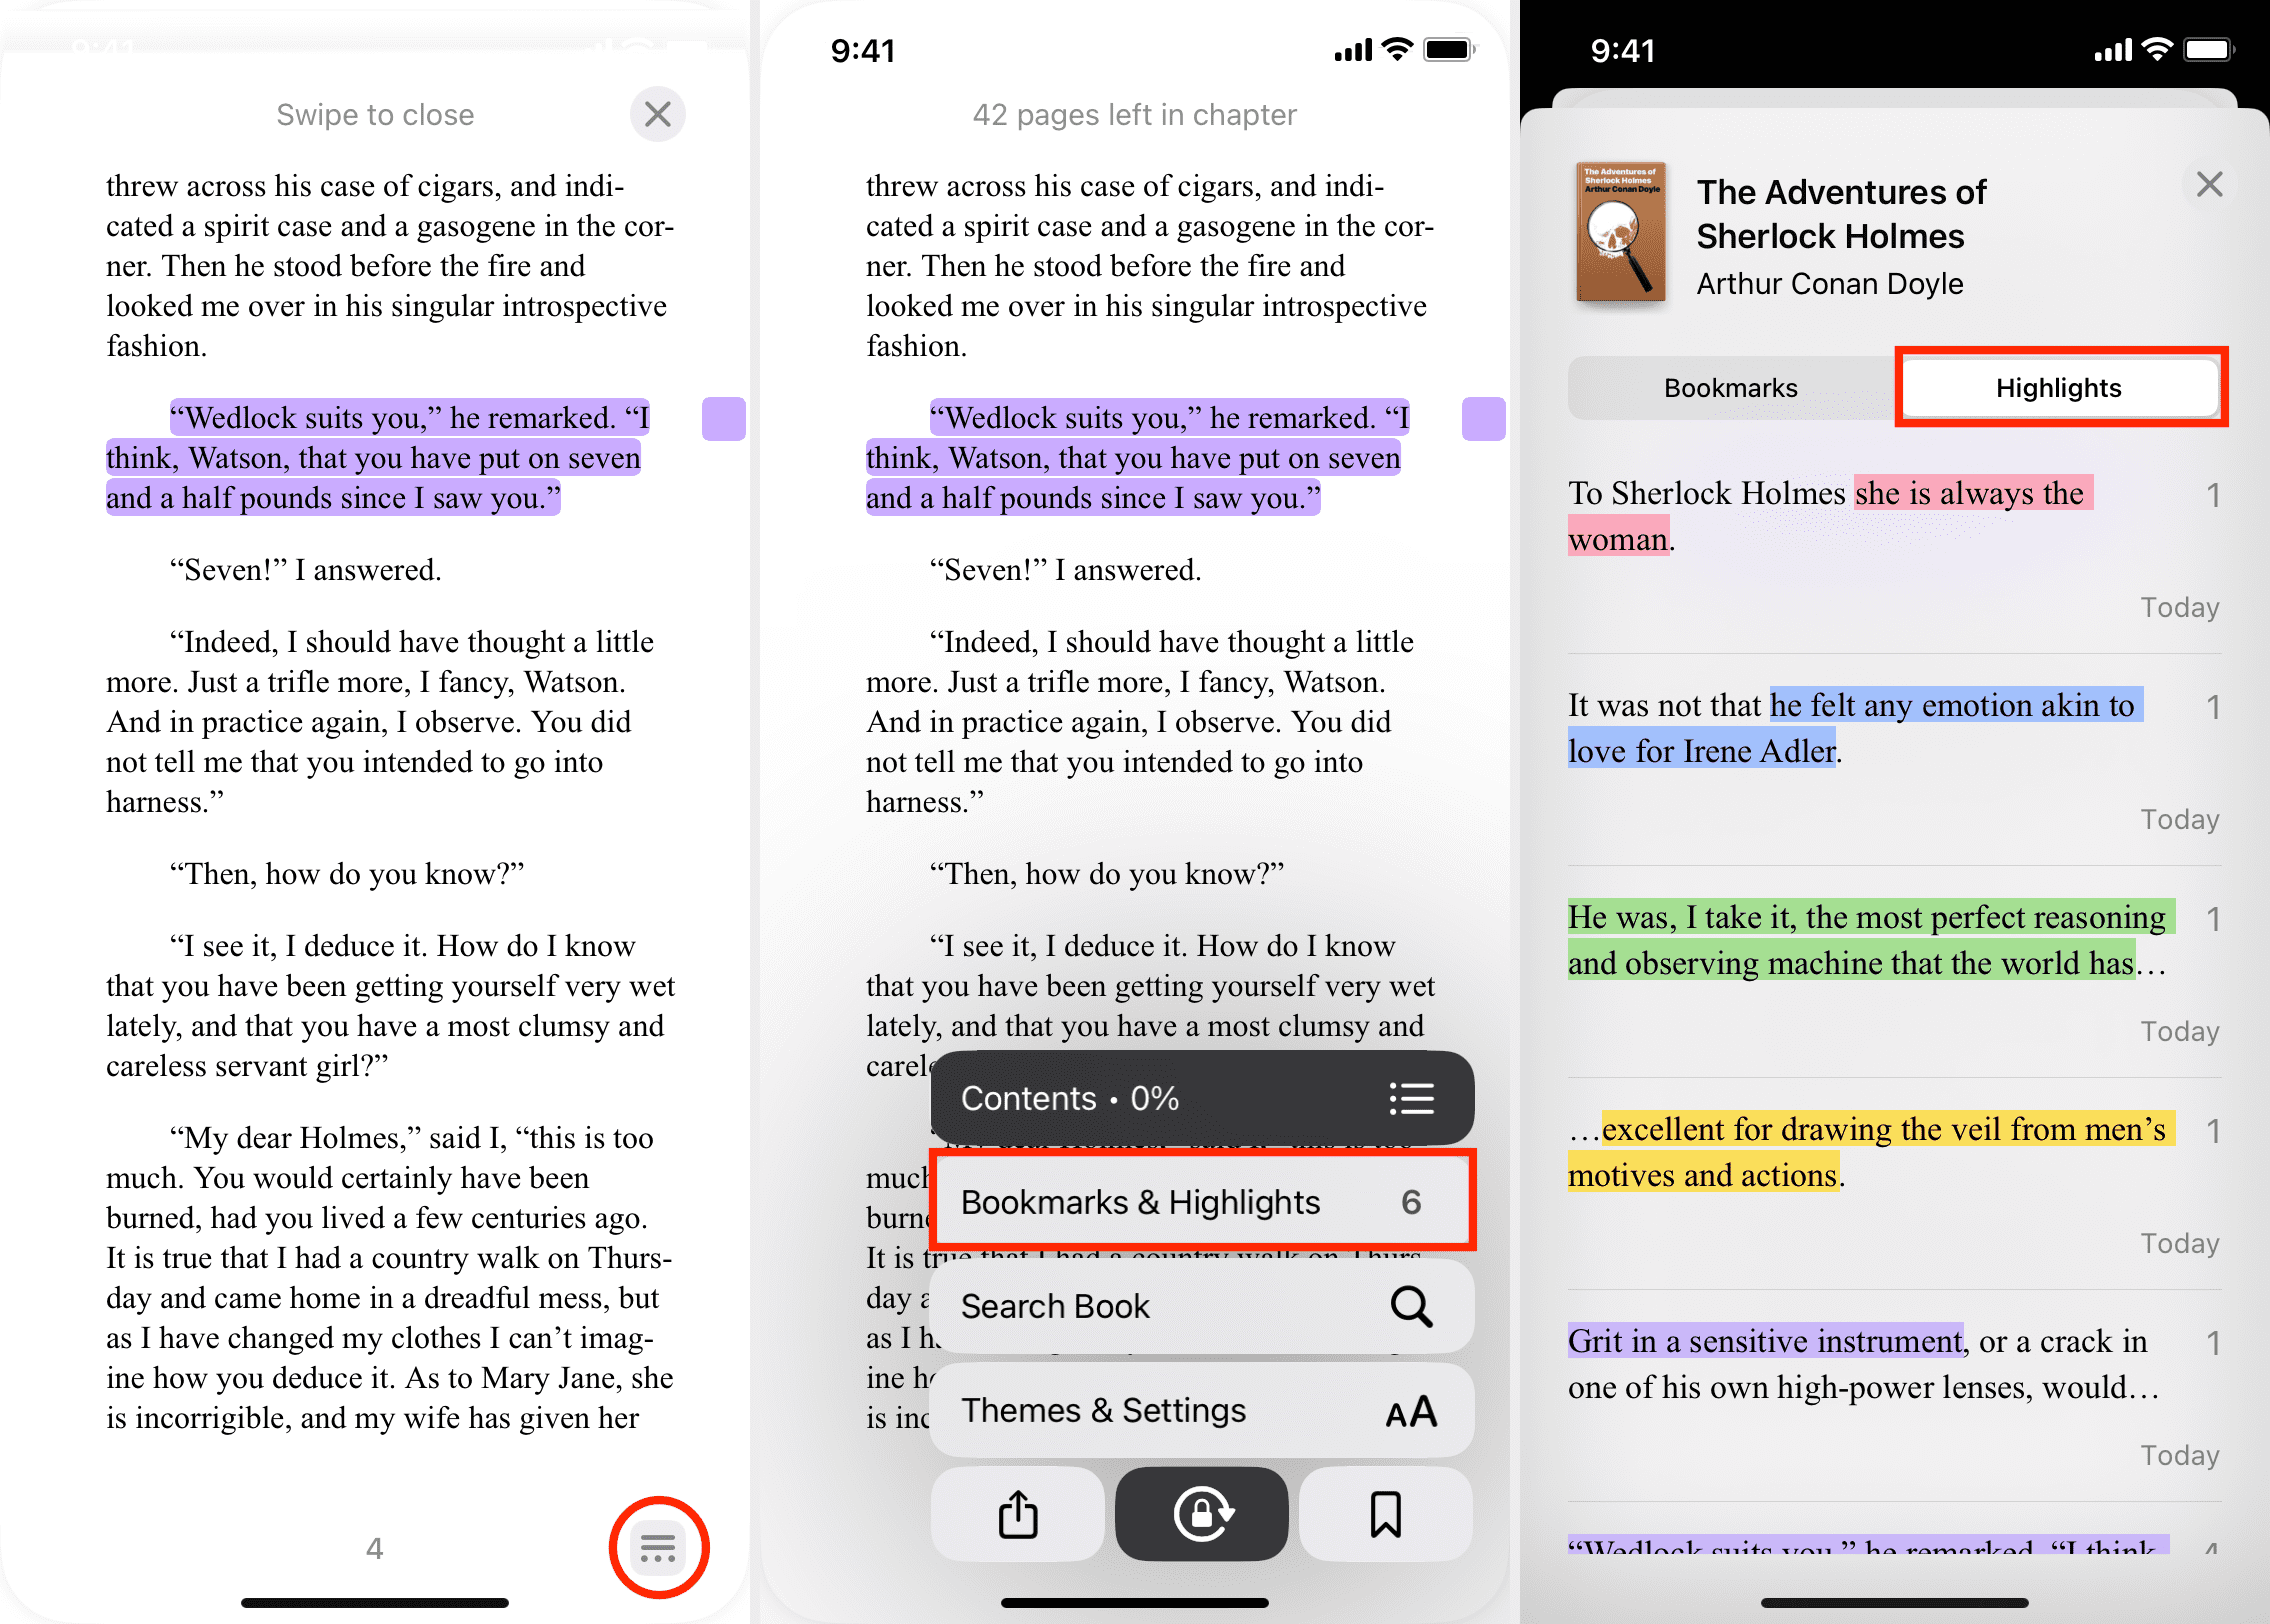
View highlights and notes on iPhone and iPad
Any highlights or notes that you add in Books on iOS will appear in the same place. Here’s how to access them:
- Tap the icon made of three dots and two lines (see image below).
- Choose Bookmarks & Highlights.
- Select Highlights. You’ll see a list of highlights and notes along with the page numbers. Tap to visit the page with the highlight or note if you want to make edits to it.
- To delete a highlight and note, swipe it from right to left and tap Delete.
Highlights in Books on Mac
Open the Books app on your Mac to the book where you want to add or remove highlights, then do one of the following:
Add a highlight
- Select the text that you want to highlight by holding your cursor and dragging through a word, phrase, sentence, or paragraph.
- You should see a shortcut menu appear immediately. Choose a color in the menu and it will apply as a highlight. You can also choose the red underline option if you prefer.
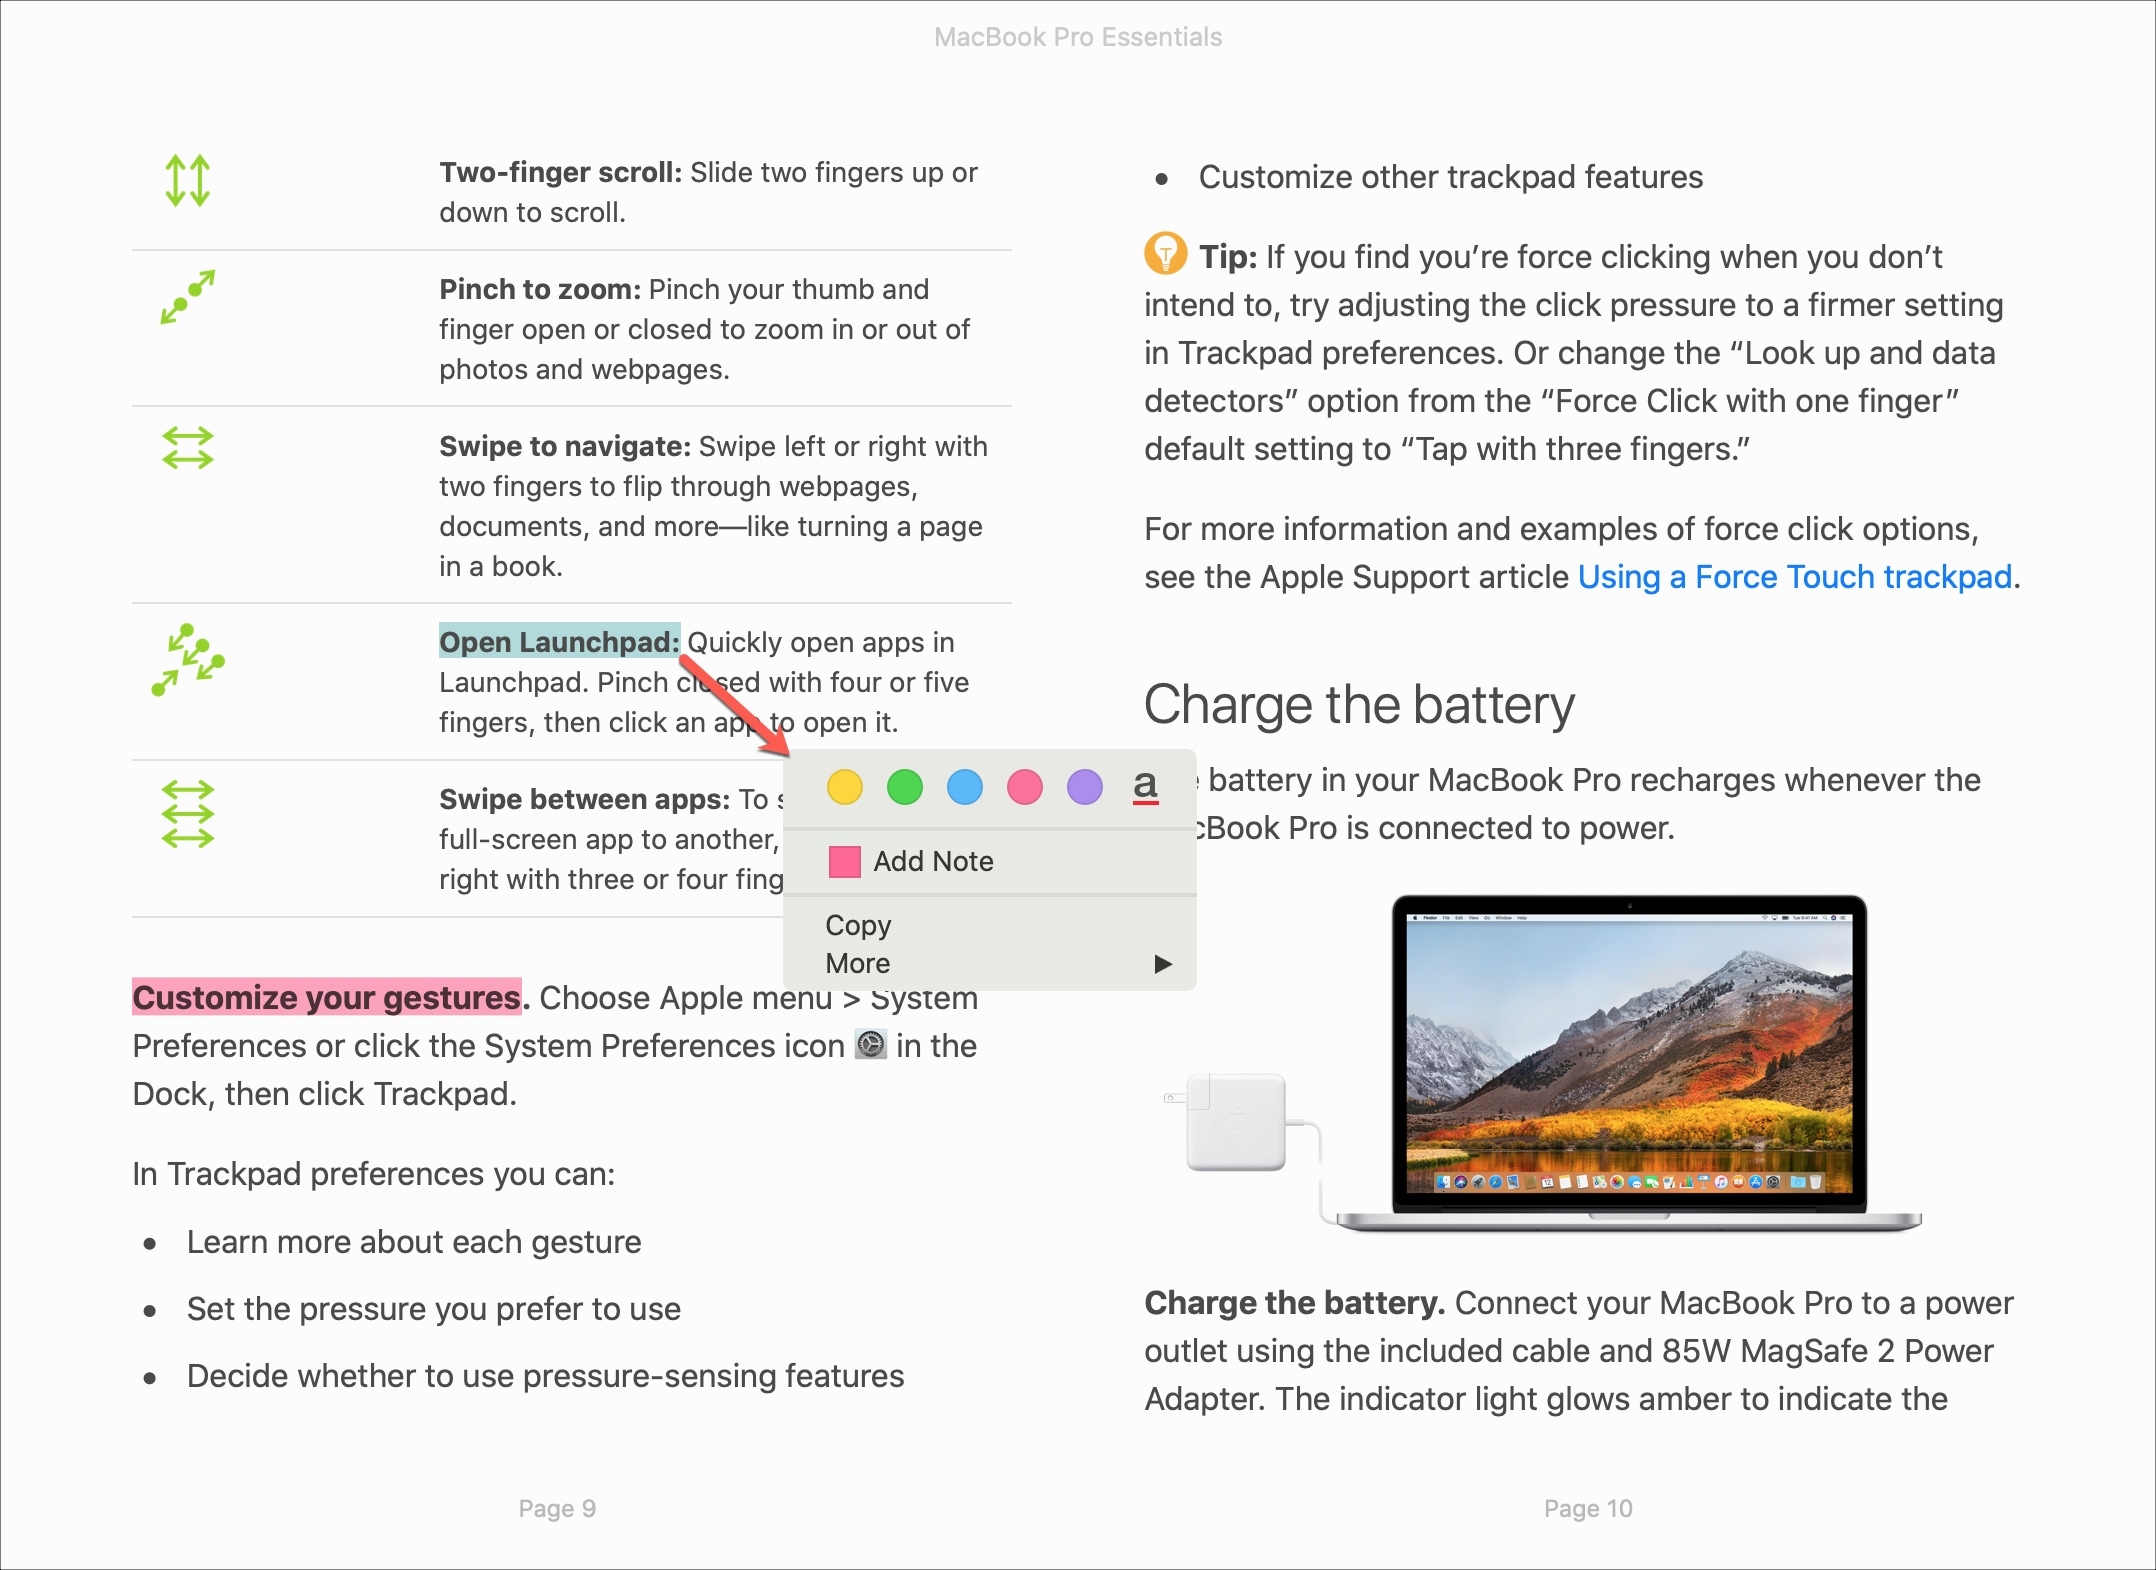
Alternatively, you can pick Edit > Highlight and pick a color from the menu bar.
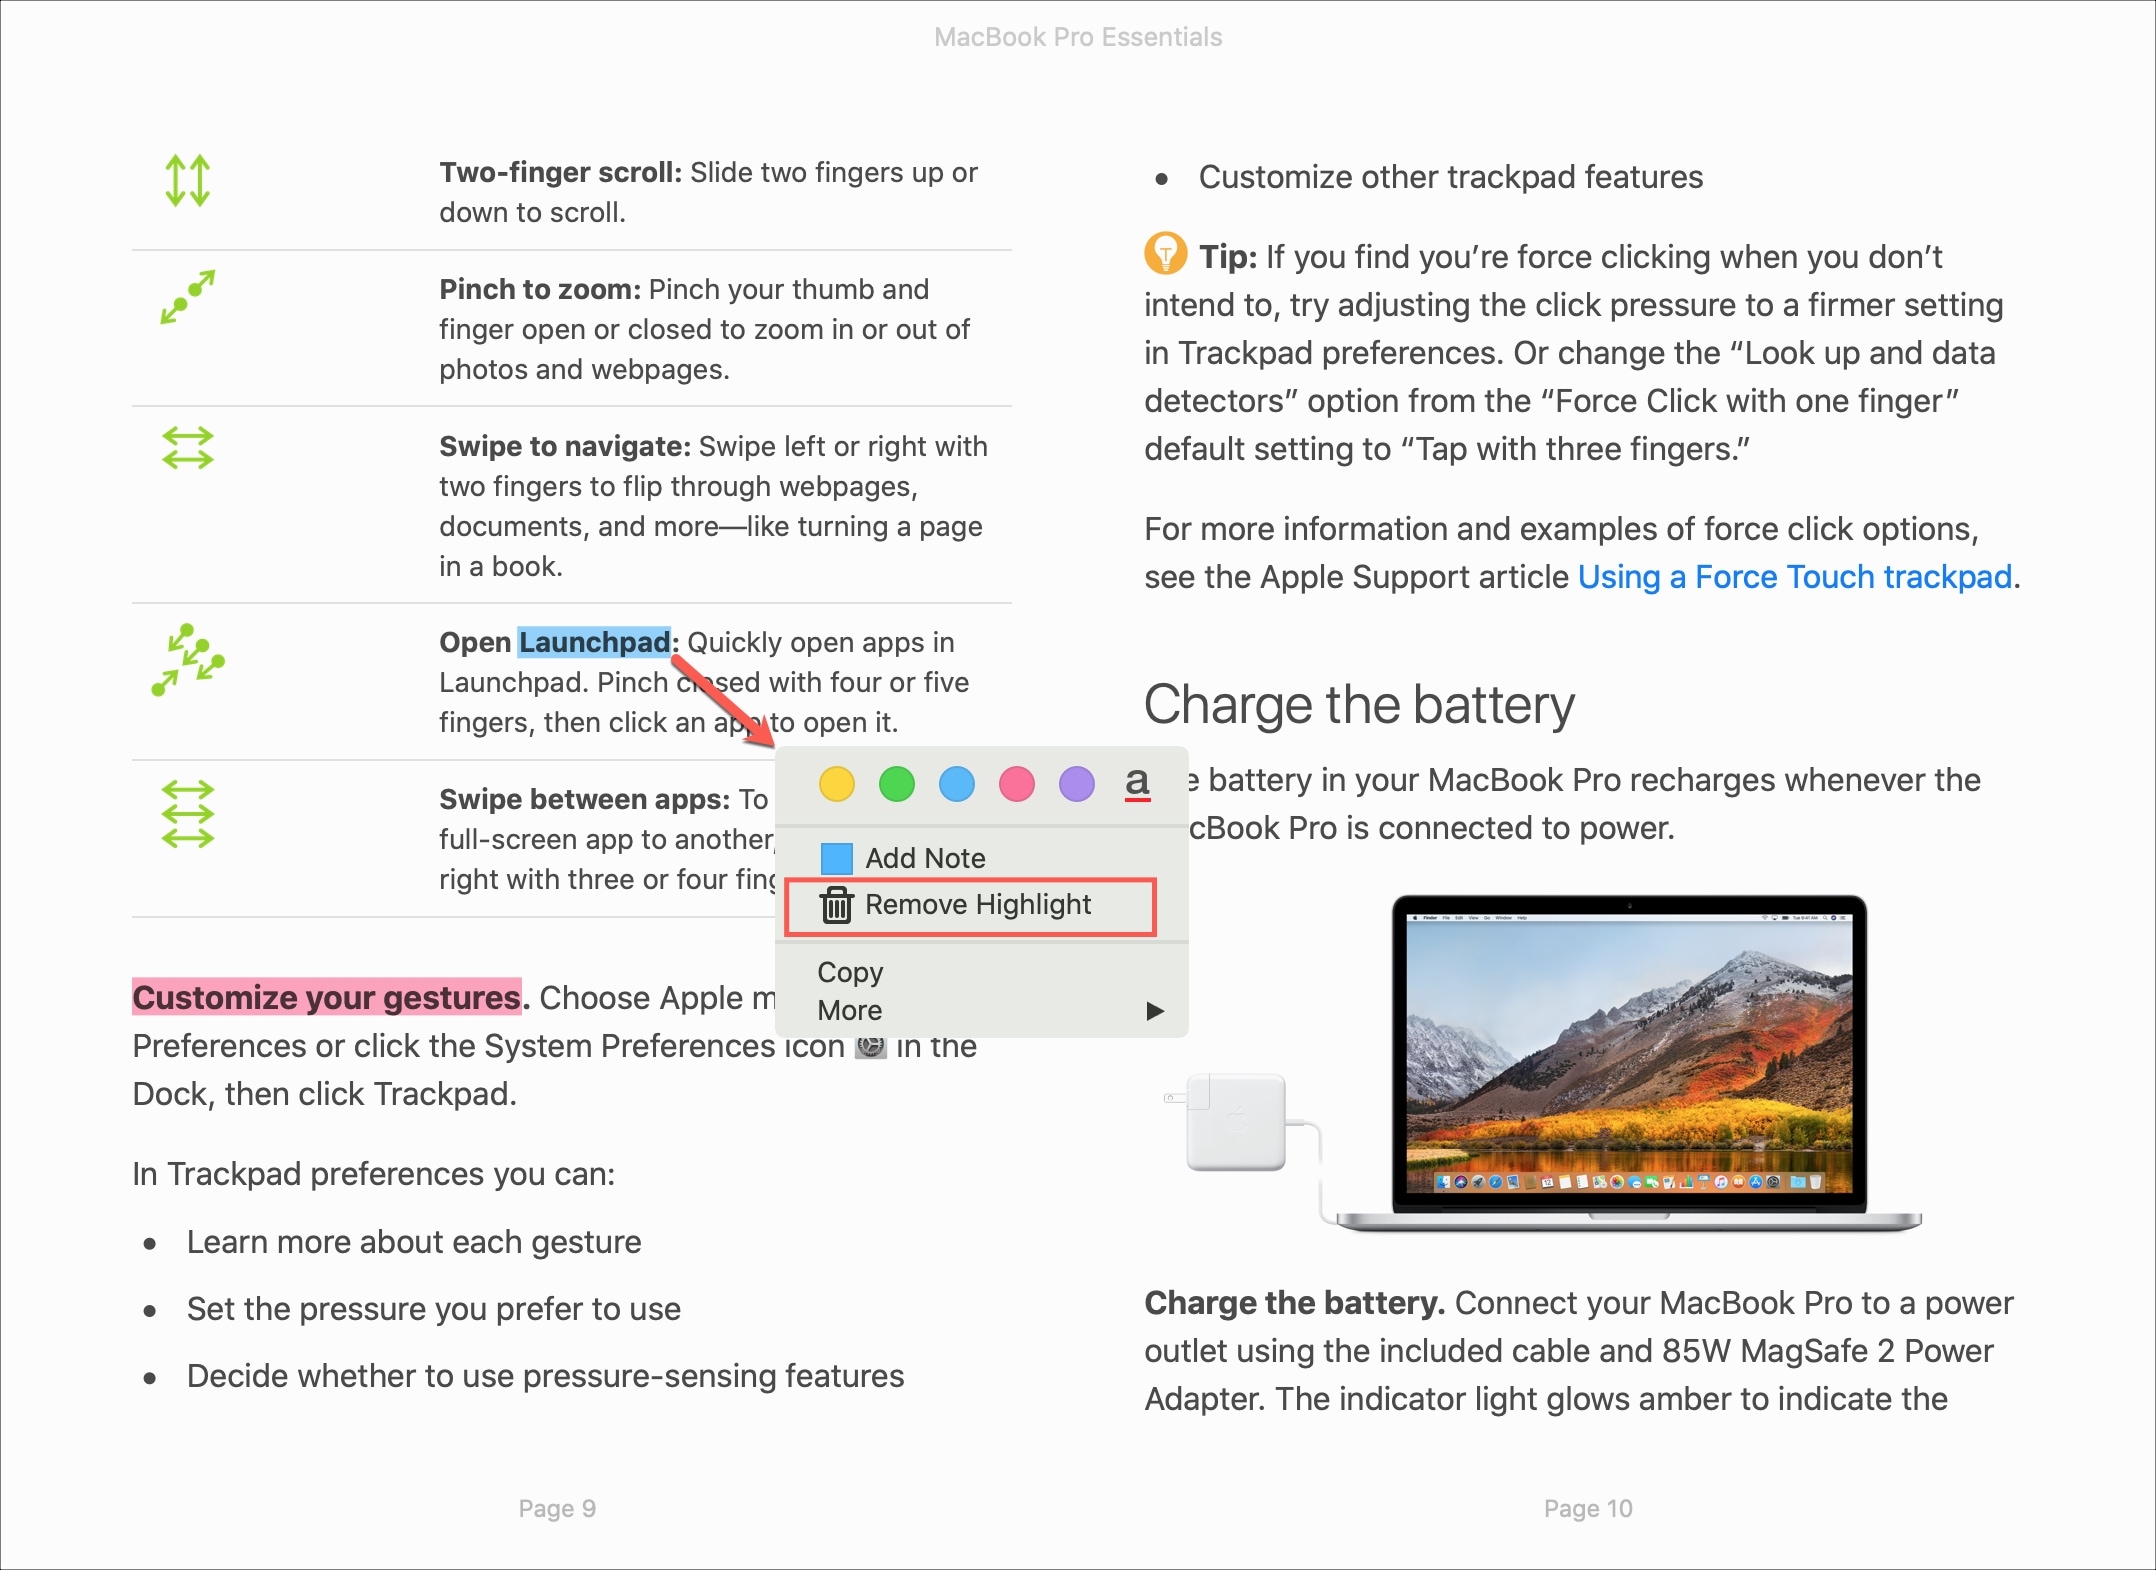
Remove a highlight
If you want to delete a highlight in Apple Books later, this is super easy.
Select any part of the highlighted text and click Remove Highlight from the shortcut menu.
Notes in Books on Mac
Open the Books app on your Mac to the book where you want to add or delete notes and then do one of the following:
Add a note
1) Select the spot in the book where you want to add the note.
2) Right-click or hold the control key and click to display the shortcut menu. Pick Add Note.
Alternatively, you can select text and click Edit > Add Note from the menu bar.
3) When the tiny window opens, type in your note. Click Done to close its window.
You’ll see a marker (tiny square icon) in the book where you added the note.
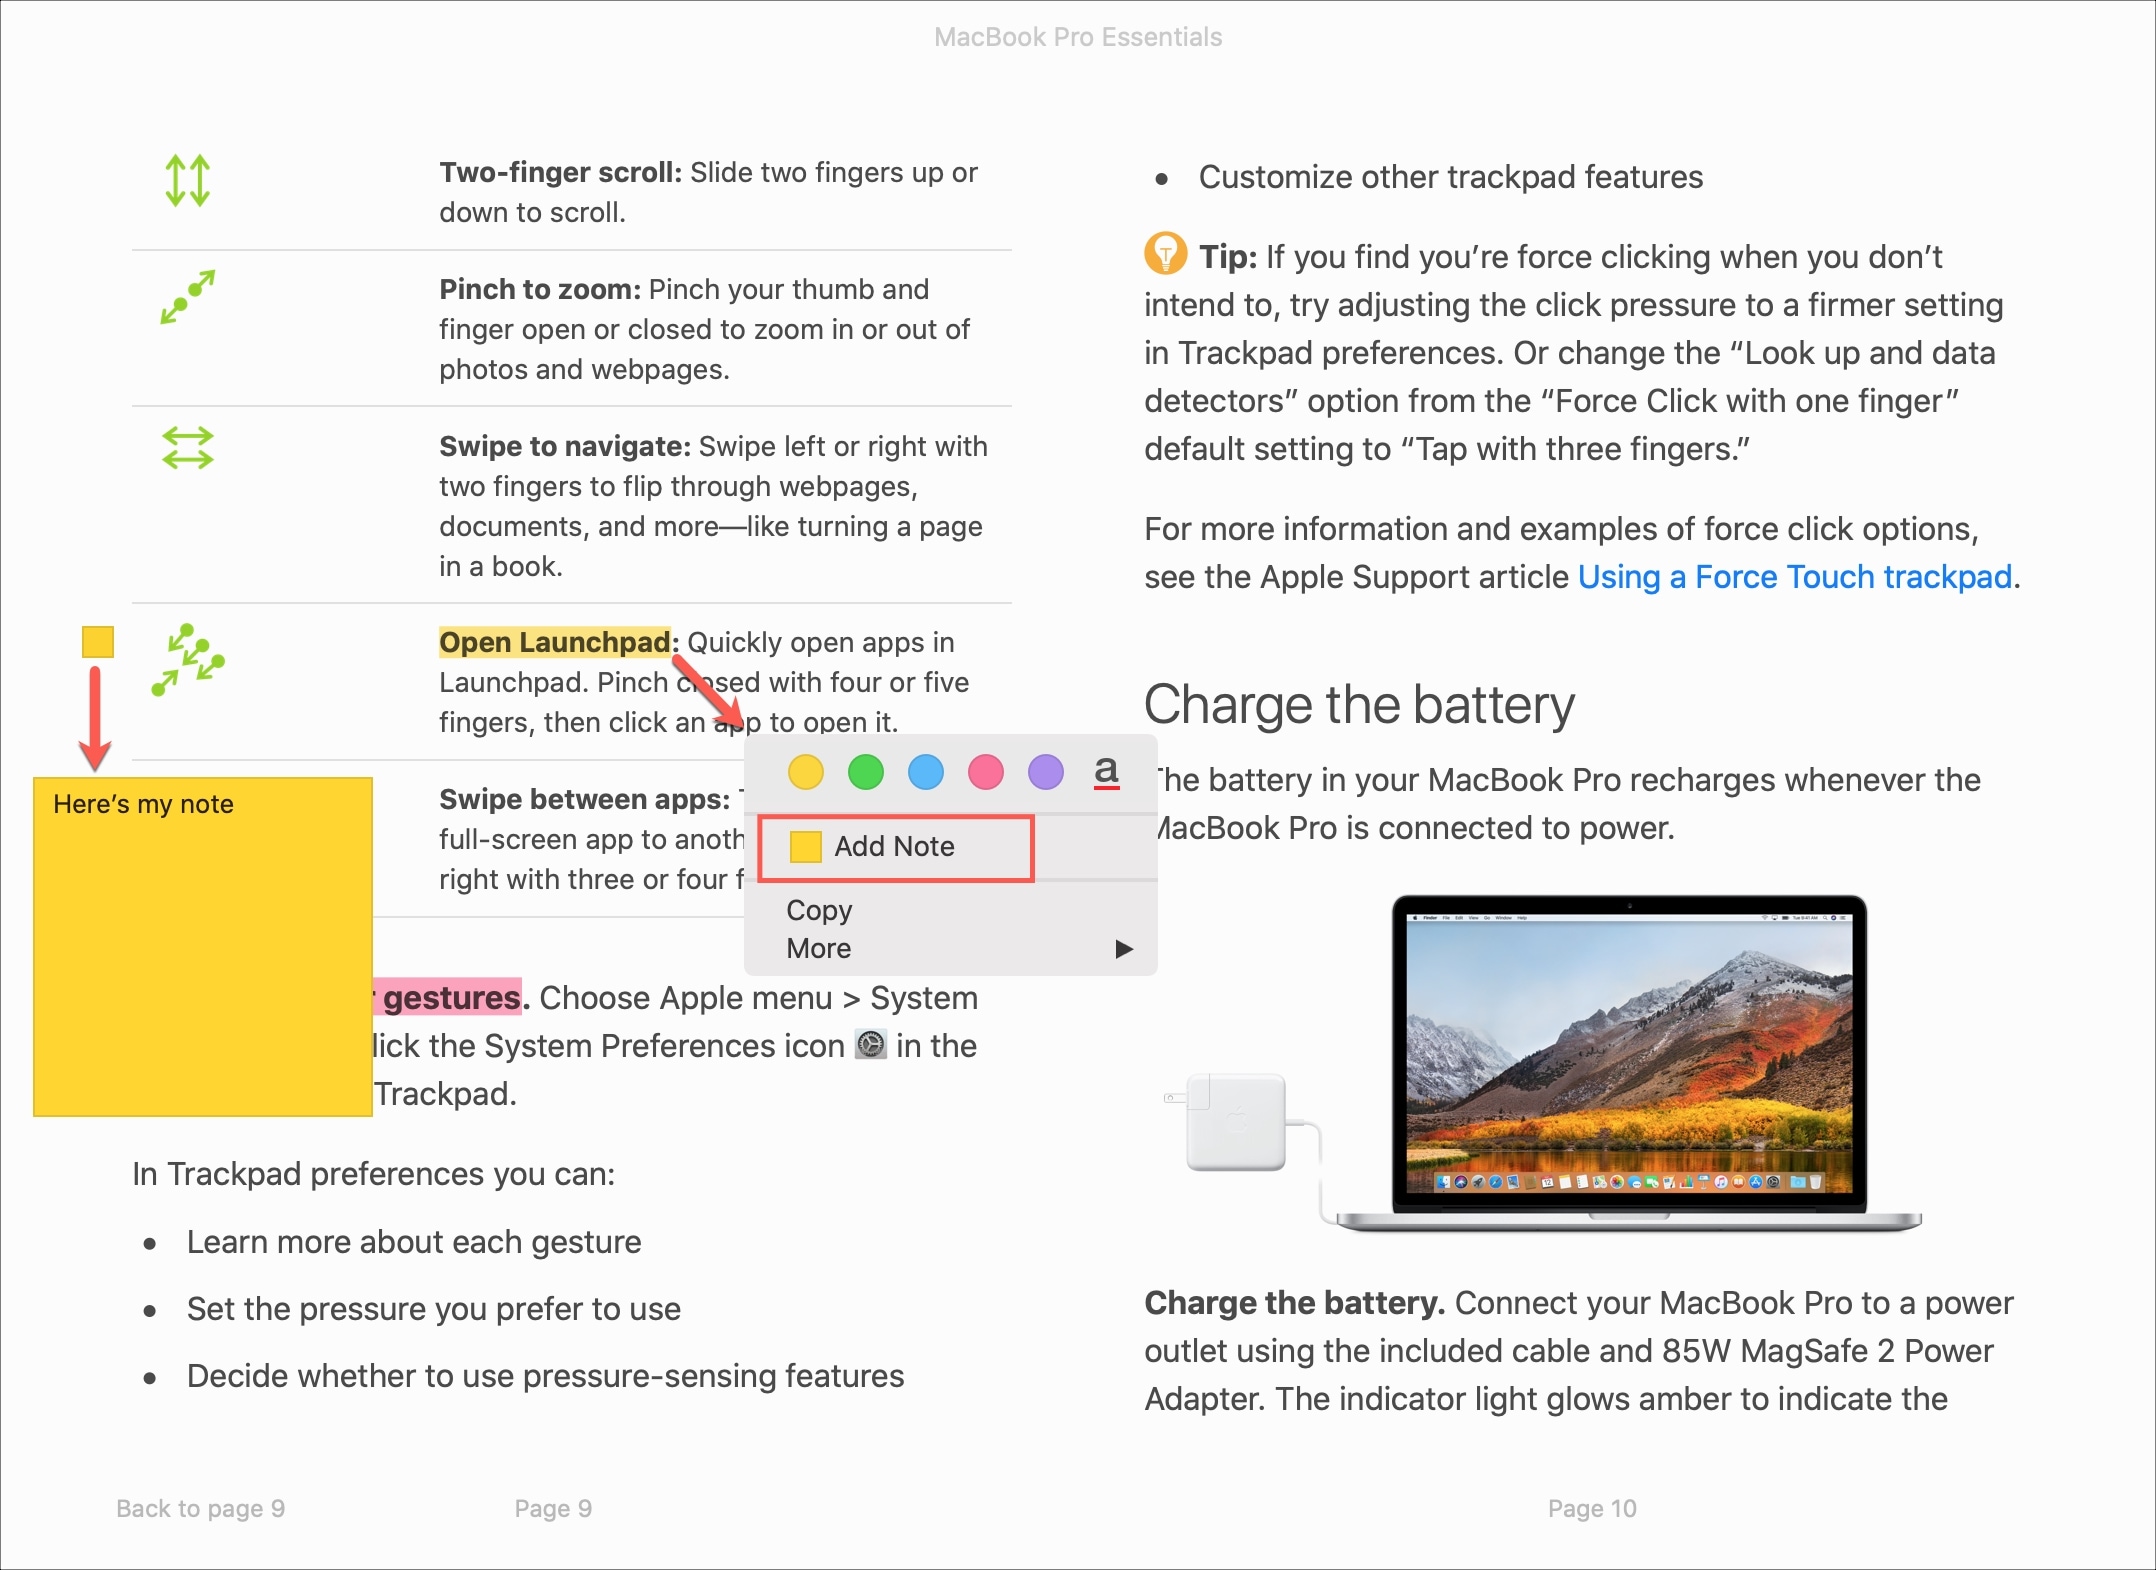
Notice that the note you add also adds a highlight to the text in the same color. You can change the note and highlight color by opening the shortcut menu again and picking a different one.
Remove a note
To delete a note and/or its corresponding highlight, right-click/control-click the text that the note is attached to and when the shortcut menu displays, select either Remove Note or Remove Highlight & Note.
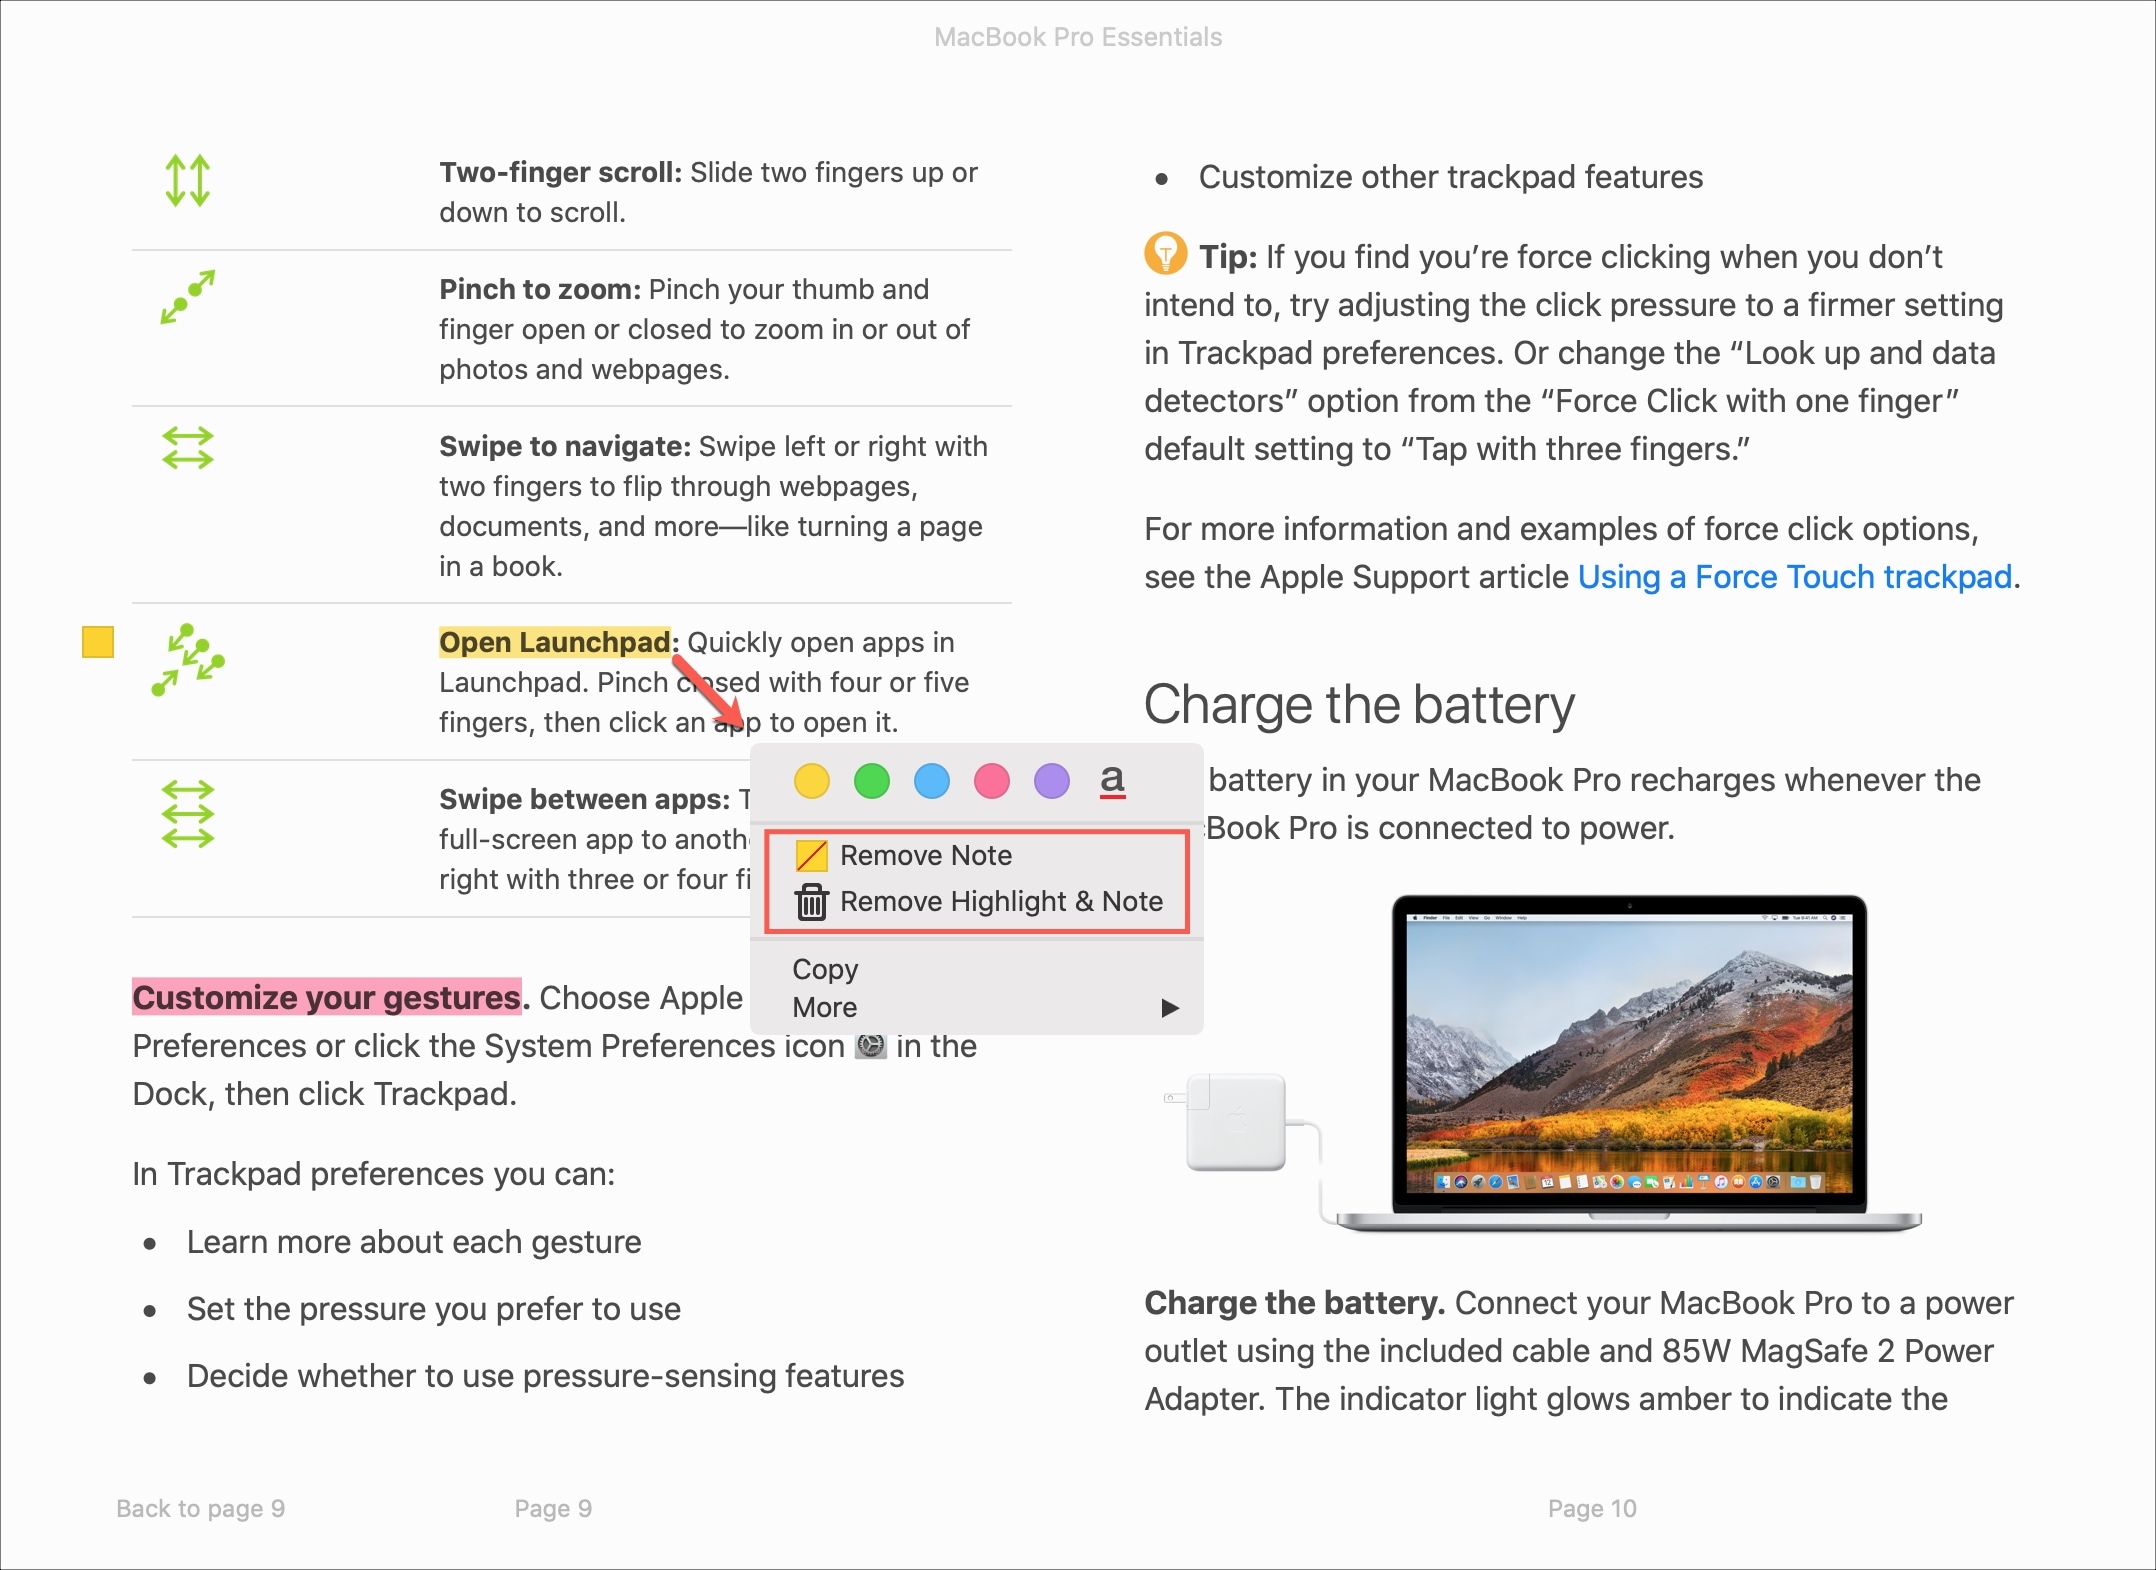
Keep in mind that if you only choose to Remove Note, that highlight will remain attached to the text.
View highlights and notes on Mac
Any highlights or notes that you add in Books on Mac will appear in the same place.
Move your cursor to the top of the Books window to open the controls menu.
Click the Show highlights and notes button on the left. You’ll see a list of highlights and notes along with the page numbers.
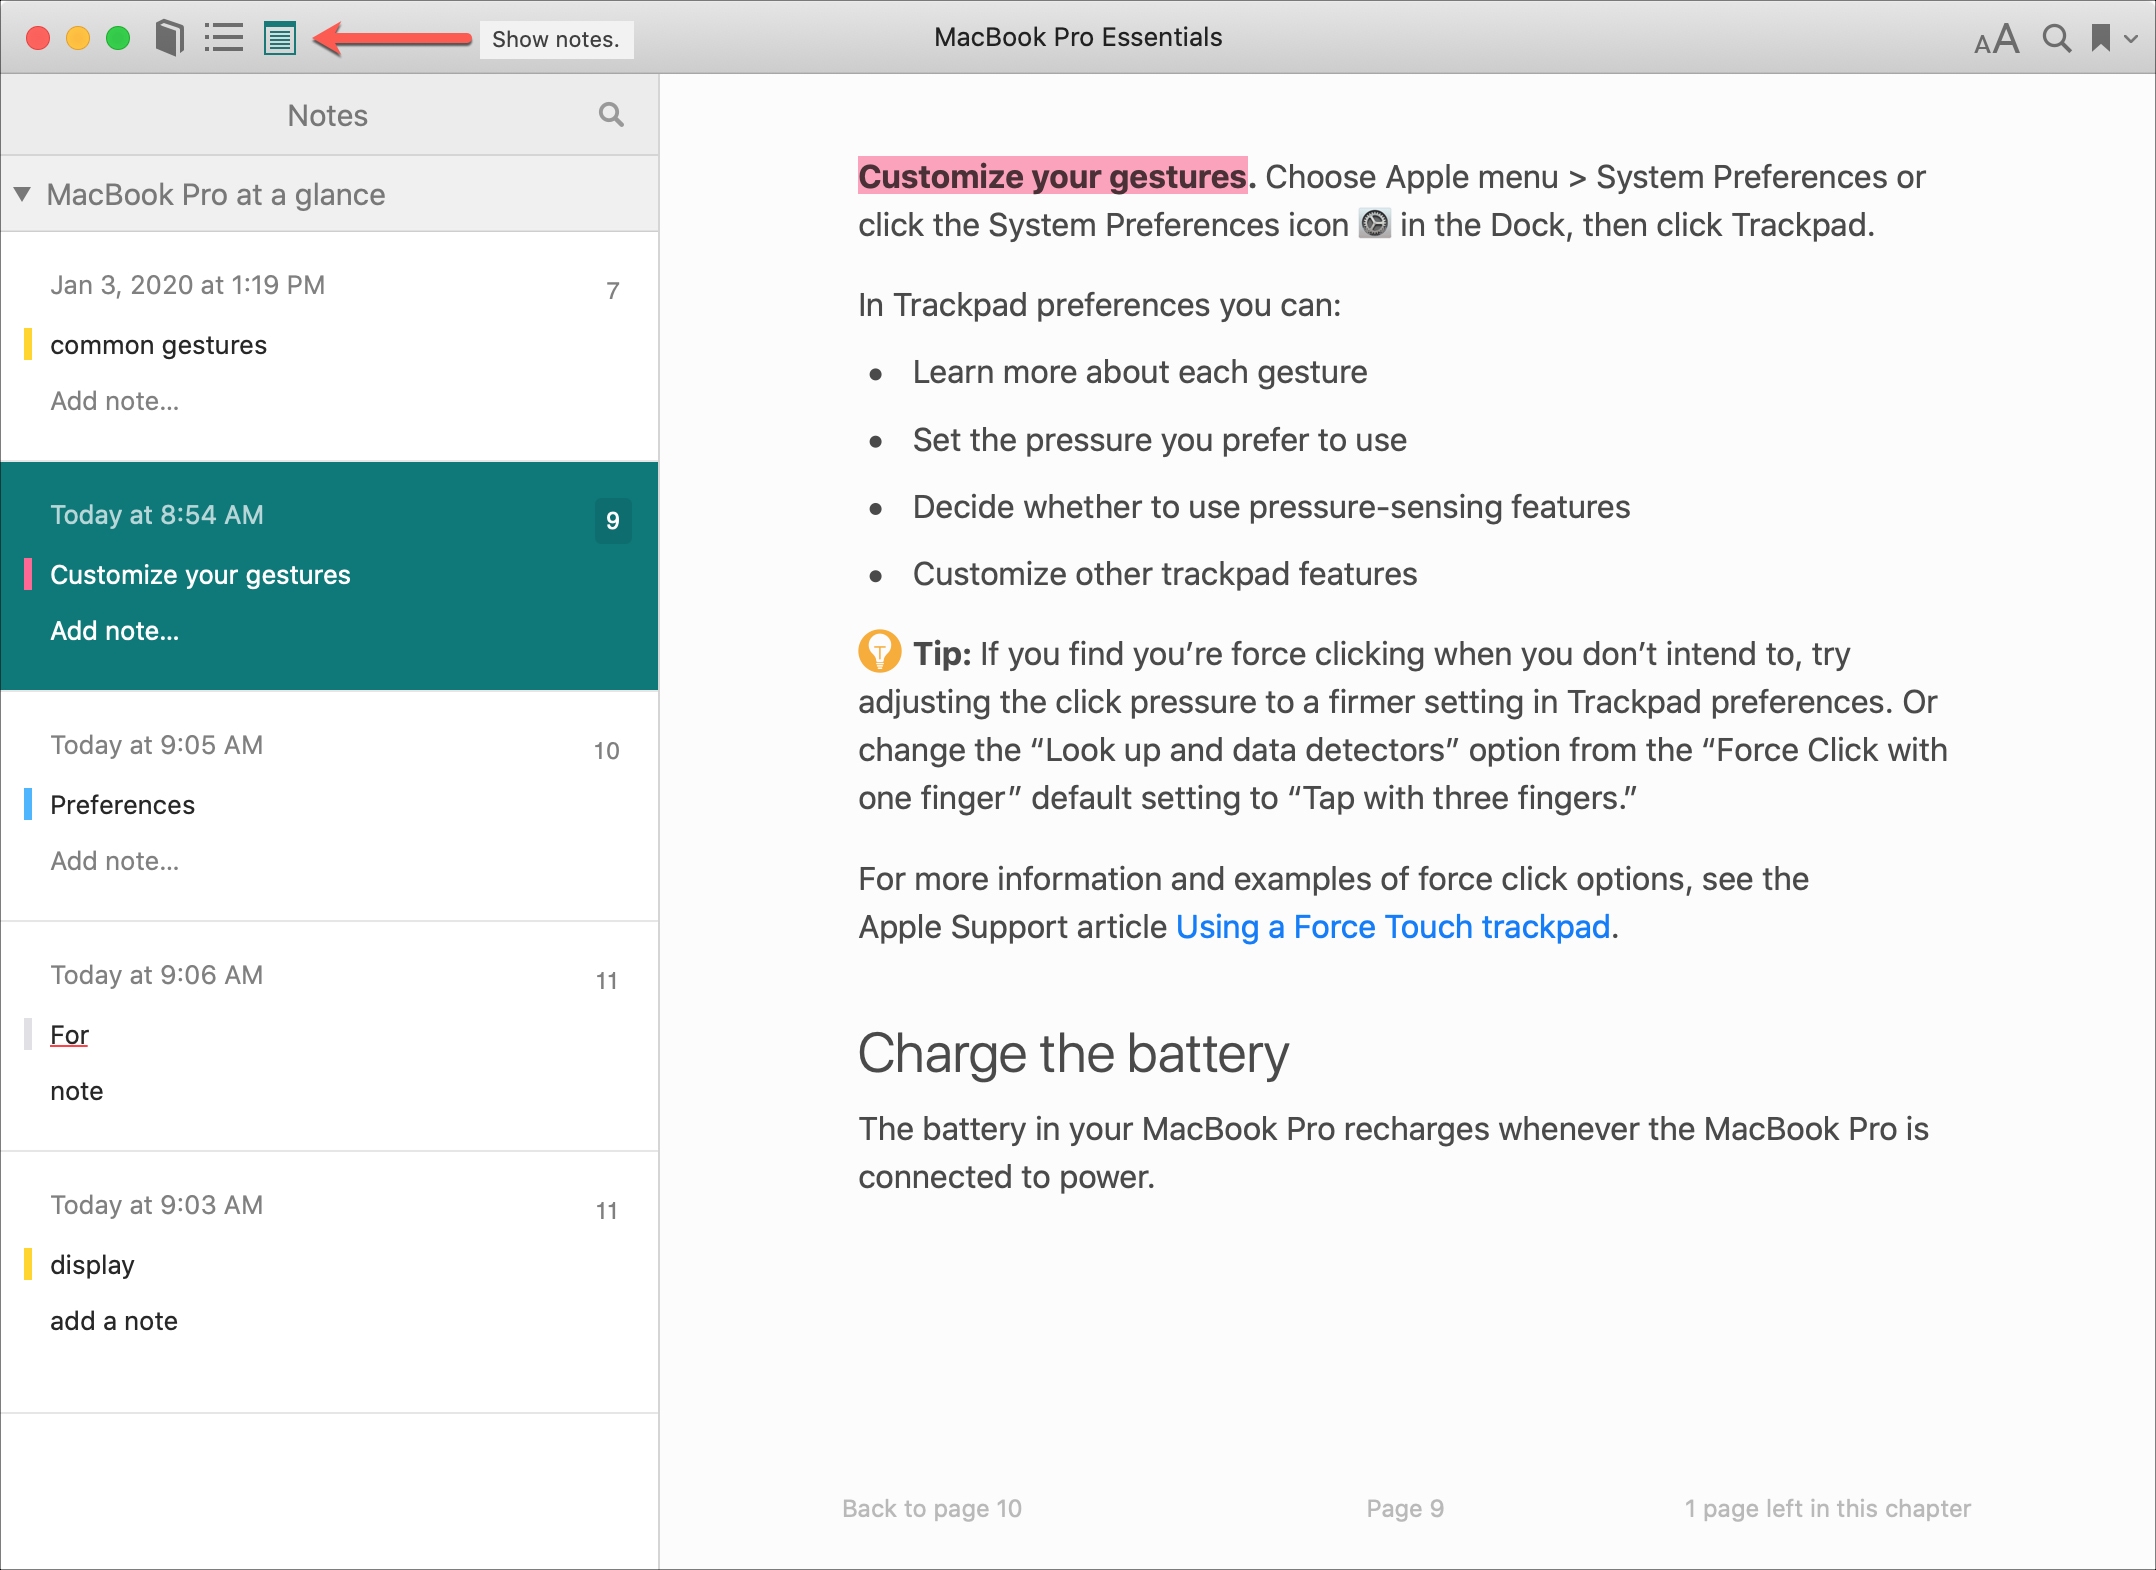
- Click the page number to jump to that spot in the book.
- Click an existing note to edit it.
- Click Add Note to add a new note to the highlight.
When you finish, just click the Show Notes button in the controls menu to close the list.
Notes and highlights in the Apple Books app
By using highlights and notes in the Books app, you can have wonderful references right at your fingertips. Use different colors for specific topics or assignments, jump to particular pages for those items quickly, and see your highlights and notes on all of your devices.
Are you going to take advantage of these features in the Books app? Let us know if you have tips of your own you’d like to share!
Check out next: