
Continuity Markup in iOS 13, iPadOS and macOS Catalina 10.15 or later lets you annotate documents on your Mac using your iPhone, iPad, or iPod touch. It works like magic. In this short step-by-step tutorial, you’re going to learn how to use this feature to mark up Mac documents such as PDFs and images on your nearby iOS device with your Apple Pencil or finger, zero setup needed.
Marking up Mac documents
Apple’s operating systems feature “Continuity” technologies that let nearby devices work better together, allowing you to do things like receive cellular phone calls on your Mac, pick up on right where you left off on another device and so forth.
In iOS 13, iPadOS and macOS Catalina, you can draw a sketch using your nearby iOS device and have it appear instantly on your Mac right where you need it, like in an email message, a Messages conversation, a document or a folder — Apple calls it Continuity Sketch.
TUTORIAL: How to use Continuity Sketch
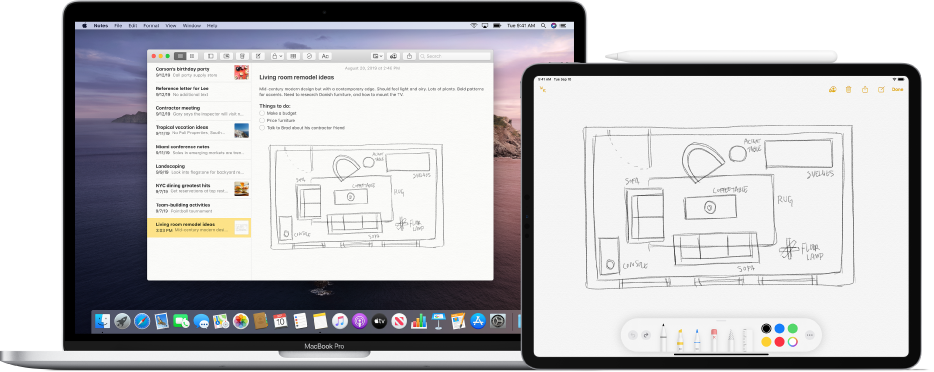
On top of that, you can also mark up a PDF document or image on your Mac computer with your Apple Pencil or finger using a nearby iOS device — a feature Apple calls Continuity Markup — with the changes appearing live on your Mac.
TUTORIAL: How to sign a PDF on your Mac notebook using its trackpad
Continuity Markup lets you sign PDF documents, correct school projects or research papers, circle important details on images or screenshots and more. This feature doesn’t work with file types beyond PDF documents and images – at least not yet.
Continuity Markup system requirements
Continuity Markup requires iOS 13, iPadOS and macOS Catalina or later. This feature is supported by the following Apple device models:
iPhone and iPod touch
- iPhone 6s or newer
- iPhone SE
- iPod touch (7th generation) or newer
iPad
- iPad Pro (all models)
- iPad (5th generation) or newer
- iPad Air 2 or newer
- iPad mini 4 or newer
Mac
- MacBook introduced in 2015 or later
- MacBook Air introduced in 2012 or later
- MacBook Pro introduced in 2012 or later
- Mac mini introduced in 2012 or later
- iMac introduced in 2012 or later
- iMac Pro (all models)
- Mac Pro introduced in 2013 or later
Devices used for the Continuity features must have both Wi-Fi and Bluetooth enabled, as well as be signed in to iCloud with the same Apple ID using two-factor authentication.
Follow along with iDownloadBlog’s step-by-step tutorial included further below to learn how to mark up Mac documents like PDF documents and images by using the Markup tools and your Apple Pencil or finger on a nearby iPhone or iPad, courtesy of Continuity Markup.
How to mark up Mac documents
Follow the steps below to learn how to use your Mac computer to request document markup from your iPad, iPhone or iPod touch with just a few clicks.
1) Click the Finder icon in the Dock of your Mac to open a new Finder window.
2) Using the Finder, navigate to a folder with the PDF document or image you wish to mark up.
3) Activate Continuity Markup by taking one of these actions:
- Click the PDF document or image once with the left mouse button to select it and press Space bar on the keyboard to invoke a preview window, then click the Markup button at the top of the Quick Look window.
- Control-click the PDF document or image file and choose the Quick Actions option from the shortcut menu, then select Markup from the sub-menu.
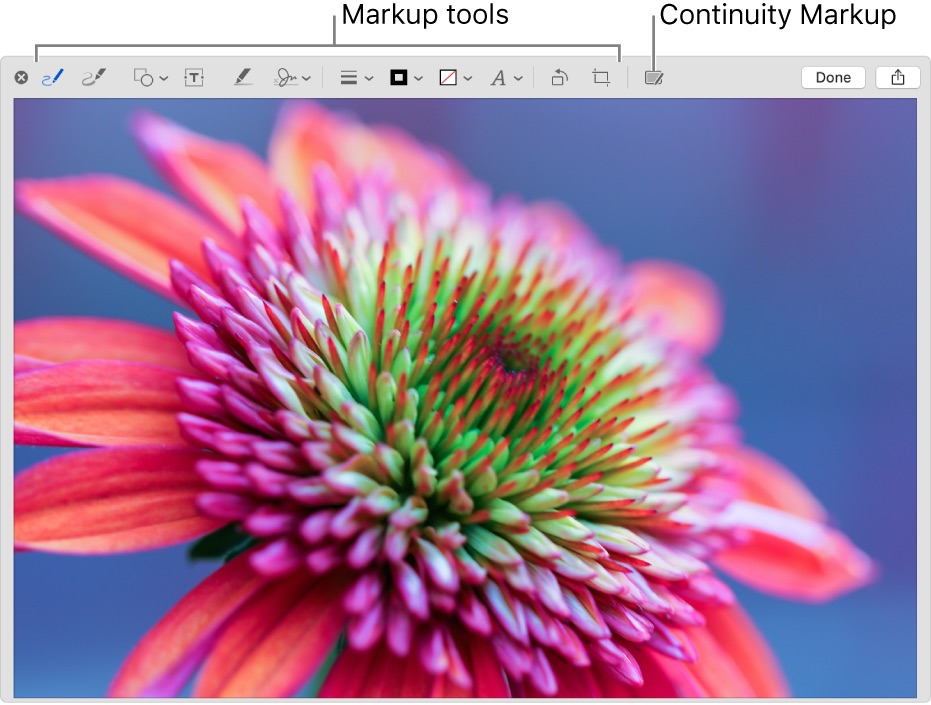
Your Mac will reveal the markup toolbar at the top of the preview window.
4) Click the Annotate button at the rightmost side of the toolbar and select the nearby iOS device that you wish to use for document markup. The Annotate button is tinted blue when the nearby iOS device is connected. To disconnect the iOS device, click the Annotate button again.

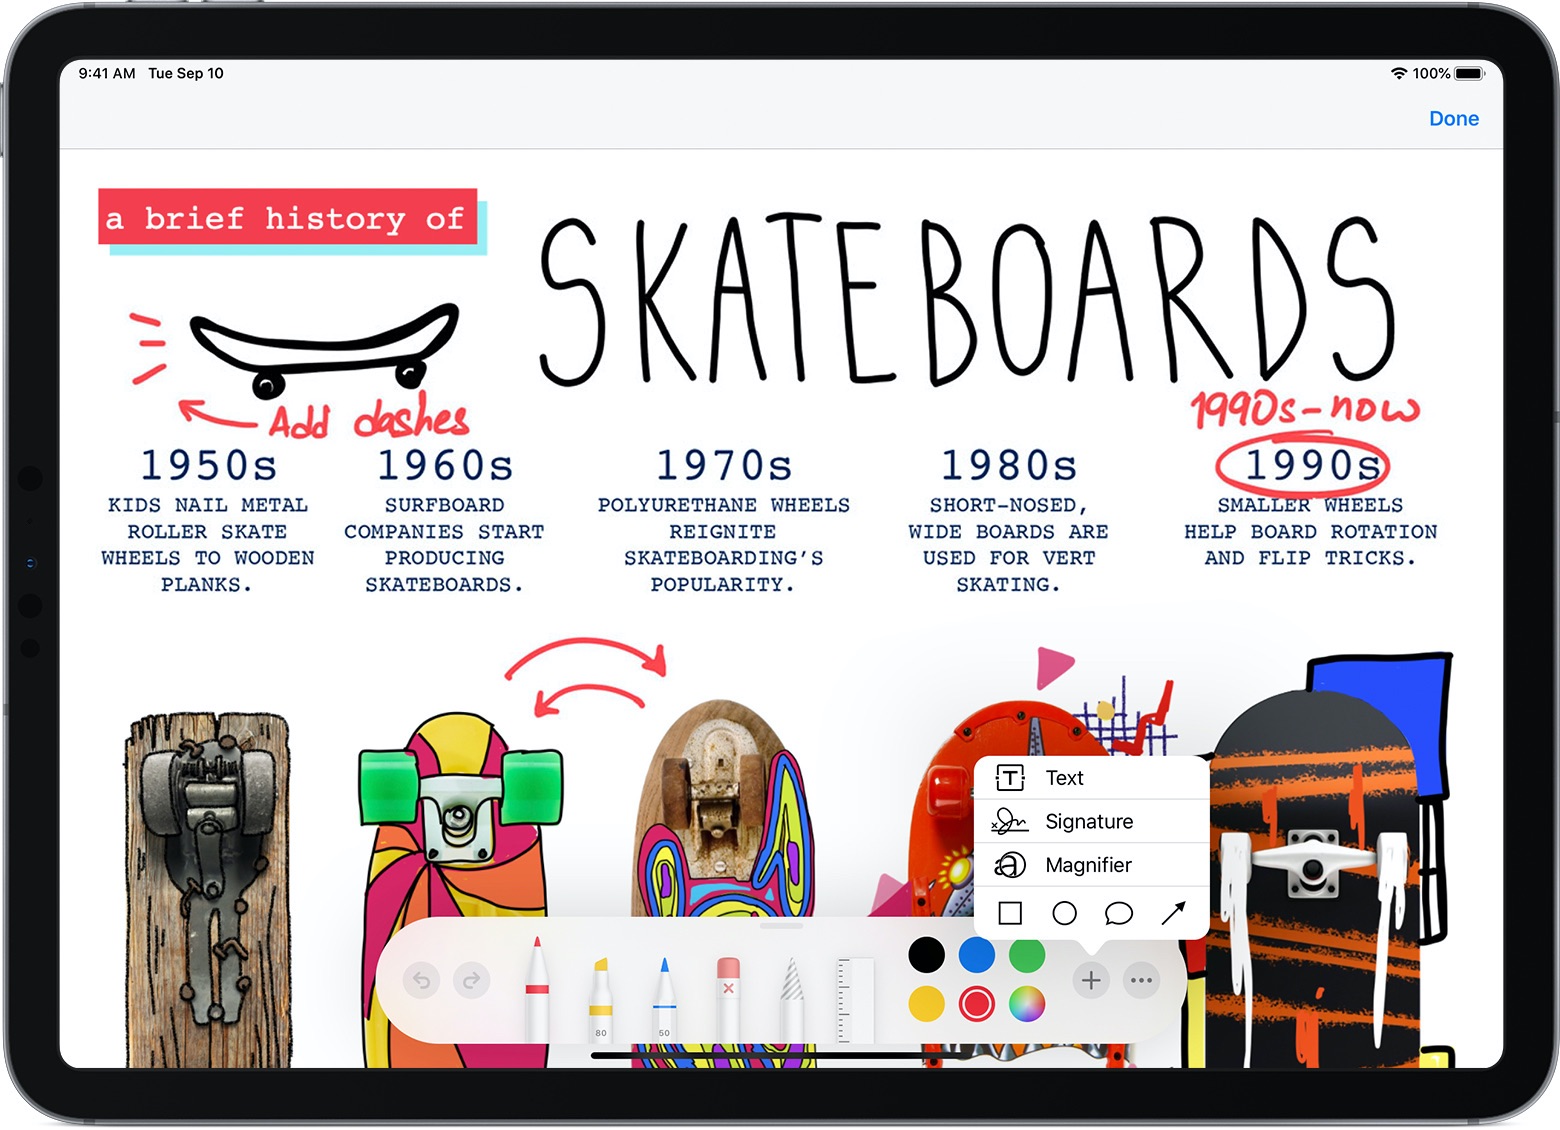
5) When a new markup window opens on the selected iOS device, use your Apple Pencil or finger for freehand drawing or tap the plus button to use the markup tools for adding text, handwritten signature, a loupe or vector shapes and arrows.
6) Every change made on the iOS device is reflected live on your Mac. When you’re finished marking up your content, click Done to close the markup window on the iOS device.

7) To save your annotations and other changes you just made to the PDF document or image, click the Done button in the preview window on your Mac (this action cannot be undone). Clicking the Revert button will disregard your annotations and revert to the original version.
And that’s how you mark up Mac documents with your iOS device, girls and boys!
Places you can mark up Mac documents
With Continuity Markup, all the annotations added on your iOS device appear instantly on the Mac without you having to do anything particular on your part. It “just works” without any setup or special app.
The ability to mark up Mac documents with your nearby iOS device is available in various Mac apps, too, including Mail, Notes, TextEdit and Photos. In Photos, for instance, you can click the markup icon when editing content in order to use Continuity Markup.
TUTORIAL: How to use Continuity Camera
In Mail, you can use your nearby iOS device to add sketches, shapes and other markup to the attached PDF or image. In TextEdit, use Continuity Sketch to mark up embedded images. And in the Notes app for macOS, feel free to use the markup tools on your iPad or iPhone to annotate PDF attachments and images in your notes.
Lastly, it doesn’t hurt repeating that Continue Sketch only works with PDFs and images.
Need help? Ask iDB!
If you like this tutorial, pass it along to your friends and leave a comment below.
Got stuck? Not sure how to do certain things on your Apple device? Let us know via help@idownloadblog.com and a future tutorial might provide a solution.
Submit your own how-to suggestions via tips@idownloadblog.com.