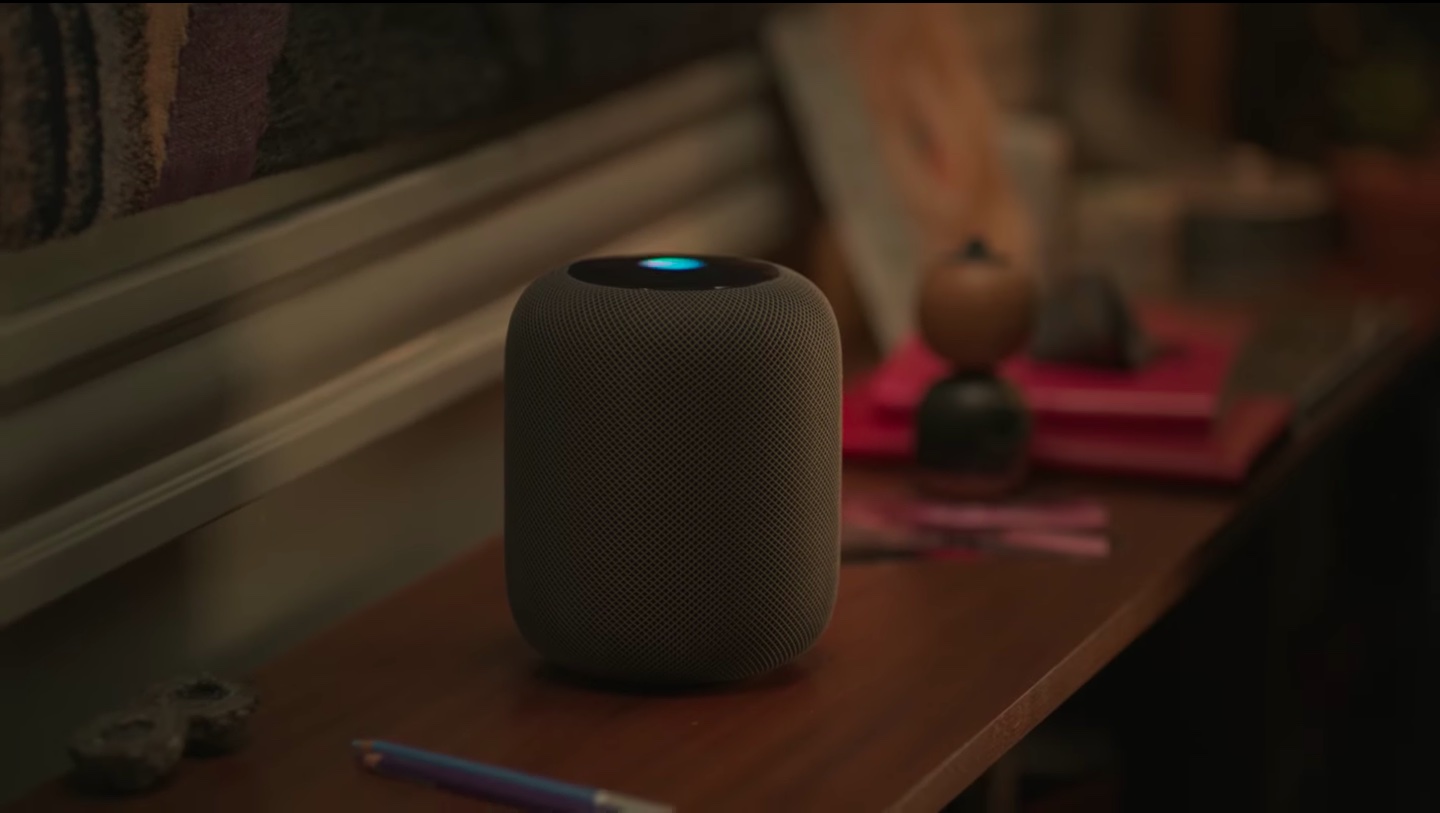
With HomePod multiuser support, Siri on your speaker can recognize different voices. This lets Siri on your HomePod use other people’s personal information. Follow along with us as we lay out how to set up HomePod multiuser support with different voices.
HomePod’s multi-user support works with up to six users in a home.
Each Family Sharing member or another user can use your HomePod wireless speaker to listen to music, ask Siri questions or access their personal information without polluting your own listening history, influencing recommendations or seeing your personal data. Non-registered accounts can use Siri on your HomePod to play music from your account, but nothing else.
Use HomePod just like you always have—ask Siri for the weather, manage your calendar, get the latest news, make phone calls and more. But with multiuser, now your family can personalize their HomePod experience, too. Siri can identify who in the family is speaking and tailor the music selection to that user’s taste profile, respond to their own Personal Requests and access their information to help them with everyday tasks.
Multiuser on HomePod only supports English at this time.
You may have already received a notification in the Home app saying your HomePod can now recognize your voice. However, completing setup isn’t as straightforward as following the onscreen instructions, but that’s where your trusted blog comes to the rescue.

Follow along with our step-by-step tutorial to learn what you’ll need and how you can set up multiuser on your HomePod to have Siri recognize different voices.
Prerequisites for multiuser HomePod
Setting up multiuser support on your HomePod to have Siri recognize different voices isn’t as trivial as it sounds. There’s a bunch of pre-checks you should run through before you even begin setting things up for multiuser voice recognition.
Here’s what you’ll need:
- An iPhone or iPod touch running the iOS 13.2 software or later
- An iPad running the iPadOS 13.2 software or later
- A HomePod speaker with the HomePod 13.2 software or later
- You must be logged in to your iOS device with the Apple ID that you use with iCloud
- The iOS device must be signed in with the same Apple ID as your HomePod
- Your HomePod and iOS device must be connected to the same Wi-Fi network
- The Siri language on the iOS device must match HomePod’s Siri language
- Other users that Siri on HomePod should recognize must be part of your Home network
- Bluetooth, Location Services, Location Sharing, Siri and Personal Requests must be on
You can update your iPhone, iPad or iPod touch to the latest software by going to Settings → General → Software Update. To update the software on your HomePod, launch the Home app on your iOS device and tap the Home icon in the upper-left corner and then Software Update.
TUTORIAL: How to enable and use Personal Requests on your HomePod
If you’ve got the latest version, you’ll see an appropriate message. If there’s a new update available, tap Install. One thing to keep in mind: HomePod software updates are simultaneously installed on all the HomePod speakers you’ve set up in your home.

Although Apple says you’ll need at least the HomePod software version 13.2, we advise making it 13.3 at least because, according to Apple’s changelog, that version improves the ability to recognize different voice profiles belonging to family members while letting individual users enable or disable the Personal Requests feature needed for multiuser on HomePod.
How to set up multiuser on HomePod
This is quite a multi-step affair so let’s get started with it.
1) Invite users whose voices your HomePod should recognize to your Home network by tapping the Home icon located near the top-left corner of the Home app on your iOS device. On your Mac, simply click the Edit menu in the Home app and choose the option Edit Home.
Underneath the People heading, choose the option Invite.
The app will list everyone in your Family Sharing network that you can invite to your Home network. You can also guests or other users who are not part of Family Sharing circle, too, by entering their email address.
When done, hit Send Invite and wait for the other side to accept your invitation.
2) With the selected users now part of your Home network, it’s time to adjust several required settings. On your iOS device, press and hold the icon for your HomePod found in the main screen of the Home app, then hit the settings cog icon near the bottom-right corner. On macOS, right-click the icon and choose Settings from the popup menu.
3) Be sure that the entry Language underneath the Siri heading is the same as the Siri language set on your iPhone in Settings → Siri & Search → Language. For example, if your HomePod uses English (United Kingdom) as its primary language and your iPhone is set to use English (United States), you will need to change one of these options to match the other.
4) Double-check that the option Listen for Hey Siri has been enabled for your HomePod in the Home app and for your iOS device in Settings → Siri & Search. For some iPhone models, this option may instead read as Press Home for Siri or Press Side Button for Siri.
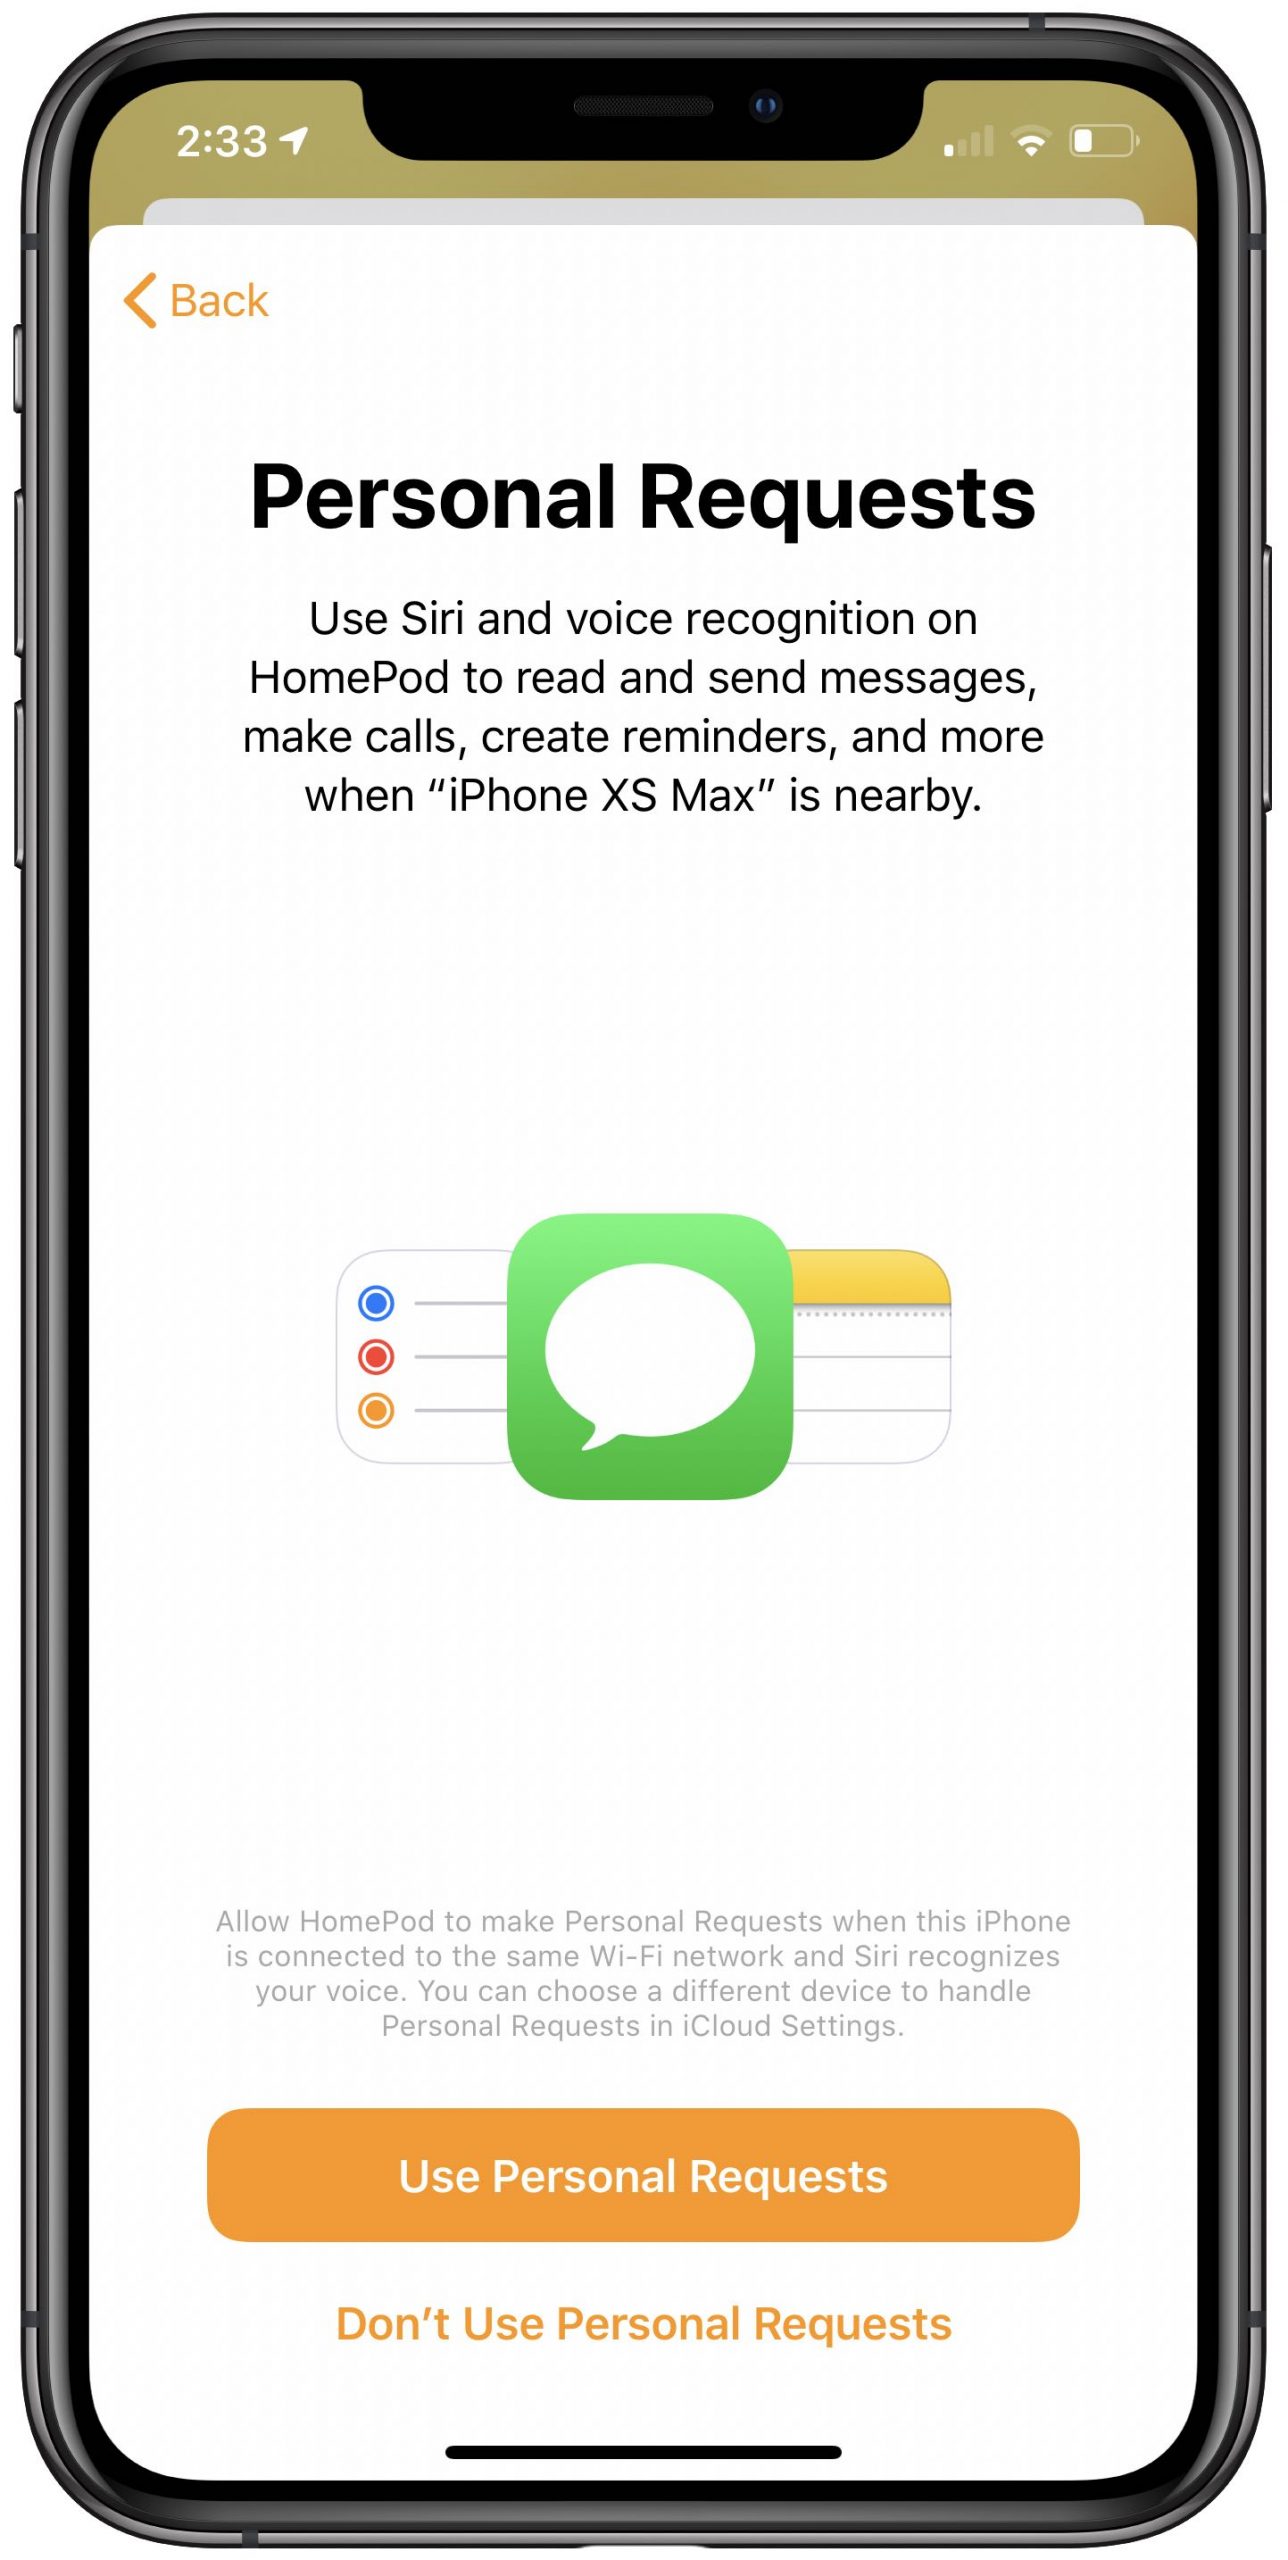
5) New ensure that the option Personal Requests has been enabled for this HomePod underneath the Siri heading in the Home app on your iOS devices, then choose one of the following two options underneath the heading Require Authentication:
- Turn on Secure Requests: Enabled by default, this enforces authentication via Face ID, Touch ID or passcode on your iOS device before Siri can read personal information on the speaker.
- Never: Without authentication (not recommended), anyone with an iOS device connected to the same Wi-Fi network as your HomePod can use your wireless speaker to have Siri read your own personal information, including your upcoming appointments, your messages, your notes, your reminders and so forth.
6) Be sure that the switch next to Location Services at the bottom of your HomePod settings in the Home app has been slid to the ON position. On your iOS device, go to Settings → Privacy → Location Services and toggle on the switch Location Services.
7) Your iOS device must be set as the primary device for the Share My Location feature. Open the Settings app on the iOS device and tap your Apple ID name and bio pic at the top of the screen. Choose Find My and slide the switch next to Share My Location to the ON position, then set My Location to This Device. Be sure to have Find My turned on as well.
Again, you are required to share your location from the iOS device that you previously used for setting up your speaker. By default, the iOS iPhone or iPad that was used to sign in to the Family Sharing feature is the one that shares your location.
8) Enable Bluetooth on the iOS device in Settings → Bluetooth.
9) If you’ve followed the above steps carefully, you should now see a notification in the Home app saying that the HomePod speaker now recognizes multiple voices. Tap Continue to let Siri use your iPhone voice profile to recognize you when you use your HomePod
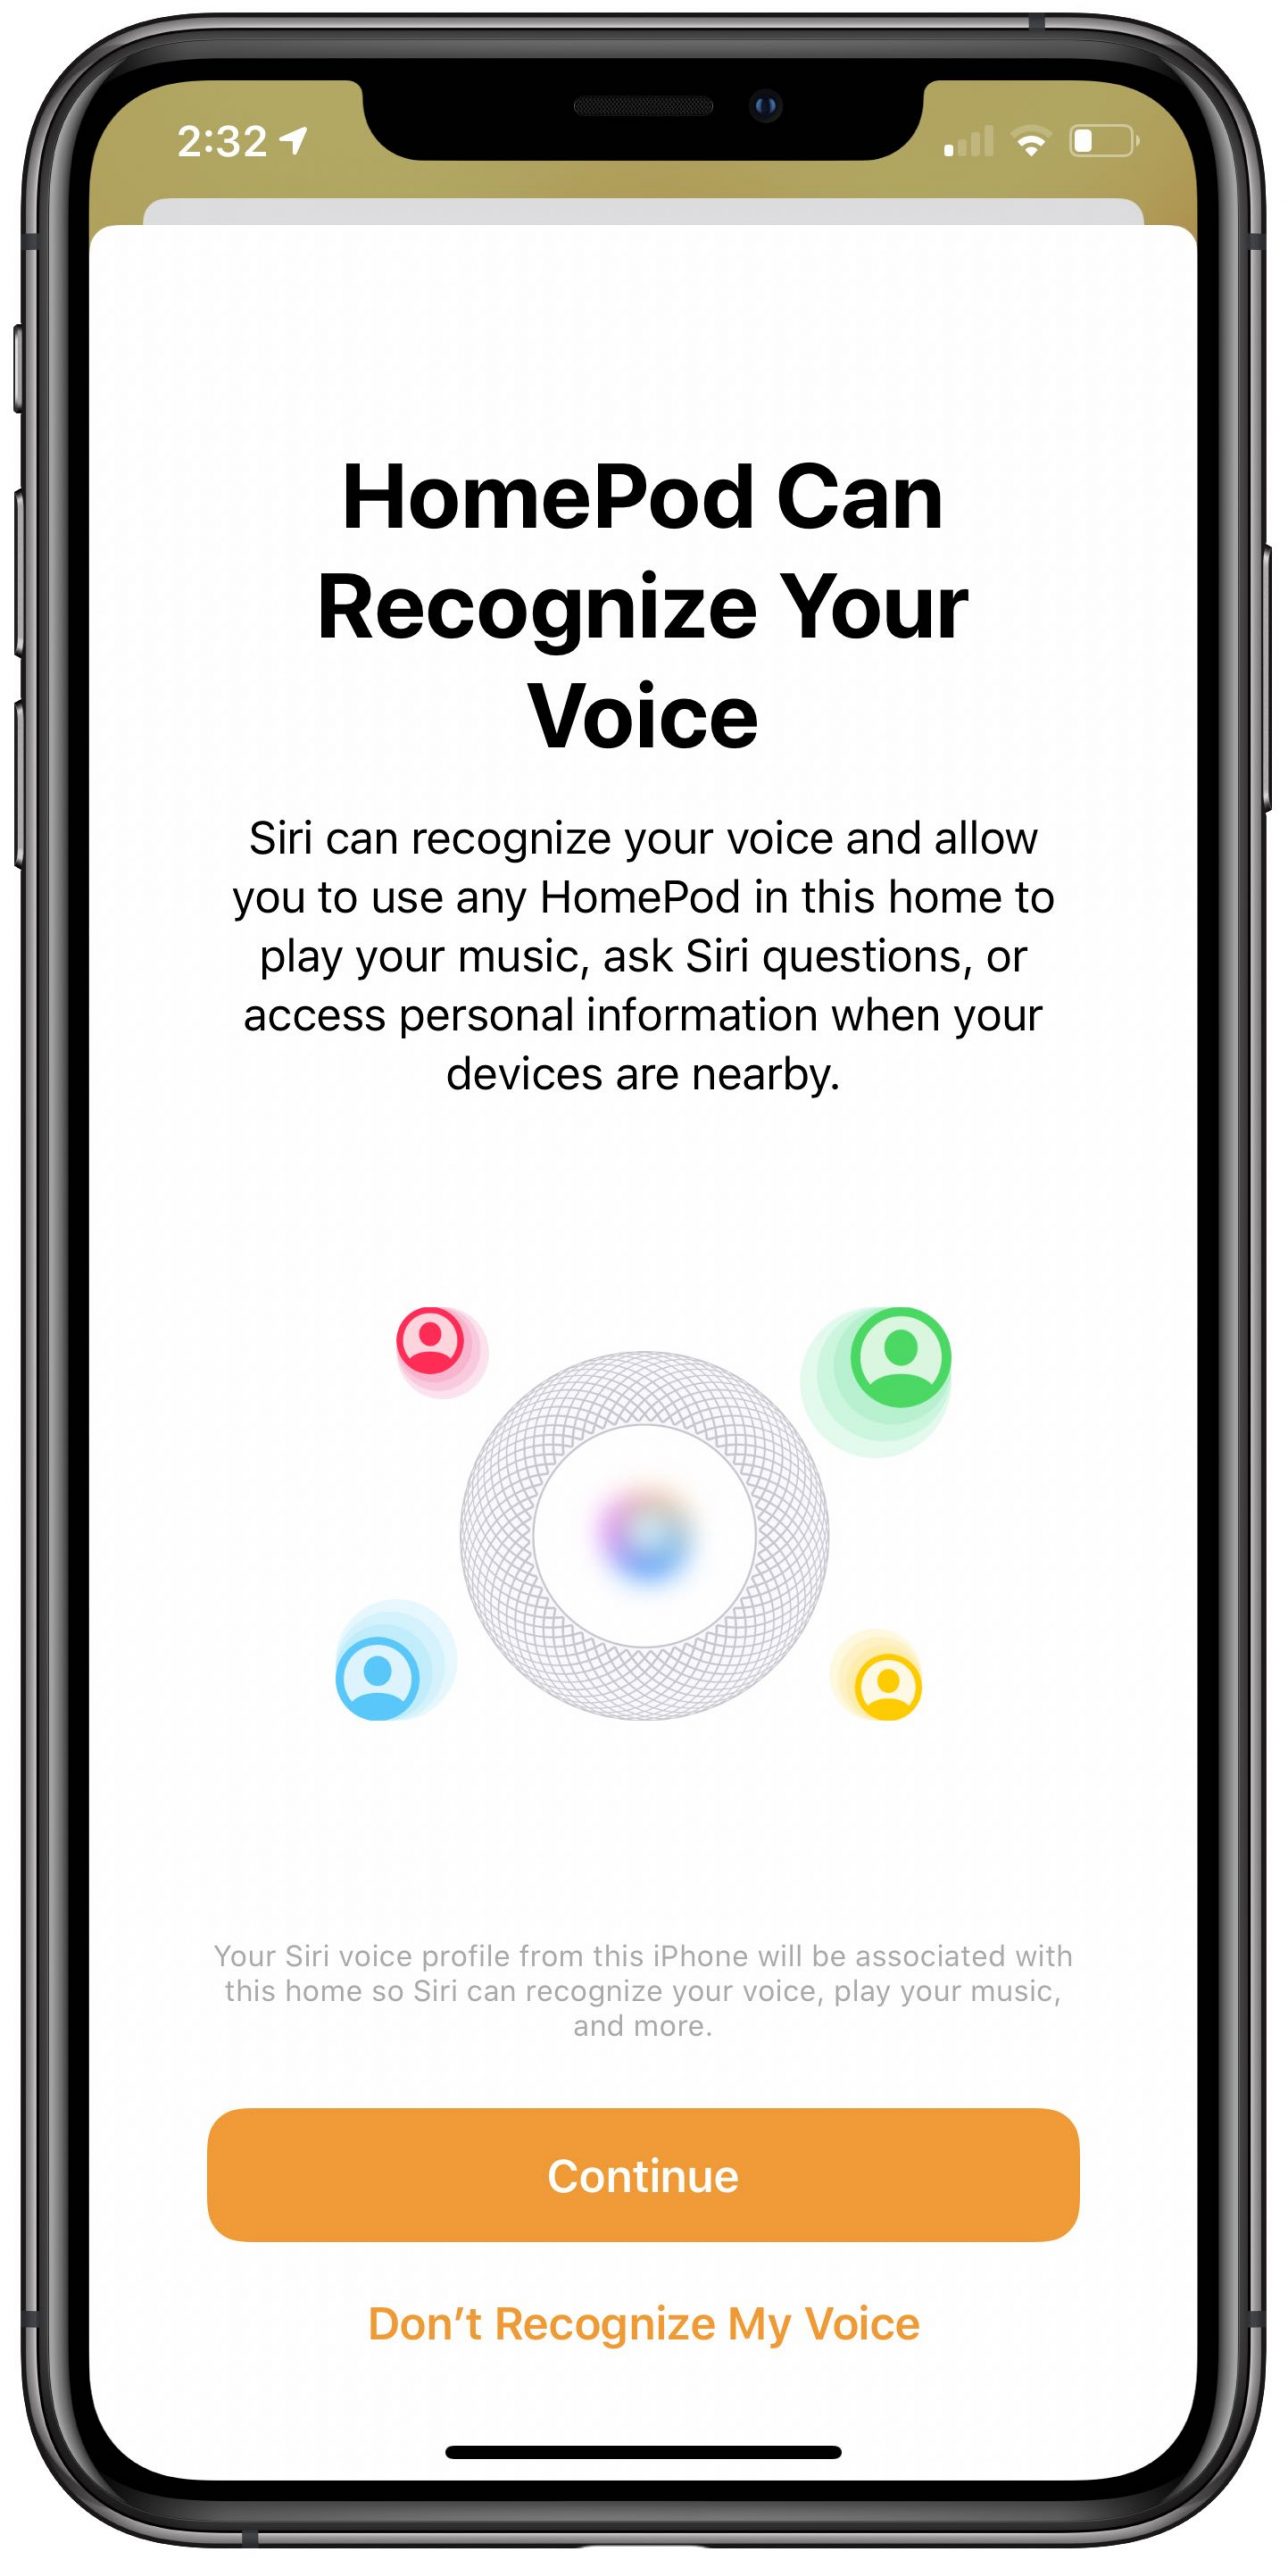
Siri on this speaker will now know your name and be able to access your music library and Apple Music account, use Find My and control secure HomeKit accessories from the speaker.
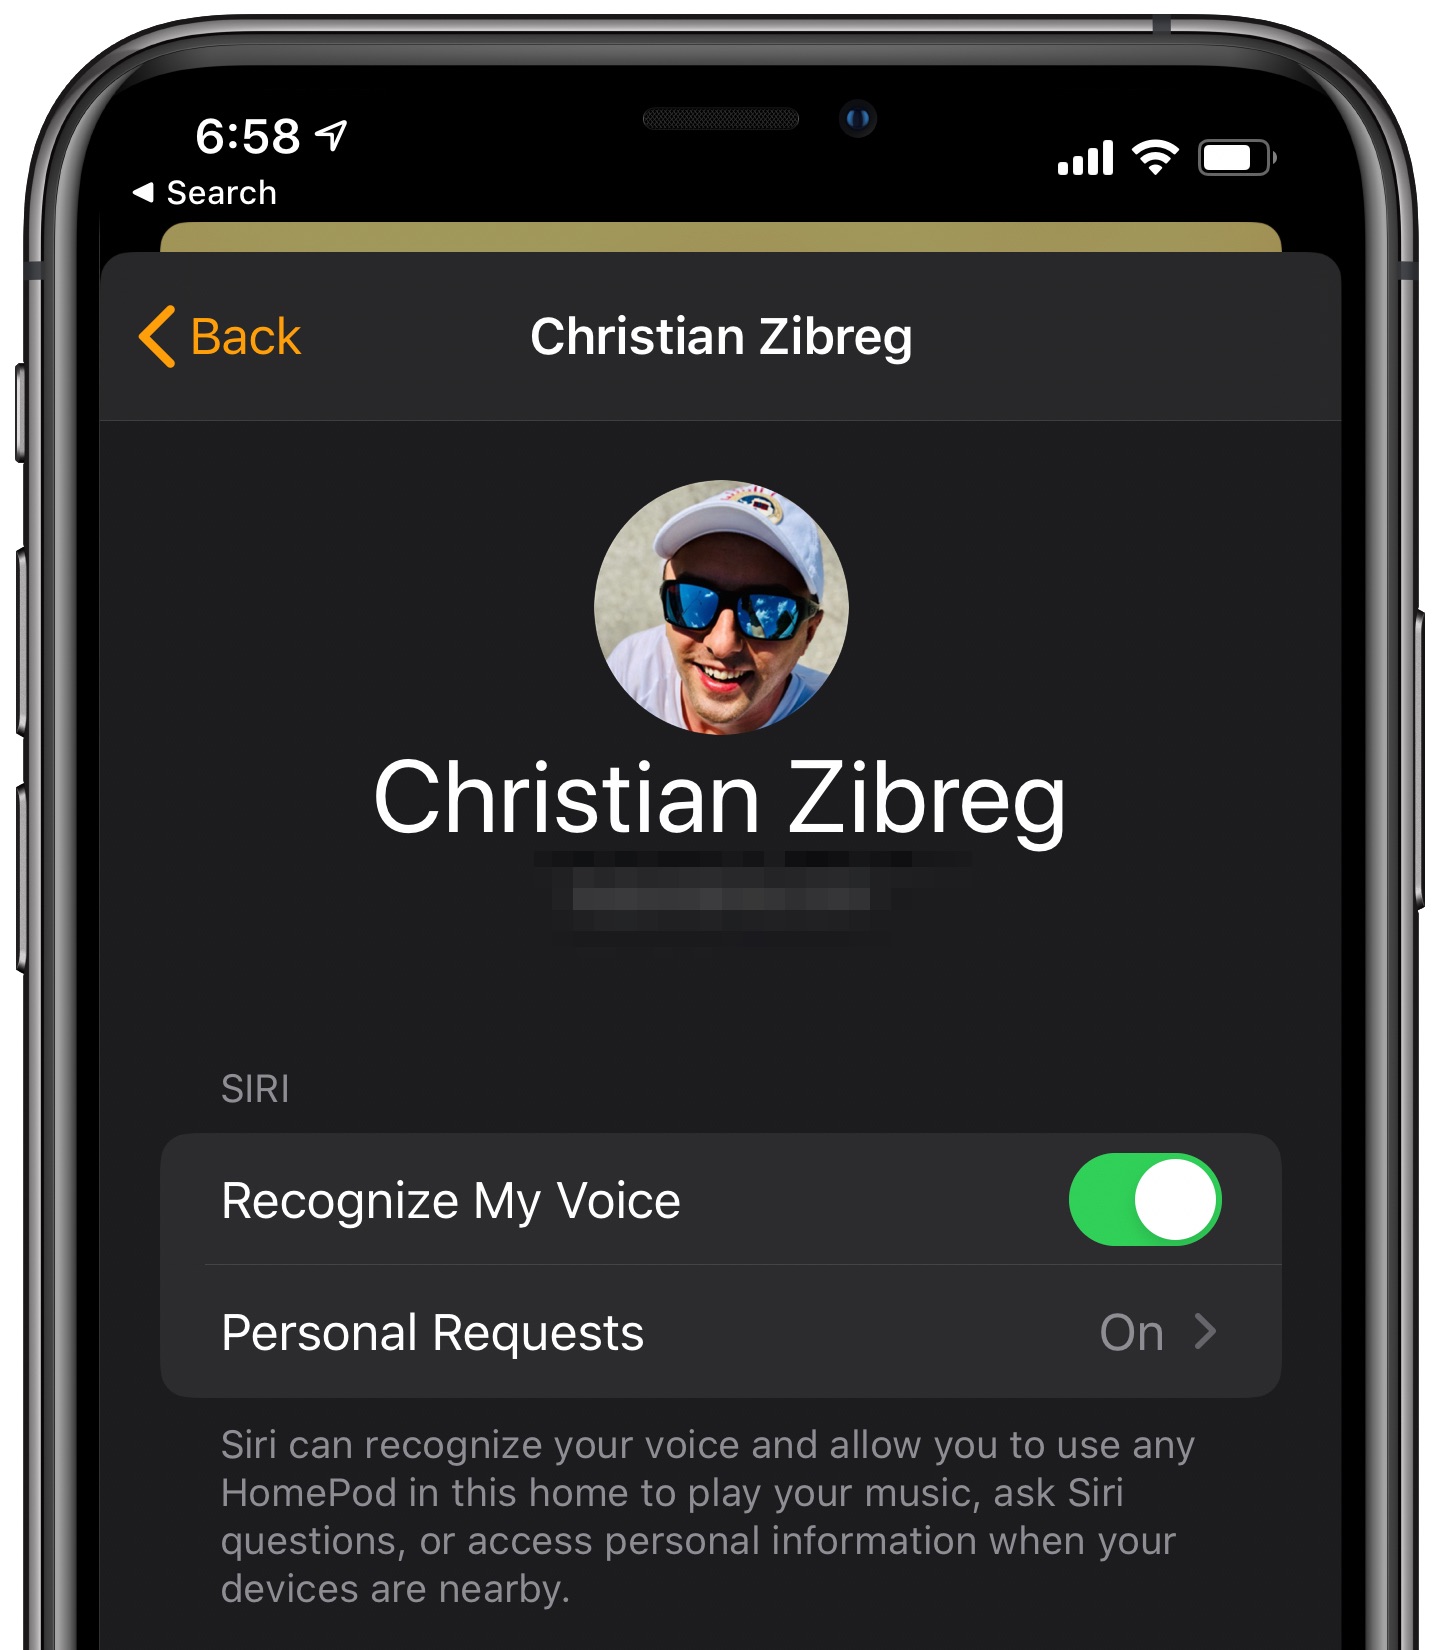
Don’t see the notification within the Home app? Tap the Home icon in the top-left corner of the Home app to bring up your settings. Now choose your name under the People section and slide the switch next to Recognize My Voice to the ON position to enable the feature.
If everything is set up properly, Siri should identify you when you say “Hey, Siri, who am I?”.
10) You will now need to ask other users to go through similar steps requiring them to:
- Update the software on their iOS device to the latest available version
- Accept your invitation within the Home app
- Match the language for their iOS device to the language of your HomePod
- Enable Find My and Location Services on their iOS device
- Enable Listen for Hey Siri on their iOS device
- Turn on Personal Requests in the Home app on their iOS device.
Once other people have done all that, HomePod multiuser support should “just work”.
If you’re having issues setting up multiuser on HomePod, with none of the traditional troubleshooting steps helping, Twitter advises removing all other invited users from the Home app and factory resetting your HomePod.
How multiuser on HomePod works
A user simply asks Siri on HomePod to do something.
Thanks to the fact that the Personal Requests feature is now expanded to each user added to your Home network, they will be able to ask for their own reminders, calendar events, messages or even your custom Siri shortcuts that in iOS 13 now work with Siri across devices.
Siri responds with “Okay [user name]” before speaking that person’s requested information.
There are times when Siri might not recognize the user correctly, in which case you can start your request by saying something along the lines of “Hey Siri, this is…”, followed by your name, or simply say “No, this is [your name].” Do you have the same name as someone else sharing your HomePod? If so, have Siri call you by your nickname.
When Siri is unsure who’s talking, she will ask who you are. Apple cautions that the assistant might have trouble telling the difference between children or people with similar voices.
If Siri doesn’t recognize you after setup, try these steps.
- Reset Recognize My Voice: In the Home app, tap the Home icon in the upper-left corner, then tap Home Settings. Now select your home and turn Recognize My Voice off then back on. Wait a few minutes before trying Siri again.
- iOS device: Restart the iOS device that you use with Hey Siri by venturing into Settings → General, then tap Shut Down at the bottom of the list.
- HomePod: Restart the HomePod by pressing and holding the speaker in the Home app on your iOS device, then tap the Settings icon. Now choose Reset HomePod, then tap Restart HomePod (be sure you’re near your speaker).
- Set up Hey Siri again: On your iOS device, go to Settings → Siri & Search and turn the option Listen for Hey Siri off then back on. You will need to teach Siri your voice again.
After each step, see if Siri recognizes you.
“If you have two Apple IDs in your home that have Hey Siri set up with the same voice, you might need to turn off the Recognize My Voice feature on one account for the best user experience with Siri,” Apple notes.
Need help? Ask iDB!
If you like this tutorial, pass it along to your friends and leave a comment below.
Got stuck? Not sure how to do certain things on your Apple device? Let us know via help@idownloadblog.com and a future tutorial might provide a solution.
Submit your own how-to suggestions via tips@idownloadblog.com.