You can create some pretty cool movies using iMovie on Mac, iPad, and iPhone. Whether you’re using an existing video or arranging photos, you can tell any type of story with visuals and audio.
One neat effect that you might want to try is a Split Screen. This lets you display two images on the screen at the same time. The images can be next to each other or on Mac, shown on the top and bottom.
If you haven’t tried this yet, here’s how to create a Split Screen effect in iMovie on macOS, iPadOS, and iOS.
Use a Split Screen in iMovie on Mac
Open your iMovie Project for editing on your Mac and follow these steps to create the Split Screen effect:
Add Split Screen
1) Go down to your movie Timeline and select the first clip that you want in the Split Screen.
2) Drag that clip to the top of the second one you want in the Split Screen and release.
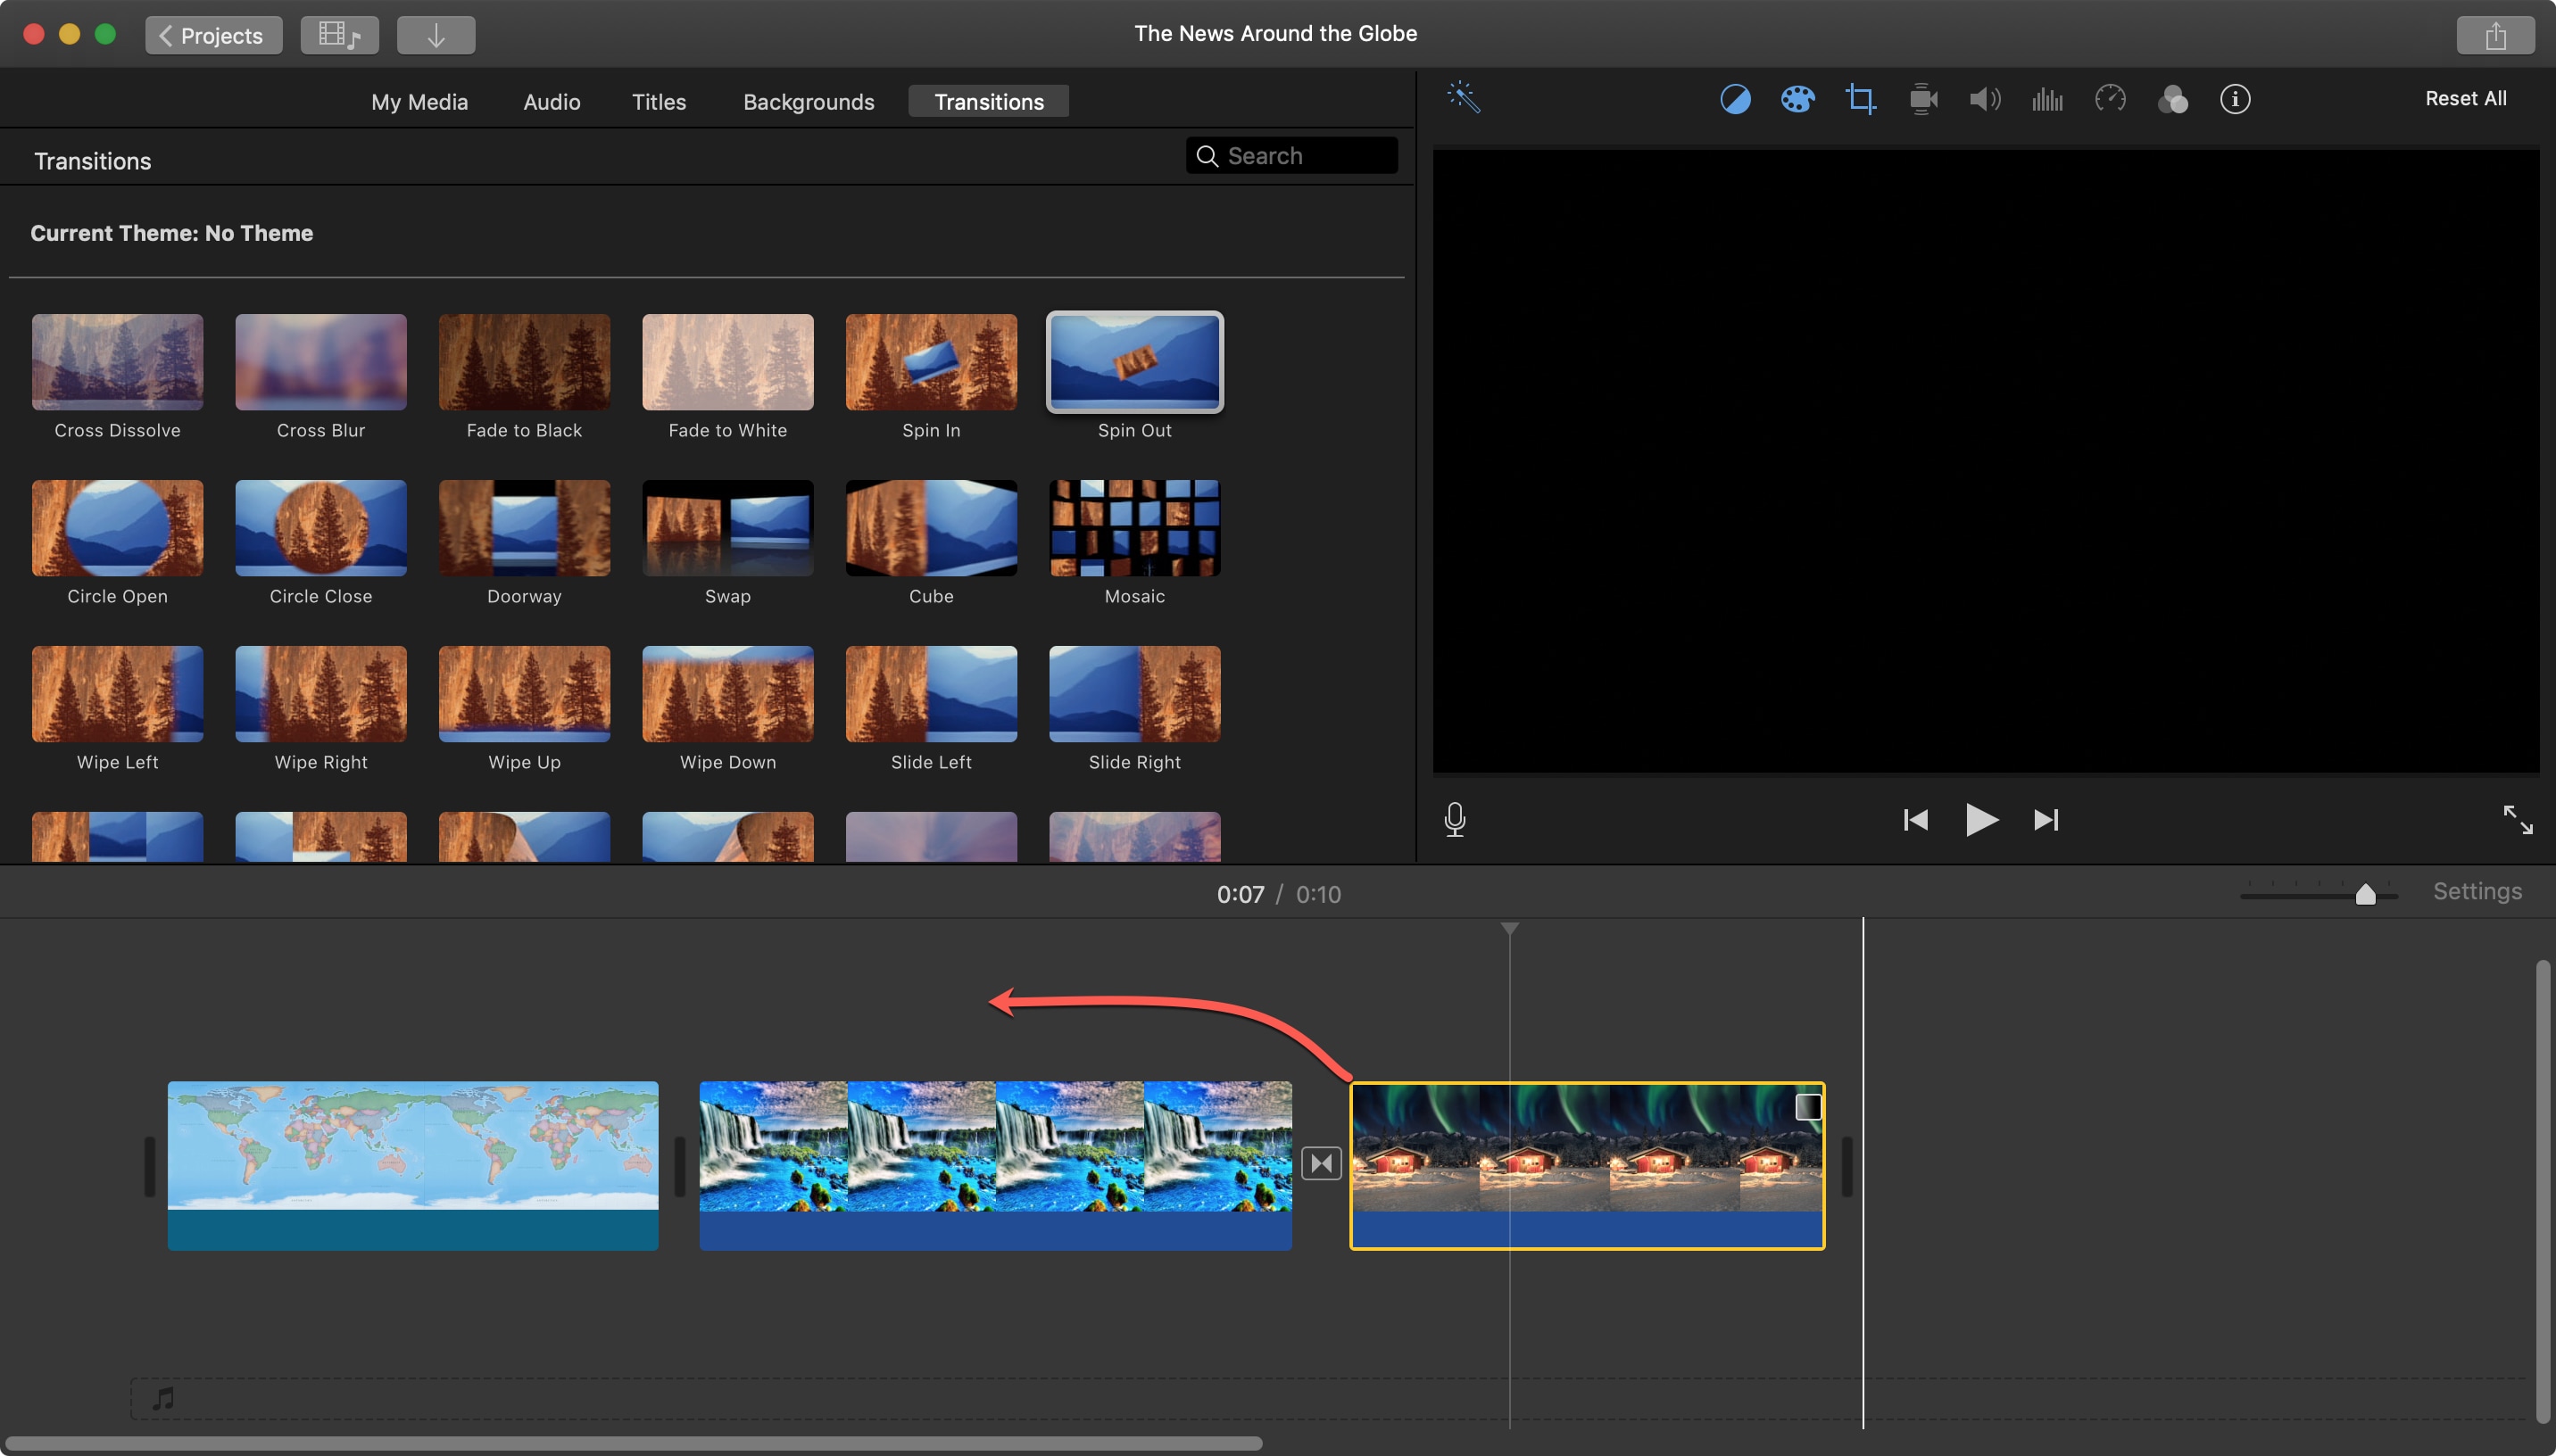
3) Click the Overlay Settings button at the top of the Viewer.
4) In the drop-down on the left, select Split Screen.
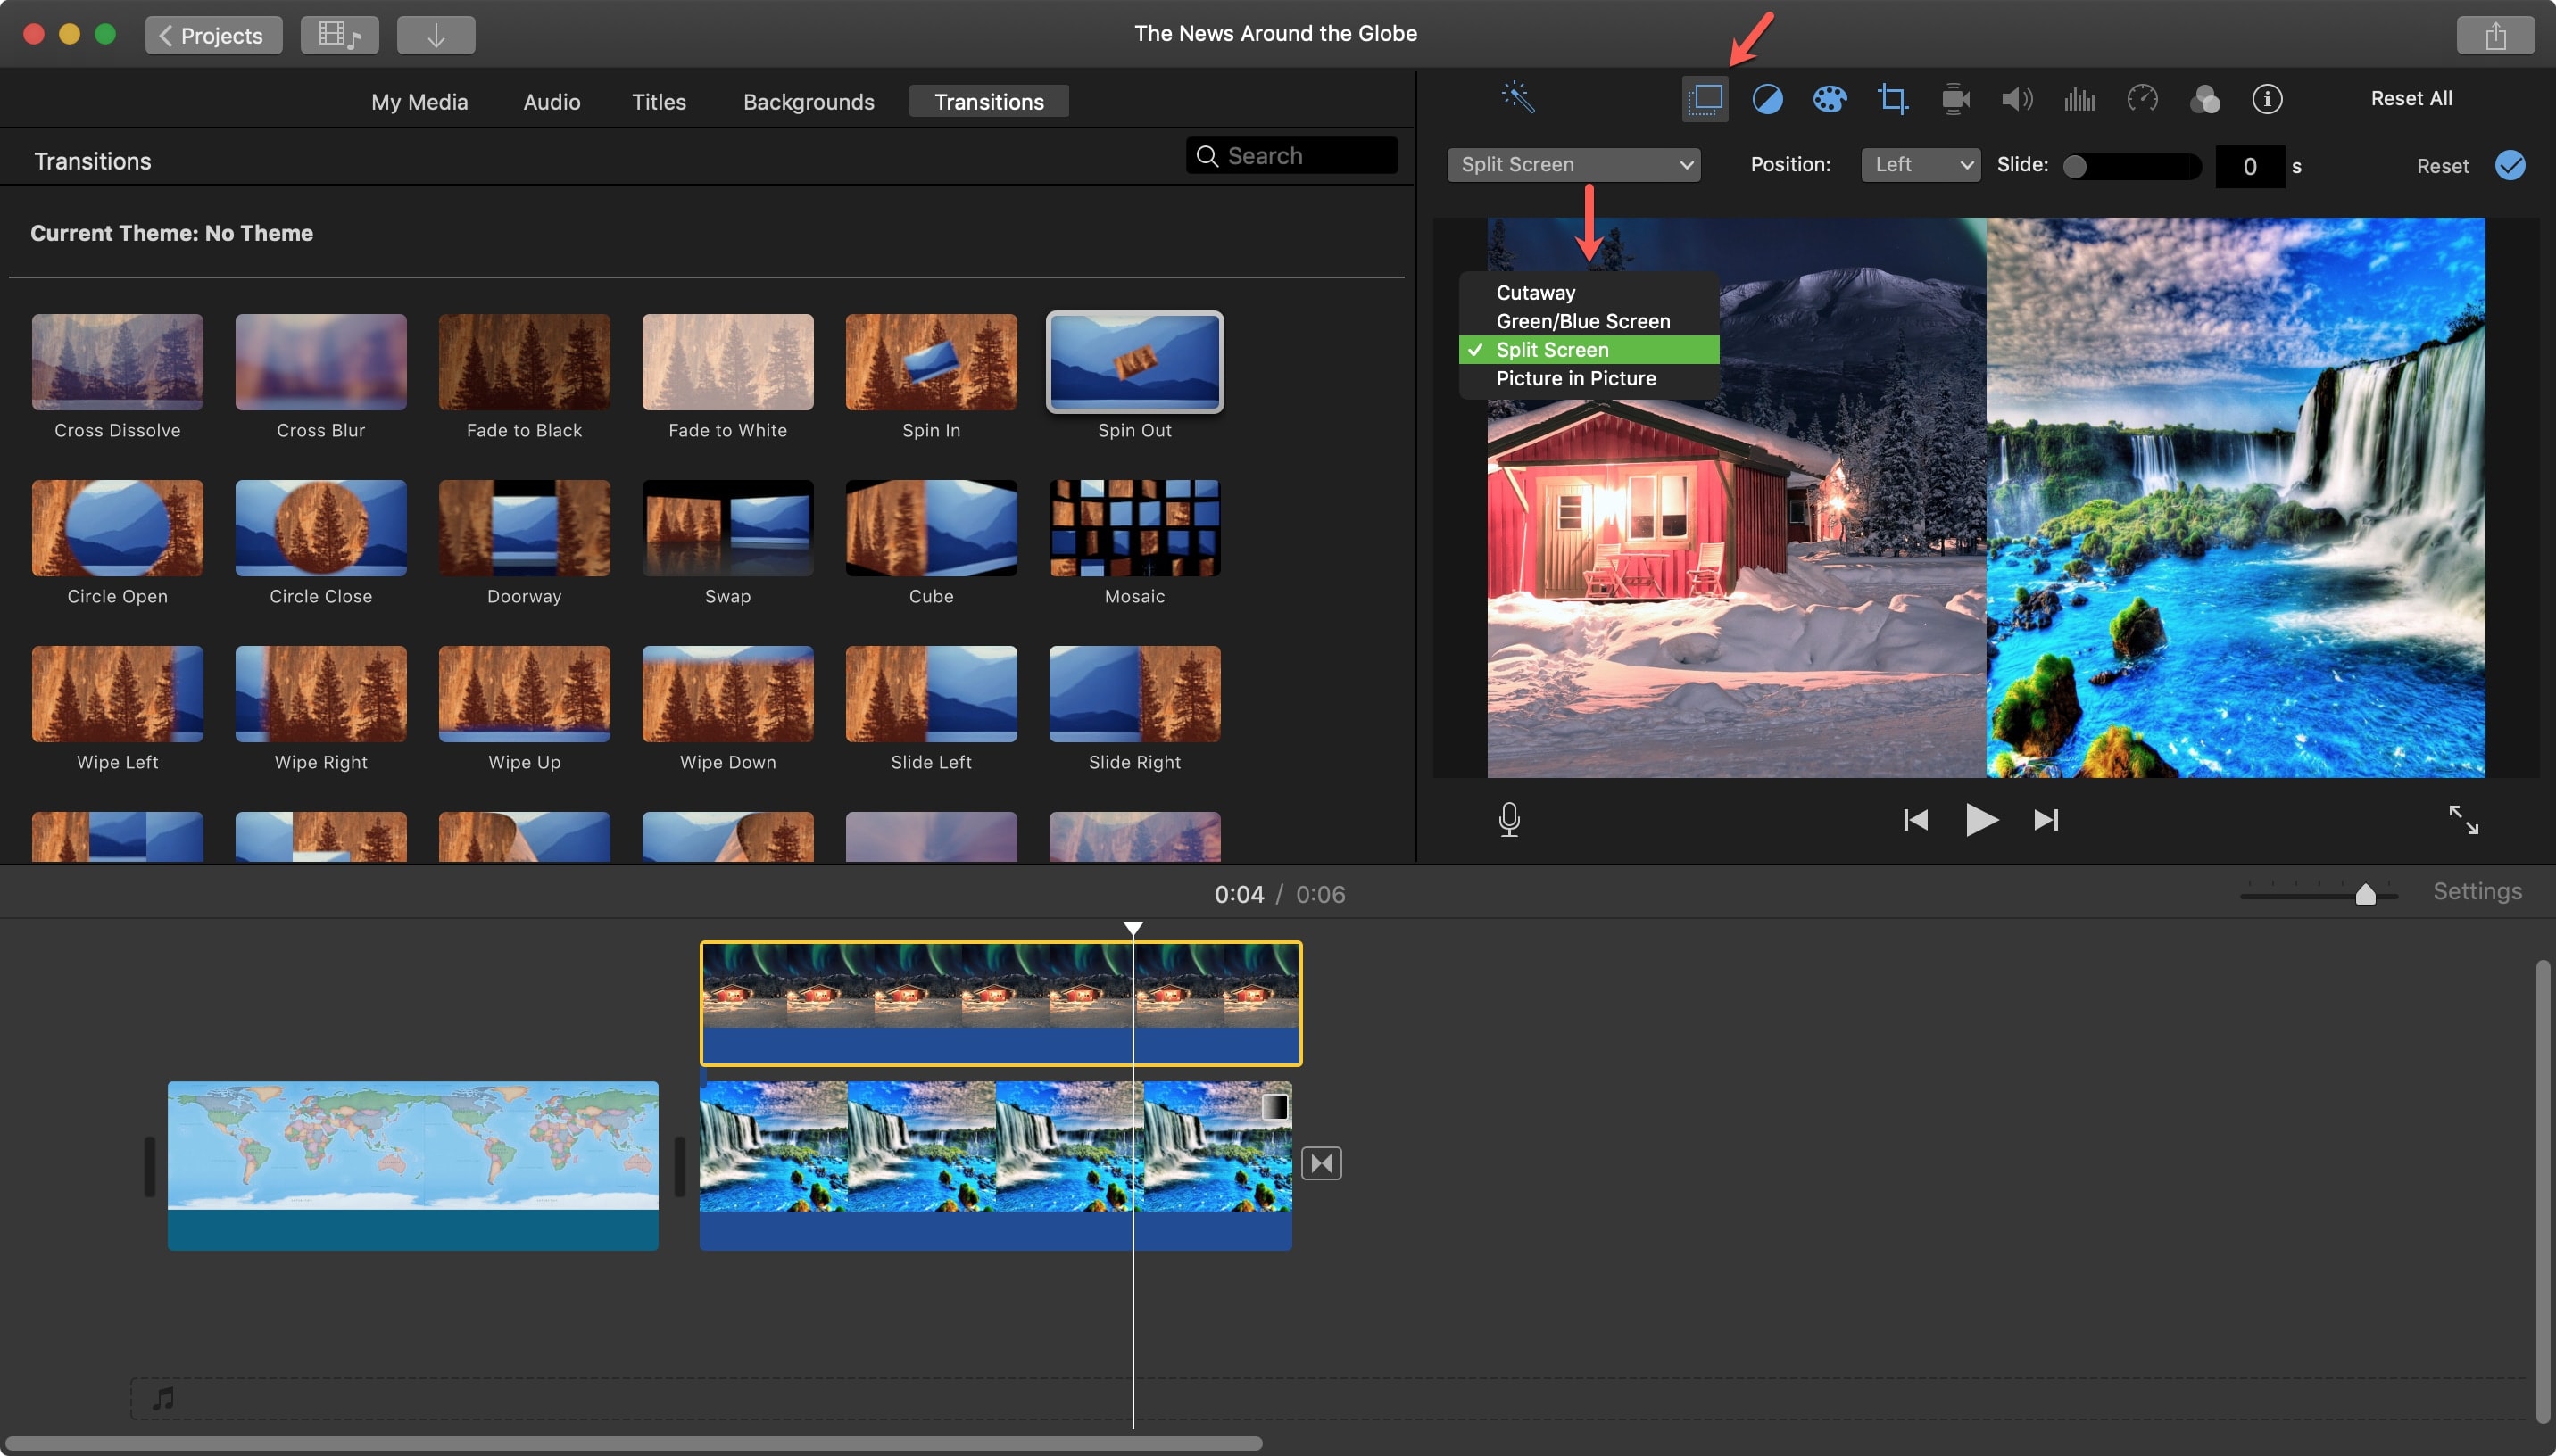
You should now see your images in a Split Screen view.
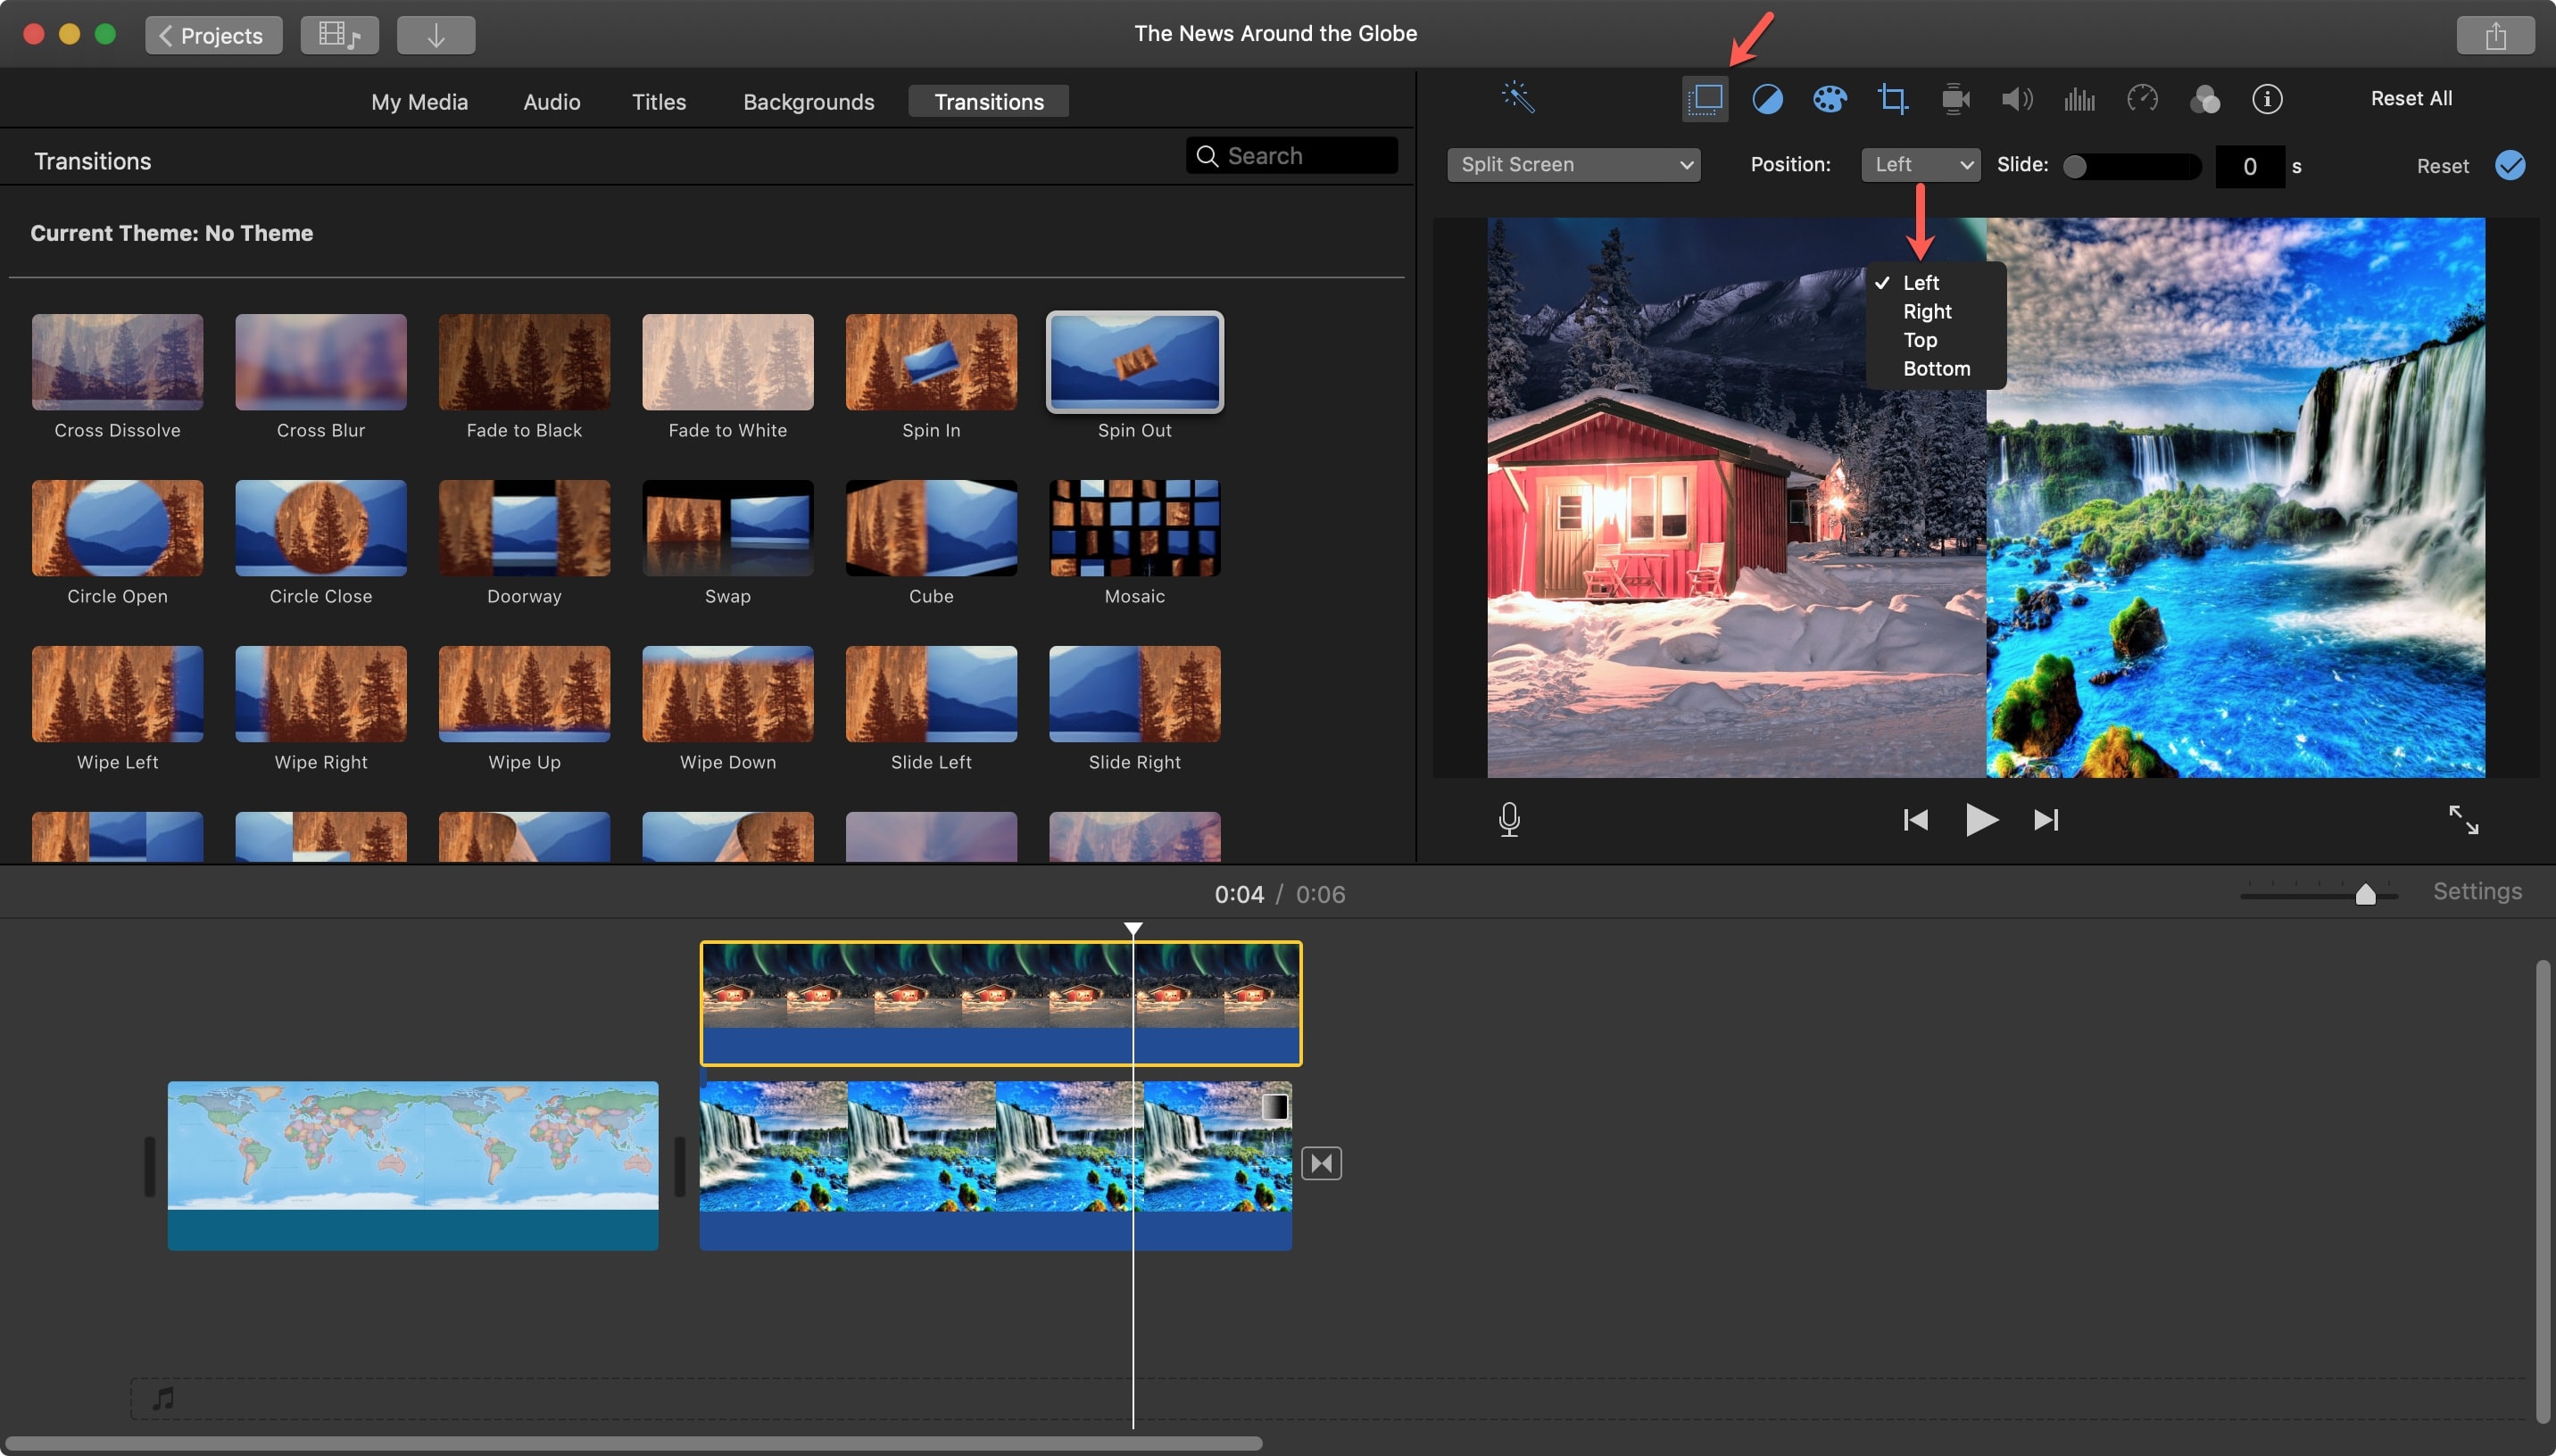
Change the image layout
If you’d like to change the layout, just click the Position drop-down menu in the Overlay settings of the Viewer. Pick from left, right, top, or bottom to rearrange your images.
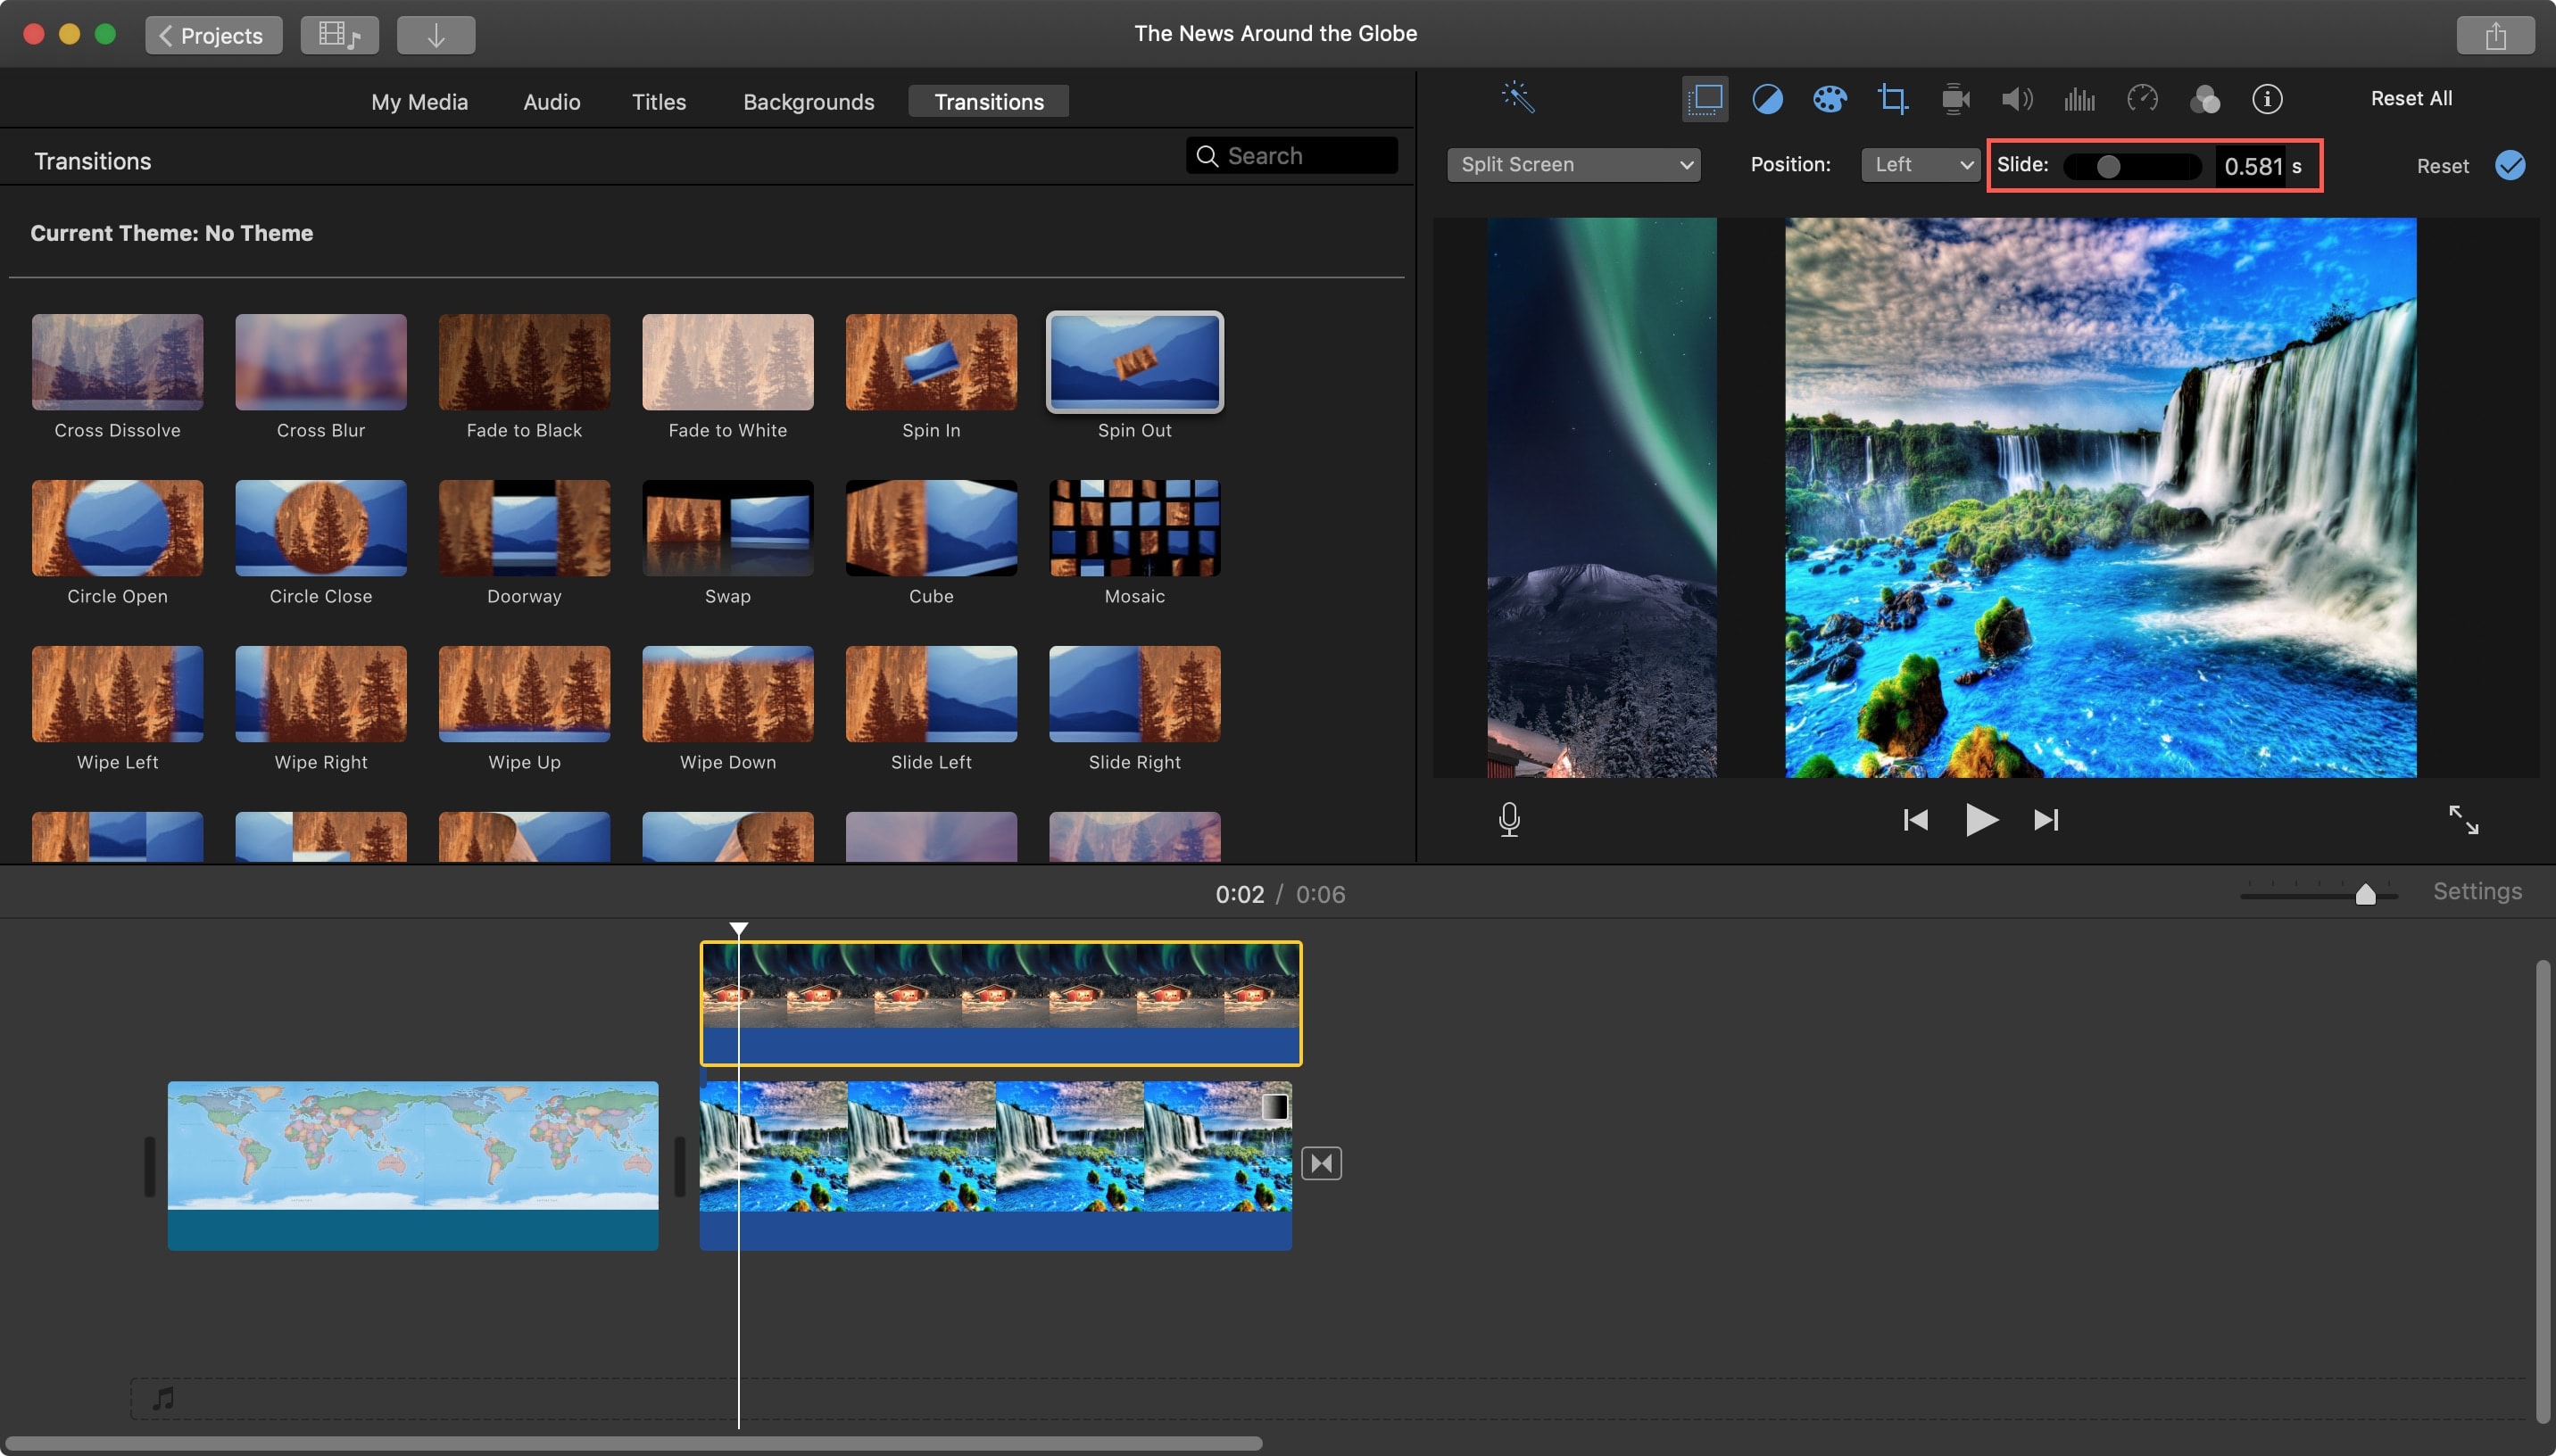
Insert a slide transition
You can have a brief transition from the first to the second image if you like. In the Overlay settings of the Viewer, move the Slide slider, which is set at zero by default, to set the duration of the transition. This creates a nice slide-in effect.
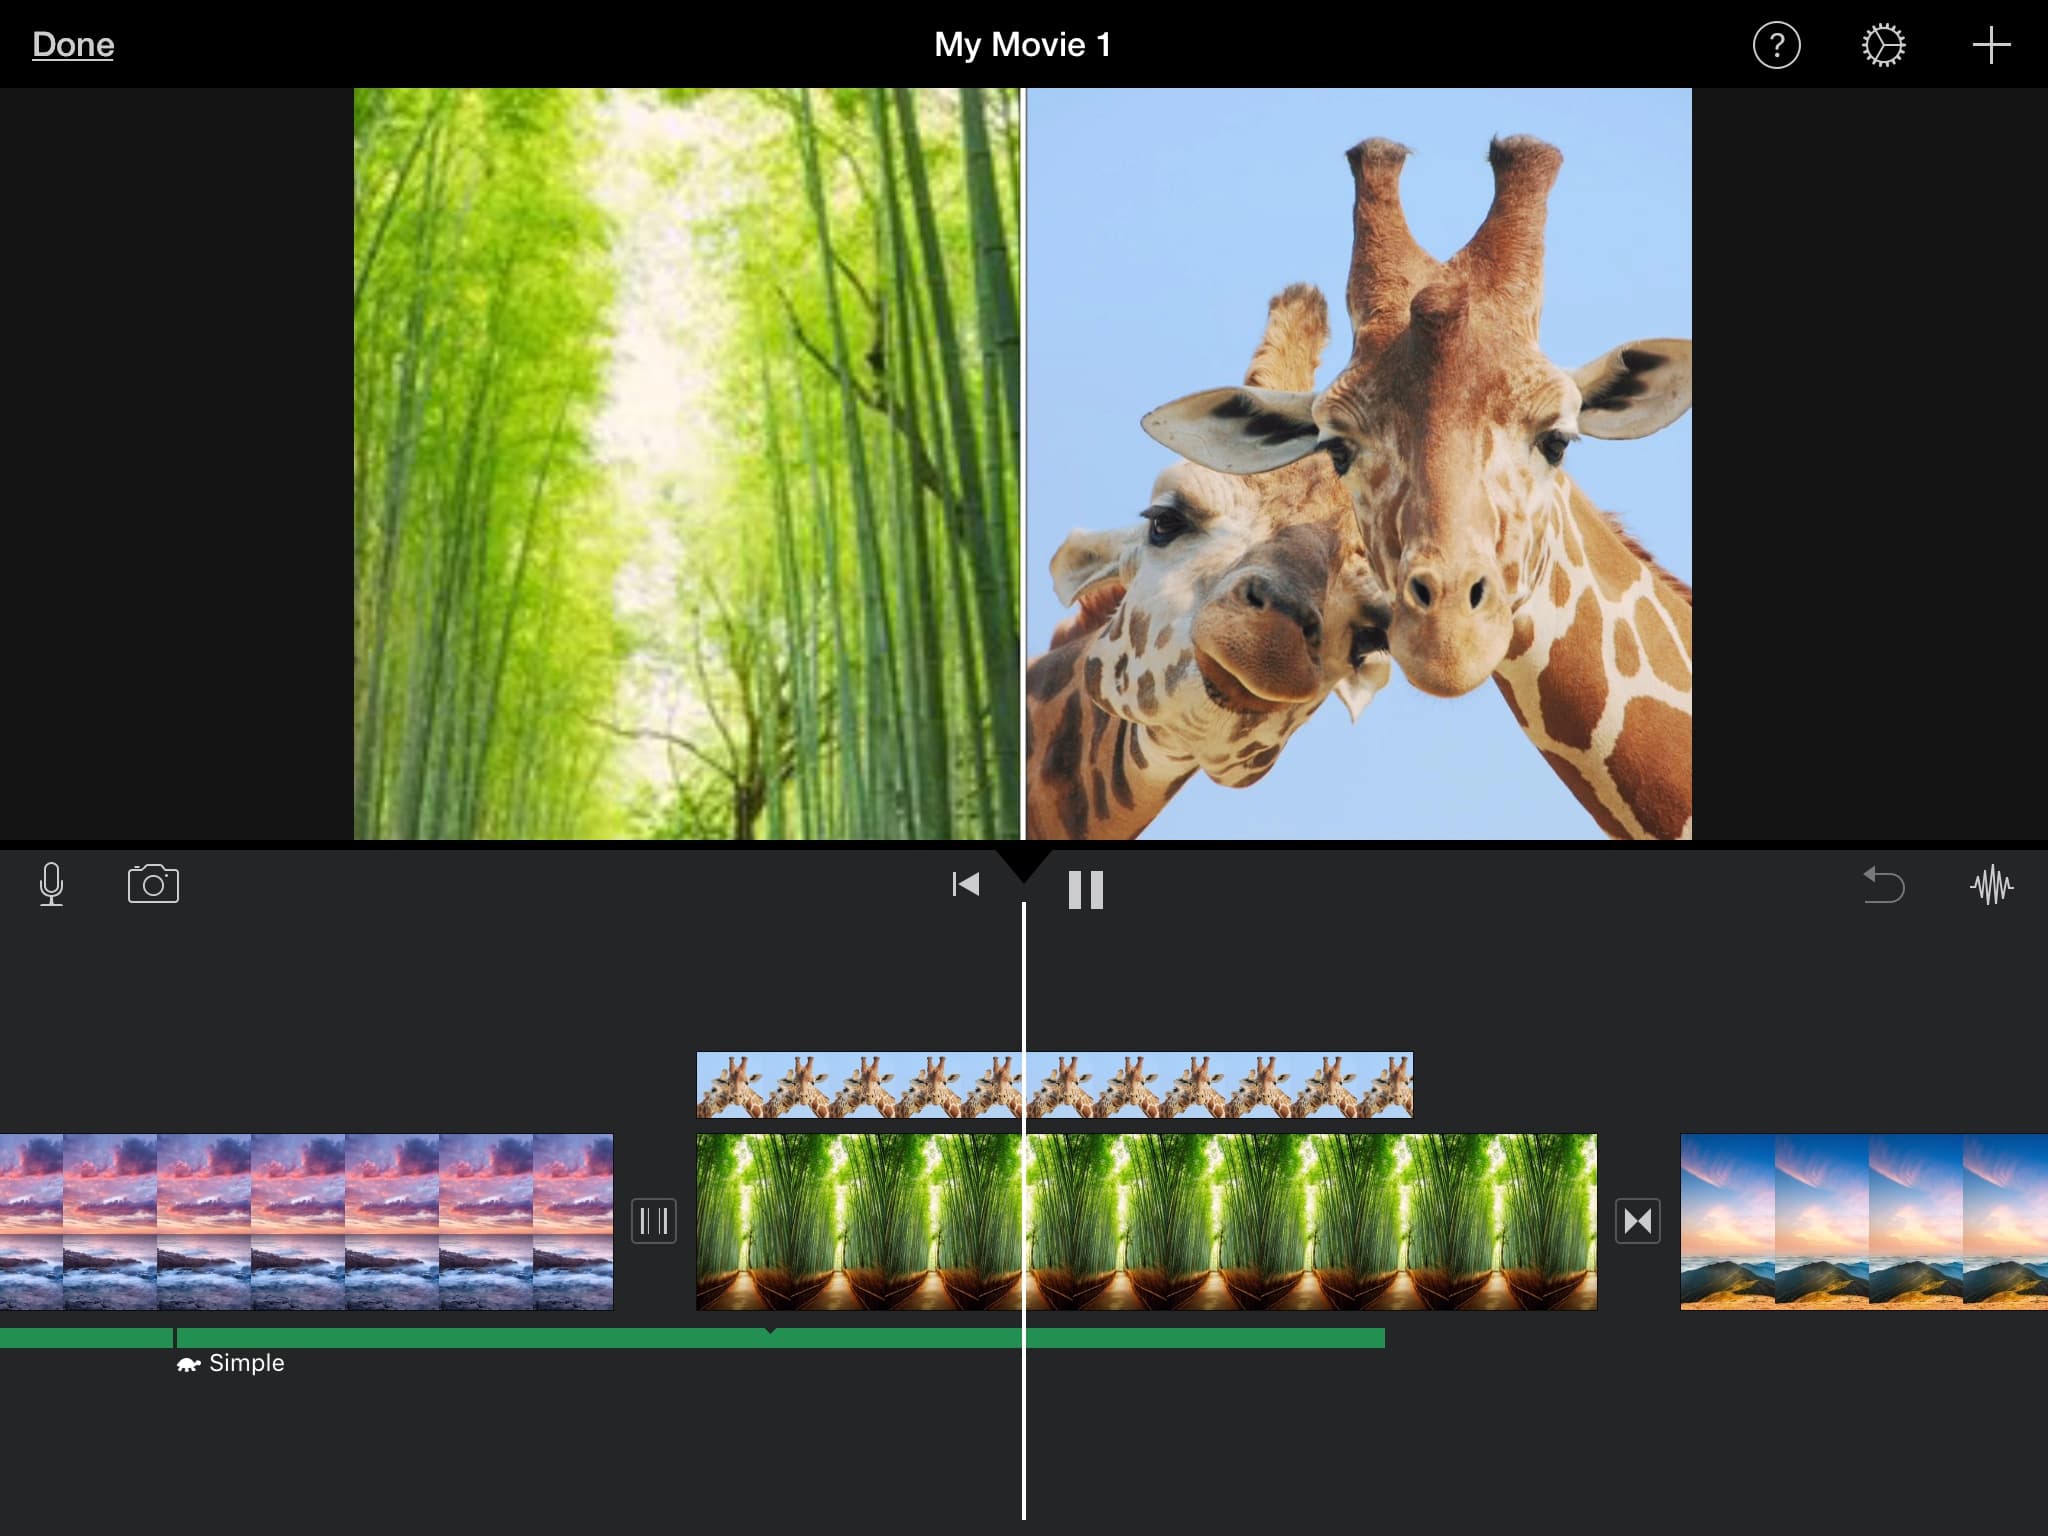
Use a Split Screen in iMovie on iPhone and iPad
Open your iMovie Project for editing on iPad and follow these steps to create the Split Screen effect:
Add Split Screen
1) In your movie Timeline, select the first clip that you want in the Split Screen.
2) Tap the plus sign to add the second one you want in the Split Screen.
3) Select the image and tap the More (three-dot icon) button.
4) Pick Split Screen.

You should now see your images in a Split Screen view.
Adjust the images
You can swap the images in your Split Screen left, right, top, and bottom. Select the Overlay clips in the Timeline and tap the Swap button in the Viewer.
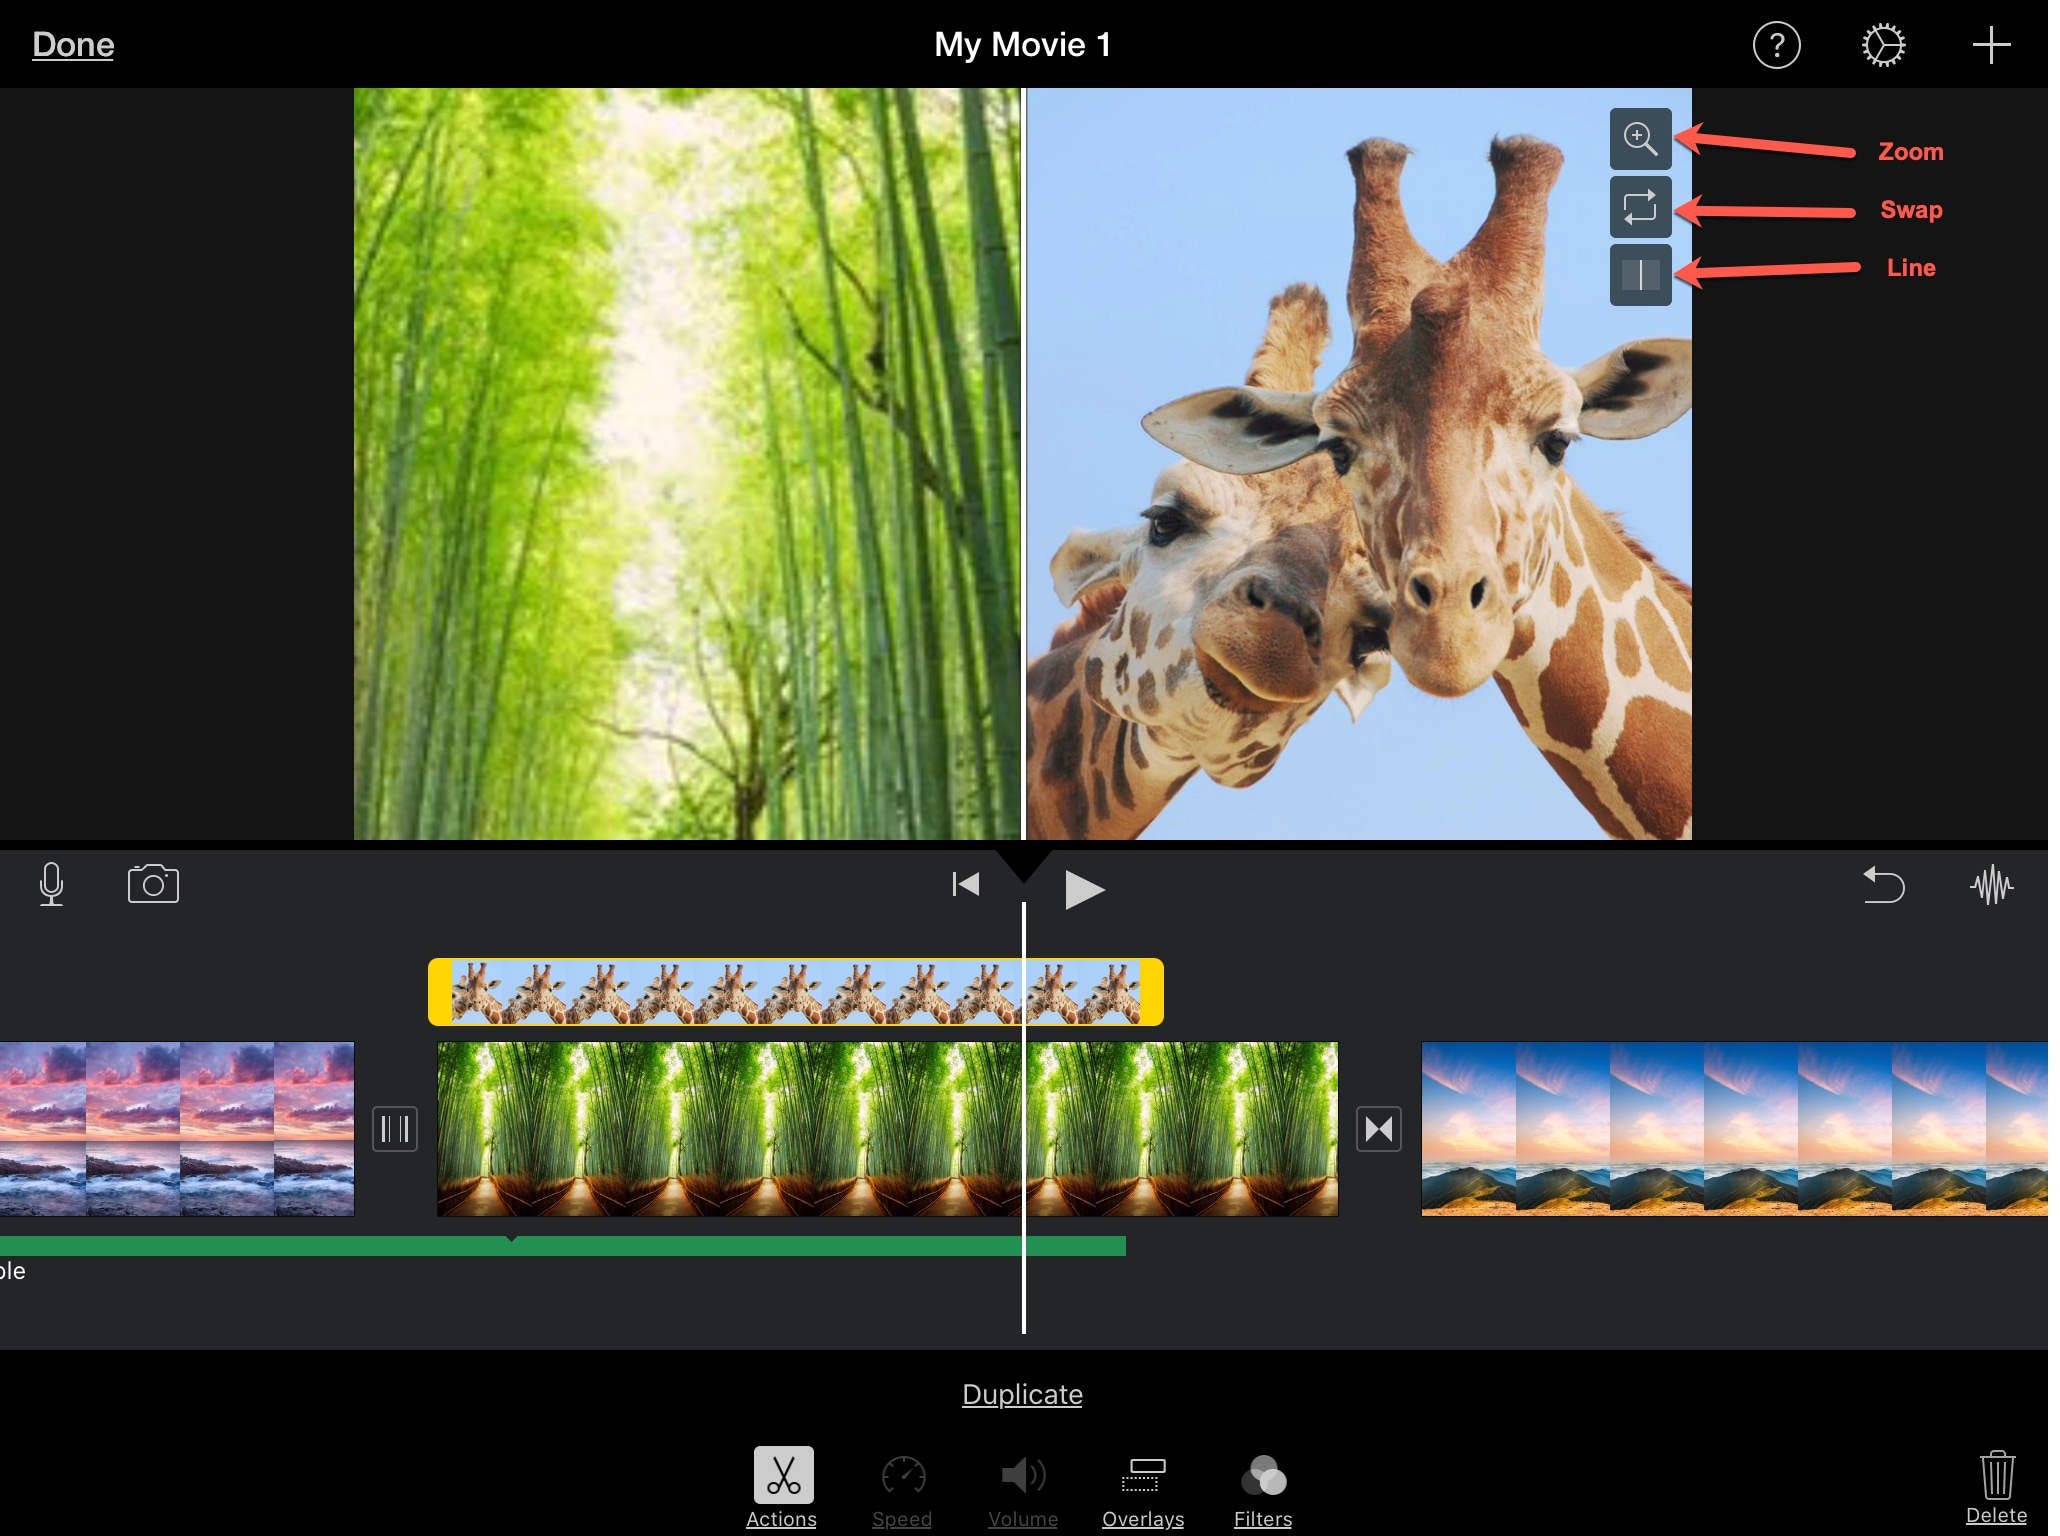
To insert a white line between the images, select the Overlay clips and tap the Line button in the Viewer.
To resize an image, select it, tap the Zoom button in the Viewer and use your fingers to zoom in or out of an image.
Wrapping it up
The Split Screen feature in iMovie is a nifty one that can help you add another nice effect to your movie. Is this a feature you can see using for your own movie creations? Let us know!
Useful iMovie tutorials: