In this tutorial, we will show you how to rate songs in your iPhone, iPad, or Mac’s music library on a scale of one to five stars and then create smart playlists based on these rated songs.
A star rating is something you see everywhere. From products to services, the more stars you see the better the product or service is considered. So of course, you can assign a star rating to your songs and albums in Apple’s Music app.
By giving something a star rating on a scale of one to five, you can find music you like much easier and create smart playlists.
But before you begin, please note that:
- You can only rate songs that are added to your music library. It could be tracks from Apple Music or ones you ripped from CDs or downloaded from the Internet.
- Ratings are for your own information. They do not influence your Apple Music recommendations.
- Ratings sync automatically to all your devices like iPhones, iPads, and Macs logged in to your Apple ID.
- Don’t confuse this rating feature with the Favorite feature, which is represented by one star (earlier, it used to be a heart icon). Favoriting a song will affect your recommendations.
Turn on ratings for the Music app
You will have to activate this feature before you can use it.
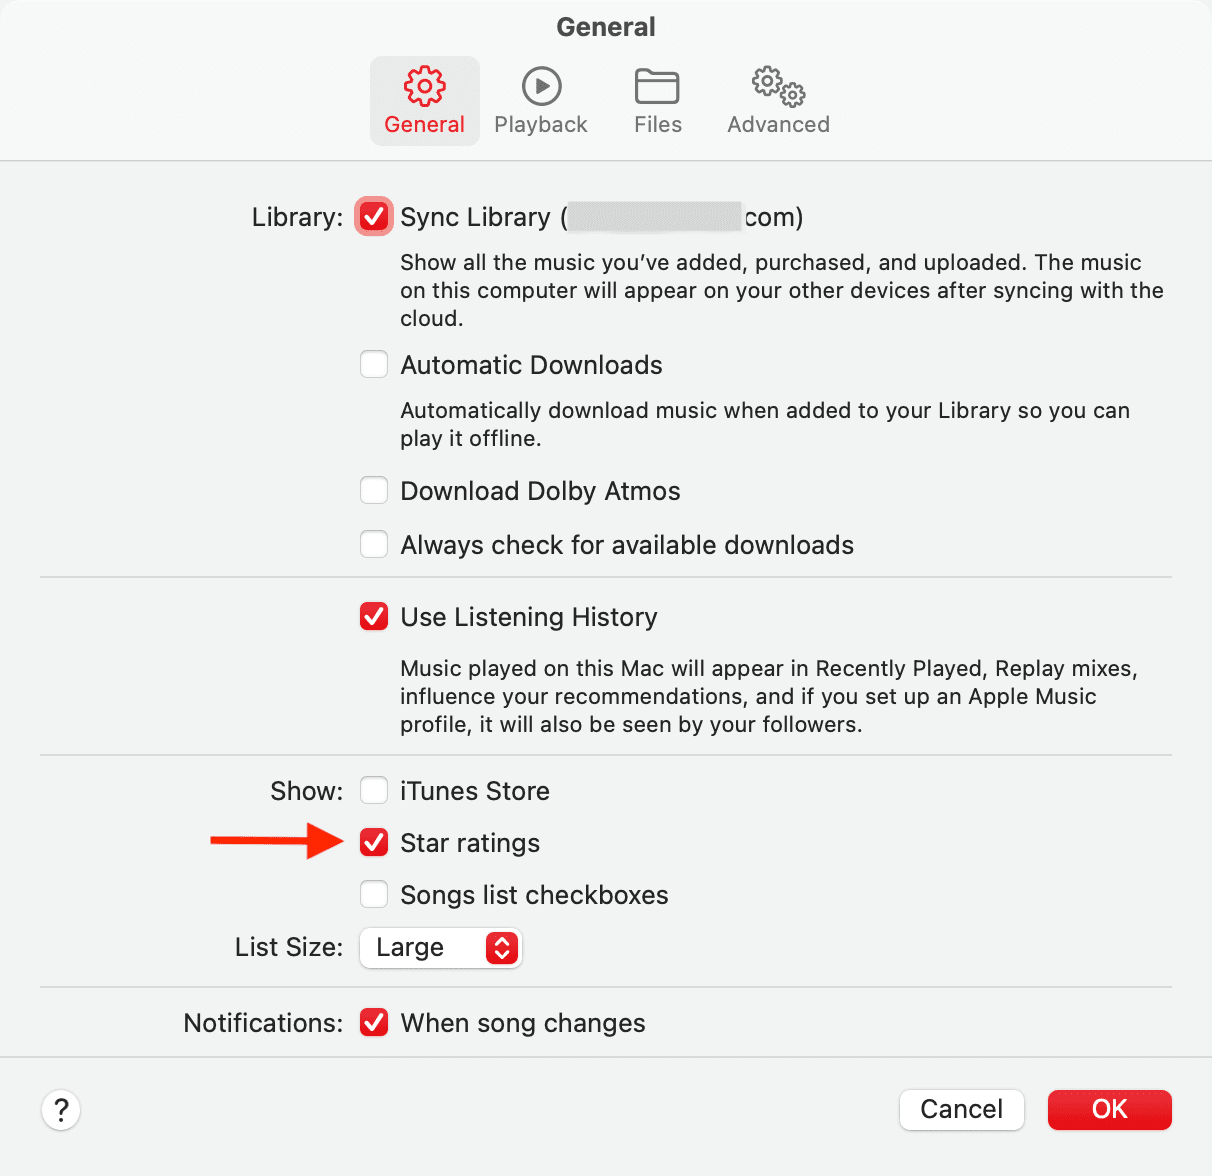
On Mac
- Open the Music app and click Music > Settings from the top menu bar.
- Make sure you’re in the General tab and check the box for Star ratings.
- Click OK.
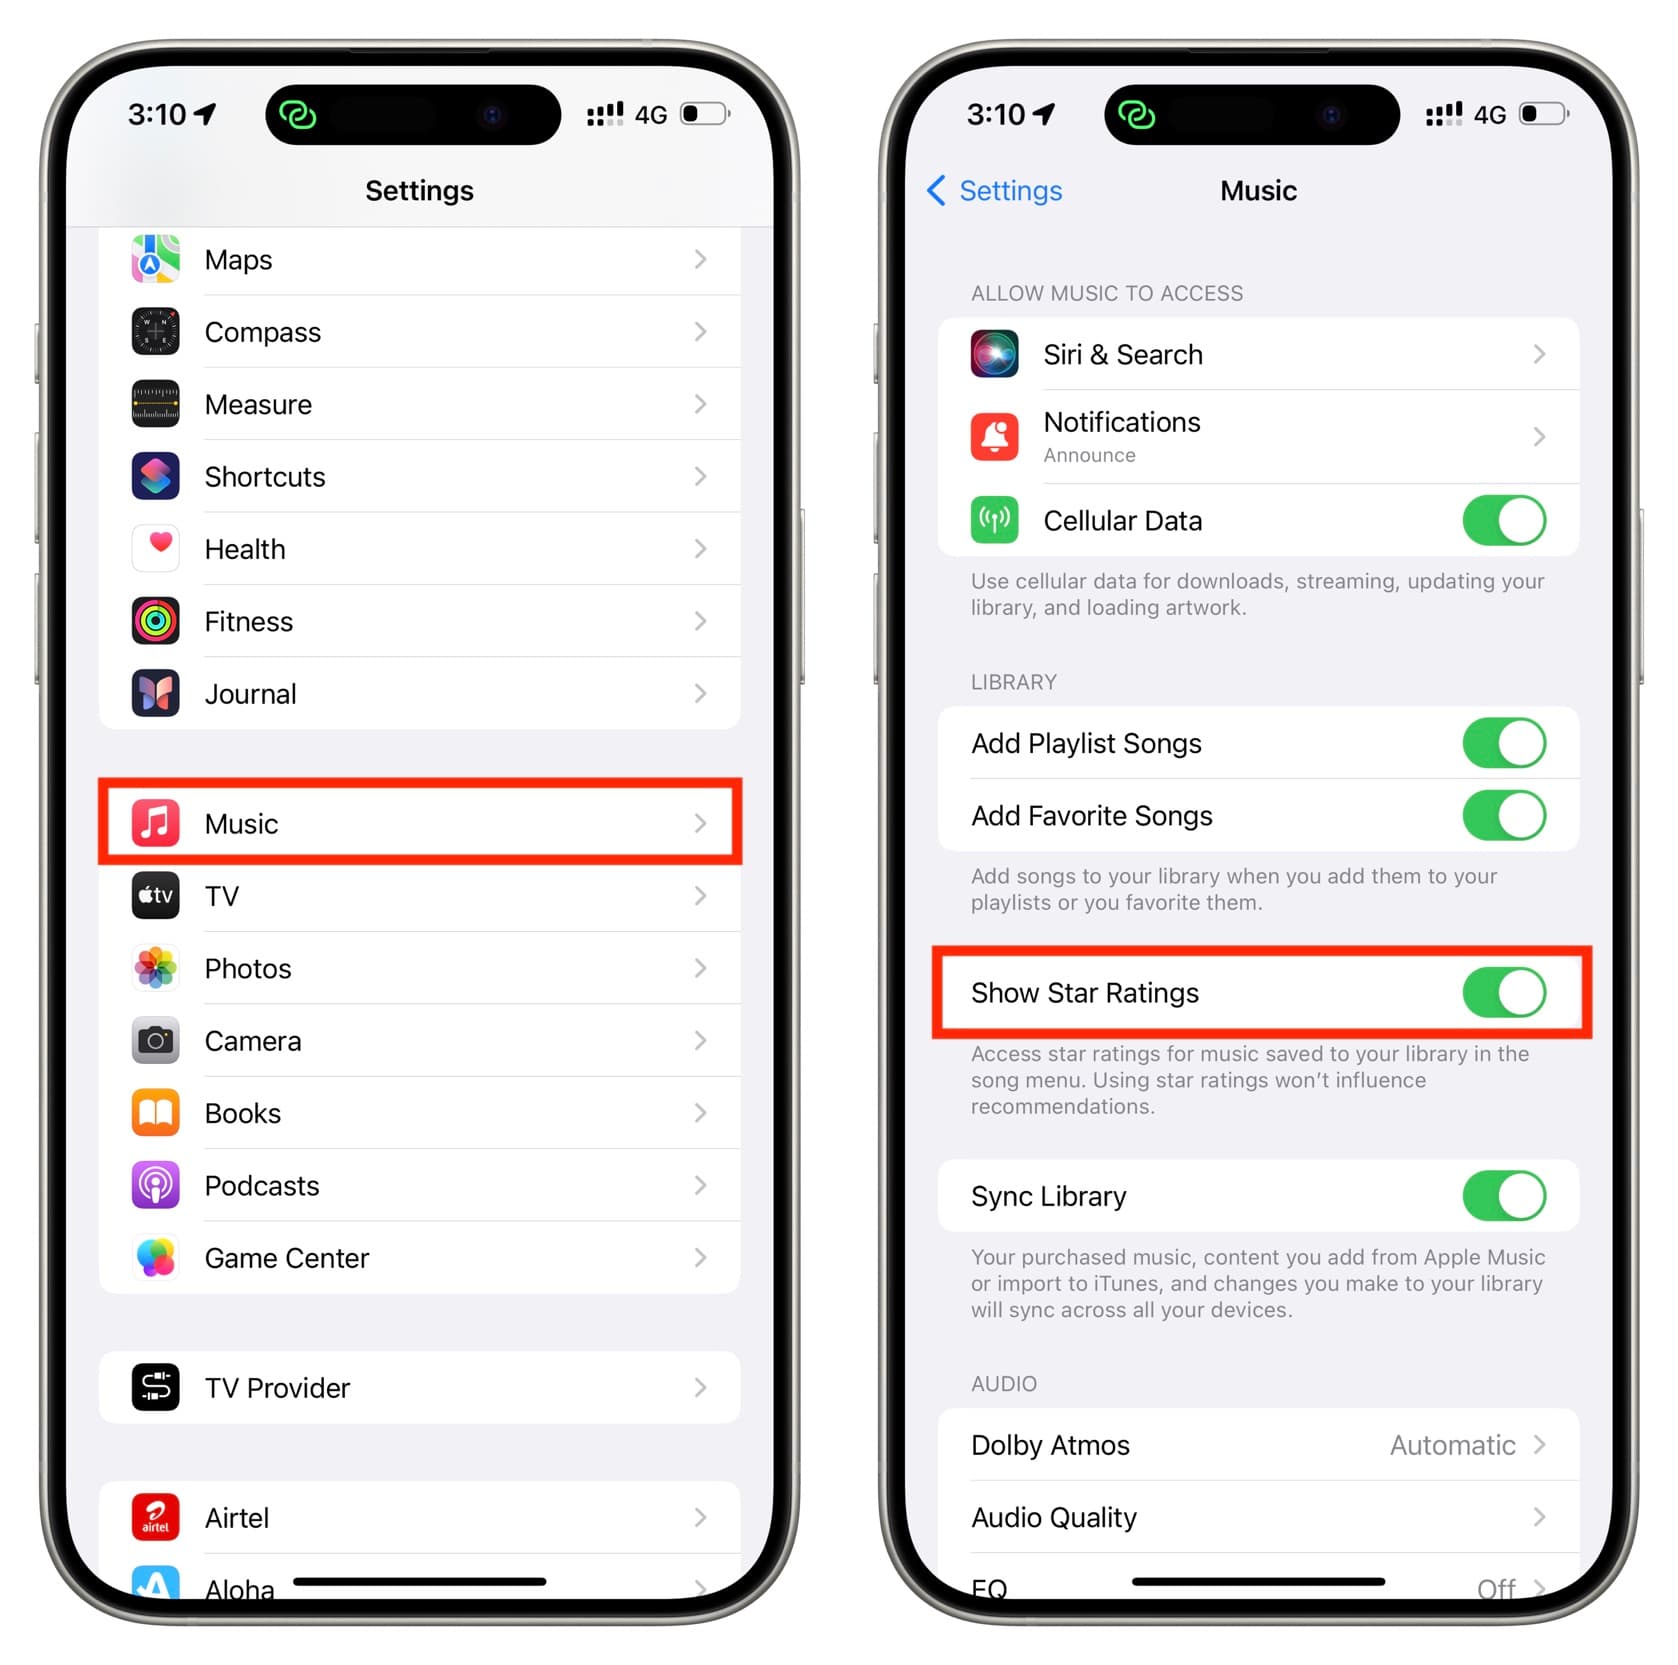
On iPhone and iPad
- Open the Settings app, scroll down, and tap Music.
- Turn on the switch for Show Star Ratings.
Give one to five stars to songs in the Music app
Once you have enabled this feature, it’s time to rate songs on a scale of one to five based on your preferences.
On Mac
- Go inside the Music app and click Songs.
- You will see a Rating column here. Hover the pointer over a song and pick from one to five stars in the Rating column for that track.
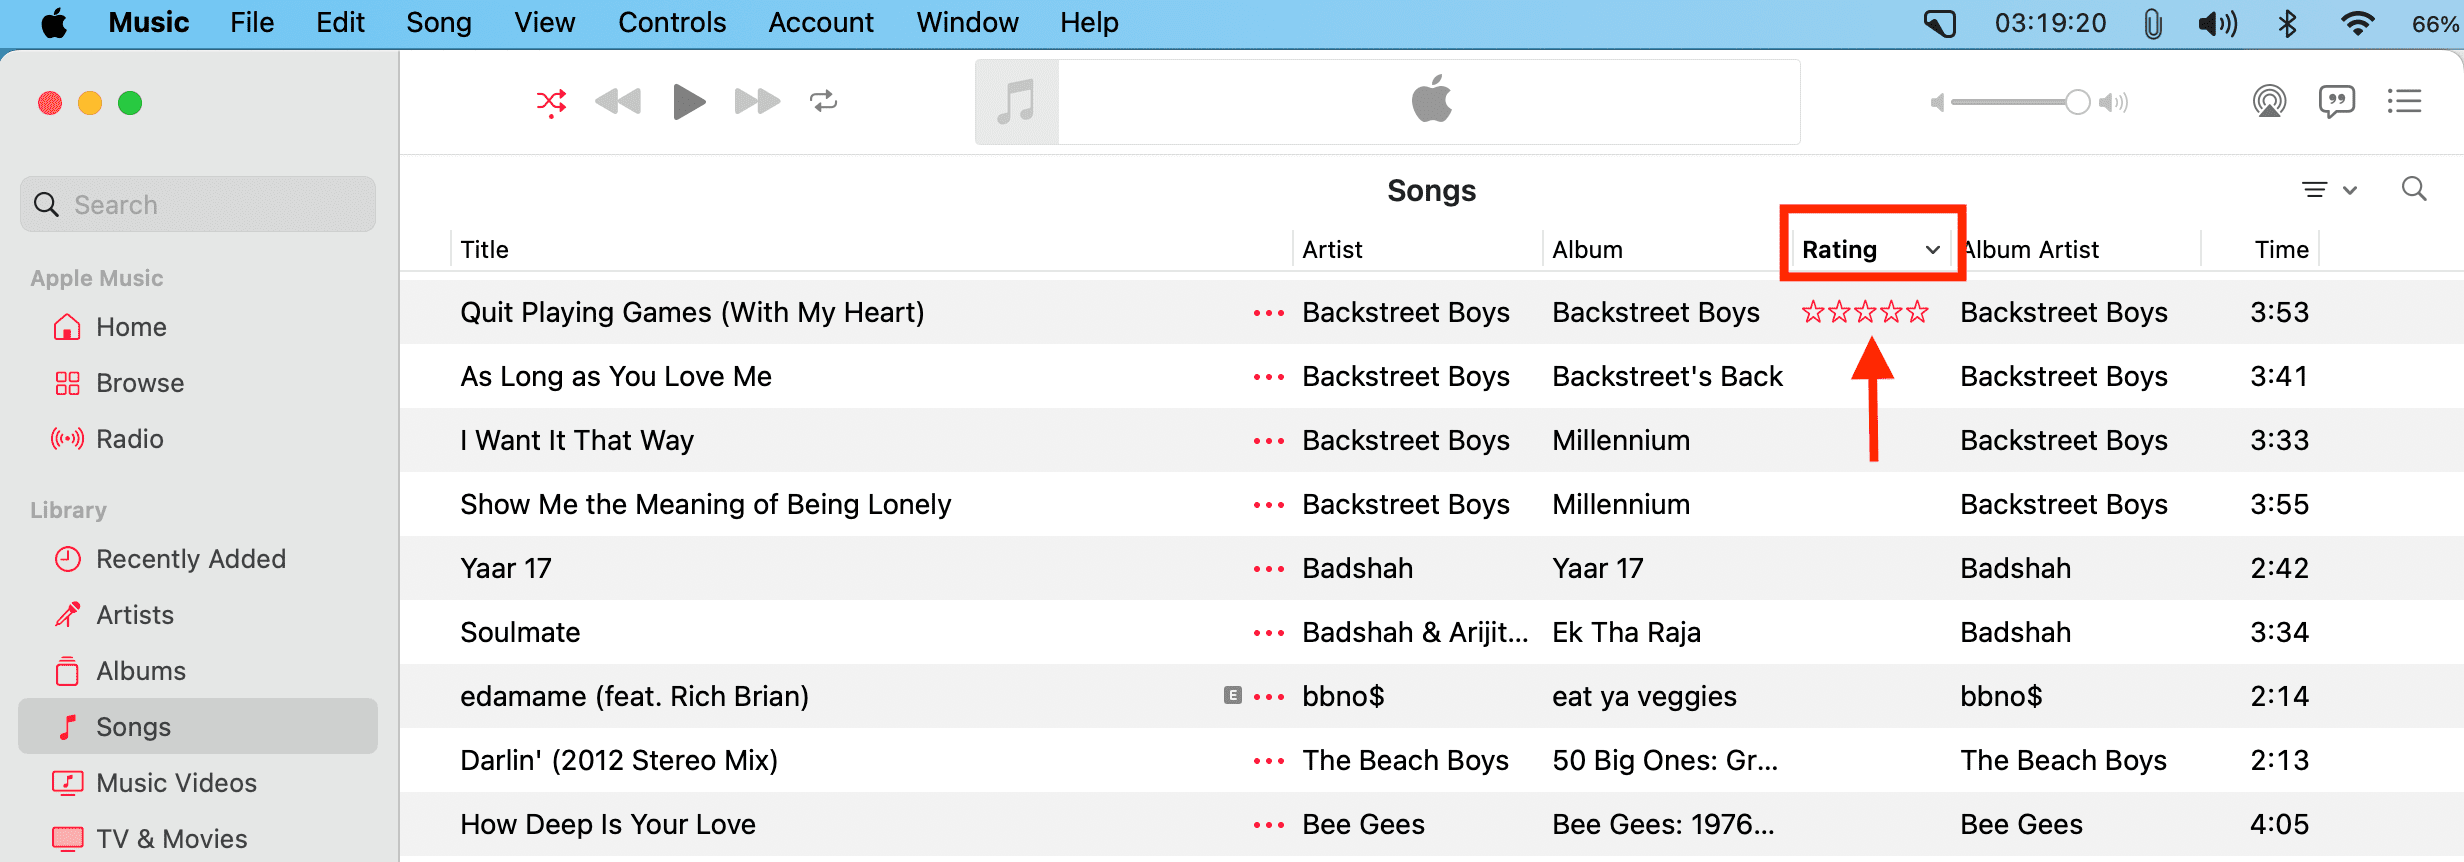
You can also right-click over a song or click its three dots icon and choose Rating. Now, pick from one to five stars. Choose None if you want to remove the rating.
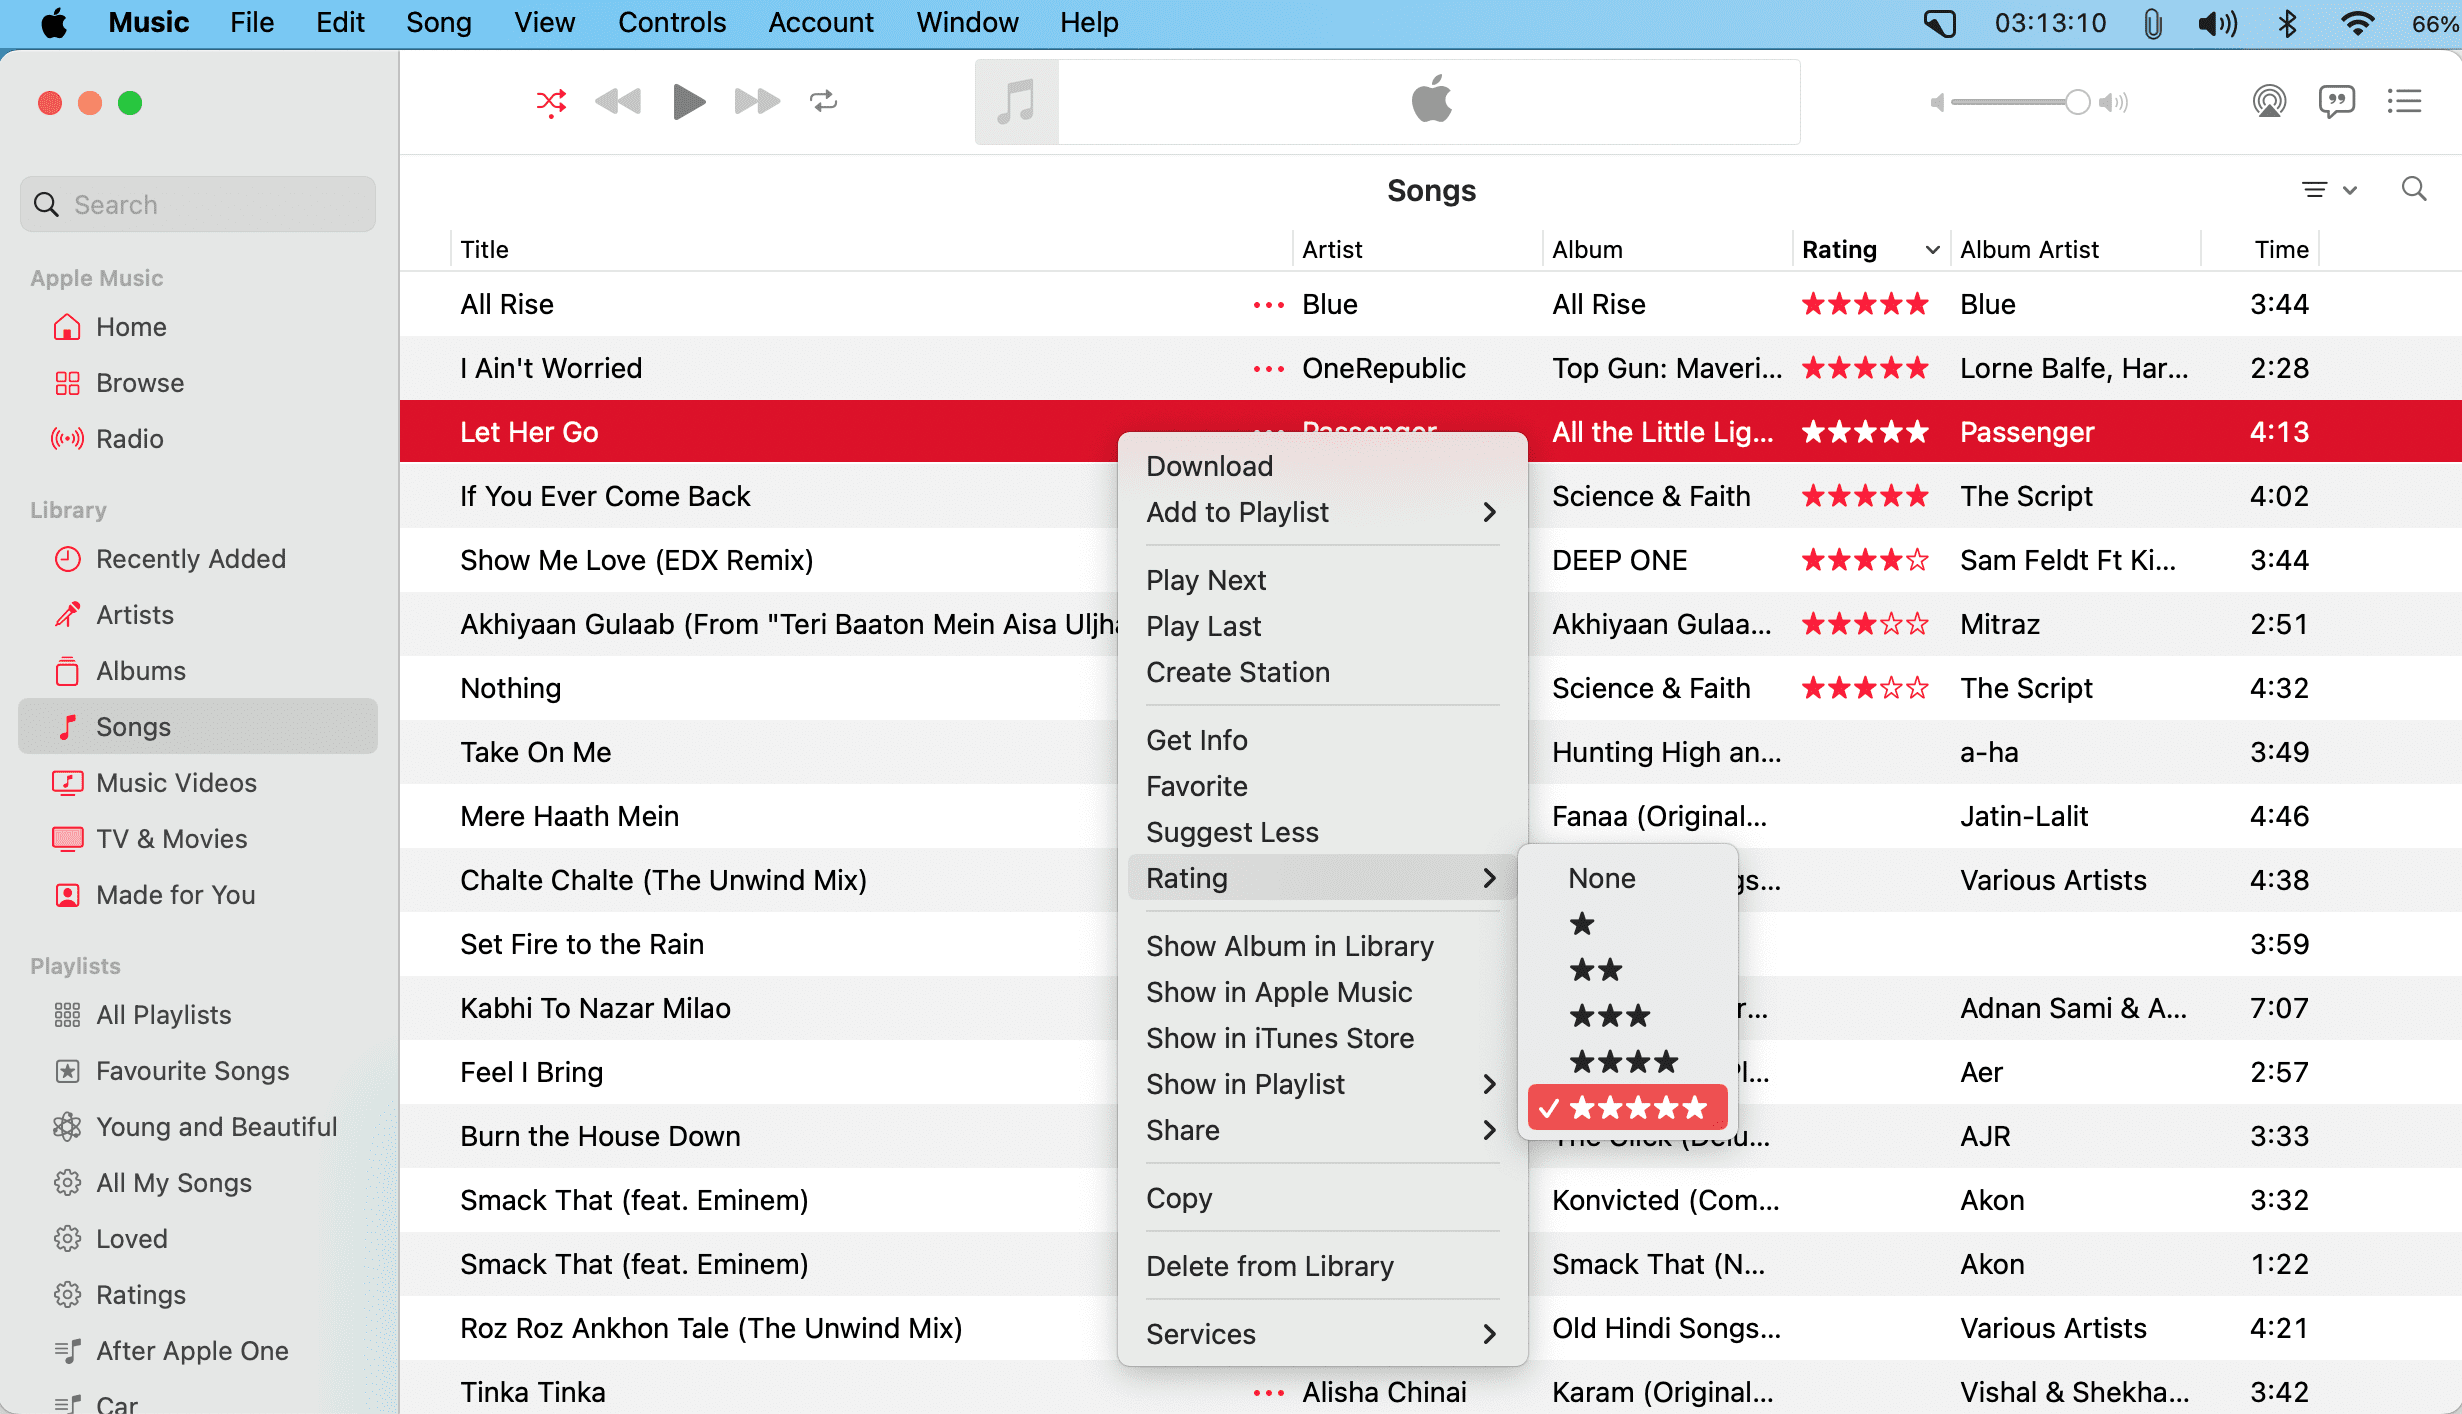
Note: You can also rate albums in a similar fashion.
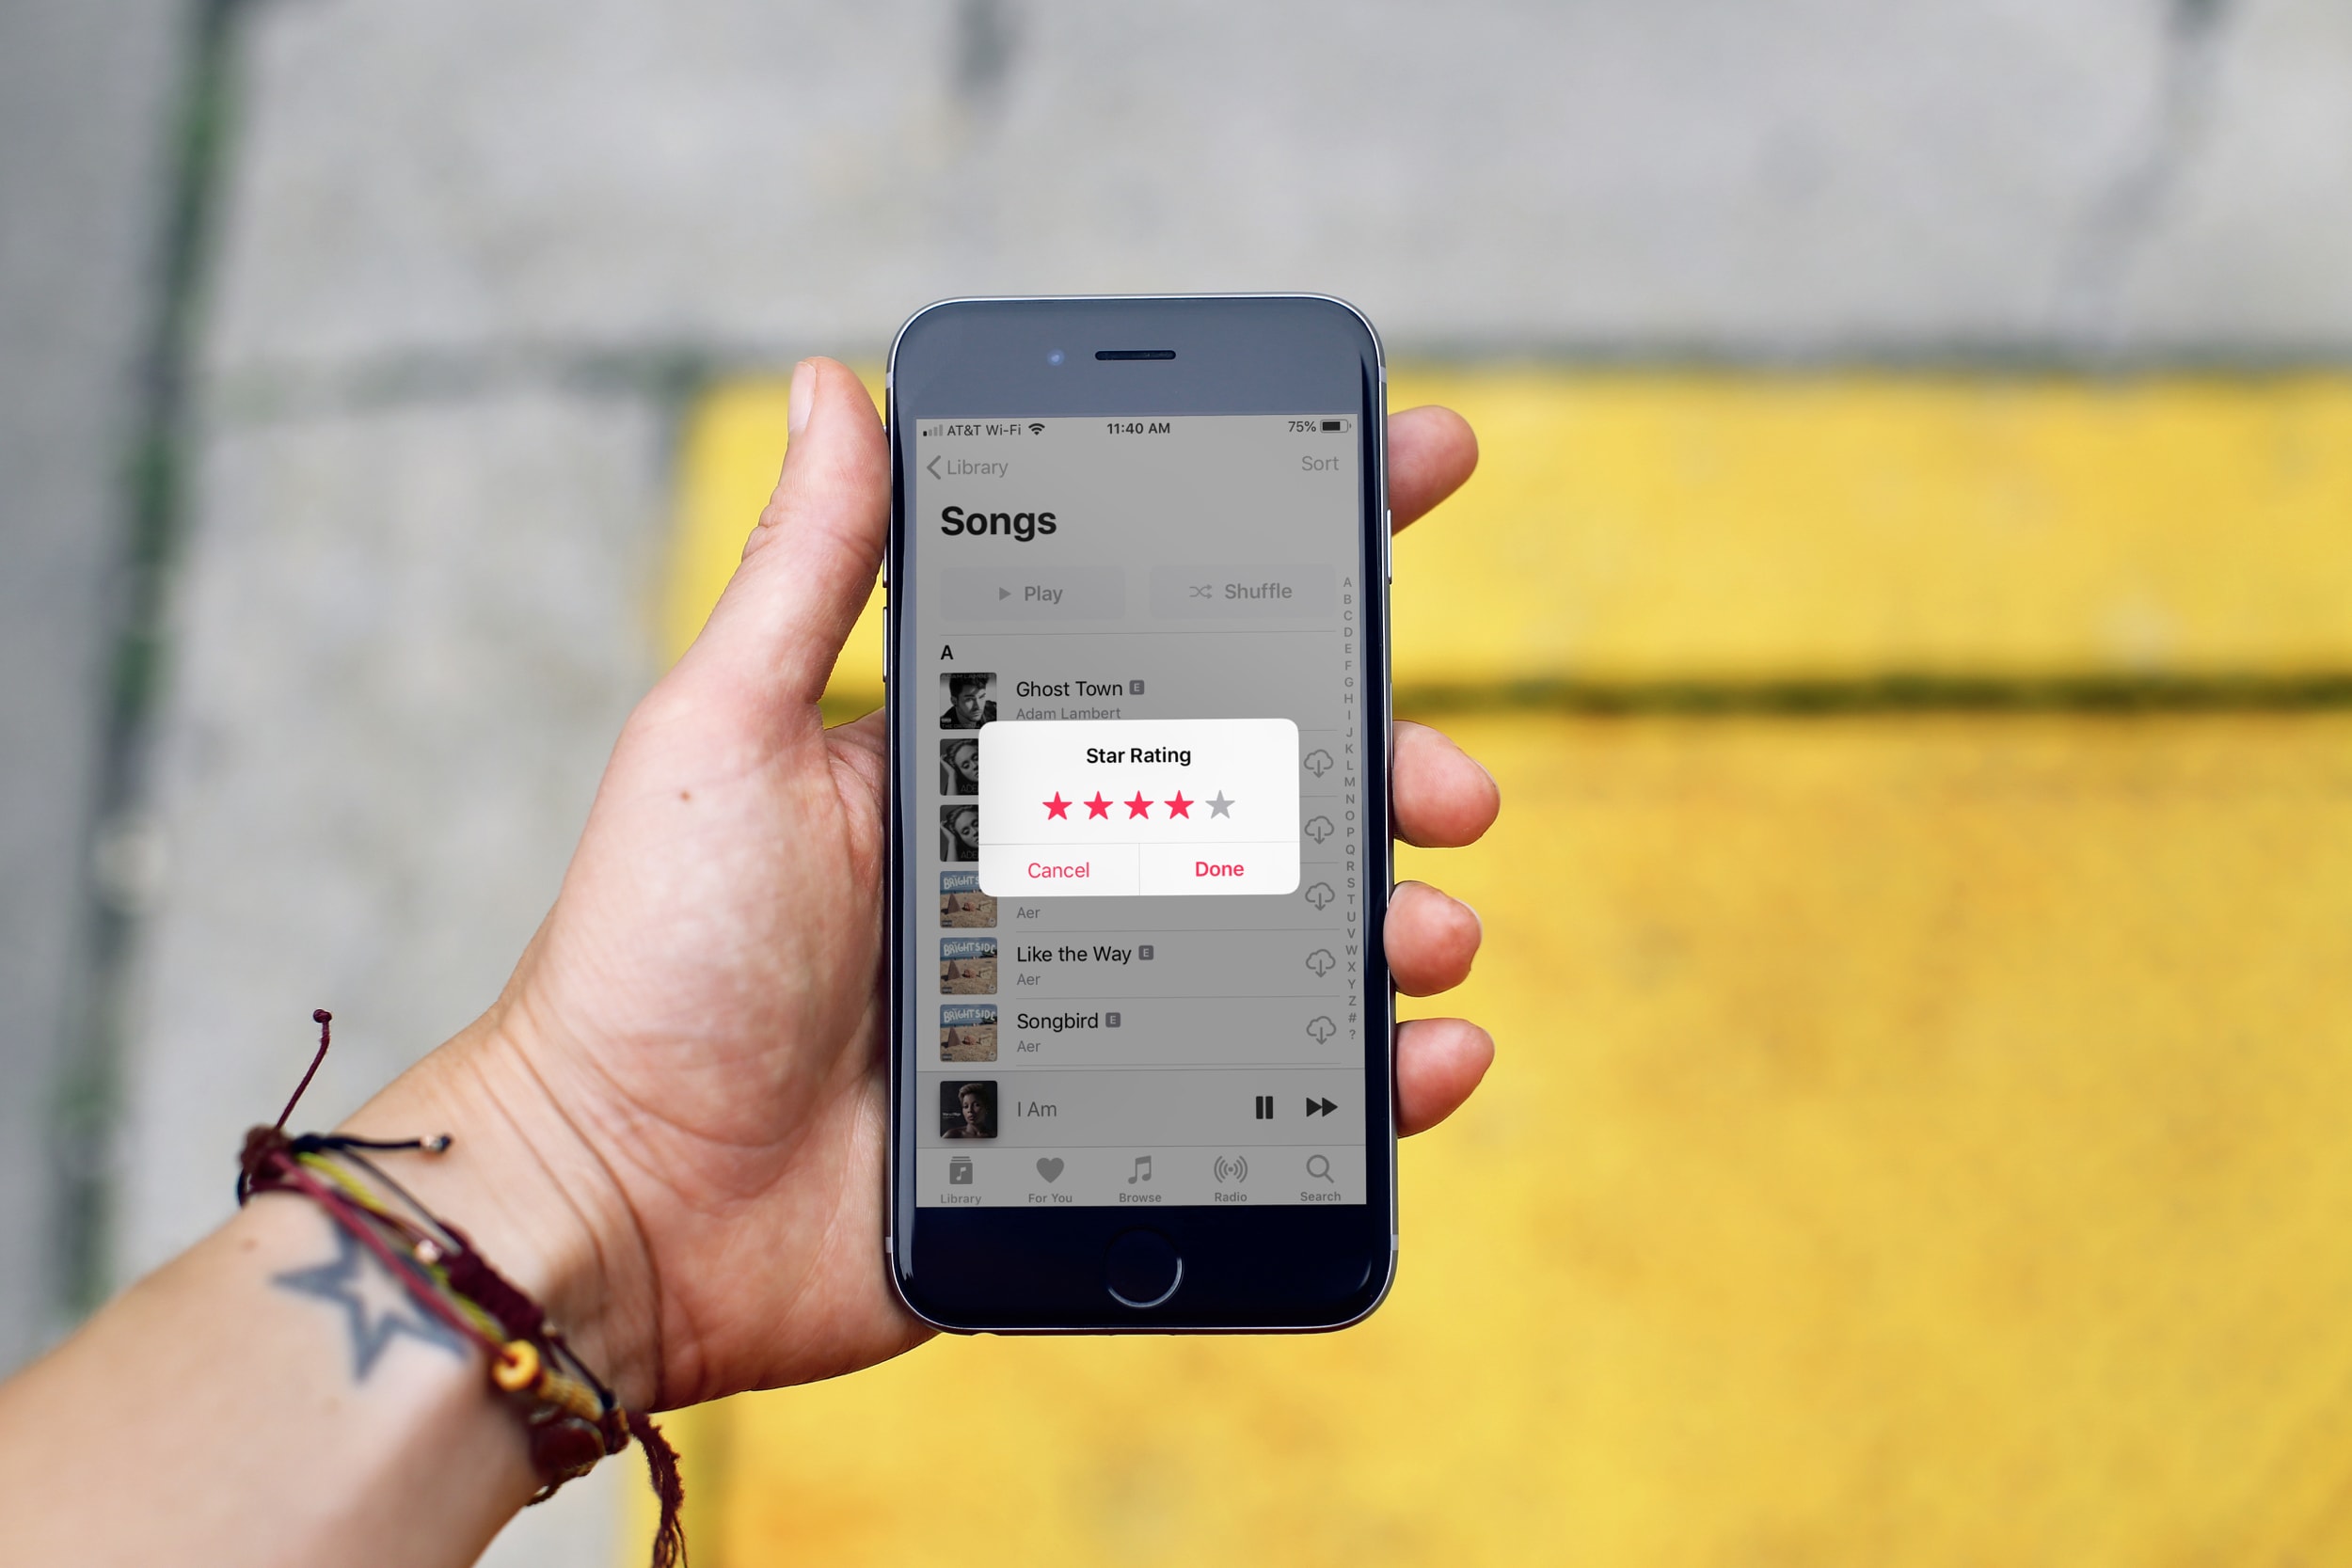
On iPhone and iPad
- Open the Music app and find the song you want to rate.
- Touch and hold the song or tap its three dots icon and choose Rate Song. You can also tap the three dots button on the Now Playing screen.
- Assign it one, two, three, four, or five stars, and tap Done.
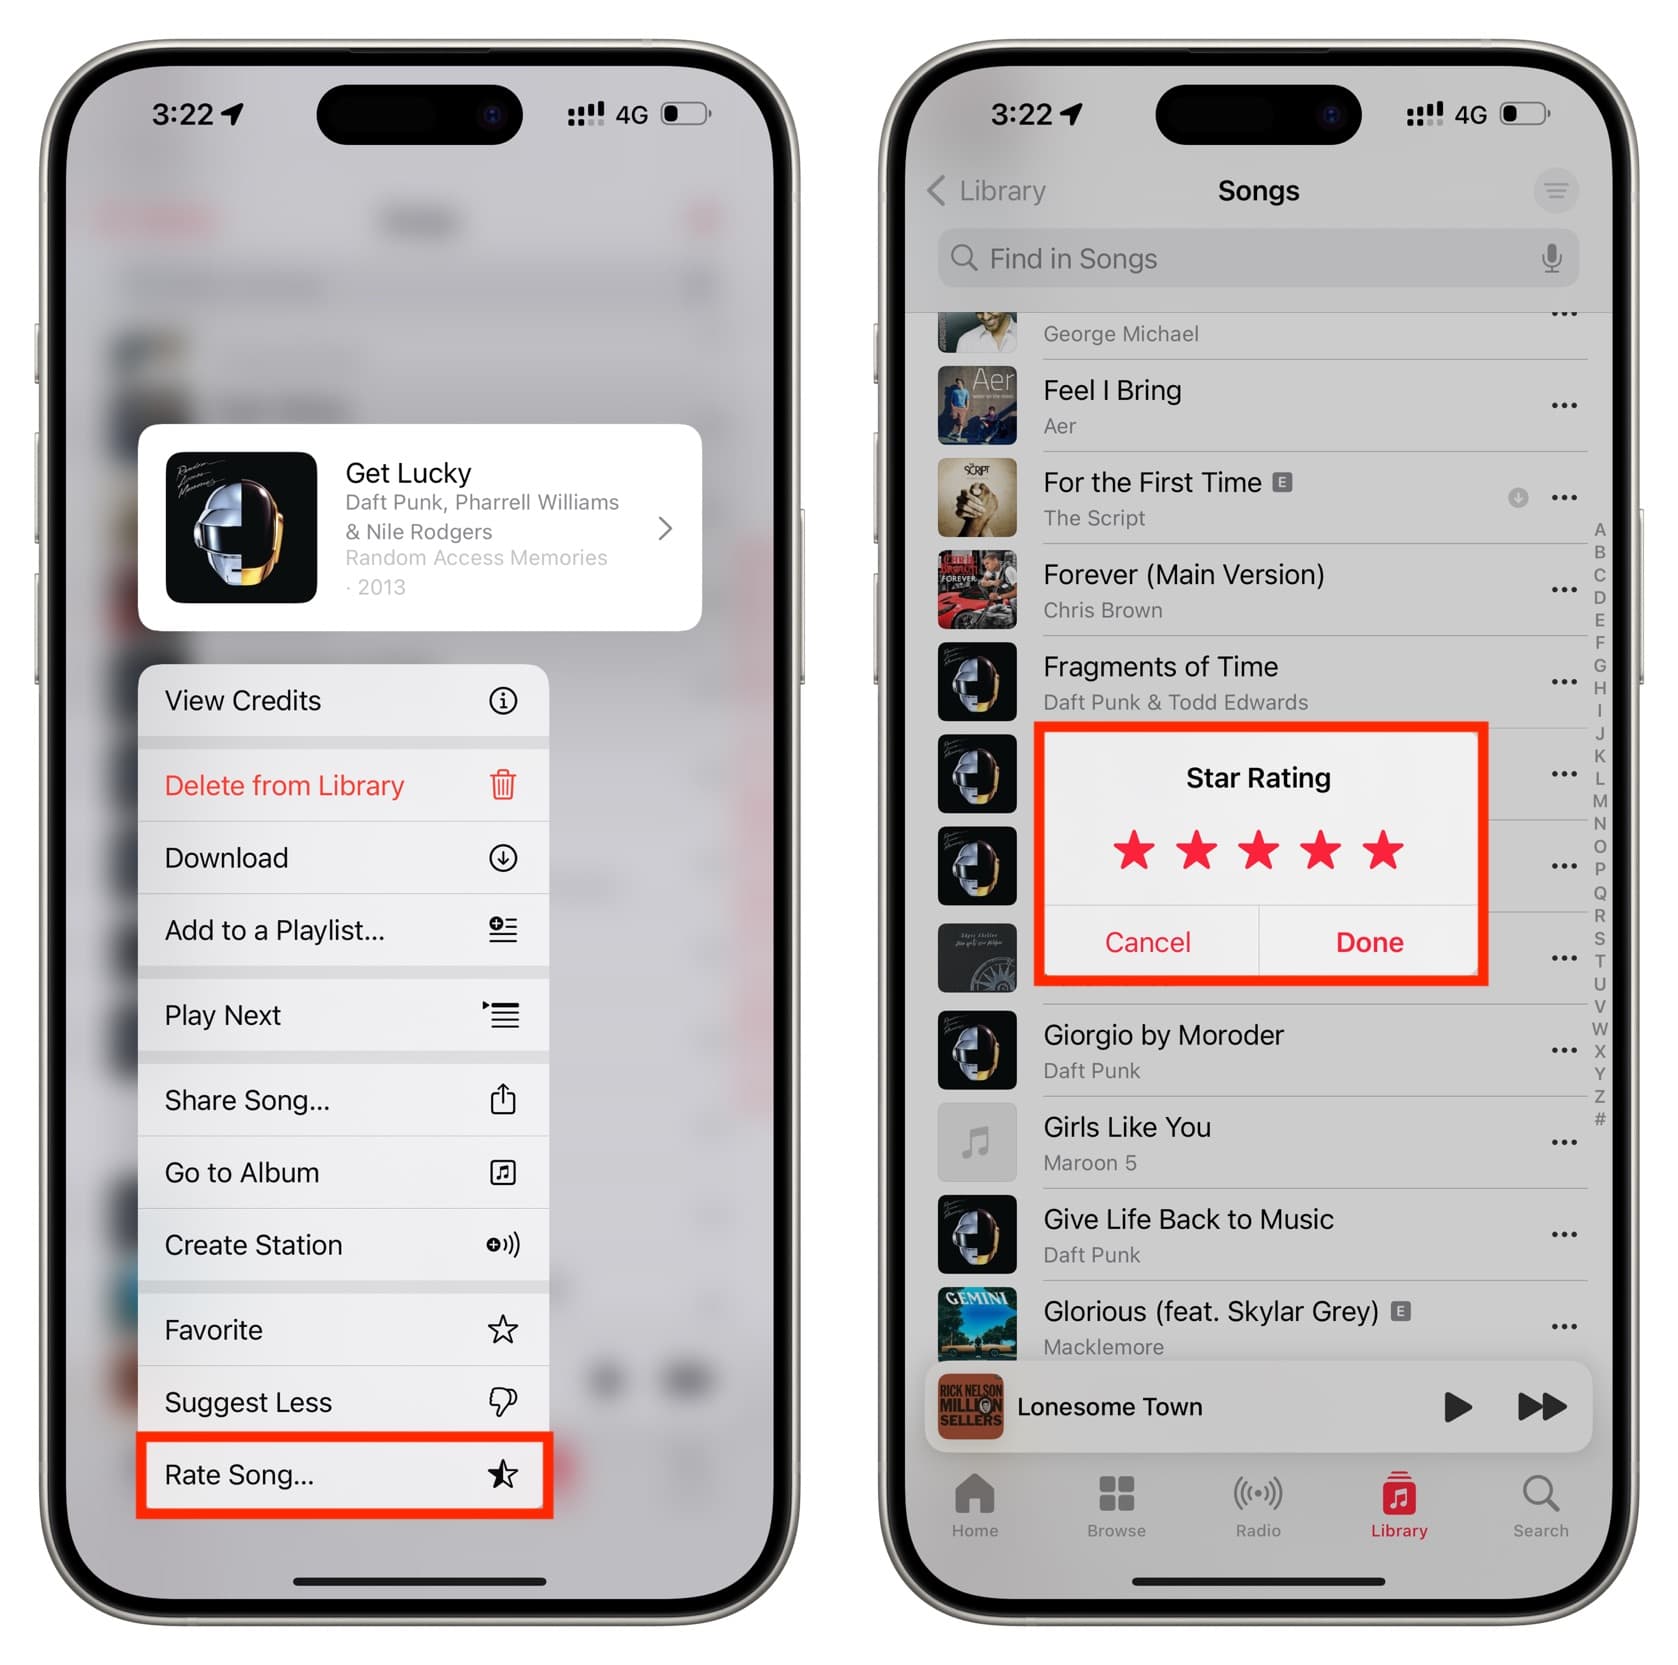
Note: Unlike on the Mac, you cannot rate albums on iOS.
How to use the Apple Music rating system
Once you have rated a few songs, it’s time to enjoy the fruits of your labor. You can do it in these two ways.
Create Smart Playlists
The first thing you can do is create a smart playlist of your rated songs using the Music app or iTunes on your Mac or PC. For instance, I have a smart playlist that automatically picks up all the songs I have rated four or five stars and puts them in the playlist.
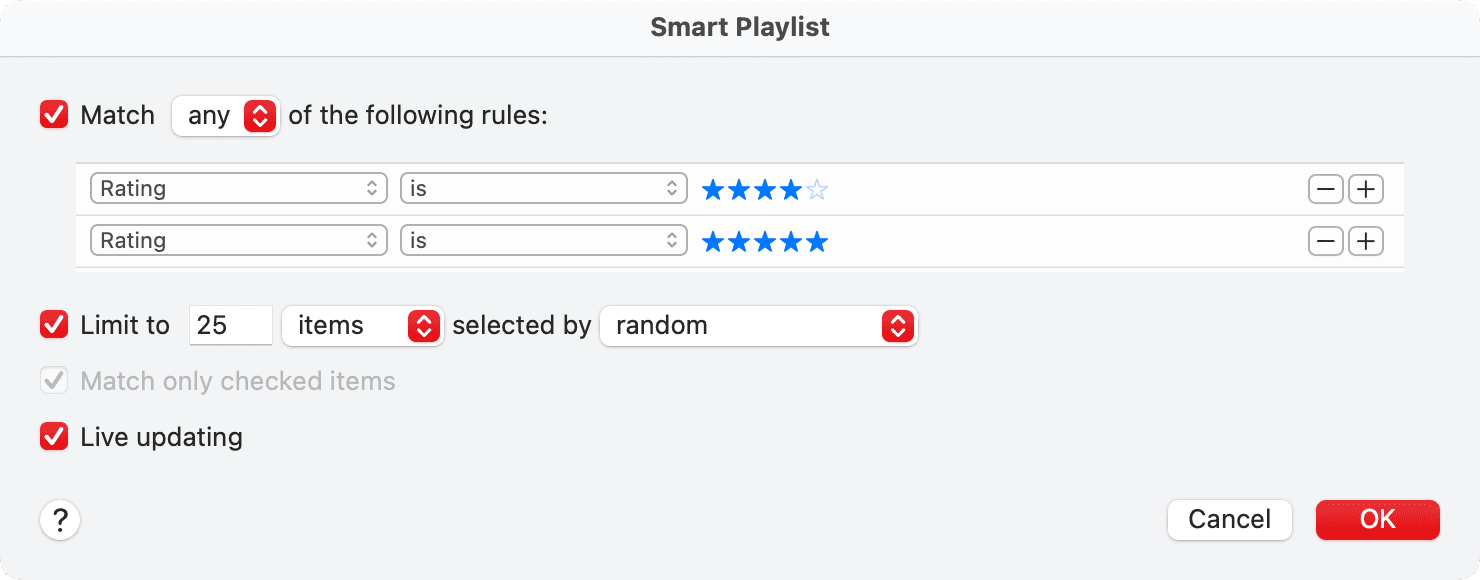
You can see what works for you. As an example, you can have a smart playlist that lists all your five-star songs, while another lists your three or four-star tracks. You get the idea.
Note that you cannot create smart playlists in the Music app on iPhone or iPad. However, the smart playlists you create in the Music app or iTunes on your Mac or Windows PC will sync to your iOS device as well as update in real-time when you rate songs on your computer or phone.
Sort by ratings
While the iPhone or iPad Music app does not allow you to sort tracks by ratings (you can sort by favorites), you can sort them by ascending or descending rating on Mac or PC.
To do this, just click the Rating column in your computer’s Music app once or twice to sort it accordingly.
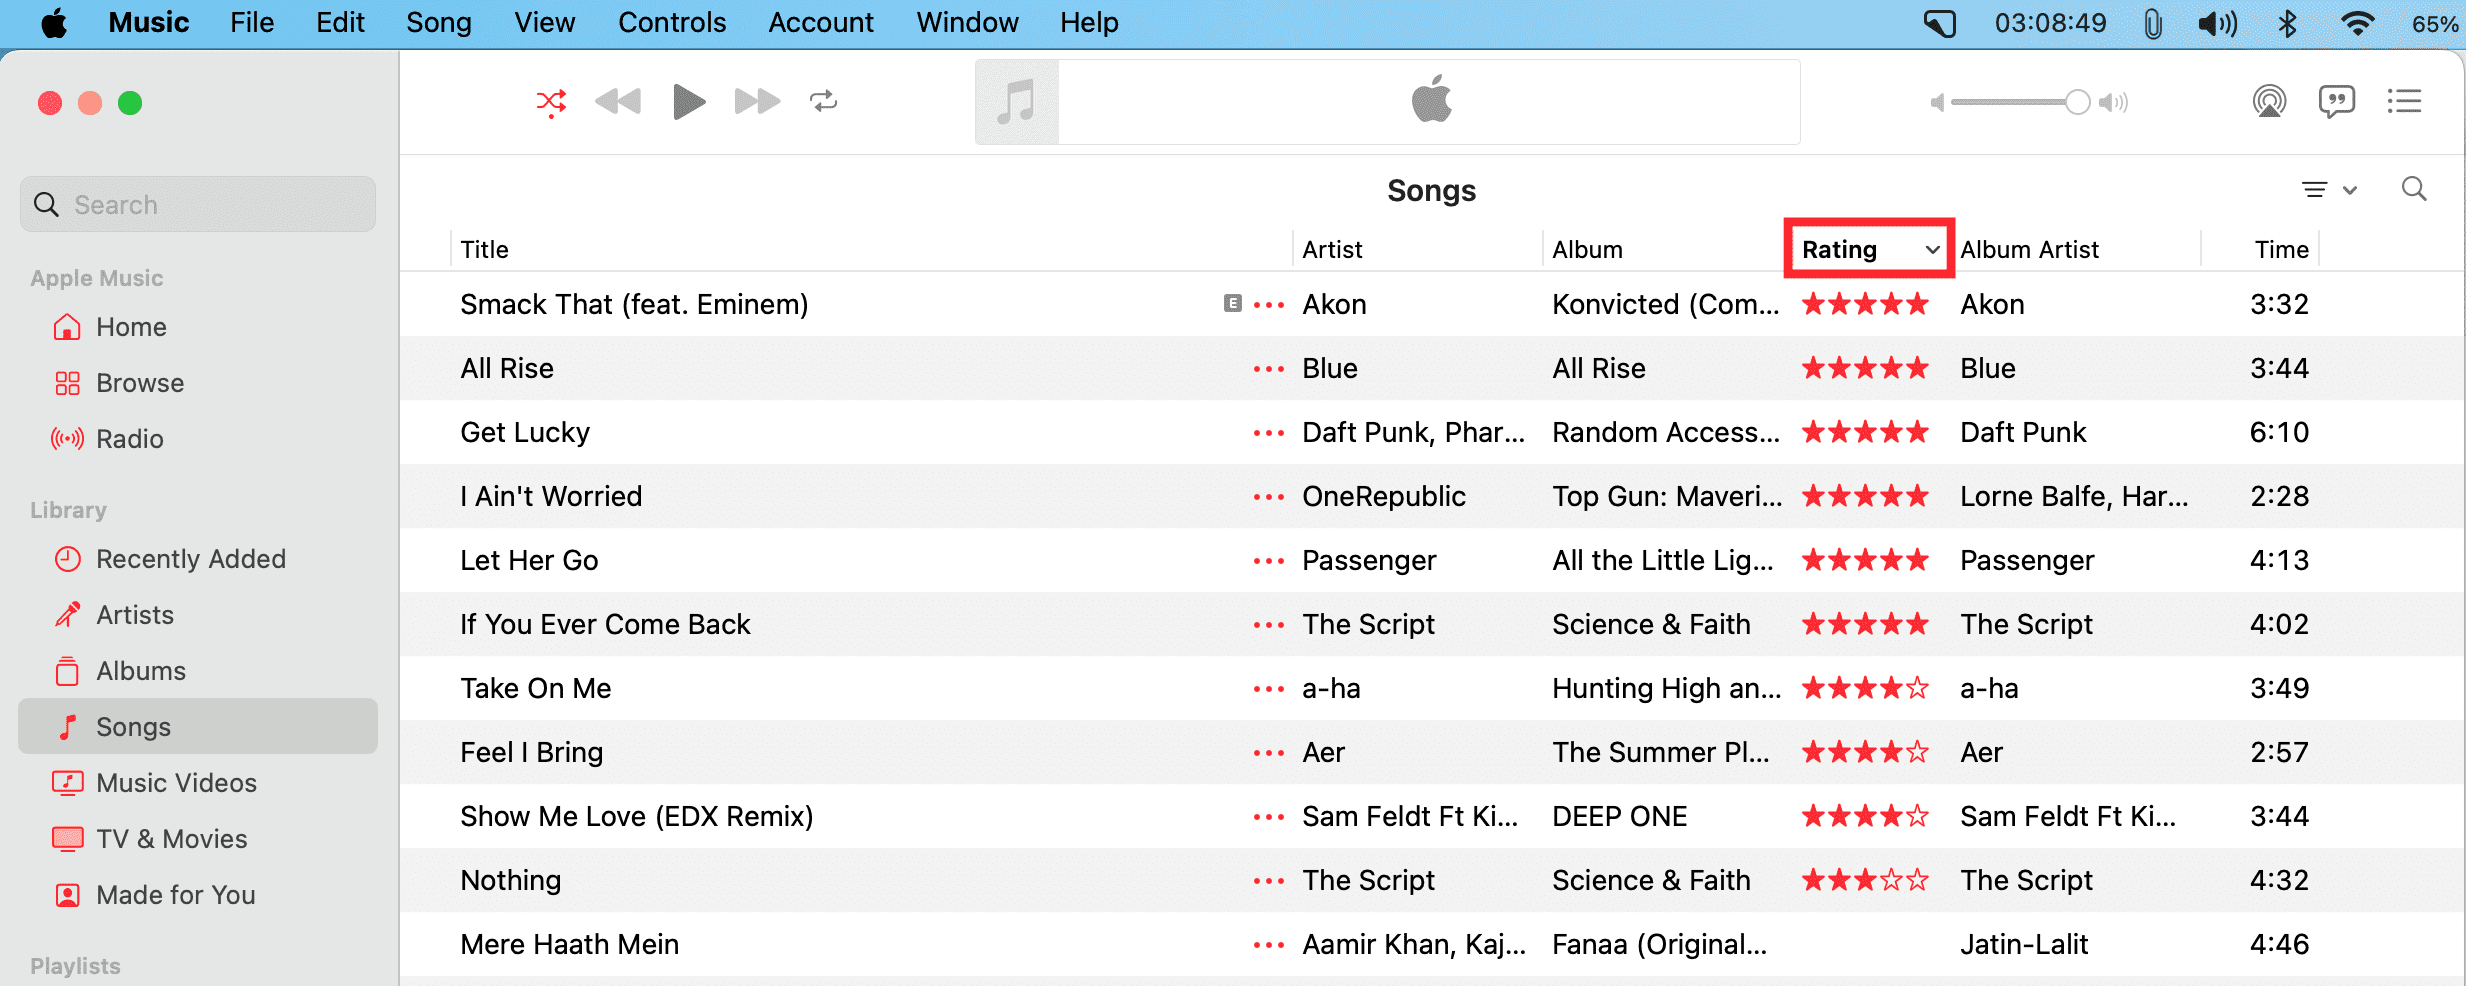
You can show or hide the Rating, Album Rating, and other columns by making sure you are in the Songs section and then clicking View > Show View Options. If you need help, check out our tutorial on sorting your Music library the way you want.
On a related note: How to download all your Apple Music songs to your iPhone or iPad at once