If you have a Keynote presentation that could benefit from some movement, you can easily animate objects. You might be creating a presentation for your class and want it to be entertaining. Or, maybe you want one for business that shows directional movement. With animations, your presentation can be more fun or more useful.
Here’s how to animate objects on a slide in Keynote on Mac.
Create a basic Keynote animation
1) Open the Keynote presentation on your Mac and go to the slide where you want to animate your object.
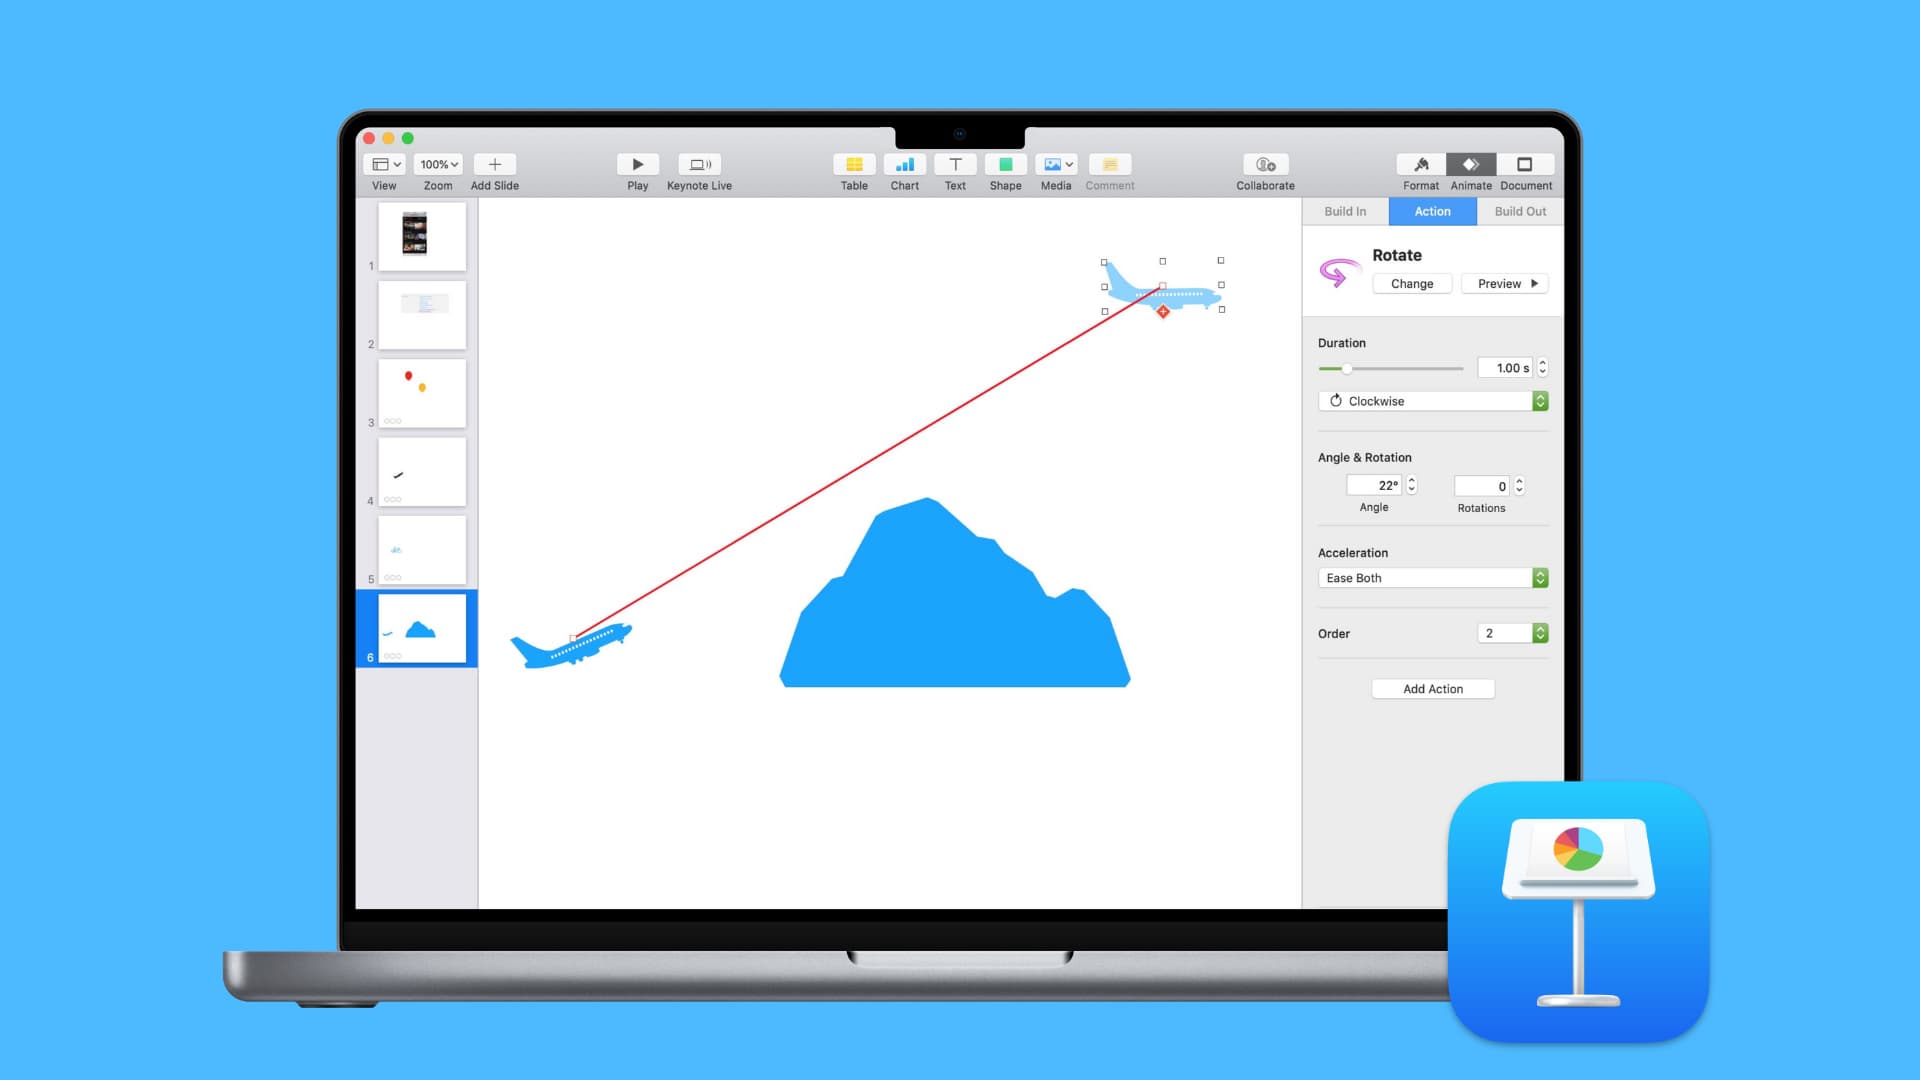
1) Select your object and click the Animate button on the top right to open the sidebar.
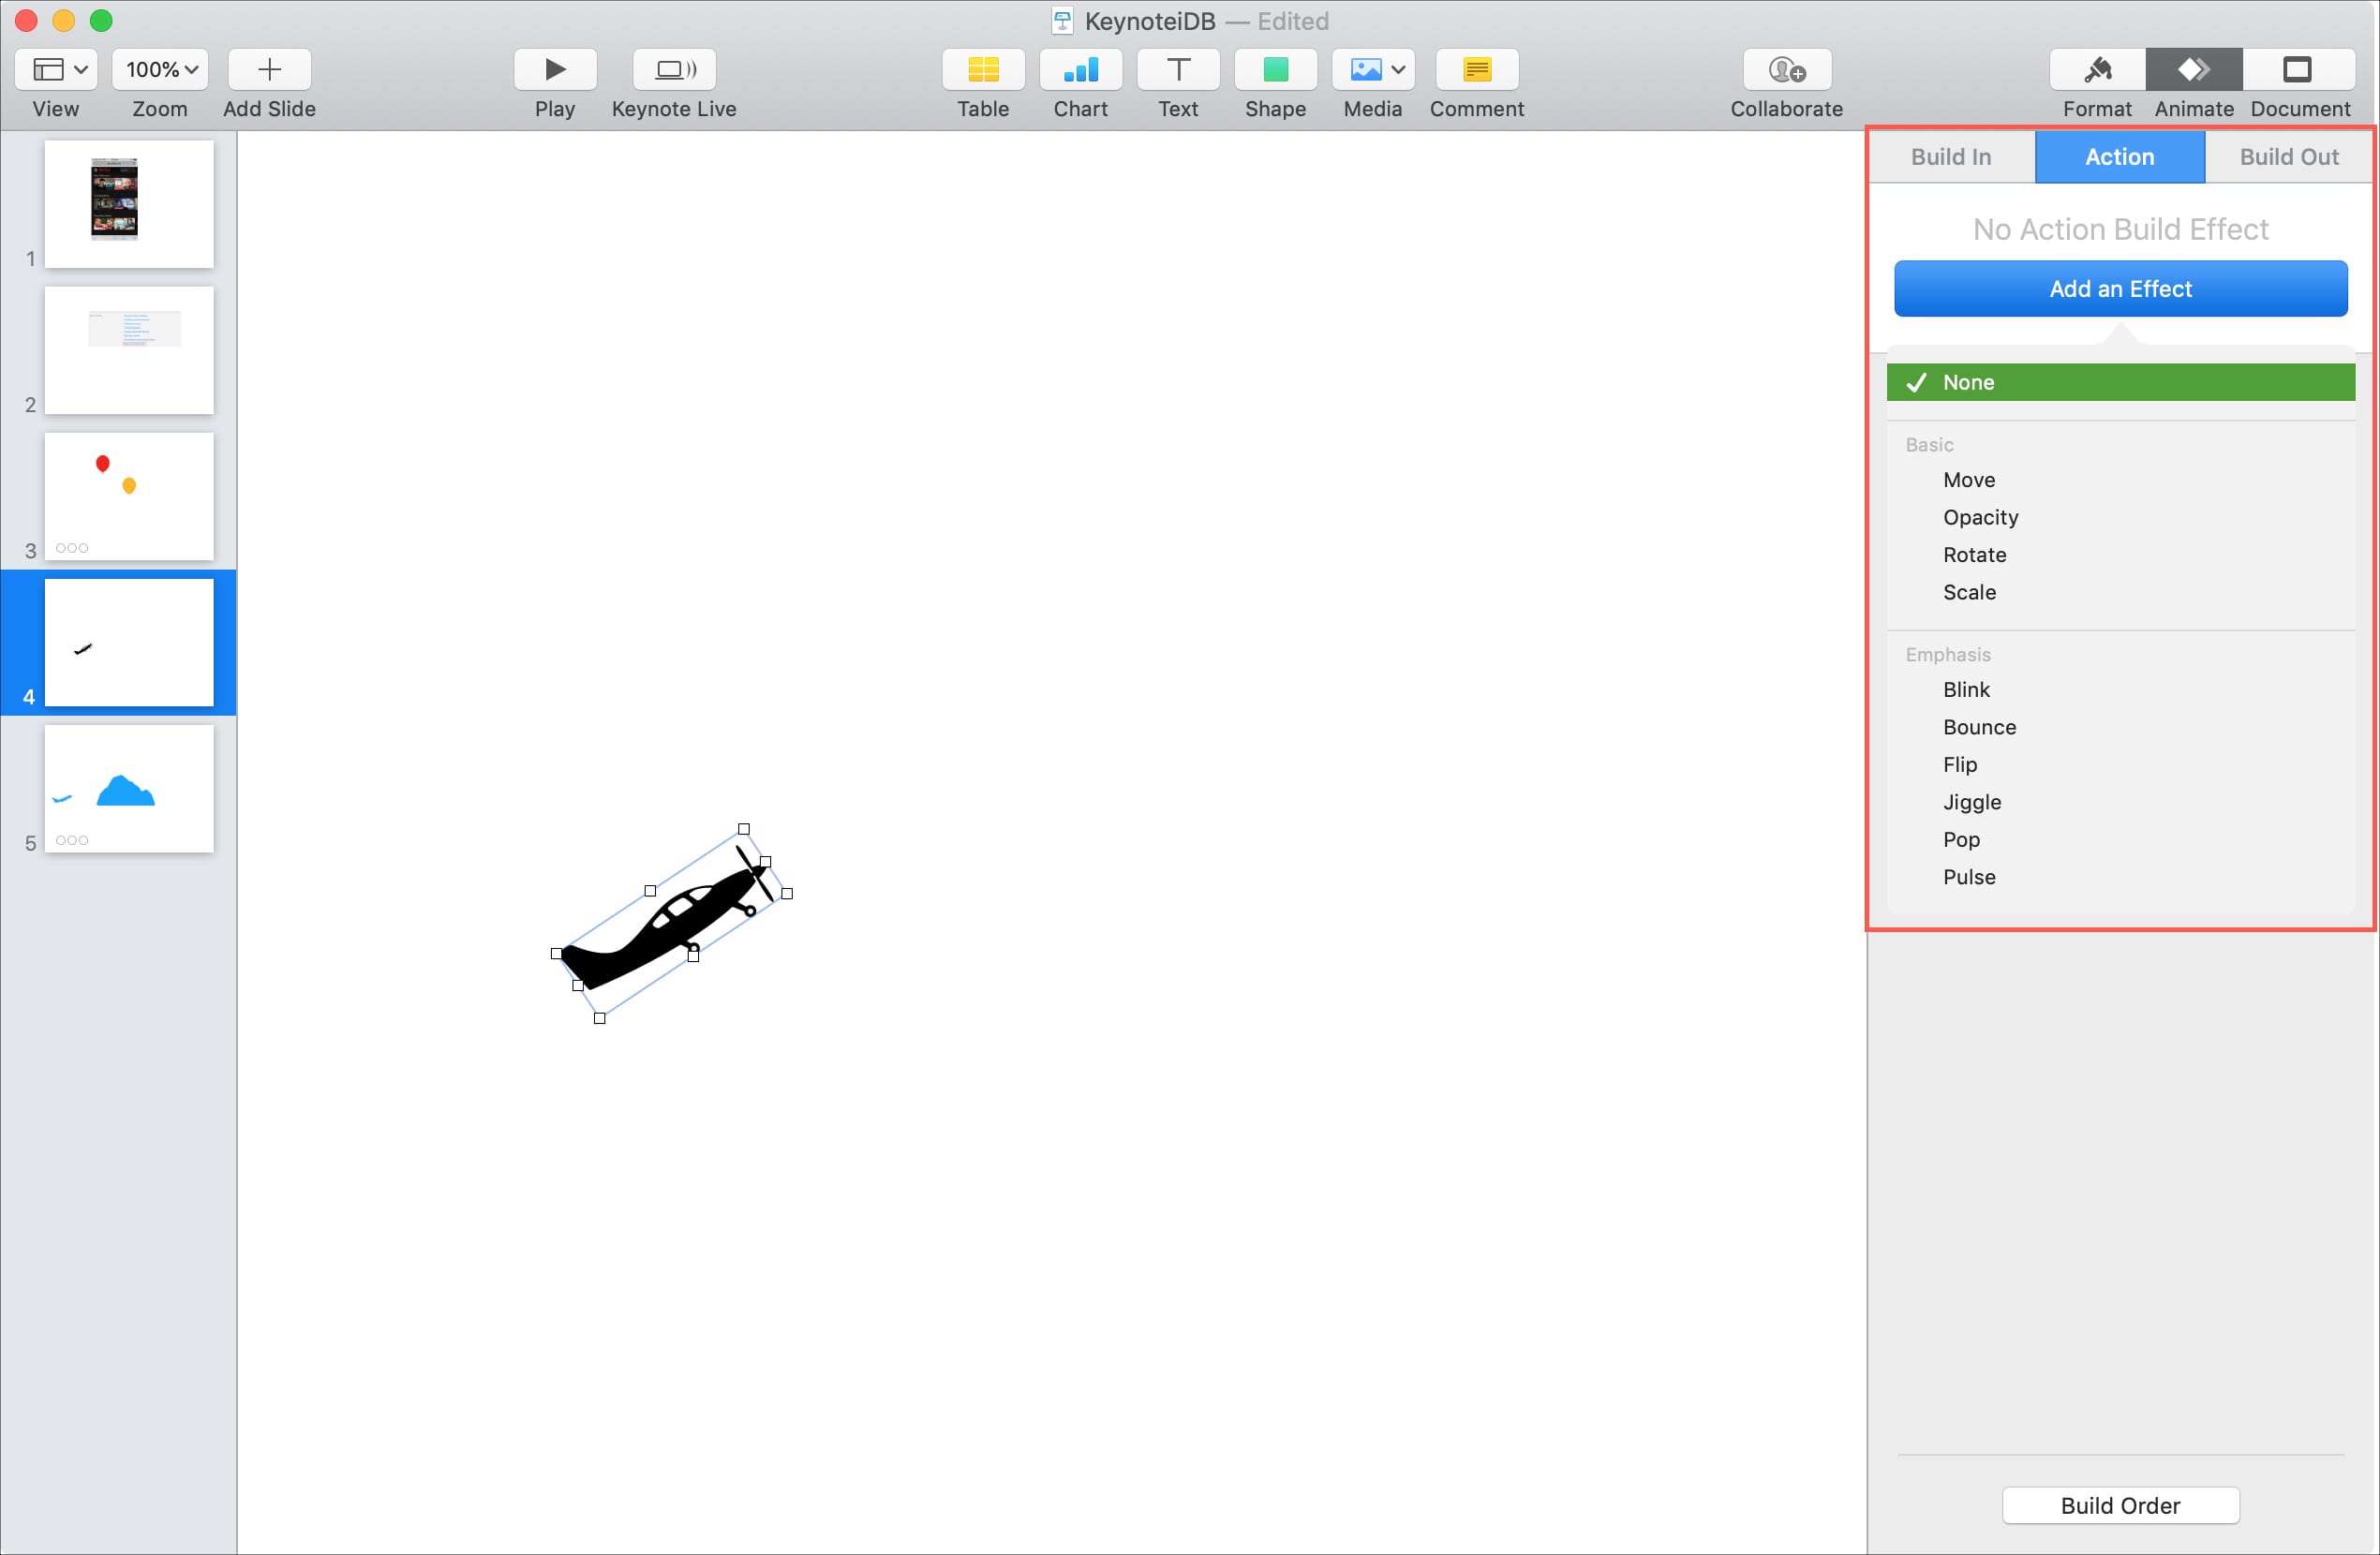
2) Click Action in the sidebar and then Add an Effect.
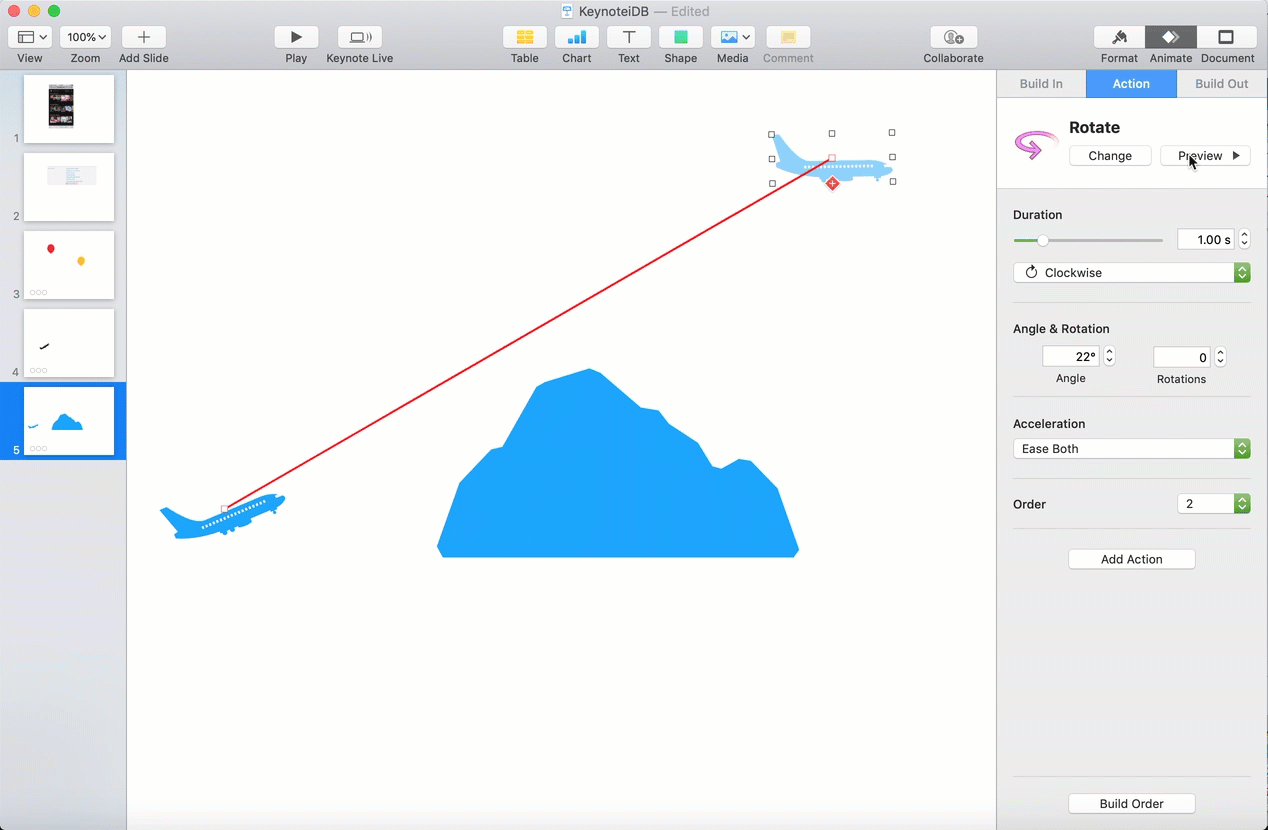
3) You can pick from Basics like rotate and scale or give the object Emphasis with jiggle or blink animations.
4) Once you select an animation, you can adjust the duration of the animation. And depending on the type of animation you choose; you will see other options. For instance, with rotate, you can pick the angle and number of rotations, and blink lets you pick the number of blinks.
5) Click the Preview button near the top of the sidebar to see a preview of the animation. You can also hit the Change button if you want a different effect.
Add more actions to your animation
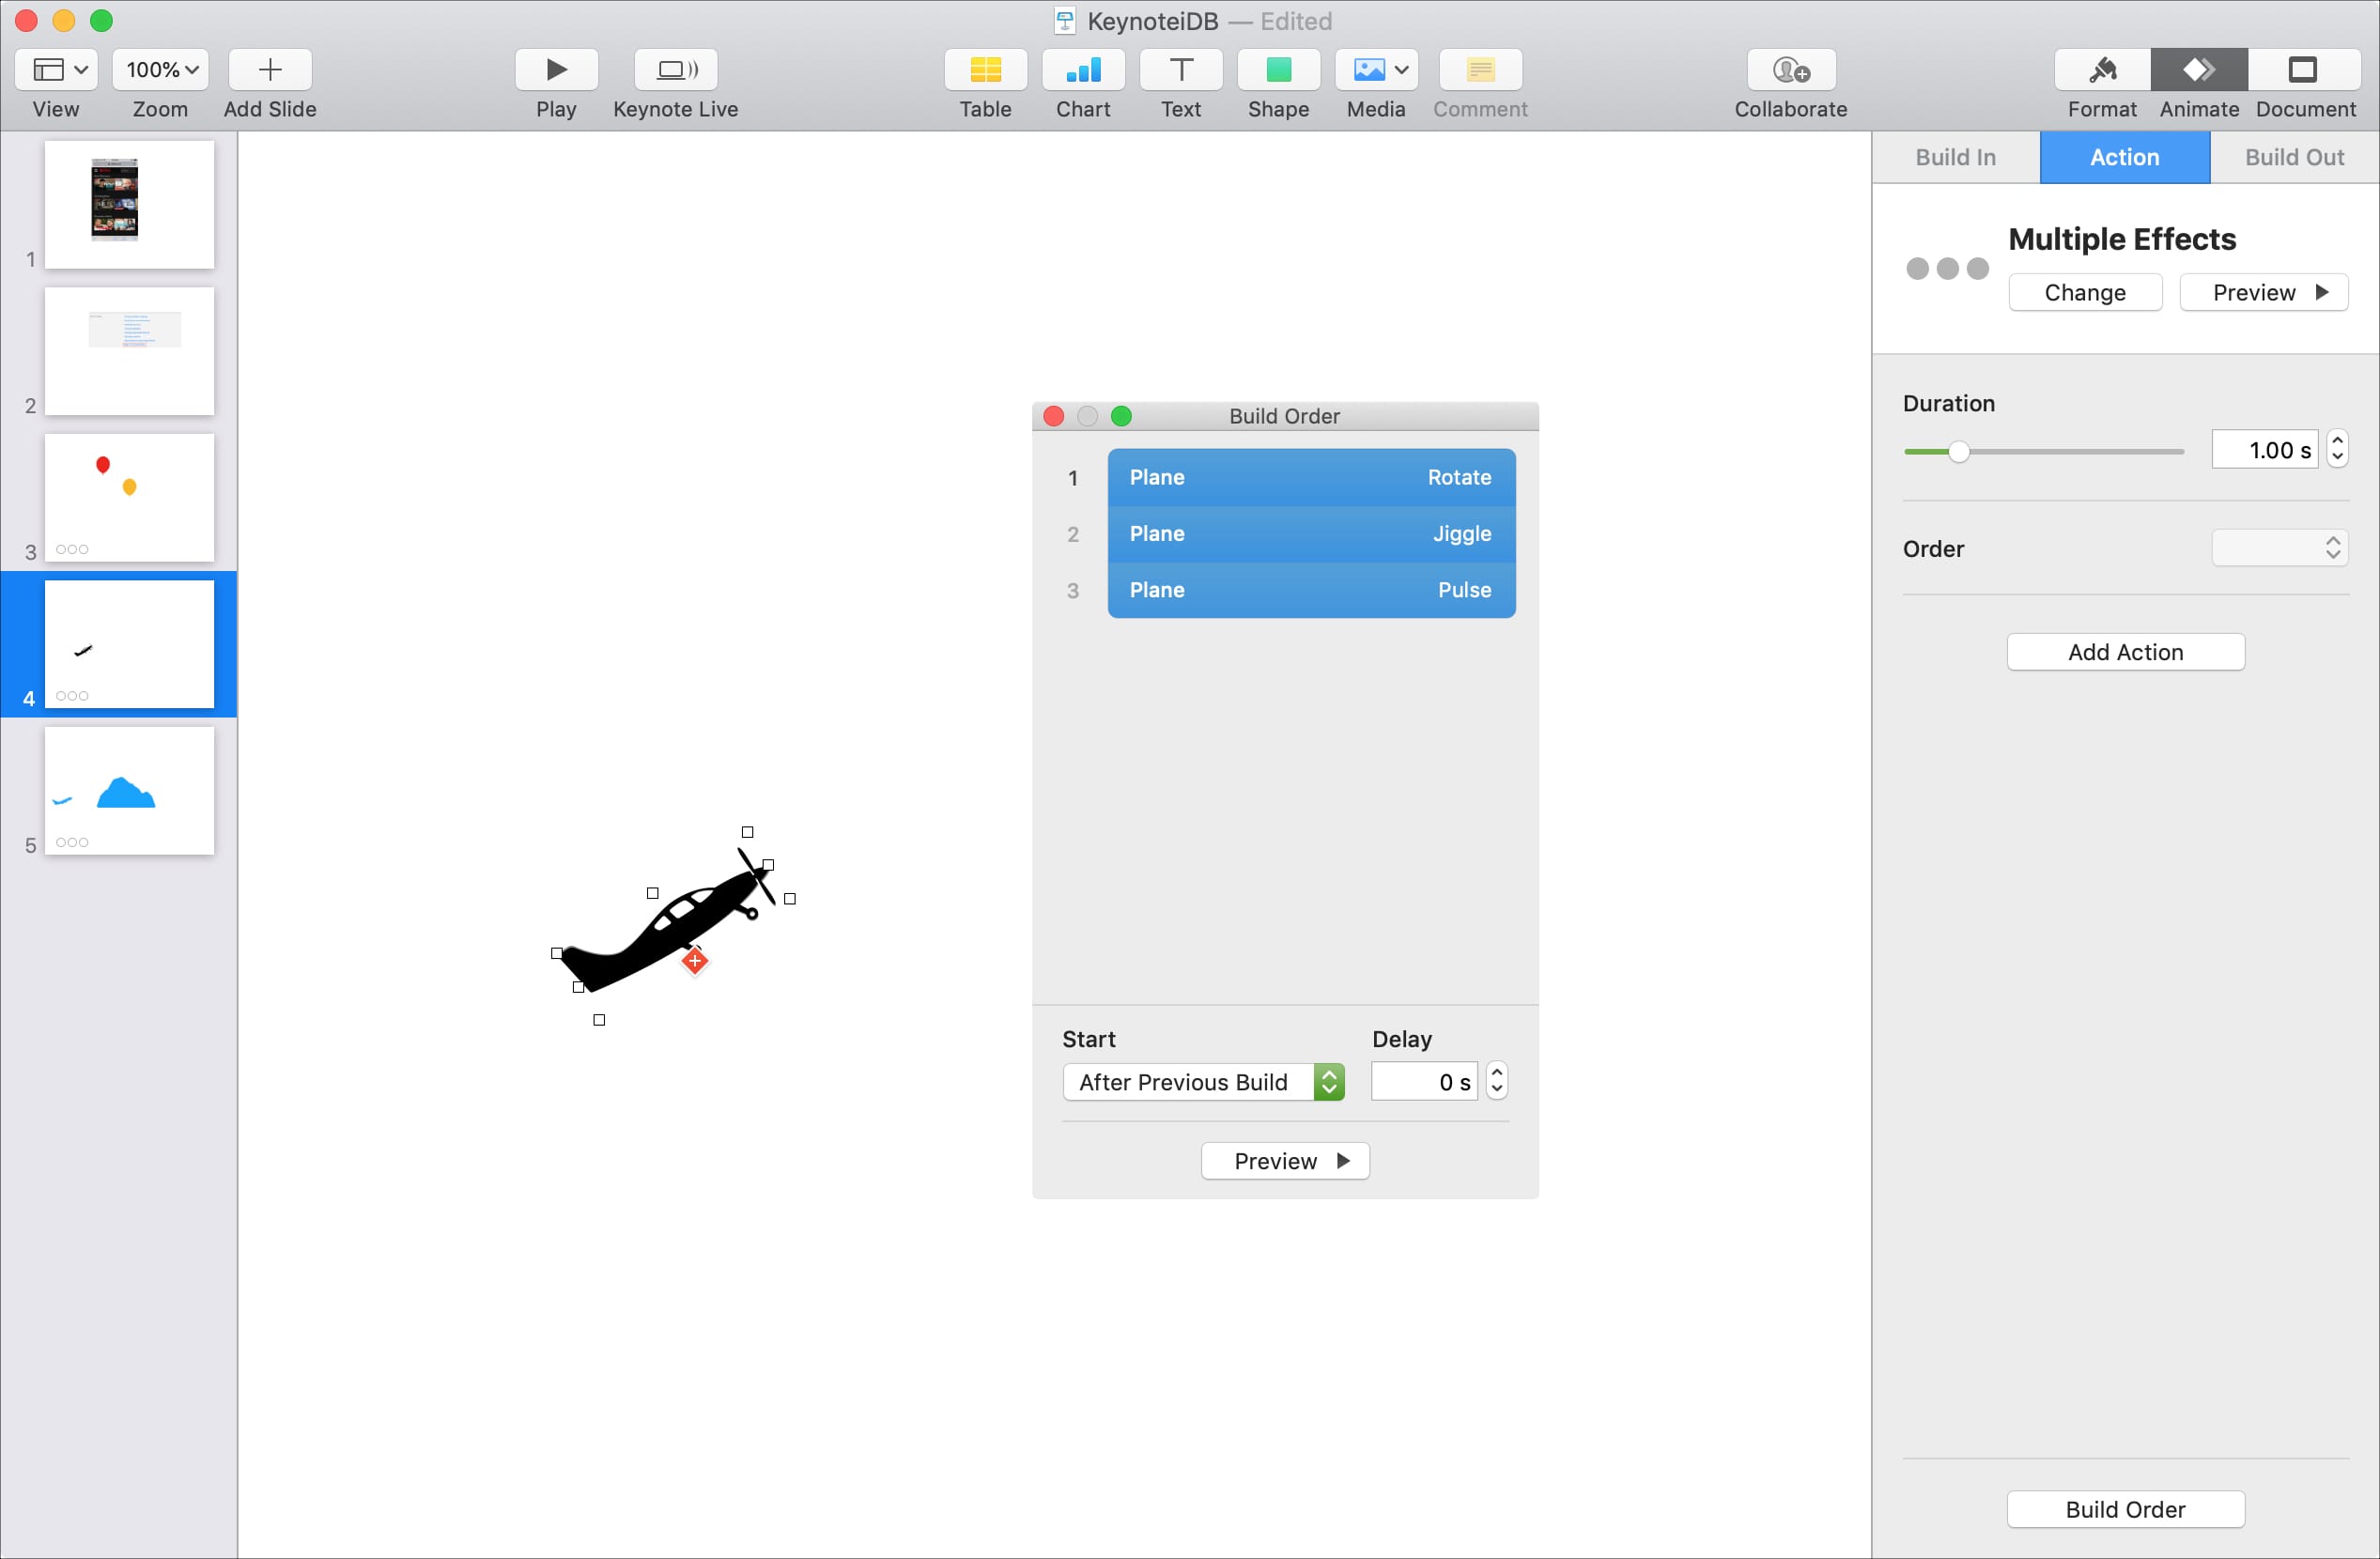
If you want your object to do more than one thing, you can set this up using the Build feature. So, you can have your object rotate, then jiggle, then pulse.
1) Create the first animation for your object using the steps above. Then click Add Action in the Animation sidebar.
2) Go through the same process by selecting the next animation type and adjusting the settings.
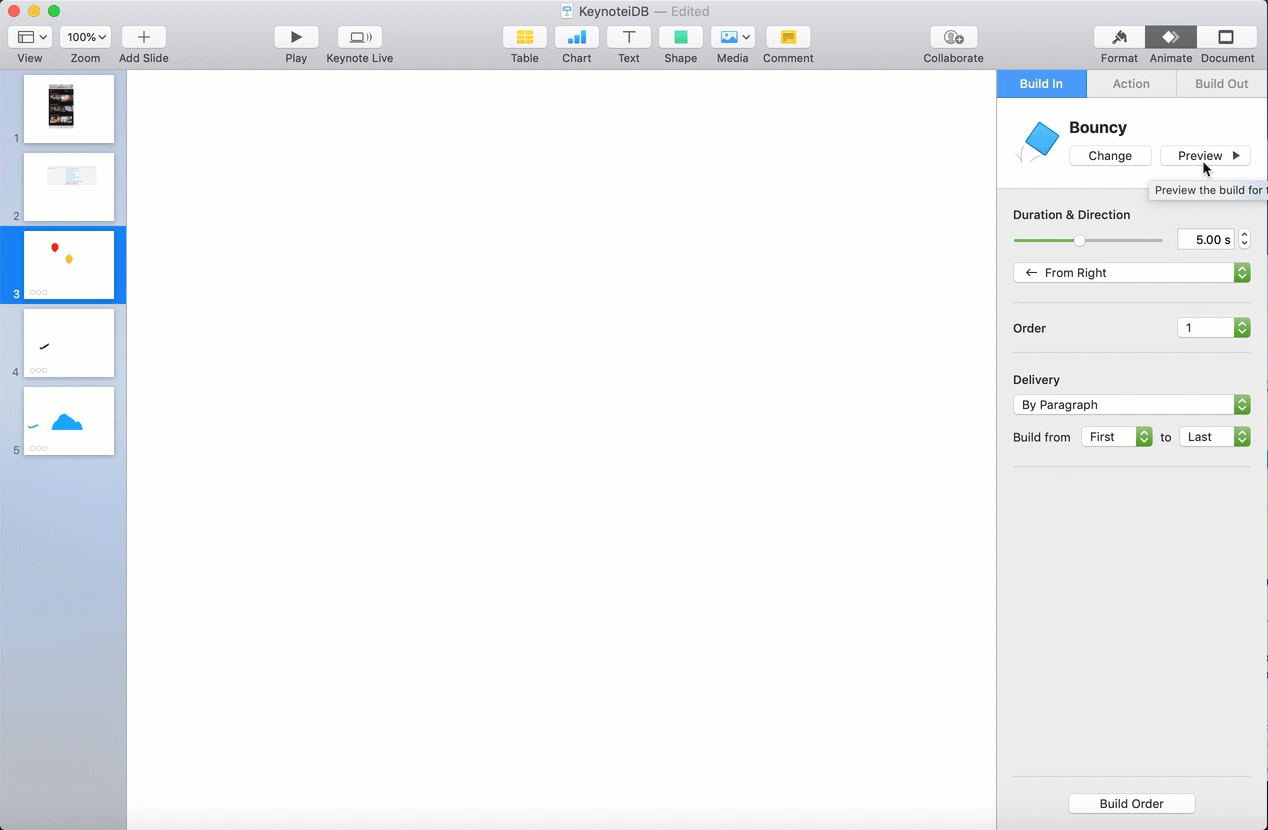
3) When you finish adding actions, click the Build Order button at the bottom of the sidebar.
4) A small window will appear, showing you the actions you set up for the object. Select all of the actions by either clicking the first, holding your Shift key, and clicking the last or use the Command + A shortcut.
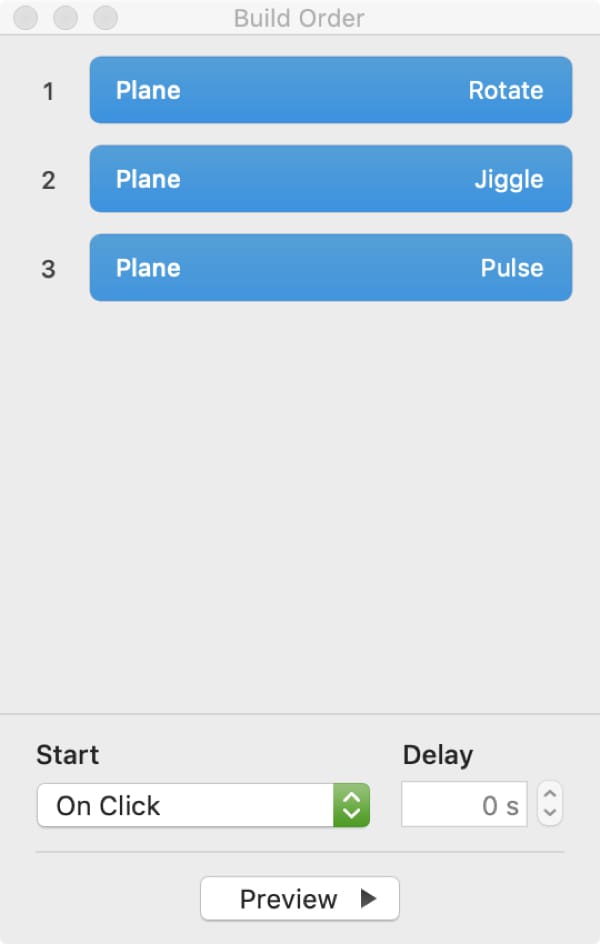
5) At the bottom of the window, under Start, choose After Previous Build. You’ll then see the actions grouped together.
6) Click the Preview button, and you should see your object animated with the combination you create.
You can then close the small window, and you’ll notice under Action in the Animation sidebar Multiple Effects have been applied.
Create a motion path for an object
Maybe the type of movement you need is for an object to move from one place to another on your slide. You can do this by creating a motion path.
1) Select your object, make sure the Animation sidebar is open, and you’re on the Action tab.
2) Click Add an Effect and choose Move.
3) You’ll then see a ghost of your object next to it. Move that ghost to where you want your object to end up at the end of the move. Click Preview to see your animation.
4) If you want to add another animation when your object gets to its destination, click the plus sign on the ghost object and choose one from the list. You can also add one to your original object in the same way.
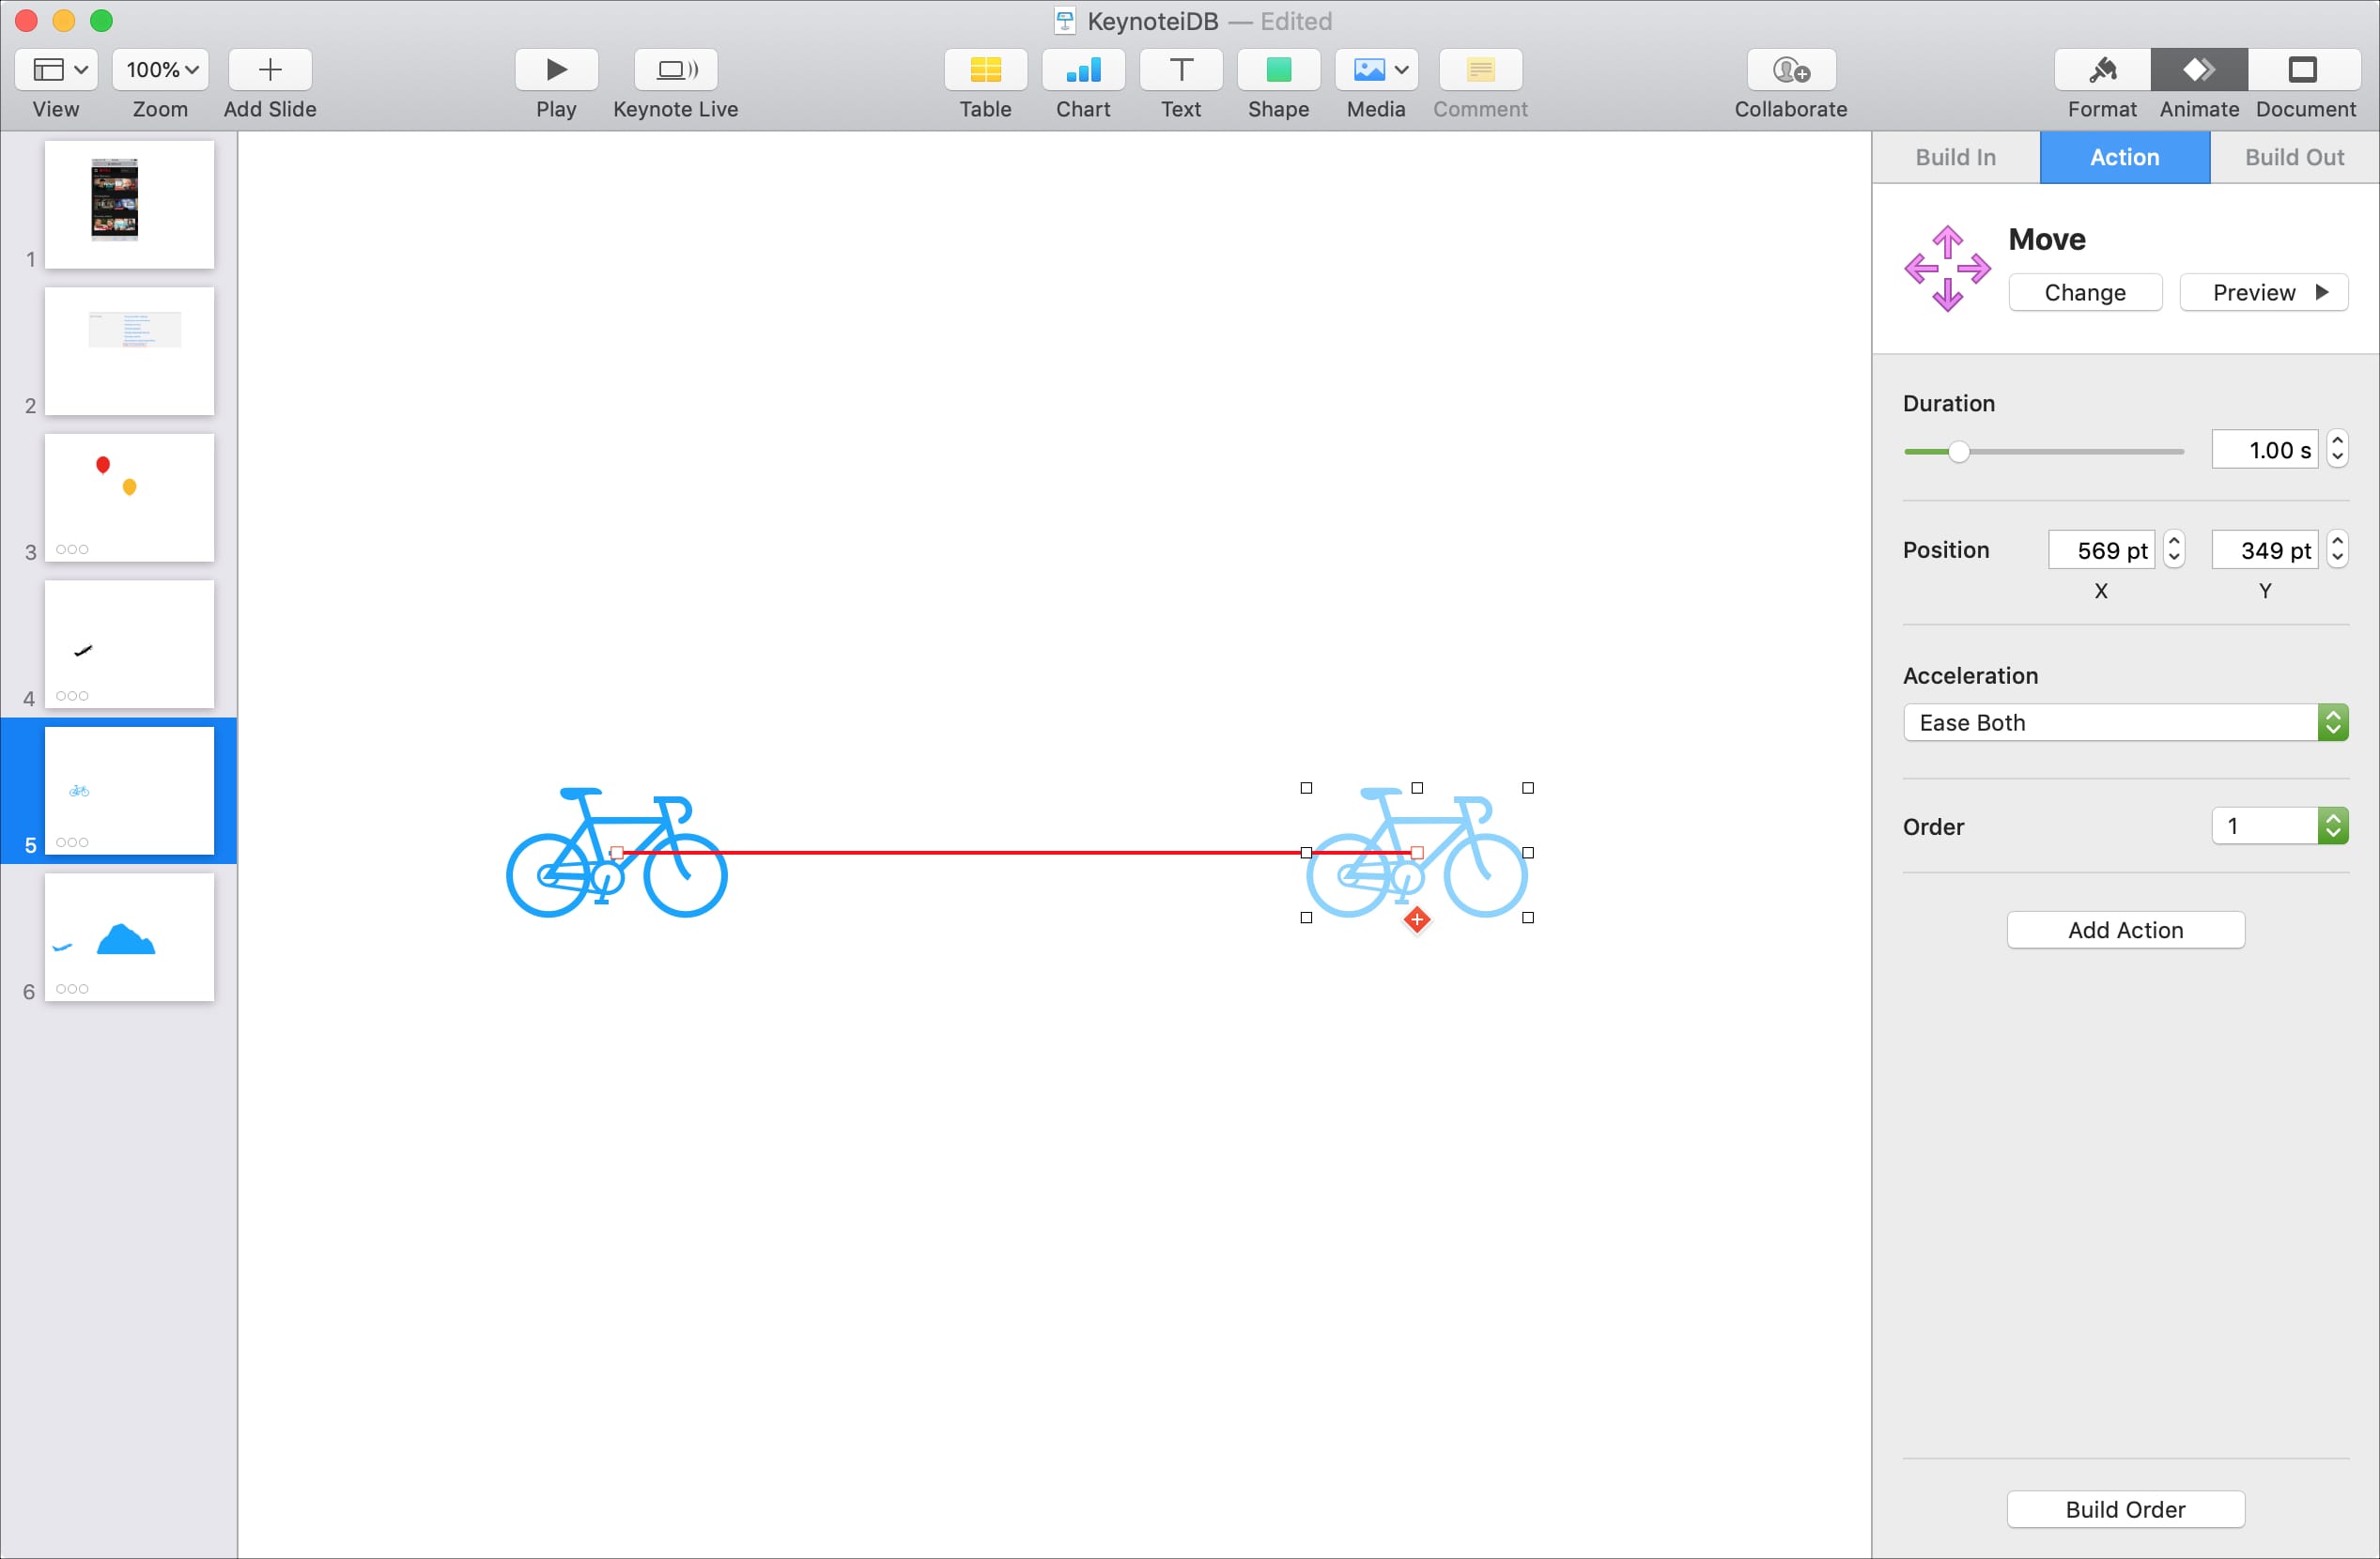
Note: To see the motion path correctly from start to finish, make sure to select your original object when you click the Preview button.
Object animations on slides in Keynote are not appropriate for every type of presentation. But where they add value, you should consider using them.
Are you going to take Keynote animations for a spin?
Useful Keynote tips: