Learn how to have your HomePod recognize your and family member’s voices, and answer questions based on who is making that request.
What is Recognize My Voice and Personal Requests on HomePod?
Imagine you have a HomePod or HomePod mini kept in your living room that all family members use. Now, if voice recognition (Recognize My Voice) is on, HomePod will understand which member is giving the Siri command and then play music that’s personalized for them.
Personal Requests is a sub-option of the voice recognition feature, which takes things further. Once you turn on Personal Requests for yourself (and the respective family members), HomePod will be able to cater to Siri voice requests related to Messages, Calendars, Reminders, Contacts, Notes, and other apps, based on who is asking.
For instance, if you ask HomePod, “Hey Siri, what’s my update,” it will tell you about your day with your calendar events, reminders, and such. Next, if your spouse asks this to HomePod, it will reply with their day’s events and reminders. You get the idea…
All in all, with Personal Requests enabled for Siri on your HomePod, you and your family members can send text messages, call your contacts, check your calendar, and create notes and reminders. This is a convenient way to use your Apple smart speaker because you don’t have to lift a finger to do any of these things.
After activating Personal Requests, Siri on HomePod gets access to Messages, Contacts, Notes, Calendars, Reminders, and other third-party iPhone apps that work with Siri.
Turn on voice recognition and Personal Requests for HomePod
1) Make sure your iPhone and HomePod are connected to the same Wi-Fi network. After that, open the Home app on your phone.
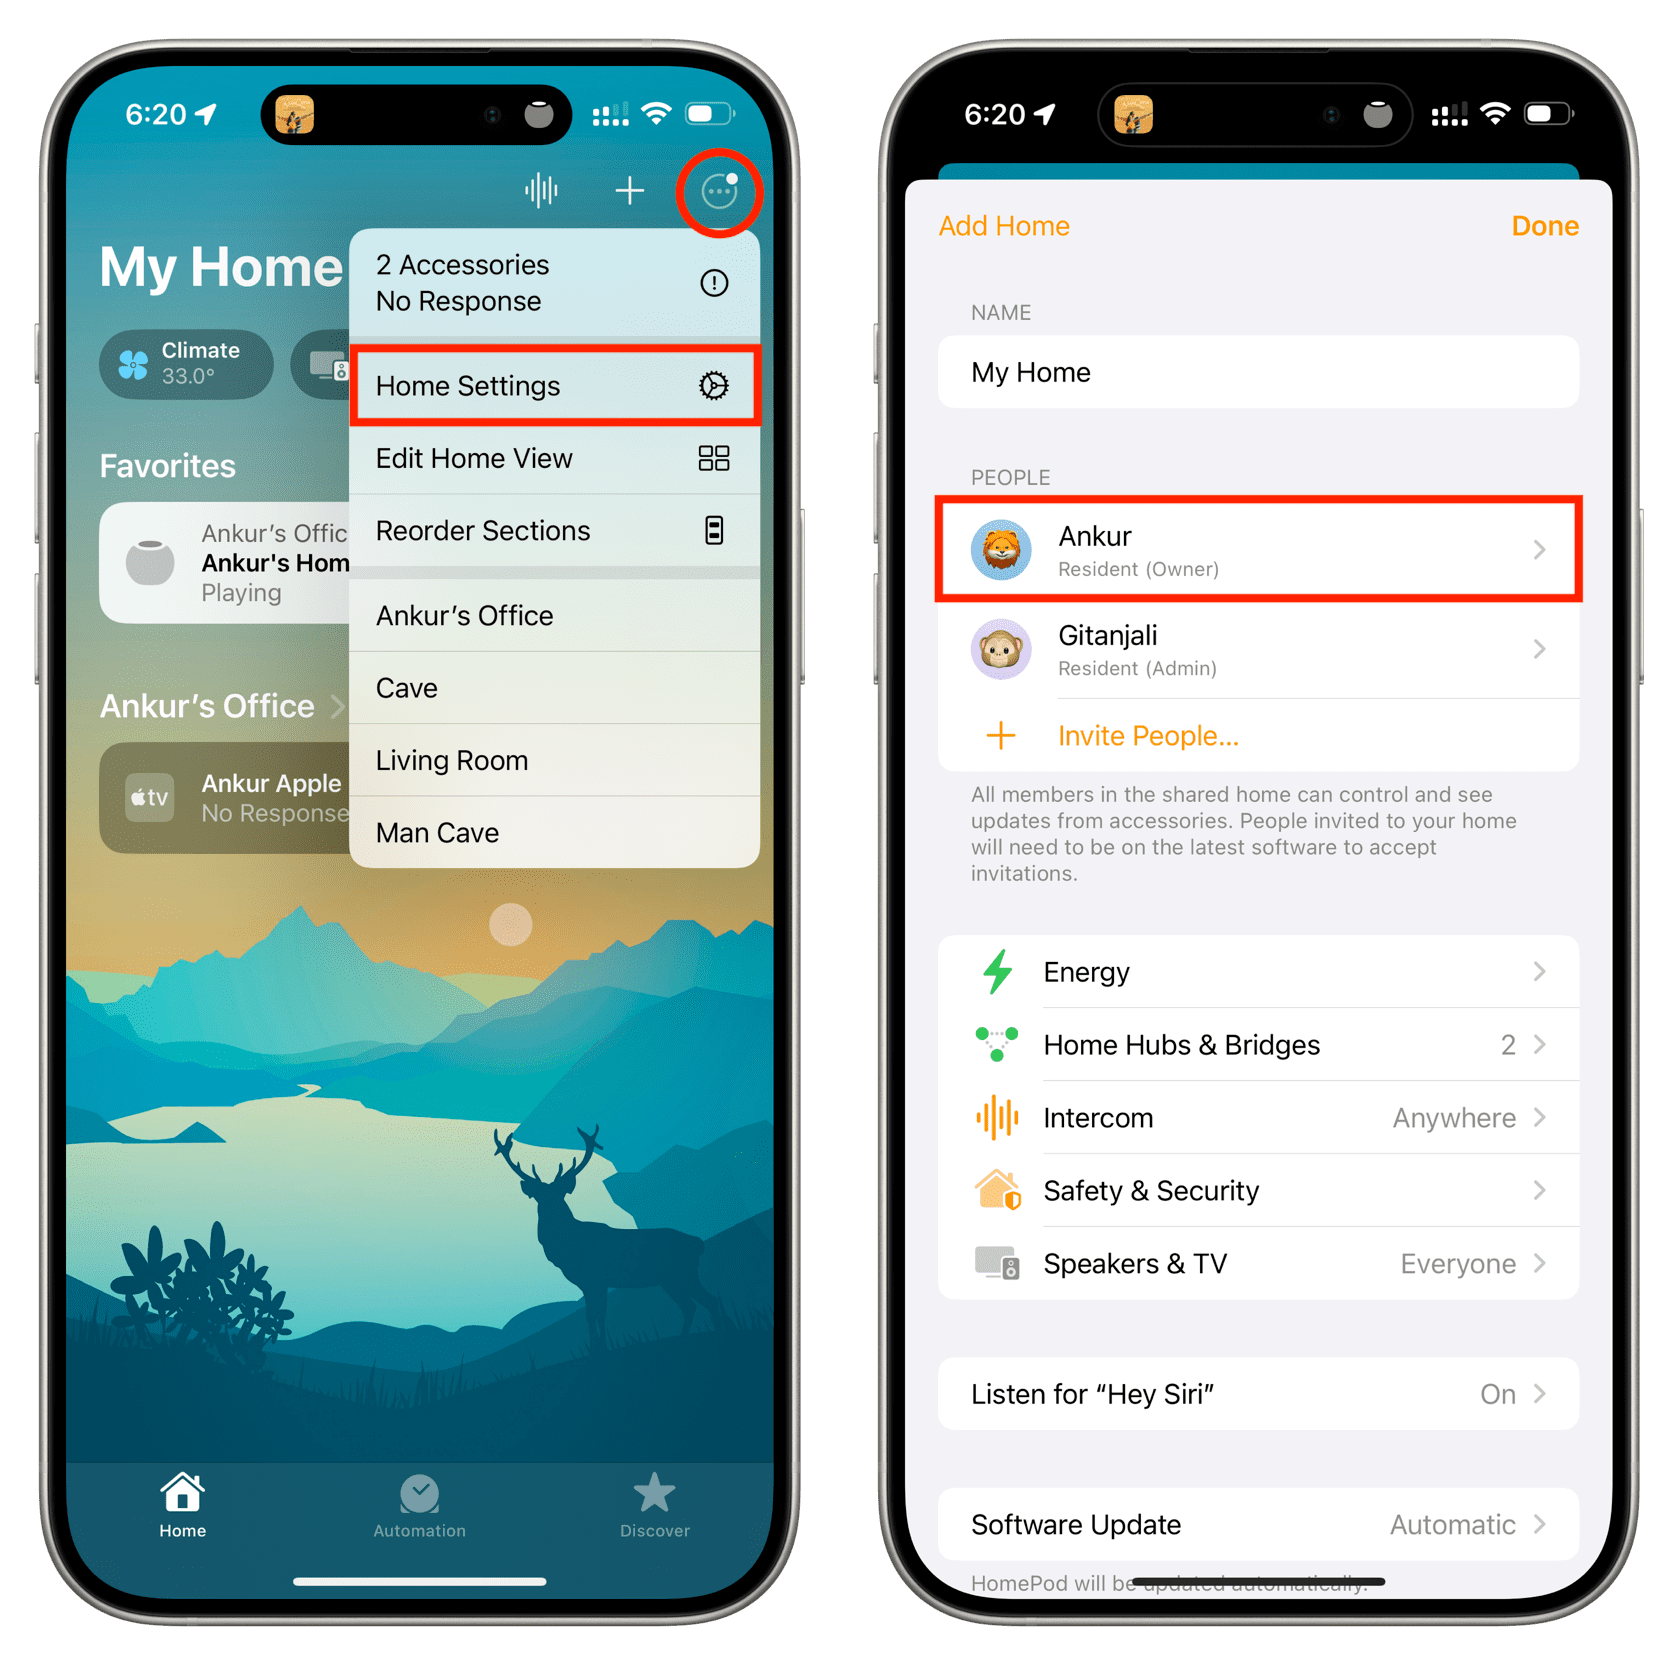
2) Tap the three dots menu icon from the top and select Home Settings.
3) Tap your name under the People heading.
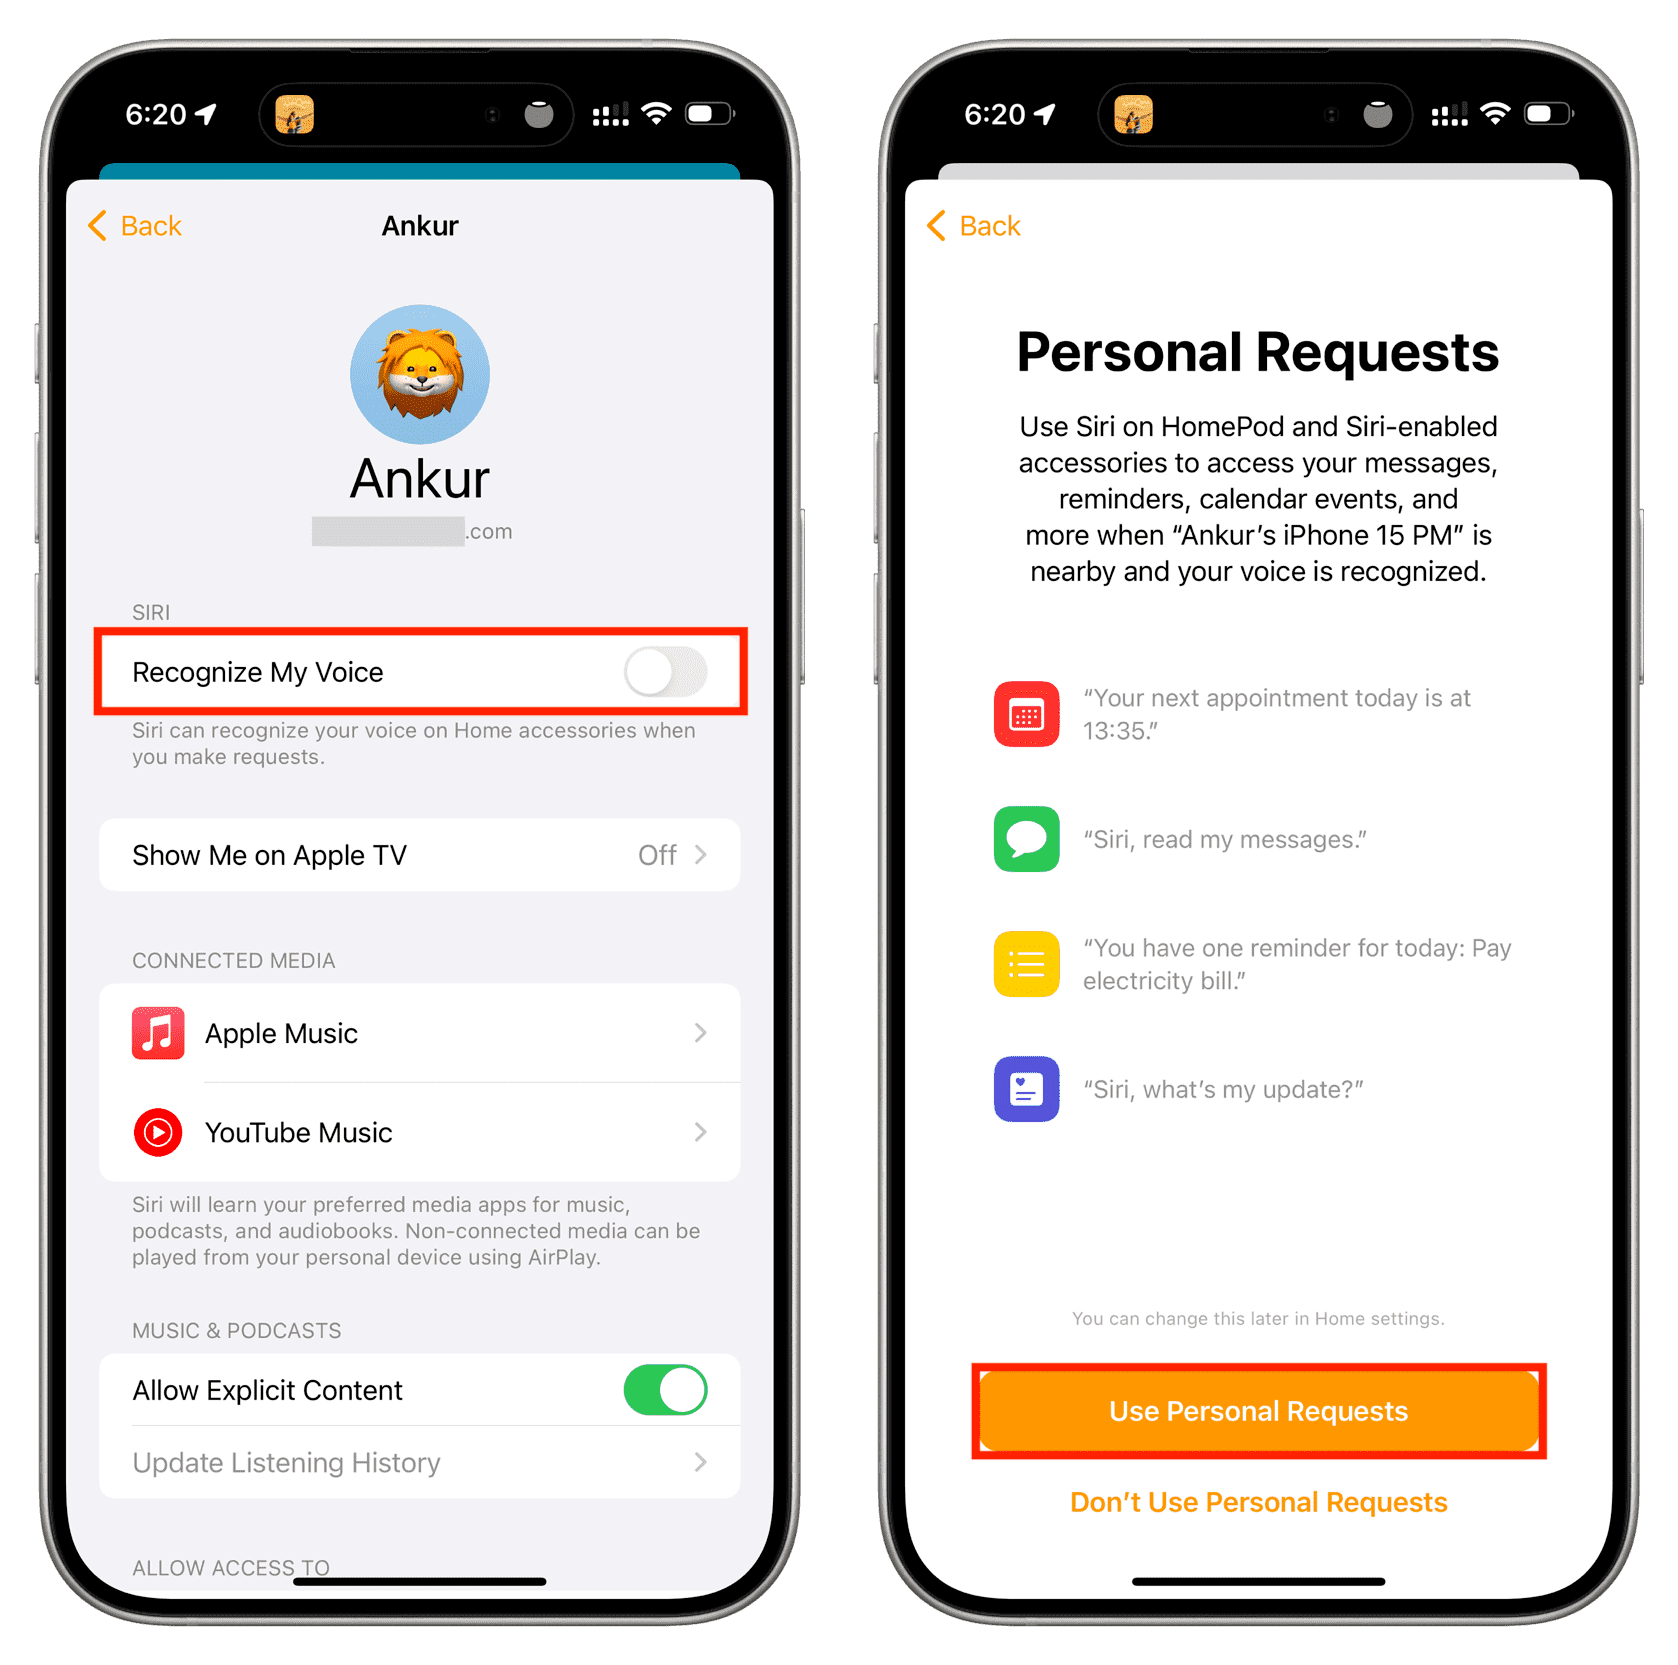
4) Switch on Recognize My Voice, and you will see a few splash screens. Tap Continue. You may also be asked to finish the Siri setup, so do that.
Additionally, you will see a “Personal Requests” screen. Go through it and tap Use Personal Requests.
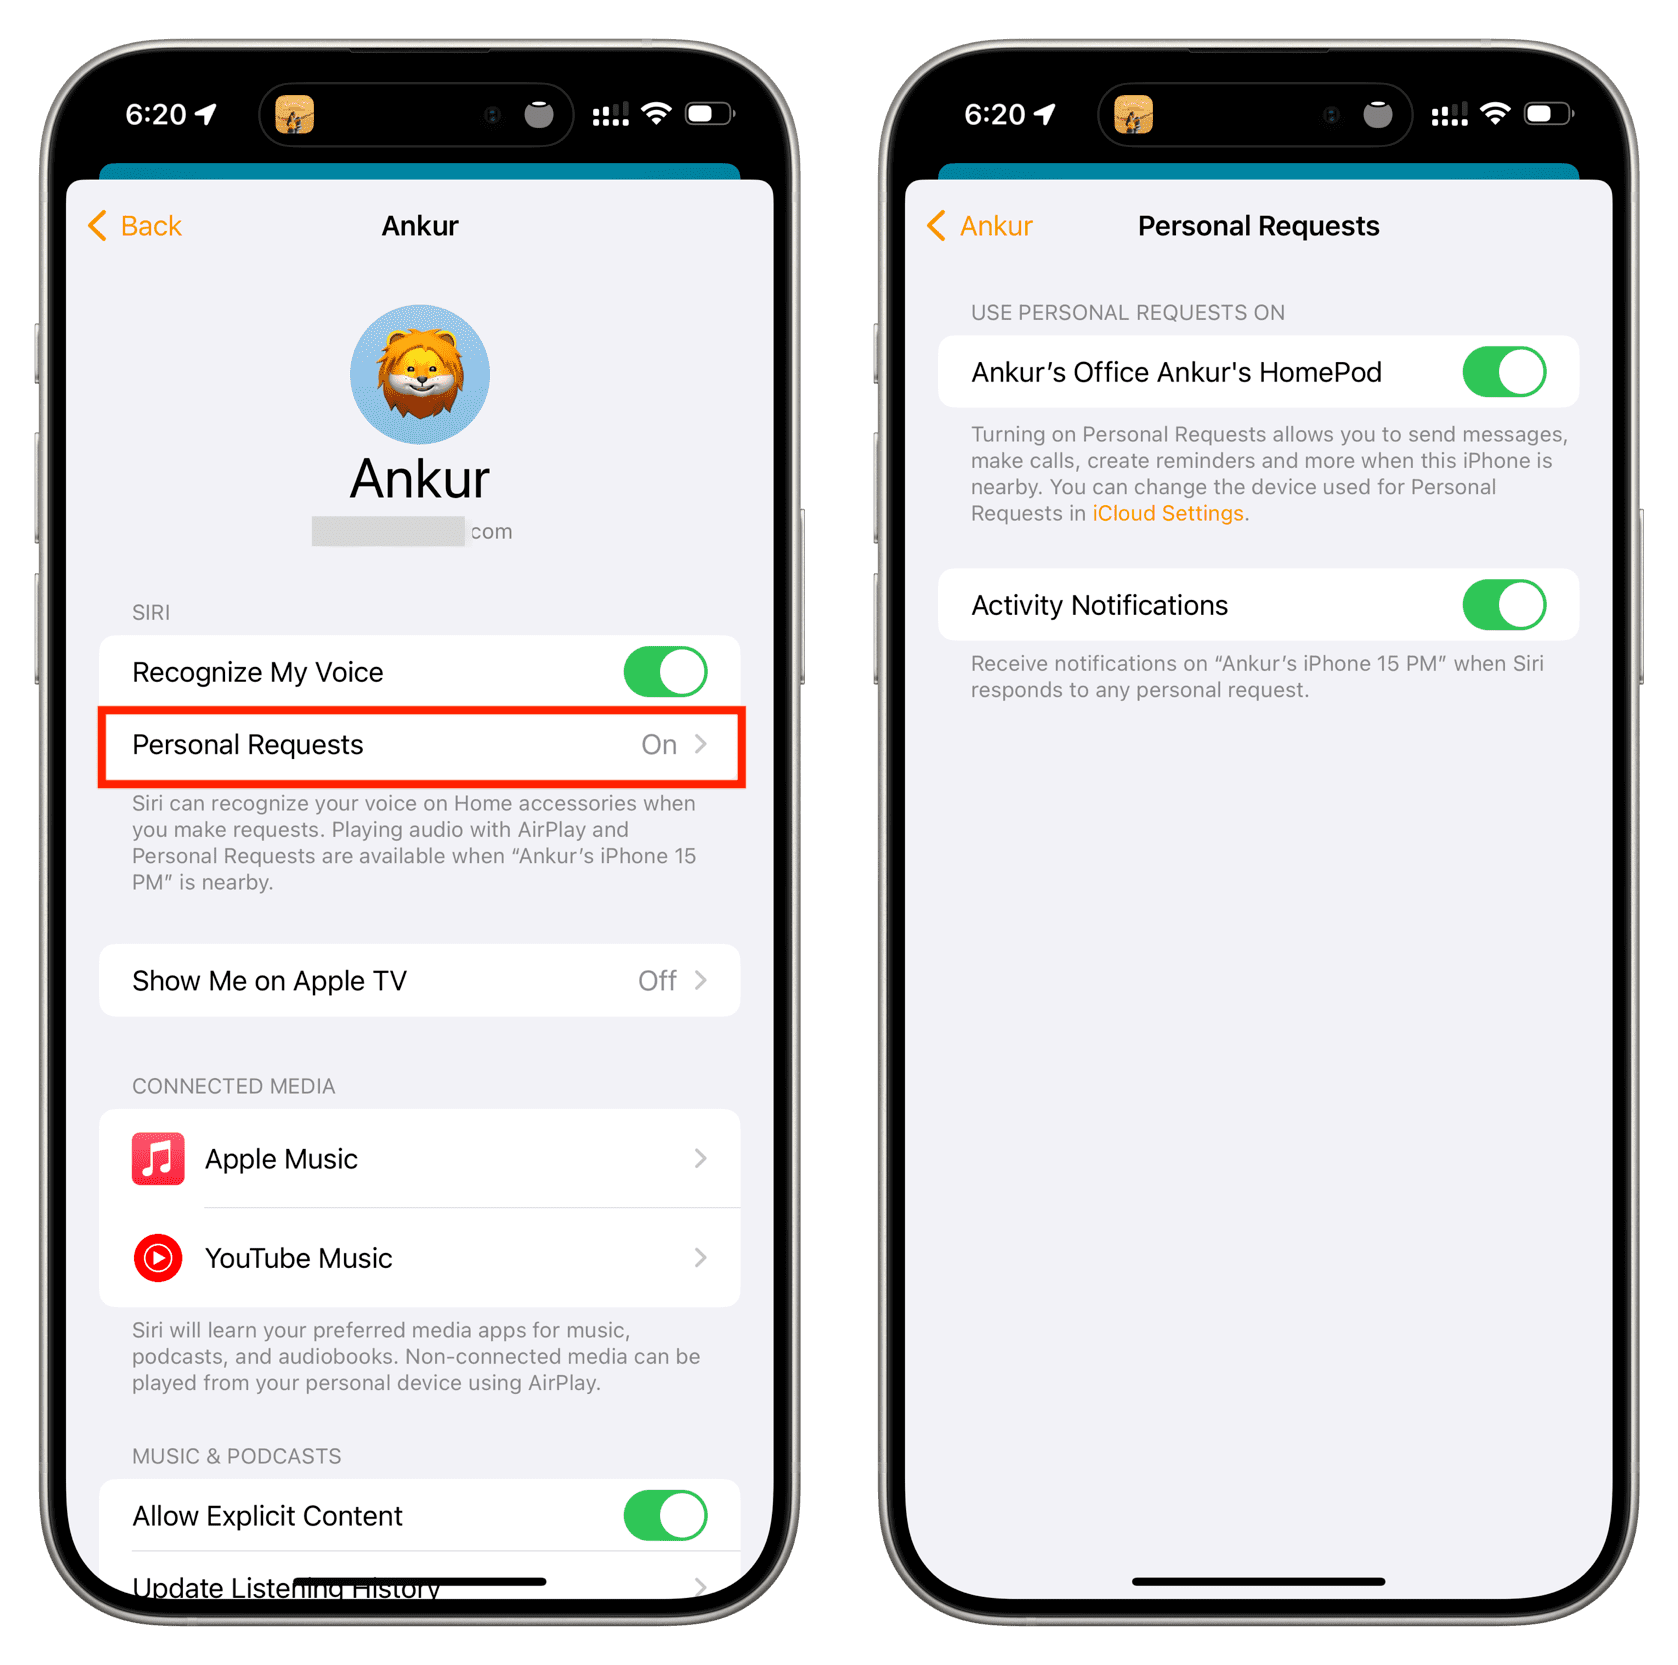
5) Next, if you have multiple HomePods, you can decide on which ones you want to use Personal Request on. To do that, tap Personal Request under the Recognize My Voice option. Now, turn on or off the switch for your various HomePods.
With everything in order, your HomePod will now recognize your voice and cater to your personal requests.
If you have added family members to your Home (Home app > Home Settings > Invite People), grab their iPhone and follow the above steps on their device to activate Recognize My Voice and Personal Requests for them. Note that when enabling Recognize My Voice, if Siri asks to do a little training, then have that family member do it in their voice.
Making Personal Requests on HomePod
Once you’re set up, you can make Personal Requests that use Messages, Phone, Calendar, Reminders, Notes, and other apps. Here are some examples of what you can ask for.
Messages
- “Hey Siri, send a message to Abby that says {message}.” When Siri asks if you want to send it, say “Yes” or “No.”
- “Hey Siri, send a message to Abby and Julie.” Tell Siri what the message should say, and then confirm you want to send it.
- “Hey Siri, read my messages from Abby.”
- “Hey Siri, do I have any new messages?”
Phone
- “Hey Siri, call Abby.”
- “Hey Siri, hang up.”
- “Hey Siri, answer my phone.”
- “Hey Siri, who just called me?”
- “Hey Siri, play my voicemails.”
Calendar
- “Hey Siri, what’s on my calendar for today?”
- “Hey Siri, do I have any events at 2pm today?”
- “Hey Siri, where is my 2pm event today?”
- “Hey Siri, create an event named {event name} for {date and time}.”
Reminders
- “Hey Siri, remind me to do laundry at 2pm today.”
- “Hey Siri, mark do the laundry complete.”
- “Hey Siri, what are my reminders for today?”
- “Hey Siri, remind me to pick up milk when I leave work.”
Notes
- “Hey Siri, create a note that says {note text}.”
- “Hey Siri, add {new item} to my {existing} note.”
- “Hey Siri, read my {folder name} notes.”
Related: How to use your HomePod to find your iPhone and other Apple devices
You can learn more about making personal requests on this Apple Support page.
What to do if you can’t set up HomePod voice recognition or Personal Requests
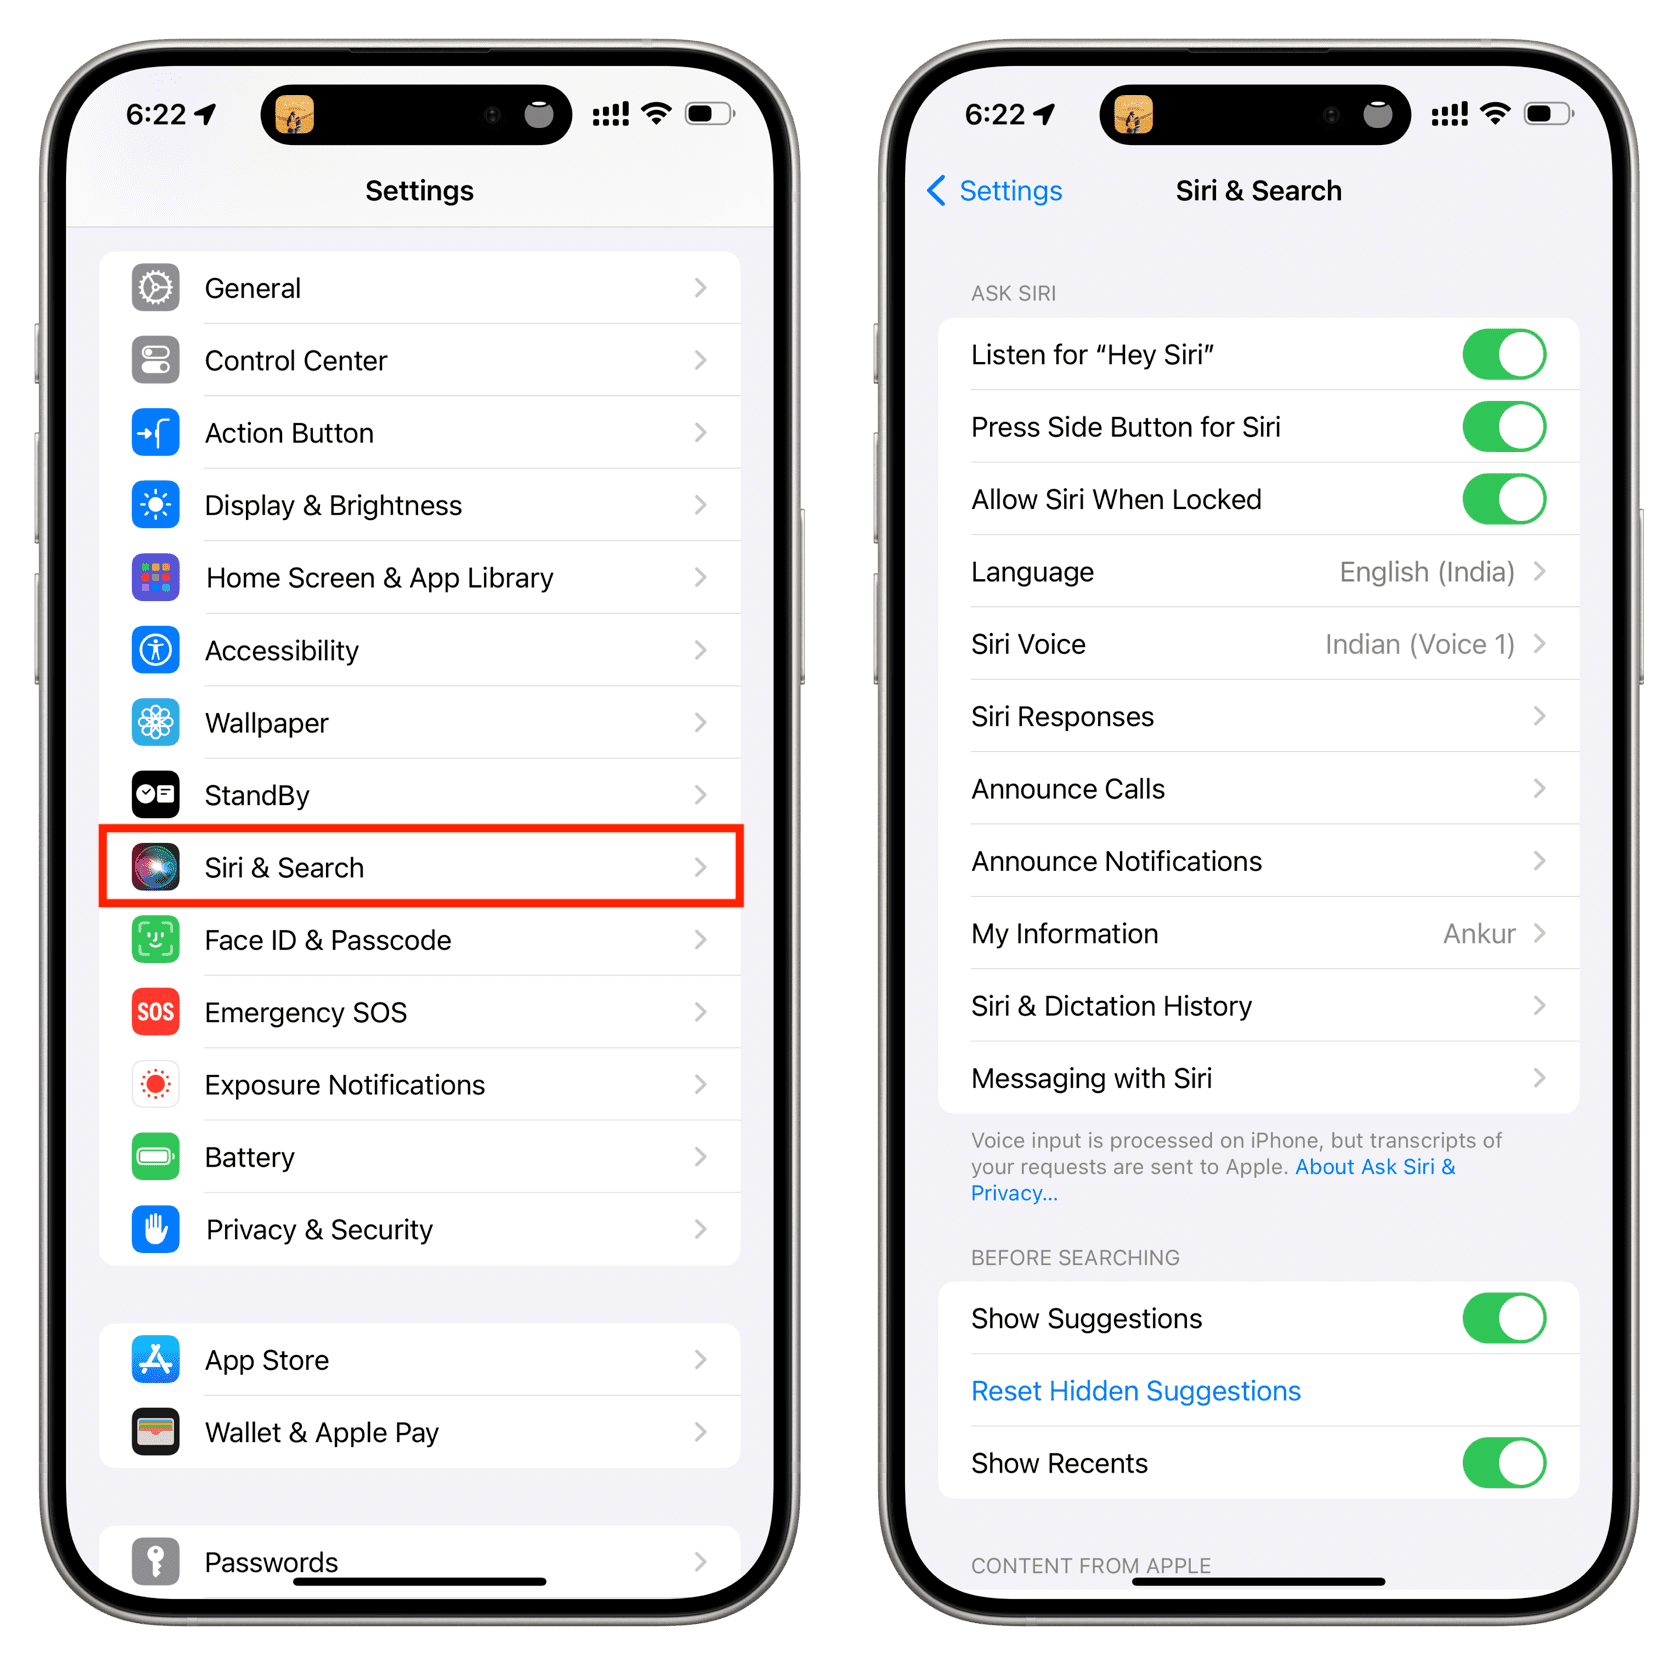
Fix 1: Go to iPhone Settings > Siri & Search and turn on Listen for “Hey Siri”, Press Side Button for Siri, and Allow Siri When Locked.
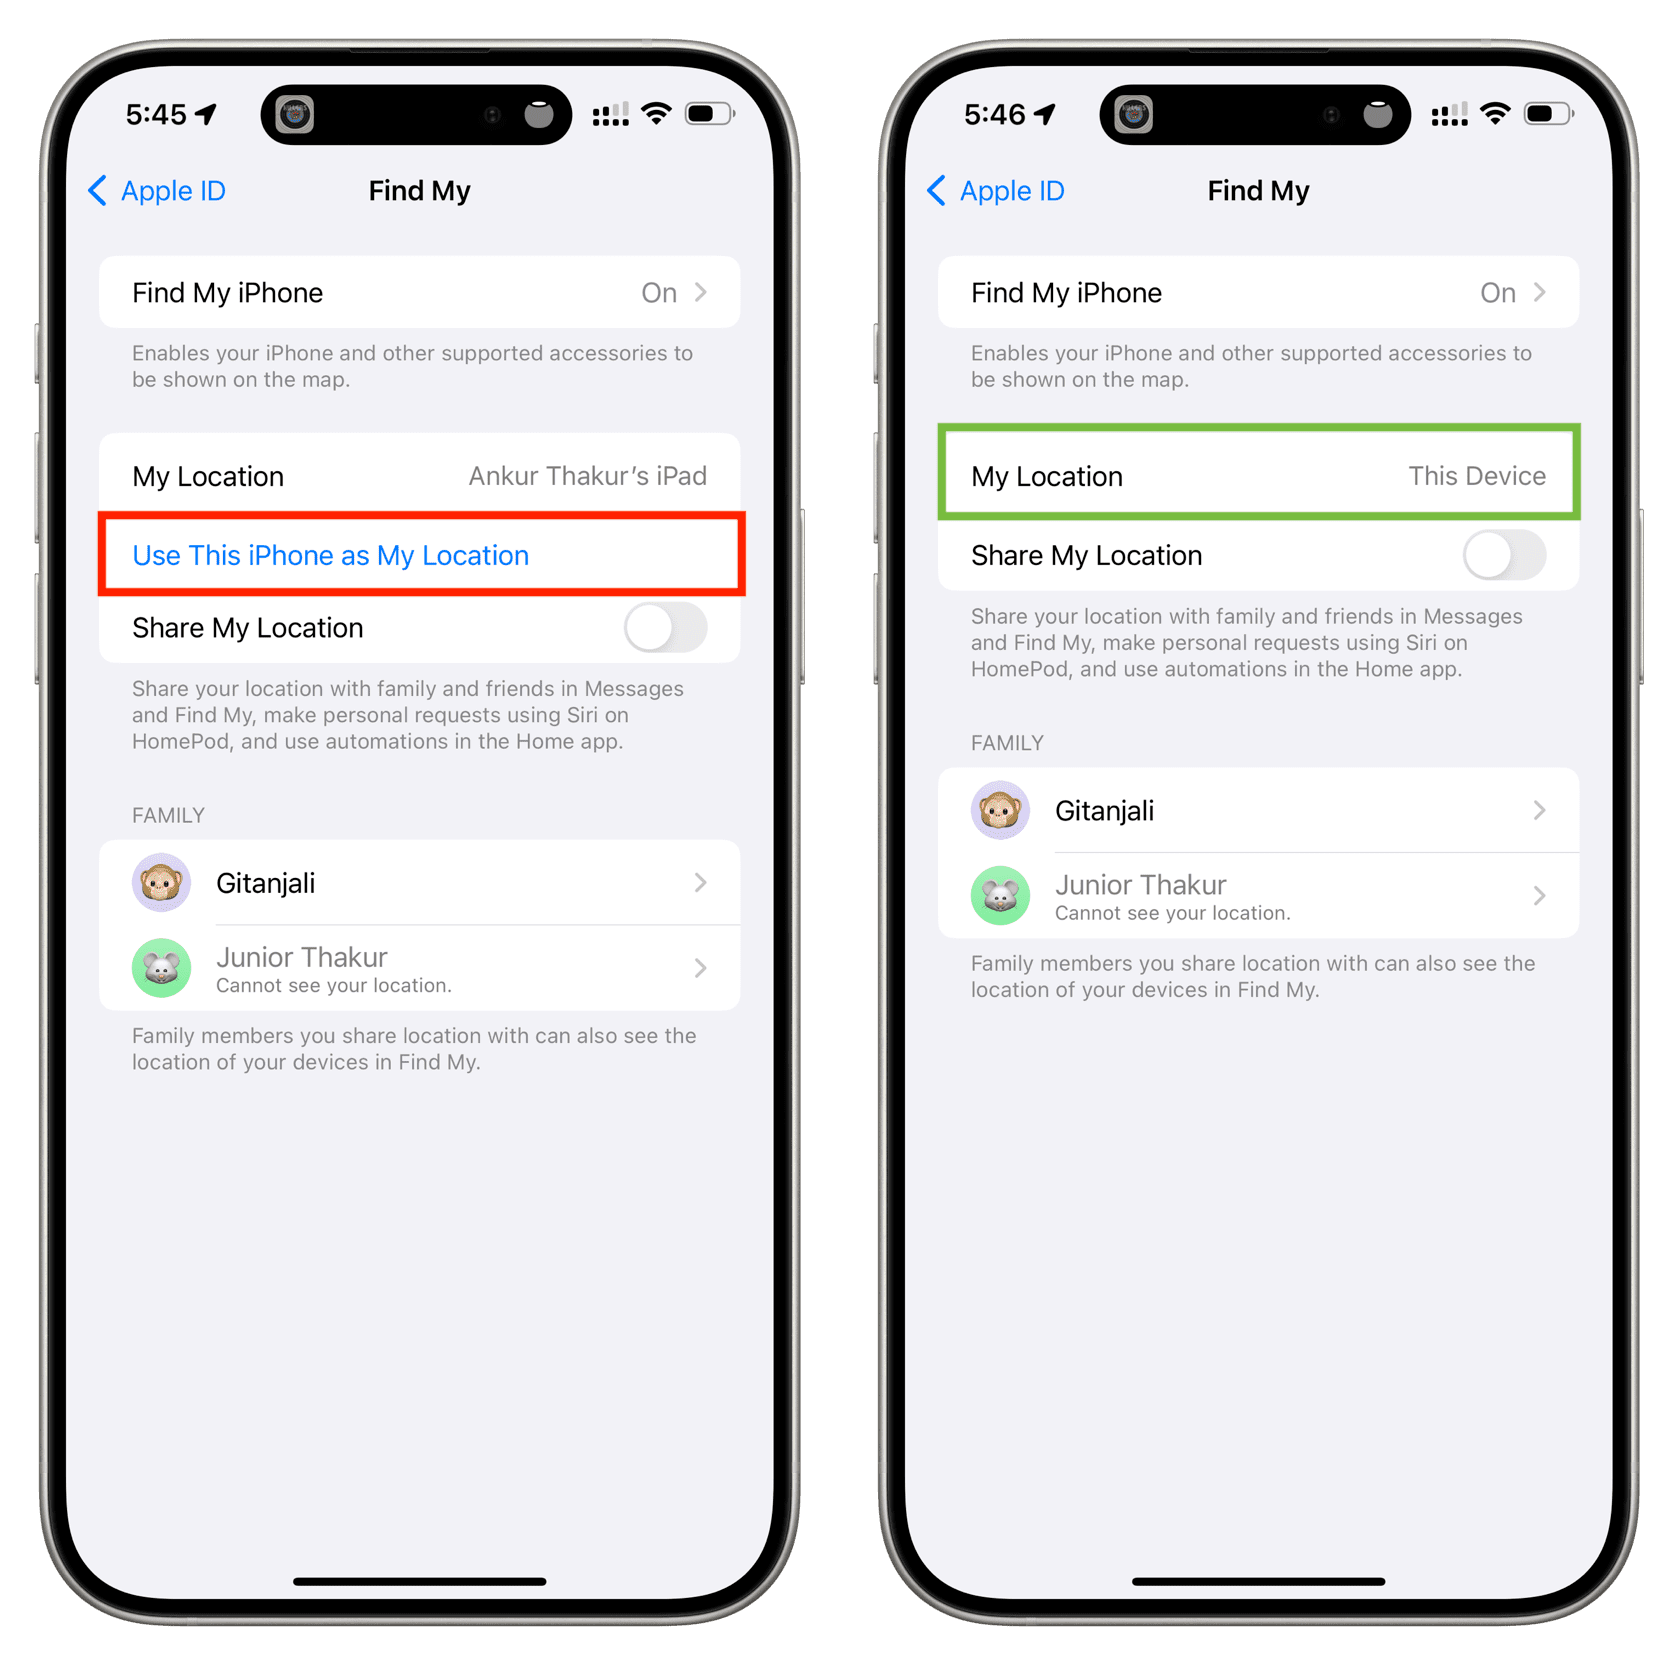
Fix 2: Open the Settings app and tap your Apple ID name from the top. Now, tap Find My and make sure it says This Device next to My Location. If one of your other devices is being used, tap Use This iPhone as My Location.
Fix 3: Open the iPhone Settings app and tap your Apple ID name. Now, tap iCloud > Show All and make sure the switch next to Siri is green. This allows Siri to use iCloud, which is a requirement for using voice recognition on HomePod.

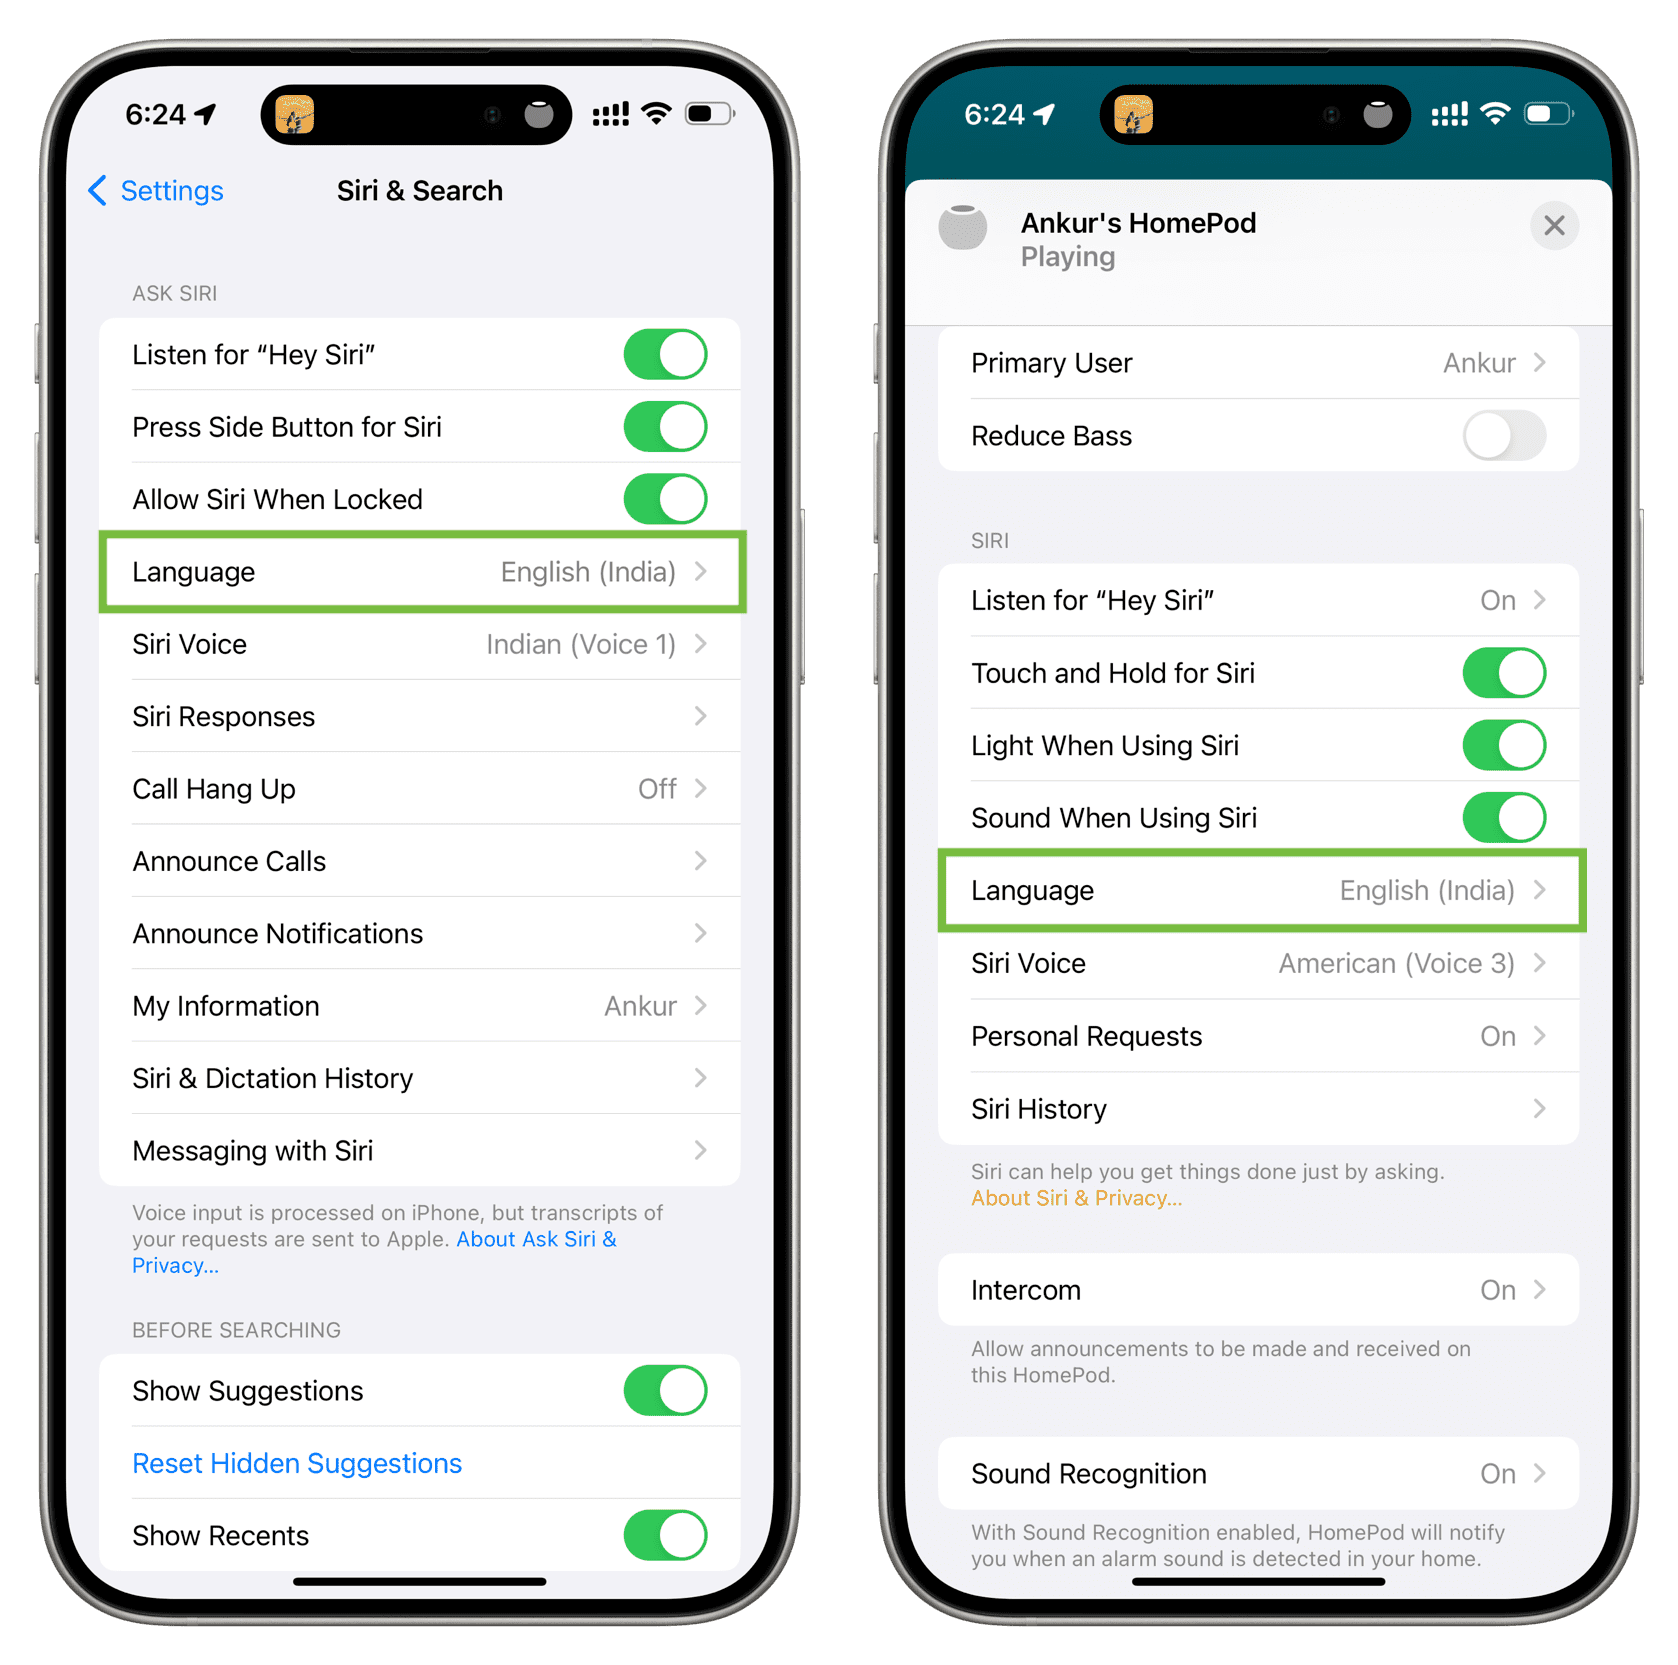
Fix 4: Make sure your (or your family member’s) iPhone’s Siri language (Settings > Siri & Search > Language) and HomePod’s Siri language are the same.
Fix 5: If the problem persists:
- Force close and reopen the Home app a couple of times.
- Restart your iPhone.
- Reboot your HomePod.
- Make sure your HomePod is updated. Also, ensure your iPhone is running the latest version of iOS.
Turn off Personal Requests
The Personal Requests feature is a handy one but it’s not for everybody. If you’re concerned about privacy or actually need help turning it off, check out our article on disabling Personal Requests.
Read next: How to get alerted if HomePod hears your smoke or carbon monoxide alarms