The Smart Folder feature in Finder on Mac is a handy way to automatically place items into a folder for you. This saves you time, reduces the risk of missing items, and helps you work more efficiently.
In this tutorial, we will go over how to create and use Smart Folders on your Mac in order to increase productivity.
Create a Smart Folder
To get started, open Finder on your Mac. Then click File > New Smart Folder from the menu bar.
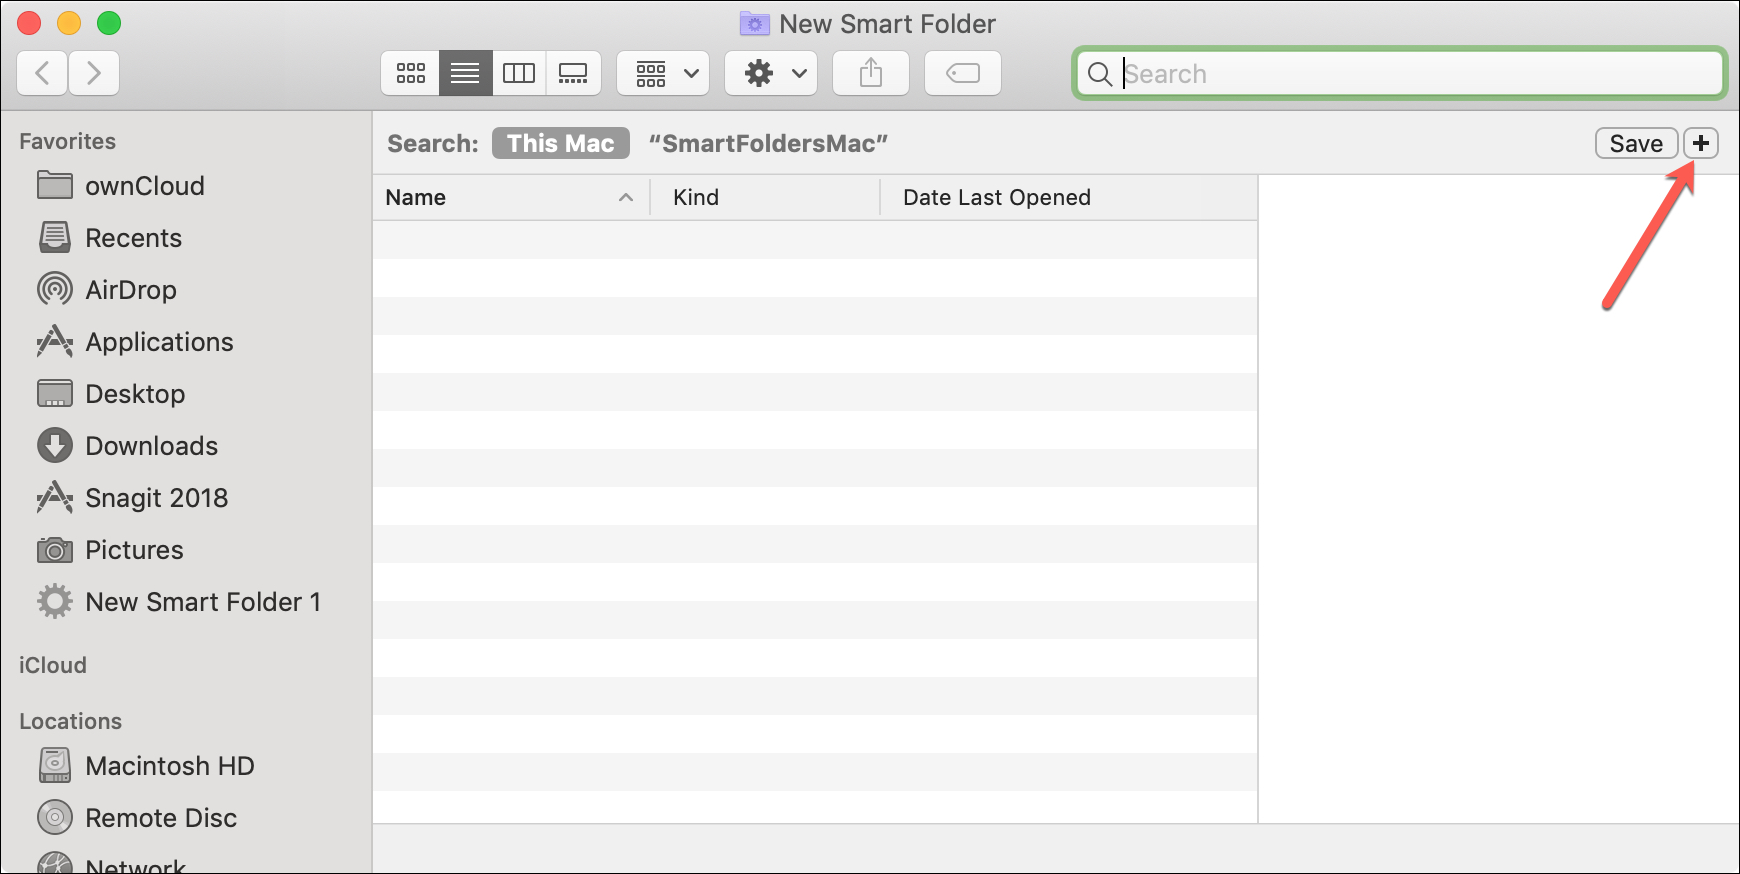
When the New Smart Folder window opens, choose where the items for the folder should come from, such as This Mac. Then, click the plus sign on the right to add attributes for the Smart Folder.
Folder by kind
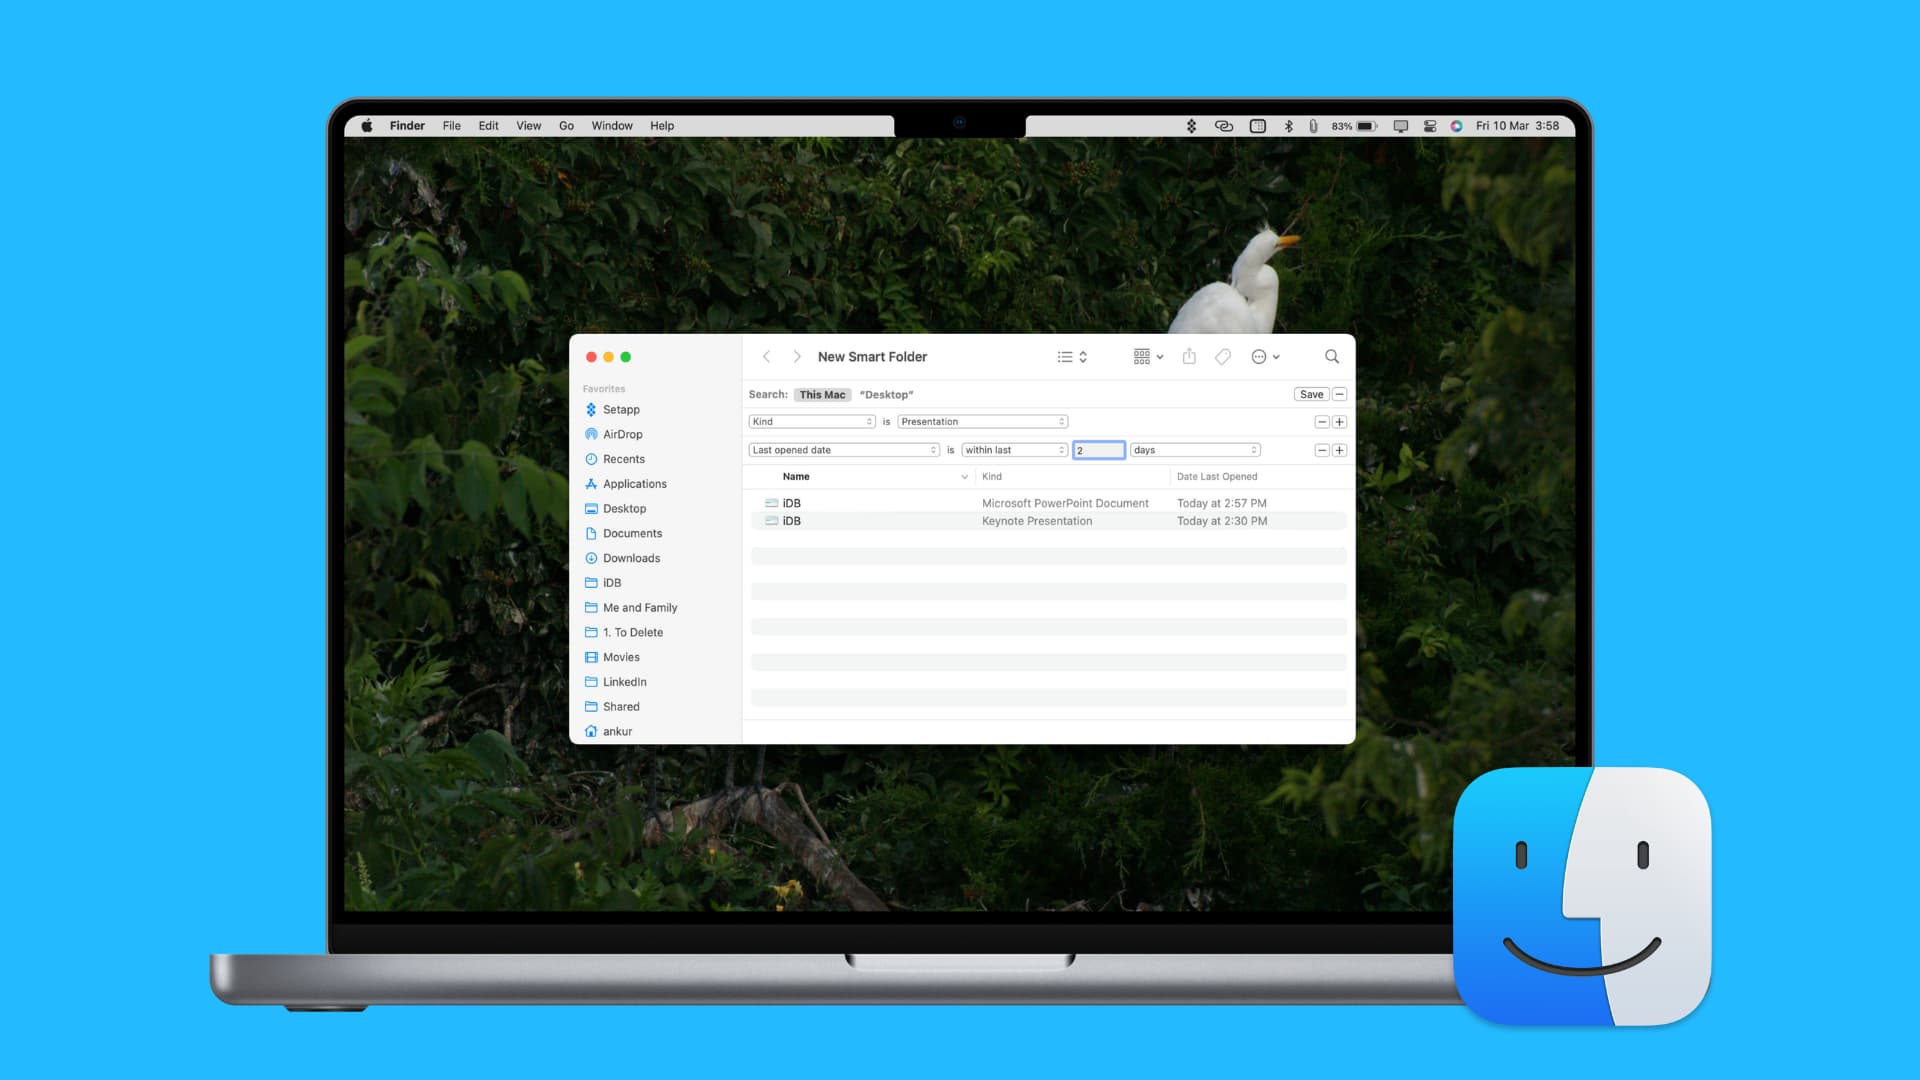
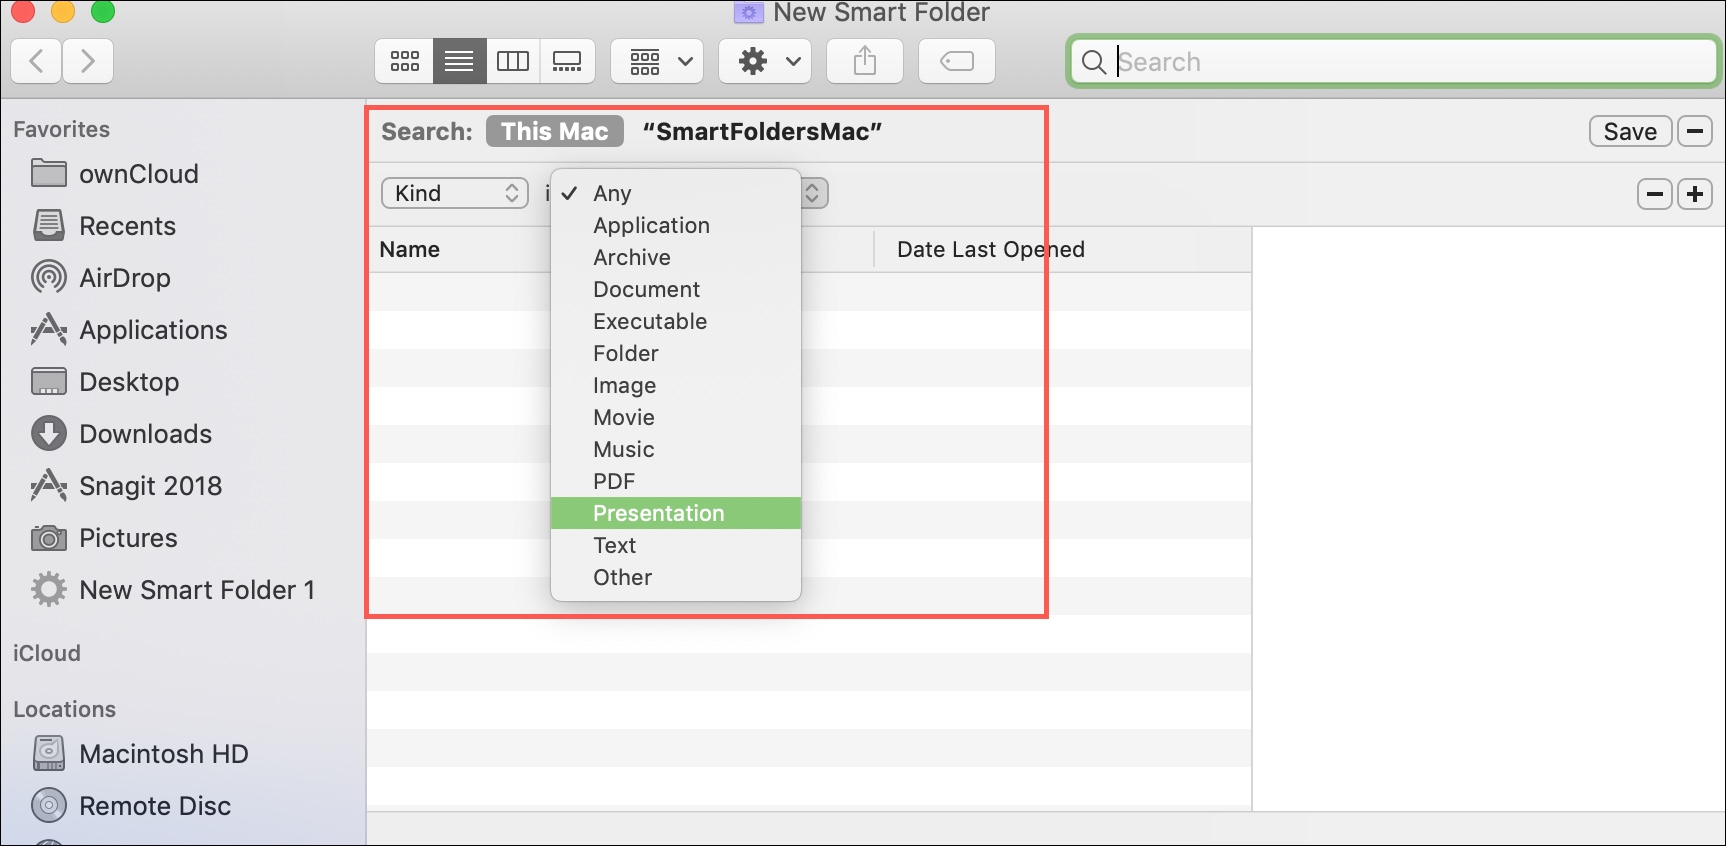
One important criteria you see is for Kind. In the box next to it, you can choose the kind with options for application, document, folder, image, and others.
So, say you want to have a special folder for all of the presentations you create because you have them scattered in various folders. You can select Kind is Presentation.
Then, whenever you create a new presentation, regardless of where you save it, you’ll be able to access it from the new Smart Folder as well.
Folder by date
If you don’t want to use Kind, you can click the drop-down box for additional options. You’ll see that you can create a Smart Folder using dates like Last opened date, Last modified date, or Created date.
This can be convenient for having quick access to your most recent items, for example. For this type of folder, select Last opened date. And say you want all items opened on the previous day, so pick yesterday in the next drop-down box.
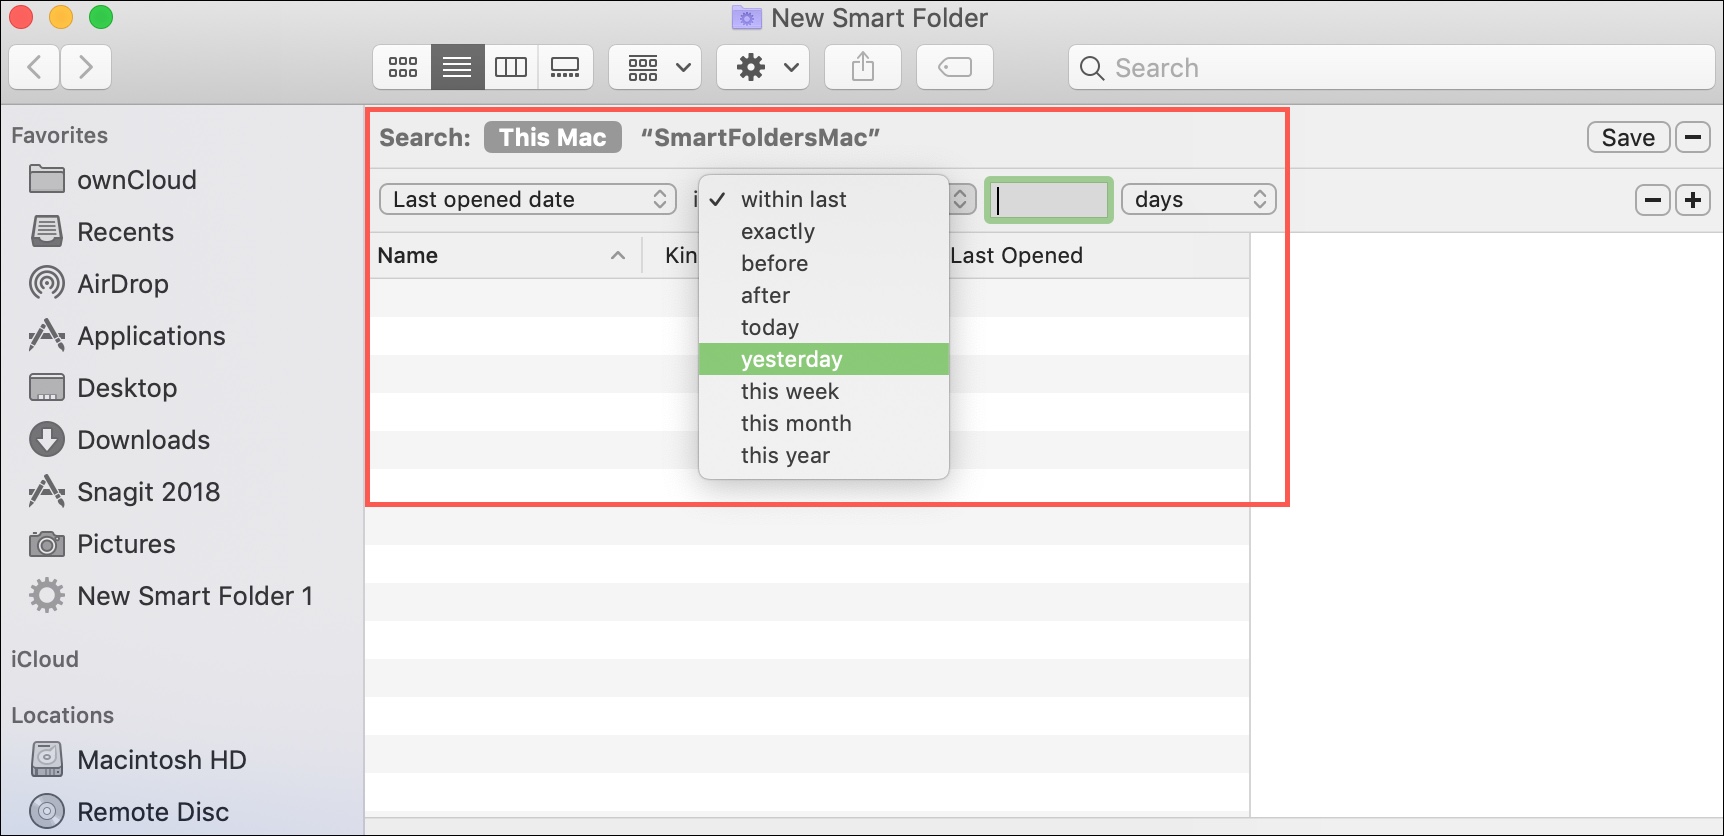
Now each day, you’ll see the items you opened yesterday in your new Smart Folder.
Folder by name
Another option for your Smart Folder is to use Name. So, whenever an item contains, matches, begins with, ends with, or whatever you choose, it will pop into that folder.
For instance, say you want all items that have the word Work anyplace within the Name to go into the folder. Select Name in the first drop-down box, Contains in the second one, and then type Work into the text box.
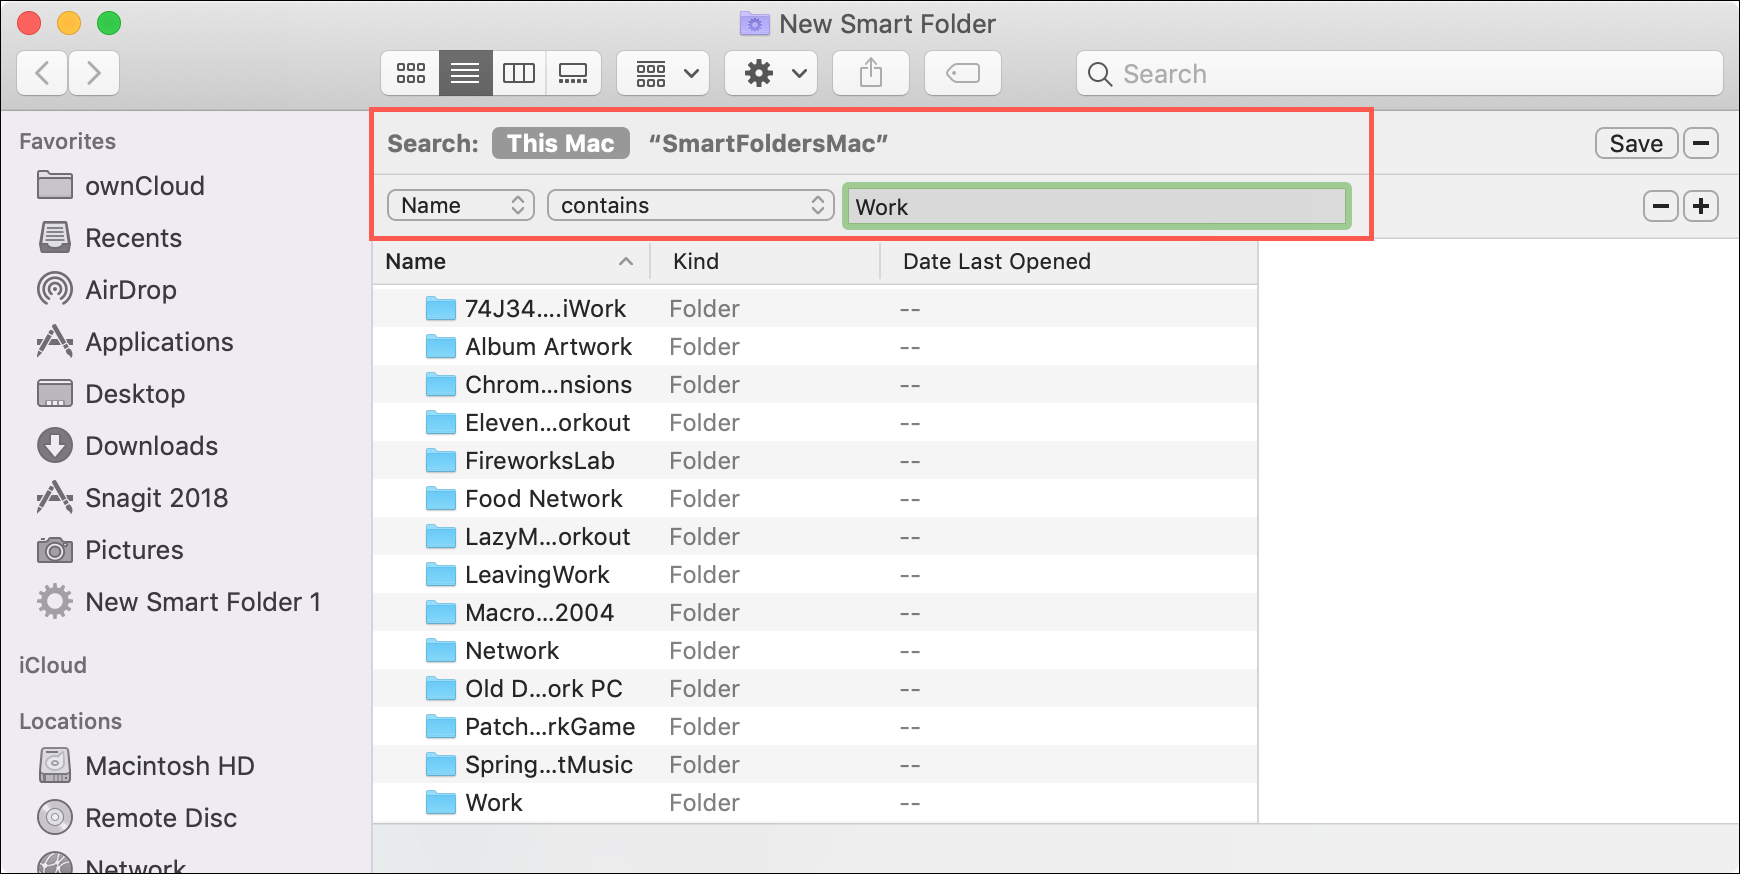
Whenever an item has the word you choose in the name of it, you’ll see it in your Smart Folder.
Folder by contents
Maybe the names of items don’t always contain the word or phrase you want for the Smart Folder for, but the contents usually do. So, you could choose Contents instead.
As an example, say you want any item with the word Taxes to go into your Smart Folder. Select Contents from the drop-down box and then type Taxes in the Contains text box.
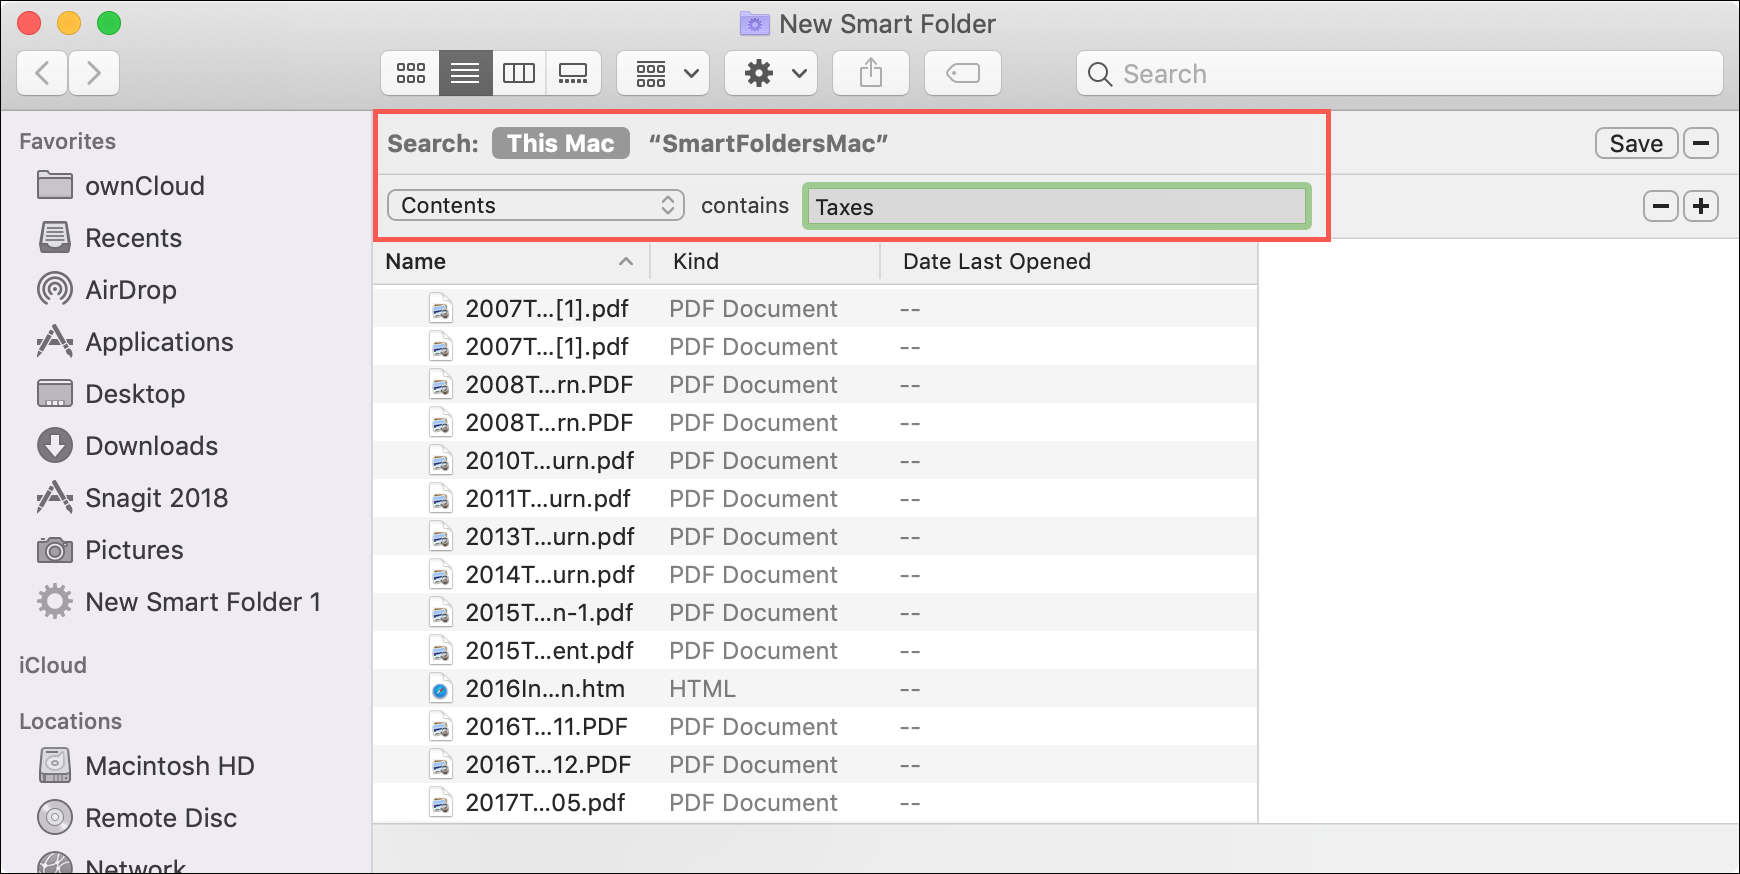
Now any time you have an item with that word inside of the contents, you can access it from the Smart Folder in addition to the location you saved it.
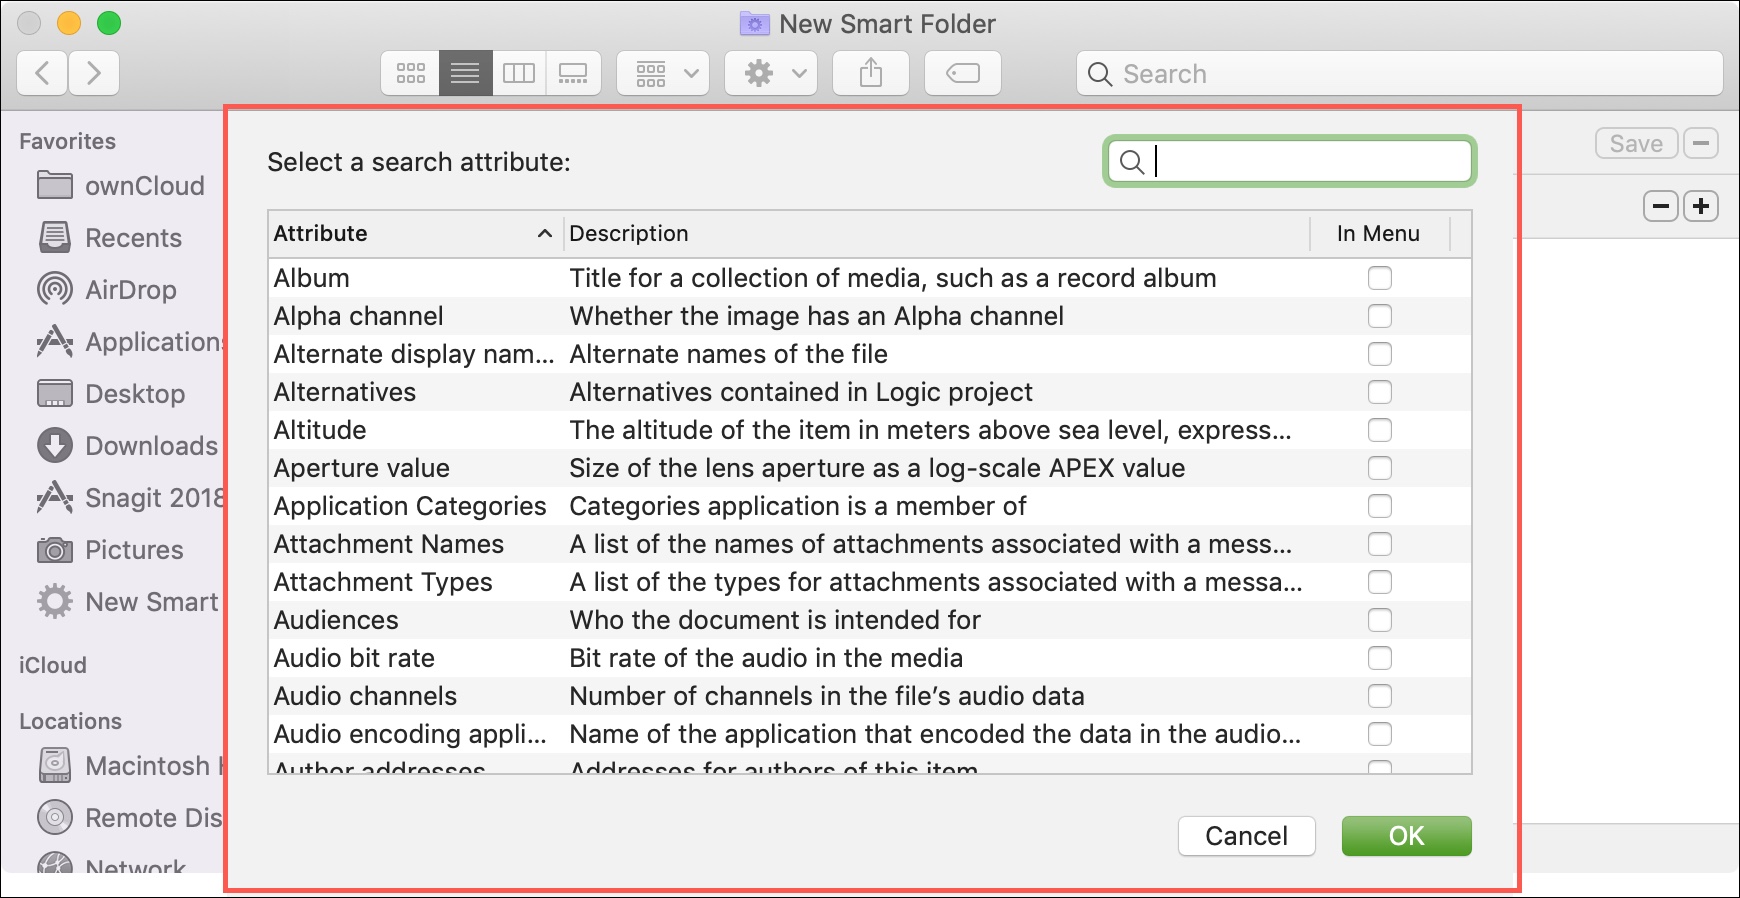
Folder by other
If none of the above options seem to fit what you want the Smart Folder for, don’t worry because there are plenty of others you can use. Pick Other from the drop-down box. You’ll then see a pop-up window with tons of attributes to choose from, like Album, Headline, URL, and Where From. Each offers a short description, so you know exactly what you’re getting.
Just mark the checkboxes for the other attributes, and then you’ll see them in the criteria section as additional options in the drop-down. Select the one you want and complete the other details as applicable.
Combining attributes and criteria
While using one set of criteria for your Smart Folder may be enough, there may be times when you want to get more specific.
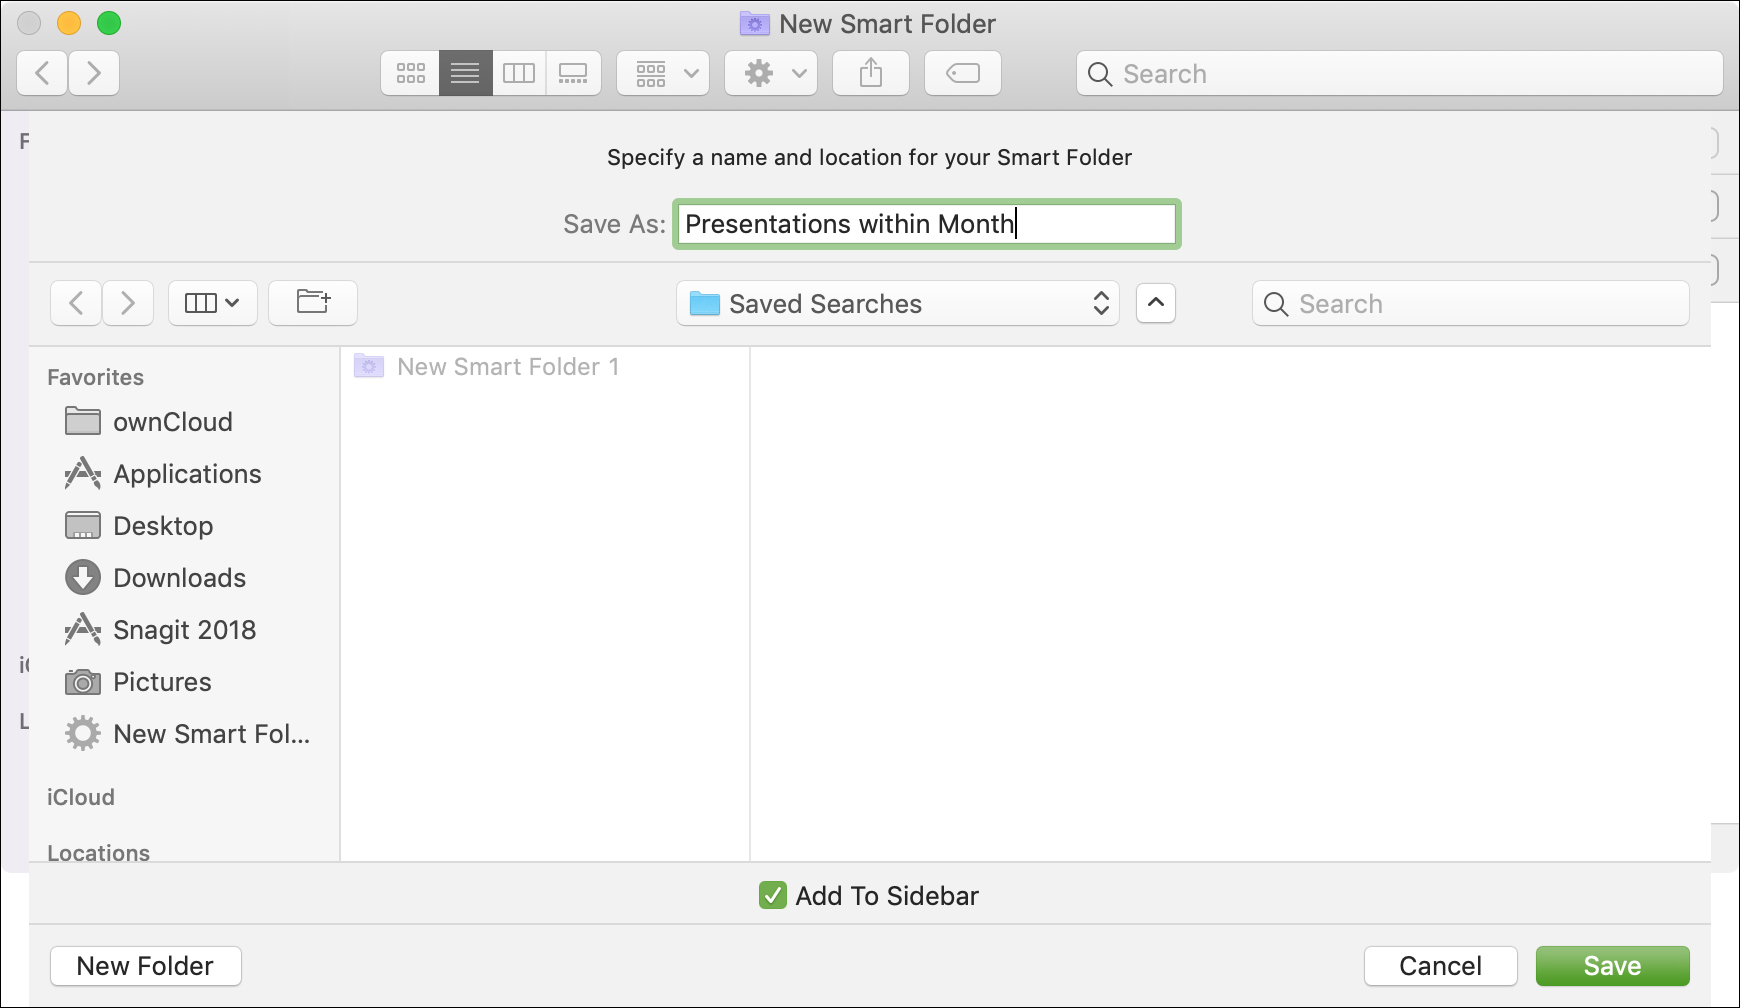
For instance, we’ll use our Presentations Smart Folder example above. Maybe you do want all presentations that you create to go into the folder, but only want those that you’ve created in the last month. You would simply add another criterion set for the date part.
1) Select Kind > Presentation.
2) Click the plus sign on the right to add another attribute.
3) Select Created date is within last 1 months.
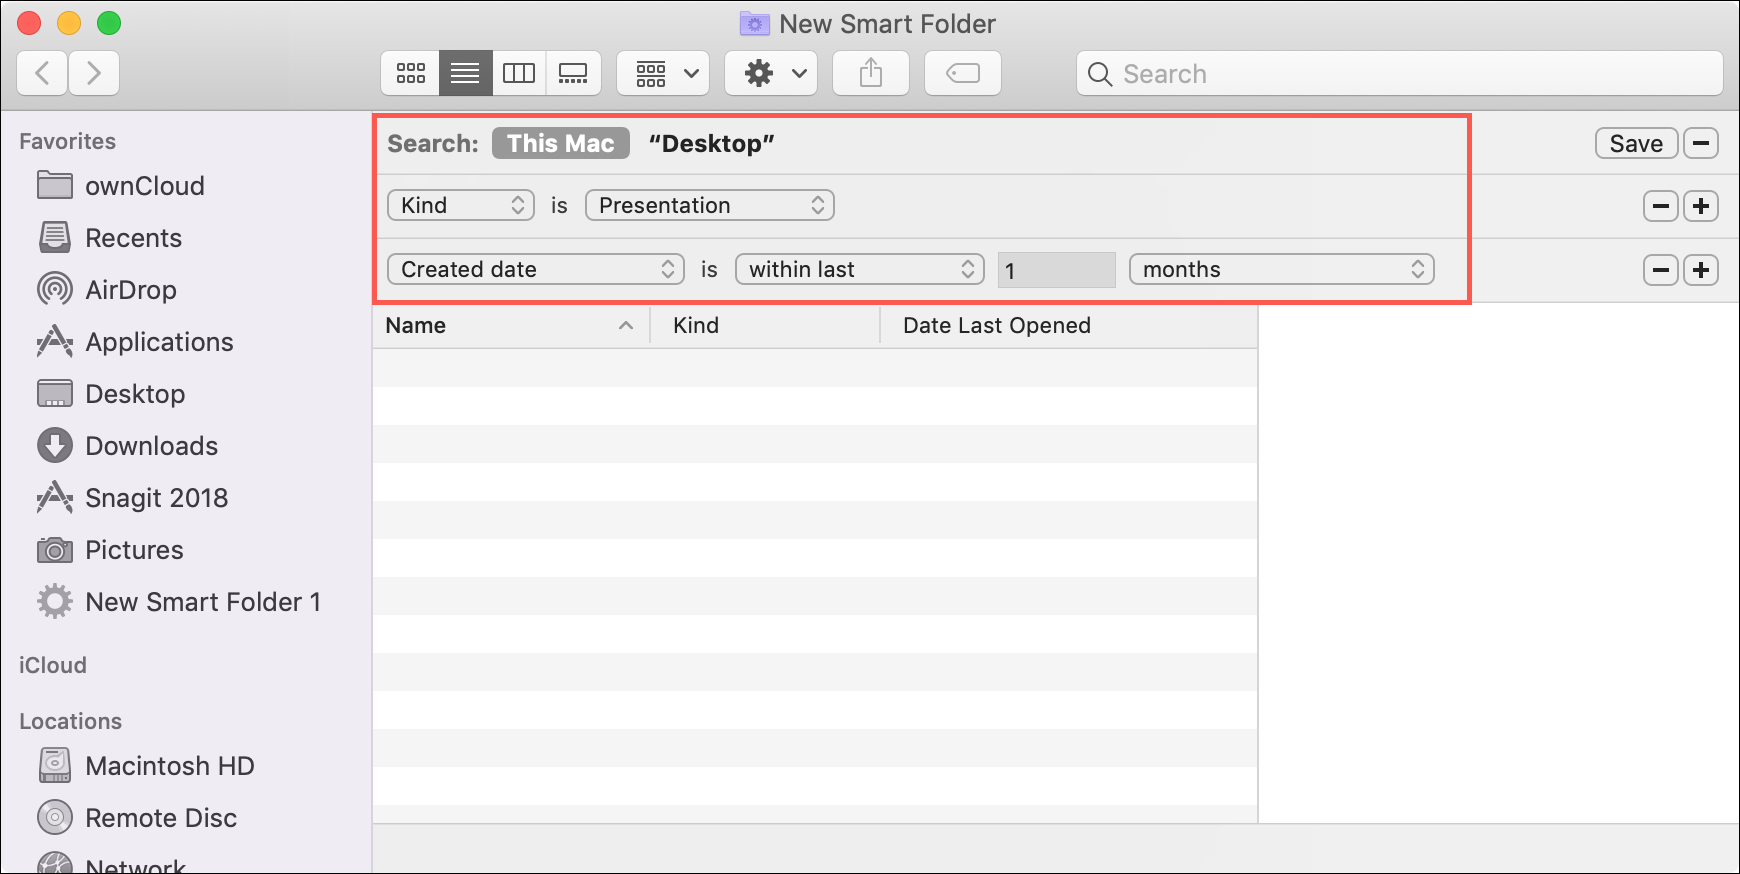
This is just one example of combining the attributes to create your Smart Folder. Experiment with different combinations as you need to, and remember that you can continue adding sections for the criteria as needed.
If you decide you don’t need a set of criteria after all, just click the minus sign on the right to remove it.
Save your Smart Folder
After you enter the attributes for your Smart Folder, click the Save button on the top right. You’ll then be prompted to name your folder, select its location, and optionally add it to the Finder Sidebar. Click Save when you finish.
Smart Folders on Mac can come in super handy. You can create a folder for things like all of your screenshots or, as we mentioned above, your most recent items. Are you going to use this cool feature to create a convenient Smart Folder? Let us know!
Check out next: