If you want to disguise your iCloud email address when signing up for newsletters, posting comments online, or simply don’t want to give out your true email address, you can use an alias. Here’s how to create an alias for your iCloud email address.
Why use an email alias?
An email alias is a secondary email address that redirects incoming messages to your primary email account without revealing your primary email address to the sender.
For example, if your email address is myname@icloud.com, you can set up an alias for youcantfindme@icloud.com. Then, use that alias when you don’t want to give out your primary address. All emails to your alias will still arrive in your main iCloud inbox.
If you use Gmail, check out how to create a Gmail email alias.
Create an iCloud email alias
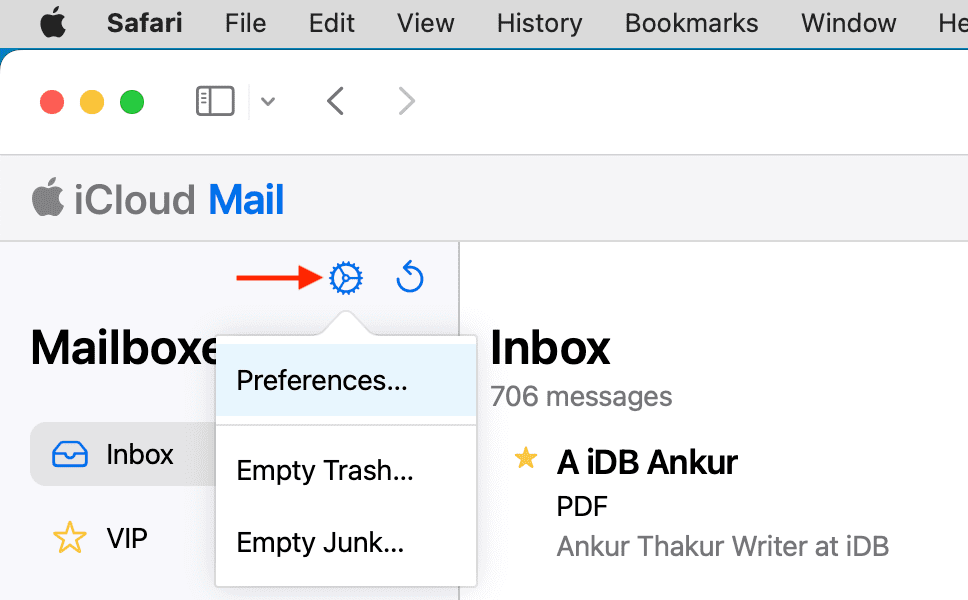
1) Visit iCloud.com in a web browser and sign in using your Apple ID.
2) Select Mail.
3) Click Settings and select Preferences.
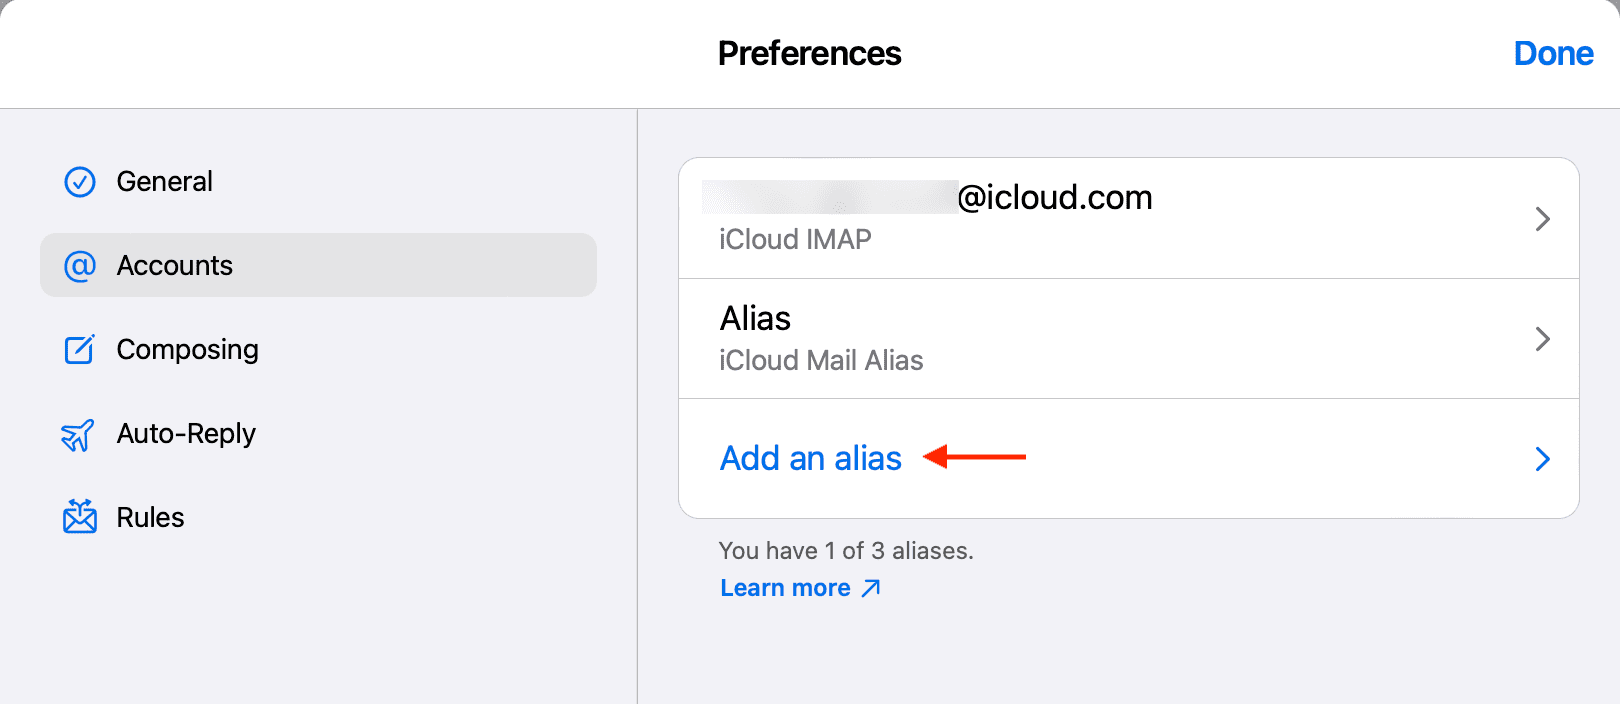
4) In the pop-up window, click Accounts.
5) Select Add an alias.
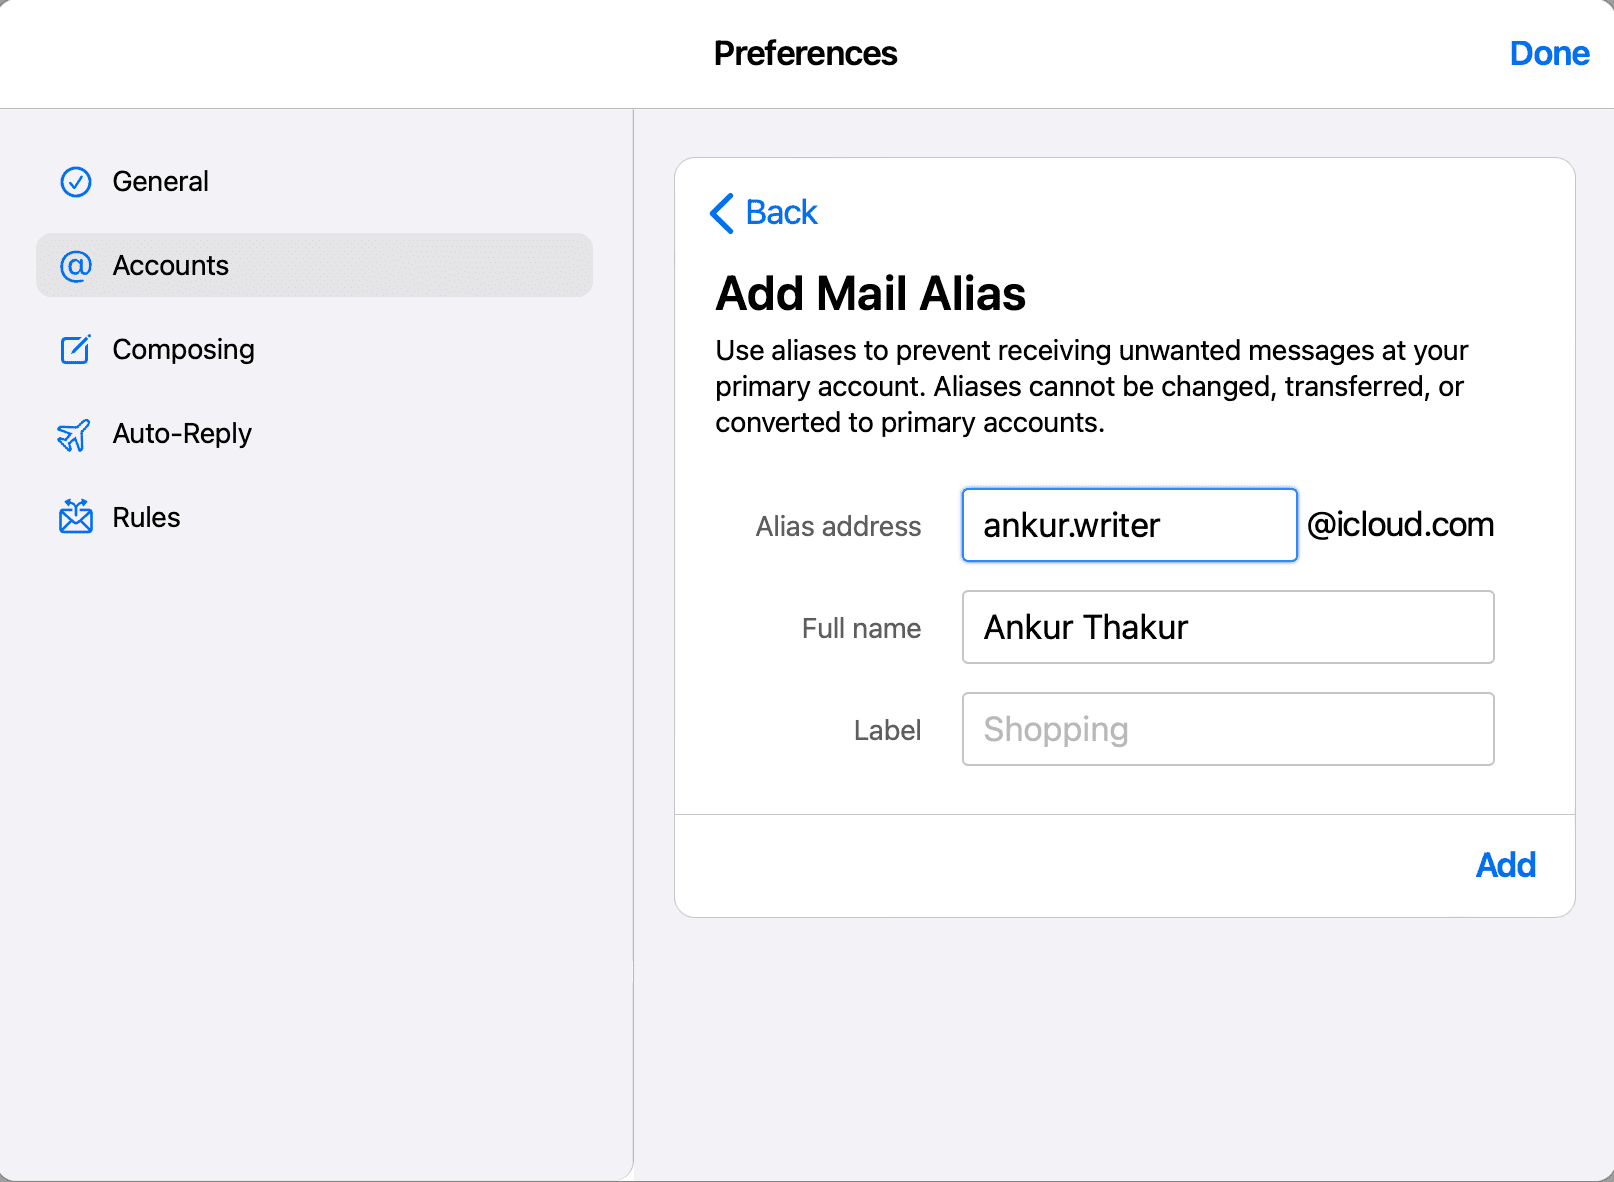
6) In the next pop-up window, create your Alias, enter your Full Name, and optionally choose a Label.
7) Finally, click Add.
Now you can use that alias email address whenever you like.
Plus, when you compose an email from your iCloud account, you will see a drop-down when you click your email address. You can pick your alias, and the email will be sent from it instead of your primary address. This works on the iCloud website and the Mail app for Mac and iOS.
Cannot save alias
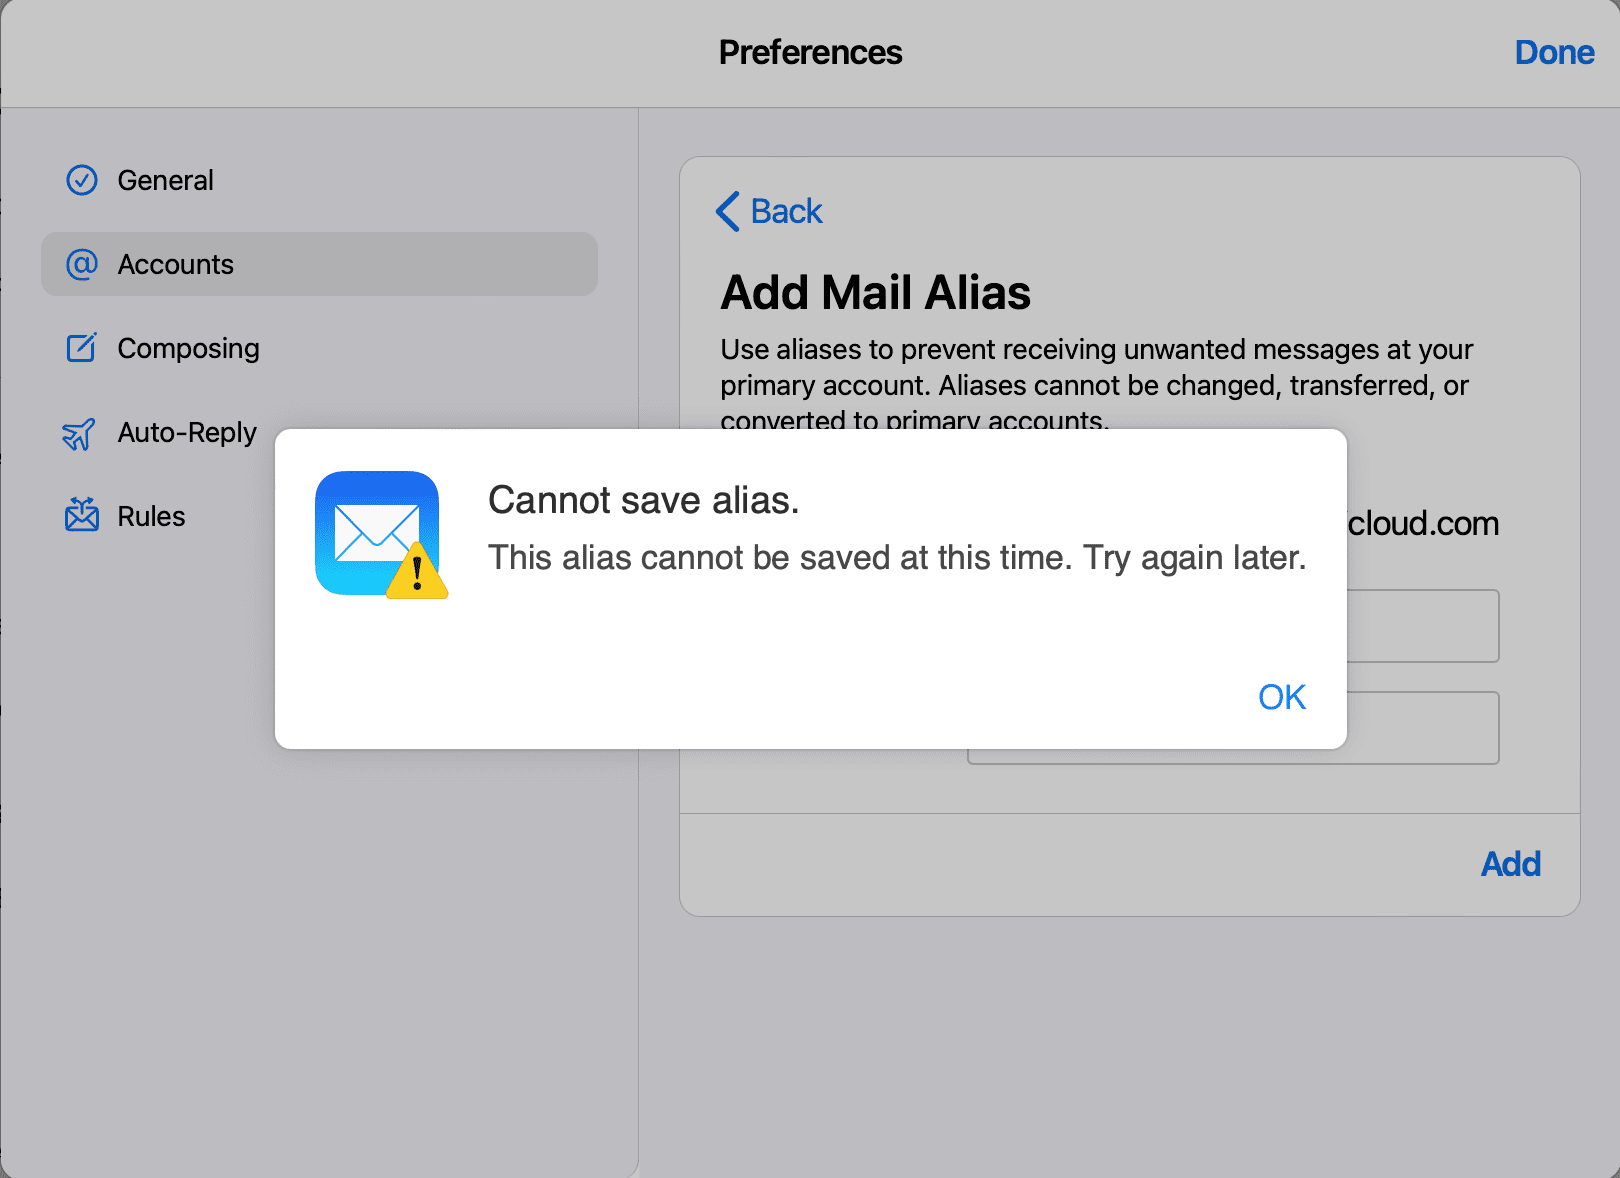
If you see an error saying, “This alias cannot be saved at this time. Try again later,” head over to the Apple System Status page and make sure iCloud servers are working. You can also try to turn off your VPN if you’re using one, or use another device to create the iCloud email alias.
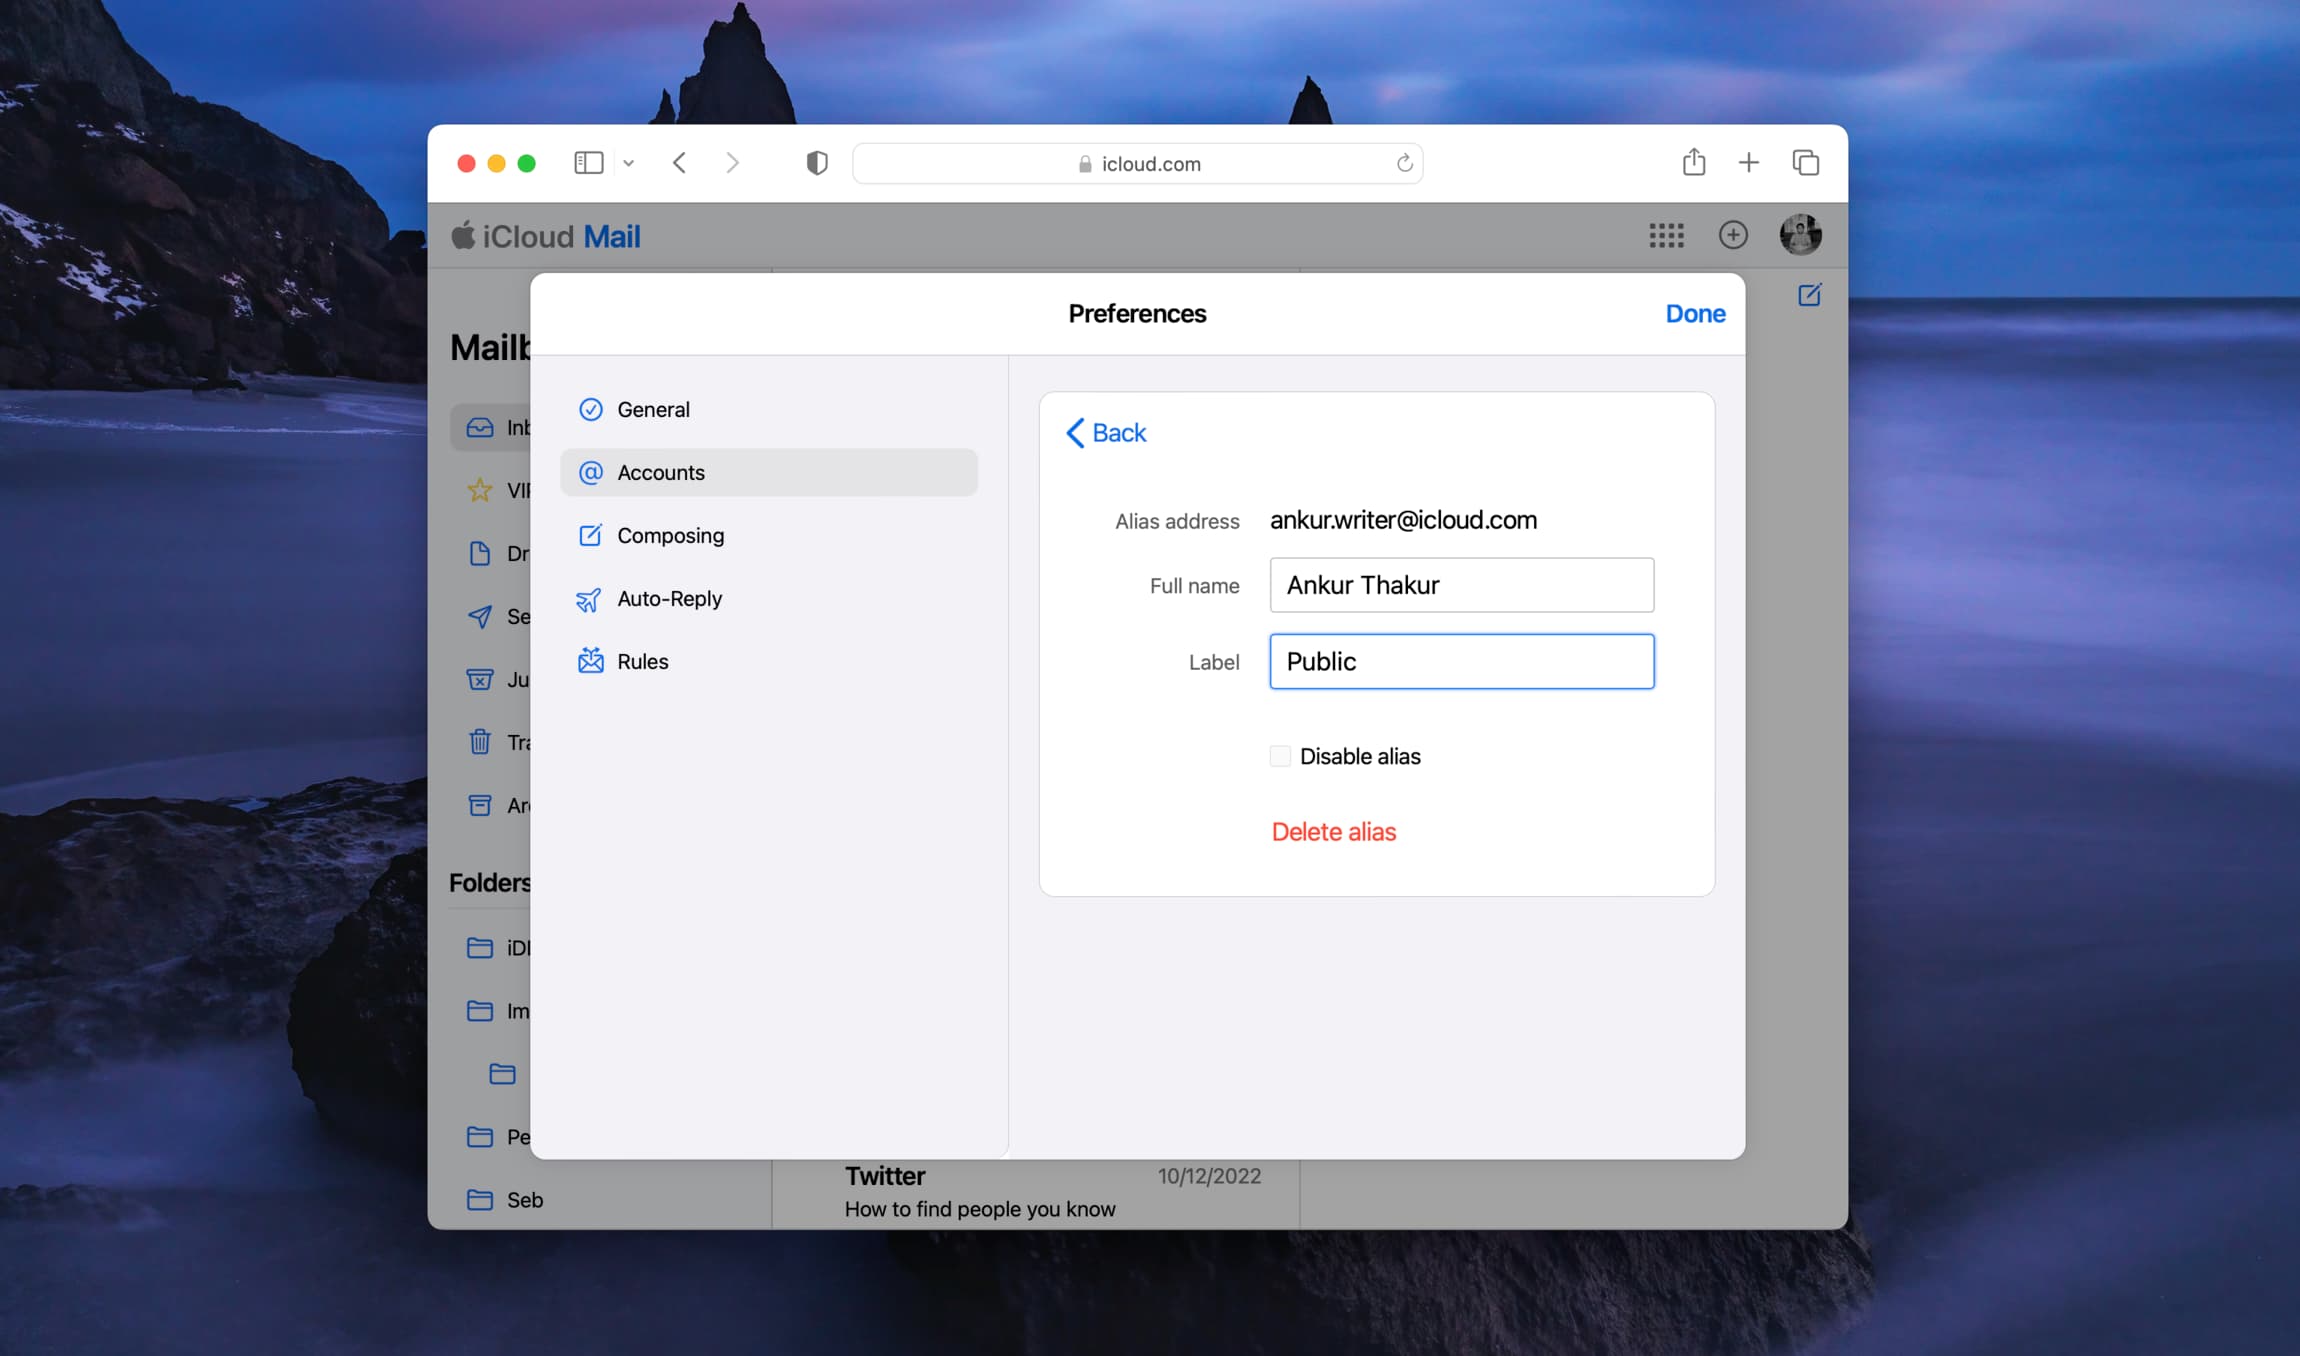
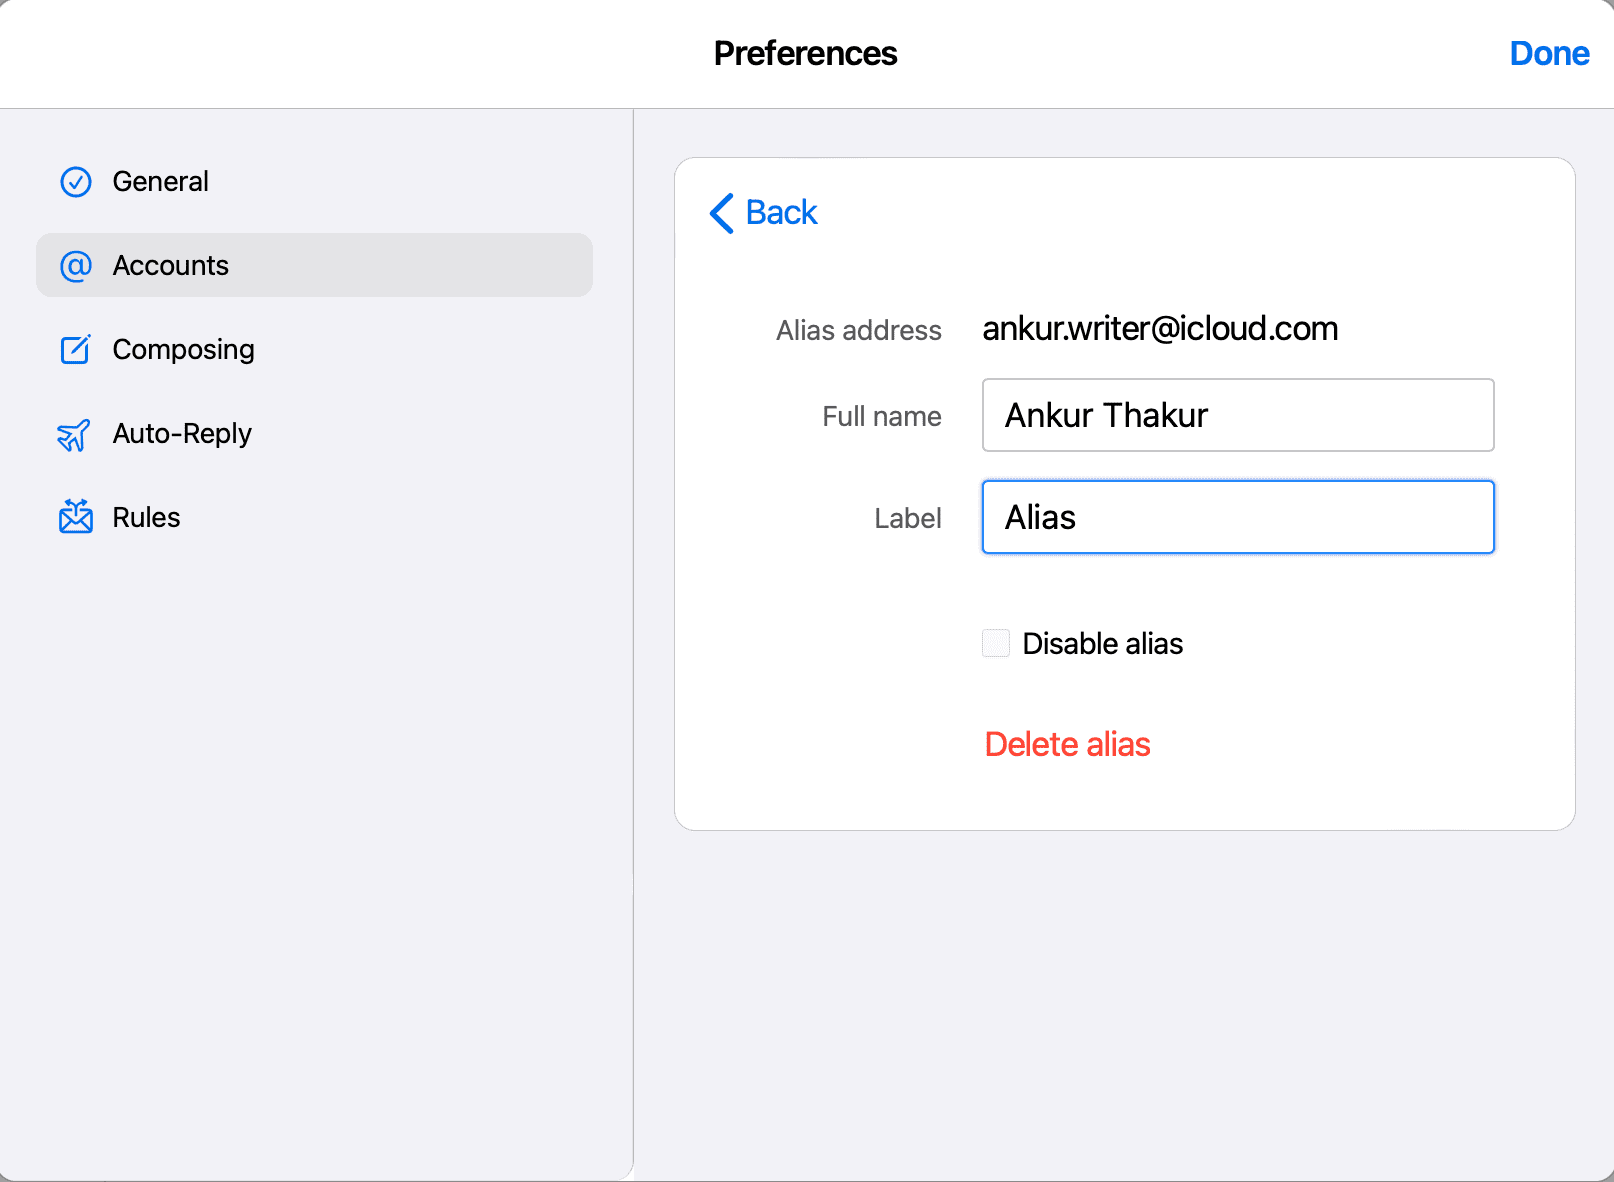
Disable or delete your alias
1) Head back to iCloud.com and access Accounts as mentioned in the steps above.
2) Select the alias email address in the list.
3) Check the box for Disable alias or hit Delete alias.
4) Finally, click Done.
Check out next: