Did you know you can quickly connect to a Wi-Fi network by scanning a router’s QR code in Apple’s Camera app on your iPhone or iPad, no password typing required whatsoever? In this tutorial, we show you how to connect to Wi-Fi using your iPhone camera.
How to join a Wi-Fi network using your iPhone camera
The iOS camera app supports QR code scanning, which allows you to automatically visit an underlying website, pair with a HomeKit accessory, add contact information, share a Wi-Fi password, join a Wi-Fi network, and much more. Scanning the QR code found on the back of your router is probably the fastest and most efficient way of connecting to the wireless network using the underlying login credentials. Here’s how:
1) Open the Settings app on your iPhone or iPad.
2) Scroll halfway down and tap Camera.
3) Slide the switch next to Scan QR Codes to the ON position.
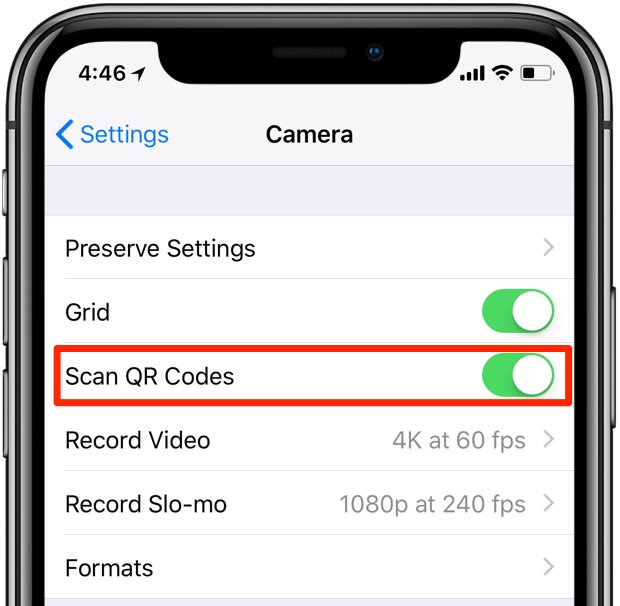
You can scan QR codes with Apple’s stock Camera app.
4) Open the Camera app and ensure you’re in the Photo section.
5) Point the camera at the QR code that’s printed somewhere on the back of the router.
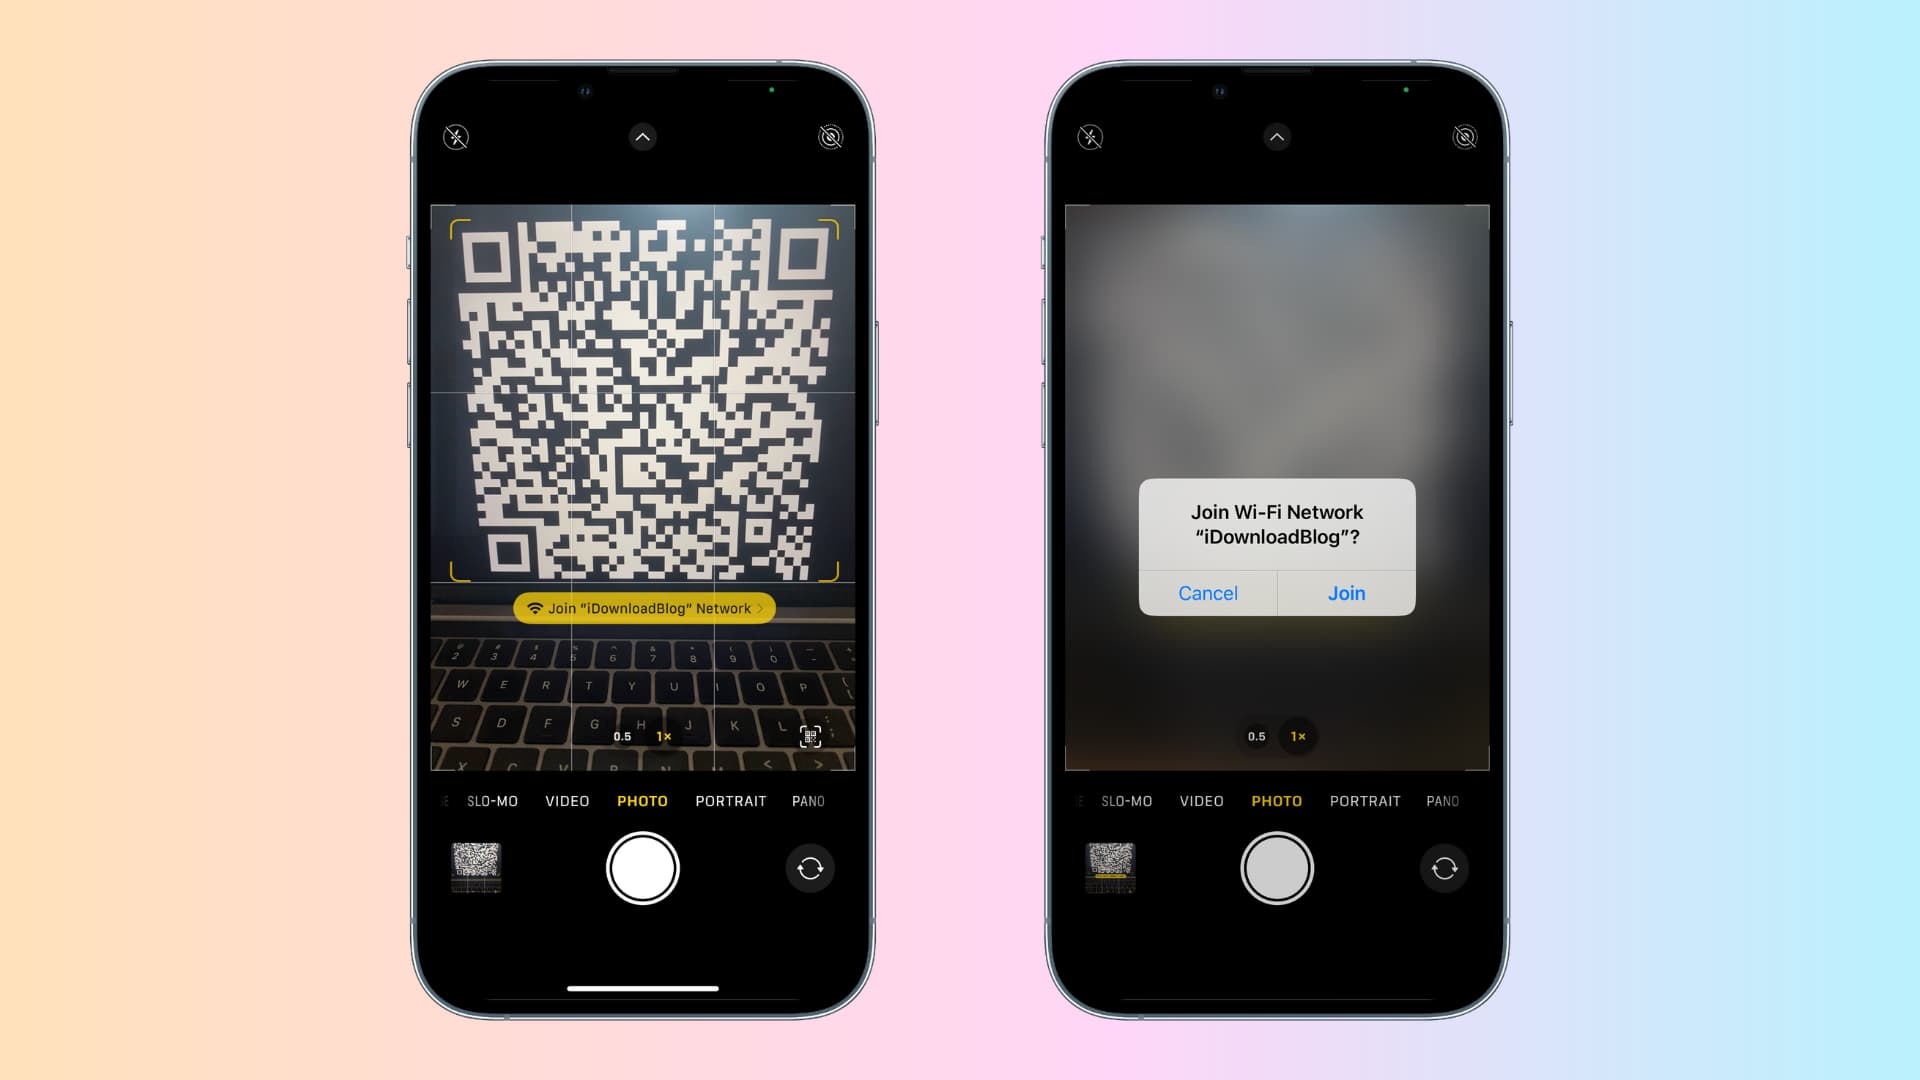
6) Upon successful QR code scan, the Camera app will put up a notification banner containing the network name. Simply tap the banner to have your iPhone or iPad automatically join the Wi-Fi network using access credentials stored in the QR code.
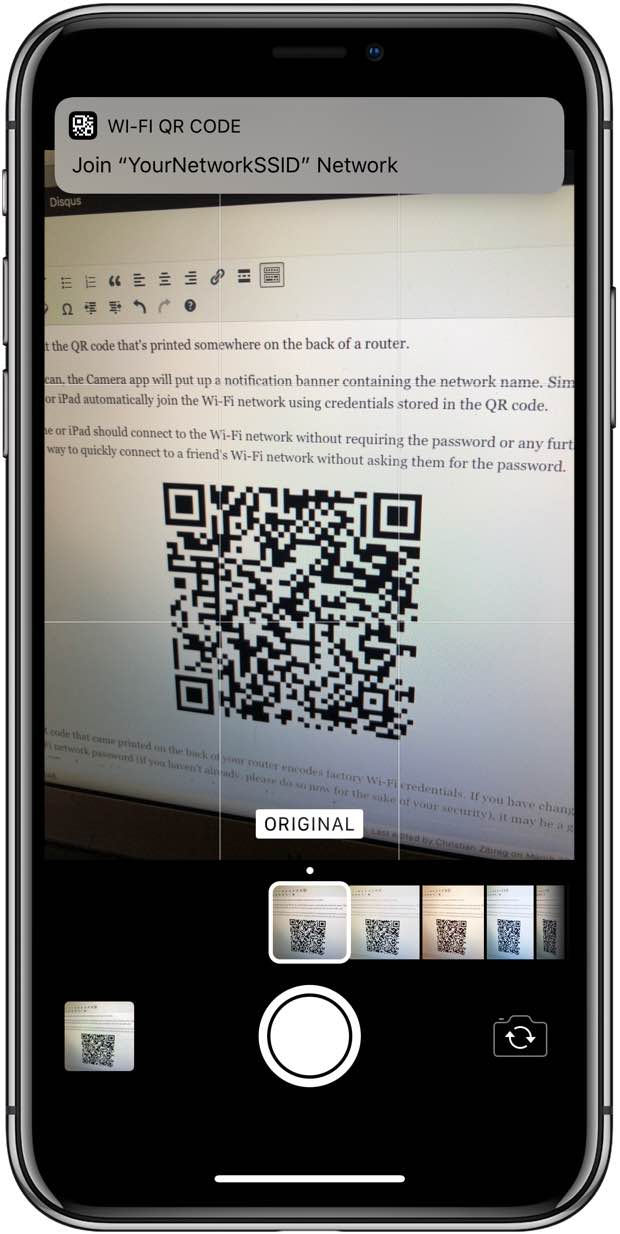
Tap the banner to act on content embedded in the QR code
That’s it! Your iPhone or iPad should automatically connect to the Wi-Fi network without requiring the password or any additional action on your part. This is a great way to quickly connect to a friend’s Wi-Fi network without asking them for the password.
Now, the QR code that’s probably printed on the back of your router encodes factory Wi-Fi credentials. If you have changed your default Wi-Fi network password (and if you haven’t already, please do so now for the sake of your own security), it may be a good idea to print a new QR code containing your new network name and/or password.
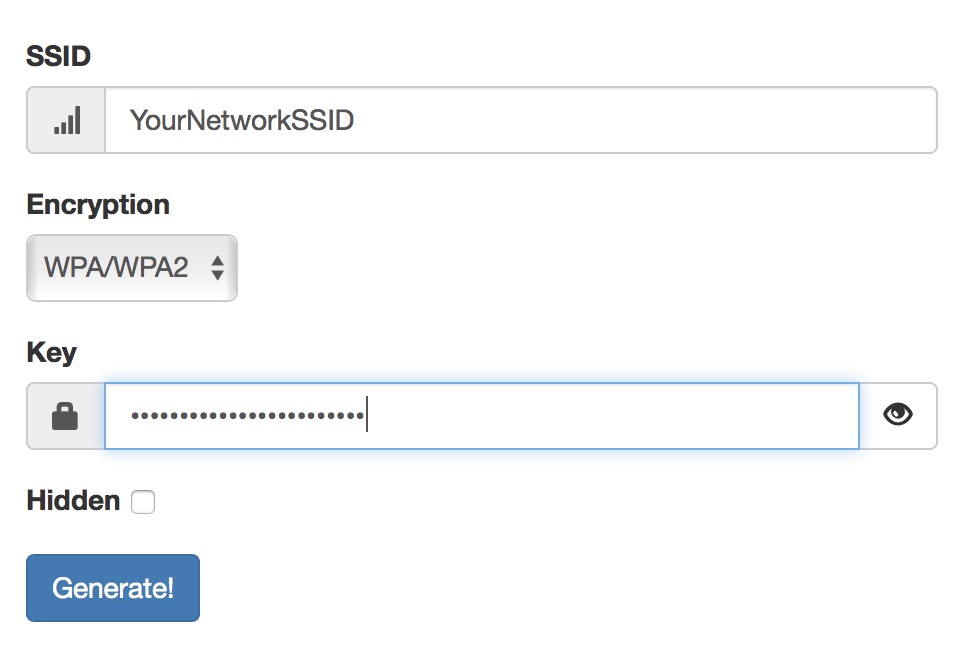
To create a QR code for your Wi-Fi network, visit a browser-based service called QiFi on your computer by pointing your browser at https://qifi.org. Type in the name of your wireless network and the password, then click the Generate button—that’s all there’s to it.
The web app will generate the corresponding QR code, which you can print or screenshot.
If your router supports guest networking, you could generate a QR code for your guest network.
Print it and leave it in a drawer or maybe in the guest bedroom of your house. The next time you have many guests over at your place but don’t want to leave your Wi-Fi password on a post-it note for everybody to see, ask them to scan the QR code.
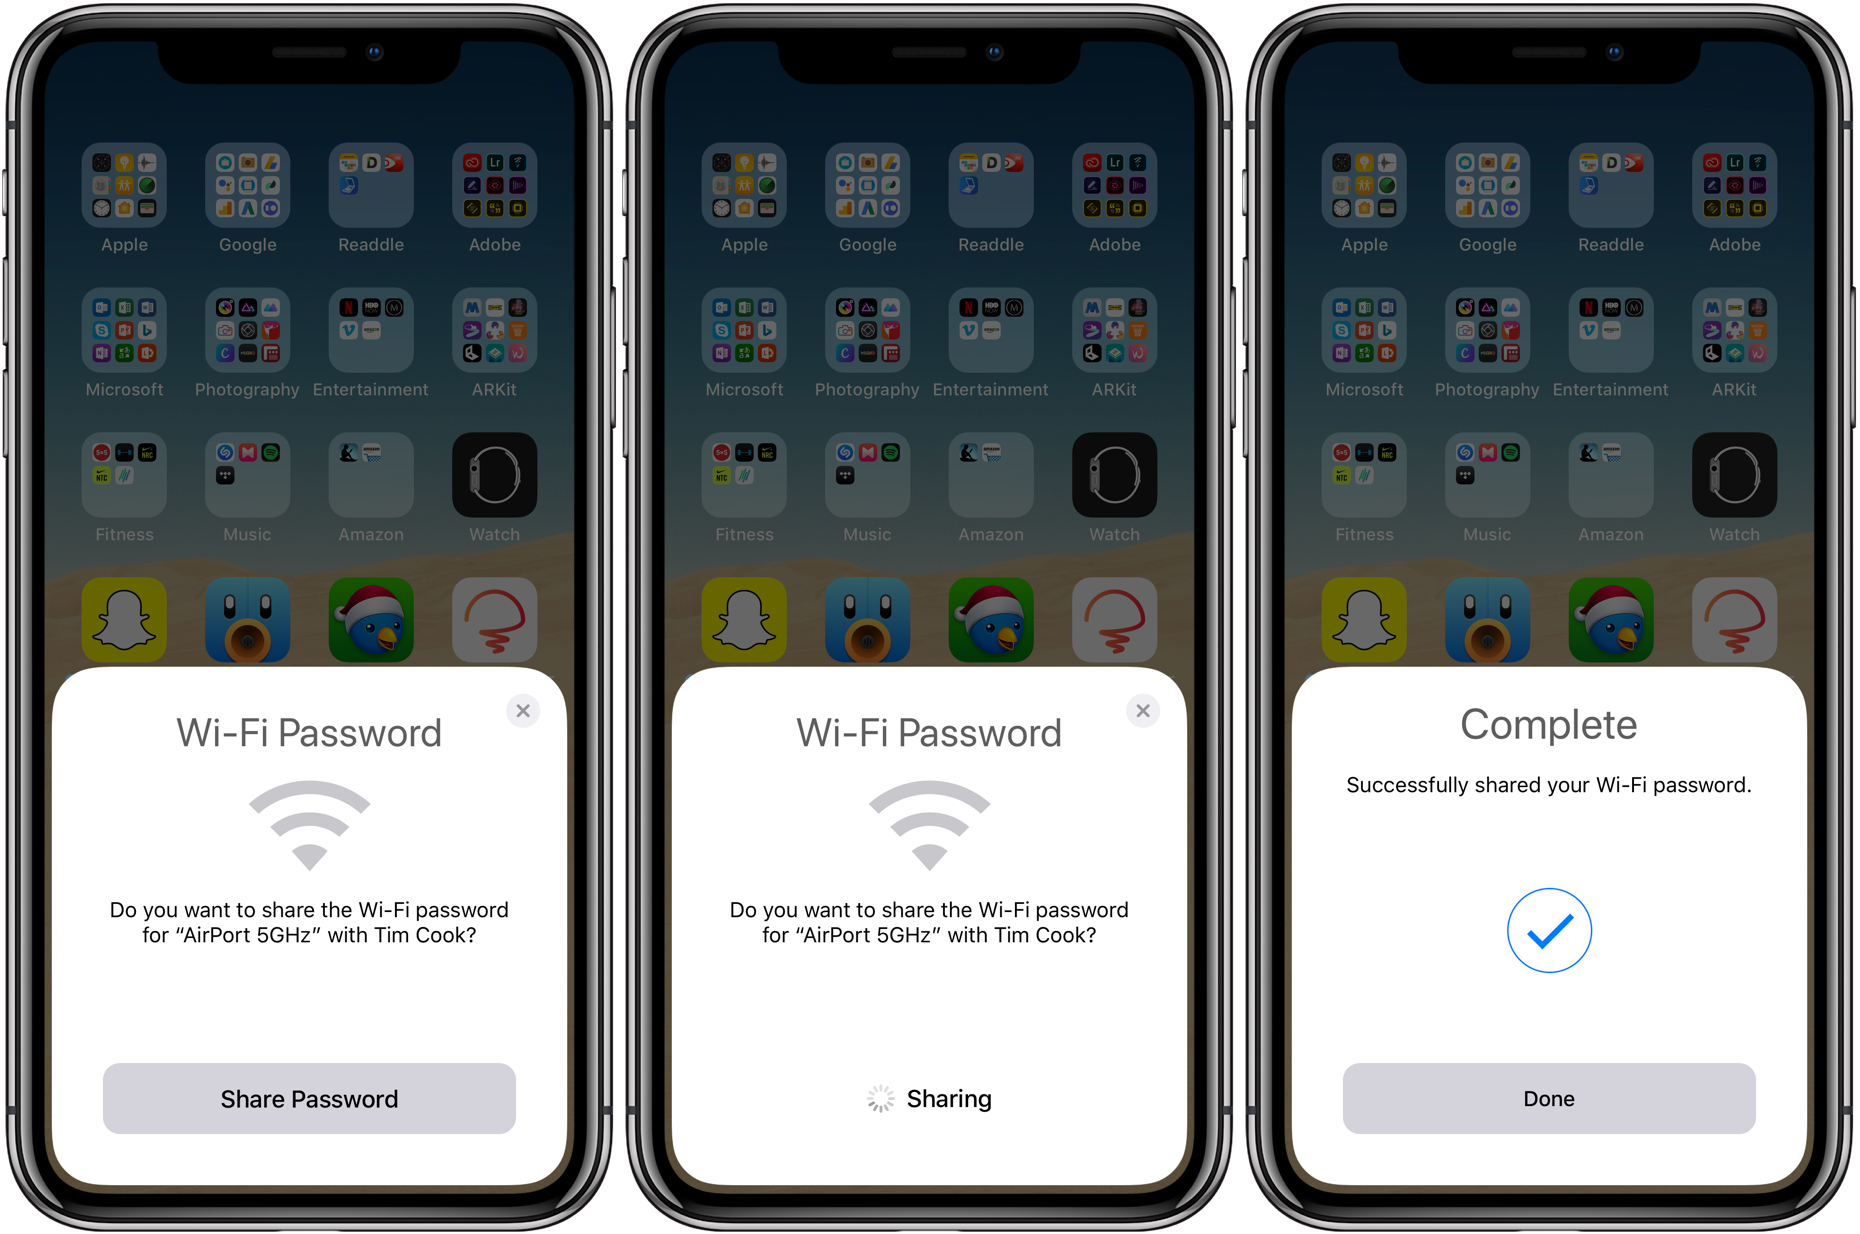
Another way to share access to your Wi-Fi network without exchanging any network name or password is to use a cool Wi-Fi Sharing feature. It’s ridiculously easy to use as long as you’re connected to the Wi-Fi that you’d like to share with another person. Just make sure that your device is unlocked, then ask a friend to select your network’s name on their device. A Wi-Fi sharing card should automatically appear on your device, asking if you’d like to send your encrypted Wi-Fi password to a friend’s device over the air.
Tap Send Password to share access to your Wi-Fi network with a friend’s device in a secure manner without actually revealing the actual access password for your Wi-Fi network.
The other person must be saved as a contact in your address book.
Also, this feature won’t work if your wireless network uses MAC address filtering.
These capabilities, along with other cool QR code-scanning features, take advantage of Apple’s computer vision APIs in iOS 11 and later.
Check out next: