Knowing what the various status lights on the top of your HomePod convey is an important feedback mechanism when using the speaker’s touch controls and other interactions.
For those wondering, the touch-sensitive surface on the top of your HomePod does recognize touches but is not a true bitmap screen. As noted by iFixit, the HomePod “screen” is but a simple LED array paired to a diffuser that gives Siri’s listening graphics that cloudy look.
In other words, while HomePod was built to produce some visual cues, Apple simply cannot program it to render an arbitrary user interface without refreshing hardware.
Now, before we get to it, don’t forget that you can adjust the sensitivity of HomePod’s touch controls by opening the Home app on your iOS device, then tap your HomePod, choose Details, hit Accessibility and lastly tap Touch Accommodations.
Identifying HomePod status lights
As mentioned earlier, the status lights appear on the top of your HomePod and change colors depending on what you’re doing on the device.
Here are the six different status light states that you might see.
White swirling light
HomePod is turning on or updating its software. You can also check for a new HomePod firmware manually or disable automatic updates altogether. HomePod defaults to automatically downloading and installing new software updates as they become available.
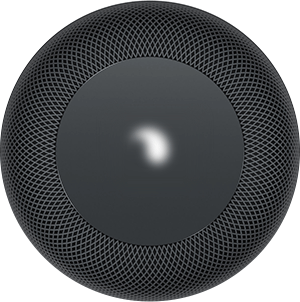
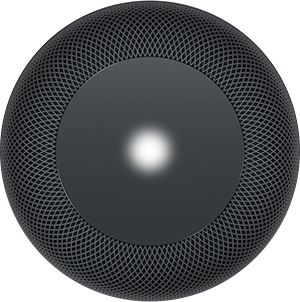
White pulsing light
HomePod is ready to be set up or an alarm or timer is going off. Setting up a brand new HomePod for the first time is a breeze thanks to Apple’s Automatic Setup procedure.
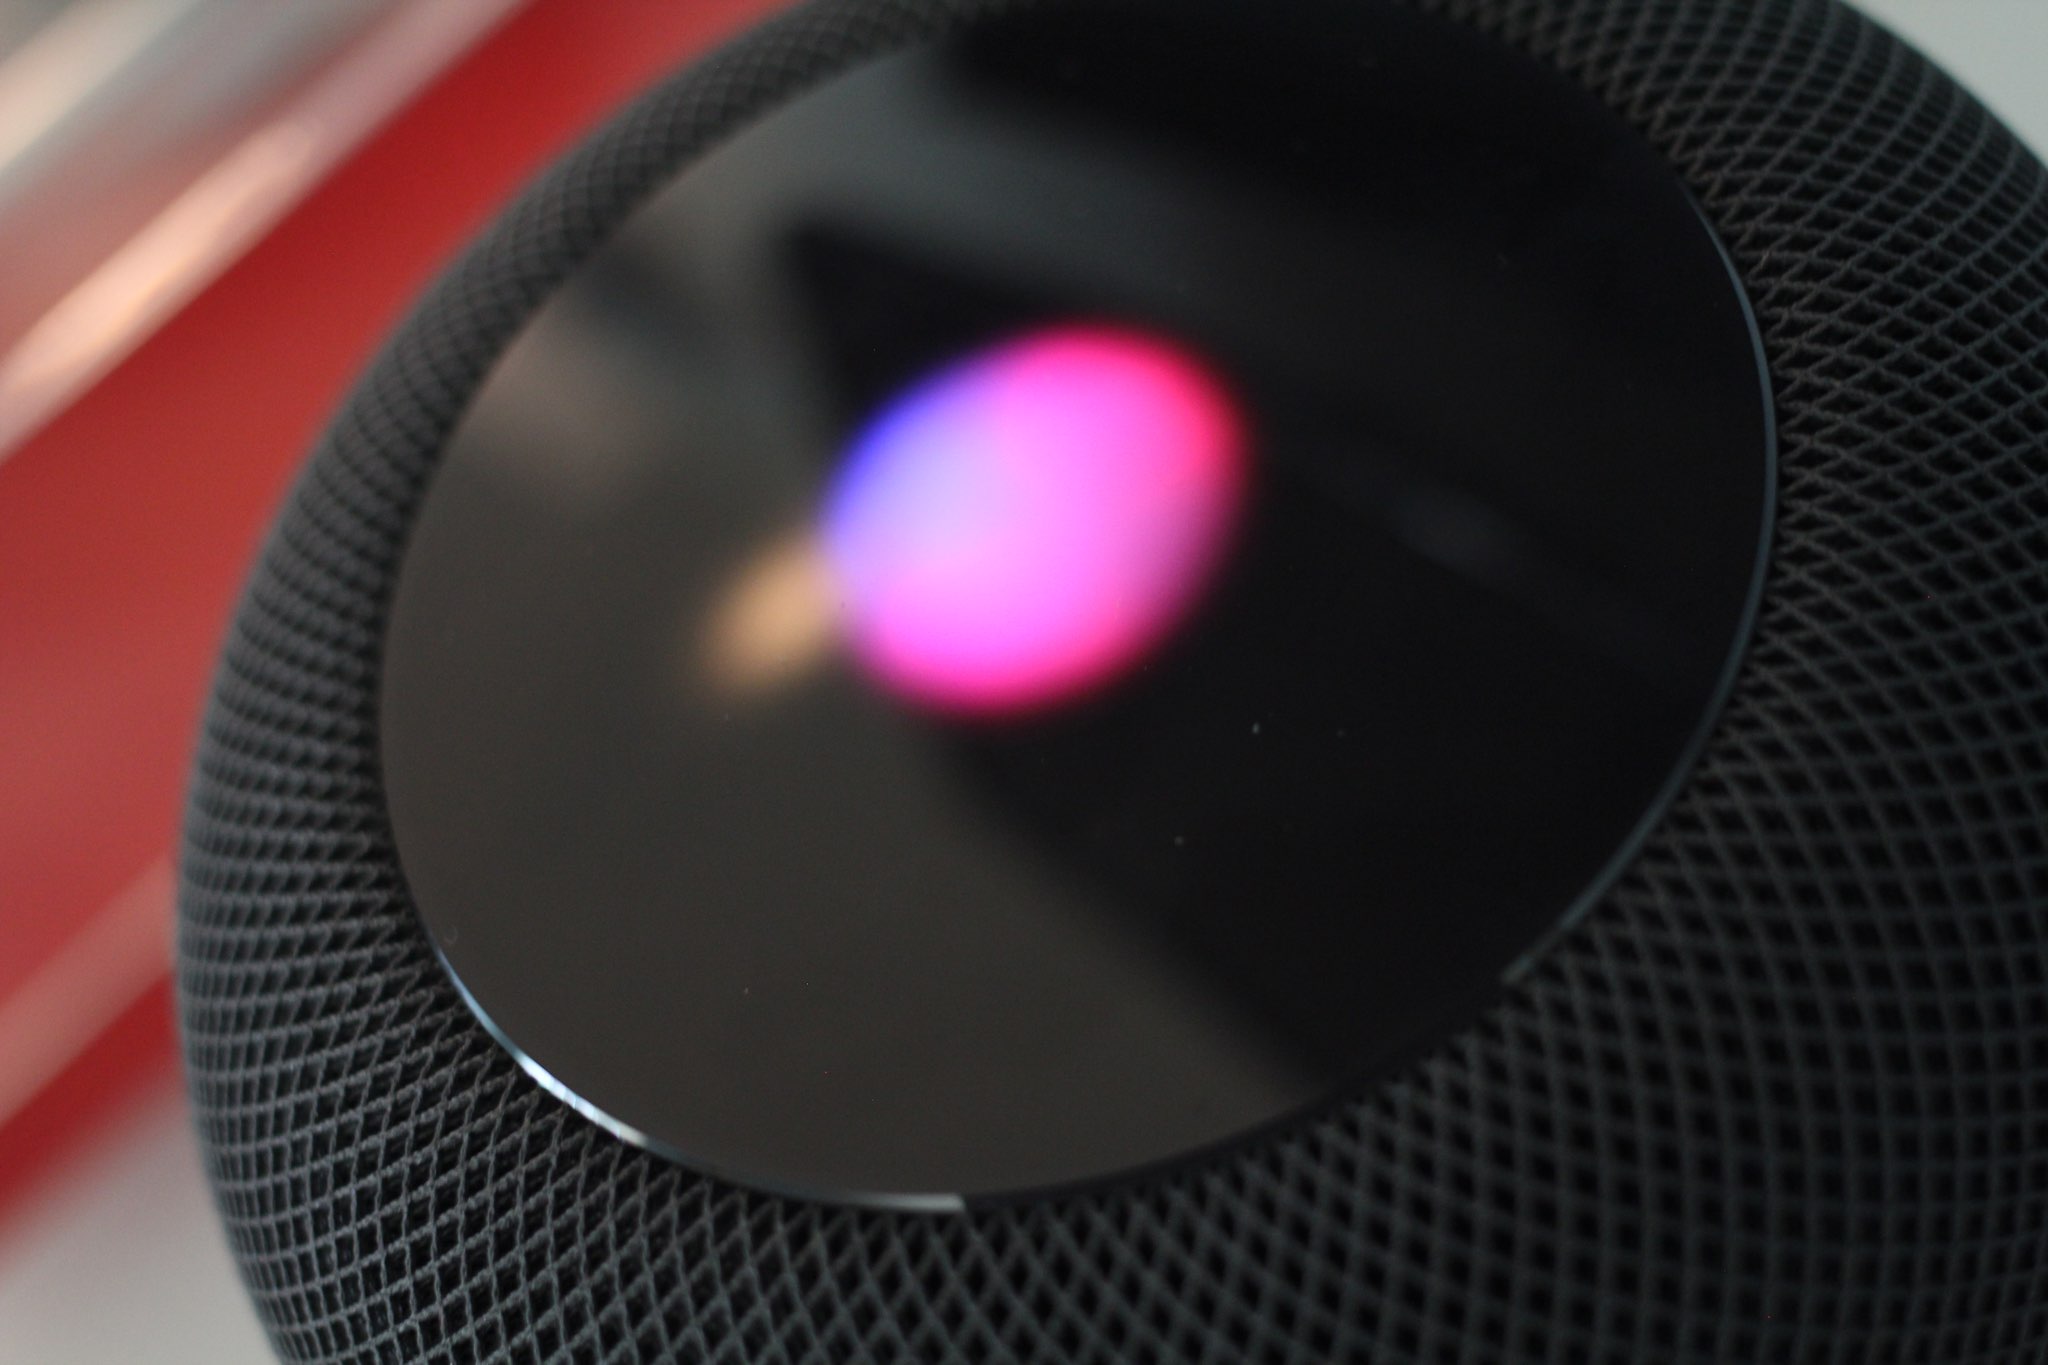
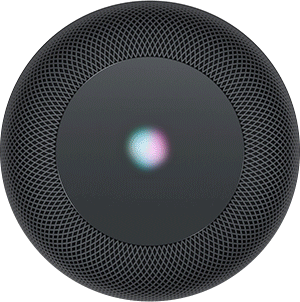
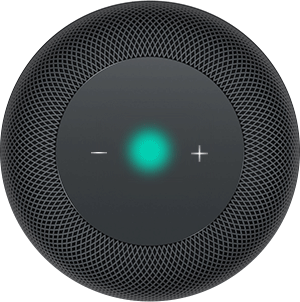
Multicolored spinning light
Siri is listening. Don’t forget that you can also touch and hold the HomePod top to call upon Siri. When you activate Siri this way, there’s no need to say “Hey Siri”—just say your command.
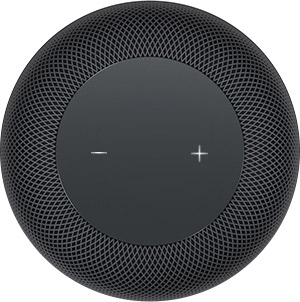
Volume controls
Tap the “+” on the top of your HomePod to boost the volume or hit “-” to lower the volume. These volume control indicators appear only when HomePod is playing music.
Green pulsing light
You transferred a phone call to HomePod. To route call audio through HomePod, accept or make a phone call on your iPhone, then tap Audio in the Phone app and choose your HomePod. The status light on your HomePod turns green when it’s connected to phone audio.
If another call comes in while you’re using HomePod as a speakerphone, touch and hold the green status light to end the current call and answer the new one. When you have a call on hold, you can switch between calls with a double tap.
Red spinning light
You’re resetting your HomePod to factory settings. To reset your HomePod, unplug it from power then plug it back in. Alternatively, press and hold the top of HomePod to reset it.

Be sure to hold your finger the entire time. Lift it and you’ll need to start over.
GUIDE: What the status icons on your Apple Watch mean
As a reminder, HomePod supports limited touch controls:
- Tap: touch the top of your HomePod to pause/resume playback
- Double-tap: touch the top of your HomePod twice to skip to the next track
- Triple-tap: touch the top of your HomePod there times to play the previous track
- Tap or hold “+“: touch or hold the plus sign on the top to up the volume
- Tap or hold “-”: touch or hold the minus sign on the top to lower the volume
- Tap and hold: touch and hold the top of your HomePod to talk to Siri
Other feature-specific touch interactions are possible in certain situations.
For example, when a previously set alarm goes off, just tap anywhere on the top of your HomePod to dismiss it. Similarly, if VoiceOver on HomePod is turned on, you’ll need to double-tap the top of the speaker to activate the touch controls. As with iPhone and iPad, the controls require an extra tap when VoiceOver is turned on (i.e. tap twice to pause playback).
Need help? Ask iDB!
If you like this how-to, pass it along to your support folks and leave a comment below.
Got stuck? Not sure how to do certain things on your Apple device? Let us know via help@iDownloadBlog.com and a future tutorial might provide a solution.
Submit your how-to suggestions via tips@iDownloadBlog.com.