As the 32-bit devices have been a little neglected of late, long in the tooth as they are, this new release could help to spice things up a little. Developer tihmstar has updated his futurerestore tool, which we’ve reported on extensively in the past, with an interesting piece of legacy support.
It now includes all the functionality of the Odysseus downgrade tool, allowing users to levy their saved blobs to upgrade, downgrade, or restore their devices to unsigned firmware, hassle-free. In this guide, we’ll show you how.
If you’re looking to downgrade a 64-bit device, check out my futurerestore guide, which details how to use the futurerestore tool on newer models.
Requirements
- A 32-bit device.
- A jailbreak on the starting firmware.
- The IPSW file for the destination firmware.
- The updated futurerestore tool with libipatcher support.
- Saved .shsh blobs for the destination firmware.
- Public keys available for your device (most are, but if not, you’re out of luck).
- A Mac or Linux computer. (These instructions are for Mac but Linux will be almost identical. There is currently no Windows support, so try a VM).
Instructions
1) Download the IPSW for your destination firmware.
2) Download the latest version of futurerestore with libipatcher support. Unzip it.
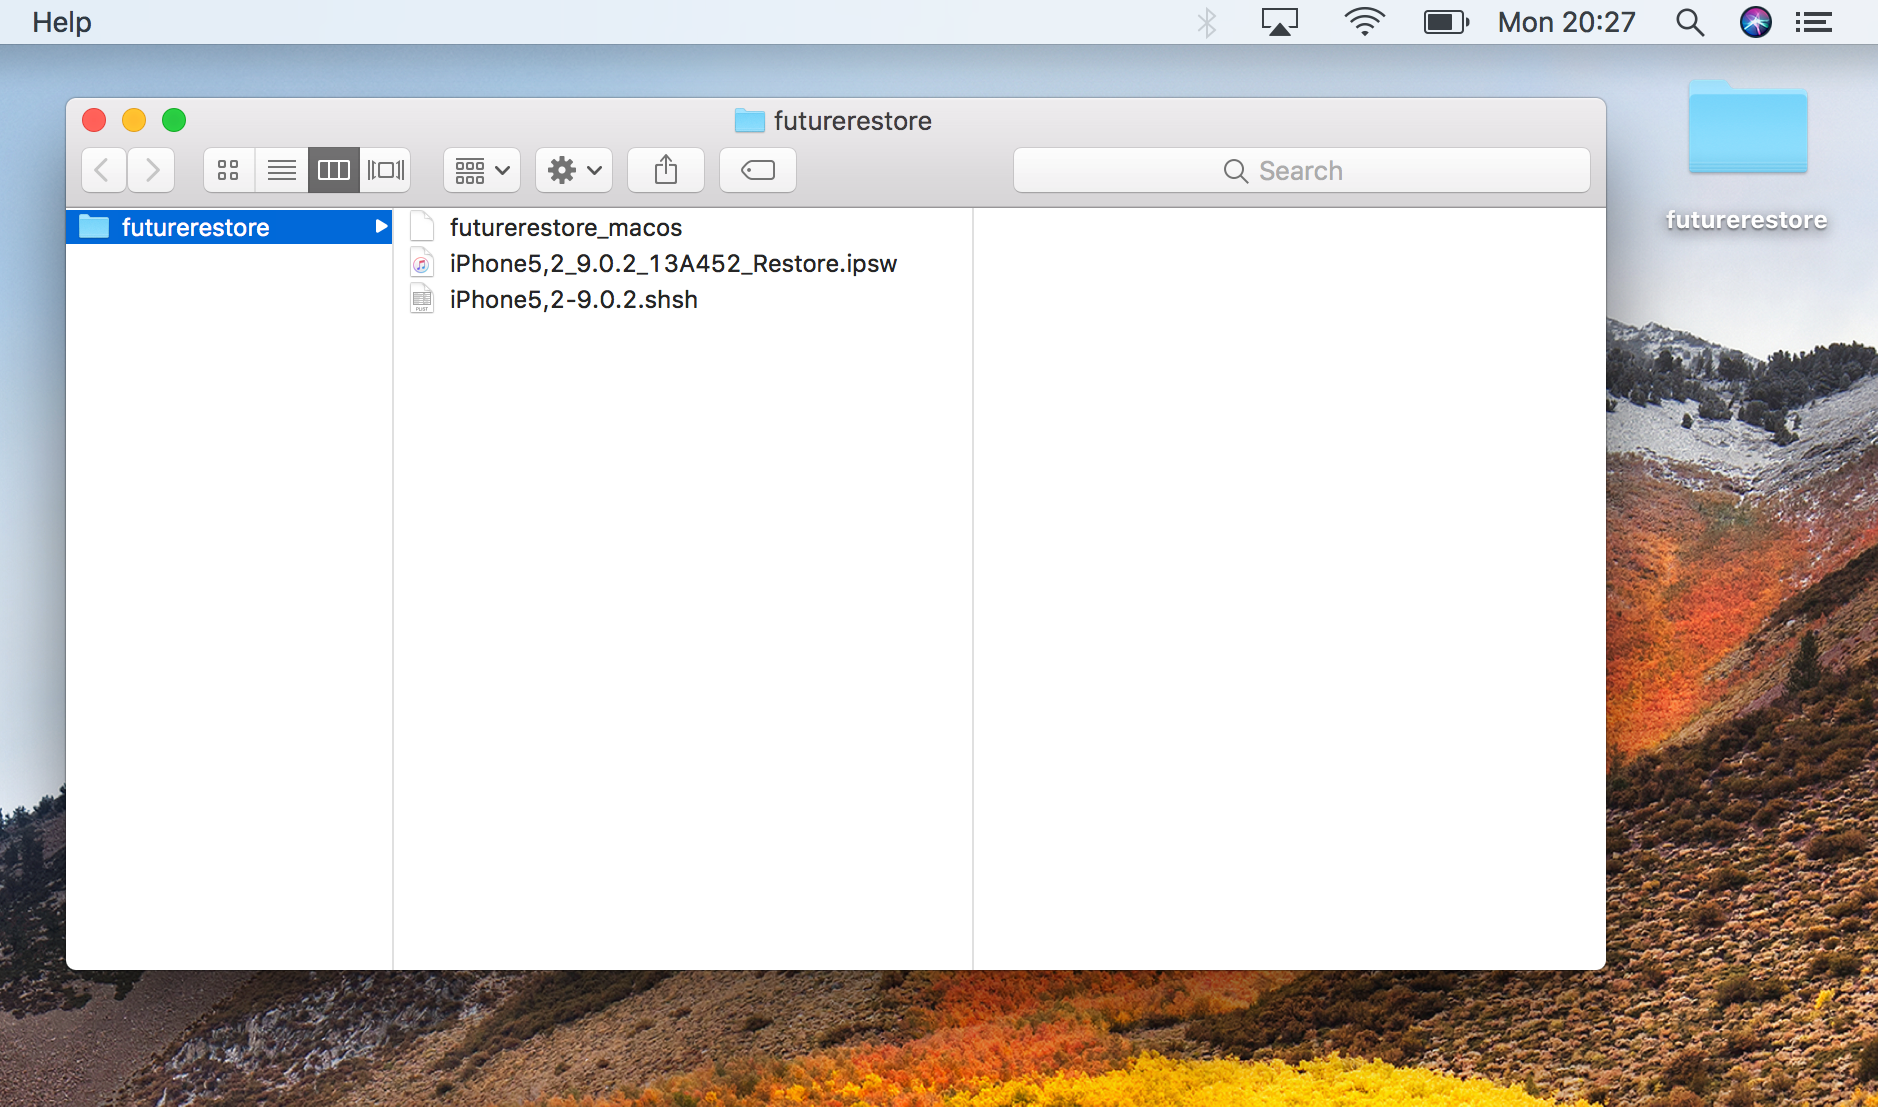
3) Create a folder on your Desktop called futurerestore.
4) Put the destination IPSW, the futurerestore_macos file and your destination firmware .shsh blob inside the futurerestore folder on your Desktop.
5) Open Cydia on your iOS device and add the following repo:
http://repo.tihmstar.net
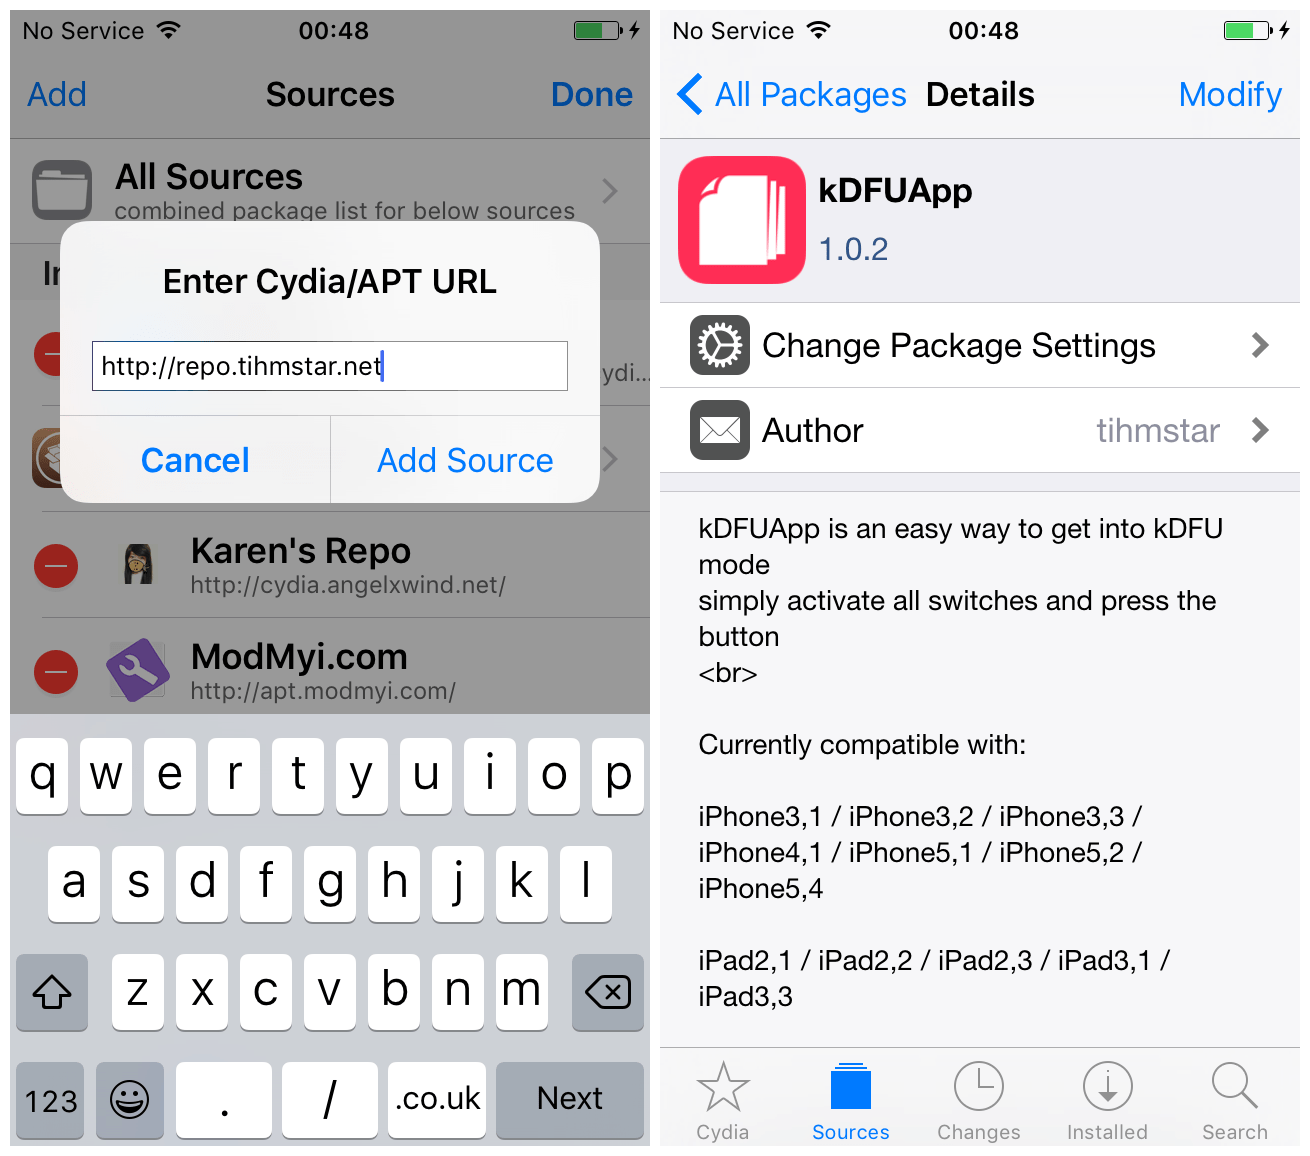
6) Install the kDFUApp package from that repo.
7) Connect your iOS device to your computer, and launch the kDFUApp from your home screen.
8) Slide all the sliders in the app until they’re green, and then press enter kDFU to reboot your device into pwned DFU mode ready for the restore. Don’t worry about which firmware is selected by kDFUApp’s first slider, it doesn’t matter. If kDFUApp does not support your device yet you will have to find an iBSS to use from another source, which is beyond the scope of this article. Alternatively, kDFUApp will be updated at some point to widen its support.
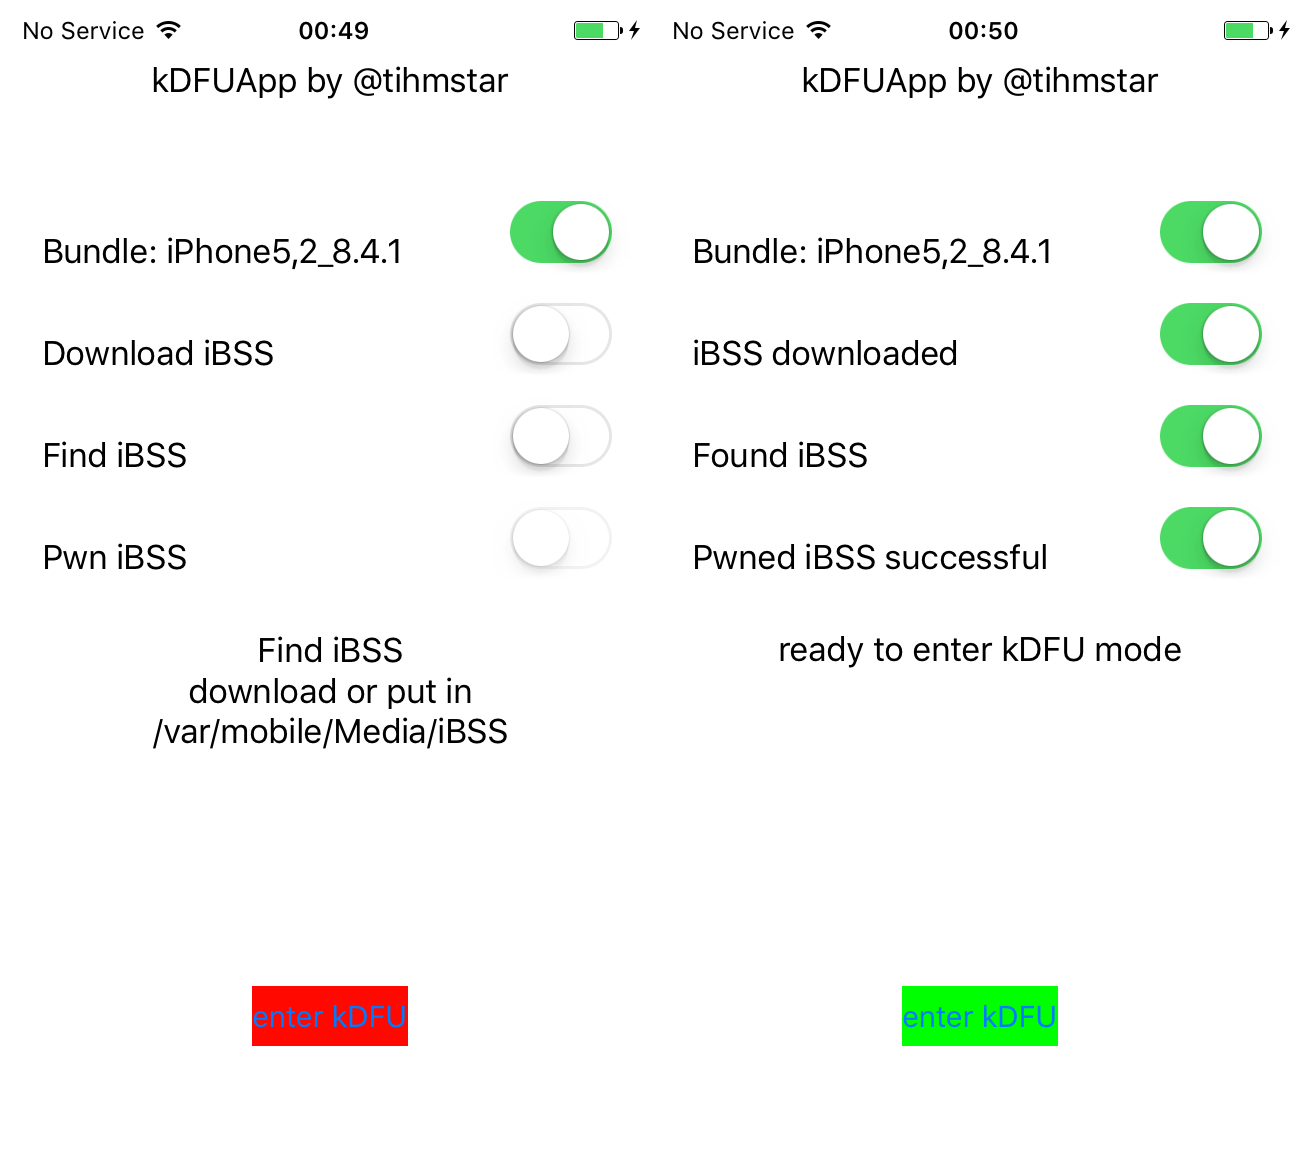
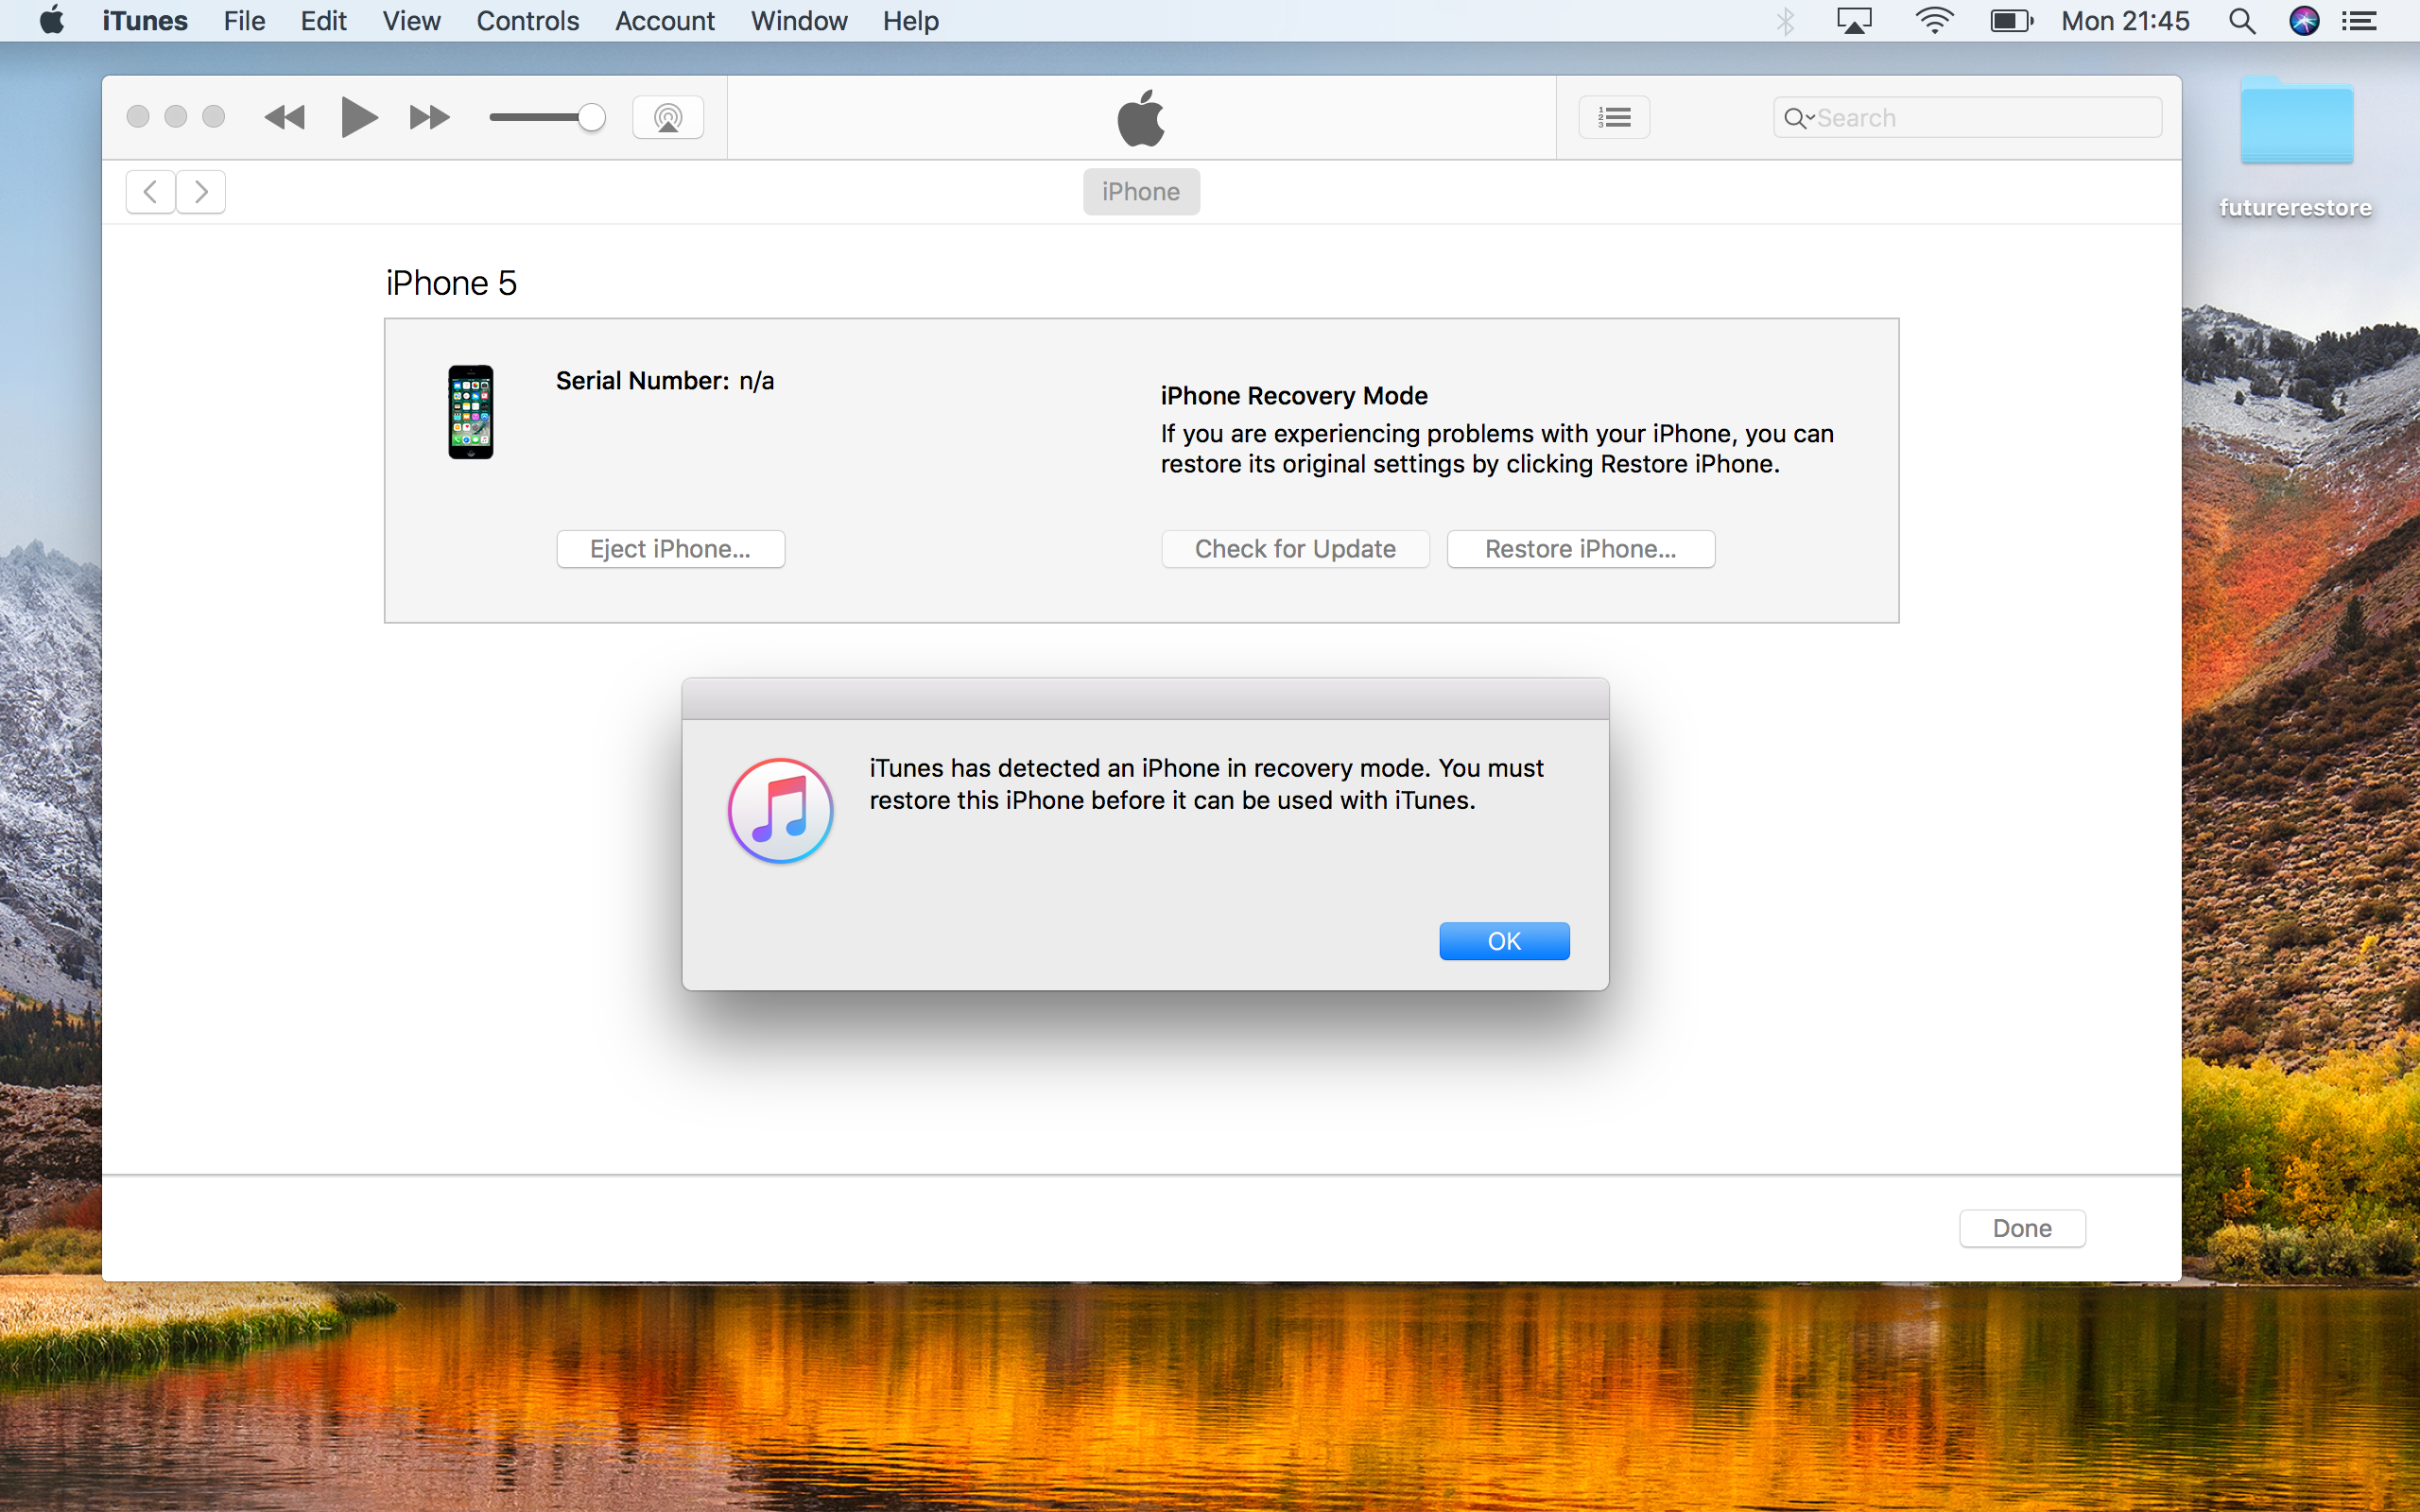
iTunes may open and inform you that it has detected a device in Recovery Mode. This is fine, and in fact confirms that kDFU mode has been entered. Simply quit iTunes without making any changes.
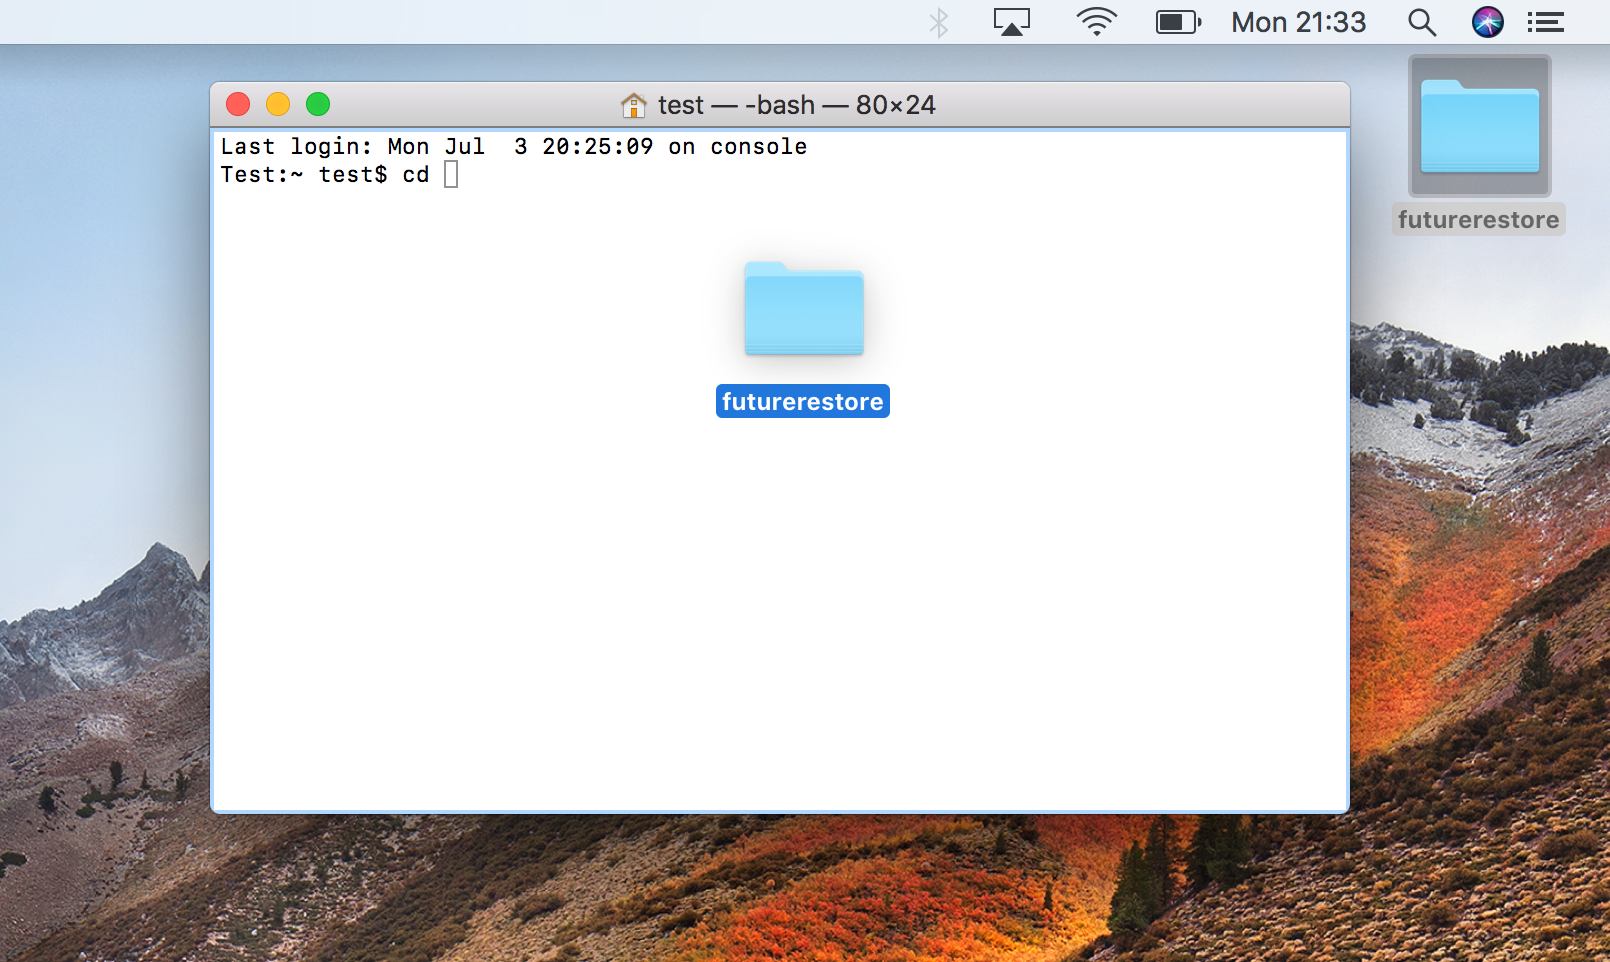
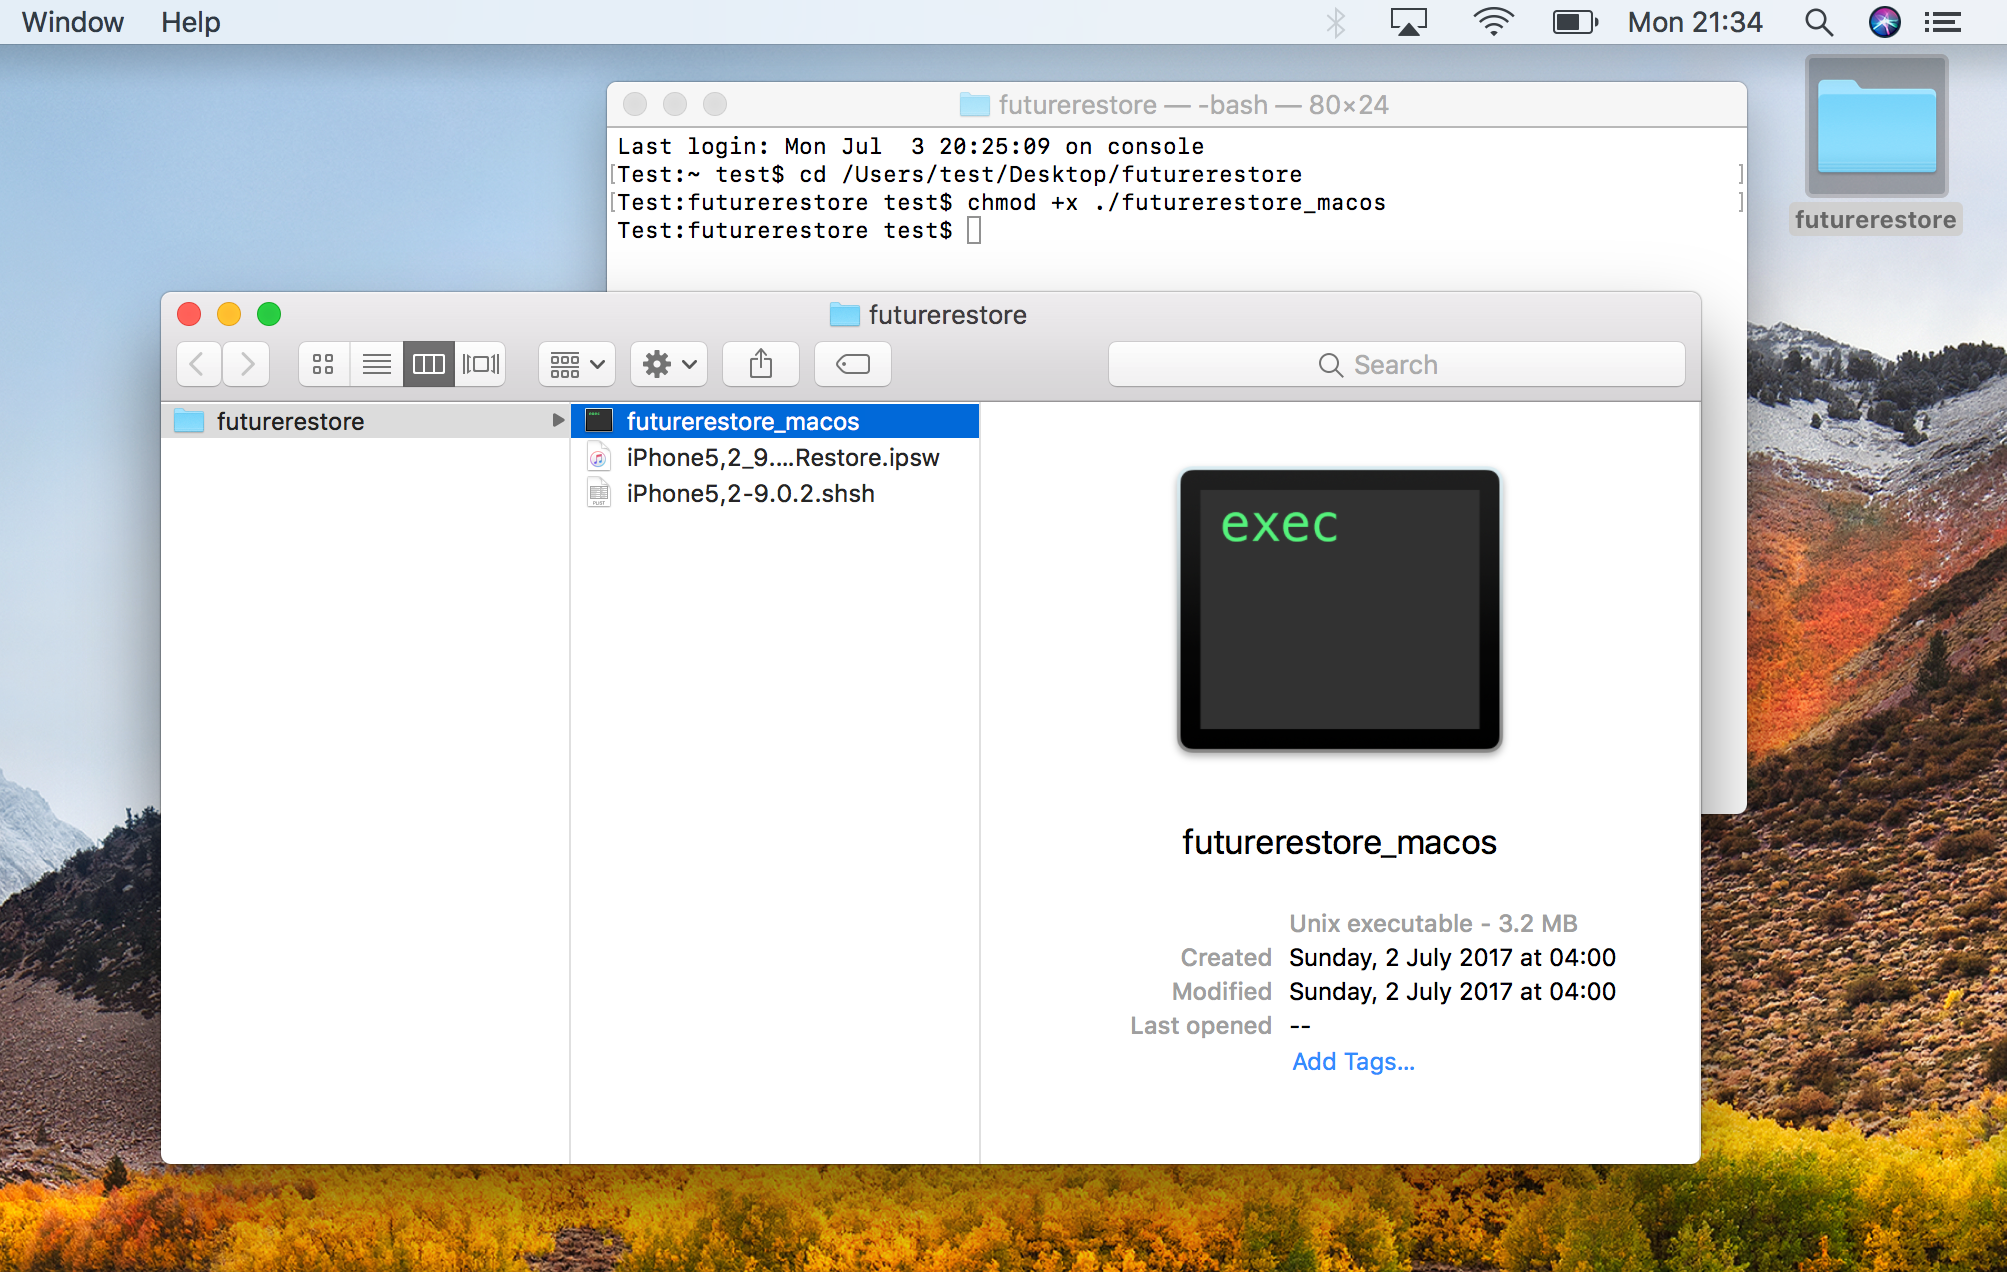
9) Open a Terminal window on your computer. Type cd, followed by a space, and then drag your futurerestore folder from the Desktop onto the Terminal window. Hit Enter.
10) Now enter the following command into Terminal:
chmod +x ./futurerestore_macos
The futurerestore_macos file in your folder should now have the square black symbol indicating it is executable.
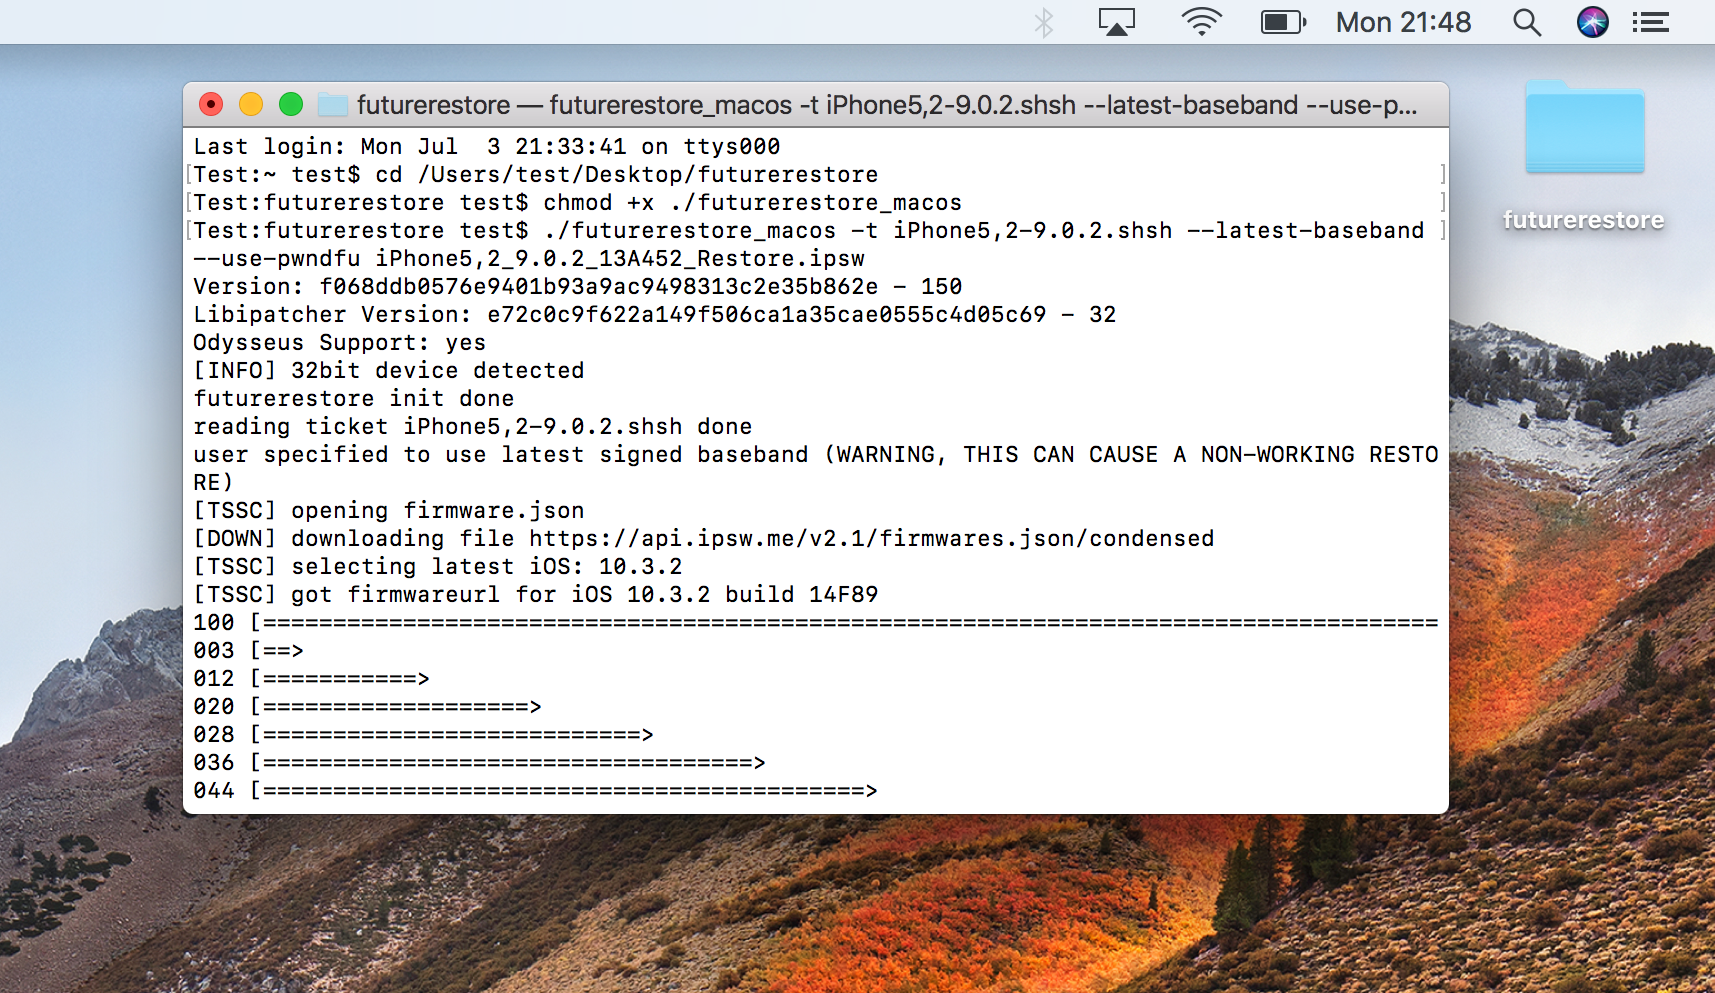
11) Now all we have to do is run the futurerestore command with the right options. The command looks like this:
./futurerestore_macos -t SHSH.shsh --latest-baseband --use-pwndfu IPSW.ipsw
- Replace SHSH.shsh with the name of your .shsh file.
- Replace IPSW.ipsw with the name of your .ipsw file.
- If you are using a non-cellular device, like a WiFi-only iPad or an iPod touch, replace –latest-baseband with –no-baseband.
An example command to downgrade an iPad 2 (WiFi) from iOS 9.3.4 to iOS 8.3 would be:
./futurerestore_macos -t iPad2,1_8.3-12F69.shsh --no-baseband --use-pwndfu iPad2,1_8.3_12F69_Restore.ipsw
And an example to restore an iPhone 5 from iOS 9.0.2 to iOS 9.0.2 would be:
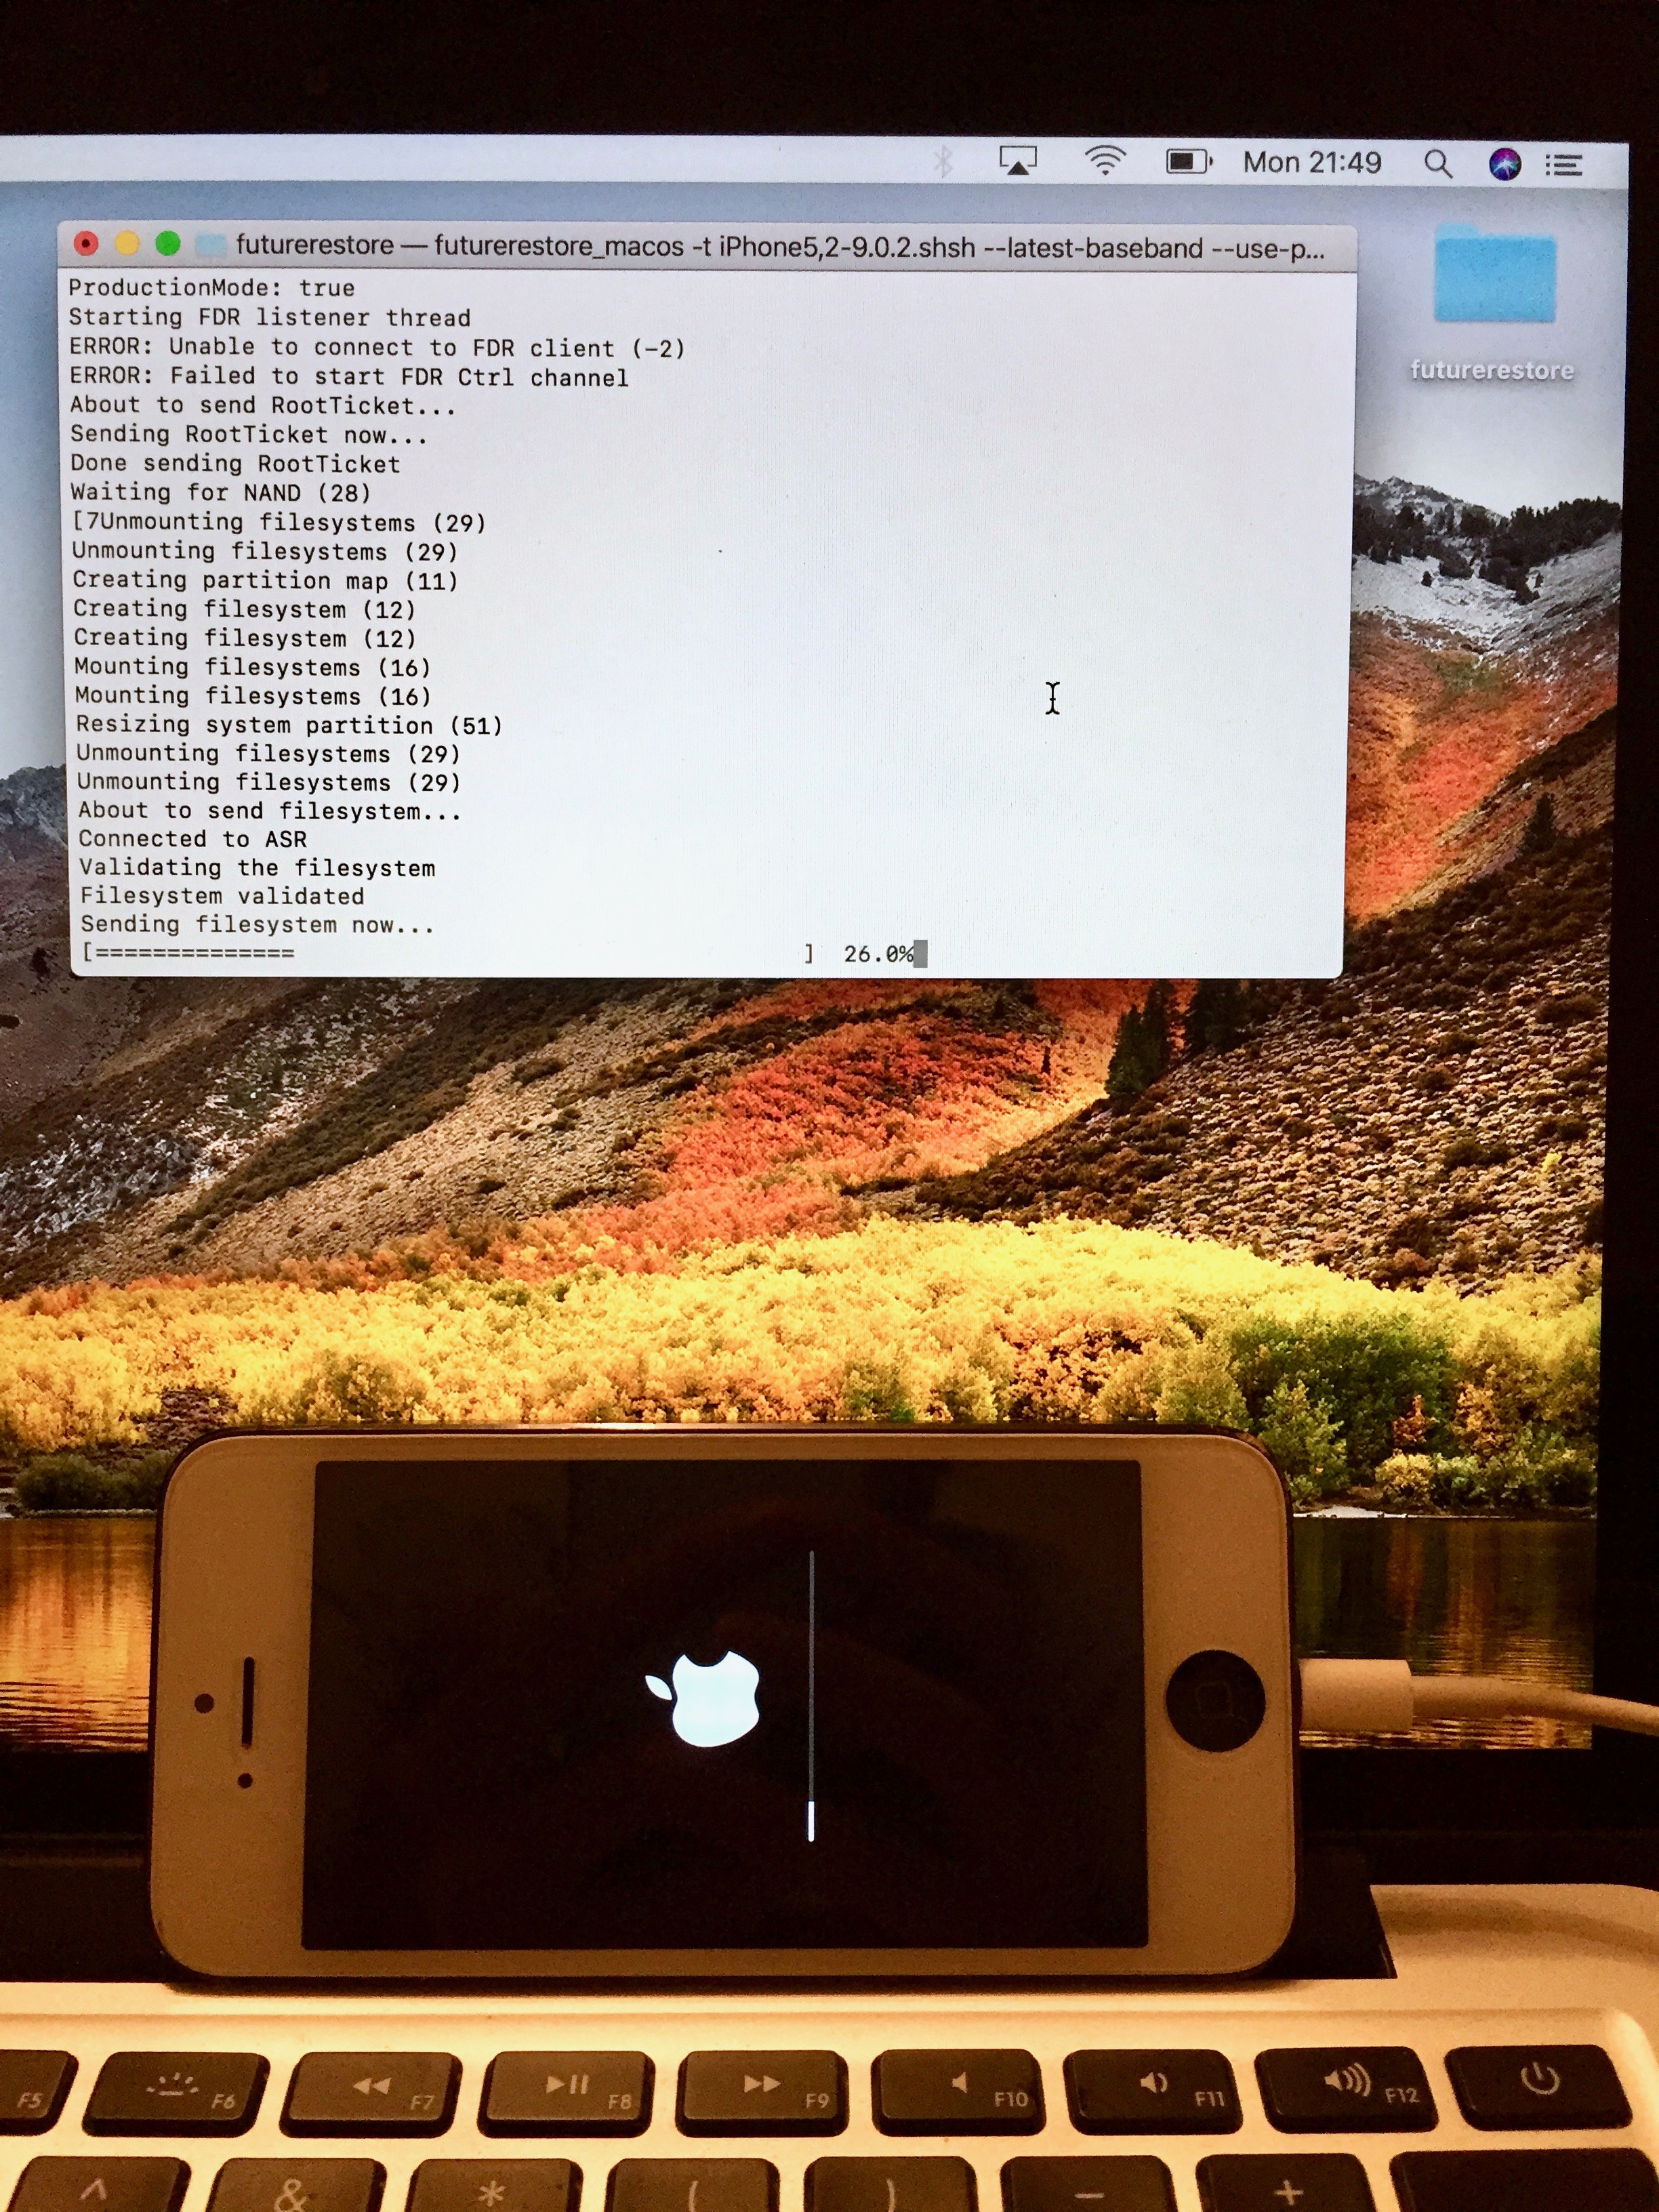
./futurerestore_macos -t iPhone5,2-9.0.2.shsh --latest-baseband --use-pwndfu iPhone5,2_9.0.2_13A452_Restore.ipsw
Be sure to double-check your filenames are correct and the files are in the futurerestore folder before issuing the command. If you wish to use a signed baseband other than the latest one please refer to tihmstar’s video, or my futurerestore guide which also shows how to specify the baseband and build manifests. Whilst this is not significantly harder, you must specify several more files in the restore command and so I will leave it out of this guide. It should not be necessary to do this anyway; the latest baseband seems to be compatible with all destination firmwares so far in testing.

12) Once you are ready, issue the command with Enter. Make sure your device is still plugged in, with a black screen (kDFU mode), and that you do not disconnect it until the process is done. The restore will initiate. Watch the Terminal output for errors, and look out for your iOS device’s screen flashing green at one point. This is desired and means the process is successfully begun. If it reboots without a green screen then it may not have worked.
With luck, the restore will complete successfully and your device will return to the iOS setup screens. You are now back to the firmware of your choice!
The addition of Odysseus functionality to futurerestore is very powerful, allowing the restoring of all legacy devices to any firmware with a single Terminal command, if you have the blobs to back it up. I’ve used it several times already and it has worked perfectly on every occasion.
Leave a comment down below if you need additional help with this process, and to let me know your results. Did it work for you? Are keys not available for your device, or is it not supported by the kDFU app?