In this tutorial, we will show you how to use referenced library mode in Mac’s Photos app to stop it from making copies of your media and help save space.
Photos for Mac defaults to saving a copy of every imported image or video into its own library. If you’d like to change this behavior, consider using the so-called referenced mode. When Photos is running in this mode, it references your imports in their original locations rather than copying them to the library.
This lets you keep referenced items outside the Photos library and access them in the app like you normally would. In this mode, Photos uses symbolic links, a macOS feature that lets apps converse storage by referencing files. This is the preferred mode for anyone looking to keep images and videos manually organized in multiple folders or external drives on their Mac. It also helps keep storage space free.
About referenced files
Please keep in mind the following caveats before enabling this mode:
- Referenced files are not included in backups of your Photos library
- Referenced files are not stored in iCloud Photos (previously called iCloud Photo Library)
- Referenced files are not synced across devices via iCloud Photos
In case you’ve been wondering, touch-ups made to referenced items won’t overwrite the originals on your Mac’s disk. That’s because editing in Photos is non-destructive: your edits are saved as scriptable commands in accompanying .AAE files, giving you the freedom to undo all your edits at any time and easily revert to the originals.
This is why you cannot open a referenced file in another app expecting to see all your edits. Instead, use Photos to export the file as a new copy, which saves its edited version.
With that in mind, let’s get to it.
Related: Where are the items from the Photos app saved on my Mac?
Turn on the referenced mode in Mac’s Photos app
- Open the Photos app and click Photos from the top menu bar, followed by Settings or Preferences.
- Make sure you’re in the General tab and untick the checkbox next to “Copy items to the Photos library.”
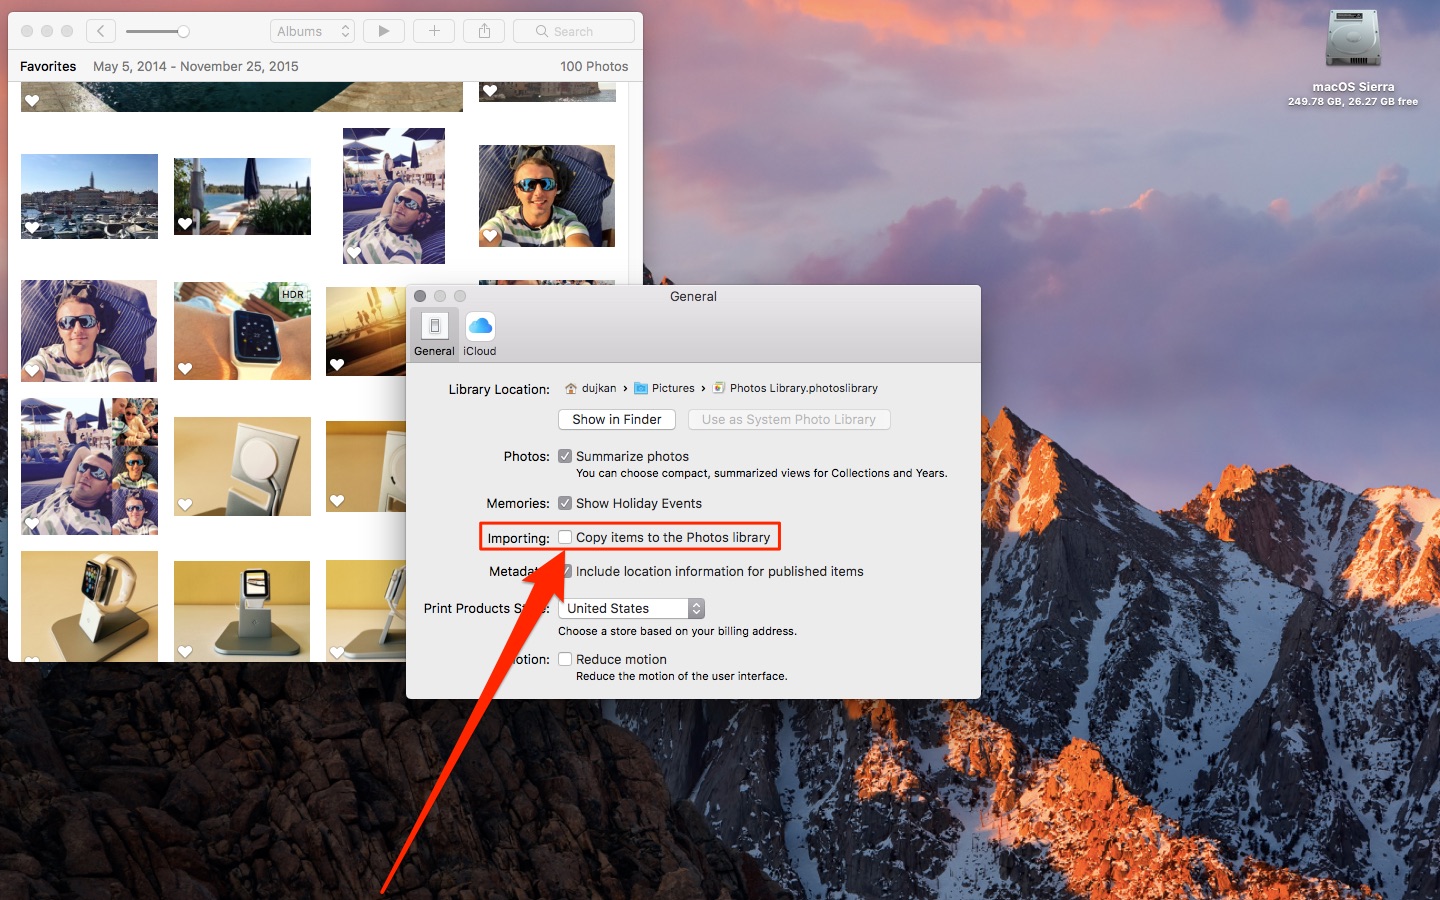
Photos and videos you import from this point onward shall be referenced rather than copied to the library, helping avoid file duplication.
As long as the volume or folder is accessible to Photos, you can view and work with your referenced media in the app as you normally would.
When you switch to referenced mode, the app puts up a message informing you that your referenced images won’t upload to iCloud Photos. If you rely on iCloud Photos, you’ll want to avoid running Photos in referenced mode.
Related: How to adjust the location of your photos and videos on Mac
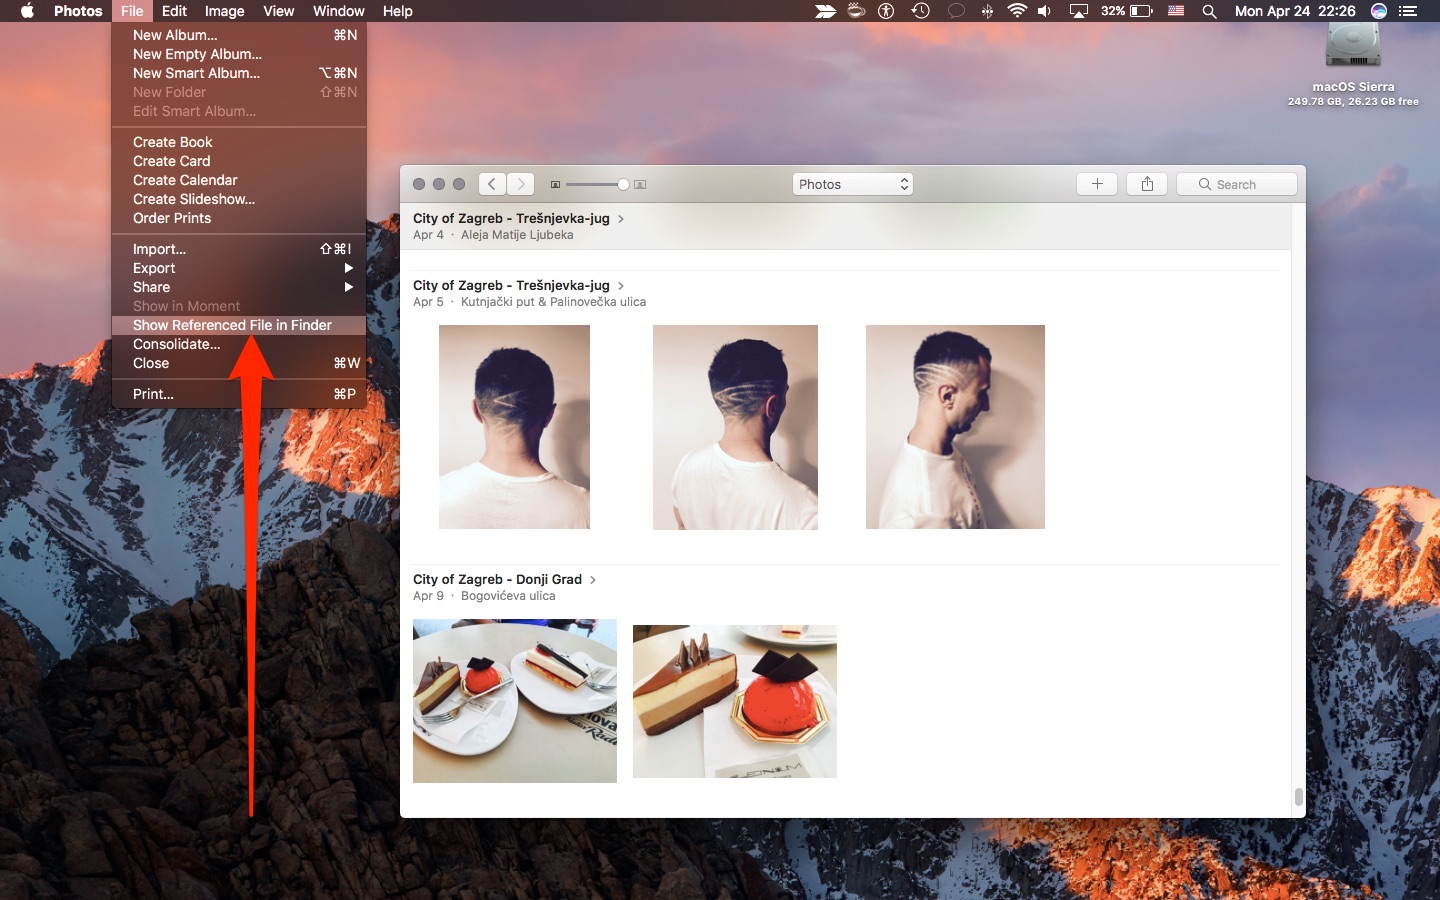
Show referenced file in Finder
To reveal a referenced item in Mac’s Finder, select it in the Photos app, then choose the option labeled Show Referenced File in Finder from the app’s File menu.
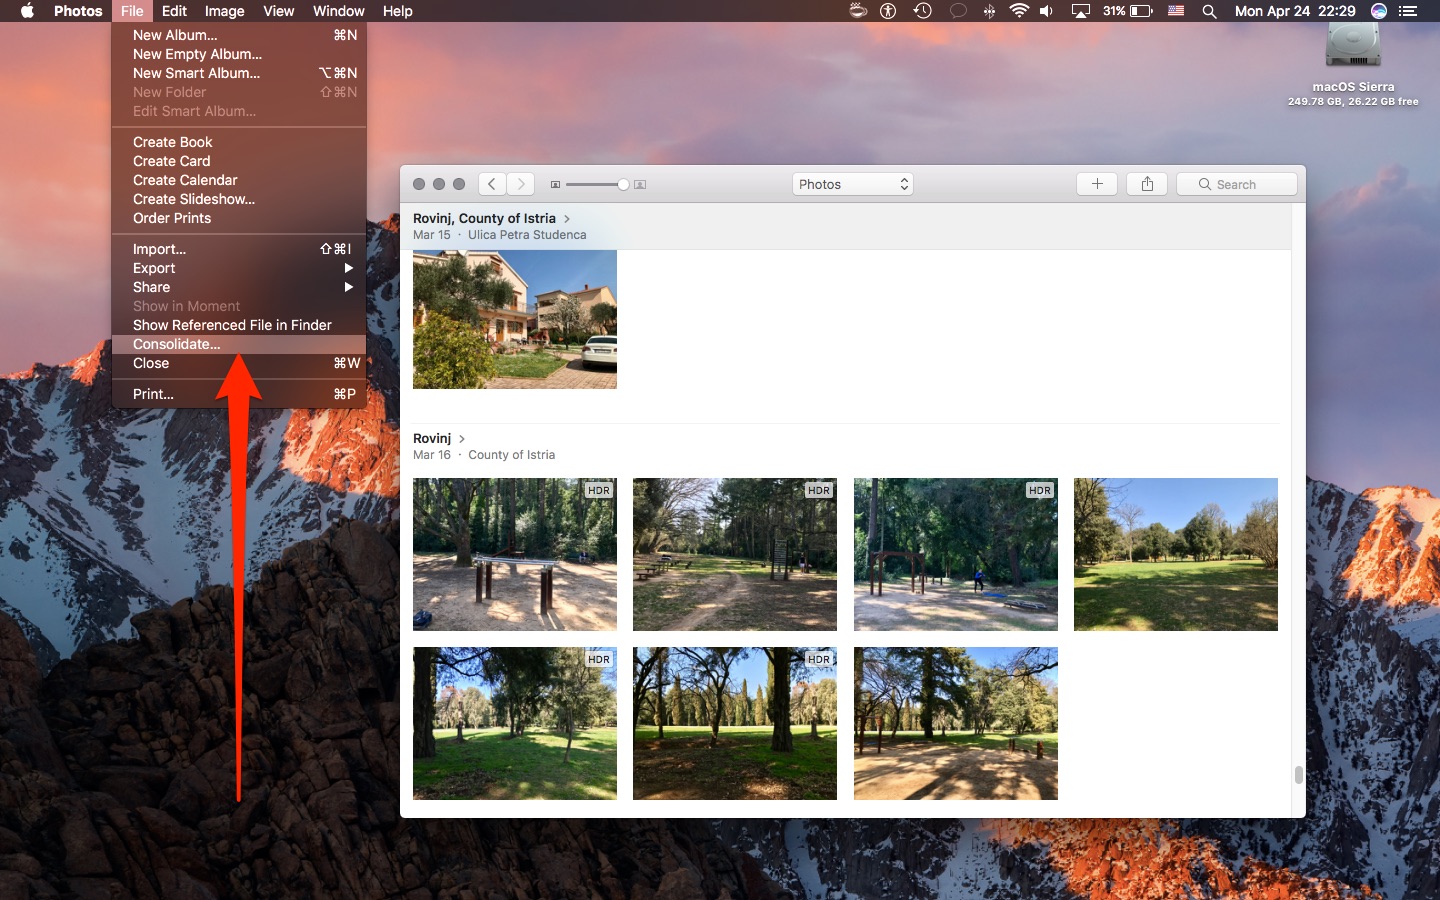
Consolidate referenced files
Referenced items live outside the Photos library.
Depending on your workflow, they can be scattered across many different locations, even spanning multiple external disks and network shares. Referenced files don’t move along with the Photos library when you move them to a new folder or drive.
Deleting a referenced file in Finder makes it inaccessible in Photos. Perhaps most importantly, referenced files are not automatically uploaded and stored in iCloud Photos. But don’t worry; that’s why Photos gives you the option to consolidate the library.
This action copies all referenced files into the Photos library. Consolidated items will be backed up along with the rest of your images and photos in the Photos library.
Again — if you rely on iCloud Photos to sync your photos and videos, you must consolidate any referenced files into the library to make them part of your iCloud Photos sync.
To consolidate one or more referenced items, select them in Photos, choose Consolidate from the File menu, and then click the Copy button to confirm the action. “This action will copy the original files into the Photos Library and cannot be undone,” reads the prompt. The process may take a while, depending on the size and locations of the referenced files.
You now know how to use referenced mode in Photos for Mac.
If you’re running low on storage or want the freedom to organize your photos and videos into custom folders — and don’t use iCloud Photos to sync them across devices, then you should definitely consider giving referenced mode in Photos a try.
Of course, not everyone needs to organize their media files manually, and most people won’t. But for those who do, Apple provides this tremendously useful option in Photos.
Check out next: