Small glitches or problems with your devices can cause Home Sharing to not work properly. This guide will help you troubleshoot and fix Home Sharing issues on your Mac, iPhone, iPad, iPod, Apple TV, or Windows PC.
Home Sharing is a useful feature you can use to stream your content from your Mac’s or PC’s media library to iPhone, iPad, other computers, and Apple TVs in your household.
While it’s a useful feature, that’s not to say it works all the time. Small glitches or problems with your devices can cause the feature to not work properly. Other times, the Music or TV app on iPhone may show a popup saying, “Unable to turn on Home Sharing.”

If you’re facing such issues, here’s how to fix them.
1. Make sure Home Sharing is enabled on your devices
To get Home Sharing to work, you should first make sure the feature is enabled on all your devices. To do that, go through the steps below:
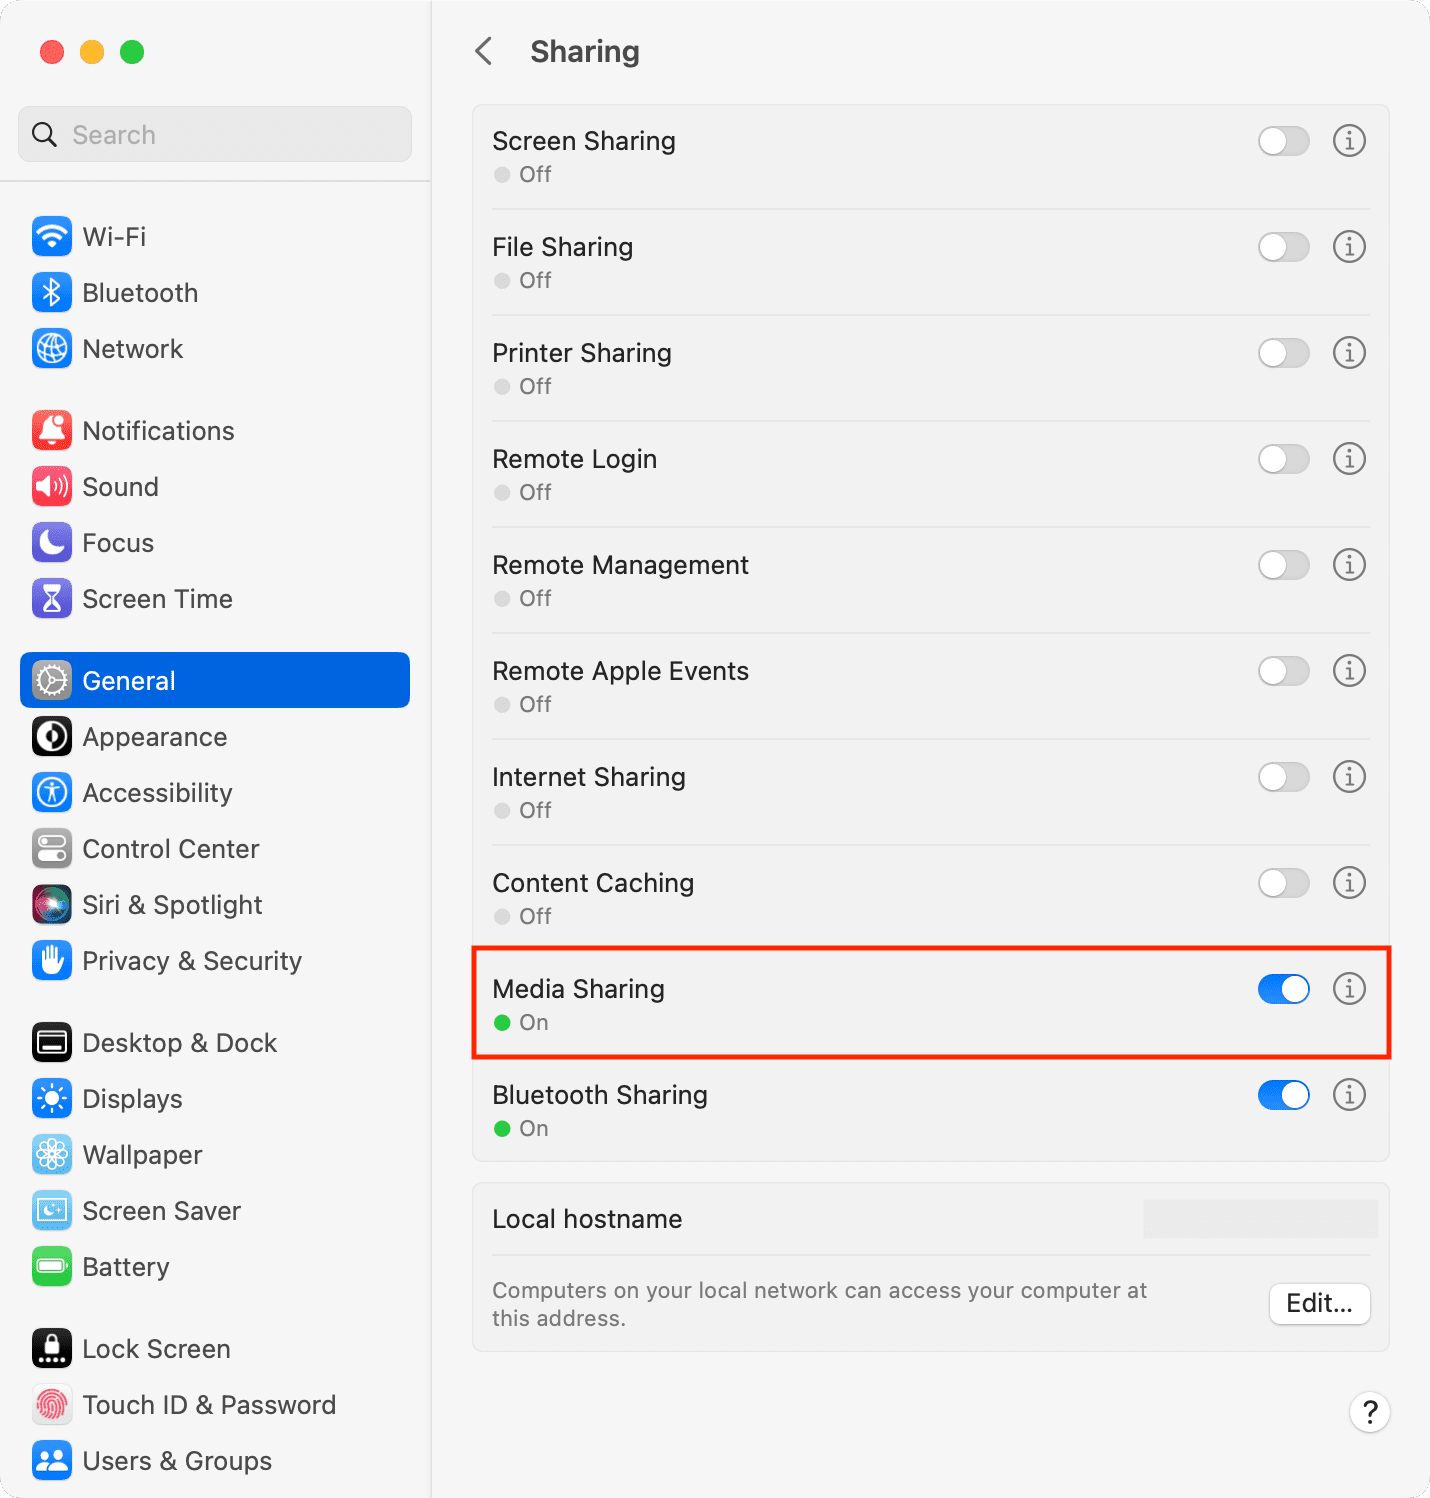
- Mac: Open System Settings and go to General > Sharing > Turn on Media Sharing. After that, click the info icon ⓘ and make sure Home Sharing is checked.
- Windows PC: Open iTunes and go to File > Home Sharing > Turn on Home Sharing in the menu bar.
- iPhone or iPad: Go to Settings > Music or TV and tap Sign In under the Home Sharing heading. From the popup, tap Sign In again.
- Apple TV: Go to Settings > Users and Accounts > Home Sharing and Turn on Home Sharing. On older Apple TVs, go to Settings > Computers.
Once Home Sharing is enabled on your devices, everything should work seamlessly, but if you have everything enabled and it’s still not working, then move on to the next troubleshooting steps.
2. Use the same Apple ID on all devices
If you have more than one Apple ID or a family member is signed into one of your devices instead of yourself, then this can impact your Home Sharing abilities.
For Home Sharing to work, all of your devices must be signed into the same Apple ID that owns the content you want to stream. In other words, if ABC@icloud.com has a movie you wish to watch with Home Sharing, and you’re signed into your Apple TV with XYZ@icloud.com, then it’s not going to work. Both devices will need to be signed in with ABC@icloud.com. You can sign out of the current Apple ID and sign in using the other ID.
3. Ensure your Mac or PC is on and awake
Home Sharing will not work if your computer is turned off or in sleep, as it may disconnect your computer from Wi-Fi, which is needed for Home Sharing. So, make sure you keep your Mac or PC awake.
Note: I noticed that Home Sharing will work even if your Mac is on the Lock Screen (Apple icon > Lock Screen) but awake. However, if you put it to sleep (Apple icon > Sleep), Home Sharing will stop working.
If you want to use Home Sharing but not keep your Mac’s screen awake, first set it to not automatically go to sleep. Next, you can lock it, turn down its brightness to zero, or turn off the monitor if you use a Mac desktop.
You can also set your Mac to wake on demand if you’re using an Apple TV. To do that, go to System Settings > Energy Saver and turn on Wake for Wi-Fi network access. On MacBook, go to System Settings > Battery > Options and set Wake for network access to Always or Only on Power Adapter.
If Home Sharing disconnects automatically, go to System Settings > Privacy & Security > Advanced and turn off the switch for Log out automatically after inactivity.
4. Keep iTunes open
For Home Sharing to work on Windows PC, make sure you keep iTunes open. On Mac, you can keep the Music app and the TV app open. However, in my test, Home Sharing works even if Mac’s Music and TV apps are closed.
If you already have iTunes, Music, or the TV app open and everything looks good but still isn’t working, try quitting and reopening it to the foreground on your Mac and try again.
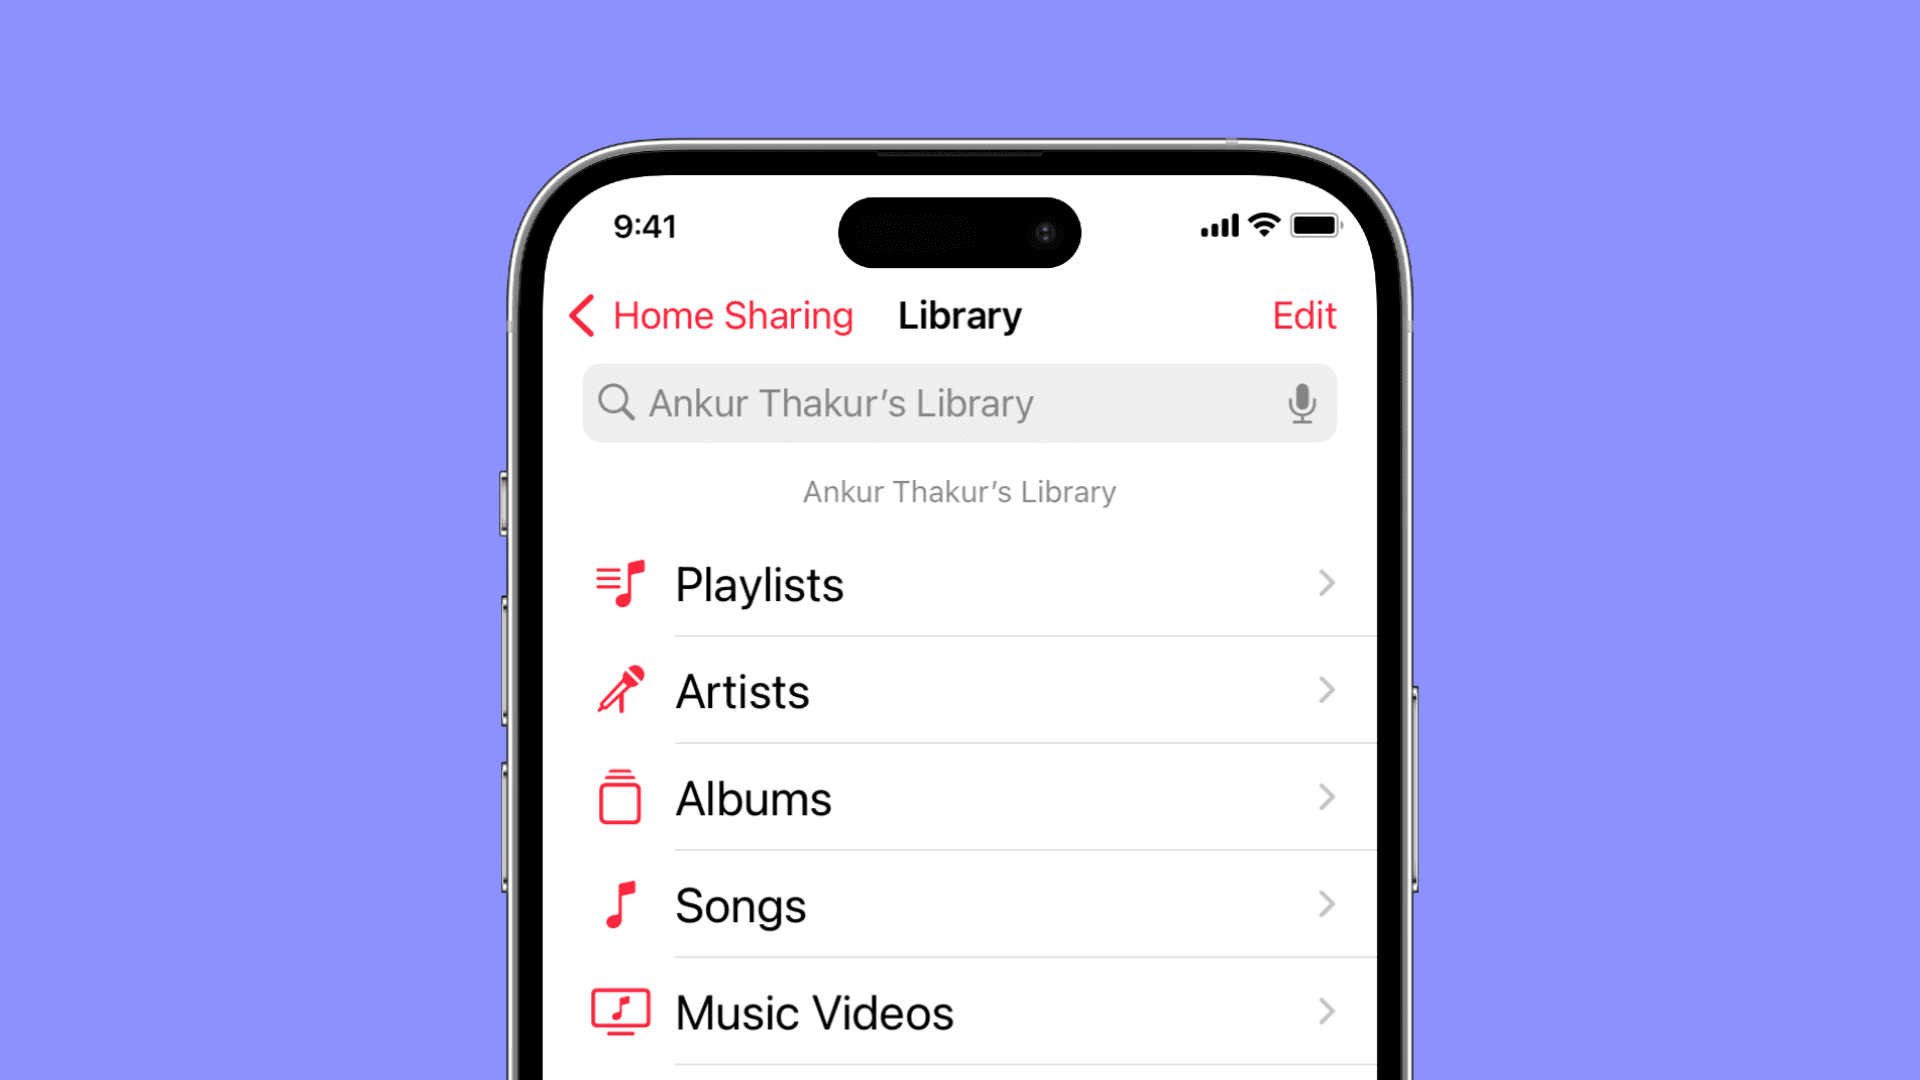
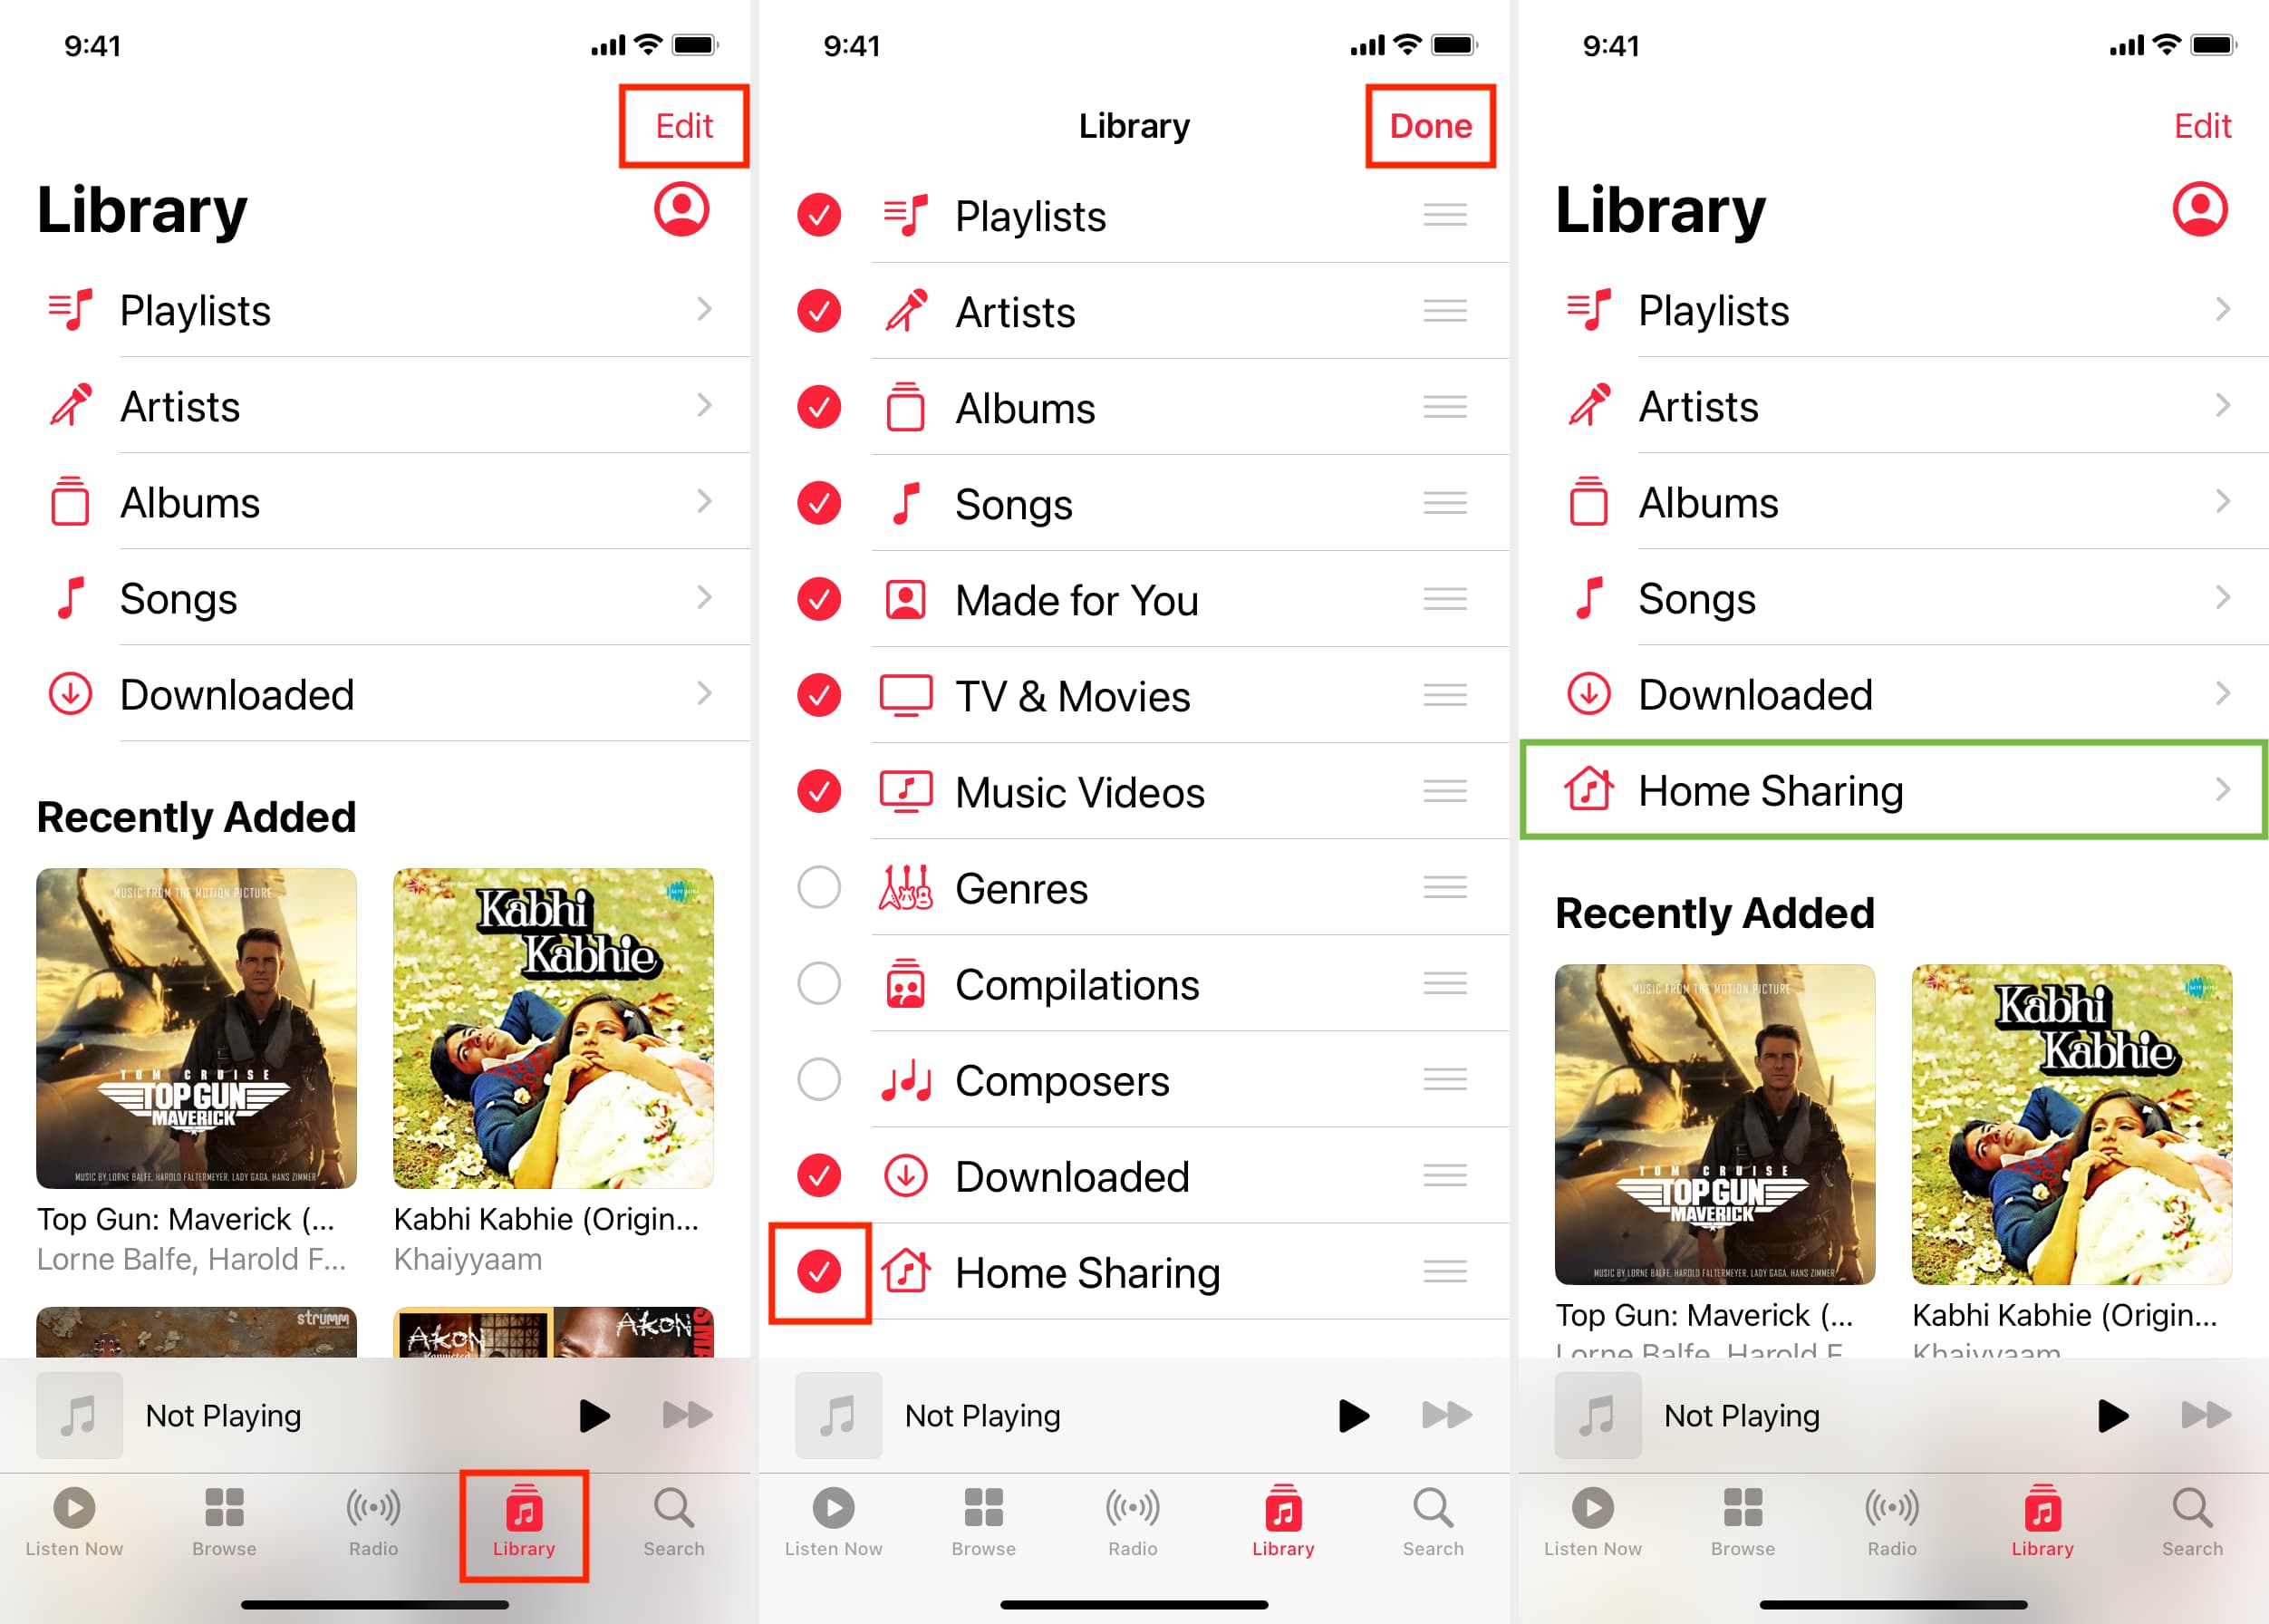
5. Show the Home Sharing option on iPhone and iPad
If you don’t see the Home Sharing option, open the Music or TV app on your iOS device and tap Library. Next, tap Edit, check Home Sharing, and hit Done.
6. Get on the same Wi-Fi network
For Home Sharing to work, you must be on the same Wi-Fi network with all of your shared devices. This will not work if your Mac is on one Wi-Fi network and your Apple TV is on another, for example.
If everything is on the same Wi-Fi network, make sure none of your devices are connected to a VPN or another kind of internet-intruding service that might interrupt or intercept your ability to have your devices talk to one another.
Another thing to check for is a guest network. Modern wireless routers sometimes channel two separate networks; one is a personal network for you and your family (often password protected), while the other is a guest network for your visitors (often not password protected). Make sure both devices are on the same channel and that one isn’t on the guest network and one isn’t on the personal network.
Note: Modern routers also offer 2.4 GHz and 5 GHz network bands, and you might see two Wi-Fi network names that have almost a similar name, like Emily and Emily_5G. Make sure all devices are connected to the same network.
7. Restart everything
You should also try restarting your devices if things aren’t working. Don’t only restart your Mac, Apple TV, and/or iOS devices, but also restart your wireless router. It could be that it’s not allowing the devices to talk to one another like it’s supposed to because of a glitch of its own.
8. Update all your software
It’s also good to make sure all your devices and wireless routers are running the latest software, as new software has all the latest bug fixes and performance improvements to make sure things run as smoothly as possible. To do that, follow these steps:
- Mac: Open System Settings and go to General > Software Update. On older versions of macOS, go to System Preferences > Software Update.
- PC: Open both Windows Update and Apple Software Update to see if there are any updates to be installed.
- iPhone or iPad: Go to Settings > General > Software Update to see if you have any updates waiting.
- Apple TV: Go to Settings > System > Software Updates > Update Software to check.
If you’re using an outdated software version, it might not even support Home Sharing, so be sure to keep this in mind.
9. Check security settings
If you’ve got some kind of security setting in place, such as a firewall, then this could potentially be hindering your access to Home Sharing. Most of the time, this is going to be related to third-party security software or firewall settings in the wireless router itself.
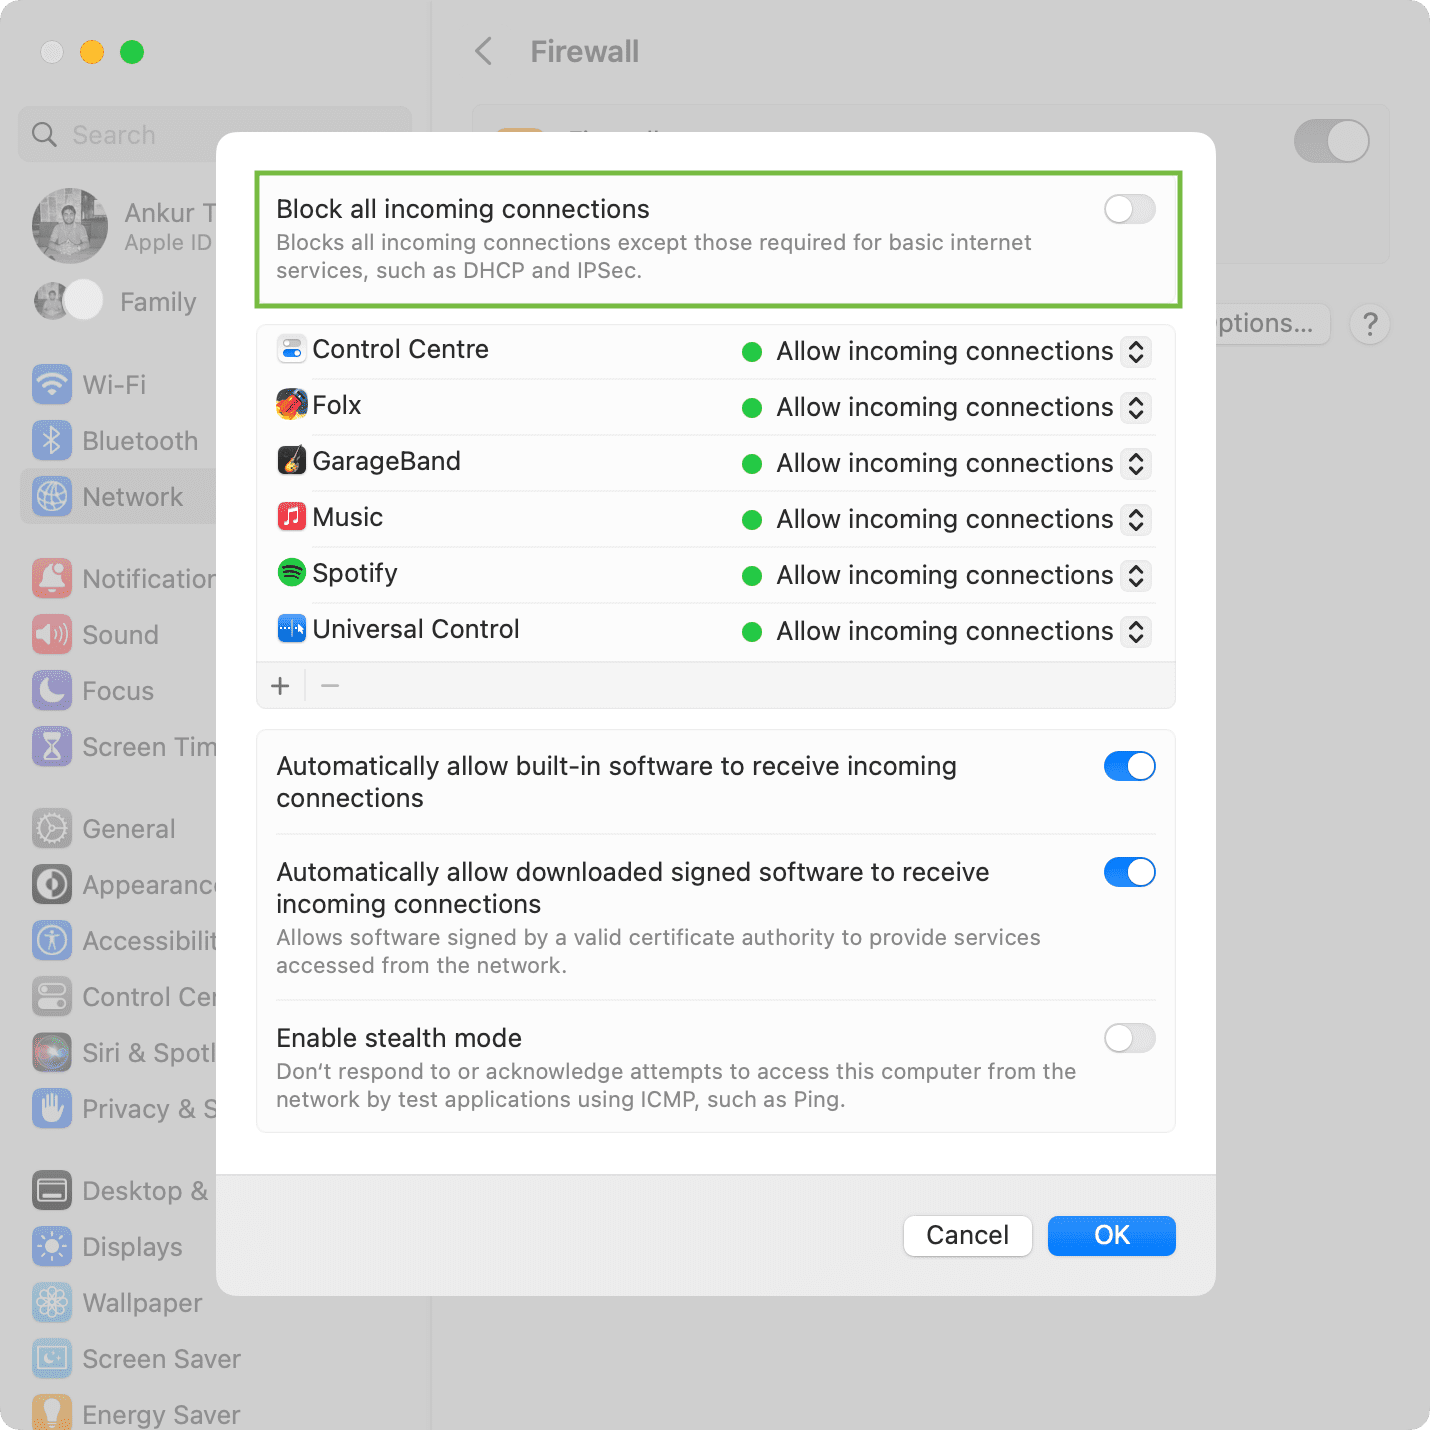
In rare instances, a Mac user may have turned off incoming connections via the firewall. You can check this by following these steps:
- On macOS Ventura and later: System Settings > Network > Firewall > Options and make sure Block all incoming connections is off.
- On earlier versions of macOS: Go to System Preferences > Security & Privacy and open the Firewall tab. You can edit the settings to make sure nothing is blocking your Home Sharing by opening the Firewall Options.
10. Look at your router settings
Ensure that no ports needed for Home Sharing are being blocked. Home Sharing relies on TCP port 3689 and UDP port 5342. Make sure these are open and can be accessed.
11. Are you trying to authorize more than 5 machines?
You can only have a maximum of five computers connected to Home Sharing. If you are trying to use a sixth machine, then this isn’t going to work. If you have too many machines authorized to use your iTunes account, you may want to deauthorize the ones you don’t need so the ones you do need can be utilized.
After going through the steps above, the most common Home Sharing issues will be resolved. If they were not, your only hope might be to contact Apple Support or the support division of your wireless router manufacturer.
Were you successful in getting Home Sharing to work? Share in the comments section below.