In this tutorial, we’ll show you how you can upgrade a Mac user account’s privileges to administrator level, and we’ll also go through the steps to strip an account of its admin rights.

Related: How to add a new user account to your Mac
Why promote or demote Mac user accounts
If you’re managing a network of computers for a school or institution, then it may be required to give teachers or other employees administrator access to a Mac so they have the same privileges you do to get things done when you’re not on your shift.
Likewise, even if you’re not doing this for a business setting, you might want to do this if you’re a parent and are trying to promote the rights of another user account for your significant other. This will give them the same access rights to the Mac as you would have and can make it so the both of you can better manage your children’s time on the computer.
On the other hand, you might not even be looking to promote someone; perhaps you will want to demote an account because someone’s abusing their powers and changing settings or deleting stuff from the Mac when they shouldn’t be. In this case, you would need to put a stop to it for the safety of your company’s information or to keep someone on your personal computer from damaging something and putting your personal data at risk.
There are an array of reasons why knowing how to do this is important, so we’ll get right into it.
Caution: Please keep in mind that if you choose to make someone else an administrator on your Mac, they’ll have all the same rights as you, so only give responsible people this power, or else you might end up regretting it later on.
How to promote a Mac user account to admin
- Open the System Settings app on your Mac.
- Select Users & Groups from the left sidebar.
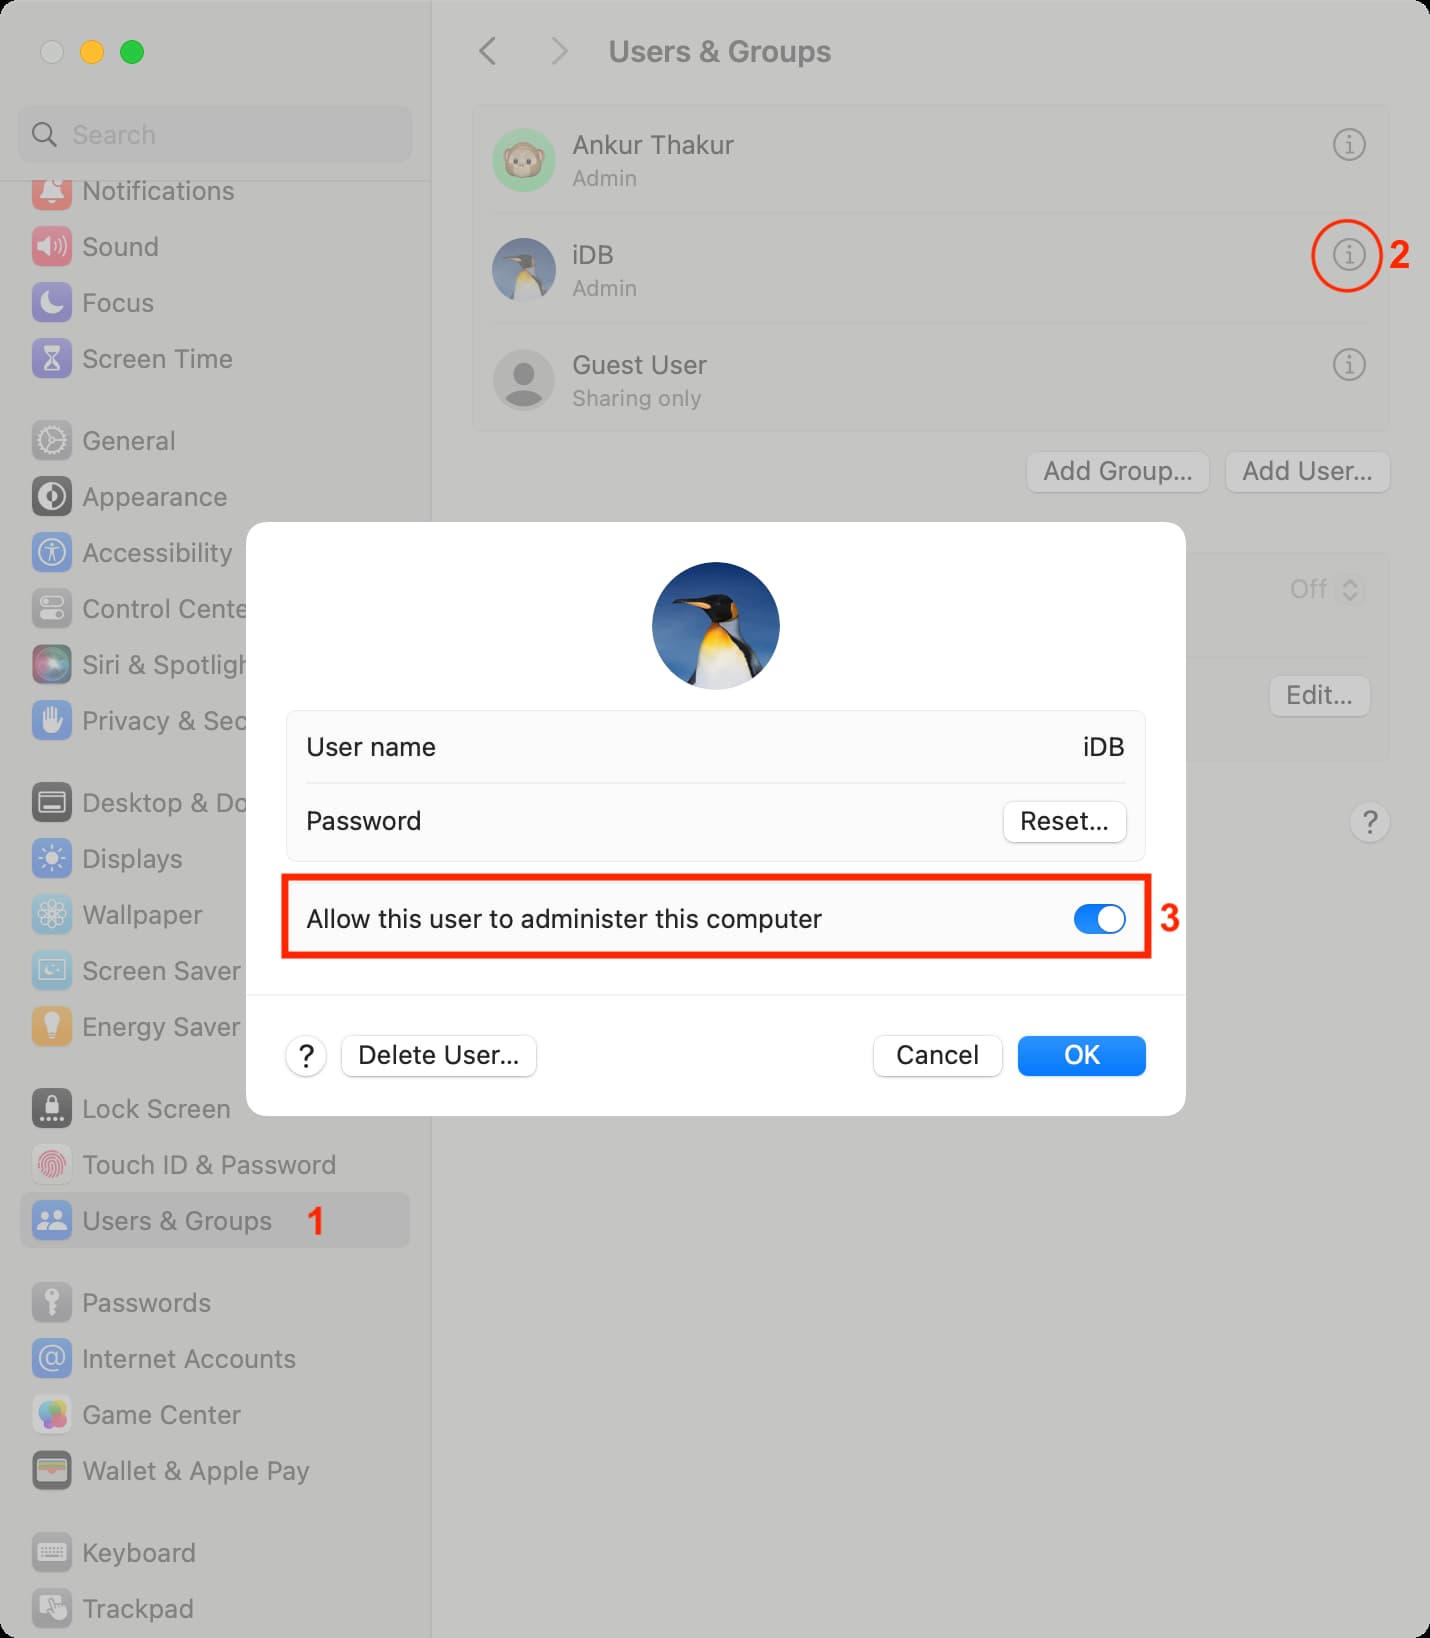
- Click the info icon ⓘ next to the Standard user’s name.
- Turn on the “Allow this user to administer this computer” switch.
- Enter your Mac’s current admin password and click Unlock.
- Lastly, click OK.
That’s all there is to it. You’ve just given a basic user account administrator access over your Mac. The word ‘Admin’ will now appear under this user’s name in System Settings.
On macOS Monterey or older
- Go to System Preferences > Users & Groups.
- Click on the Lock button at the bottom of the preferences pane to unlock the settings.
- Enter your own administrator password, then click the blue Unlock button to unlock the settings.
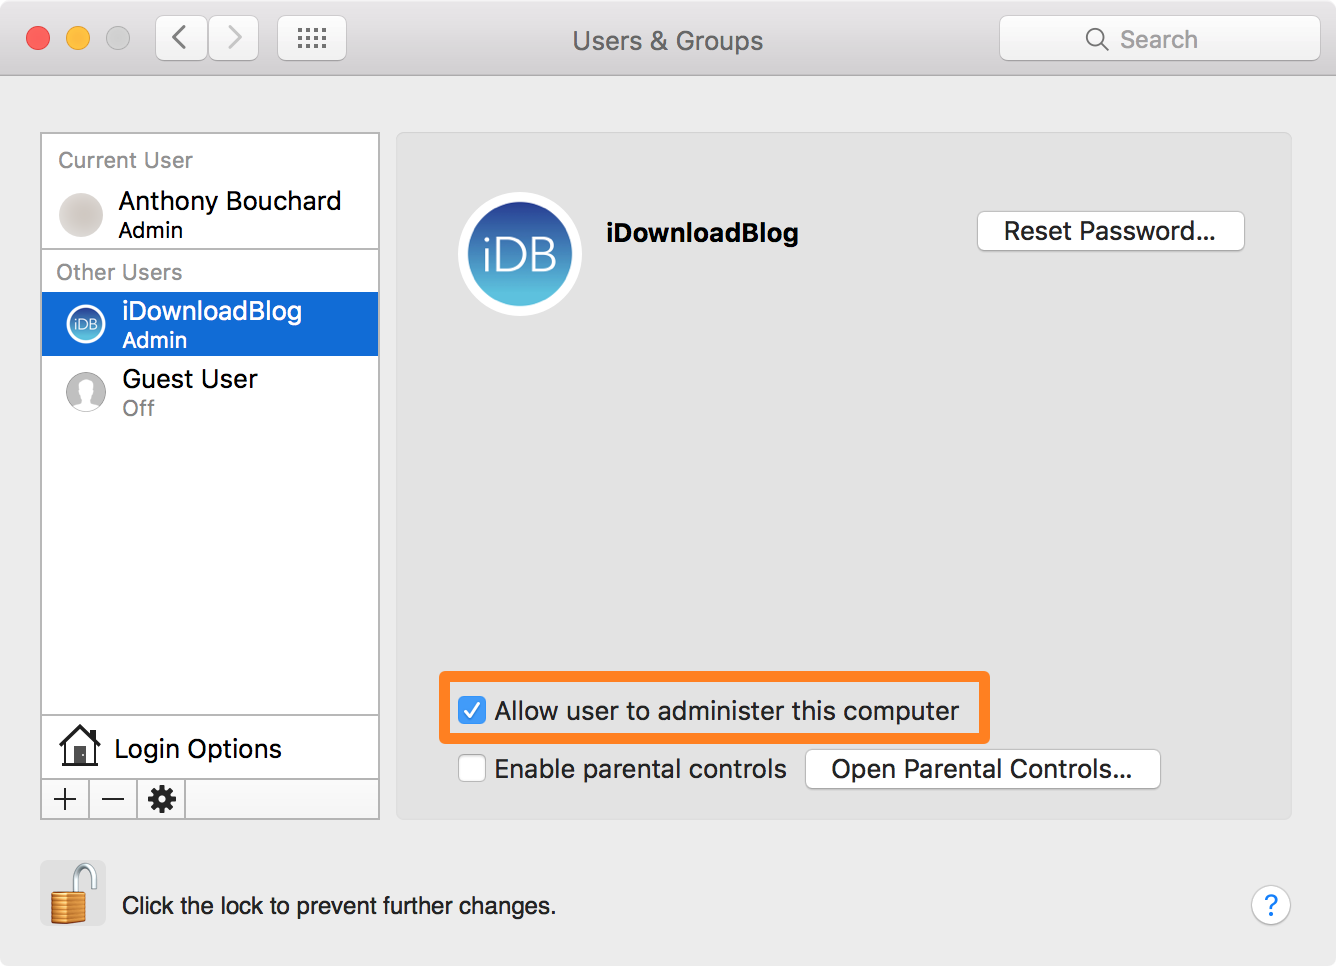
- Select the user account you want to promote to an administrator.
- With the standard user account selected, put a checkmark in the Allow user to administer this computer checkbox.
How to demote a Mac admin account to standard account
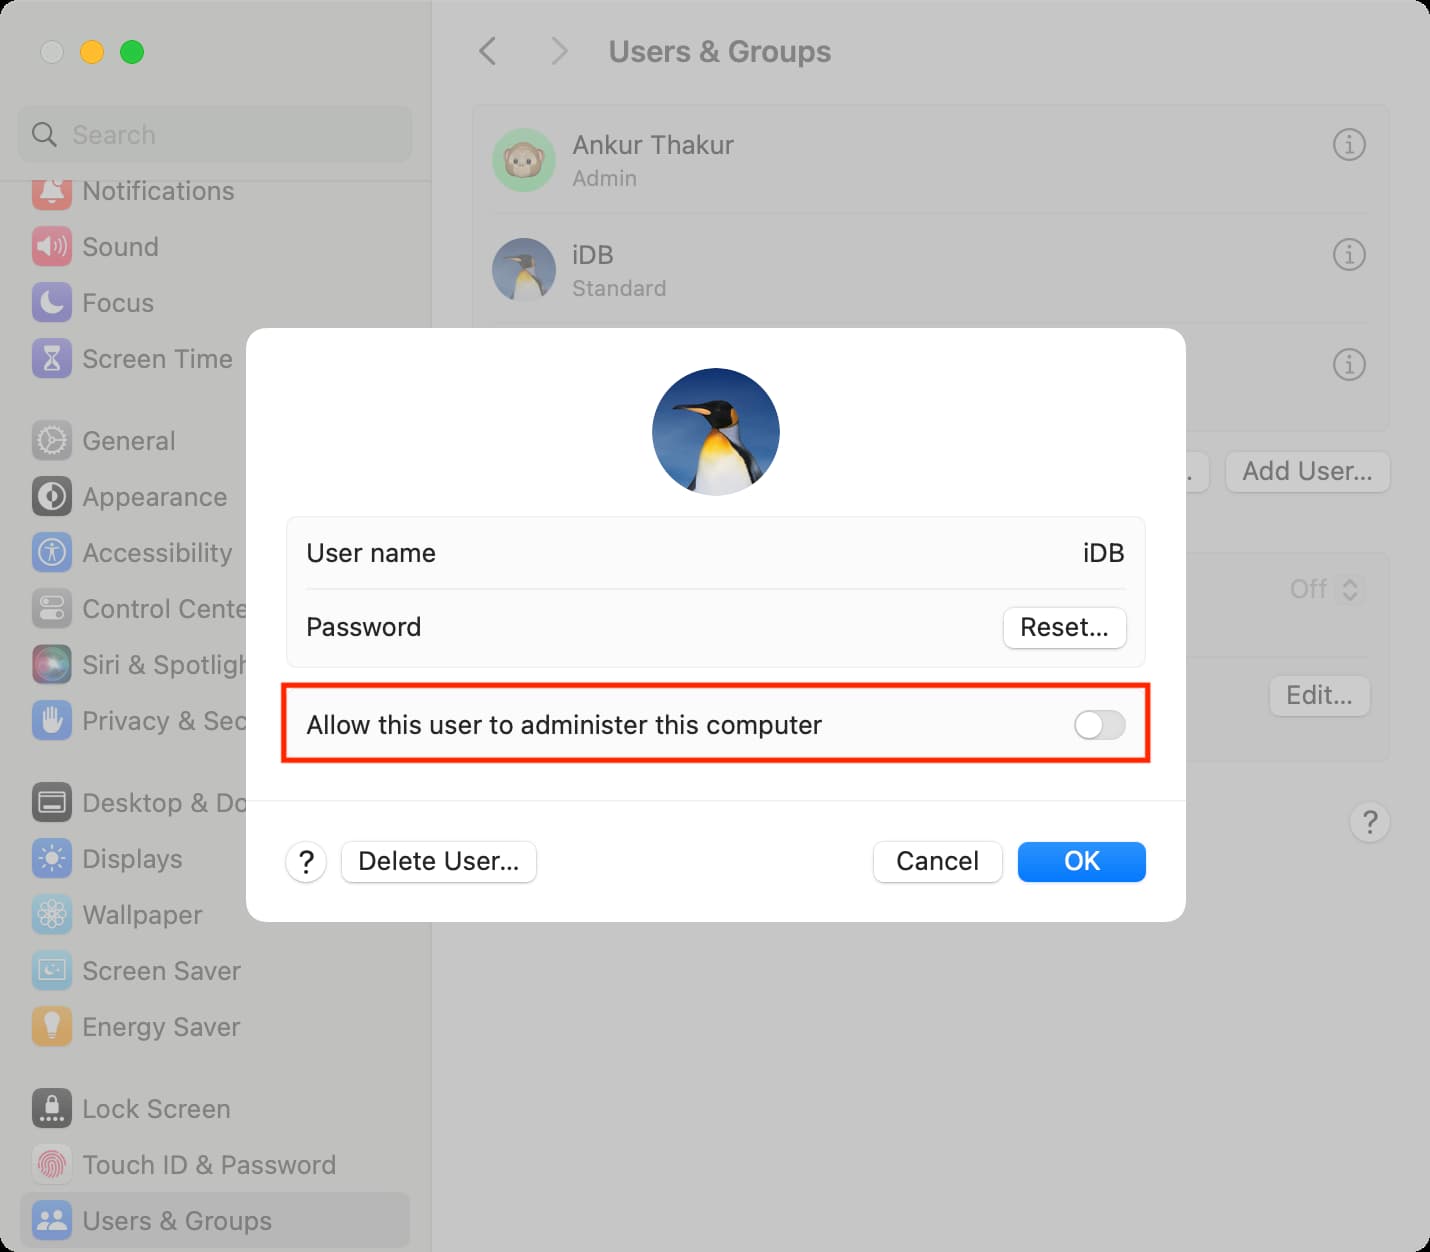
If you have someone abusing their powers and changing things on your Mac that they aren’t supposed to be, you can also demote an administrator account back to a standard user so that they have to wait for your approval to make major system changes.
To do this, follow all the initial steps mentioned under the previous heading and turn off the switch for “Allow this user to administer this computer” or uncheck the “Allow user to administer this computer” checkbox. After removing the administration rights, the word “Admin” under the selected account name will change to “Standard.”
Do you have multiple administrators on your Mac? Share below!
On a related note: