
Every so often, you might end up with two devices on your Wi-Fi network that have the same IP address. This conflict can cause a plethora of problems with trying to use the internet on any of the devices affected.
Fortunately, there’s a really easy to way reset your IP addresses on your iOS devices or Macs, and in this tutorial, we’re going to show you how!
Fixing an IP address conflict in iOS or OS X
IP address conflicts can happen on your computer, no matter what operating system it’s running, as well as your mobile devices. They can be a huge pain in the rear because they can cause your browser to request a website for ages without actually loading anything, and it can cause connectivity issues.
If you’re using an iOS device, and you’re having issues loading web pages or downloading things from the internet even though you have a full internet signal, you may be experiencing an IP address conflict. In this situation, your wireless router will just be too confused to accomplish anything because two devices with the same IP address will be trying to do things on the same network.
This is easily fixed by renewing your DHCP lease, which is a feature built into the Wi-Fi settings. We’ll break this up into two sections for you below; the first for iOS, and the second for your Mac.
Renewing your DHCP lease on your iOS device
We’ll start by showing you how this is done on your iPhone, iPod touch or iPad. Here are the steps:
1) Launch the Settings app from the Home screen and navigate to Wi-Fi.
2) On the right side of your wireless network, tap on the i button to bring up the settings for your Wi-Fi network.
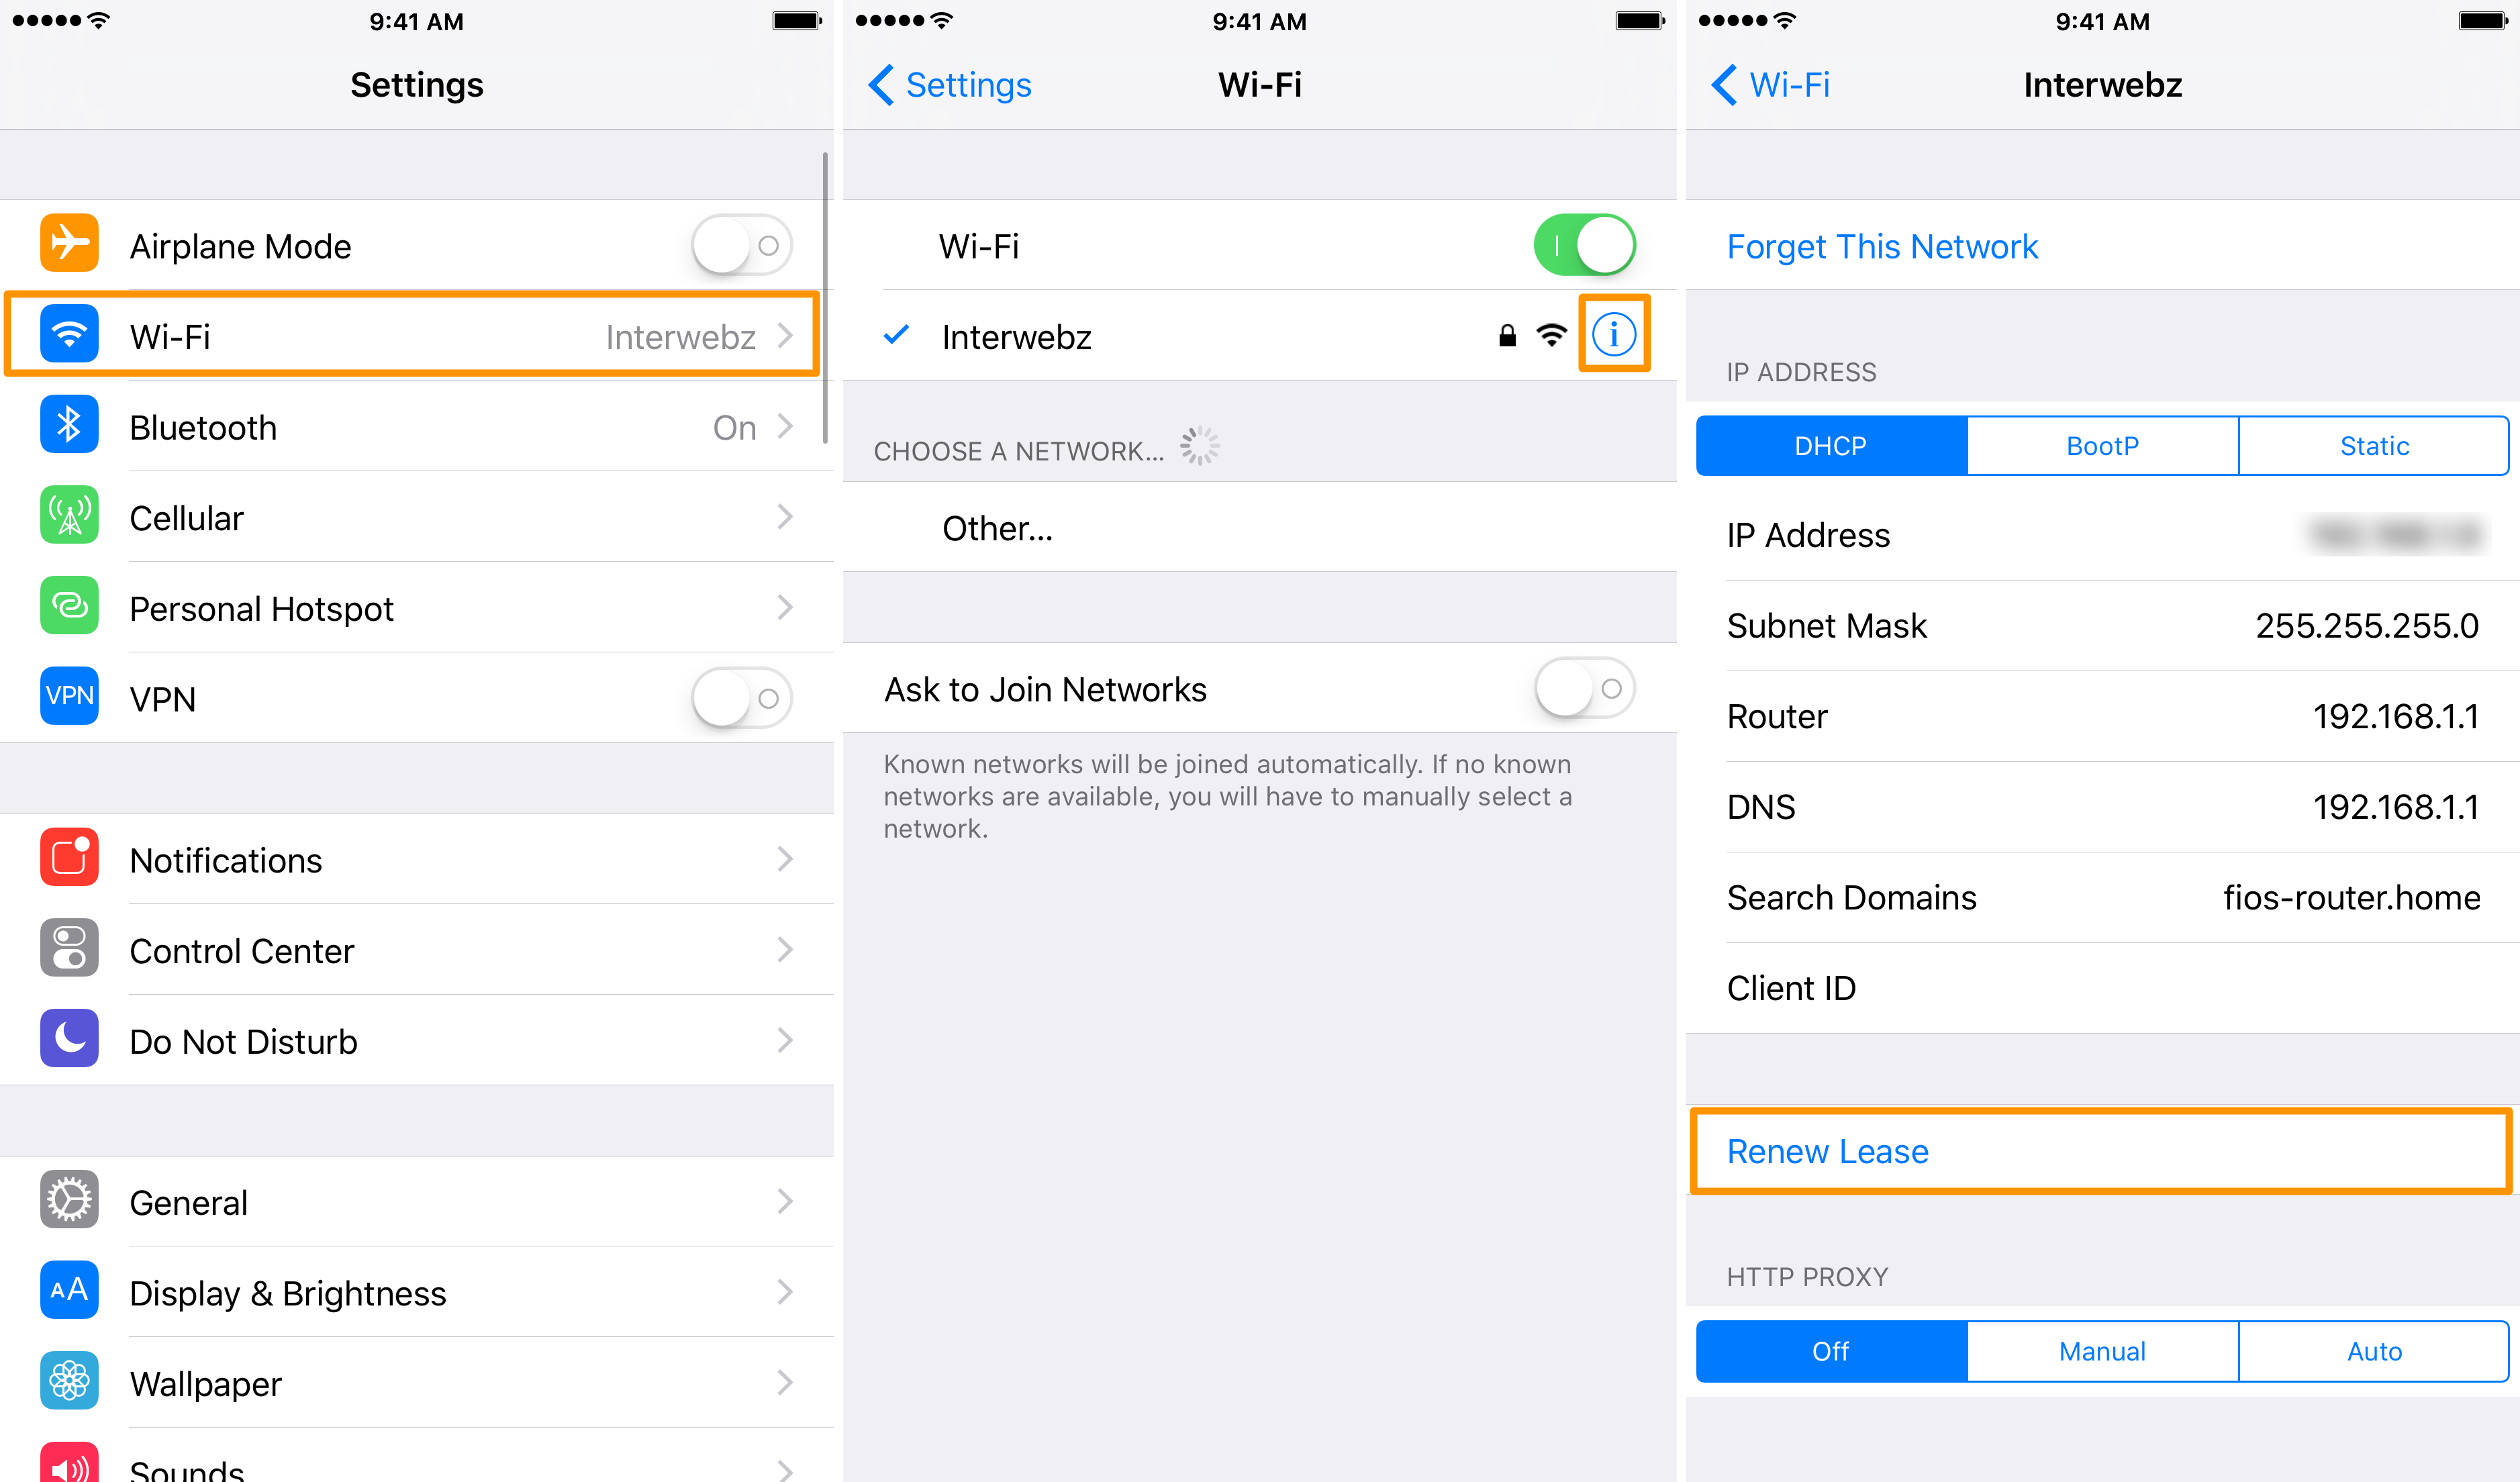
3) Tap on the blue Renew Lease button at the bottom of the settings pane to reset your device’s IP address and to refresh your connection to the wireless router.
That’s all there is to it! If you had an IP address conflict, this will have solved the issue and your websites and other internet business should start to load properly again.
Renewing your DHCP lease on your Mac
Just like on your iOS devices, your IP address can become a conflicted one even on your expensive Mac. Fortunately, it too comes with a similar function from its Wi-Fi settings. Here are the steps to renew your DHCP lease on your Mac:
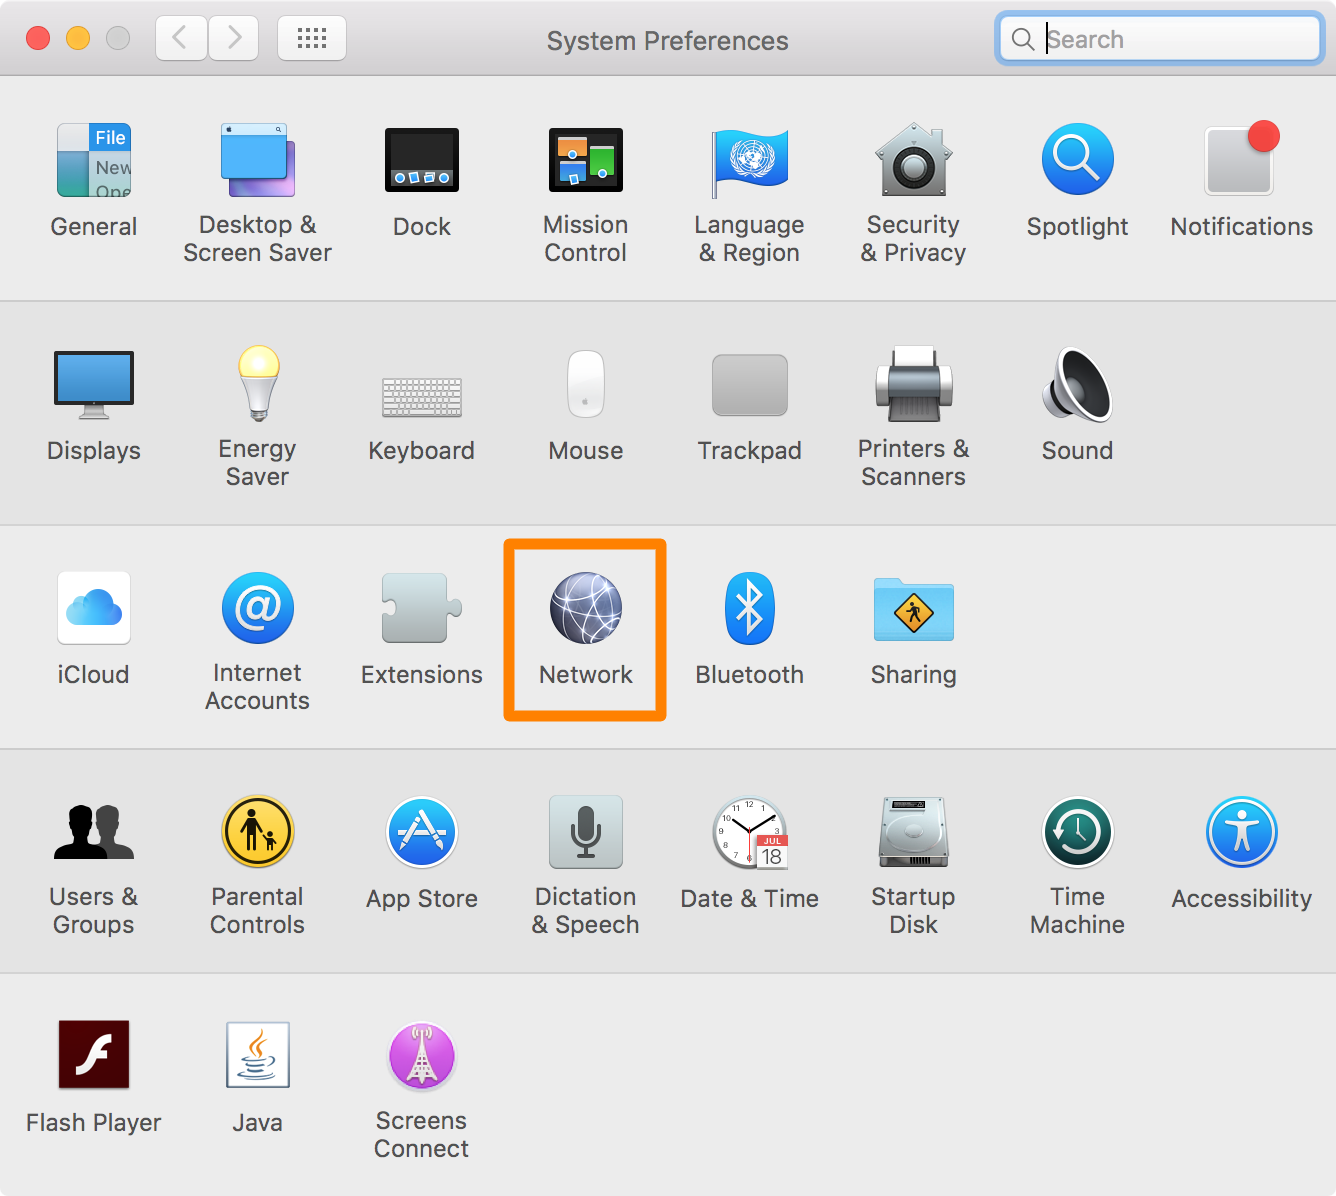
1) Launch the System Preferences app on your Mac and open the Network preferences pane.
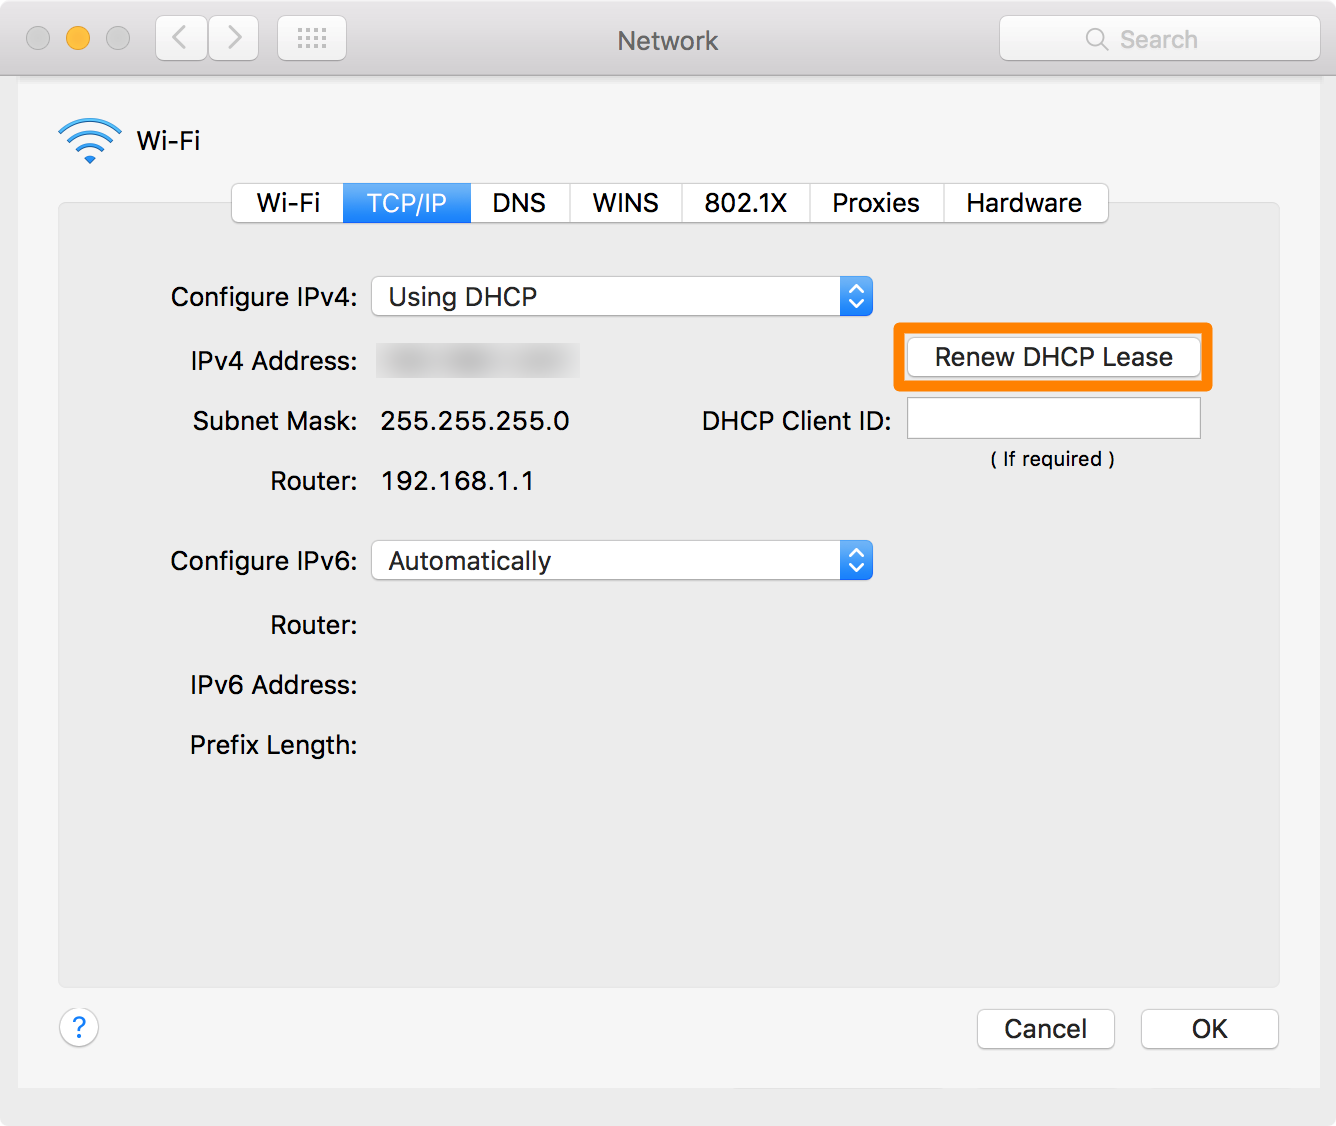
2) Now, make sure you have Wi-Fi selected on the left side of the preferences pane and you’ll click on the Advanced button at the bottom right of the window.

3) In the next window, click on the TCP/IP tab and then click on the Renew DHCP Lease button on the right side of the preferences pane.
That’s all there is to renewing your DHCP lease on your Mac. Your Mac will now acquire a new IP address and reconnect to the wireless network. You should then be able to resume your typical web activities without any issues.
Conclusion
It’s not very often that your wireless router will goof up and assign multiple devices the same IP address, but it happens on occasion, and it’s happened to me many times in the past. Fortunately, this key piece of information will give you the power to put an end to it whenever it happens to you.
Also read:
- What to do when your iOS device won’t connect to Wi-Fi
- Why and how to use a VPN on your iOS device or Mac
If you found this tutorial helpful, let us know in the comments below!