Winter may be coming to an end next month, making room for the Spring season, but that doesn’t mean you can’t keep enjoying the snow!
Snow Daze is a wonderful app that can be had from the App Store for $1.99. The app can turn any photograph scene into a snowy wonderland. With all of the different filters, configurable snow settings, and color options, you can make even the least suspecting photograph look like it was taken in the middle of a blizzard storm.
In this tutorial, we’ll be showing you how the app works.
Make any photo look like it was taken in the snow
Snow Daze is a great app for creating photographs that will enrich your holiday season, but don’t be fooled – it will work any time of the year.
The app comes with a wide variety of tools for decreasing the temperature of the scenes you took photos of, but even if you’re not the original photographer, Snow Daze will also work with anything you have stored in your Photo Library; so with that in mind, feel free to Google around for some excellent stock images to work with.
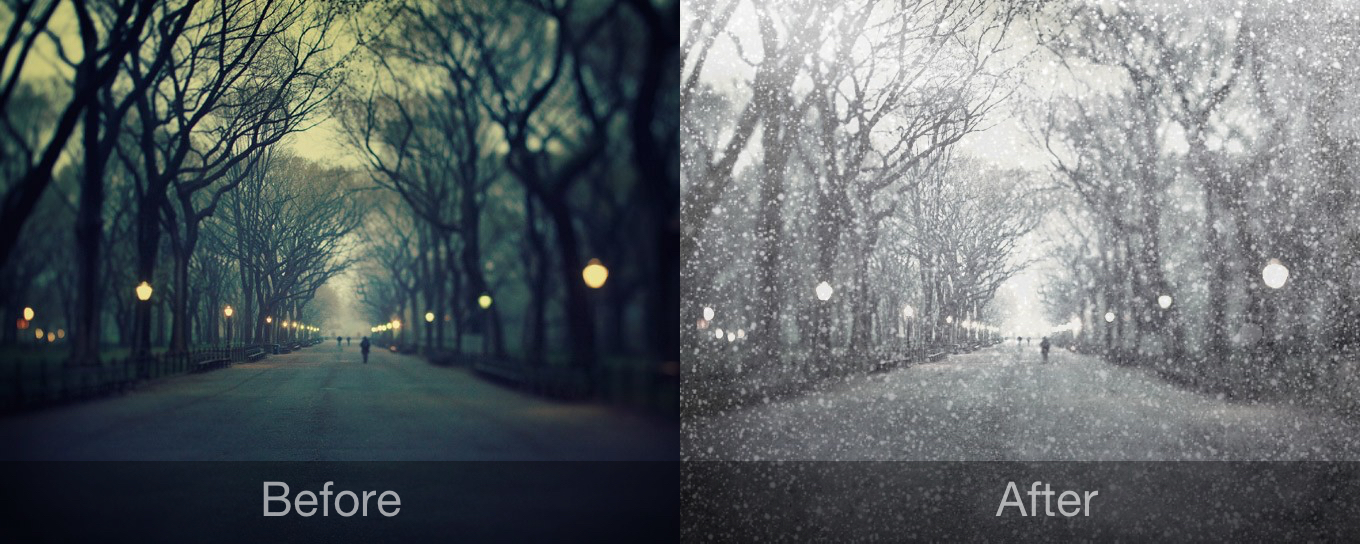
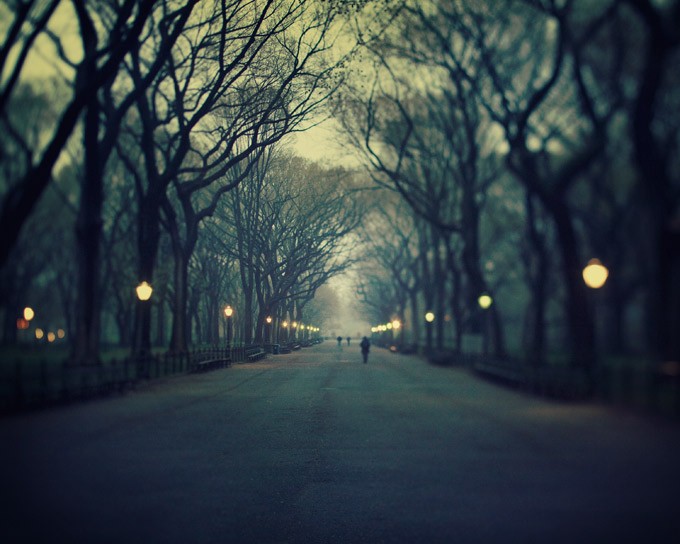
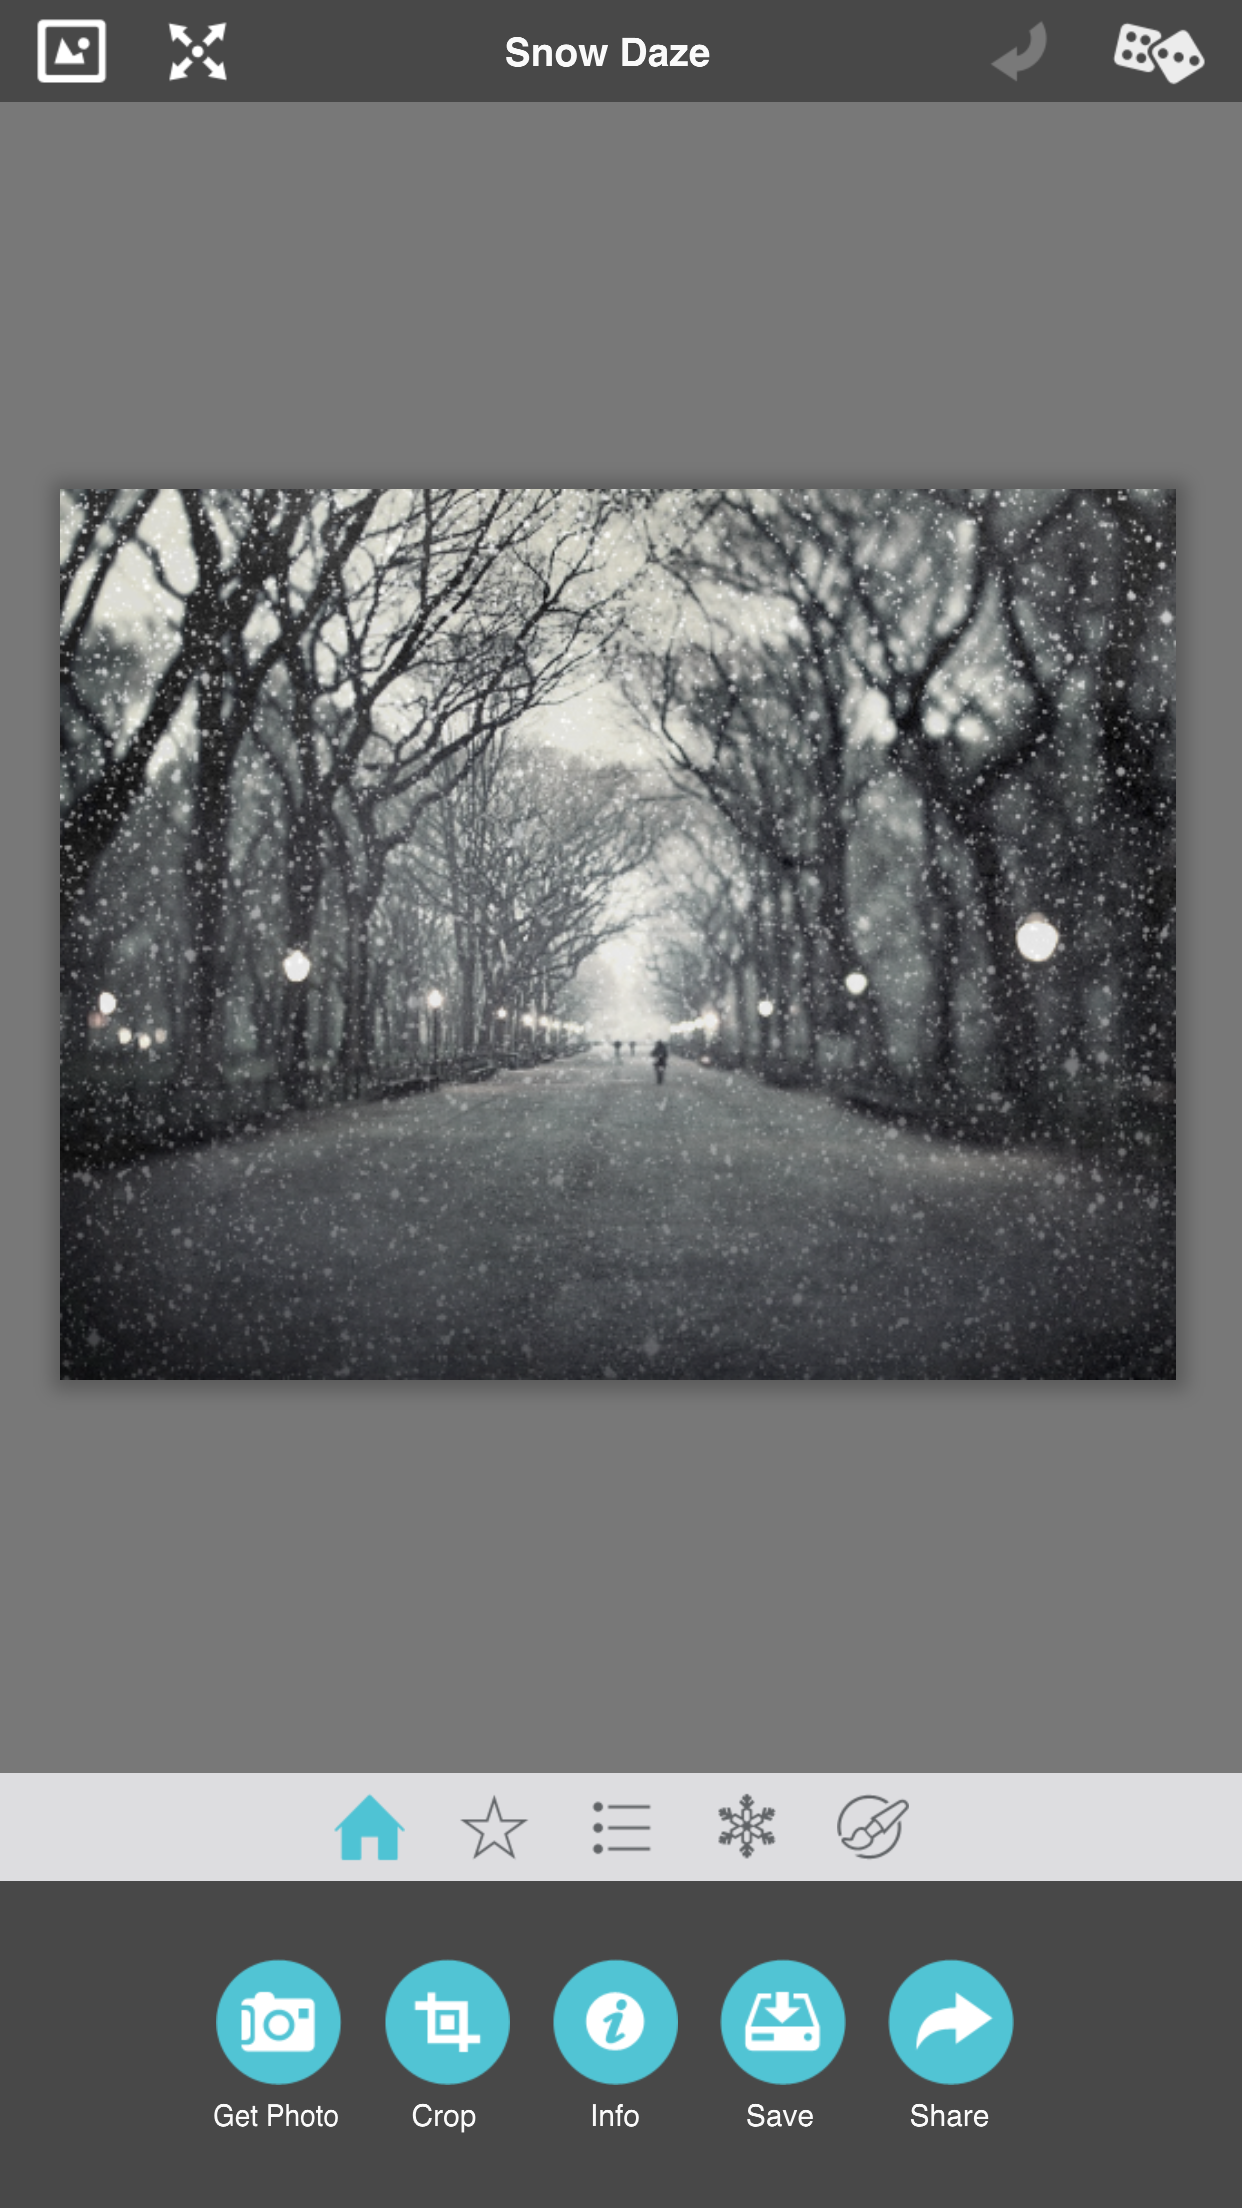
We’ll start with this one; a beautiful scene down a long walkway with tons of tree cover and some vintage road lights:
In the end, we’ll use Snow Daze to have it looking like this:
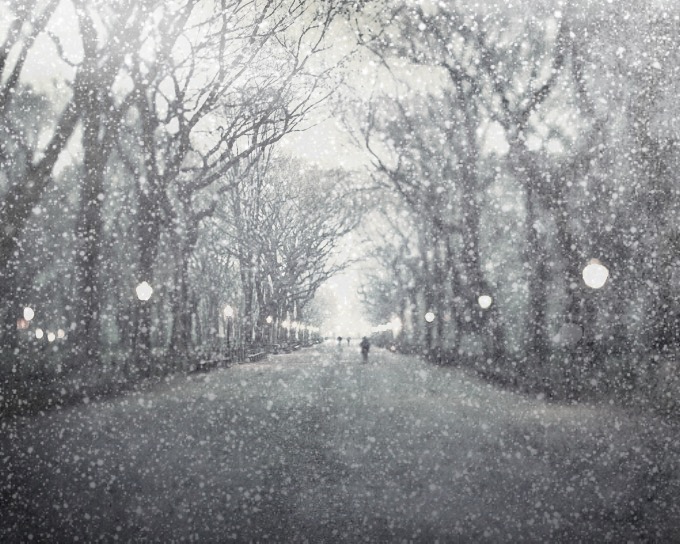
Reminds you of the holidays, doesn’t it?
How to use Snow Daze to add snow to a photo
To add snow to a photograph with Snow Daze, you’ll have to follow a few steps. There are also some settings you can tinker with later on, which will also take you through. As a starting point, we’ll show you how to load a photograph into Snow Daze from your Photo Library. To do that, just follow these steps:
Step 1: Download Snow Daze from the App Store and launch the app from the Home screen.
Step 2: Tap on the “Get Photo” button, and then choose the “Load Photo” option from the pop up that comes up next.
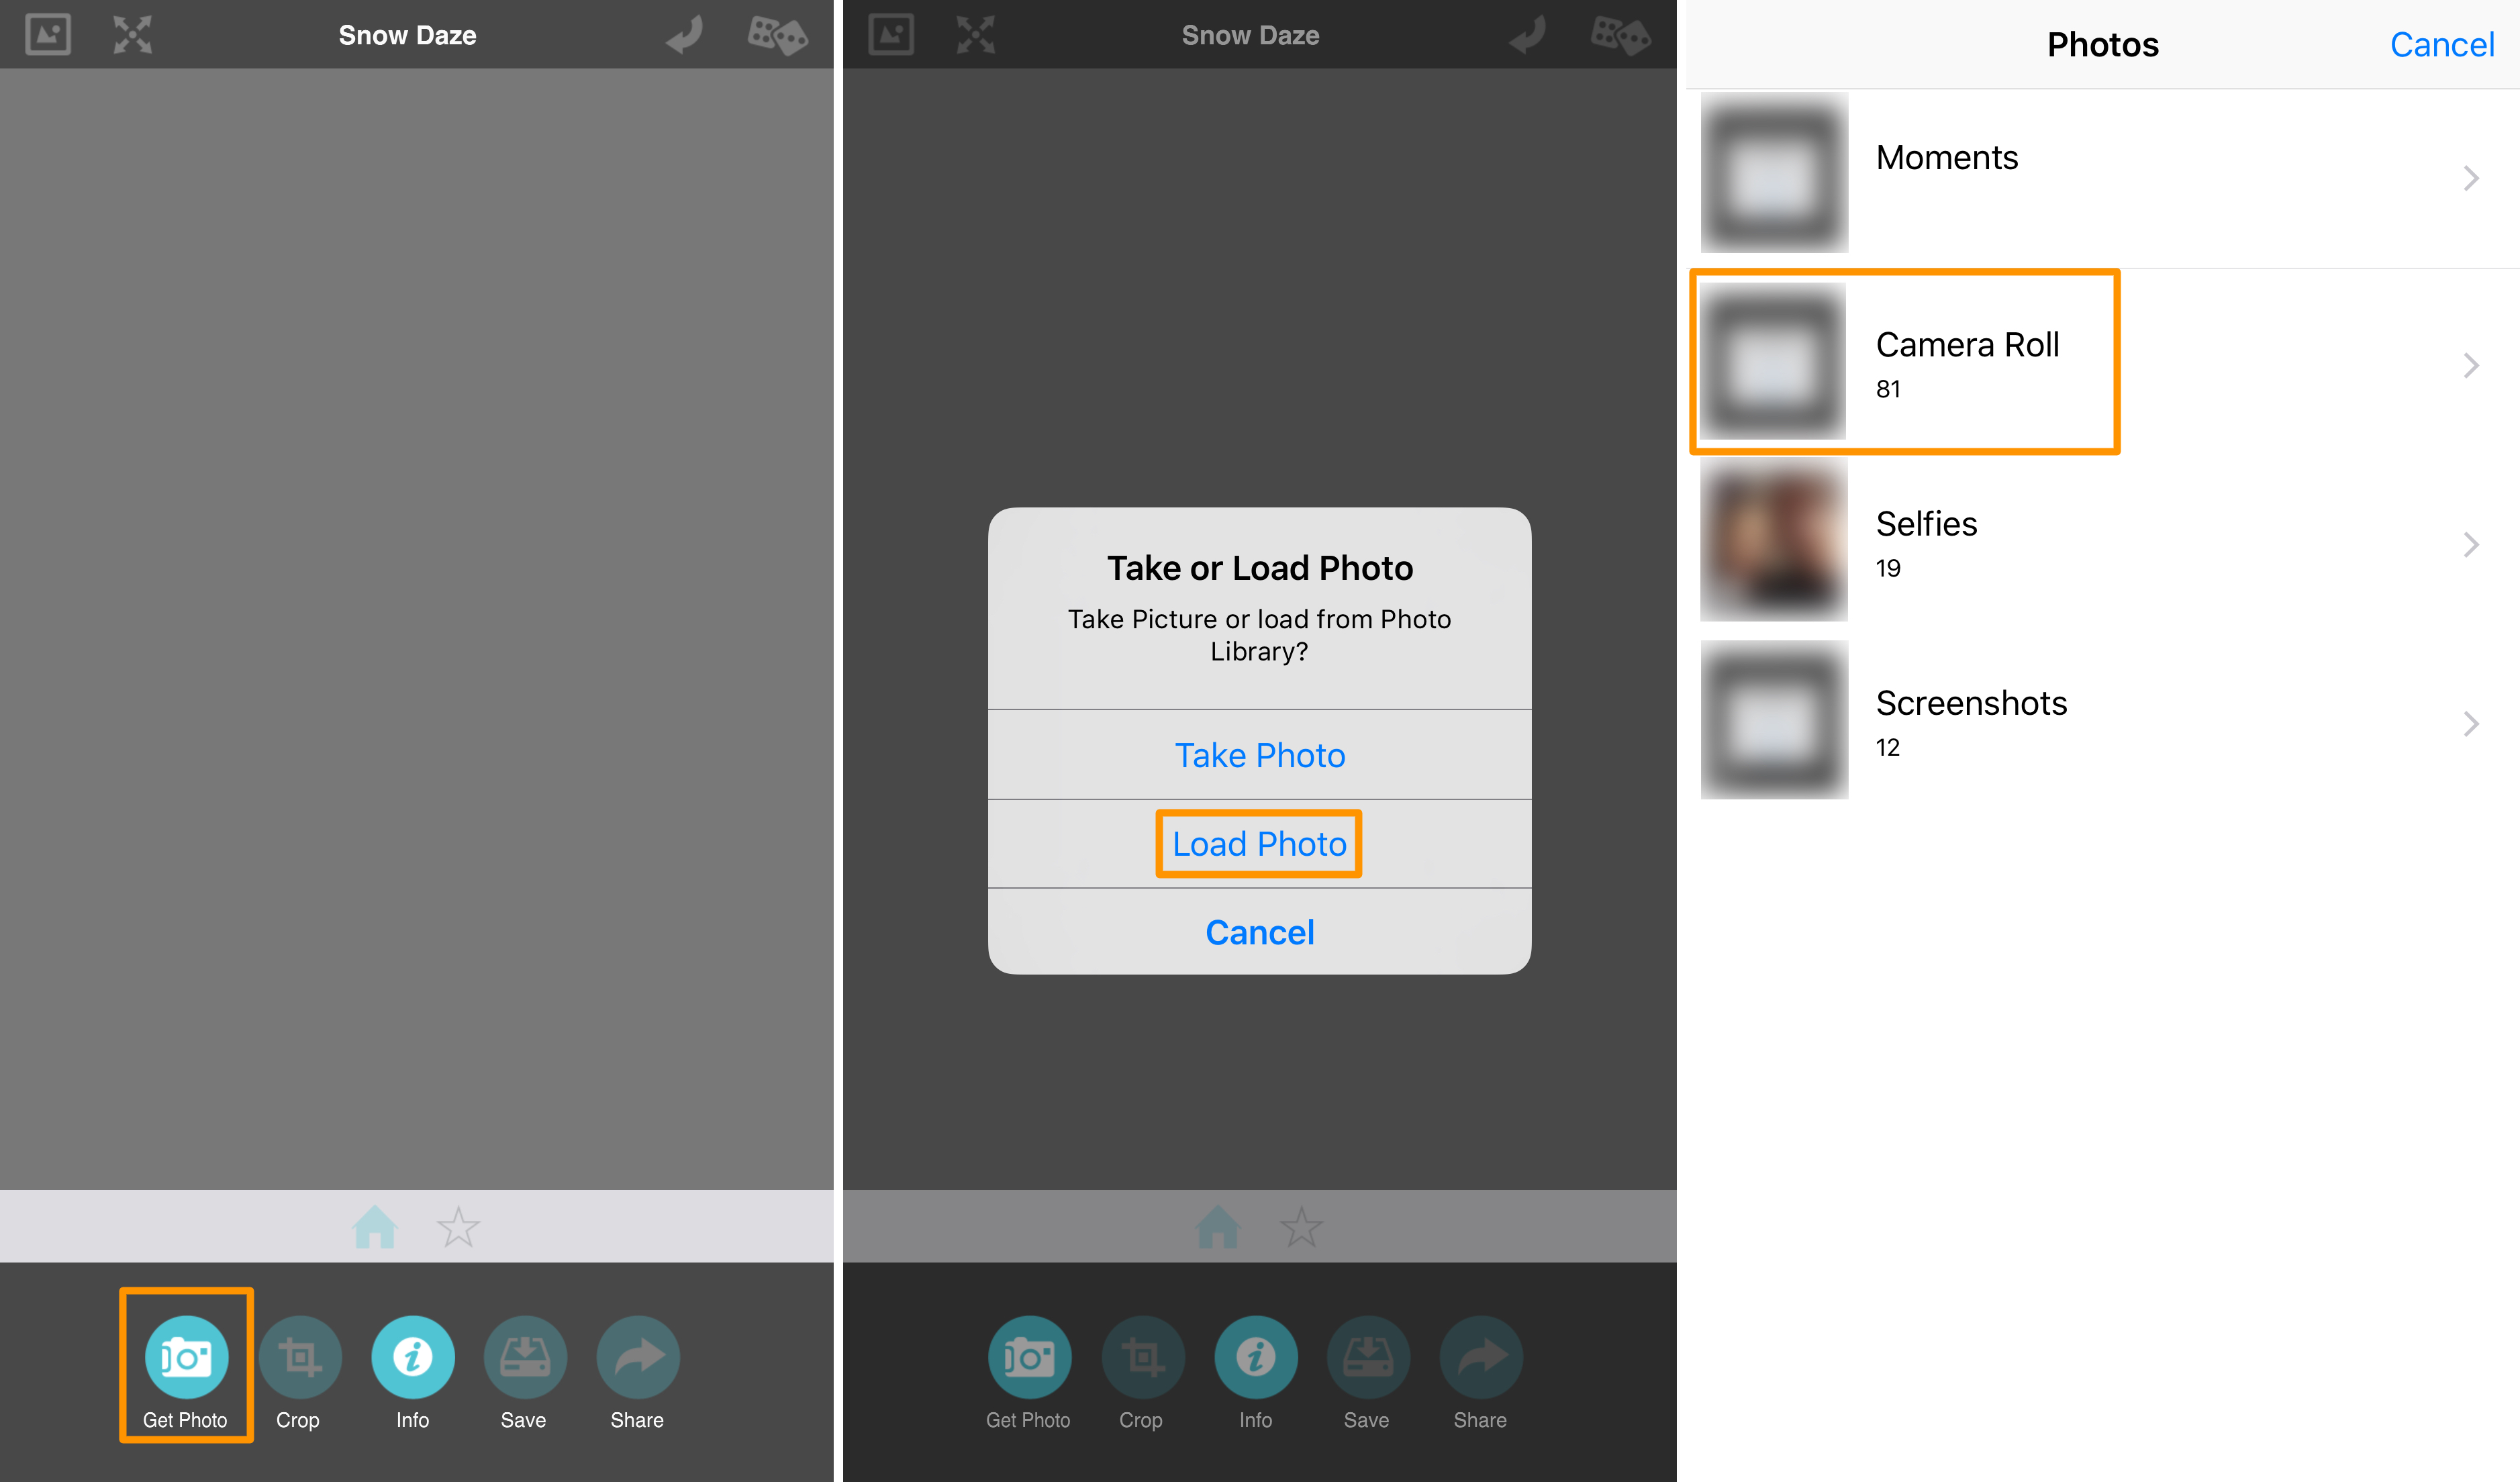
Step 3: Snow Daze will then ask permission to access your Photo Library, so give it access if you haven’t already.
Step 4: Navigate to your Camera Roll, or anywhere else you may have a photo you want to use, and then open it by tapping on it.
Note: You can also select the “Take Photo” option and this will load the Camera interface instead of your Photo Library. In this tutorial, we used an image we found on Google, so we chose to use our Photo Library.
Step 5: Snow Daze should now load your photograph and automatically apply some snow effects to it.
Micro-managing the various snow settings
Now that the basics of how to load an image from your Photo Library have been covered, we can get into the meat and potatoes of the Snow Daze app, which include many different options for fine-tuning the amount of snow, discoloration, and other effects you may want to apply to the photograph to make it more convincing.
After the photograph is imported into the Snow Daze app, you can tap on any of the editing buttons in the gray toolbar. There are four of them in the following order for each of the following functions:
- Adding a preset snow effect to a photograph
- Changing color and cloud settings
- Configuring snow strength and snow fade settings
- Choosing the type of snow pattern you would like
Changing up these options to your own liking is the key to creating a completely custom and unsuspecting photograph each time.
Choosing between snow presets
One of the features the app offers is the ability to choose from snow presets. If you’re just looking for a quick way to add snow effects to a photograph and aren’t trying to stand out from any of the other photographs you might edit in the future, then you can probably just add a preset and save your photograph for sharing later on and you’re good to go.
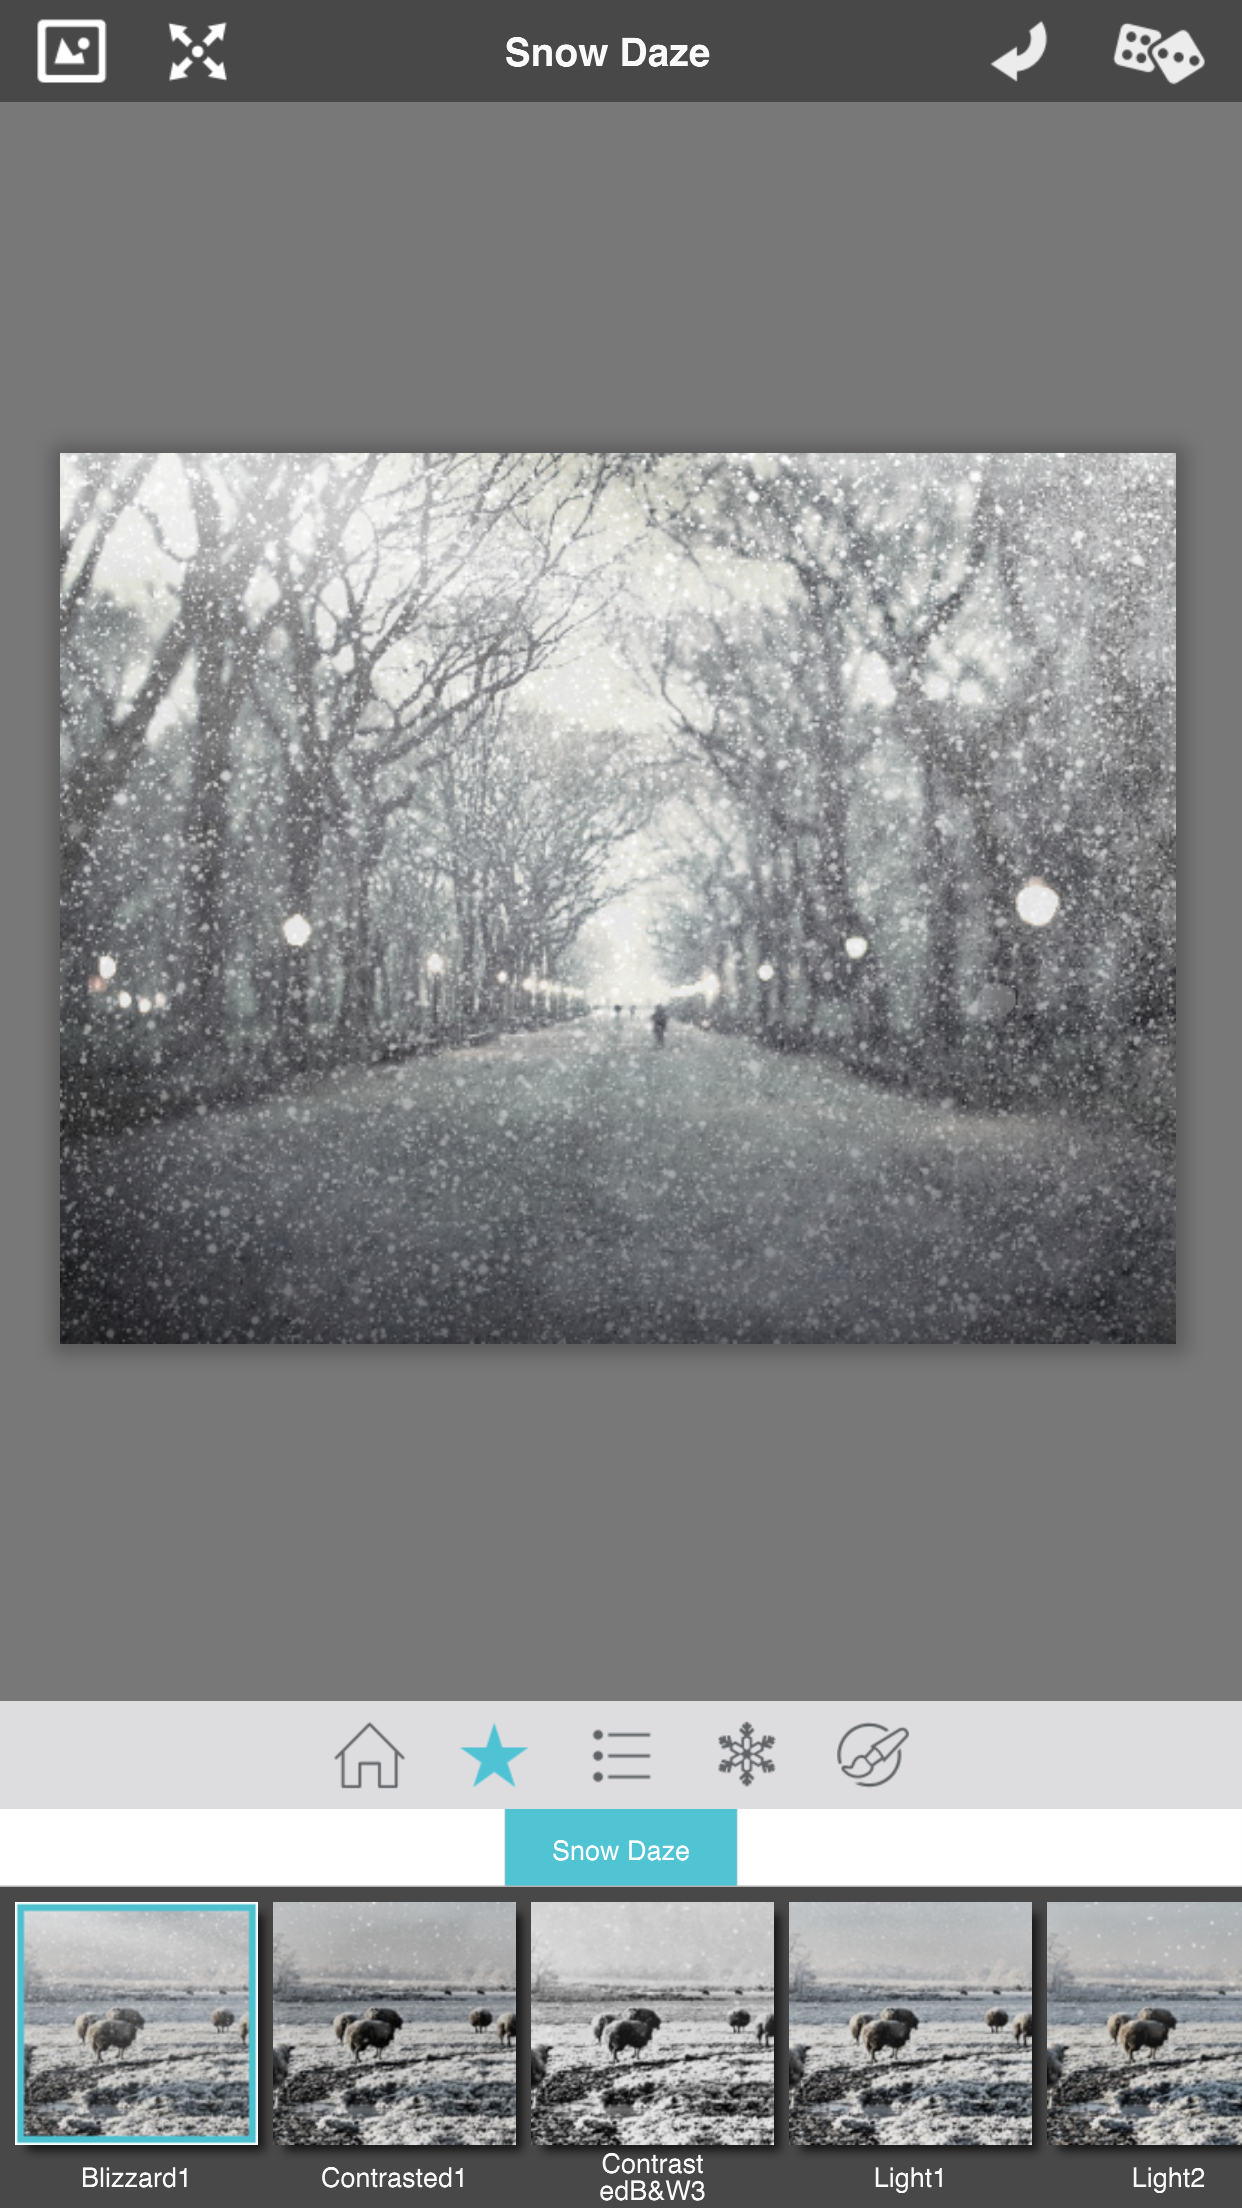
The presets are accessed by going to the “Star” button in the gray toolbar. To choose a preset, all you do is tap on one and the app will apply it to the photograph.
The app provides you with the following preset effects:
- Blizzard 1
- Contrasted 1
- Contrasted B&W3
- Light 1
- Light 2
- Light 3
- Light 4
- Light 5
- Light B&W1
- Misty 1
- Misty 2
- Misty B&W2
Each preset has its own different snow density, snow patterns, and color settings. They’re presets, so there’s really very little you have to do after choosing one. Like we mentioned before, this is a speedy way out of spending the time to edit things yourself.
Manually adjusting photo color and snow pattern settings
If you’re going to go all the way and configure things manually all y yourself, one of the things you can do is adjust the color settings of the photograph you’re choosing to turn into a snowy wonderland. The options you’ll find for this department are under the “Bulleted List” button in the app’s gray toolbar.
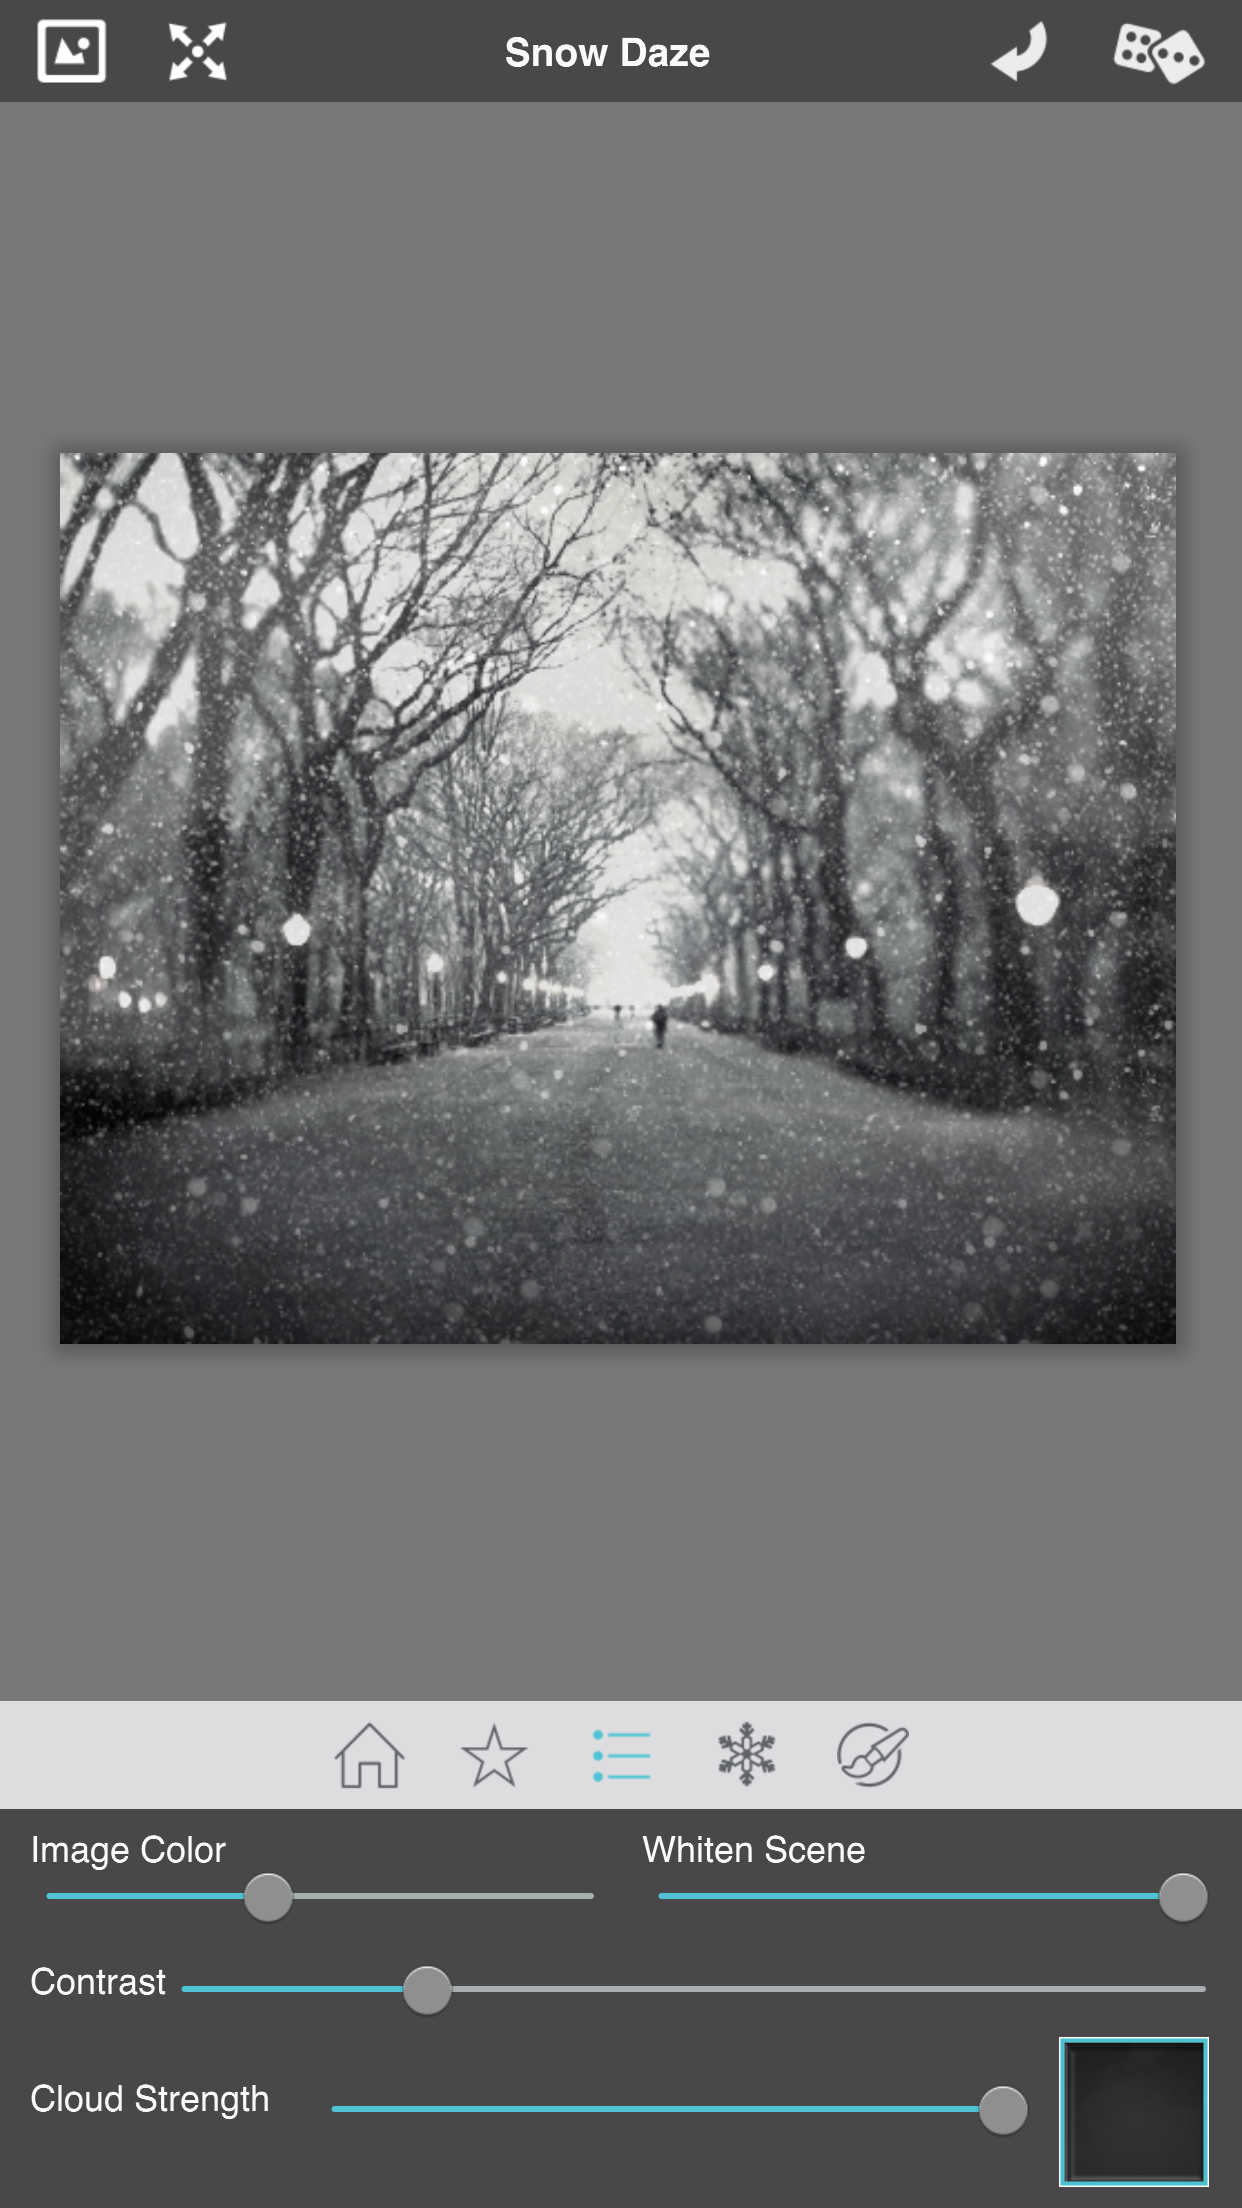
Snow Daze comes with four individual sliders that let you change:
- The image’s color scheme
- The white levels of the scene
- Increase or decrease the image’s contrast
- Increase or decrease the strength of the clouds
You can also tap on that dark square at the bottom right of the app to open a selection interface that lets you choose what kind of snowflake pattern you want.
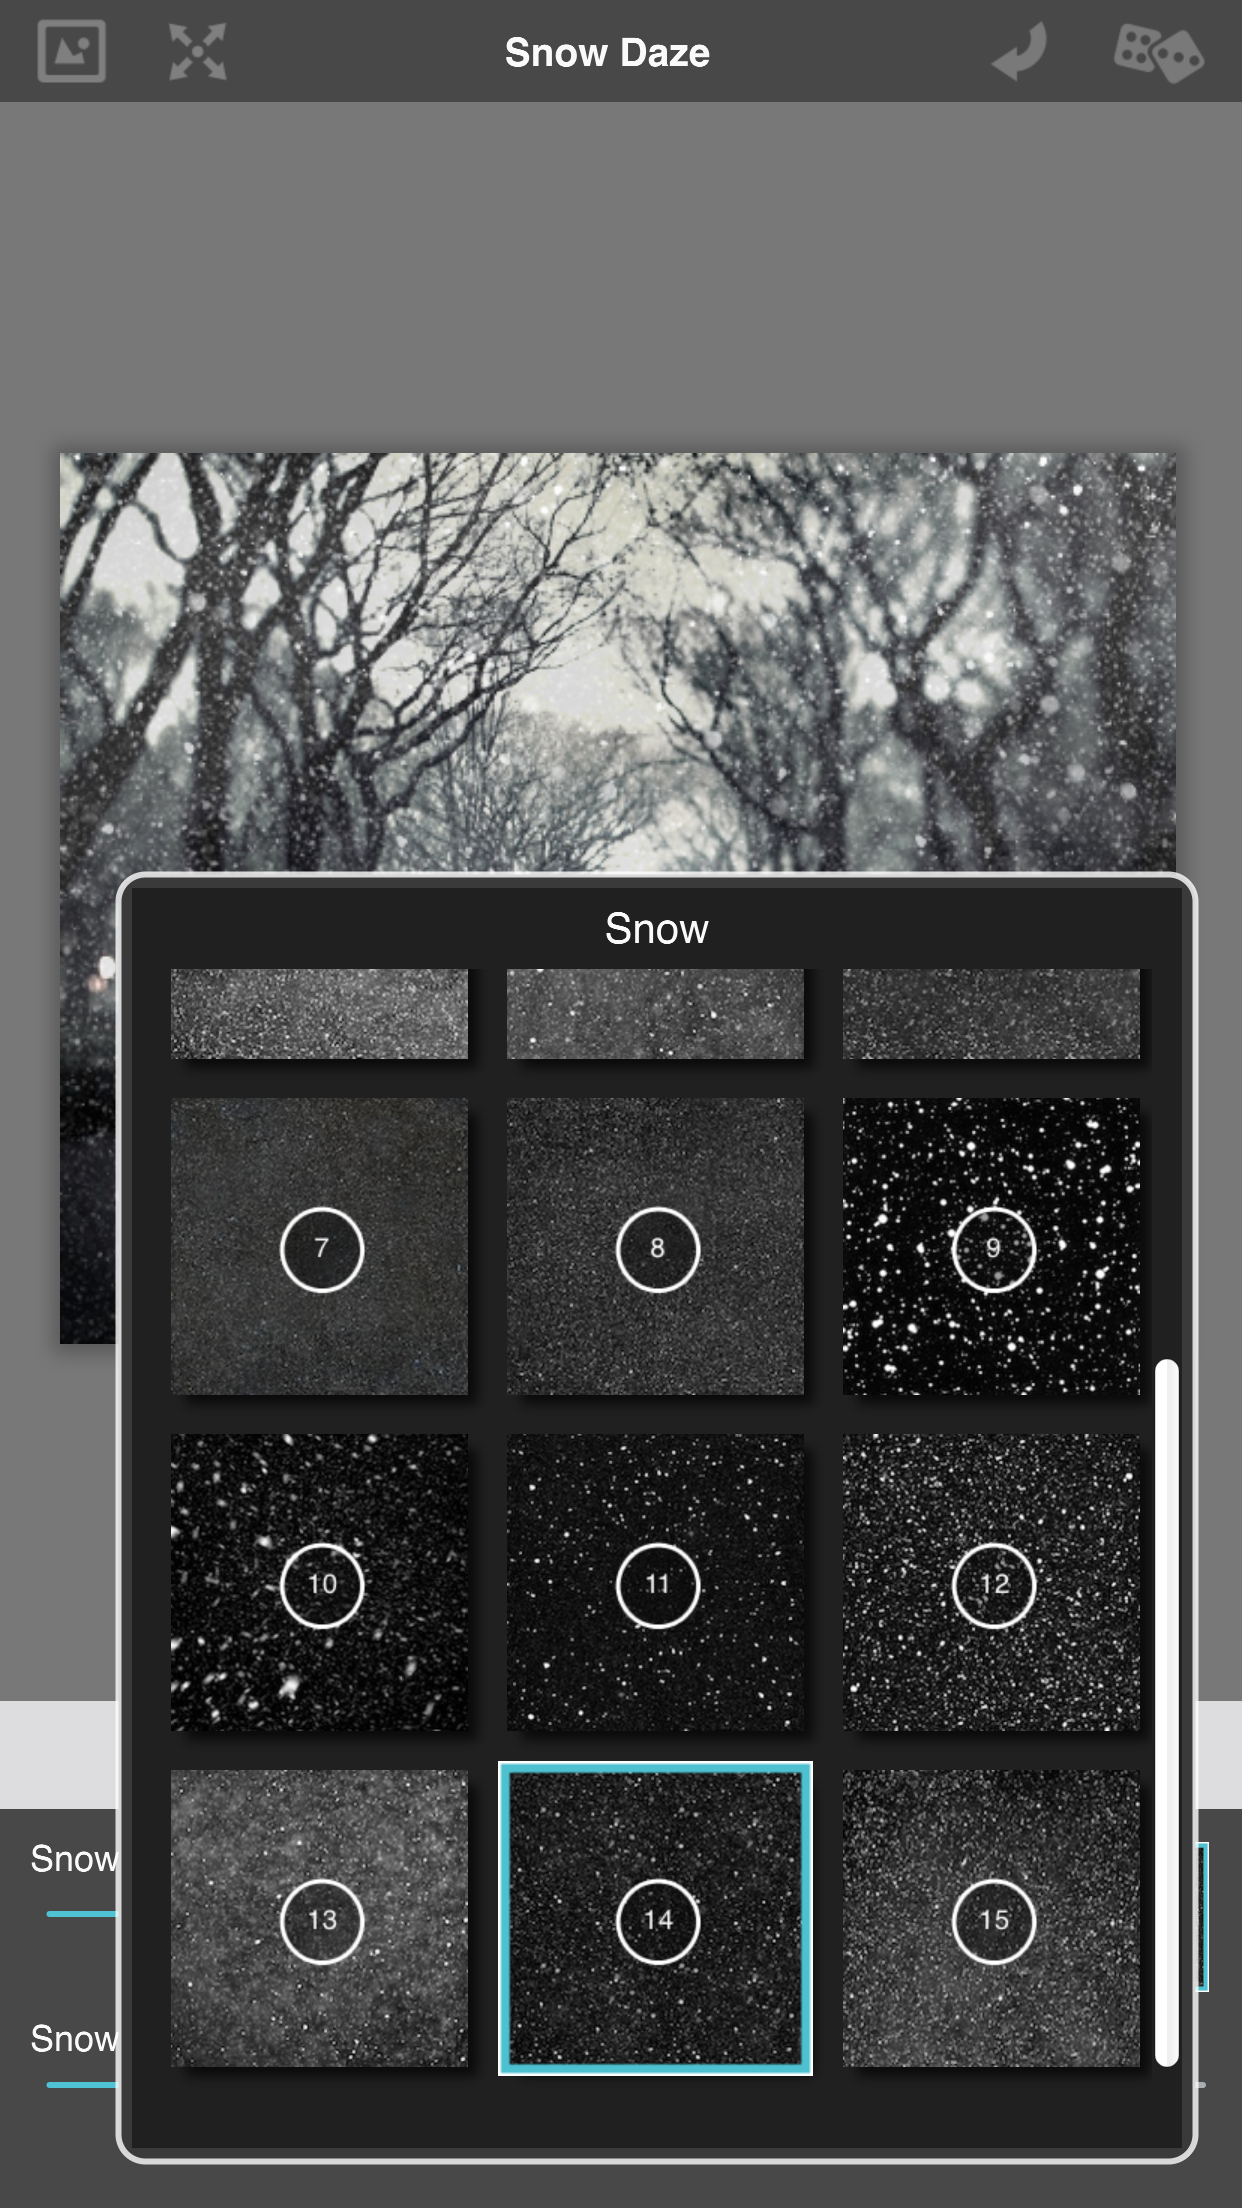
There are a grand total of 15 different patterns to choose from, and some of them are denser than others. If you want a very snowy photograph, then you’ll pick one like #14, which has a very dense snow cover across the entire photograph. On the other hand if you want a lighter snow footprint, then you’ll choose something like #7, which is very light and is hardly even noticeable; it’s just enough to add a touch of chilly weather to a photograph.
Manually configuring snow strength
The last major thing Snow Daze lets you do is manually configure how heavy or how light the snow cover on the photograph will be. These options are found under the “Snowflake” button in the app’s gray toolbar.

Here you’ll find two individual sliders – one for configuring the strength of the snow, and the other for configuring the fade of the snow. Again, you’ll also find a shortcut to changing the snow patterns here in the button in the top right of the slider interface.
Adjusting the snow strength and snow fade allow you to essentially control how chilly the weather looks in the photograph, and they’re great tools for making any photograph look like it’s seen a lot of snow fall.
My thoughts on Snow Daze
Snow Daze is a really cool tool for creating snowy effects for your photographs. The tools can create a very convincing end effect, but if I had to give you any advice for using it, I would suggest the following:
- Avoid photos with the ground in them; the app doesn’t magically make the ground all white and snowy
- Don’t over-do it; just the right amount of editing can make any photograph look like it was taken in the snow
- Try to use photos with lots of backdrop and scenery; selfies and other photos lacking depth will look goofy
With all of the options you get in this app, you should definitely consider grabbing it while it’s available as a $1.99 download in the App Store.
Wrapping things up
If you think you’ll find yourself having fun turning your photographs into that of a Wintery creation, then Snow Daze just might be the app you’ve been wanting to check out.
Also read:
What are your thoughts on Snow Daze? Share in the comments!