Moving over your existing Health and Activity data from your old iPhone to a new one can be a tricky business unless you know exactly what you’re doing. The problem stems from the fact that Health and Activity data is not stored in regular iTunes backups, which are unencrypted by default, unless you remember to turn on encryption manually. It’s a security precaution to prevent malicious users with access to your computer to mine your sensitive medical data from unencrypted iTunes backups.
The approach also poses a major challenge to folks who log their fitness and health data in Apple’s Health and Activity apps. Surely you don’t want to start from scratch and lose all the Health and Activity data that you’e amassed in the past year or so.
As it turns out, there is a way—actually, two ways—to preserve your complete Health and Activity data logs when you switch to a new iPhone.
Choose your method carefully
As mentioned, you can import your existing Health and Activity data from your old iPhone into your new one in two ways:
- Method #1: Use a third-party app to import your Health data, but not your Activity logs.
- Method #2: Back up your old device to iCloud or iTunes and then restore your old Health and Activity data to a new device from the backup your just created.
Read carefully about the benefits and drawbacks of each method that I outlined right below in order to determine which is right for you.
Method #1
This approach has the benefit of not having to set up your new iPhone from an old backup, which we know can sometimes cause problems. The key drawback is twofold: A) you need a third-party app, and B) you can only import Health’s database into your new iPhone, not Activity logs.
Method #2
Should you choose this route, you must first perform the full backup of your old device before you can move your old Health and Activity data to a new device. This is a clunkier and more time-consuming process but it gets the job done nicely.
You must back up your device to either an encrypted iTunes backup or in iCloud, which automatically encrypts your information every time. For those wondering, encrypted iTunes/iCloud backups include certain information that unencrypted iTunes backups don’t, including the following:
- Your saved passwords
- Wi-Fi settings
- Website history
- Health data
- Activity data
- Keychain data
With iCloud backup, your device information, settings and other data are stored encrypted in the cloud. With iTunes backup, your backups are stored on a Mac or Windows PC, using storage available on your computer.
Also, if you own an Apple Watch you must unpair it from its connected iPhone before you move your Health and Data content to a new iPhone. You will later pair your Apple Watch with your new iPhone.
Full tutorial: How to back up and restore your Apple Watch
Don’t worry, unpairing an Apple Watch from its connected iPhone automatically backs it up in the companion Apple Watch app on your iPhone.
Method #1: Import old Health data into new iPhone with Health Data Importer
While iOS lets you export Health data as an .XML file, it’s pretty useless and you cannot import it back. Thankfully, an app called Health Data Importer lets you easily import your Health data into a new device in no time.
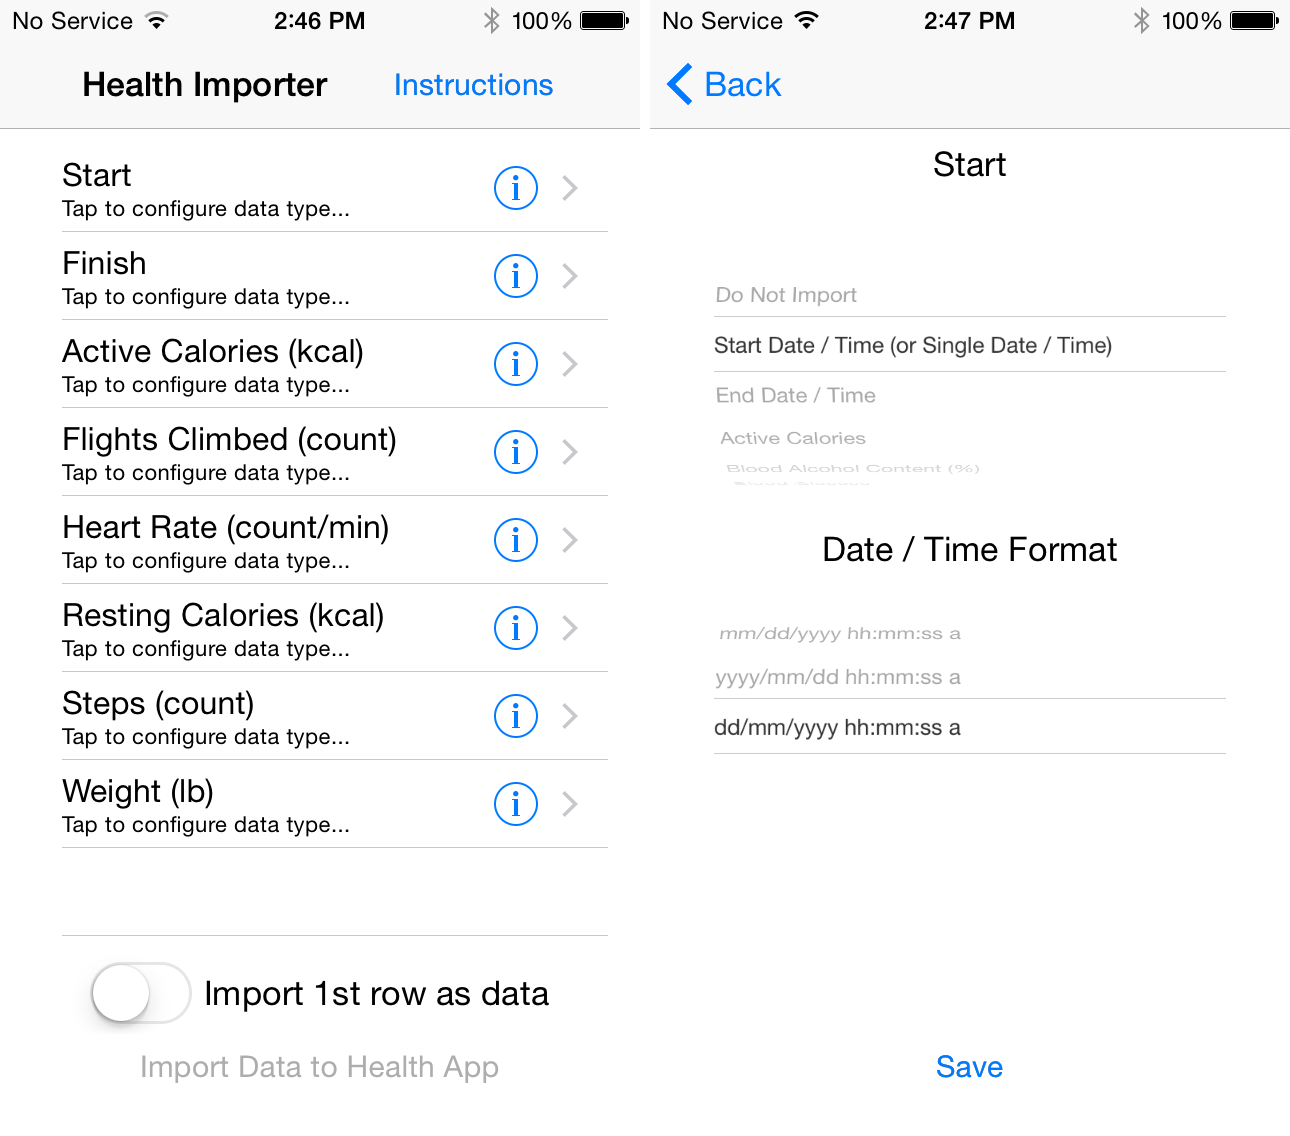
Health Data Importer lets you select specific data points you wish to export and than map back to Health categories on your new iPhone.
Full tutorial: How to move your Health data from one iPhone to another
Method #2: Back up old Health and Activity data in iTunes
iTunes doesn’t encrypt your backups by default so you’ll need to turn on the password-protected Encrypt Backup option yourself to make an encrypted backup of your device, which is required to store Health and Activity data.
Step 1: Connect your device to your Mac or Windows PC via USB.
Step 2: Open iTunes and make sure you have the latest version by selecting Check for Updates in the iTunes menu.
Step 3: Now Select your device in iTunes.

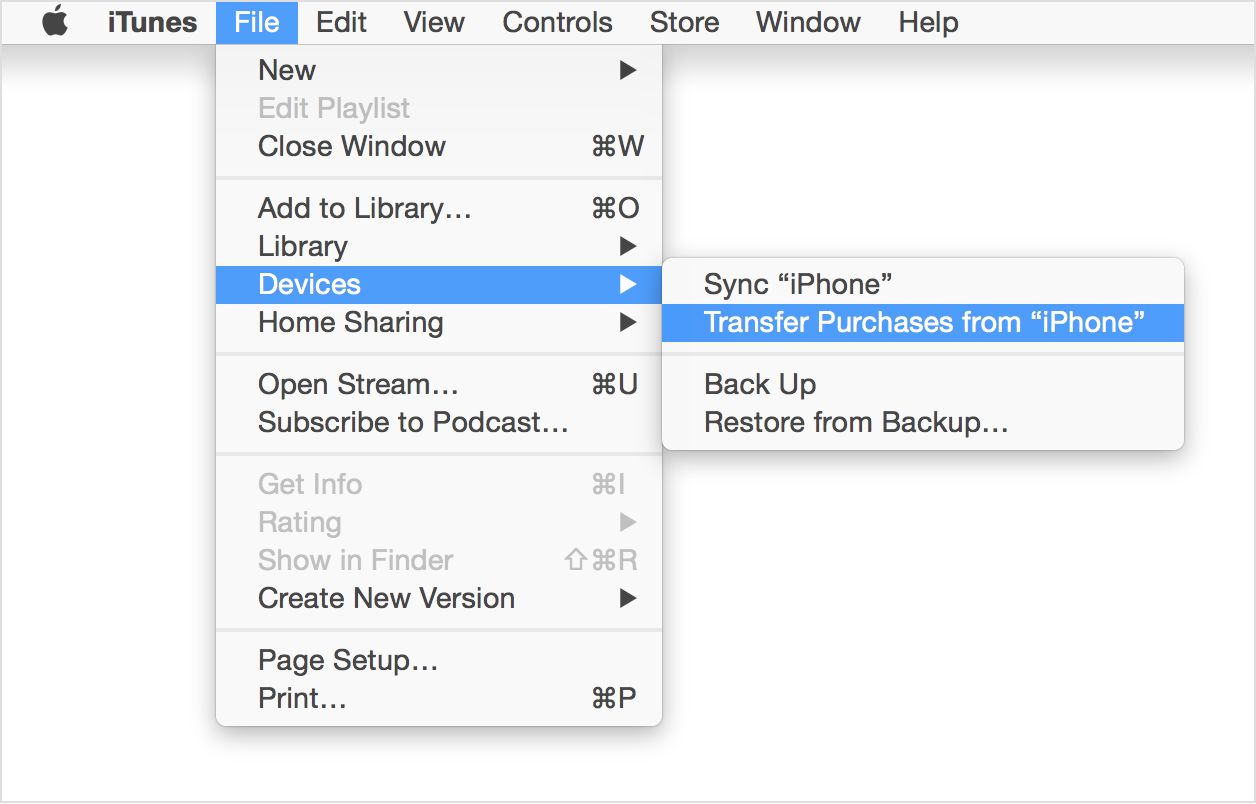
Step 4: Save any content that you downloaded from the iTunes Store or App Store by choosing File > Devices > Transfer Purchases.
Tip: If you’re on Windows and don’t see a File menu, hold down the Control and B keys.
Step 5: After the process completes, click the Encrypt Backup button in iTunes’ Summary pane.
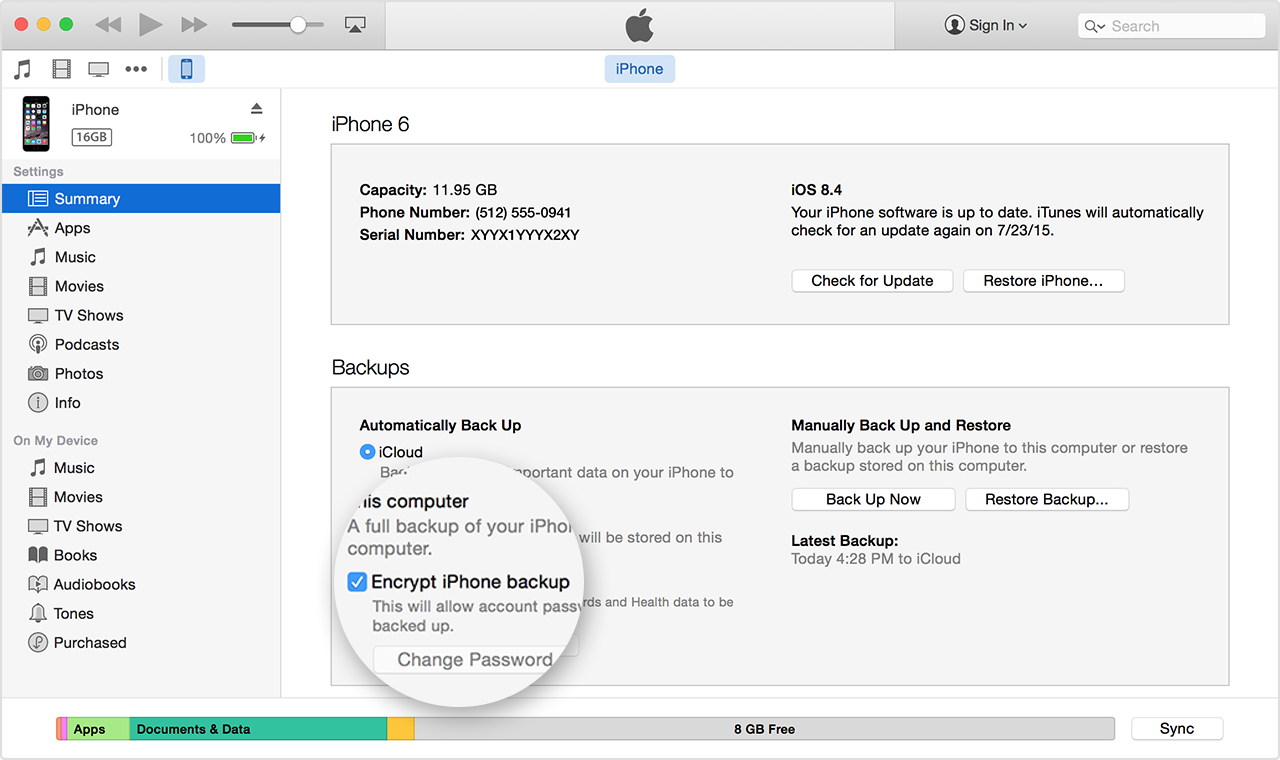
Tip: If iTunes has already been set up to encrypt your backups, the Encrypt backup option will be checked in the Summary pane when you connect your device to iTunes.
Step 6: A prompt pops up asking you to create a memorable password that will be used to encrypt your iTunes backups. Keep in mind you won’t be able to use an encrypted backup should you lose the password. In addition, your encryption password is always required to turn off backup encryption in iTunes.
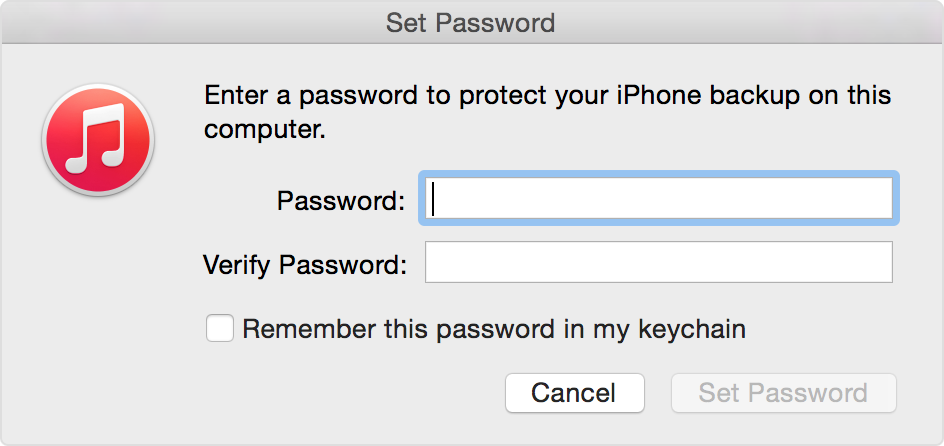
After confirming your password, iTunes starts backing up and also immediately overwrites and encrypts your previous backups. Depending on the number and size of your existing iTunes backups, this can take a while.
Tip: Make sure to write down the iTunes encryption password and safely store it because there’s no way to recover your iTunes backups without this password. Should you forget your password, the only way to turn off backup encryption on your device is to erase it (Settings > General > Reset > Erase All Content and Settings) and set up as new, which effectively removes all data from it.
Step 7: Check if your encrypted backup has finished successfully in iTunes’ Preferences > Devices. If there’s a lock icon next to the name of your device, along with the date and time that iTunes created the backup, you’re good to go.
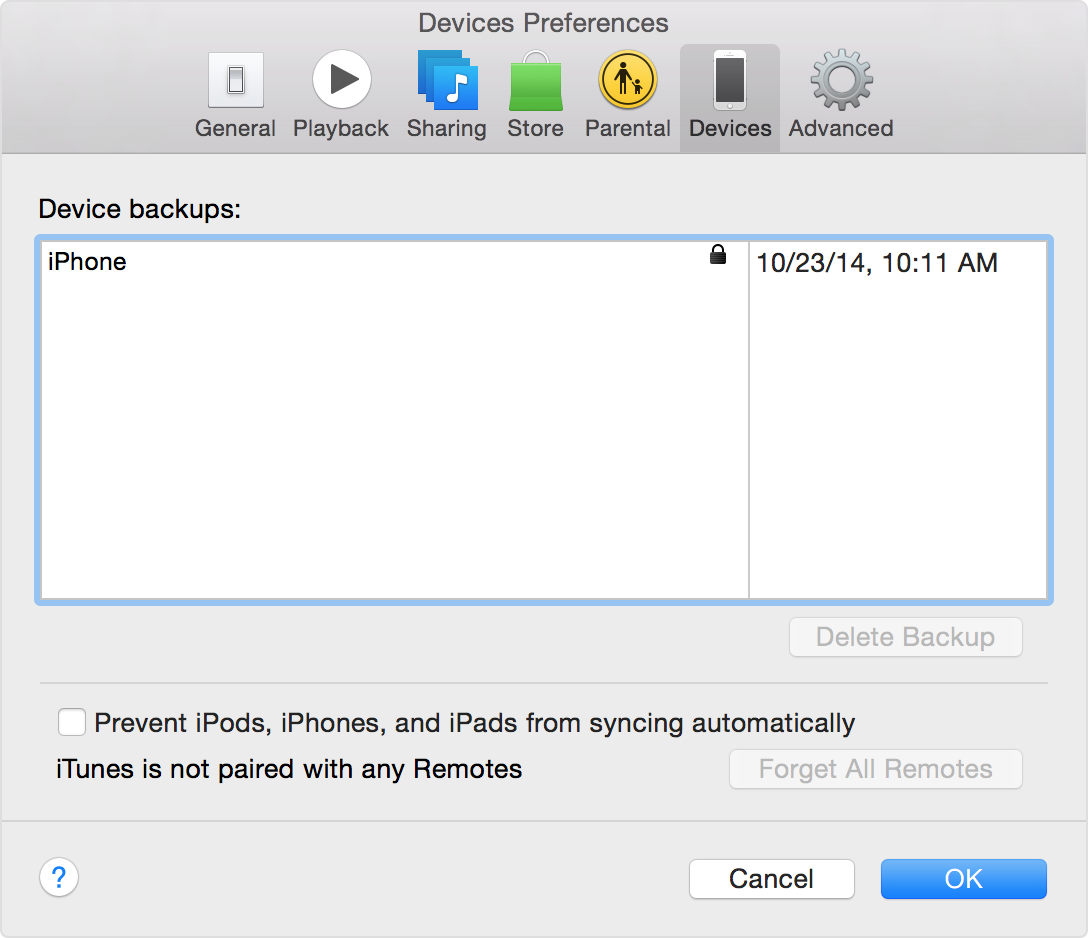
That’s it, the fully encrypted backup of your old iPhone—including its Health and Activity data—is now stored in iTunes on your computer. Now when you restore from that backup, your old Health and Activity data will transfer over to your new iPhone.
Method #2: Restore old Health and Activity data to new iPhone from encrypted iTunes backup
Just to be clear, make sure that you have enabled encryption in iTunes when you backed up your device containing your old Health and Activity data.
Step 1: Connect your new iPhone to the computer you stored your backup on.
Step 2: Launch iTunes and make sure you have the latest version by selecting Check for Updates in the iTunes menu.
Step 3: Choose File > Devices > Restore from Backup. If you’re on Windows and don’t see a File menu, press the Alt key.
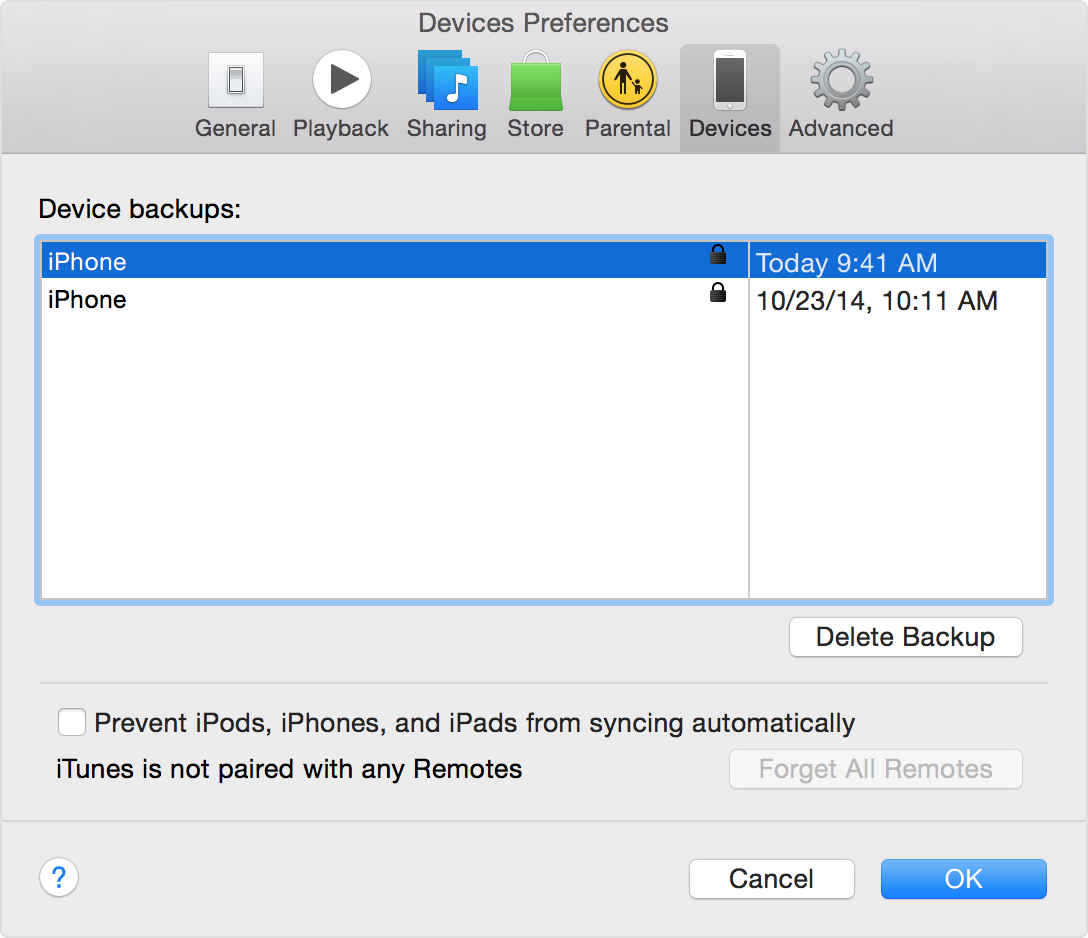
Tip: If there are multiple backups stored on your computer, look at the date and size of each backup and pick the one containing your Health and Activity data.
Step 4: Click Restore and wait for the process to finish. Your device should restart and then initiate a sync with iTunes. Don’t disconnect it until the sync has finished.
Method #2: Back up old Health and Activity data in iCloud
As mentioned before, you can also save the data stored in the Health and Activity apps by backing up your old iPhone using iCloud. All your data gets encrypted by default as it goes between iCloud and your device, and while it’s stored in iCloud.
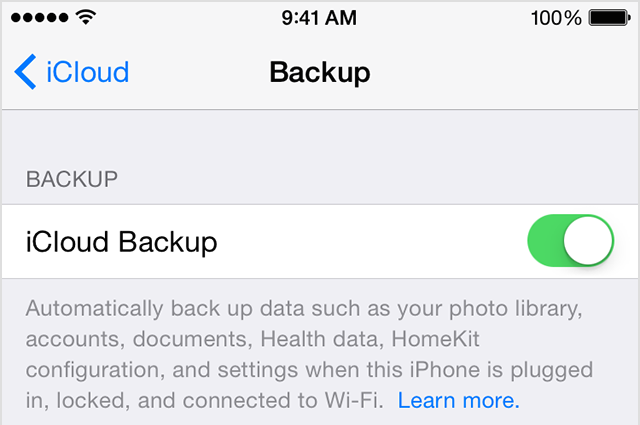
Step 1: Make sure your device is connected to a Wi-Fi network.
Step 2: In iOS 8 or later, tap Settings > iCloud > Backup. In iOS 7 or earlier, tap Settings > iCloud > Storage & Backup.
Step 3: Toggle the iCloud Backup switch to the ON position, if it’s not enabled already.
Step 4: Tap the Back Up Now button to back up your device to iCloud. Make sure you don’t disconnect from your Wi-Fi network until the process completes. You also must have enough available storage space in iCloud for the backup.
Step 5: Make sure the backup has finished successfully. To do so, tap Settings > iCloud > Storage > Manage Storage and select your device. The backup you just made should appear in the details with the time and backup size.
Method #2: Restore old Health and Activity data to new iPhone from iCloud
If you backed up your device to iCloud, all of your data, Health and Activity logs included, are safely stored and encrypted on Apple’s servers.
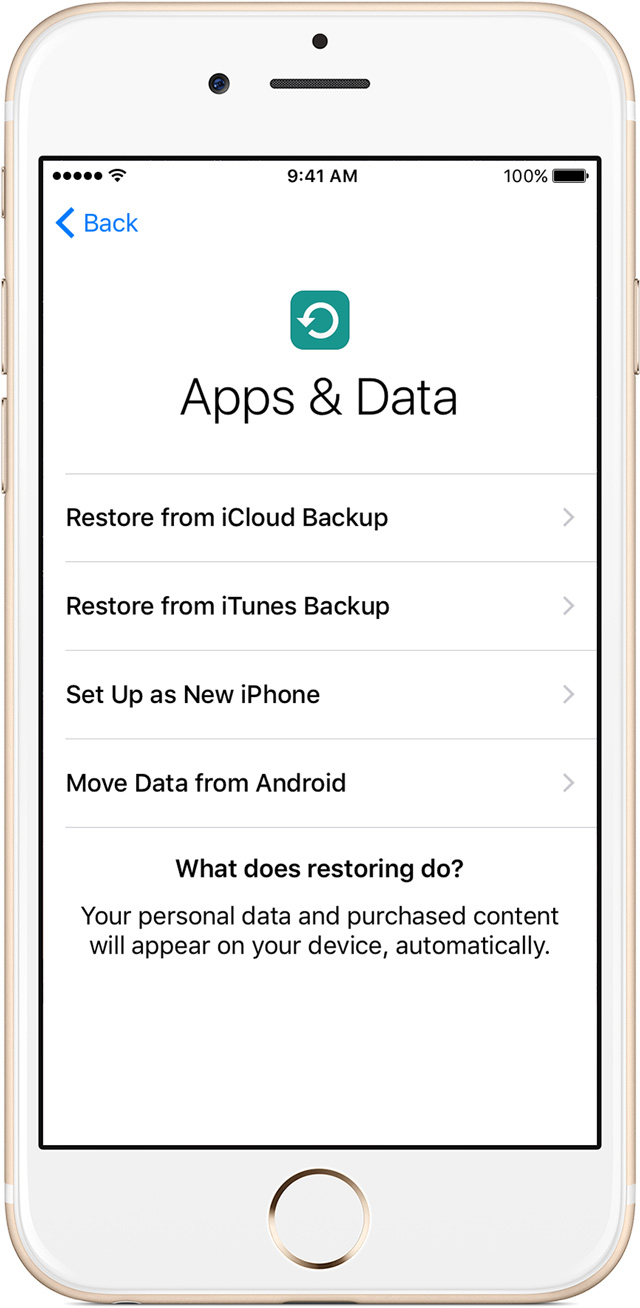
Step 1: Turn on your new iPhone. You should be greeted by iOS’s setup screen.
Step 2: Follow steps in the Setup Assistant asking you to choose your language and other basic settings. Join a Wi-Fi network when asked to and then follow the remaining steps until you see the Apps & Data screen.
Step 3: Tap the “Restore from an iCloud Backup” option and sign in to iCloud with your credentials to continue.
Step 4: Choose a relevant backup file by looking at the date and size of each. After you choose a backup, the transfer starts. Depending on your Internet connection and the size of the iCloud backup, this process may take a while.
Step 5: People who have purchased content from iTunes or App Store using multiple Apple IDs will be asked to sign in to each. But don’t worry, you can tap Skip this Step and enter credentials for your other Apple IDs later.
Step 6: Ensure that your device stays connected to your Wi-Fi until your cloud content downloads to your device. If you disconnect from Wi-Fi, the restore process pauses until you reconnect.
Cloud content includes anything stored in the cloud instead of your backup, like photos in your iCloud Photo Library, apps and media purchased on iTunes and more. This content will download automatically in the background and could take a few hours or even days to finish, depending on the amount of content and your Internet connection.
Tip: If you haven’t set up iCloud Keychain to sync your passwords, iOS might ask you to enter passwords for email, social media accounts and other apps.
See also:
If you like this how-to, please help spread the word by sharing the article with your friends and promote it on social media. We like reading feedback so feel free to submit your tutorial ideas to tips@iDownloadBlog.com.