This tutorial will show you how to set a Finder window’s default opening behavior so that it always opens in the size you want.
Finder in macOS is plagued with the baffling inability to remember window sizes and positions, which is odd considering that past old versions allowed a window to be opened exactly how it was left.
Thankfully, it’s possible to override a window’s default opening behavior on macOS and set it to open to the same size as the last one you created. We’ll show you the right steps for that.
How to get a new Finder window in the size you want
1) Open a new model Finder window by double-clicking the drive icon on your desktop or clicking the Finder icon in the Dock.
2) Set the new window to the size you want. Don’t navigate to a different folder, as resizing the window must be the first way you interact with it.
3) Close the window.
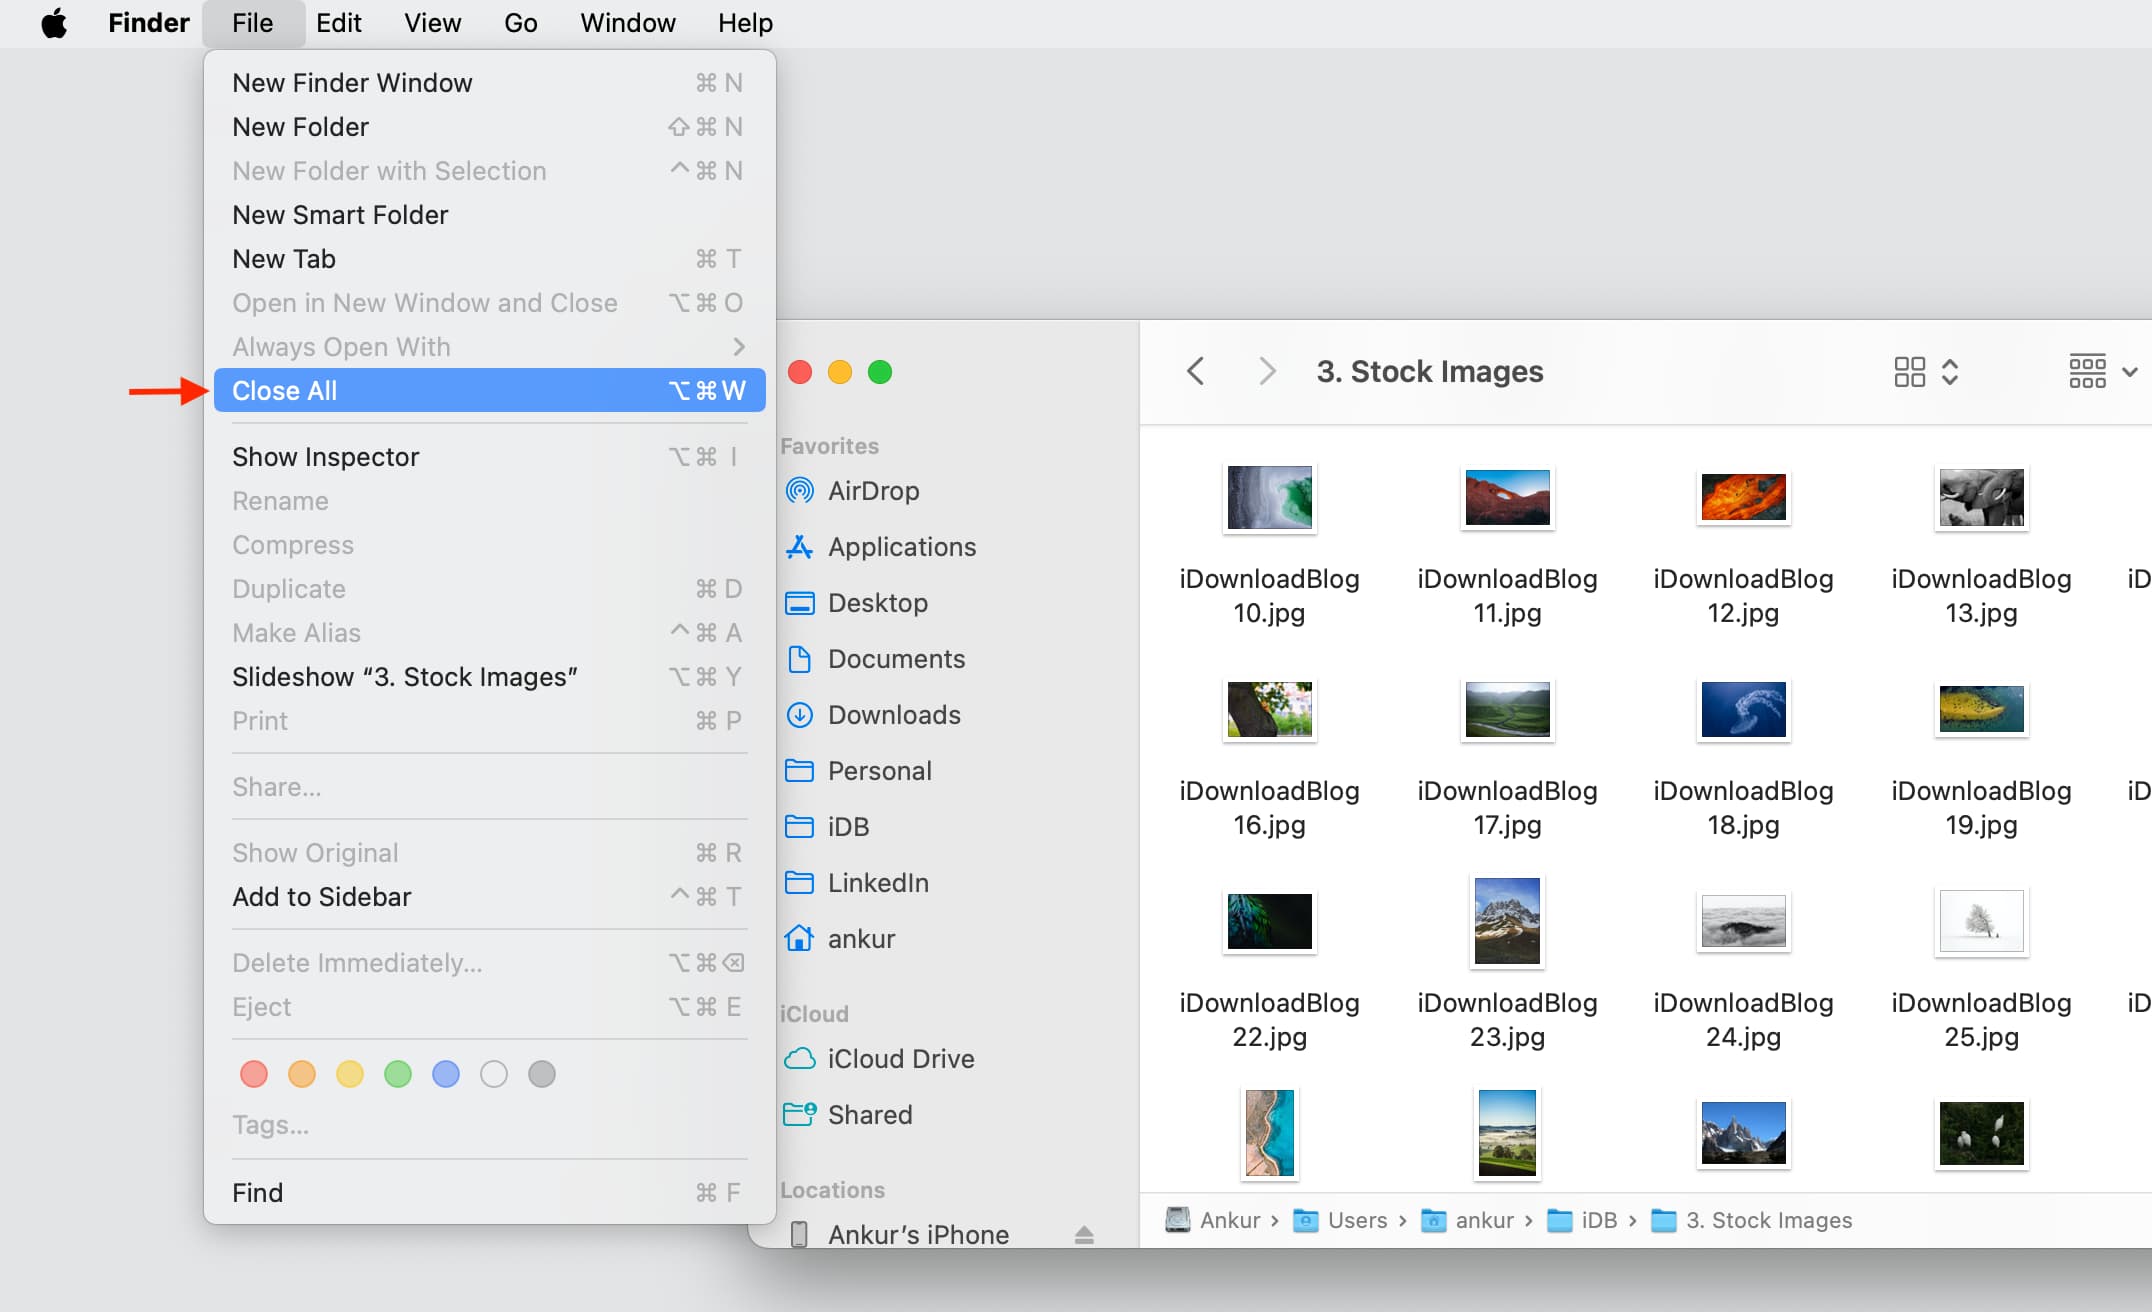
4) Close all open Finder windows by pressing the Option + Command + W keys. You can also click File in the top menu bar and then hold the Option key to reveal the Close All button and click that.
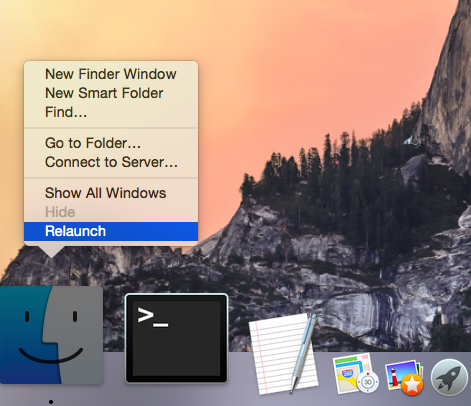
5) Hold the Option key while right-clicking the Finder icon in the Dock to reveal options, and from here, click Relaunch.
From now on, all subsequent Finder windows will now open in the same dimensions, whether you resize them manually or not. In a typical Apple fashion, new windows offset slightly in location.
If you thought about resizing a Finder window and setting its other attributes before accessing the Finder’s View Options (Command + J) to choose the Use As Defaults button, think again — that option behaves somewhat erratically as it doesn’t appear to save the window size and proportions.
Should you find this tip useful, please bookmark the article and consider passing it along to your Mac friends and support folks.
Other Finder tips: