With Time Machine, it’s easy to restore all of your data back to a new Mac or to a fresh install of macOS. As we outlined previously, users can choose to restore all data, or pick and choose the data that they wish to restore during the initial setup process of macOS, and that includes both music and photos.
Another option is to simply restore the entire Pictures or Music folder via the Time Machine interface. We show you how to do that via this post.
In the following tutorial, we’ll show you another quick and easy way to recover photo or music data from a Time Machine backup—directly from the backup folder on your Time Machine external drive.
Note: Your backups folder is read-only via Finder, so you shouldn’t be able to add, delete or change information there. You can however, copy information from the backups folder, which is what we will do in this tutorial.
How to transfer Music or Photos to a new Mac with Time Machine
Step 1: Open the external drive that houses the Time Machine backup folder (Backups.backupdb)
Step 2: Open Backups.backupdb and navigate to the Latest folder
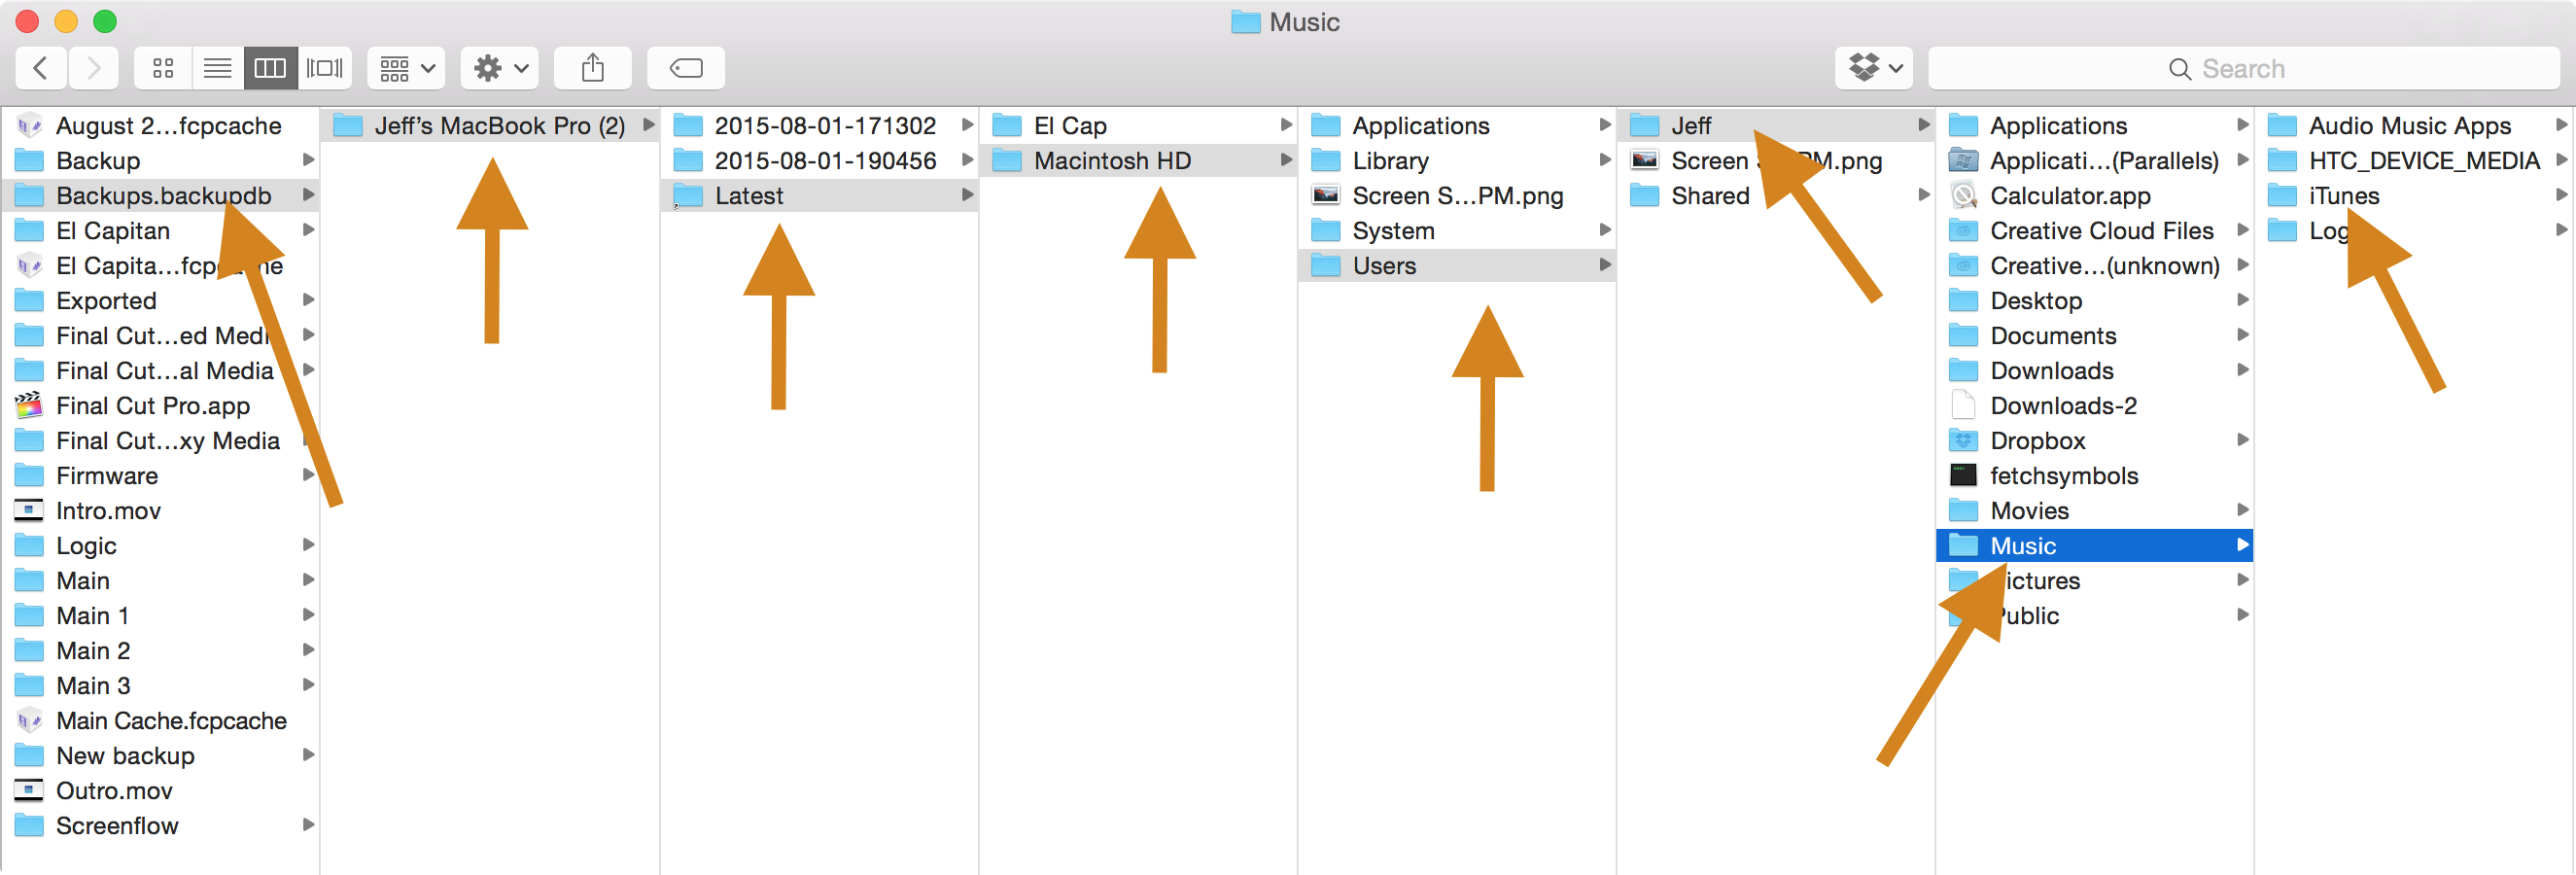
Step 3: Drill down to your Users folder, and find the Music or Pictures folder
Step 4: Open the Music folder and find the iTunes folder, or open the Pictures folder and find the Photo library. You can then drag either item to your Mac’s Music or Pictures folder, depending on which one you wish to restore
As you can see, Time Machine backups offer lots of flexibility. You can access and restore individual data during the initial macOS setup process, you can restore directly from the Time Machine section of the menu bar and restore individual files, or you can do so manually via Finder as explained above.
To learn more about Time Machine, make sure to also check out these other tutorials:
- How to set up Time Machine on OS X
- How to encrypt Time Machine backups
- How to exclude files from being backed up in Time Machine
- How to view and restore specific files using Time Machine
- How to create a partition on your Time Machine external hard drive
- How to set up a new Mac from a Time Machine backup