One of the more under-the-radar features of macOS is the ability to automatically hide the top menu bar. Just like the Dock, which has long had the ability to auto-hide, the menu bar can be hidden until needed.
Auto-hiding the menu bar brings the obvious benefit of having more screen real estate and less distraction. With both the Dock and menu bar set to auto-hide, you can experience a shockingly clean interface as you go about your work.
In this short tutorial, we’ll help you set your Mac to automatically hide the top menu bar.
How to enable auto-hide for the menu bar on Mac
On macOS Ventura and later
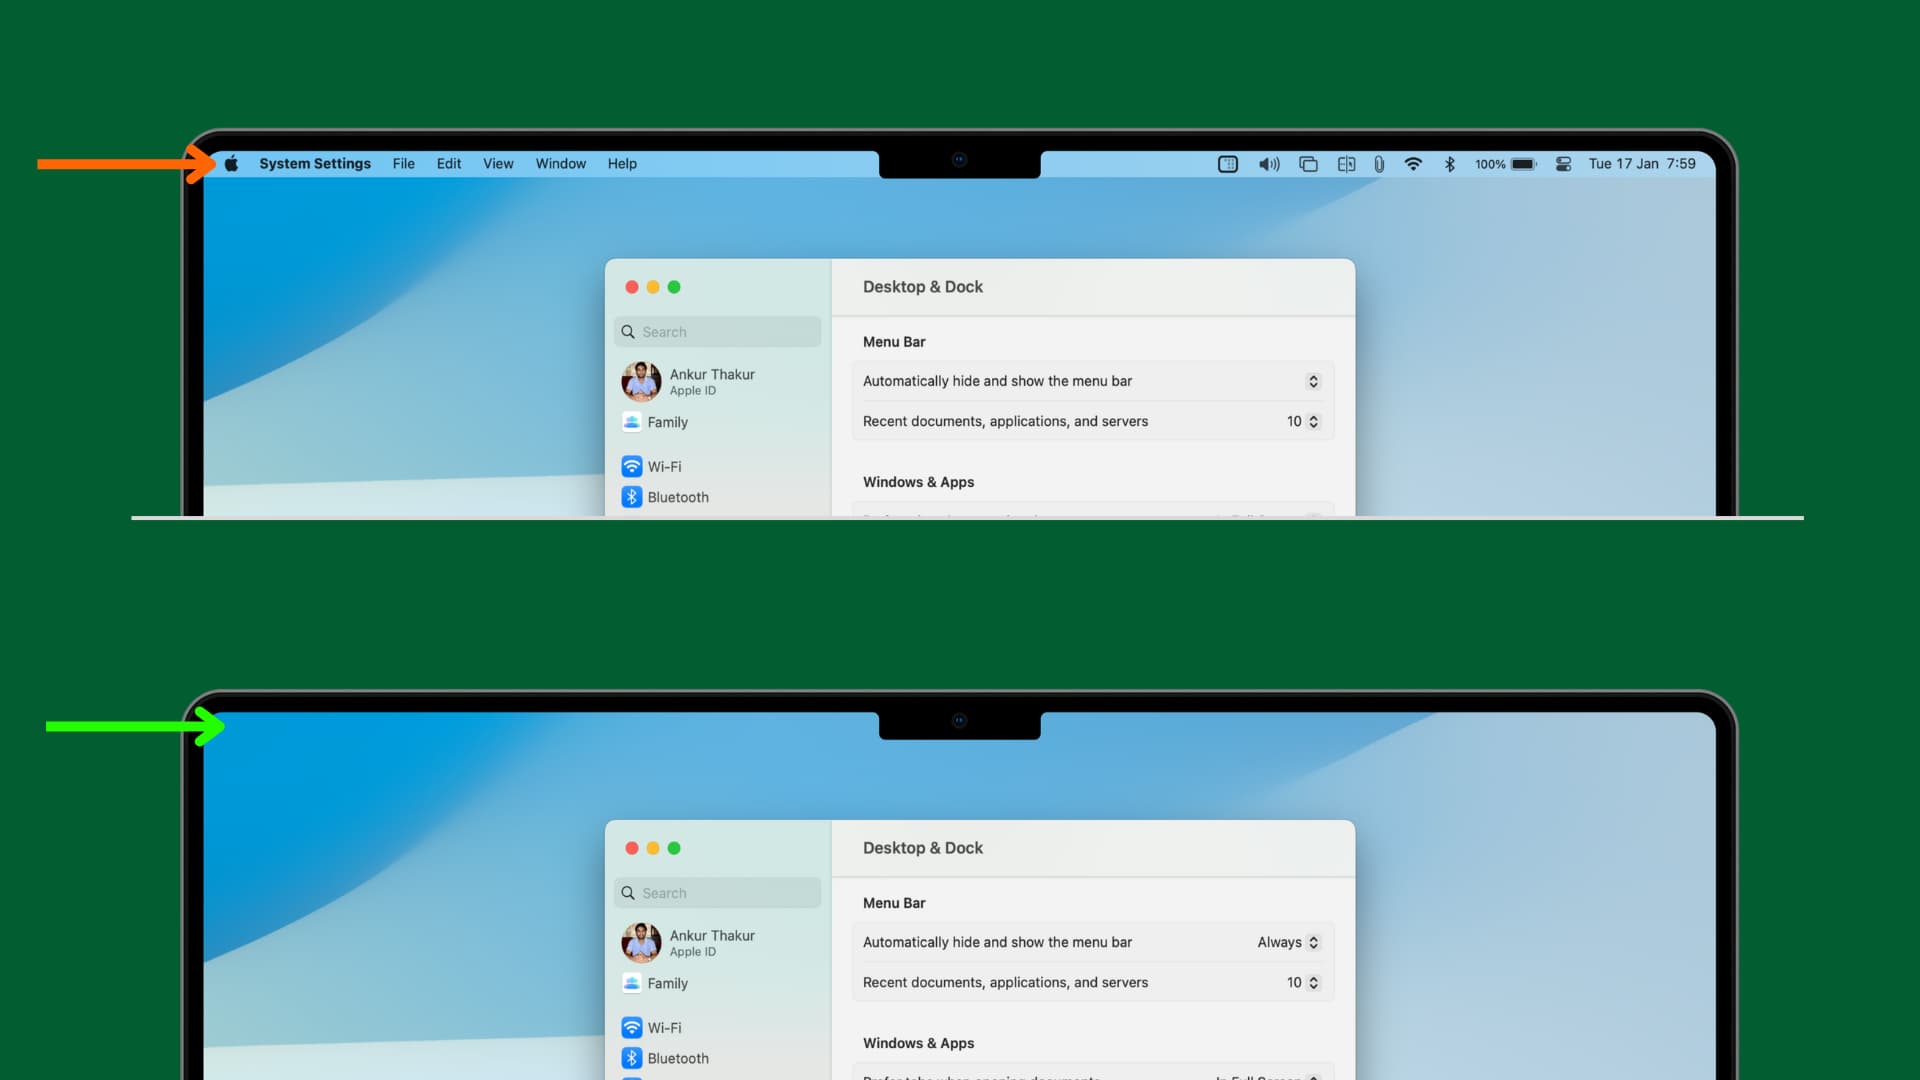
- Click the Apple icon and select System Settings.
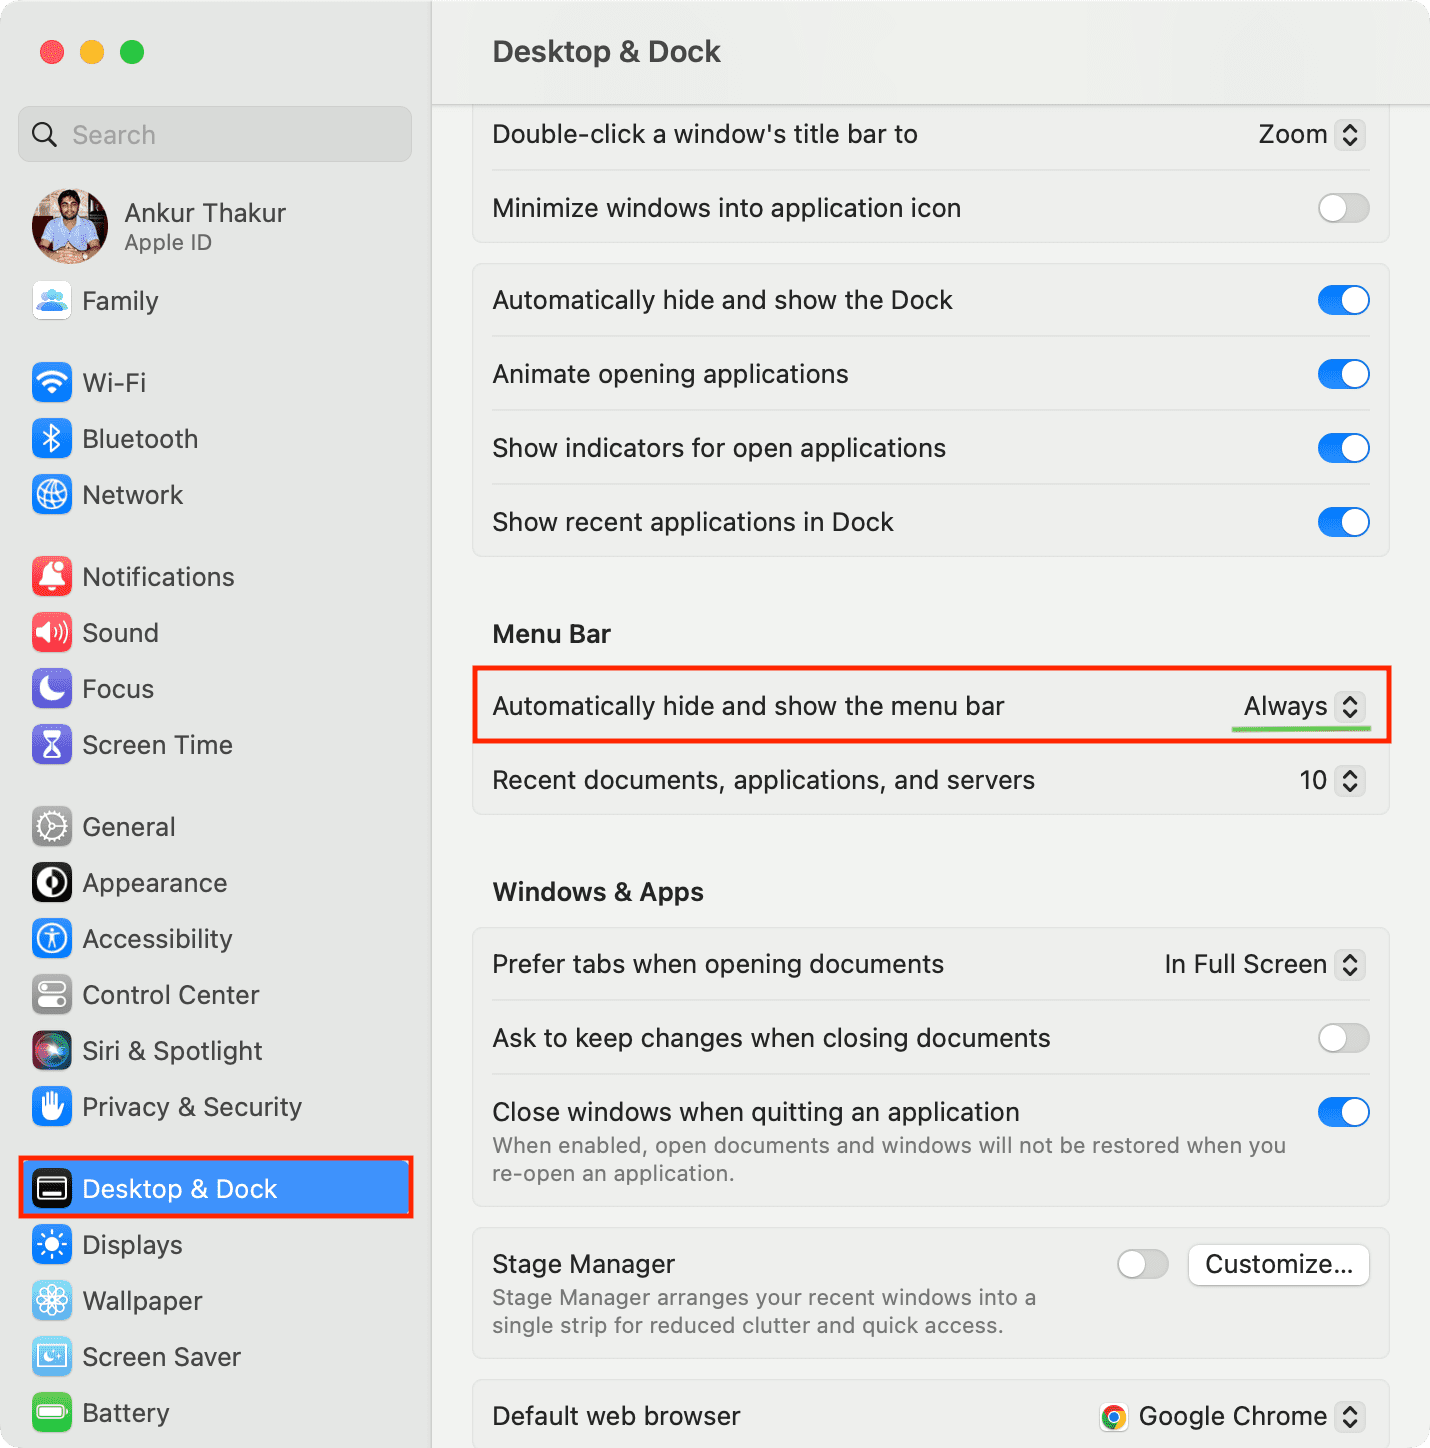
- Select Desktop & Dock.
- Scroll down to the Menu Bar heading and from here, click the drop-down next to Automatically hide and show the menu bar.
- Select Always.
This will automatically hide the top menu bar all the time and show it only when you take the mouse pointer to the top of your Mac’s screen.
On macOS Monterey and earlier
- Open System Preferences and go to Dock & Menu Bar.
- Select Dock & Menu Bar from the left sidebar.
- Check the box for Automatically hide and show the menu bar on desktop and Automatically hide and show the menu bar in full screen.
Even older versions of macOS
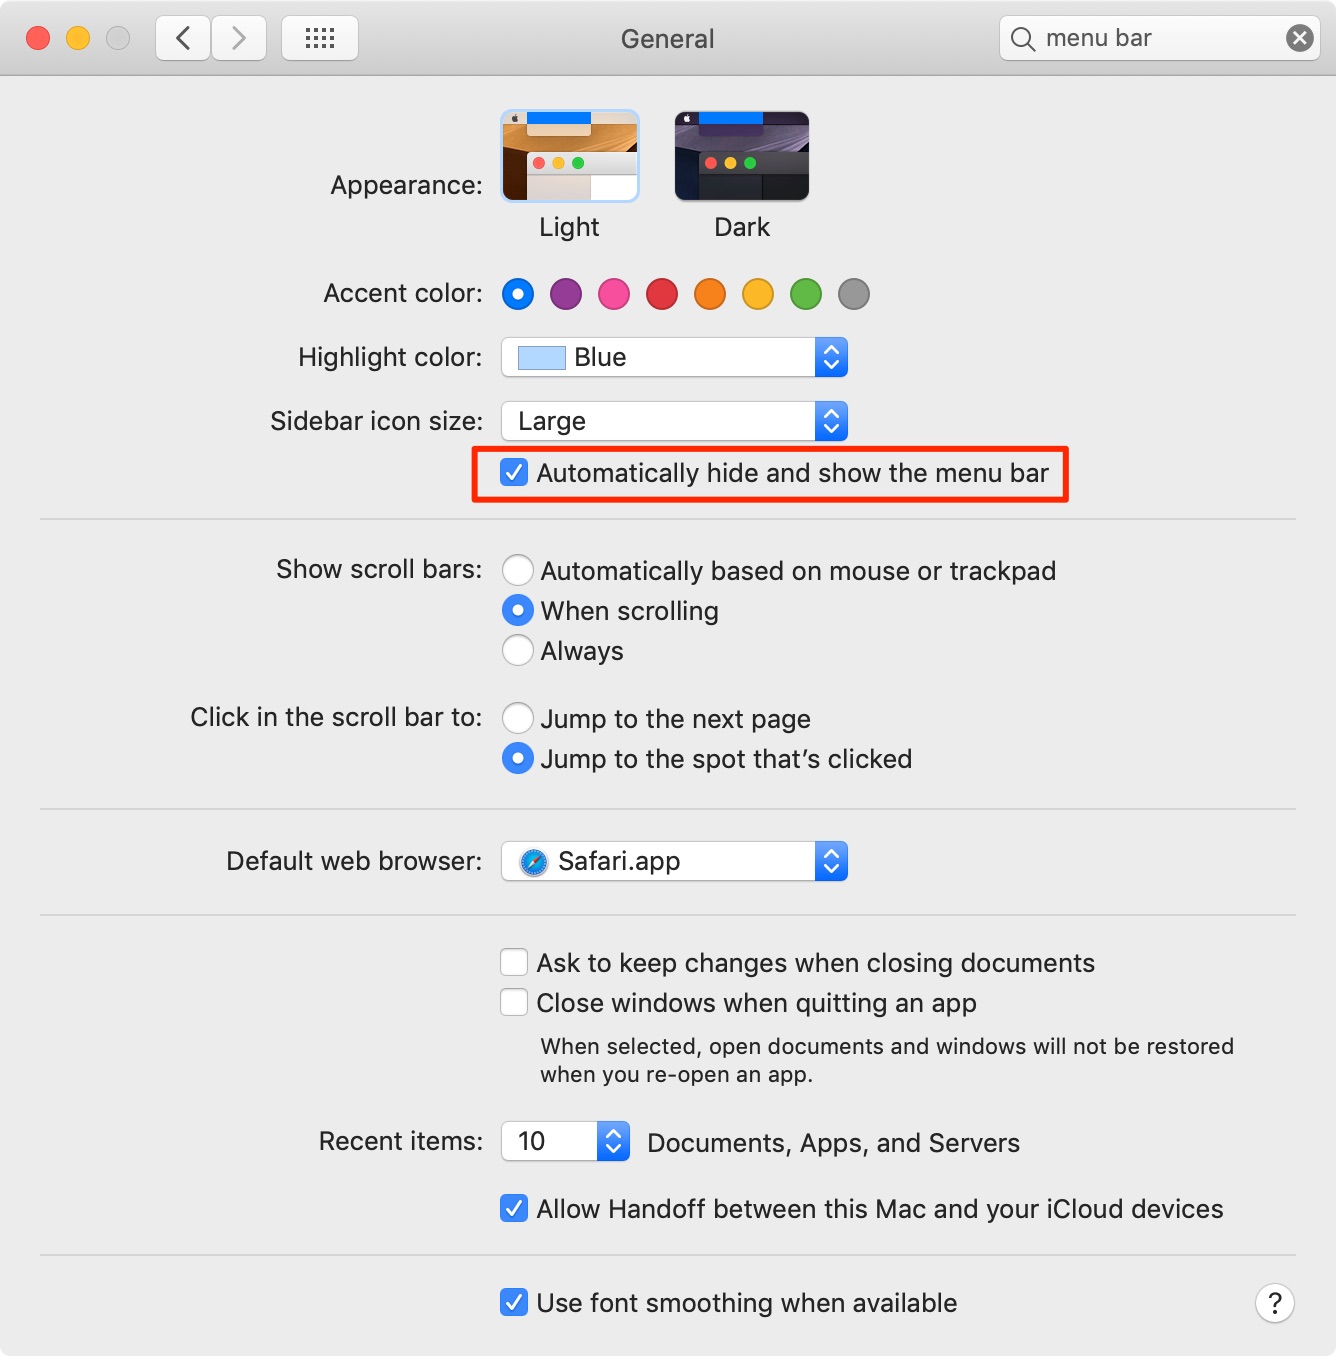
- Open System Preferences.
- Click General.
- Check the Automatically hide and show the menu bar option.
The menu bar will immediately hide from view. To access the menu bar, simply drag your cursor up to the top of the screen and hold it there for a second. Just like the Dock when hidden, the menu bar should reveal itself automatically when the cursor is near.
Check out next: