The stock Mail app is the best way to send, receive, and manage email on iOS 7. There are, of course, alternatives to the stock Mail app such as the official Gmail app and Yahoo Mail app, but no third-party app can match the feature-set and integration of the stock Mail application.
One of the primary advantages of the stock Mail app is that it can handle multiple mail accounts from a large variety of providers. There’s support for Gmail, Yahoo mail, Outlook.com, Exchange, Aol Mail, and iCloud mail. You can even configure an email account from your own server if you wish to do so.
The Mail app is an extremely versatile app with an insane amount of options, features, and idiosyncrasies. Have a look at our ultimate guide to the stock Mail app for more info on what makes it tick
Table of contents
Basics
- What is the Mail app?
- Anatomy of the Mail interface
- How to compose and send an email
- How to add attachments to an email
- How to open attachments
- How to check for new email
- How to reply to an email
- How to delete an email
- How to forward an email
- How to search email
- How to move an email
- How to mark an email as read or unread
- How to flag an email
Accounts
Advanced
Settings
- Accounts
- Fetch New Data
- Preview
- Show To/Cc Label
- Flag Style
- Ask Before Deleting
- Load Remote Images
- Organize By Thread
- Always Bcc Myself
- Increase Quote Level
- Signature
Conclusion

What is the Mail app?
The Mail app is a stock application that comes bundled with every iOS 7 installation. It allows you to send, receive, and manage email from virtually any email provider. The Mail app lets you keep track of conversations by thread and manage multiple mailboxes. It’s a full-sized mail client in a pint-sized package and it’s perfectly capable of operating as your only standalone client.
Anatomy of the Mail interface
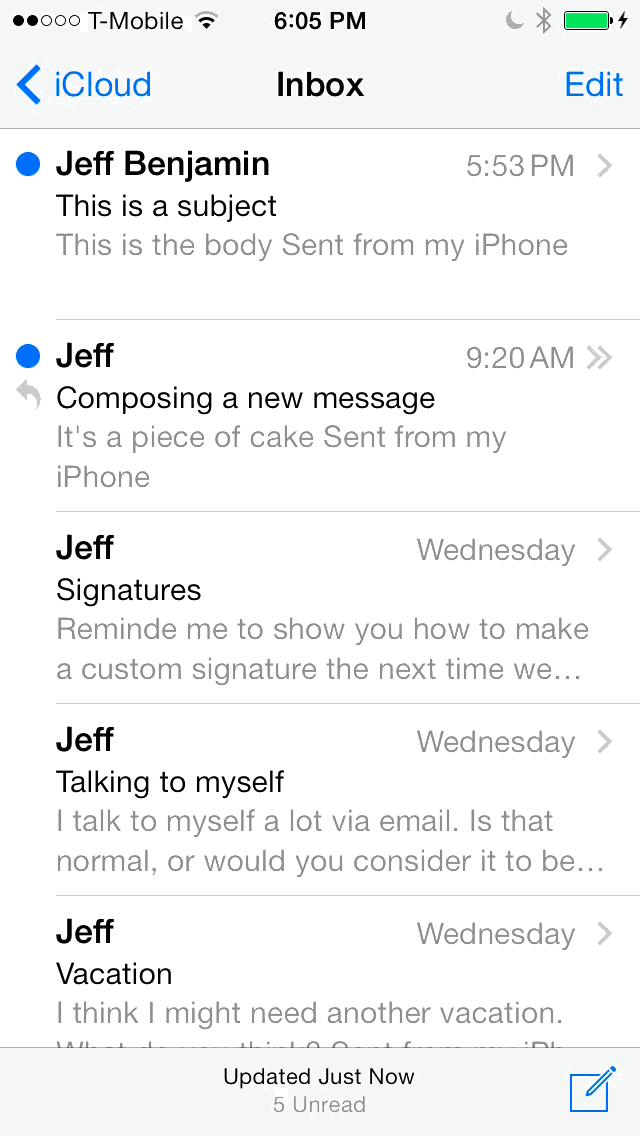
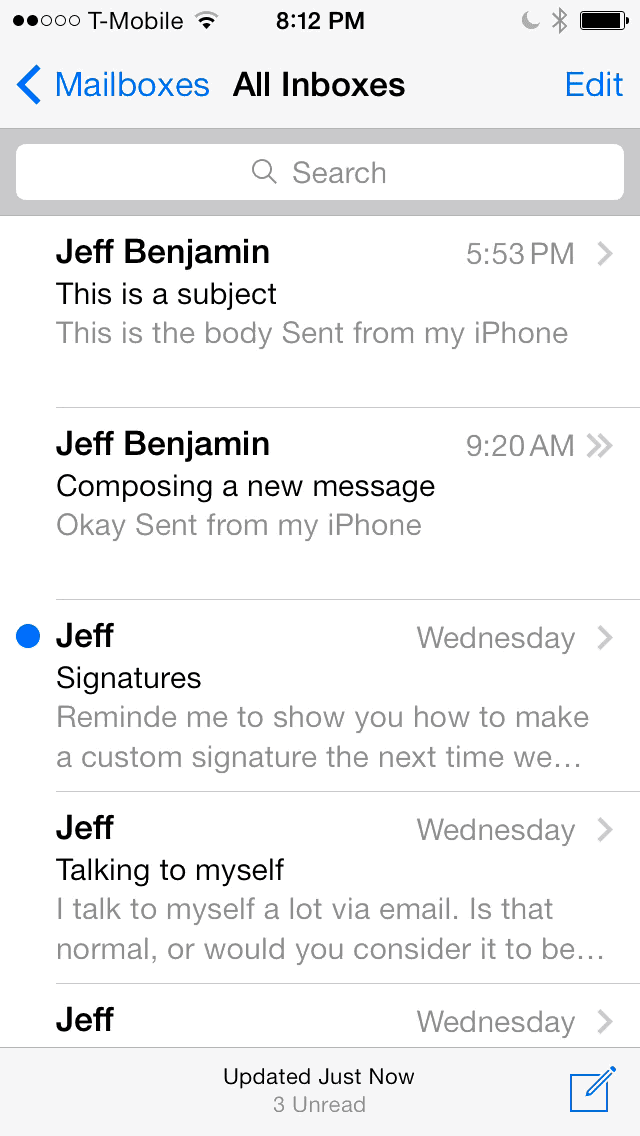
The main interface of the Mail app contains a list of emails, a search box at the top of the page, and several buttons. At the very top of the interface you’ll find a header providing context on your current location within the app. For example, when in the inbox of any particular account, the heading at the top of the main interface will read “Inbox.”
The header lets you know that you’re in the Inbox
The main body of the Mail app can change depending on your location within the app. When at a folder level view such as the inbox, you’ll see a list of available emails.
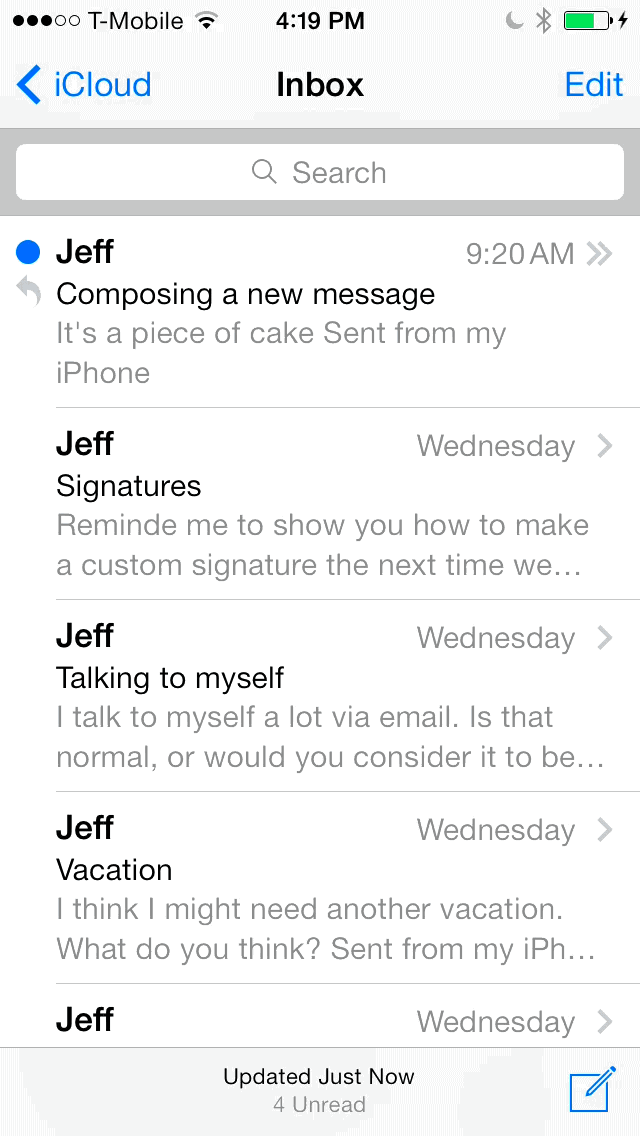
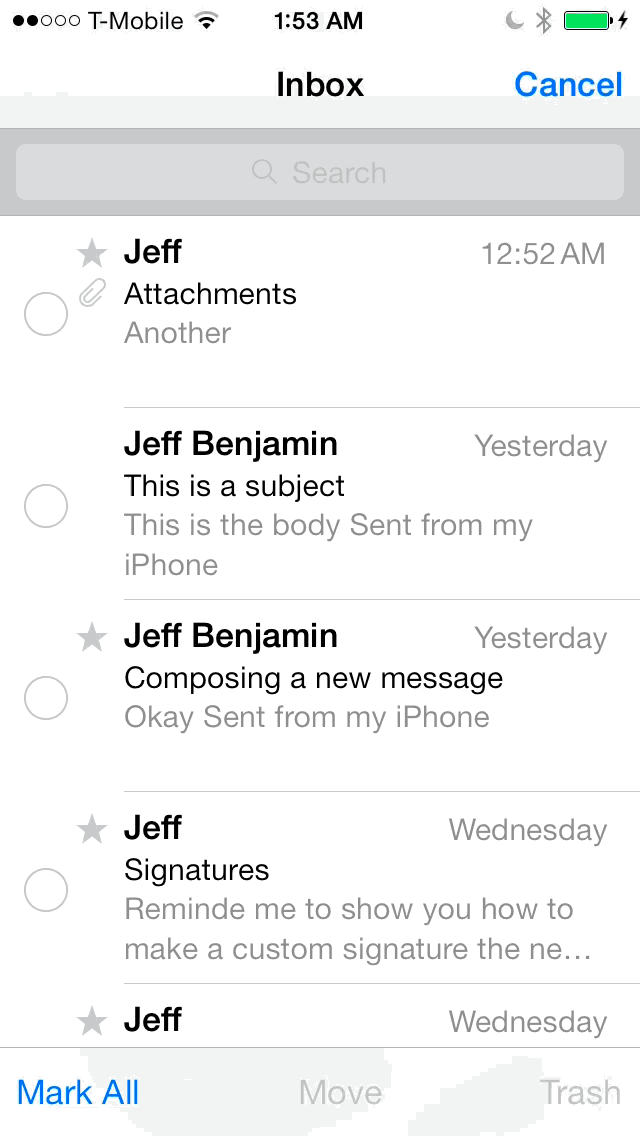
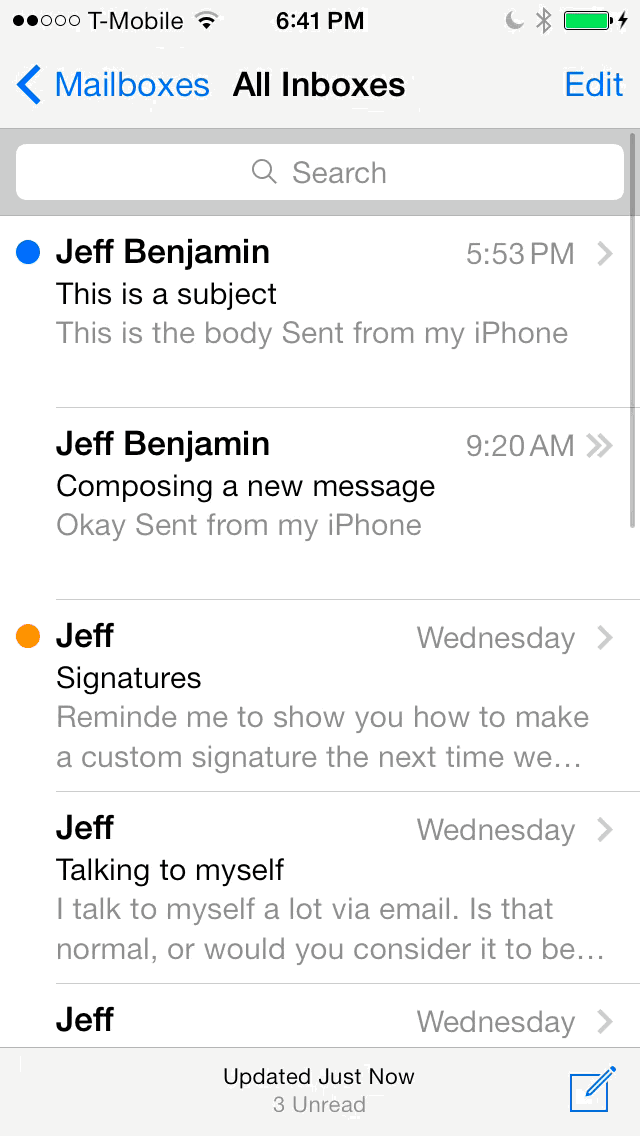
Unread emails are denoted by a blue dot next to the name of the sender, while read emails feature no such blue dot. You’ll find the time, day, or date when a message was received on the opposite side of the sender’s name, which is in bold. Above the sender’s name lies the subject of the email. Beneath the subject line you’ll find a preview of the body of the email. This is all, of course, assuming you’ve kept the Mail app’s settings as default.
The blue dot signifies and unread message
The button in the upper left-hand corner of the main Mail app interface is contextual based on where you are within the app’s mailboxes. We’ll discuss mailbox structure more in-depth in a later section of this guide.
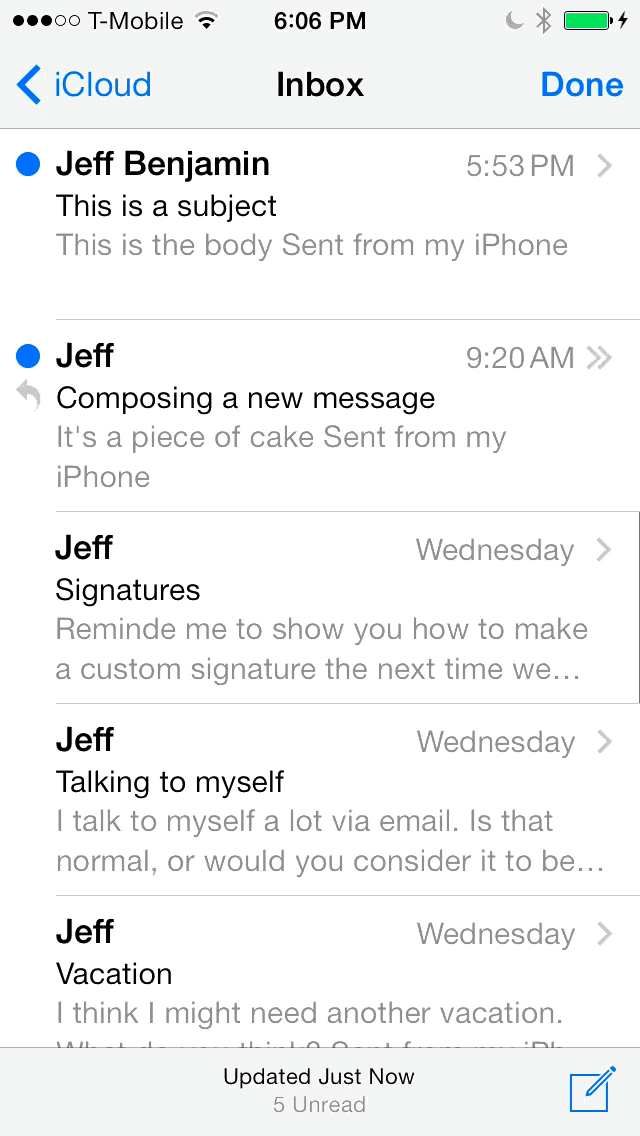
In the upper right-hand corner of the main interface lies an Edit button. Tapping this button places the Mail app into edit mode, which allows you to select emails, mark emails as read or unread, move email, trash email, flag email, etc.
Entering edit mode within mailbox list view
Located in the bottom right-hand corner lies the Compose button. Tapping this button allows users to compose new emails. By using a tap-and-hold gesture, users can view all available draft messages.
Composing a new email using the Compose button
Viewing available drafts using a tap and hold gesture on the Compose button
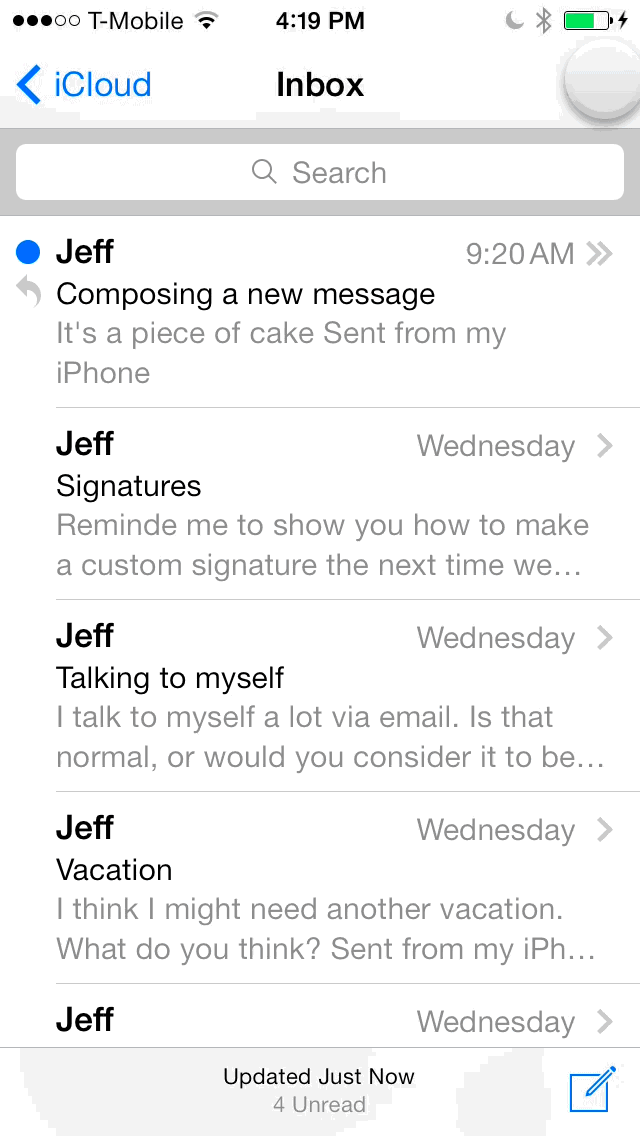
At the very bottom of the mail interface is a status bar that lets you know when the last refresh occurred, along with a running tally of how many unread messages remain in any particular view. When there are no unread messages, you’ll only see a status indicating the last refresh time.
The status bar at at the bottom of the Mail app interface with four unread messages
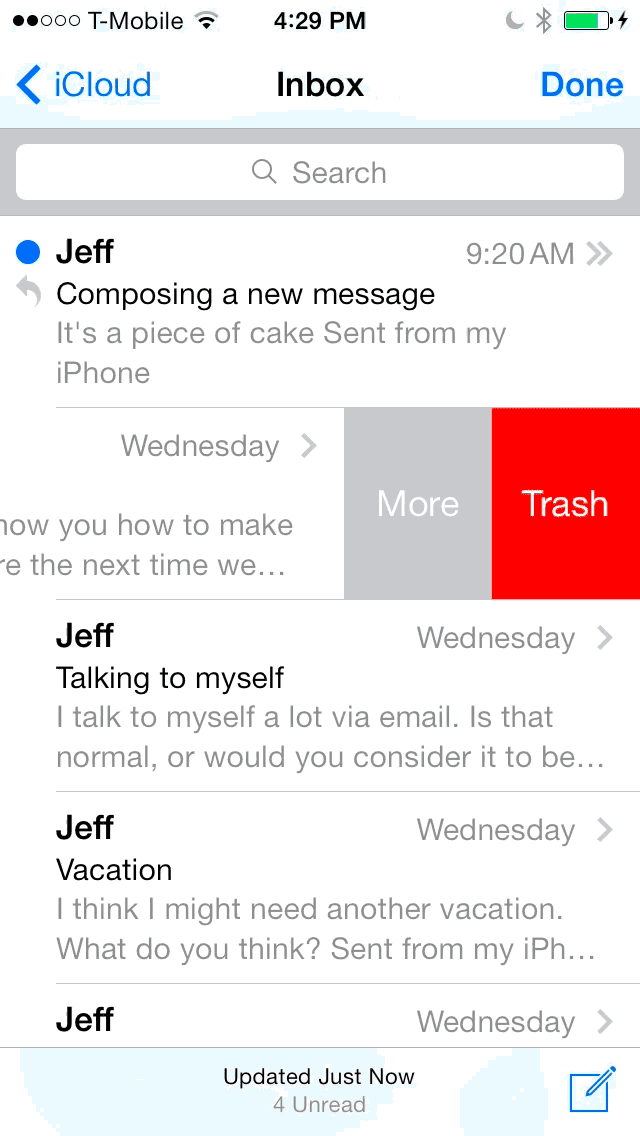
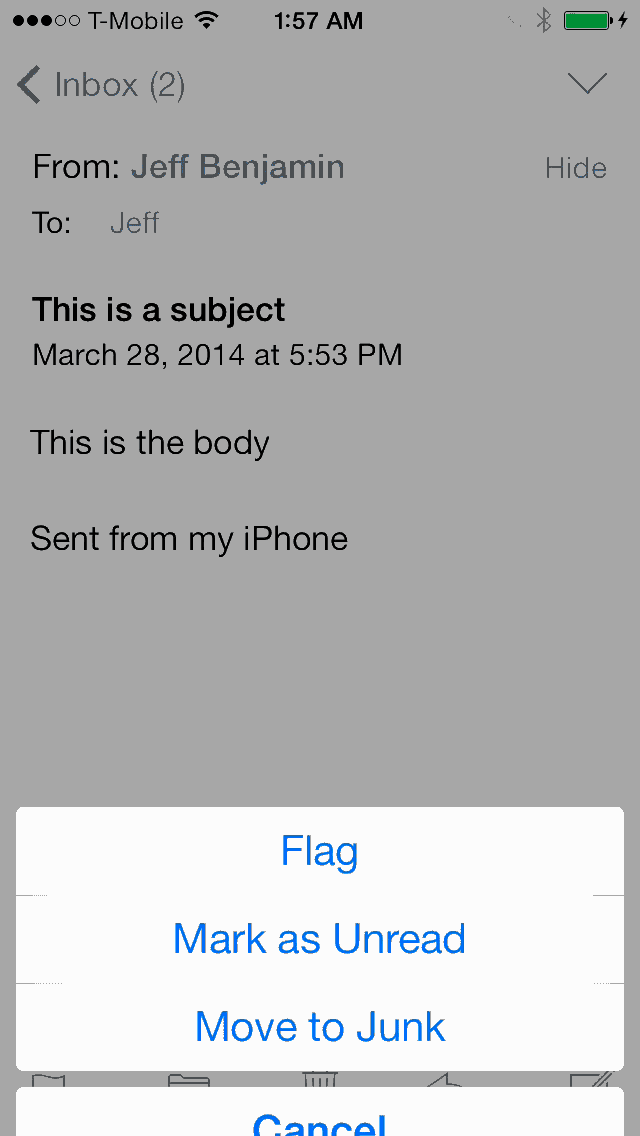
Every email contained within the list of available emails can be swiped from right to left to invoke two additional buttons—more and trash. The Trash button is pretty straightforward; tapping it moves the email directly to the trash. The More button invokes a sheet containing several options pertaining directly to that single email.
Invoking the More button and Trash button using a swipe from right to left gesture
Accessing the more menu options
The buttons included are Reply, Forward, Flag, Mark as Unread, Move to Junk, Move Message, and Cancel. You don’t have to use the More button to perform any of these features, but it’s a quick way to manage an email without opening it completely.
The individual email interface
The second big portion of the stock Mail app is the individual email interface. This is the interface that is displayed when viewing individual emails. For new users, the email interface can seem a bit complex in nature, so we’re going to step through each feature of the interface and break it down completely from top to bottom.
Viewing the full body of an email
At the very top of your screen, in the upper left-hand corner, you’ll find a link that will take you back to the inbox or other mailboxes. Opposite of that, in the upper right-hand corner of the screen, are two navigation arrows—an up arrow and a down arrow. The purpose of these arrows is to allow you to view other emails without going back out to the main mailbox.
Navigating between emails
These arrows allow you to navigate to different messages within your mailbox based on order. For example, if you tap the down arrow, it will go to the previous message in your mailbox, and if you tap the up arrow, it will go to the next message received. If either arrow is greyed out, that means that you’ve reached the end of the list in that particular direction.
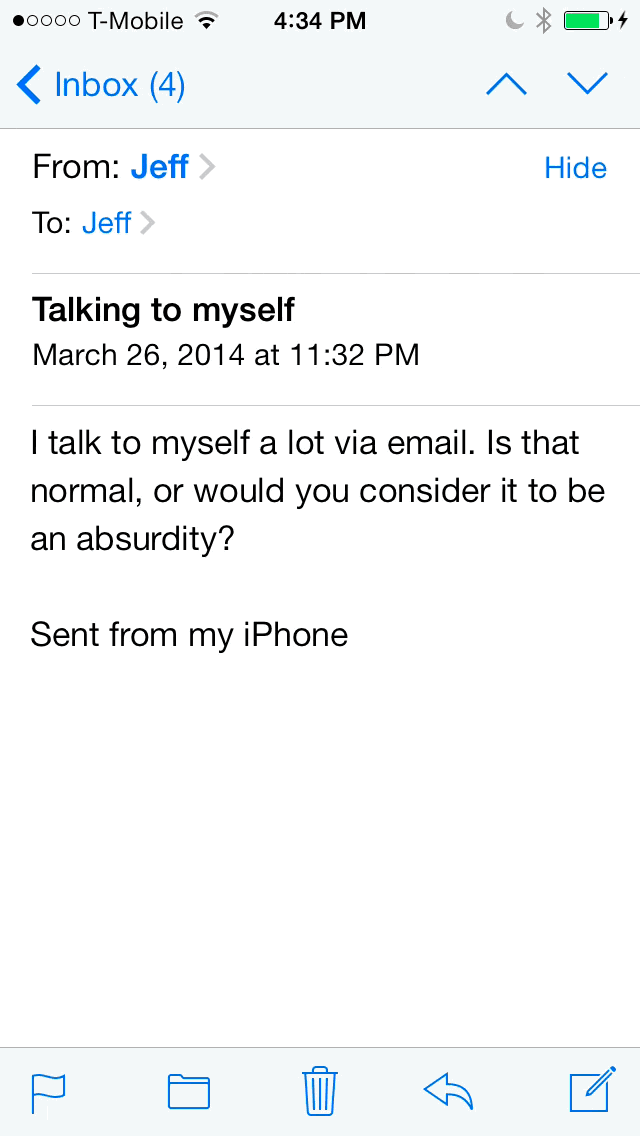
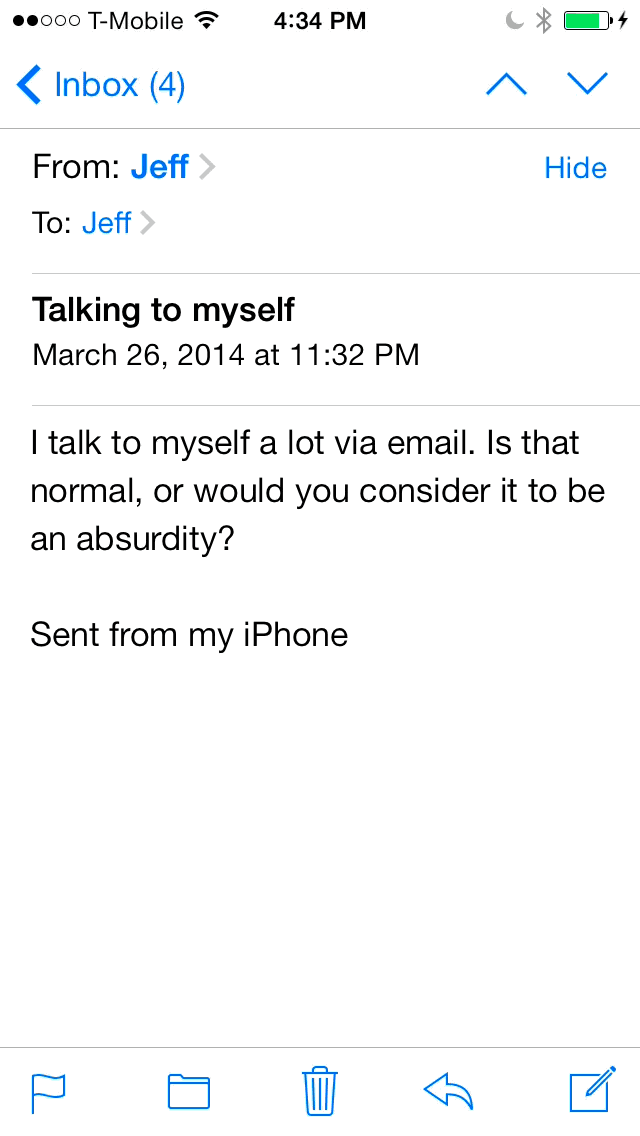
Beneath the navigation arrows lies the header for the email. This header contains the “from” contact and any other contacts included in the email. These contacts are linked to contact cards.
If you already have the contact added to your Contacts app, the links will allow you to view more information about that individual. If you don’t have the contact added to your Contacts app, it will include some generic information about the contact and feature a link to create a new entry based on that information.
Utilizing the Hide button
Directly beneath the navigation arrows is a Hide button. The Hide button allows you to compact the header information containing the persons involved in the email. This is useful for when you have a lot of recipients involved in an email, and you want to make the list more compact for easier viewing purposes.
Beneath the header information, you’ll find the subject line of the email and the date and time that the email was sent or received. The subject line is listed with a bold font, and the date and time information is listed below it.

The subject line and date/time information
Beneath the subject line comes the most important part of the email, the body of the message. This is where you’re able to view the contents of the email. Emails vary in size, and type. It could be a message based on images and devoid of much text, it could be a long email thread with dozens of replies, or it could be a simple Steve Jobs-styled email with a two word reply.
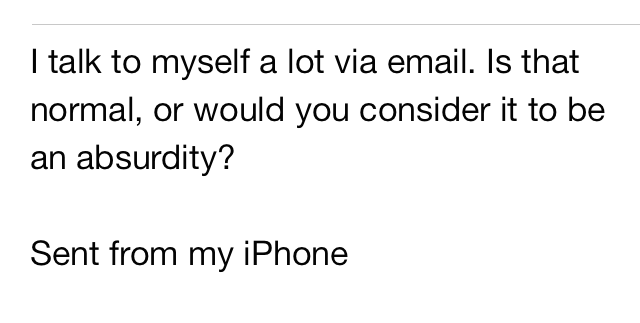
The email message body
At the bottom of each email, you’ll find a group of action buttons. These buttons are the same for each email you view, so you’ll need to be familiar with what they do.
The action buttons at the bottom of the email interface
The buttons are as follows:
- Flag – allows you to flag/unflag, mark as read/unread, or move to junk folder
- Move – lets you move a message to a folder
- Delete – immediately deletes a message
- Reply – allows you to reply, reply to all, forward, or print an email
- Compose – allows you to compose a new email and a tap and hold gesture allows you to access drafts
How to compose and send an email
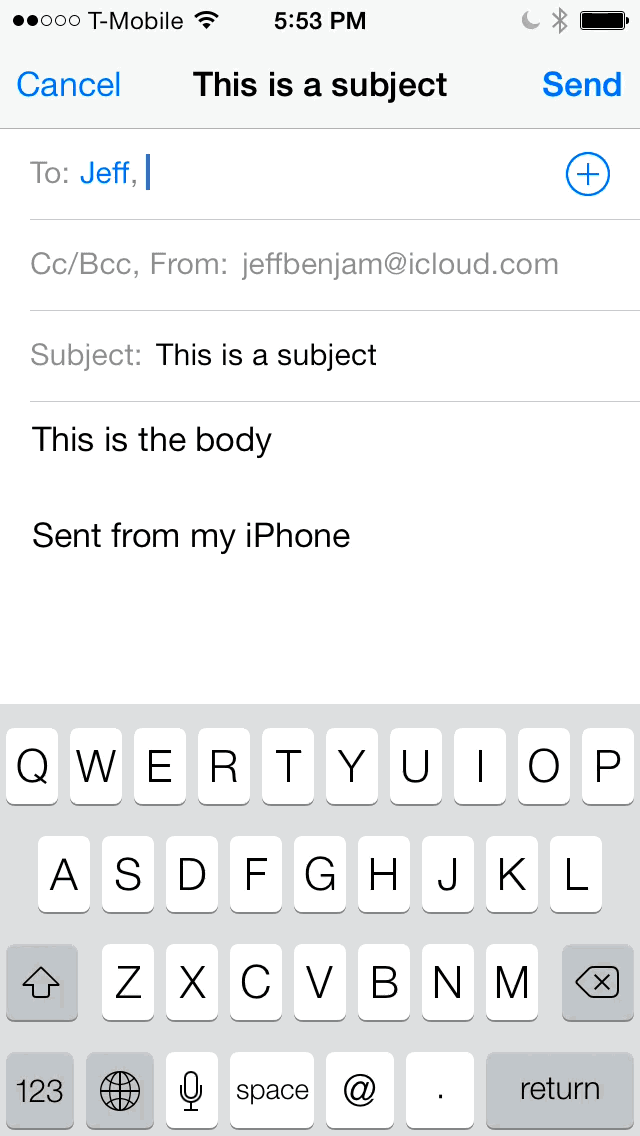
No matter where you are inside of the stock Mail app interface, the Compose button is always available for quick email composition. This is one of the features that makes the stock Mail app so effective; it’s very easy to quickly compose a new email on a whim, and there’s little friction involved.
To compose a new email, simply tap the Compose button located in the bottom right-hand corner of the stock Mail app interface. This will invoke the new message pane, which allows you to compose a new email. The new message pane contains everything that you’ll need to properly compose an email: To address, cc/bcc addresses, from address, subject, body, and signature.
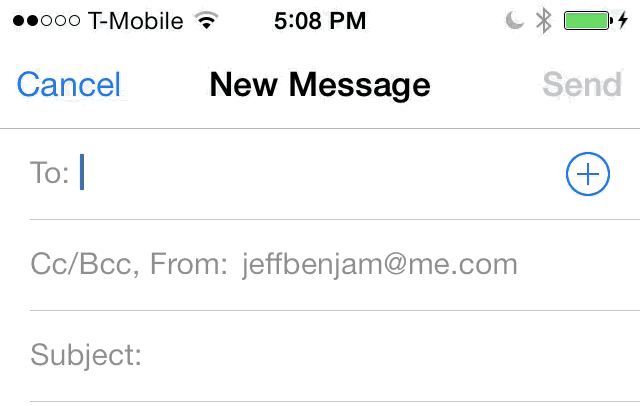
Adding contacts to an email
Typing in the “To” field will auto-populate recently used addresses and addresses from your contacts as you type. You can also use the ‘+’ button to invoke your list of contacts to pick and choose from specific individuals.
The from address and cc and bcc addresses can be modified by tapping the area beneath the to address. This area will automatically populate a from address based on the default settings for the Mail app contained in the stock Settings app, but you can change it if you have more than one email account configured. It should also be mentioned that iOS is smart enough to learn your preferred from addresses after a period of time of sending email to specific contacts.
After tapping the from address, you should see a cylindrical list of addresses to choose from at the bottom of the interface. Tap the address that you want to use to send the email, and then tap anywhere within the body of the email to confirm your selection.
Changing the from address
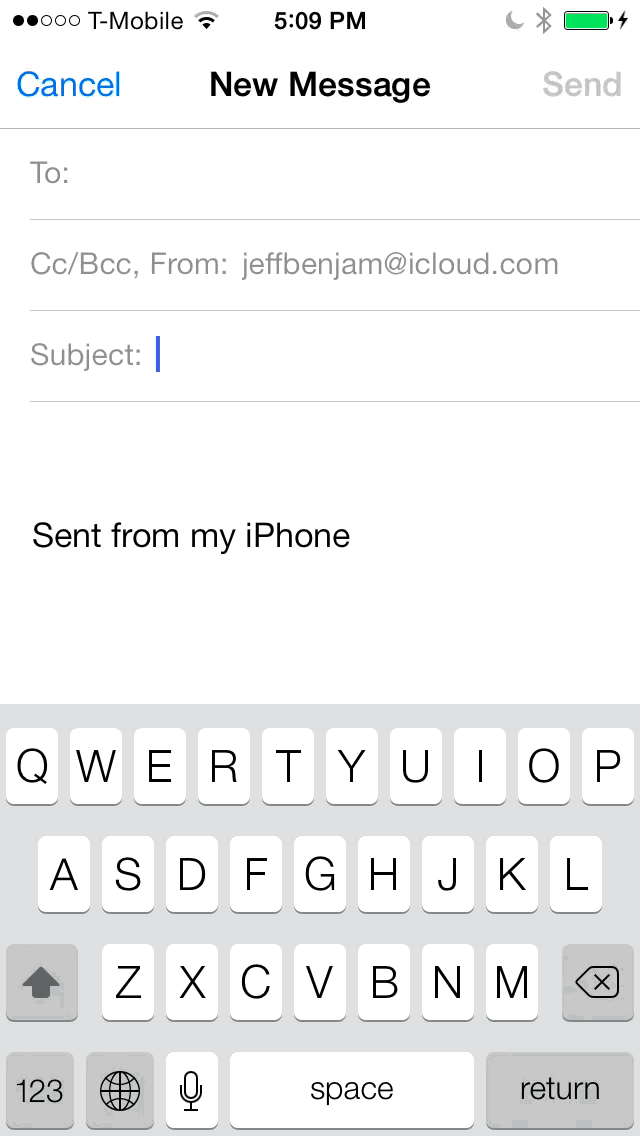
Below the “From” address is the subject line, which is fairly self-explanatory. The subject line is where you type the subject of the email that you’re composing. As you type a subject, you’ll see the heading at the top of the compose pane change from “New Message” to the subject that you type in the subject field. If you’re replying to an email or forwarding an email, the subject line will be pre-populated with info pertaining to the email.
Typing a subject, notice the header change
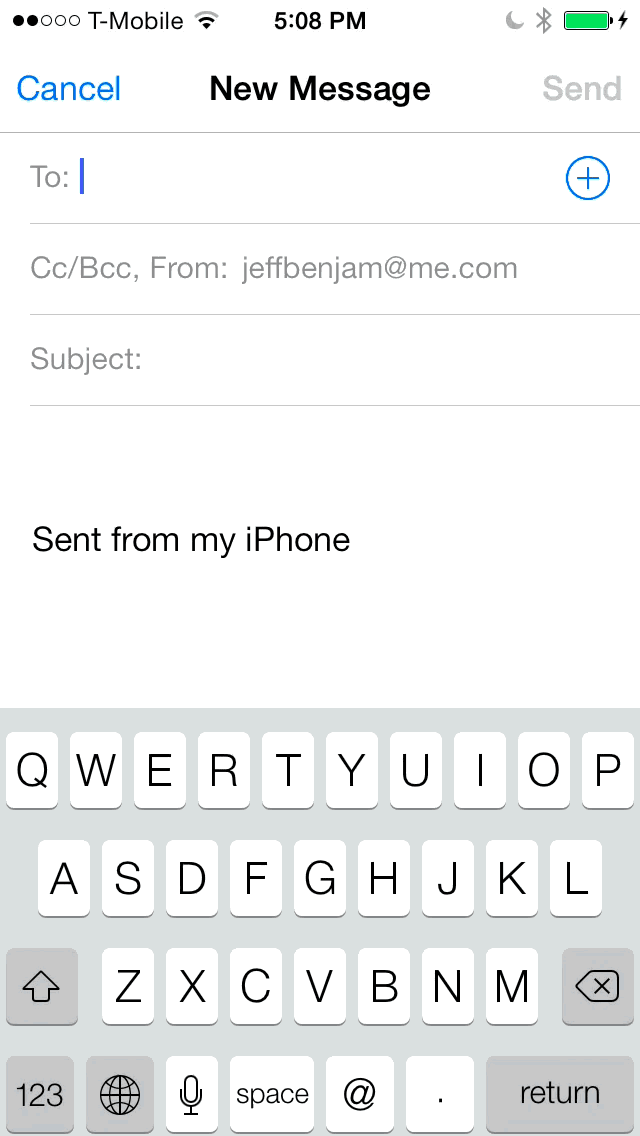
Beneath the subject section lies the body of the email. Here is where you’ll compose the actual message that you wish to send. You’ll probably find a default signature, such as “Sent from my iPhone” near the bottom of the body. This signature can be changed within the Mail app’s settings if you wish to do so.

Composing the body of a new email
In the upper left-hand corner of the compose pane is a Cancel button for canceling the email. If you tap the Cancel button, and you don’t actually want to get rid of the work in progress, you can select Save Draft at the bottom of the interface. You can also use the Delete Draft button to delete a draft.
Saving a draft
Once you’ve populated all of the necessary fields, you’ll see the send button in the interface’s upper right-hand corner light up with a blue tint. Tapping the Send button will send the message that you just composed to your desired recipients.
Sending a new email
After tapping the Send button to send your message, the new message pane will close, and you’ll find yourself back at your list of emails. At the bottom of the interface, you’ll see a message that says “sending” to denote that your email has been sent out. You’ll also hear a “woosh” sound effect if you have sound enabled and you haven’t altered the default sound effects for the Mail app.
How to add attachments to an email
There are several ways to attach items to an email, but if you’re looking for the traditional attach button, as found in many desktop email applications, you won’t find one. Since iOS doesn’t give users access to the default file system, you’re limited in the type of files that can be attached to an email directly from the stock Mail app.
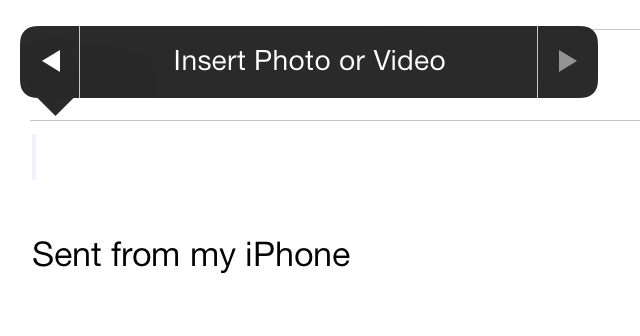
Attach photos and video via the copy and paste menu
The only types of files that you can attach directly from the stock Mail app are photos and videos. There are a few different ways to attach photos and videos, but the easiest way is to invoke the copy and paste menu by tapping on any area within the body of the message, and then tap insert photo or video. The other way to insert photos or video into an email is to simply copy and paste them directly into the body of the email.
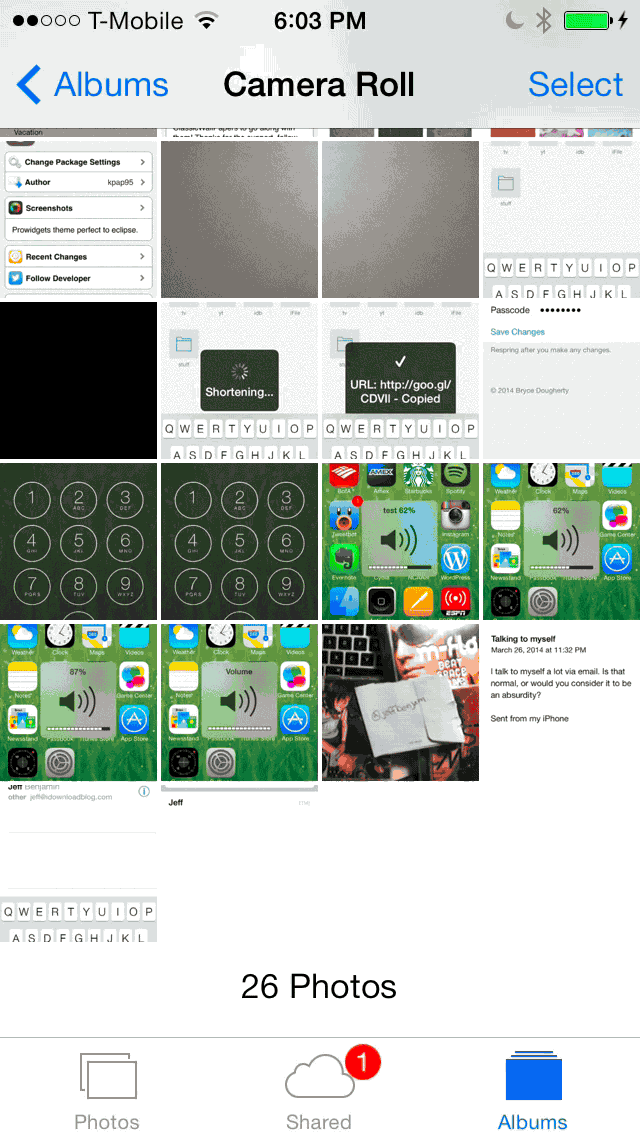
Using copy and paste to add images to email
iOS also lends the ability to create new emails with photo and video attachments directly from the stock Photos app. This is accomplished by using using the share button in the bottom right hand corner of the Photos app interface.

Emailing a photo directly from the stock Photos app
How to open attachments
Attachments appear at the bottom of the body of an email. If it’s a new attachment that has yet to be downloaded, you’ll see a box containing the phrase “Tap to Download” followed by the name of the attachment and its size.
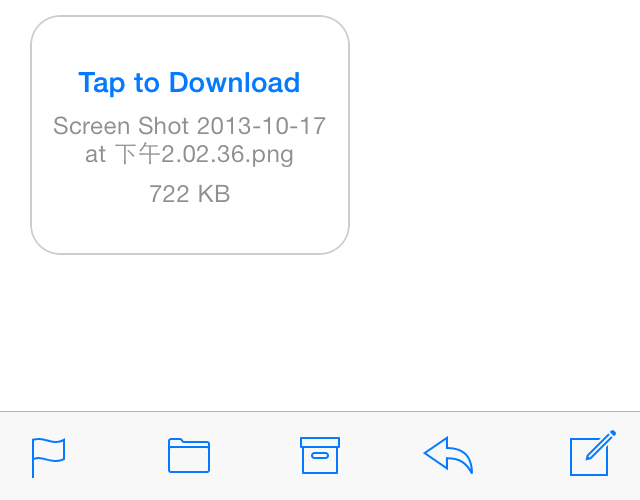
Tap to download and open attachments
Tapping on an attachment will cause it to be downloaded from the email server. Once the attachment is downloaded, it will give you a better indication as to the app that can be used to open it. This is usually denoted by the app icon of the app in question appearing inside the attachment box.
Tapping on the attachment after it is downloaded will cause it to open in a preview view. From there, you can use the Share button in the upper right-hand corner of the interface to select the app that you want to use to fully open the attachment.
How to check for new email
There are several ways to check for new email manually. Whenever you open the Mail app, the email accounts configured will automatically check for new mail. You can also manually refresh your email accounts by using a pull-to-refresh gesture from the main interface.
Pull to refresh to check for new mail
Of course, your email will refresh automatically at intervals configurable within the Mail app’s settings if you have your account set to fetch new mail. There’s also the idea of push email, which requires no refreshing; it alerts you immediately once new email is received. We’ll go more in depth on the differences between fetch and push in a later section.
How to reply to an email
There are two basic ways to reply to an email in the stock Mail app. The first way, and most obvious method, is to simply open the body of the email and tap the Reply button that lies within the group of action buttons. Once you tap the Reply button, you’ll invoke a new sheet that allows you to Reply, Forward, or Print the email. You’ll also have a Reply All button if there is more than one email address involved in the conversation.
The second way to reply to an email is to use the swipe from right to left gesture on the email while in list view. Performing this gesture will display the More button, which in turn will allow you to reply to the email.
Replying to an email is easy, because every necessary field is already pre-populated with information. All you need to do is type in your reply, which resides above the previous content contained within the message. You can, of course, add additional recipients, change the From address, alter the subject, etc.—but you don’t necessarily have to do if you don’t need to.
How to delete an email
There are three ways to delete email in the stock Mail app. The easiest way to delete an email is to swipe on it from right to left while in list view and tap the Trash button.
Deleting an email using a swipe gesture
You can also tap the Edit button in the upper right-hand corner of the list view interface, tap the blue button that resides to the left side of an email, and tap the Trash button in the bottom right-hand corner. The advantage of doing it this way is that you can easily select multiple emails and delete them in one fell swoop.

Deleting an email using Edit mode in mailbox list view
The next way to delete an email is to open the body of the email and tap the Trash icon in the group of action buttons at the bottom of the interface.
Deleting a message using the Trash button
How to forward an email
Forwarding email within the Mail app is accomplished in the same manner as replying to an email. You have two choices when it comes to forwarding email. You can do so by using the swipe from right to left gesture while in list view, or you can tap the Reply button in the group of action buttons within an individual email, and select Forward.
Forwarding an email using the reply button
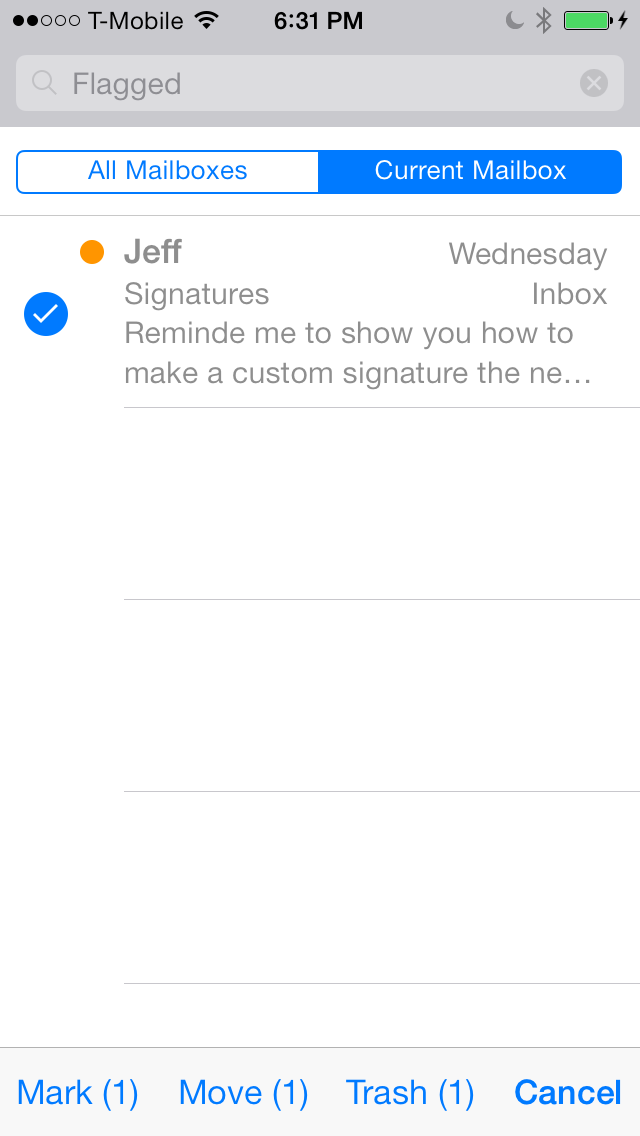
How to search email
You can search email within the Mail app from any mailbox. The great thing about search is that you have the ability to limit the search to a specific mailbox, or search within all mailboxes.
To perform a search within the Mail app, you’ll need to scroll up to the top of the screen while in any mailbox to locate the search box. Tap the search box, and the background should dim and the keyboard should appear to allow you to perform a search query. Type in your search terms, and the list of emails found will dynamically update with search results.
Performing a search inside the stock Mail app
At the top of the search results, you’ll see two buttons — All Mailboxes and Current Mailbox. The All Mailboxes button allows you to open up your search to any mailbox available within the Mail app. If you’d prefer to narrow your search to a specific mailbox, you can select the Current Mailbox button instead.
Select between all mailboxes and the current mailbox when searching mail
Once you locate an email via the search box, you can use the Edit button in the bottom left-hand corner of the screen to take action on any of the emails found. Tapping the Edit button allows you to Mark, Move, or Trash any of the selected emails originating from a search result.
Using Edit mode with search results
Mail found via search can be opened and acted on just like any other email. Once you are finished viewing the body of an email, tapping the Search button in the upper left-hand corner of the interface will take you back to the search results.
Search delimiters
Delimiters can help you to quickly locate specific items via search. For example, you can locate all flagged items by typing “flagged” in the search box.
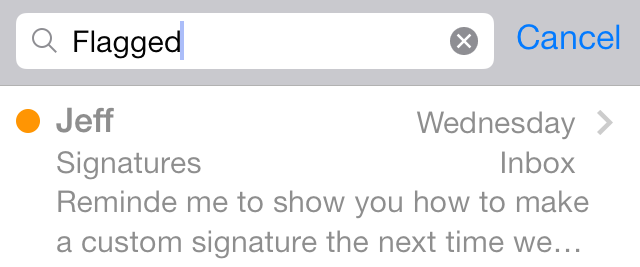
Use delimiters to speed up searches
Here are some of the advanced search features that you can use:
- flagged – shows all mail designated as flagged
- unread – shows all unread email
- from – shows email from a specific person
- to – shows email sent to a specific person
- vip – shows vip email
- dates – shows email from specific dates such as yesterday, today, wednesday, last week, etc.
How to move an email
The first, and perhaps most obvious method for moving email is from the mailbox containing the list of email. Tap the Edit button in the upper right-hand corner and select each email that you wish to move. Tap the Move button at the bottom of the interface, and select the mailbox where you wish to relocate the email. This is the best way to move multiple messages at once.
Moving a message using Edit mode
The next way to move email is to use the swipe from right to left gesture on an email in the inbox. Once you do this, tap the More button, and select Move Message(s) to invoke the move interface.
Moving a message using the More button
The final way to move an email is to do so directly from the body of an email. While an email is open, tap the Move button in the group of action buttons at the bottom of the interface.
Moving a message using the Move button
The cool thing about moving email is that it’s not just limited to moving within the mailboxes contained in a particular email account. No, you can actually move email from one email account to another by utilizing the accounts link in the upper left-hand corner of the move interface.
Moving email between accounts
Moving to junk
While it’s possible to move email directly to the junk folder using the Move feature mentioned above, Apple felt that it was necessary to feature a dedicated move to junk option within the stock Mail app in iOS 7. The junk folder, should in theory, help train items that may be viewed as spam, but this is going to largely depend on your email provider.
Like other workflows we’ve discussed thus far, moving email to the junk folder can be accomplished in one of three ways.
The first way to move items to the junk folder is from a mailbox list view. Tap the Edit button in the upper right-hand corner of the interface, and select the email that you want to designate as junk. Tap the Mark button in the bottom left-hand corner of the screen, and tap Move to Junk.
The second way to move email to junk is to swipe from right to left on a message in the list view, tap the More button, and then tap the Move to Junk option.
Moving a message to the junk folder
Lastly, just as with other workflows, you can move items to the junk folder while within an individual email. Tap the Flag button in the group of action buttons at the bottom of the screen, and tap Move to Junk.
Move to junk from a single email
How to mark an email as read or unread
You’re probably beginning to sense a pattern here, but marking an email as read can be accomplished in much of the same way as any of the other workflows we’ve talked about thus far. You can mark an email as read from the list view using a swipe from right to left gesture, using the Edit menu to mark multiple items as read, or by using the Flag button in the group of action buttons at the bottom of an individual email.
Marking multiple messages as read and unread
If an email is already read, you can mark it as unread, and vice versa. The option changes dynamically depending on whether the message has been already read.
How to flag an email
The same basic premise goes for flagging email. It, too can be accomplished via the three ways we’ve discussed in the various workflows above. You can flag multiple emails in one fell swoop using the Edit button in the upper right-hand corner of your mailbox list view, you can flag an email using the swipe from right-to-left gesture on an individual email in a list, or you can flag an email individually using the Flag button located at the beginning of the group of action buttons.
Flagging an email
Flagged email will contain a small dot denoting its flagged status in the list view of the email. The dot appears to the left of the sender’s name while in list view, and to the right of the subject while looking at the individual email.

When you first launch the Mail app on a device without any configured mail accounts, you’ll see the Add Account menu. This menu consists of several shortcuts to add accounts using specific mail providers, or if your mail provider is not listed, you can use the Other option.
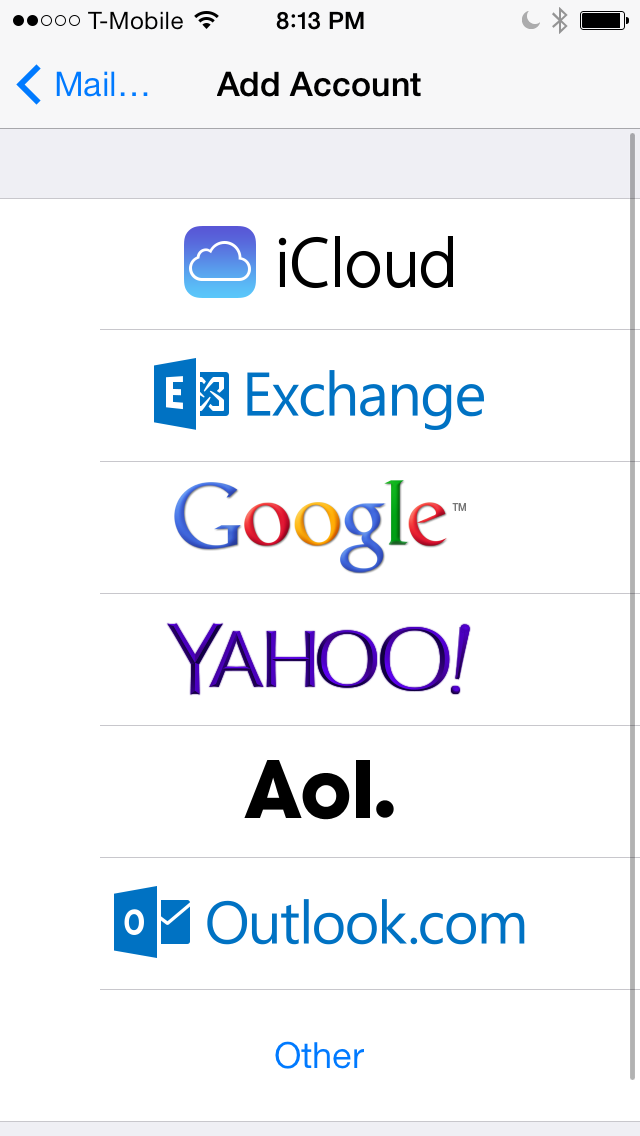
Plenty of email account options await new users
Several pre-configured account types are available for you to choose from, and they include the following:
- iCloud – an email account tied to an Apple ID
- Exchange – Microsoft Exchange email
- Google – Gmail or Google App mail accounts
- Yahoo! – Yahoo mail
- Aol – Aol mail
- Outlook.com – Microsoft’s web-based email
- Other – Any other IMAP or POP3 account type that isn’t listed
Setting up each account is a very straightforward affair. In most instances, the setup requires email address, password and description. Sometimes you’ll be asked to provide a name as well. That’s usually all there is to it.
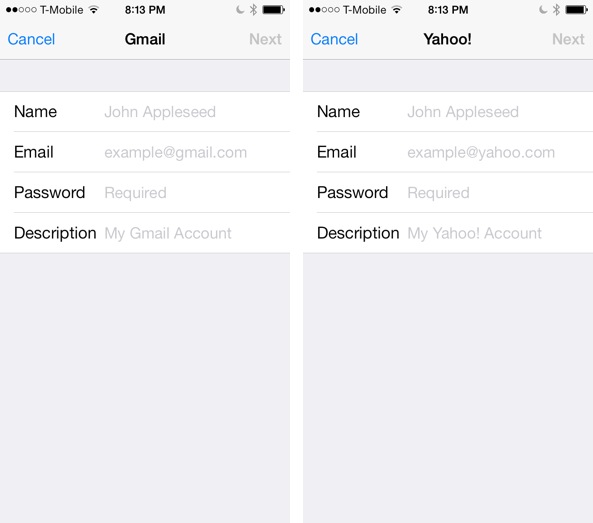
Setting up email accounts is extremely straightforward for virtually any account
Apple has made it extremely easy to get started with email on iOS with very few pieces of information. The only time you’ll need details on servers and the like is when configuring an account manually using the Other option.
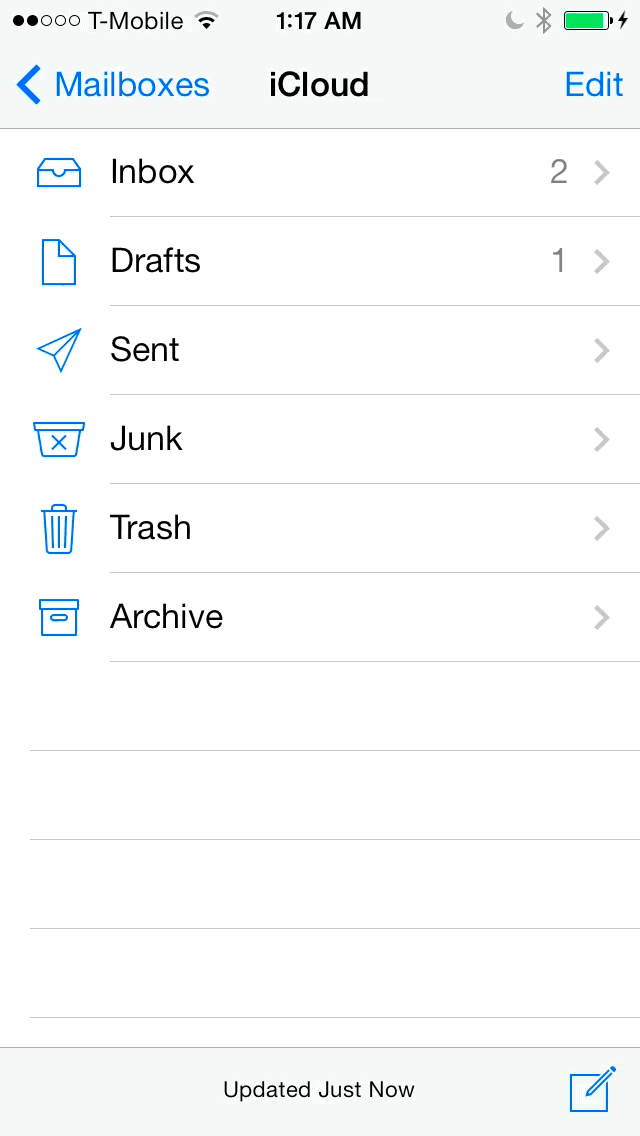
iCloud
This is Apple’s built-in email service that’s accessible by logging in to an iCloud account using an Apple ID. When you setup a new iCloud account, all you need is the Apple ID and password. No other information is required.
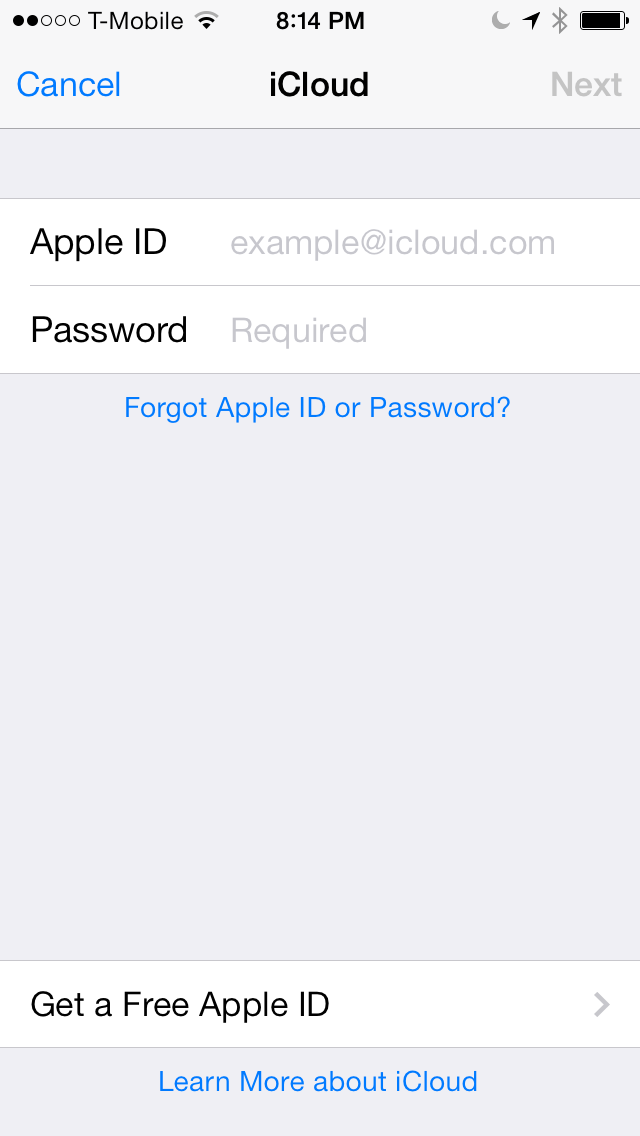
iCloud email accounts require you to login with an Apple ID
An Apple ID can be any email address, but the iCloud account that results is usually an @icloud.com email address.
Further configuring iCloud mail
While the iCloud mail setup is extremely easy and straightforward, there are a few advanced options that you can access by tapping the account in the iCloud settings found in the stock Settings app. Under the Advanced section, you should see the mail panel. Tap the mail panel to access the advanced iCloud email setup options.
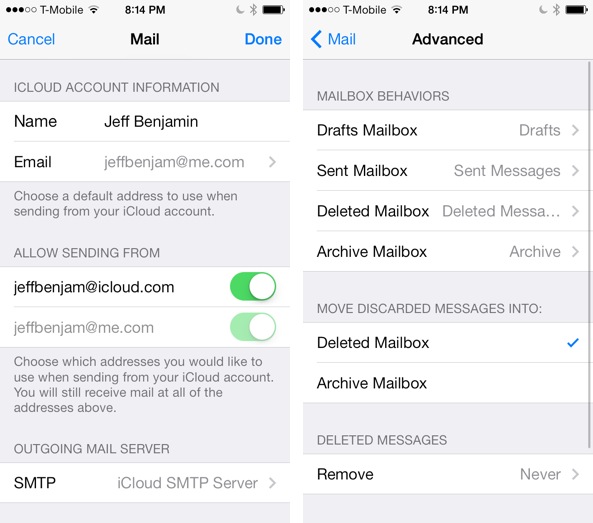
iCloud setup is straightforward, but like other email accounts, it features advanced options
Here you can change the name associated to the iCloud account, and the default email address to use when sending from your iCloud account.
The last two sections under the Advanced section allow you to alter the outgoing mail server, which generally shouldn’t be done unless you encounter some extenuating circumstances. There’s also an Advanced section for mapping mailbox behaviors.
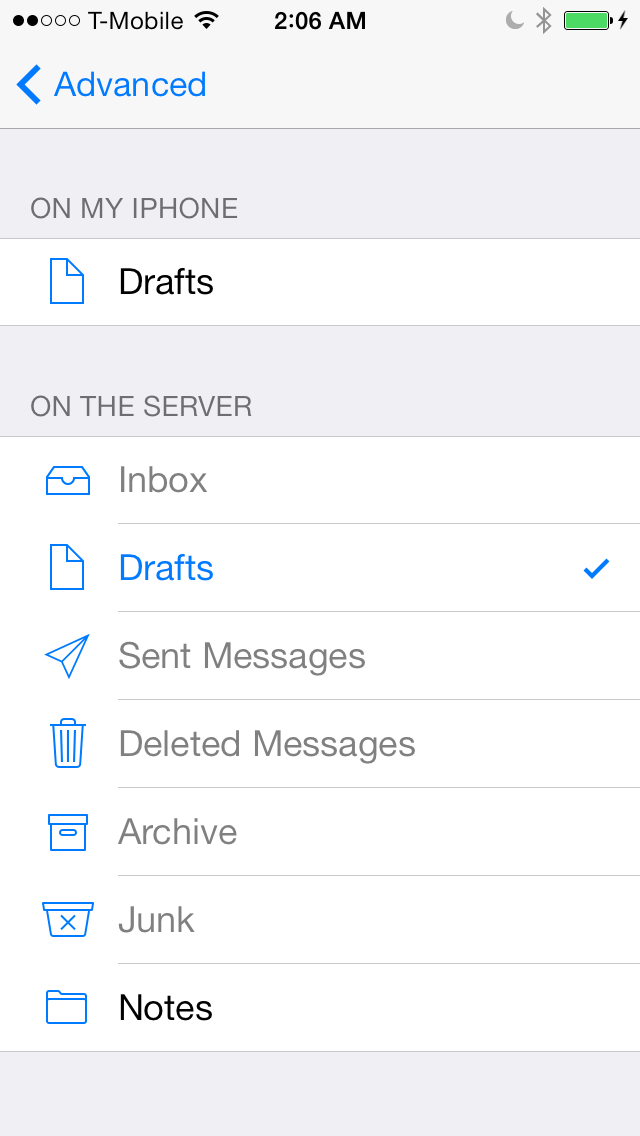
Mapping the drafts folder
The mailbox behaviors page lets your assign the following mailboxes to specific mailbox folders within your iCloud email account:
- Drafts mailbox – mapped to drafts on the server
- Sent mailbox – mapped to sent messages on the server
- Deleted mailbox – mapped to deleted messages on the server
- Archive mailbox – mapped to archive on the server
You can change any of these behaviors to map to a local folder on your device if you do not wish to sync certain folders across all devices linked to your iCloud account.
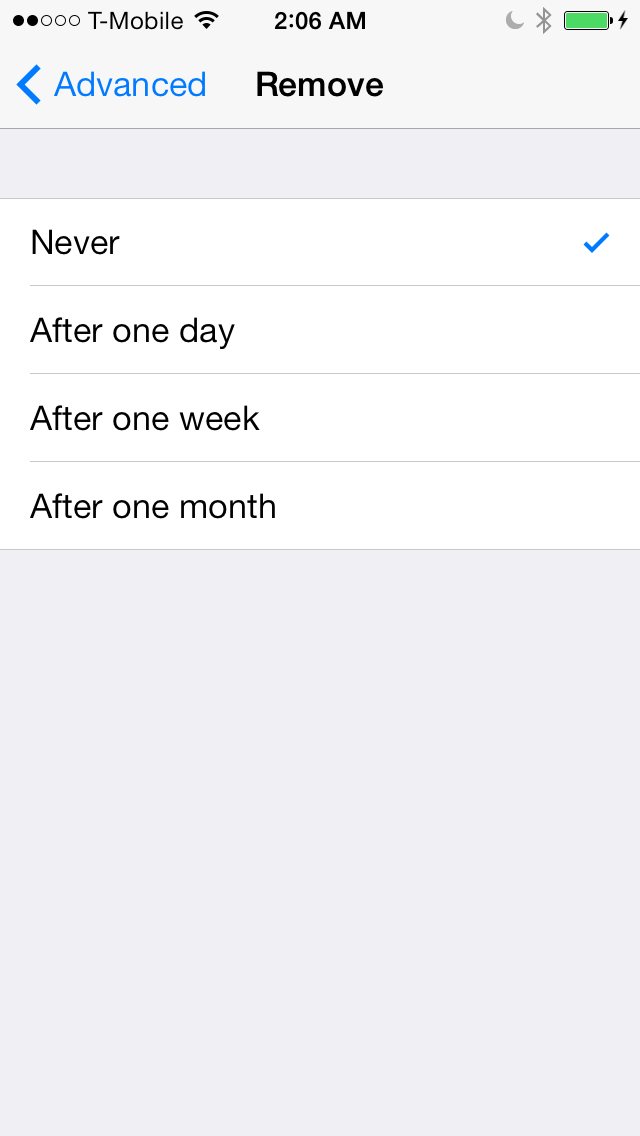
Deleted message intervals for iCloud
The last two sections allow you to move discarded mail into the deleted mailbox or archive mailbox, and set an interval for automatically removing deleted messages. The intervals for removing deleted messages are as follows:
- Never
- After one day
- After one week
- After one month
The last option under the Advanced section is the S/MIME toggle. This toggle allows you to configure your iCloud account to receive encrypted email via S/MIME. This setting is, however, beyond the scope of this tutorial.
Editing accounts
Like the advanced iCloud options mentioned above, you have the ability to edit advanced features for other accounts like Gmail, Outlook.com, etc. Here you can assign mailbox behaviors, discard behaviors, enable SSL, adjust IMAP prefixes, etc. It’s really too broad of a topic to contain in this tutorial, because of the many types of email accounts and configurations available. But just know that you can go into each account via Settings > Mail, Contacts, Calendars > and tap on the email account of your choice to see its advanced options.

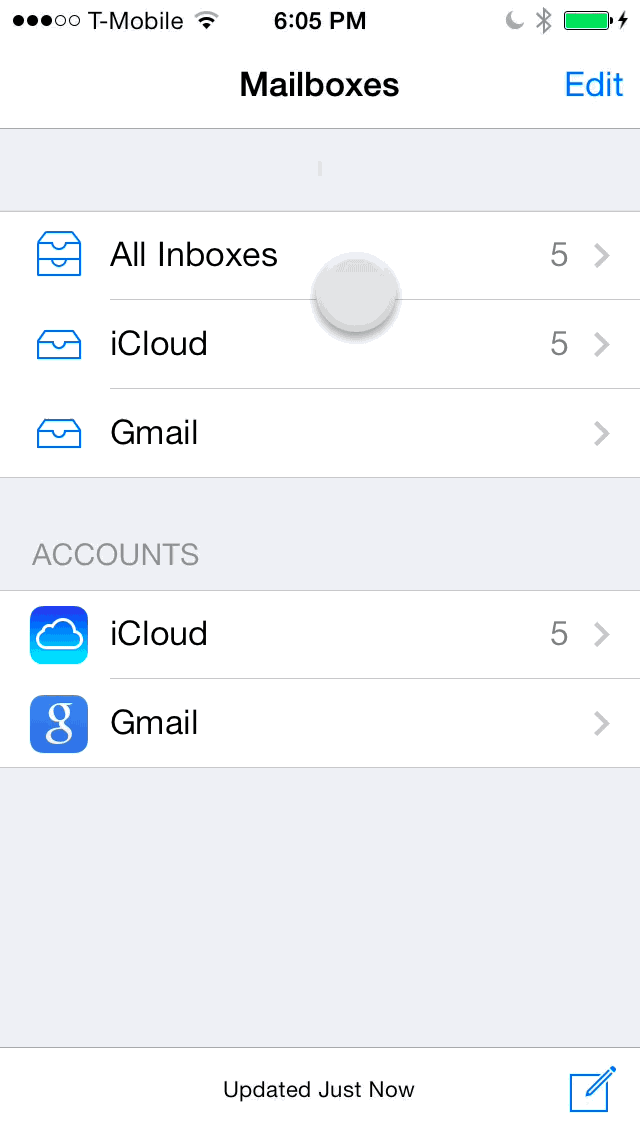
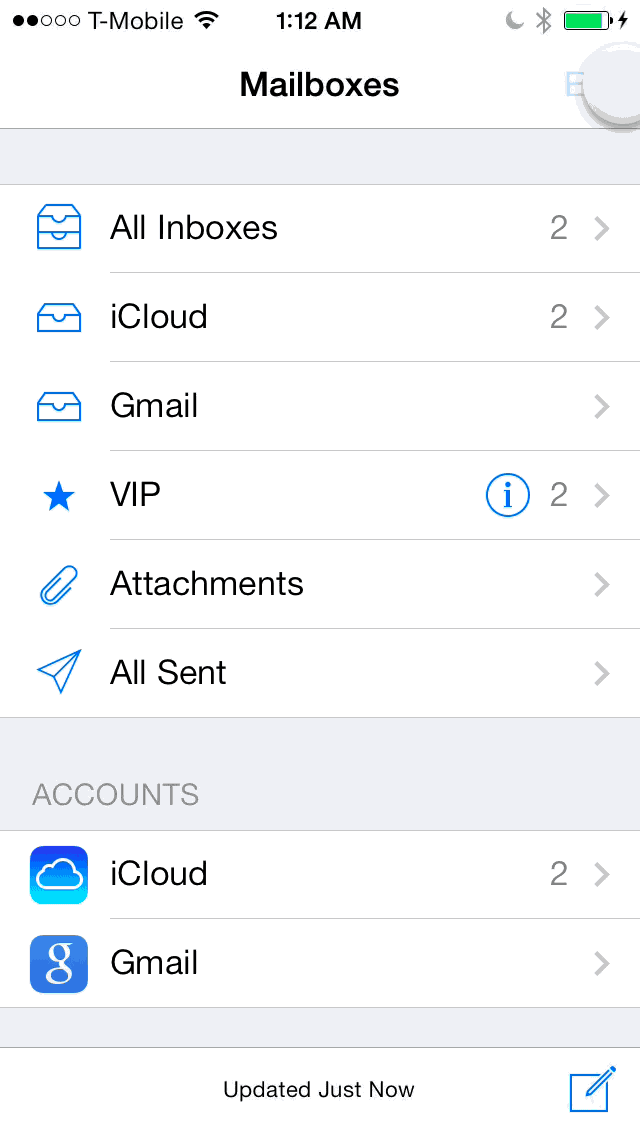
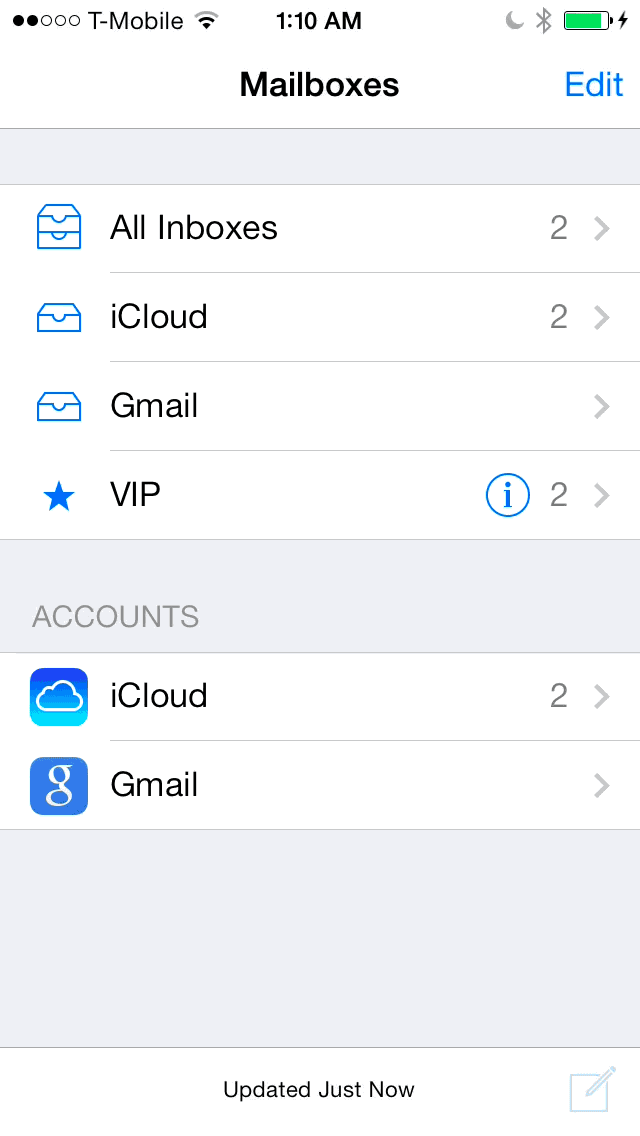
Mailboxes
The mailboxes page contains a list of all of your mailbox shortcuts, along with a list of all of the accounts and mailboxes associated with those accounts. If you only have one email account configured on your device, the mailboxes page will contain your configured shortcuts and a list of mailboxes below it. If you have multiple email accounts configured, you’ll see shortcuts, followed by a panel for each account, which can then be further broken down into mailboxes pertaining to each account.
Enabling additional mailbox shortcuts
In the upper right-hand corner of the mailboxes page, you’ll see an Edit button. Tap this Edit button to engage the shortcut editing mode. This mode allows you to add or rearrange quick shortcuts at the top of the mailboxes page.
When in Edit mode, you will see some of the available mailbox shortcuts appear. Here are a few of the shortcuts that you will see:
- Inbox – a collection of all of the email located in the inbox
- VIP – shows messages from VIPs
- Flagged – shows all flagged email
- Unread – shows unread email
- To or CC – shows all emails sent directly to a configured email account or cc’d to a configured account
- Attachments – shows all email with attachments
If you have multiple email accounts configured, you will see some of the following:
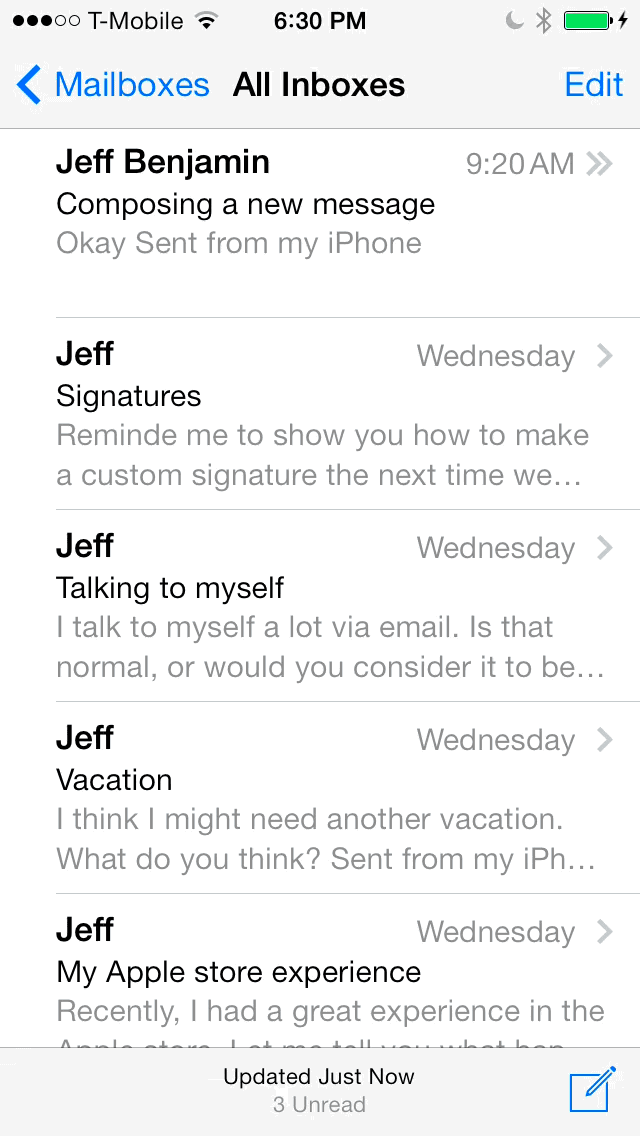
- All Inboxes – shows all email in all inboxes across all accounts
- All Drafts – shows all drafts across all accounts
- All Sent – shows all sent items across all accounts
- All Trash – shows all trash across all accounts
You’ll also find inboxes for each individual email account configured on your device.
While in edit mode, you can tap the dot to the right of the mailbox shortcut to enable or disable the shortcut. The shortcut doesn’t necessarily have to be an inbox. The only rule is that you must have at least one shortcut enabled at any given time. Drag handles can also be used to rearrange the mailbox shortcuts in any order that you see fit.
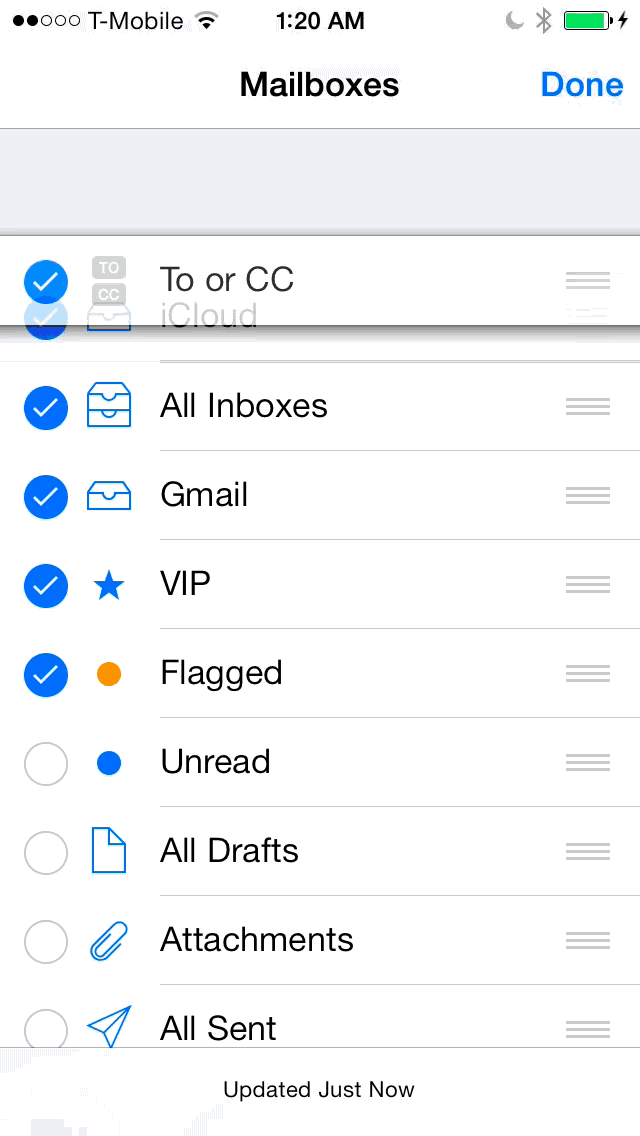
Rearranging mailbox shortcuts
You can add additional mailbox shortcuts using the Add Mailbox button at the bottom of the shortcut list. Adding a mailbox displays a list of all of the email accounts configured on your device. You can then venture into an individual account to add a mailbox from that account to your list of mailbox shortcuts.
Creating a new mailbox
If you only have one email account configured in the stock Mail app, you will see a create mailbox option in the bottom right-hand corner of the mailboxes interface while in edit mode. Tap New Mailbox to go into Edit Mailbox mode, and provide a name for the new mailbox. After providing the name, select the mailbox location, and tap Save in the upper right-hand corner.
If you have multiple email accounts configured, you’ll need to venture into the account before you can create or modify a mailbox.
Creating, editing and deleting a mailbox
Editing a mailbox
You can edit or delete a mailbox from Edit mode as well. Simply tap on the mailbox that you created, and you can edit the name of the mailbox, change its location (if applicable), or delete the mailbox outright.
Note that not all mailboxes can be edited. The default mailboxes that appear on each account will be greyed-out and are non-editable. These are the standard mailboxes that the email account requires.
VIP List
The VIP mailbox is a mailbox shortcut that can house email from specified VIP contacts. Adding a VIP is simple. Tap the VIP mailbox and tap the Add VIP button in the VIP list.
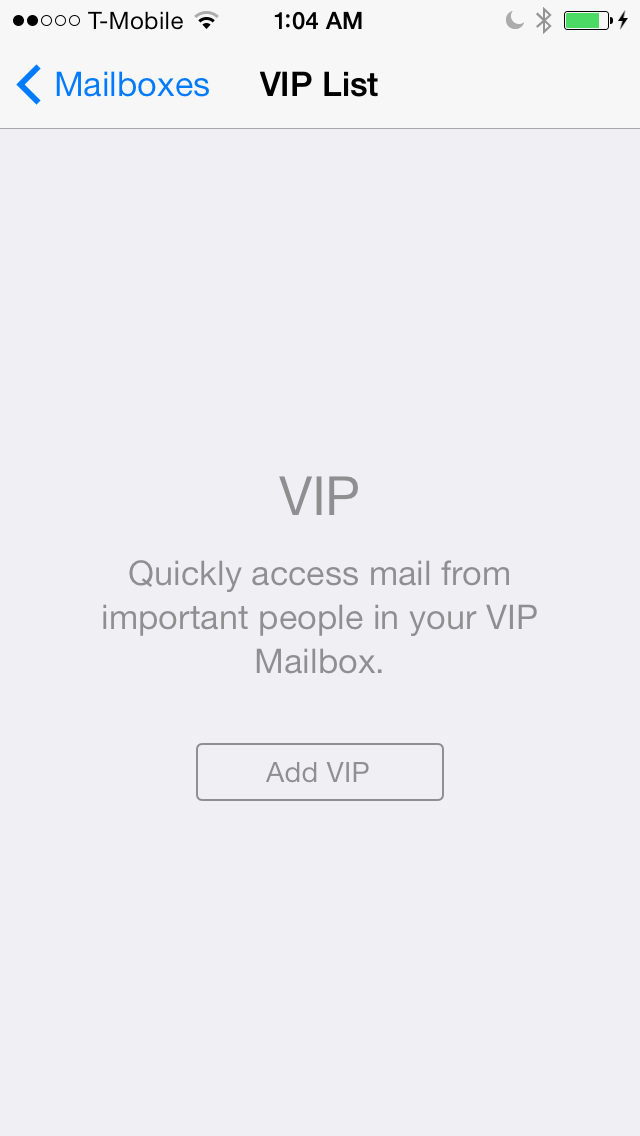
This is what you see when no VIPs have been added yet
After tapping the Add VIP button, your list of contacts will be displayed. Any contact with an email addresses can be added as a VIP. You can add multiple VIPs, but it’s best to keep the amount at a reasonable number so as to not inundate this special mailbox with potentially unimportant email.
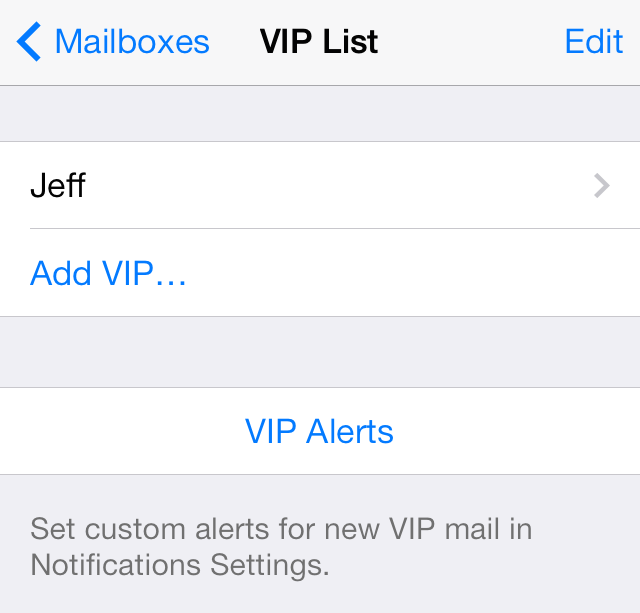
The VIP List
Once you add a VIP, you should see a VIP Alerts shortcut that will take you to the Notification Center settings so that you can setup custom alerts for new VIP email. VIP settings will override all other Mail app notification settings. See our ultimate Notification Center guide for more detail on how to configure alerts via Notification Center.
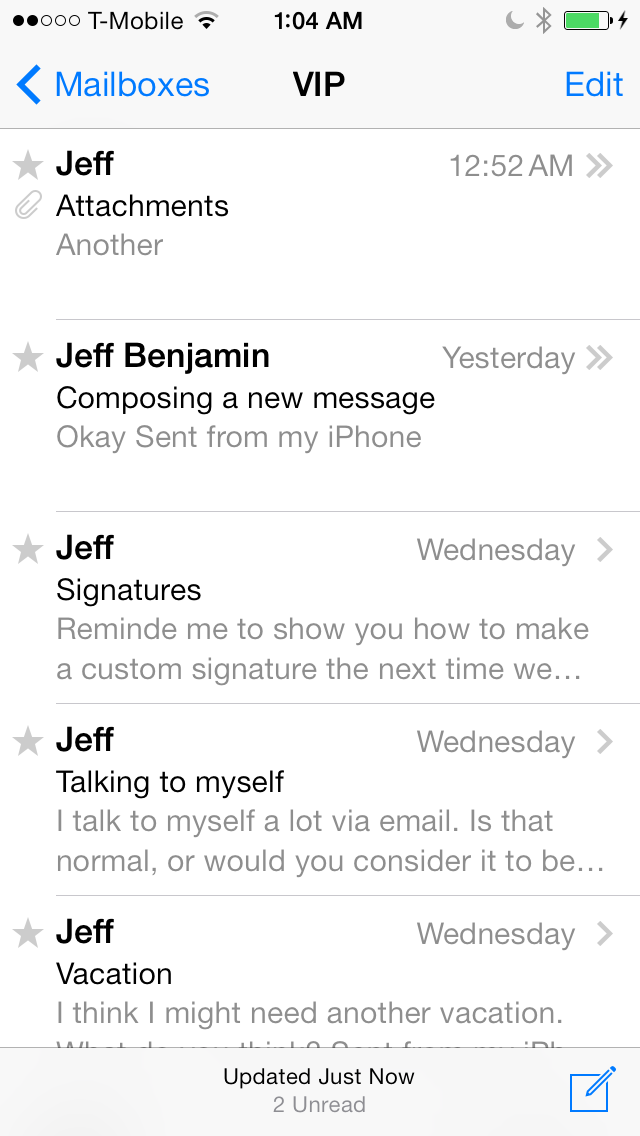
The VIP inbox
Drafts
To quickly access drafts, you can use a tap and hold gesture on the Compose button in order to view a list of your drafts. Tapping on a draft in the draft list allows you to resume working on the email. You can use a swipe from right to left gesture on the drafts to delete them. You can also compose a new message directly from the drafts interface if you choose to do so.
Using a tap and hold on the Compose button to access previous drafts

Settings for the stock Mail app can be accessed via the Settings app > Mail, Contacts, Calendars. The settings for mail is a little weird, because it’s combined with other features like calendars and contacts. In this overview, we’ll focus solely on the settings that pertain to the Mail app.
Accounts
Accounts contain your list of email accounts. Accounts can be configured to do more things than just email, but we’ll be focusing on the email portion of account management and creation in this guide.
There are several types of accounts that can be added within the Mail app’s settings, and we touched on a majority of these in the accounts section of this guide.
Fetch New Data
Receiving email can be accomplished one of two ways—by using fetch, which is the traditional and semi-automated process of receiving email at set intervals, and push, which is, in my opinion at least, a more desirable way of receiving mail, because you receive it instantly without needing to refresh.
Not all email accounts support push email in the stock Mail app, in fact, the majority of email accounts that are configurable using the standard canned configurations for Gmail, Yahoo, Aol and the like, probably do not. On the other hand, iCloud mail, and certain Exchange configurations do support push email.
For clarity, here is a brief definition of each type of schedules available for email:
- push – new data will be pushed to your device from the server when possible
- fetch – email is retrieved on a set schedule: every 15 minutes, every 30 minutes, hourly, or manually
- manual – the account will only check for updates when the Mail app is in use
Push
At the top of the Fetch New Data panel, you’ll find a toggle for Push. This toggle allows you to disable push email for all accounts in one fell swoop.
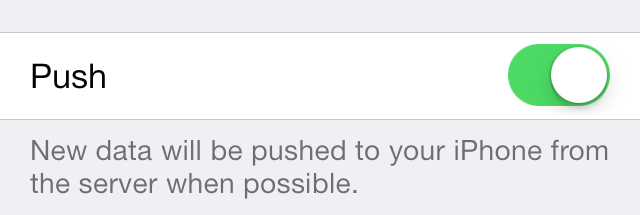
Enabling push allows you to receive new email instantly (where supported)
Accounts
Beneath the push toggle, you’ll find a panel containing all of the email accounts that you have configured in the stock Mail app. Each email account is represented.
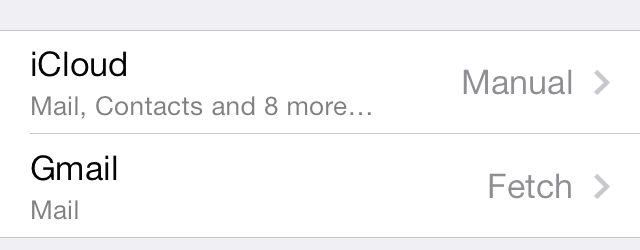
You can configure each account independently
Inside each account you’ll find a section for schedule—which allows you to select between push, fetch, and manual—and, if applicable, pushed mailboxes—a section that allows you to select which mailboxes will use push within an individual account.

The iCloud email schedule
Fetch
At the bottom of the Fetch New Data panel, you’ll find the fetch schedule. You can configure fetch to work on 15 minute, 30 minute, hourly, or manual intervals. For the best battery life, you’ll want to use fetch less frequently.
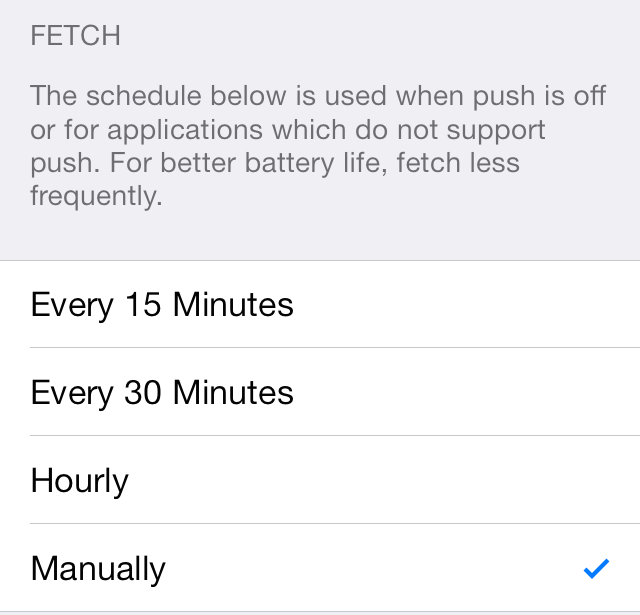
The fetch schedule
Preview
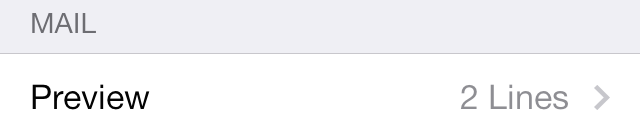
This section allows you to select how many preview lines are displayed for email in the mailbox list view. You can select between zero (none) and five lines. The more lines you have, the fewer messages will display on screen at once while viewing a mailbox. The default setting is two lines.
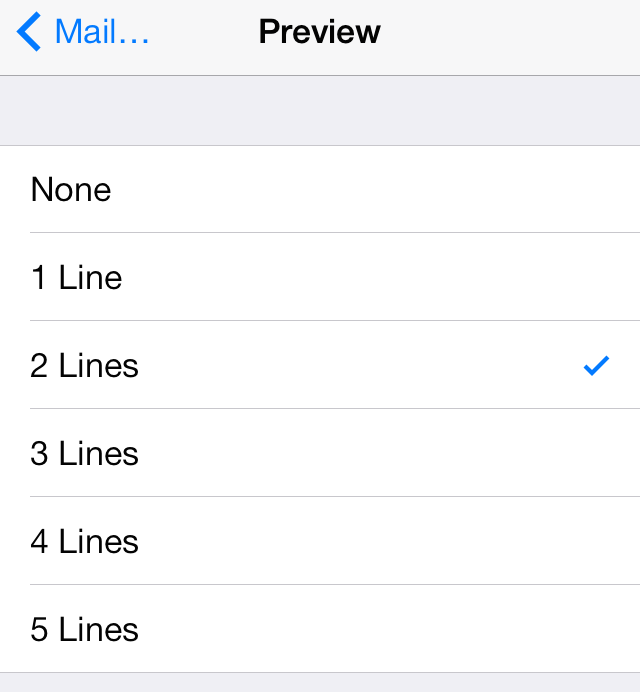
Heres is a comparison of two lines vs five lines:
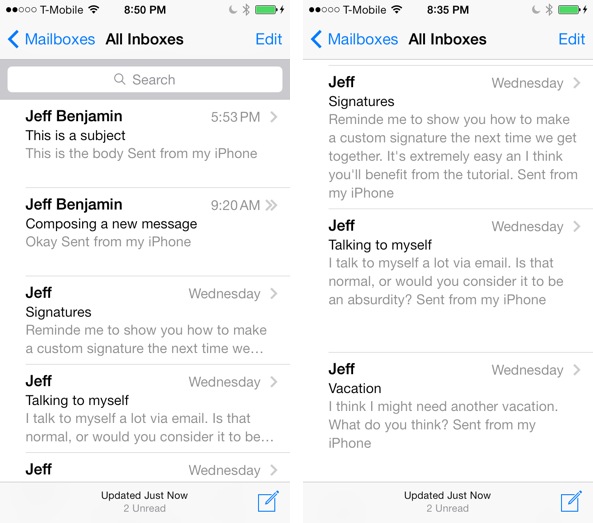
I prefer to use two line previews, because it allows me to see more email
Show To/Cc Label
This label option allows you to easily locate emails that have been sent directly to an email account configured in the Mail app or where you have been cc’d to an email account configured in the Mail app.
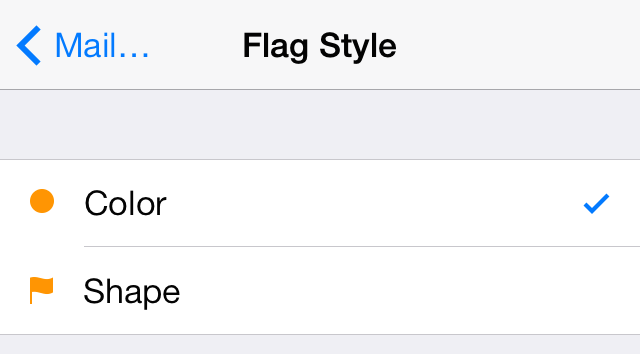
Flag Style
Select between a dot or a traditional flag shape.
Ask Before Deleting
This will force you to acknowledge whether or not you really want to trash a message when deleting using the Trash button on individual email view, or when using the Edit option in the mailbox list view. With this option disabled, mail is immediately moved to the trash without any sort of confirmation.
Regardless of whether or not you use the ask before deleting option, deleting a message using the swipe from right to left gesture will move a message to the trash immediately.
Load Remote Images
Disabling this toggle will prevent images from being displayed within email by default. When encountering email with images while this option is enabled, you will see a Load All Images link at the bottom of the email. Tap that Load All Images link to load all images manually.
Organize By Thread
Threaded mail allows you to keep email conversations grouped together in a single thread. Most modern email systems have this option, because it’s much more convenient from an organizational standpoint. This option is enabled by default, and I highly recommend keeping it that way.
You can easily identify a threaded message by the double >> located to the right of the date/timestamp on the mailbox list view.
Always Bcc Myself
This option is useful when using antiquated email protocols such as POP3. With POP3 email, the email server isn’t capable of keeping all of your replies from different devices on the server for archival purposes.
The Always Bcc Myself option is a workaround for POP3 accounts in order to keep a record of your outgoing messages. There really is no need to use this when using IMAP email or Exchange email.
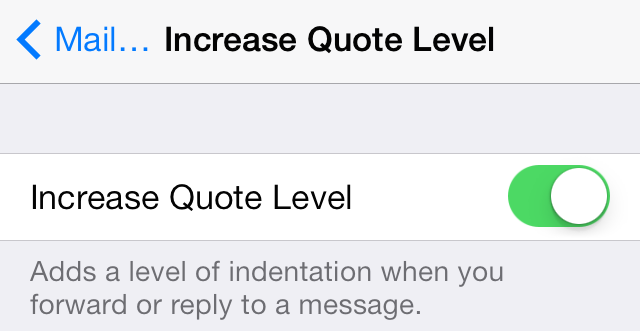
Increase Quote Level
This toggle allows you to add a level of indentation when you forward or reply to a message. This is a good option to keep enabled, because it makes email conversations more readable.
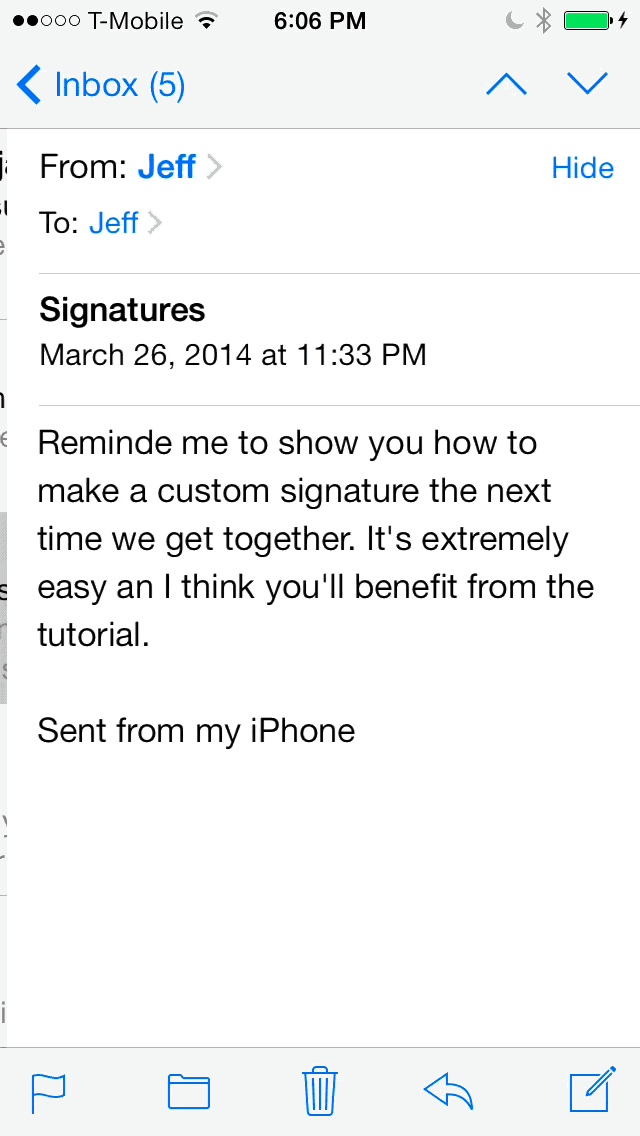
Signature
The signature is the text that appears at the bottom of each email. On the iPhone, it defaults to Sent from my iPhone. On the iPad, Sent from my iPad, and so on. The signature can be changed by tapping on the signature panel, and typing text in the signature box. This text will be included in all outgoing emails.
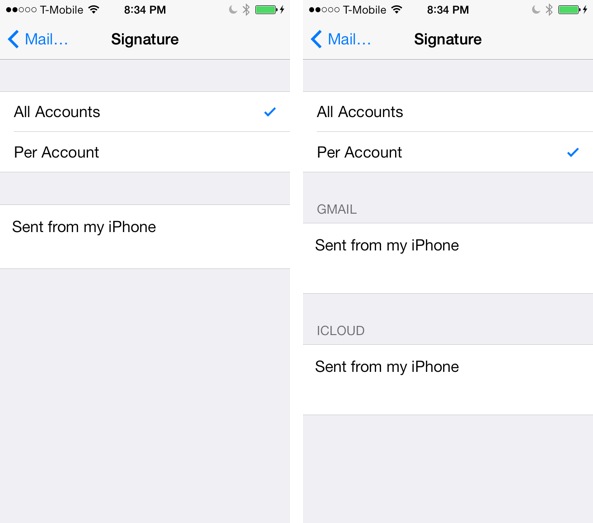
If you have multiple email accounts configured on your device, you will see an additional option inside of the signature panel for per account. You can use the per account option to customize each signature on a per account basis.
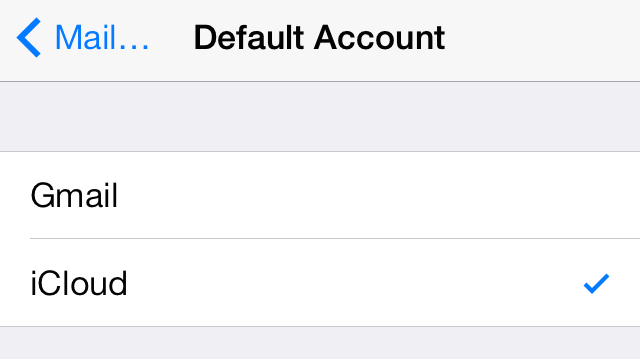
Default Account
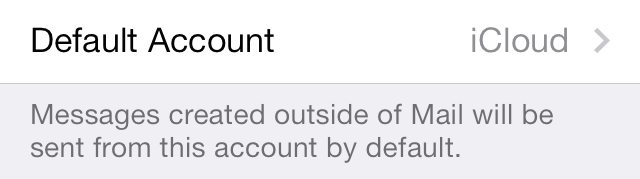
This option only shows up when you have more than one email account configured in the Mail app. The default account is used when messages are created outside of the Mail app, such as when using sharing buttons, etc. The default account is also used when composing a new mail.
The Mail app is smart enough to use the appropriate account when replying to an email. For example, if you received an email to a non-default account, replying to the message will reply using the same non-default account to keep with the context of the conversation.

There are other standalone mail apps for services like Gmail and Yahoo Mail, and those are fine. But no other apps allow you to use multiple mail accounts with varying protocols, and have them all deeply integrated with iOS as a whole. For that reason, I’m a big proponent of the stock Mail app, and iOS 7 is by far the best iteration of the stock Mail app that we’ve seen. For the integration reasons alone, I recommend using the stock Mail app over any third-party mail app available on the App Store.
What do you think about the stock Mail app? Do you use it? Are any features included with it that we failed to cover in this guide? Sound off down below in the comments section.