If you’re a new Mac user, we want to help make your macOS experience as productive and efficient as it can be. From understanding the various icons, to customizing its layout, here are the basics of the menu bar that you need to know, along with some tips to help you use it more effectively.
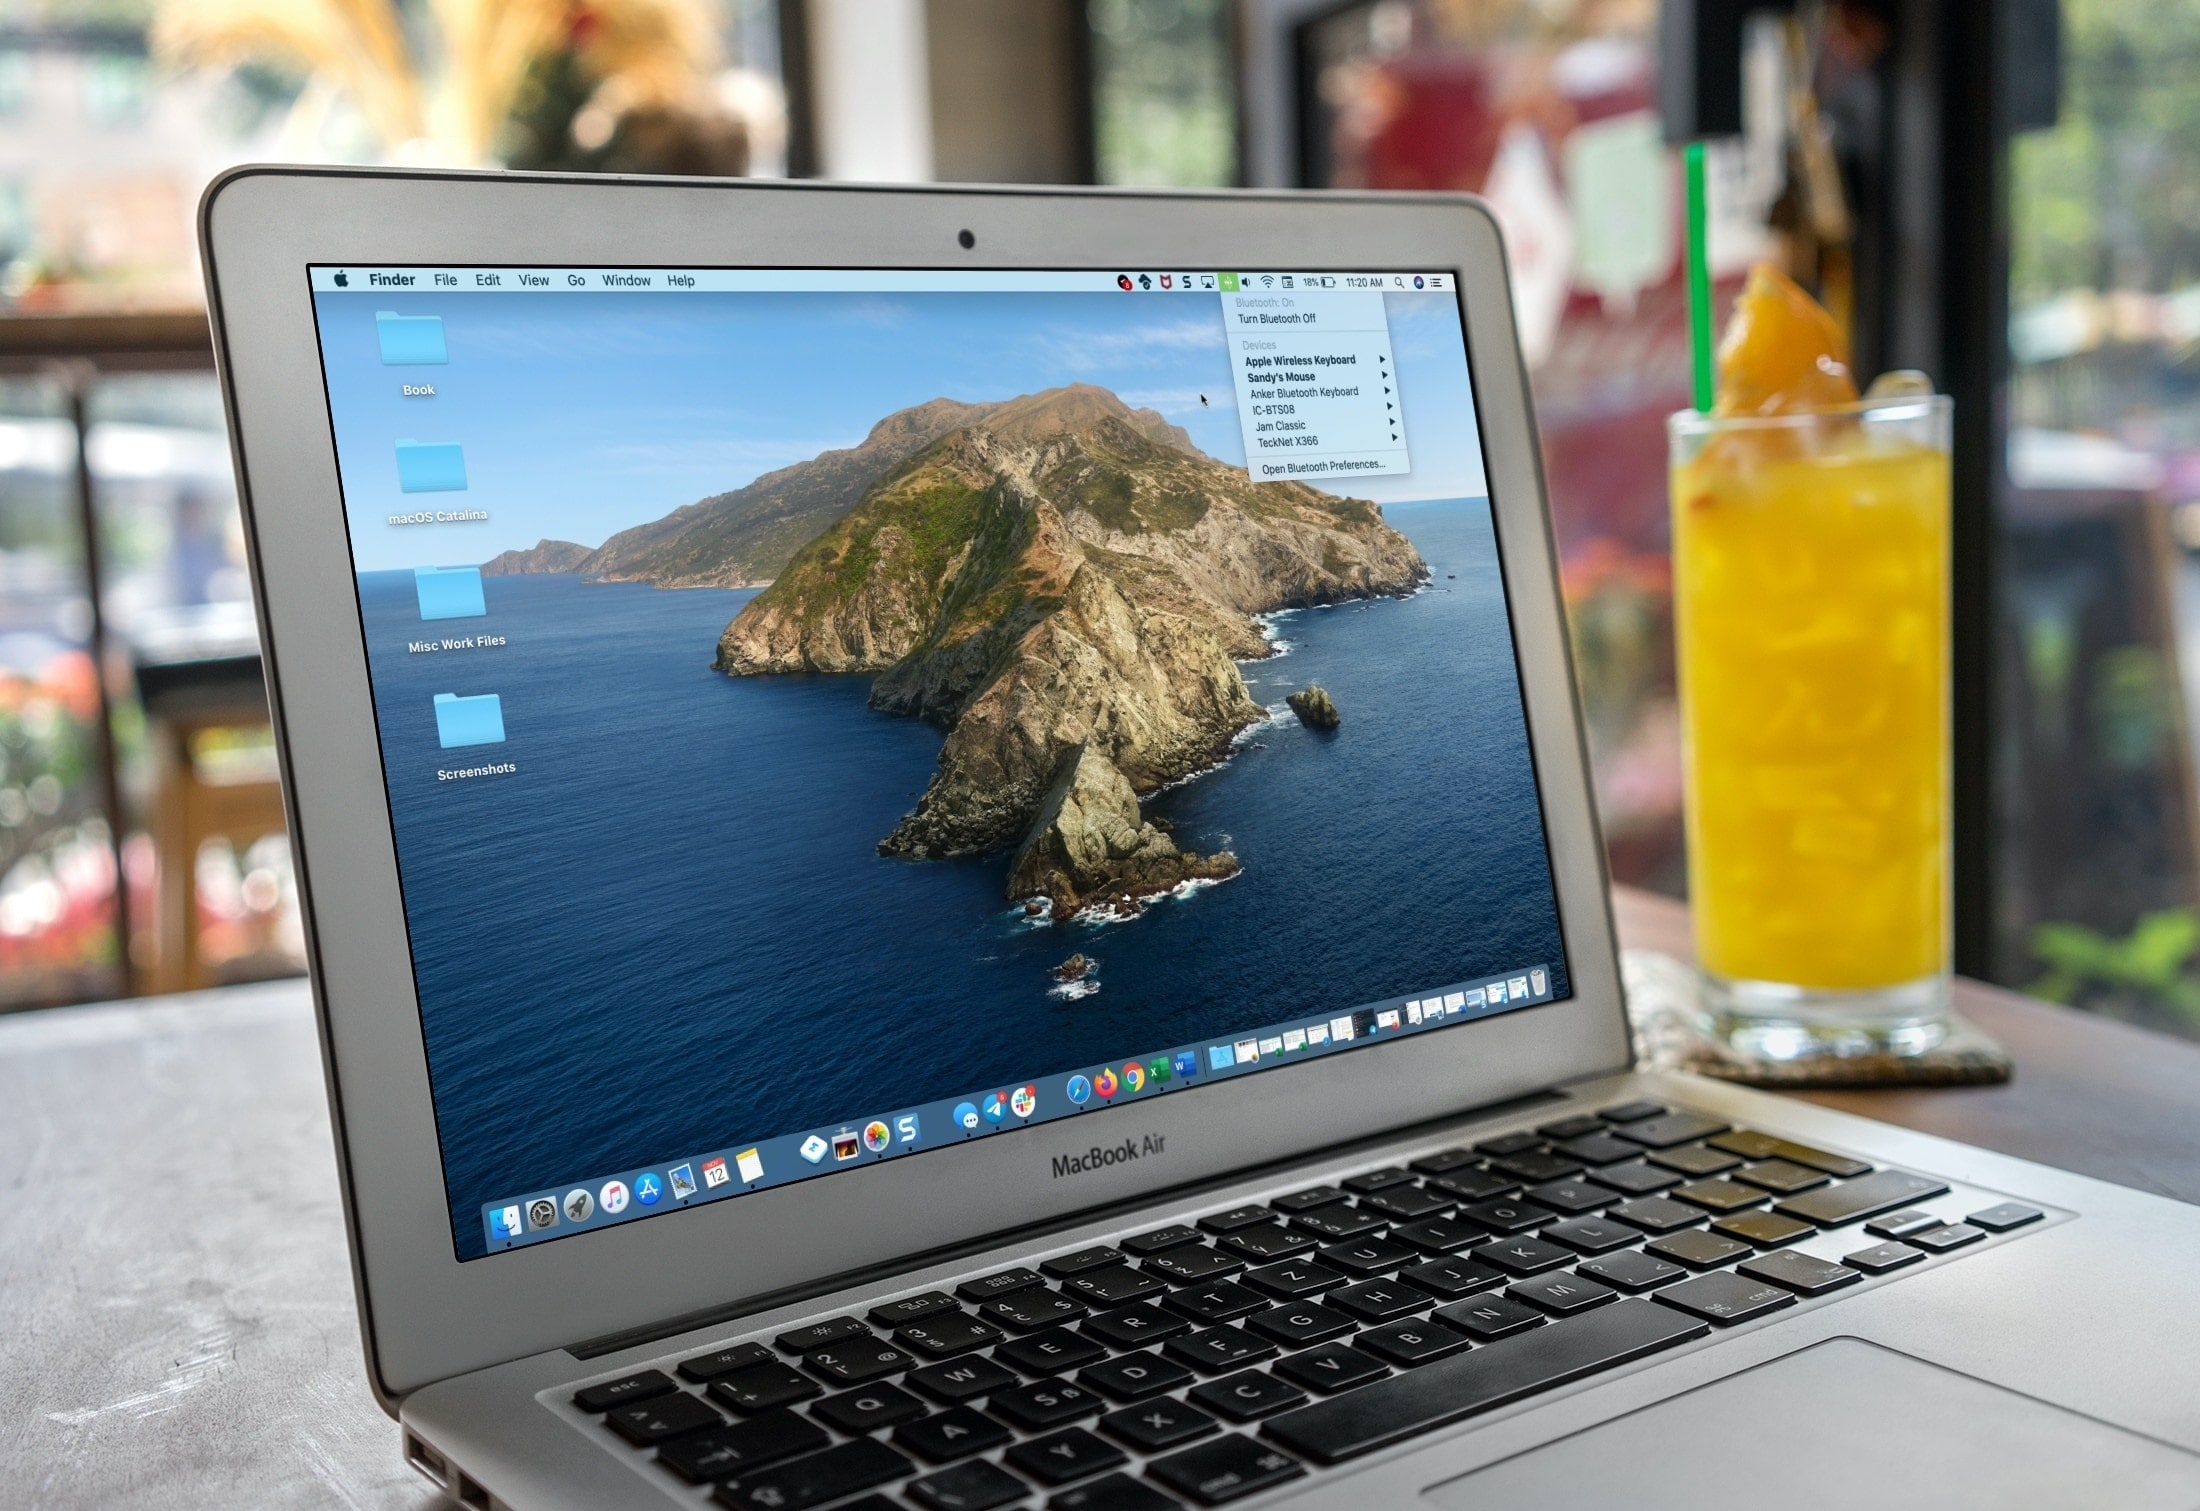
One of the key tools you have on your Mac is the menu bar. This handy dandy toolbar sits across the top of your screen as a thin strip and gives you access to everything you need on your Mac.
For those new to macOS, the menu bar can be a little tough to understand in some situations. Plus, you have ways to customize it exactly as you’d like it, as long as you know how.
Menu bar layout
Your Mac menu bar is set up for quick access to your system settings, app menus, and status indicators; from left to right.
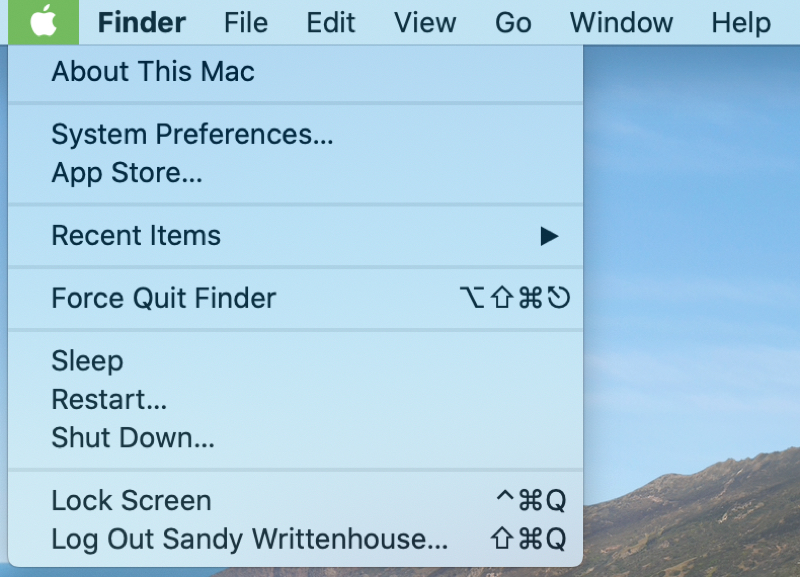
The Apple icon sits furthest to the left on your menu bar and remains there regardless of the apps you have open. Whenever you want to get information about your Mac, open the System Preferences, log out, or shut down your Mac, just click that Apple icon.
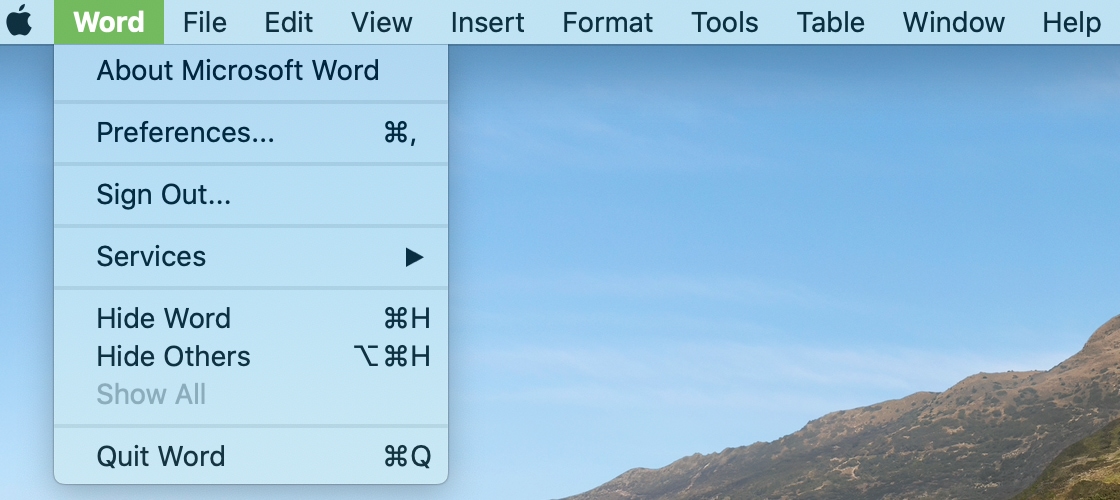
To the right of the Apple menu, you have your app menu. When you have an app open and currently active, you will see its menu options here. It begins with the app’s name in bold on the left and all options for that app to the right.
Status indicators
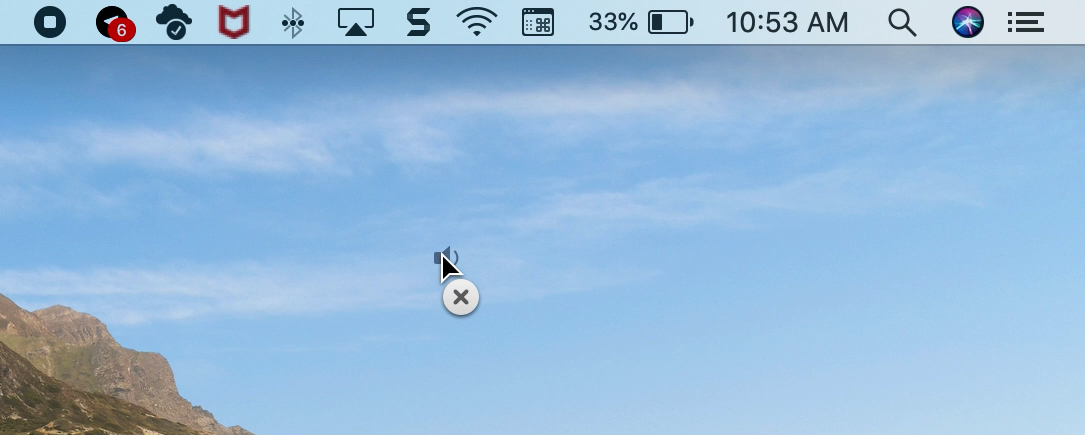
Over to the right side of the menu bar, you’ll see your status indicators. This can include volume control, Wi-Fi, Bluetooth, battery level, and the date and time. These types of items can be added, removed, and rearranged to suit your preference.
Search, Siri, and Notification Center
After the status indicators, you’ll see buttons for Spotlight Search, Control Center, Siri, and the date & time. These are convenient tools for daily use, and the buttons in your menu bar make it easy to access each of these with a click.

Tip: In newer versions of macOS, clicking the date & time in the menu bar brings up the Notification Center.
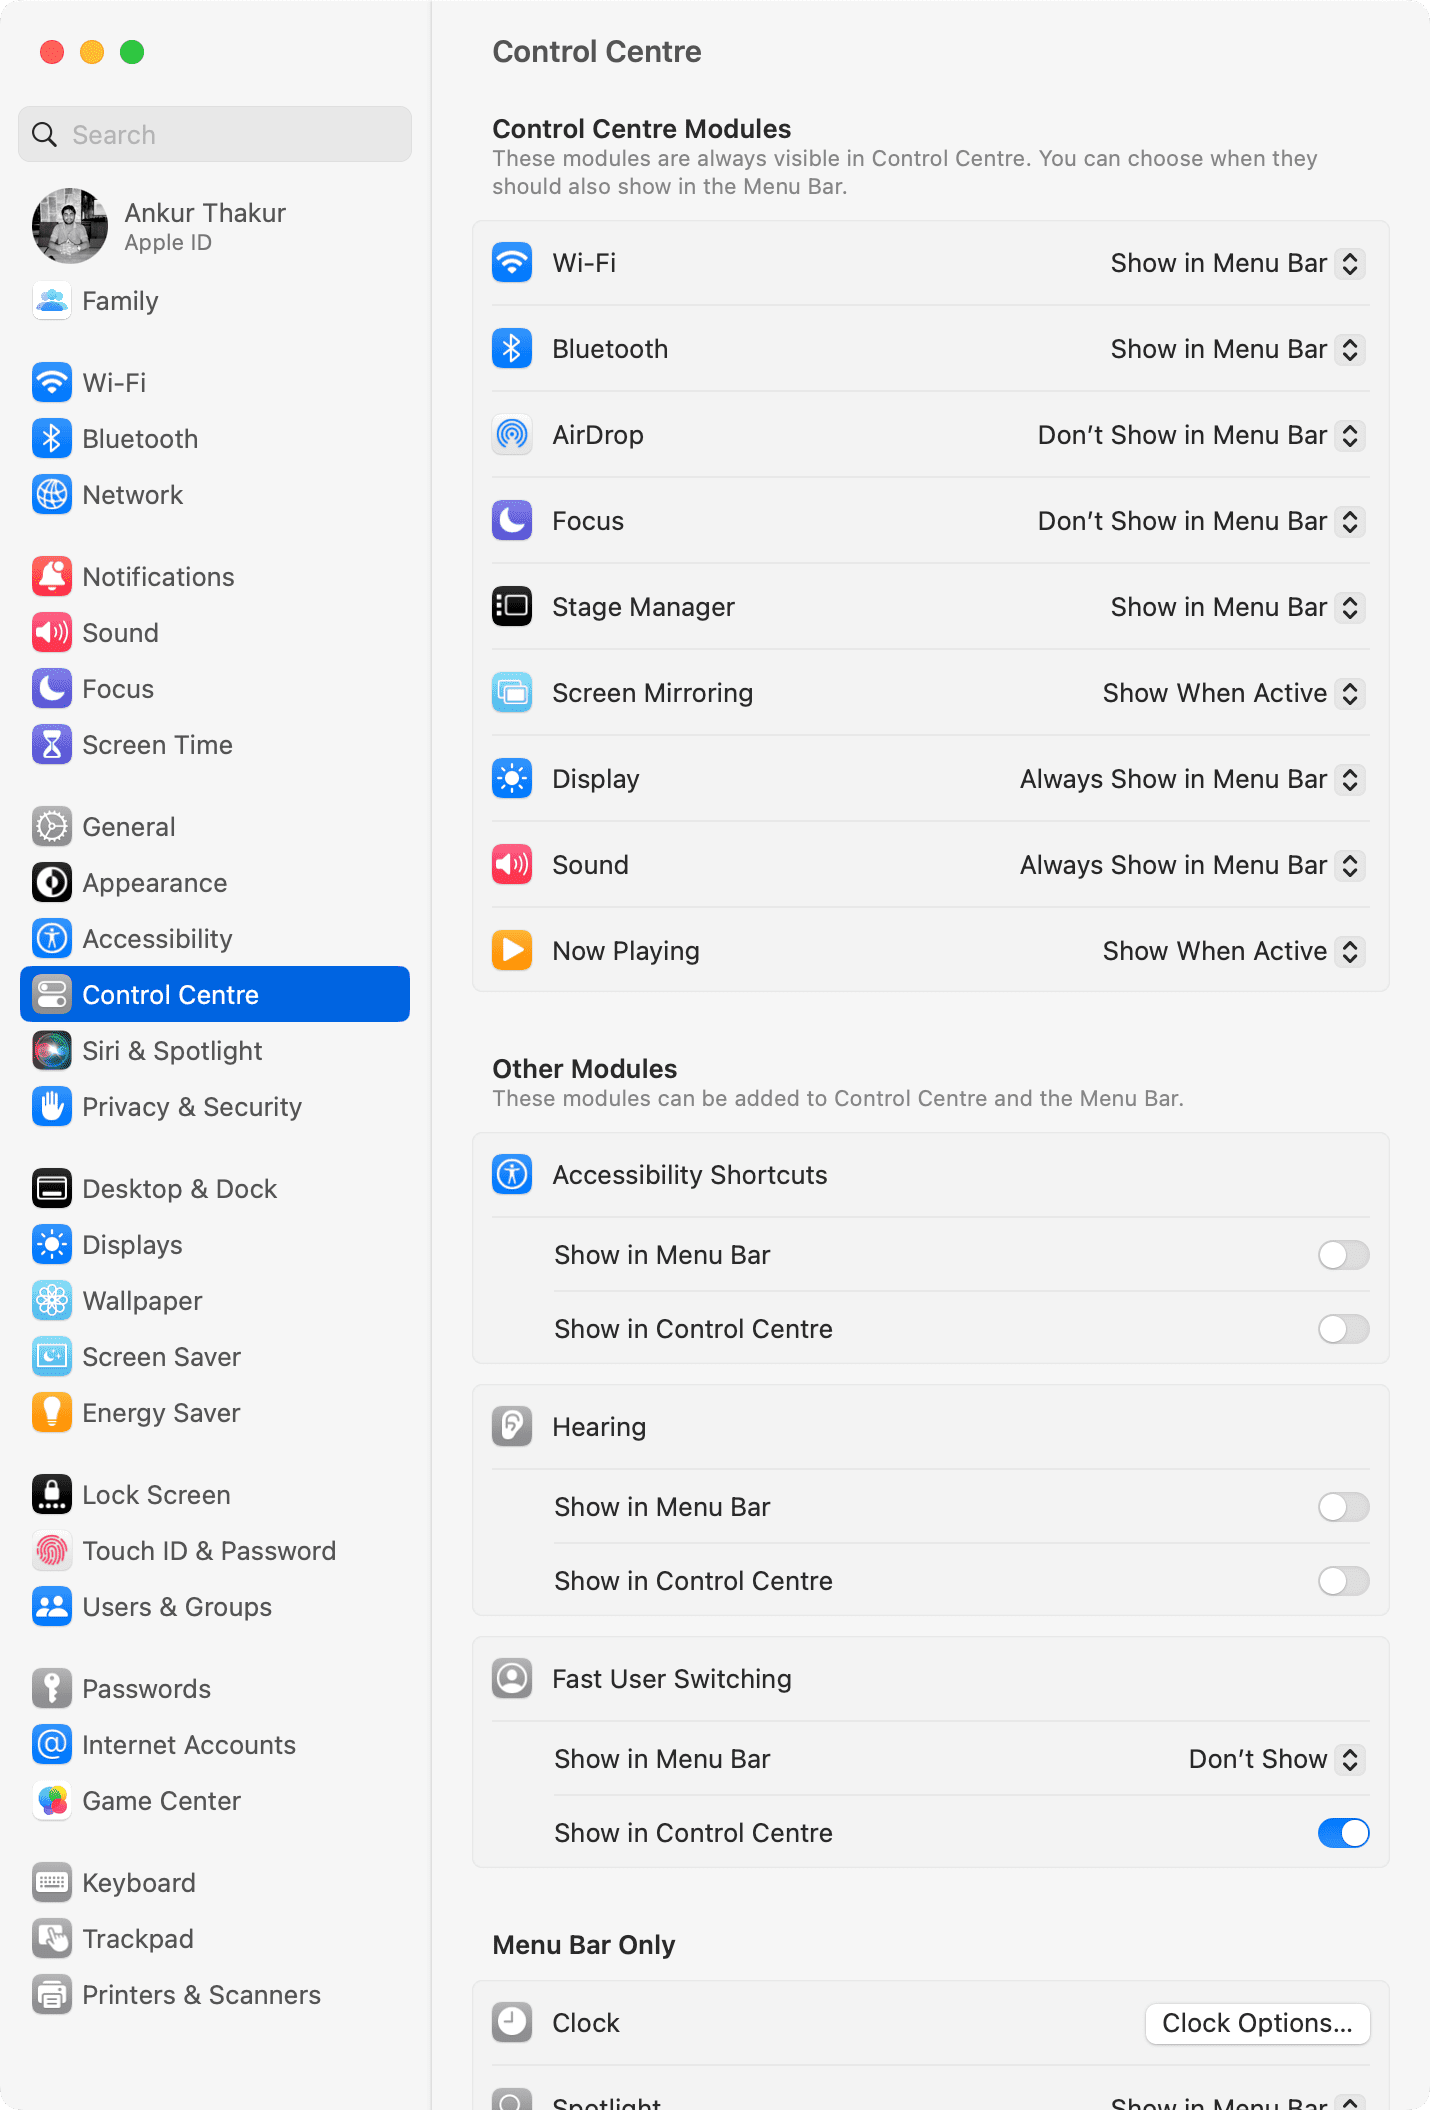
Controls built into your Mac, such as the time, date, volume, Bluetooth, Screen Mirroring, and Wi-Fi, can be added or removed.
Here are a few examples of system controls to get you started.
On newer versions of macOS:
- Date & day: System Settings > Control Center > Clock Options > Show date and Show the day of the week.
- Wi-Fi, Bluetooth, AirDrop, Focus, Stage Manager, Screen Mirroring, Display, Sound, and Now Playing: System Settings > Control Center > and select Show in Menu bar, Always Show in Menu Bar, or Show When Active.
- Accessibility shortcuts, Hearing, Fast User Switching: System Settings > Control Center and enable Show in Menu Bar.
- Spotlight, Siri, Time Machine: System Settings > Control Center and select Show in Menu Bar.
On older versions of macOS:
- Date & time: System Preferences > Date and Time > enable Show date and time in menu bar.
- Battery: System Preferences > Energy Saver > enable Show battery status in menu bar.
- Volume: System Preferences > Sound > enable Show volume in menu bar.
- Wi-Fi: System Preferences > Network > enable Show Wi-Fi status in menu bar.
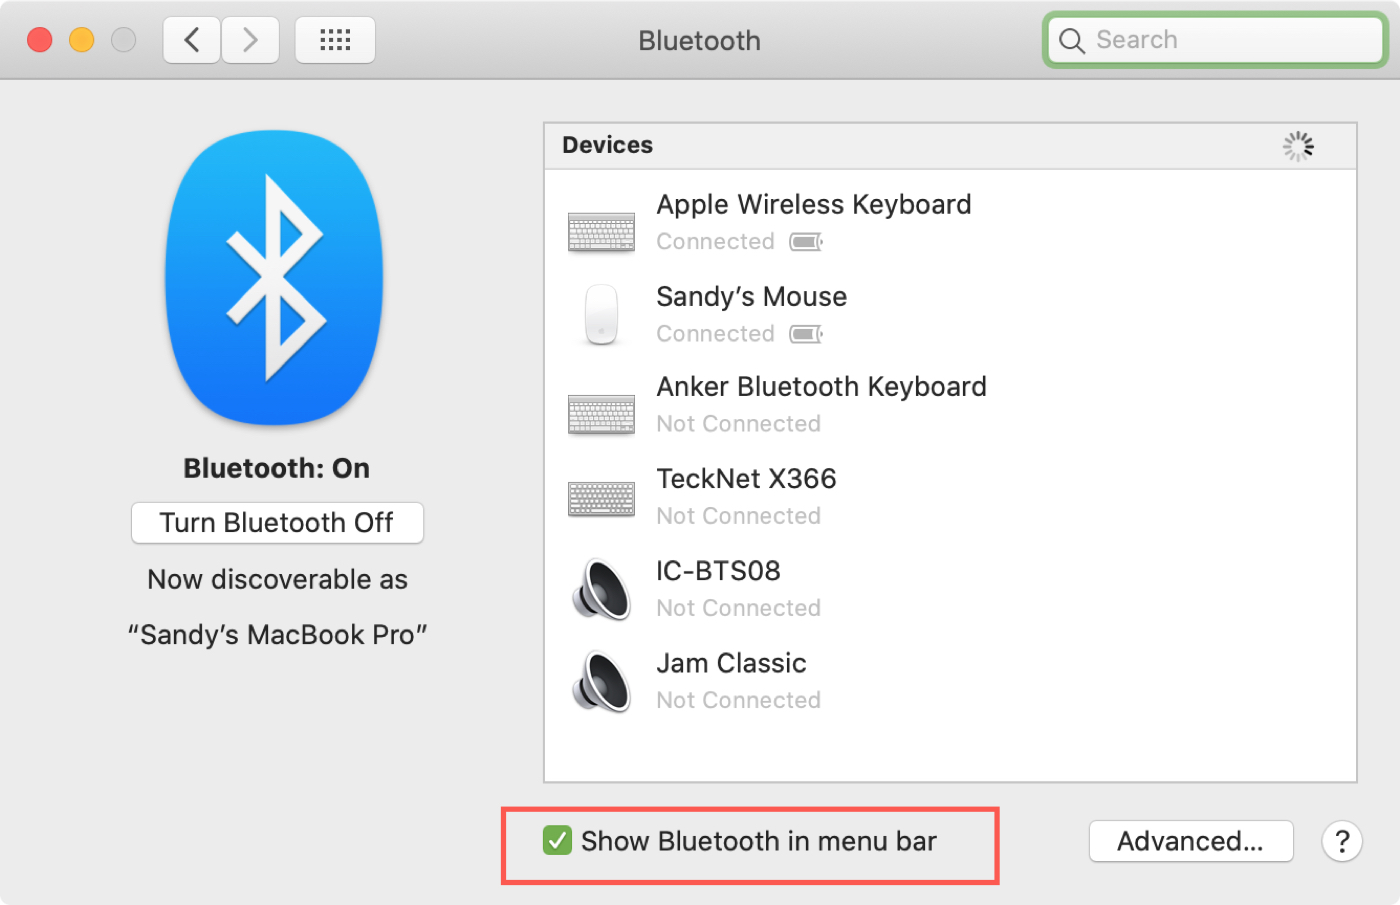
- Bluetooth: System Preferences > Bluetooth > enable Show Bluetooth in menu bar.
Many apps that you download from the App Store will offer this as well. Depending on the app, access the settings and look for the menu bar option.
Removing and rearranging icons
You can remove icons from the right side of the menu bar if you like. For instance, you might never use the Siri button and want to free up that space for something different.
You can use the steps above to disable the “Show in menu bar” option for the particular control.
For an alternative way to quickly remove an icon from the menu bar, hold down your Command key, click the icon, drag it out of the menu bar, and release.
In addition to adding and removing icons, you can rearrange them how you want them. As an example, you may prefer to have your clock on the other side of your volume control.
To rearrange an icon, hold your Command key, click the icon, drag it to its new spot, and release.
Note that you can’t change the position of (or drag them down to remove) the Control Center and Siri icons, as well as the day, date, & time.
Other menu bar tips you should check out: