Learn how to add, configure, and use two or more SIM cards on your iPhone or cellular iPad to keep your personal, business, and other lines on one single device.
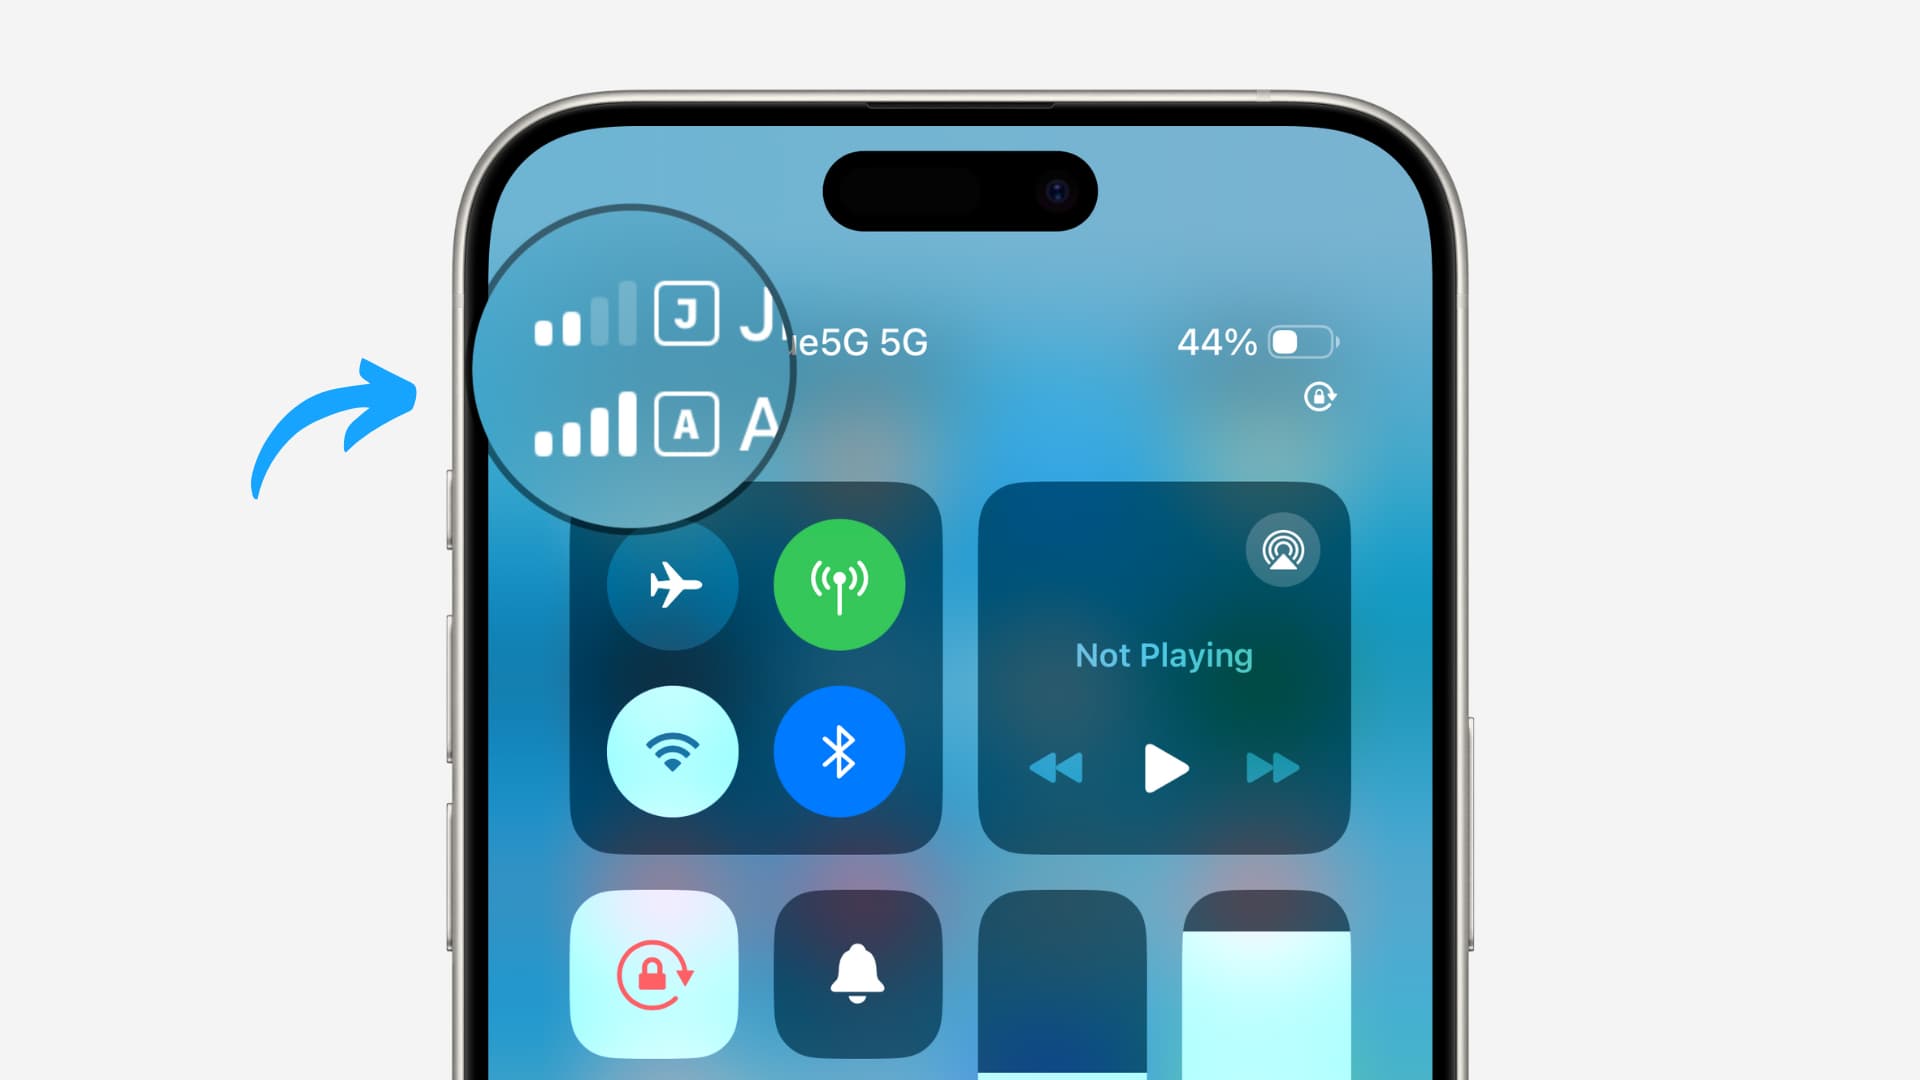
With Dual SIM, both of your phone numbers can make and receive voice calls and send and receive SMS and MMS.
Dual SIM is ideally suited for folks who:
- Need one number for business and another for personal calls.
- Want to add a local plan for travel outside of the country.
- Wish to have separate voice and data plans.
Note that you can add more than eight eSIMs to your iPhone. However, only two can be active at a given time.
Supported devices
iPhone XR, XS, and later, including iPhone SE (2nd generation and later) support more than one SIM.
If you have an iPhone 13 or older, you can use one physical SIM and multiple eSIMs.
iPhone 14 or later purchased in the United States does not have a physical SIM slot. So, you will have to use eSIMs on it. Note that iPhone 14 and 15 purchased outside the US continue to have a physical SIM slot.
On the iPad side, most recently purchased cellular models let you use a physical SIM card and eSIMs.
Supported carriers
Most carriers across the world support eSIM. If you are unsure, go through this Apple Support document.
Note that dual SIM is available on unlocked iPhones with supported carriers. If you have a locked CDMA iPhone, it won’t support eSIM from another carrier.
Set up your carrier account via eSIM
To add a carrier account via an eSIM, you can either scan a QR code or use a carrier app to get started. You can also add your information manually.
QR code
To activate a code provided by your carrier:
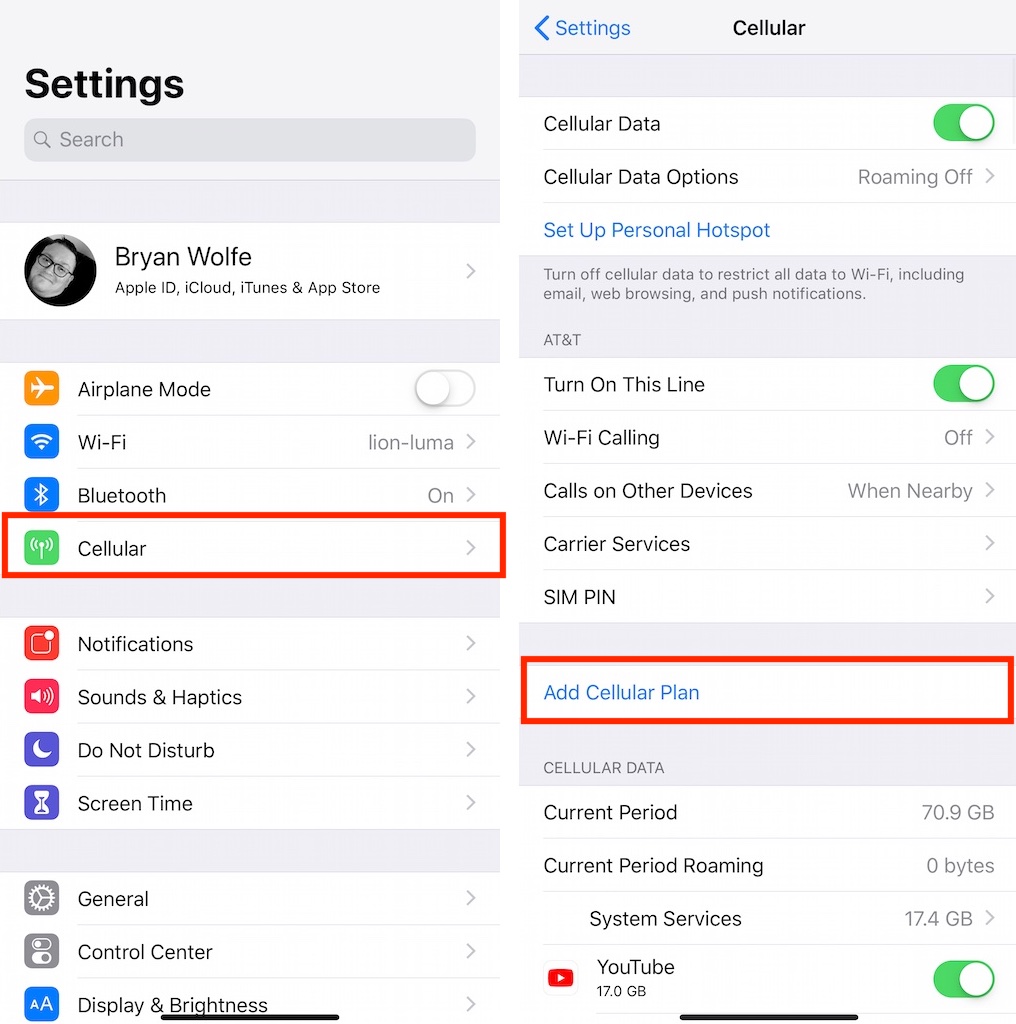
- Go to Settings > Cellular on your iPhone.
- Tap Add eSIM or Add Cellular Plan.
- Tap Use QR Code and scan the code. You can also tap Enter Details Manually at the bottom of the screen and follow the directions.
eSIM Quick Transfer
Some carriers allow you to transfer your eSIM from a nearby iPhone to another. You won’t have to contact them for this transfer.
To use this, go to iPhone Settings > Cellular > Add eSIM. Now, select Transfer From Nearby iPhone and follow along.
Carrier app
To activate your eSIM account using an app:
- Download the carrier app from the App Store.
- Use the app to purchase a plan and set up the eSIM.
Use Carrier Activation
Some carriers can send you the eSIM configuration directly to your iPhone. For this to work, you will have to contact them. It may include sending them your iPhone’s IMEI number and then tapping the Finish Setting Up Cellular notification that comes up on your iPhone.
Label your plan
Once your second plan for Dual SIM is added, you’ll be asked to label it. For example, you can mark one plan as Business and another as Personal.
You can also change the label later by going to Settings > Cellular and tapping the number whose label you want to change. Lastly, tap Cellular Plan Label and pick or give it a name.
Customize your Dual SIM setup
Before using Dual SIM, you’ll have to decide how both plans will work together.
To do that, go to iPhone Settings > Cellular.
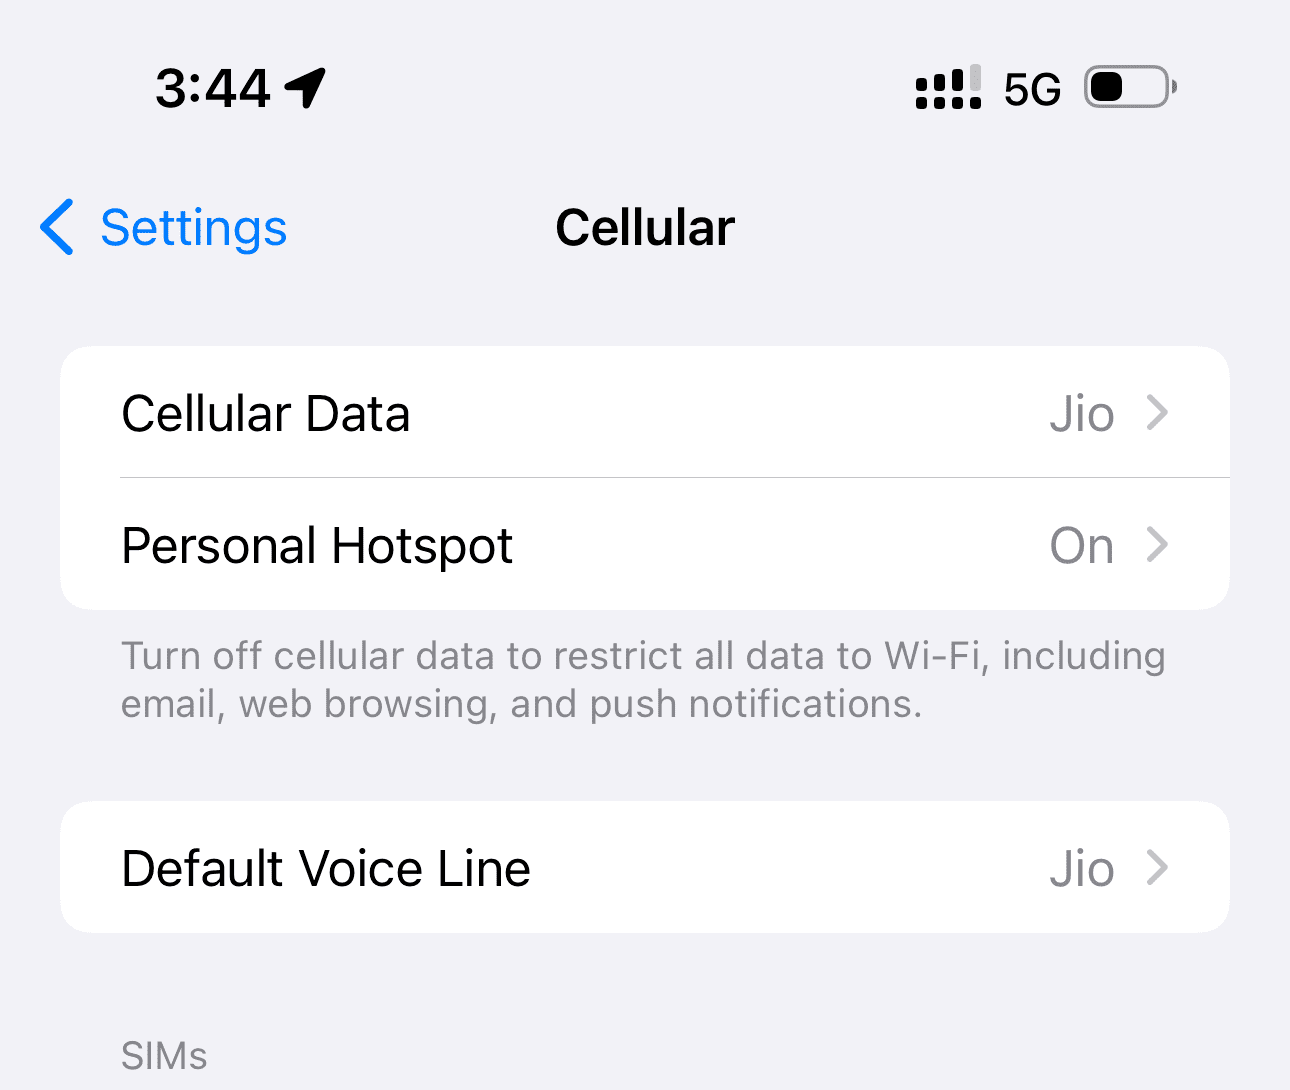
Now, tap Default Voice Line and choose which SIM you’d like to use as the default for phone calls.
Remember that you can also pick a preffered line in the Phone app when you are making the call and select a line different than the default one.
After setting the default voice line, you can tap Cellular Data and select which SIM you’d like to use for mobile data. While you are here, turn on Allow Cellular Data Switching if both your plans have cellular allowances. This will be helpful in times when you are on a phone call and want to use the internet.
You should be able to set up iMessage and FaceTime with both your numbers.
See this Apple’s support page for more information on using dual SIM with your iPhone.