In this brief tutorial, we will share the steps to add an AirDrop shortcut to your Mac’s Dock so it’s even easier to send files to other Apple devices.
If you spend a great deal of time moving files between your Mac and iOS devices, you know just how vital the AirDrop feature is to your workflow.
By default, AirDrop is accessible in the Share Sheet, Finder Sidebar, and under the Finder’s Go menu in the top menu bar. You can also press Command + Shift + R when in Finder to open AirDrop.
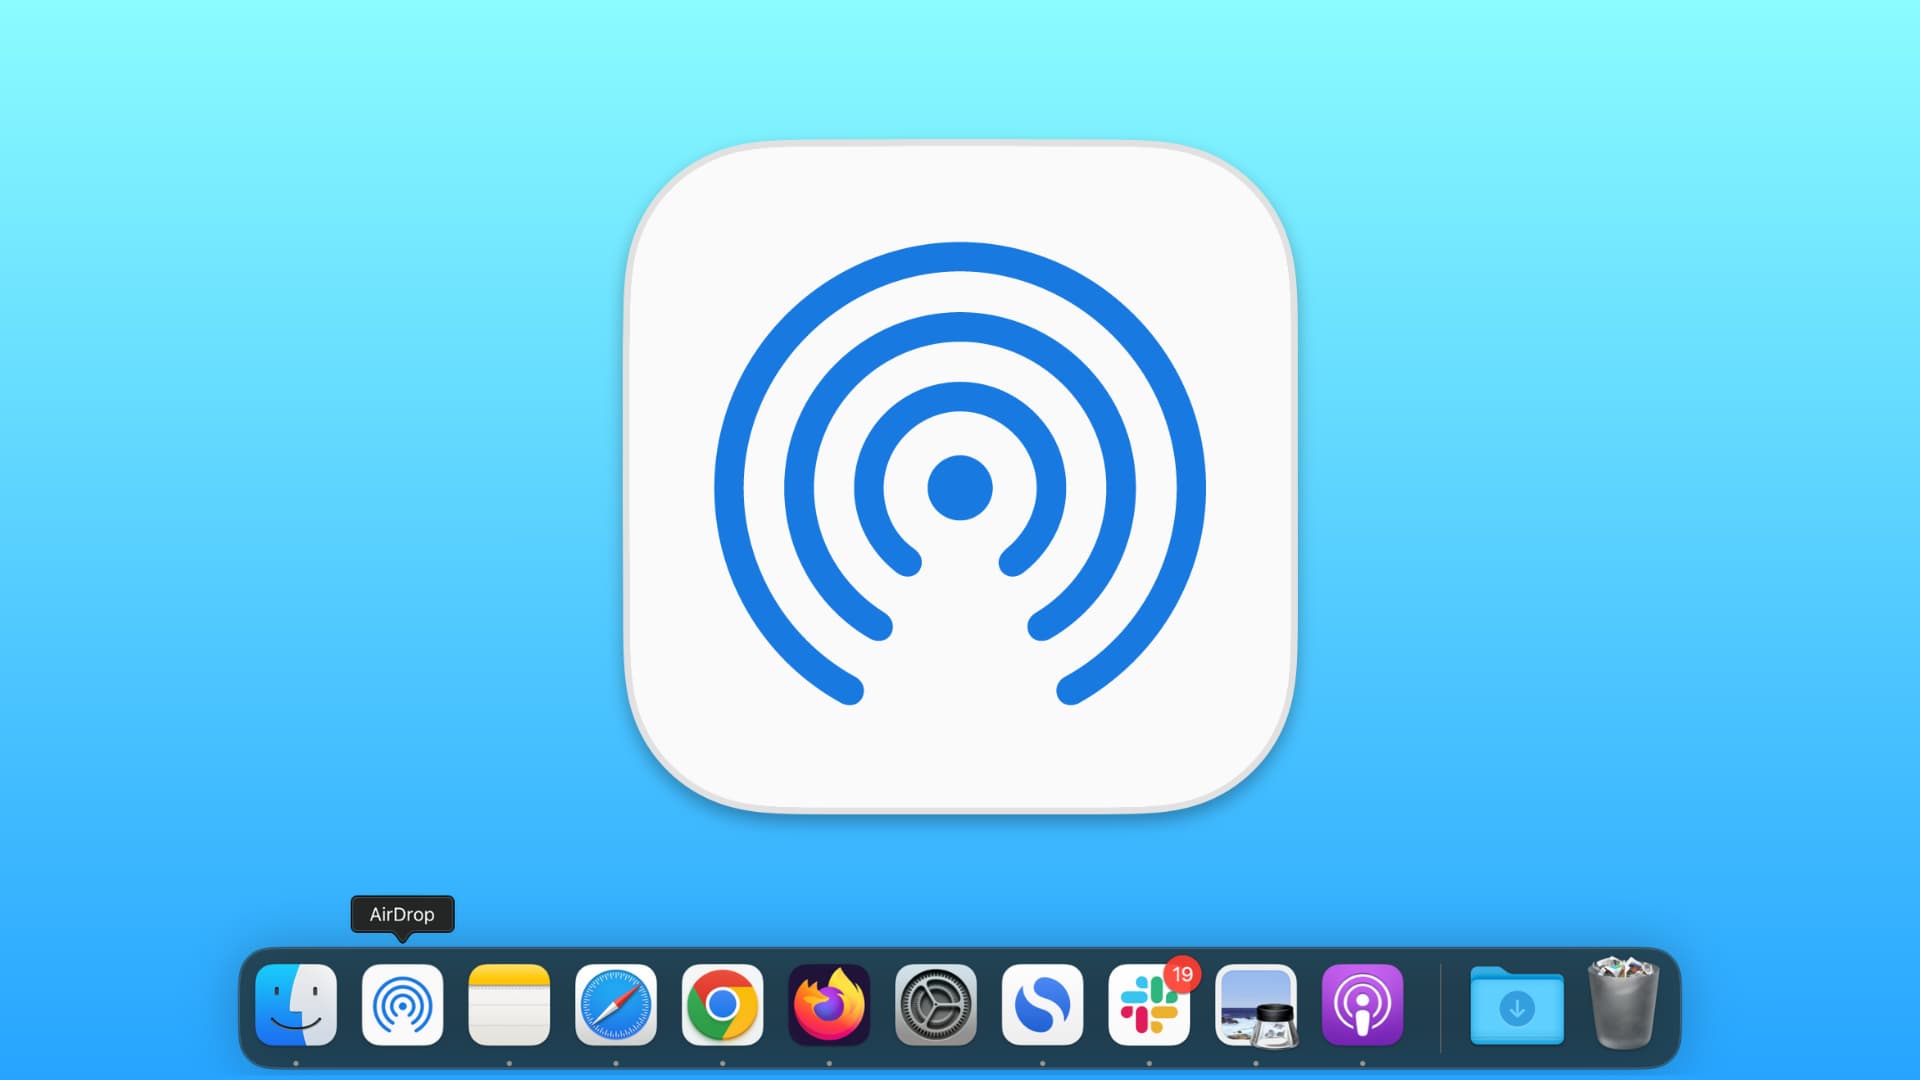
However, to gain lightning access to AirDrop, you can add it to your Mac’s Dock. After that, whenever you have to share something, simply click the AirDrop icon in the Dock and drag the files over another available device that shows up in Mac’s AirDrop window.
Add the AirDrop shortcut to your Mac Dock
1) Open Finder on your Apple computer.
2) Type AirDrop.app in the Finder search box and click This Mac. You will see a little AirDrop app here.
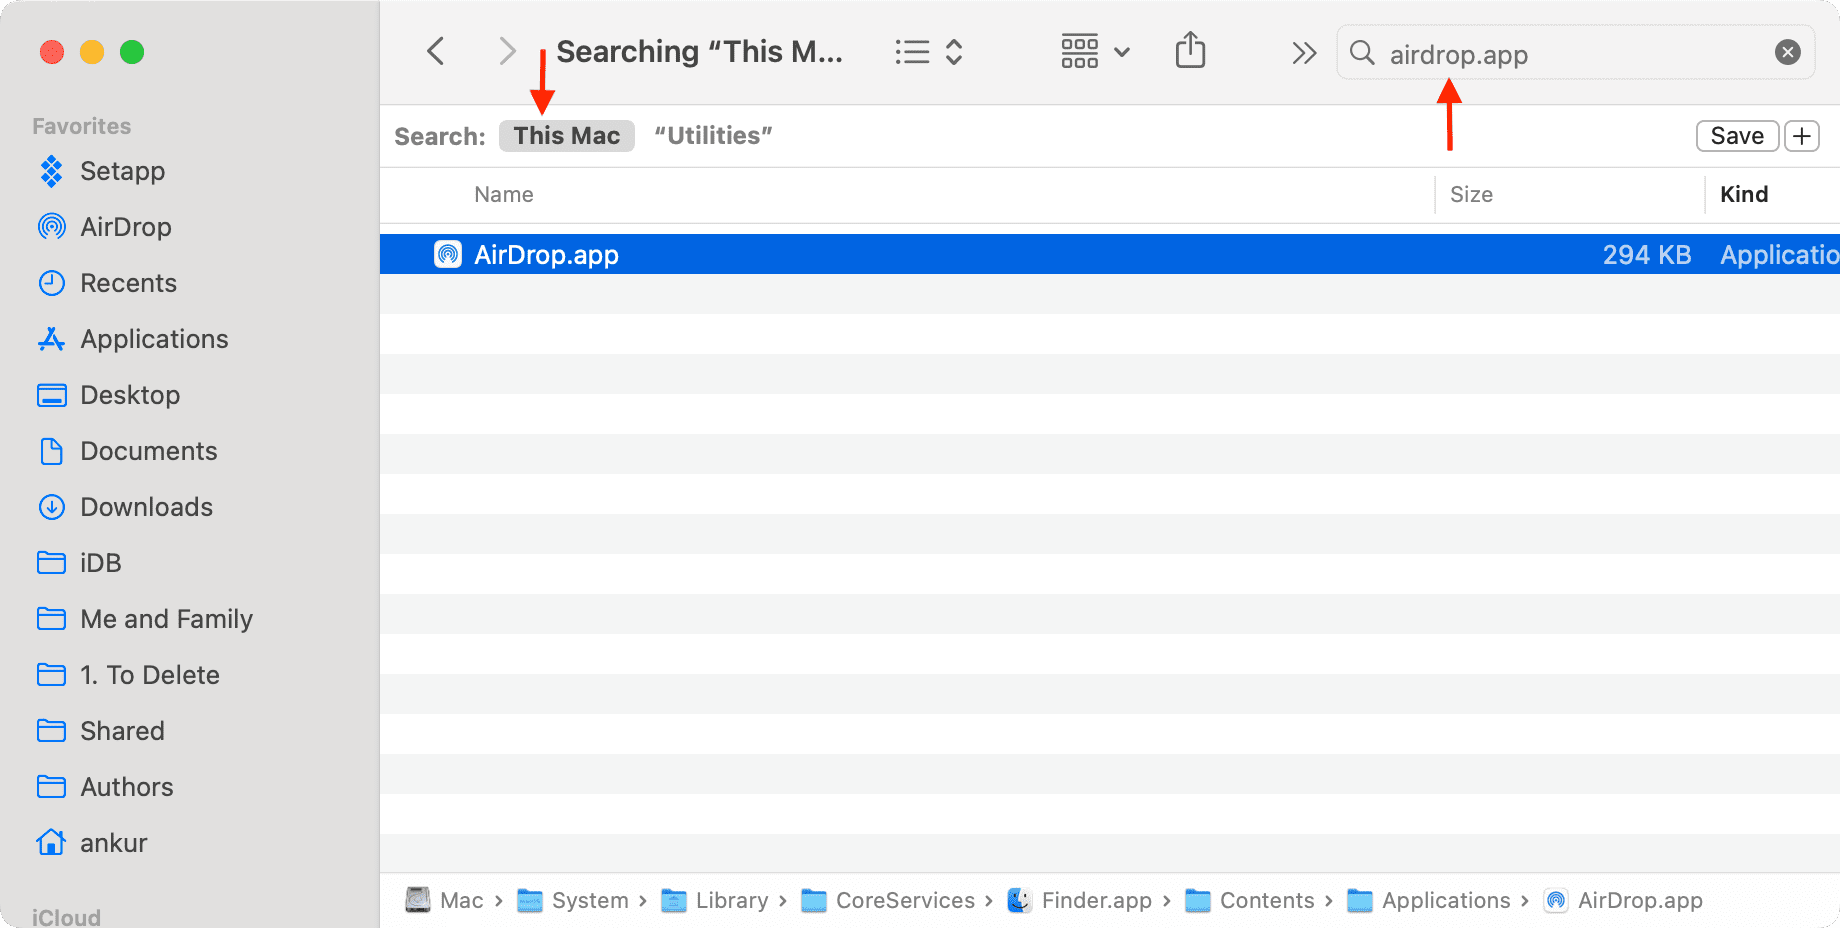
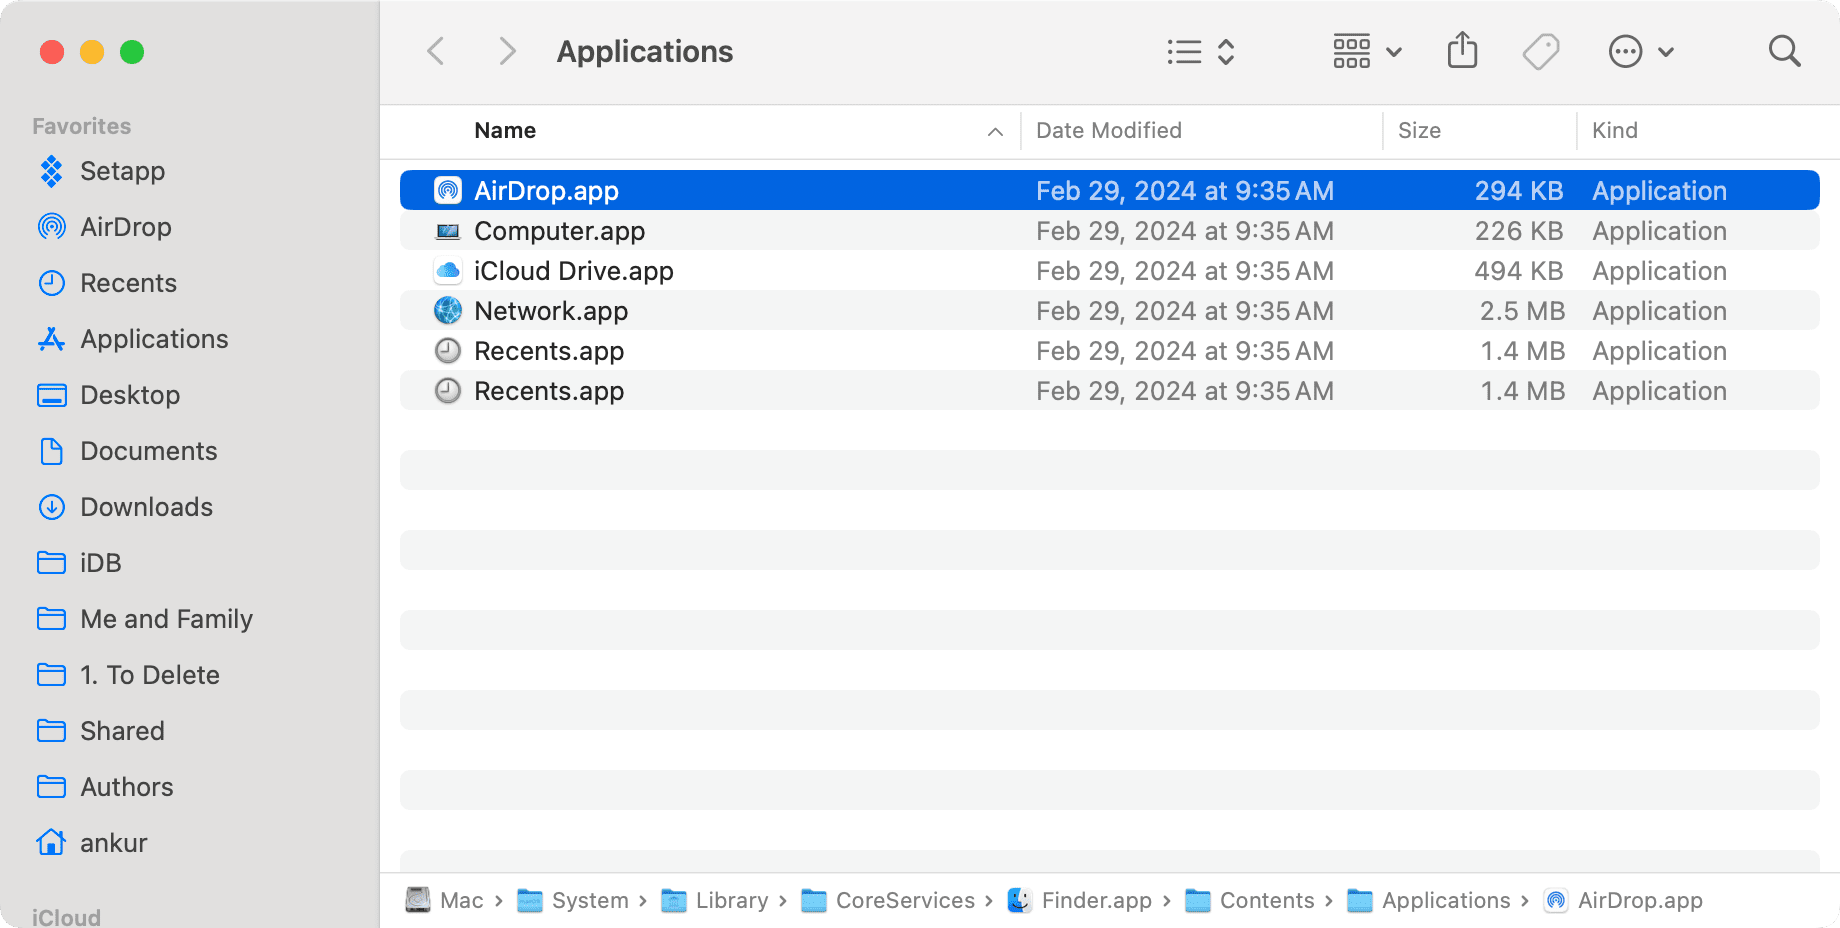
Alternatively, you can click Go from the Finder menu bar and choose Go to Folder. Now enter the following directory path in the box and hit the return/enter key. You’ll notice the app for AirDrop.
/System/Library/CoreServices/Finder.app/Contents/Applications/
3) Drag this AirDrop icon from the Finder window and drop it at a desired spot on your Mac’s Dock.
There is now an AirDrop shortcut on your Mac Dock.
From now on, you can click it, and it will open the AirDrop transfer screen in Finder. You can see the available devices here. To send files to an iPhone, iPad, or other Mac, just drag them from the desktop or other Finder window and drop them over the device icon.
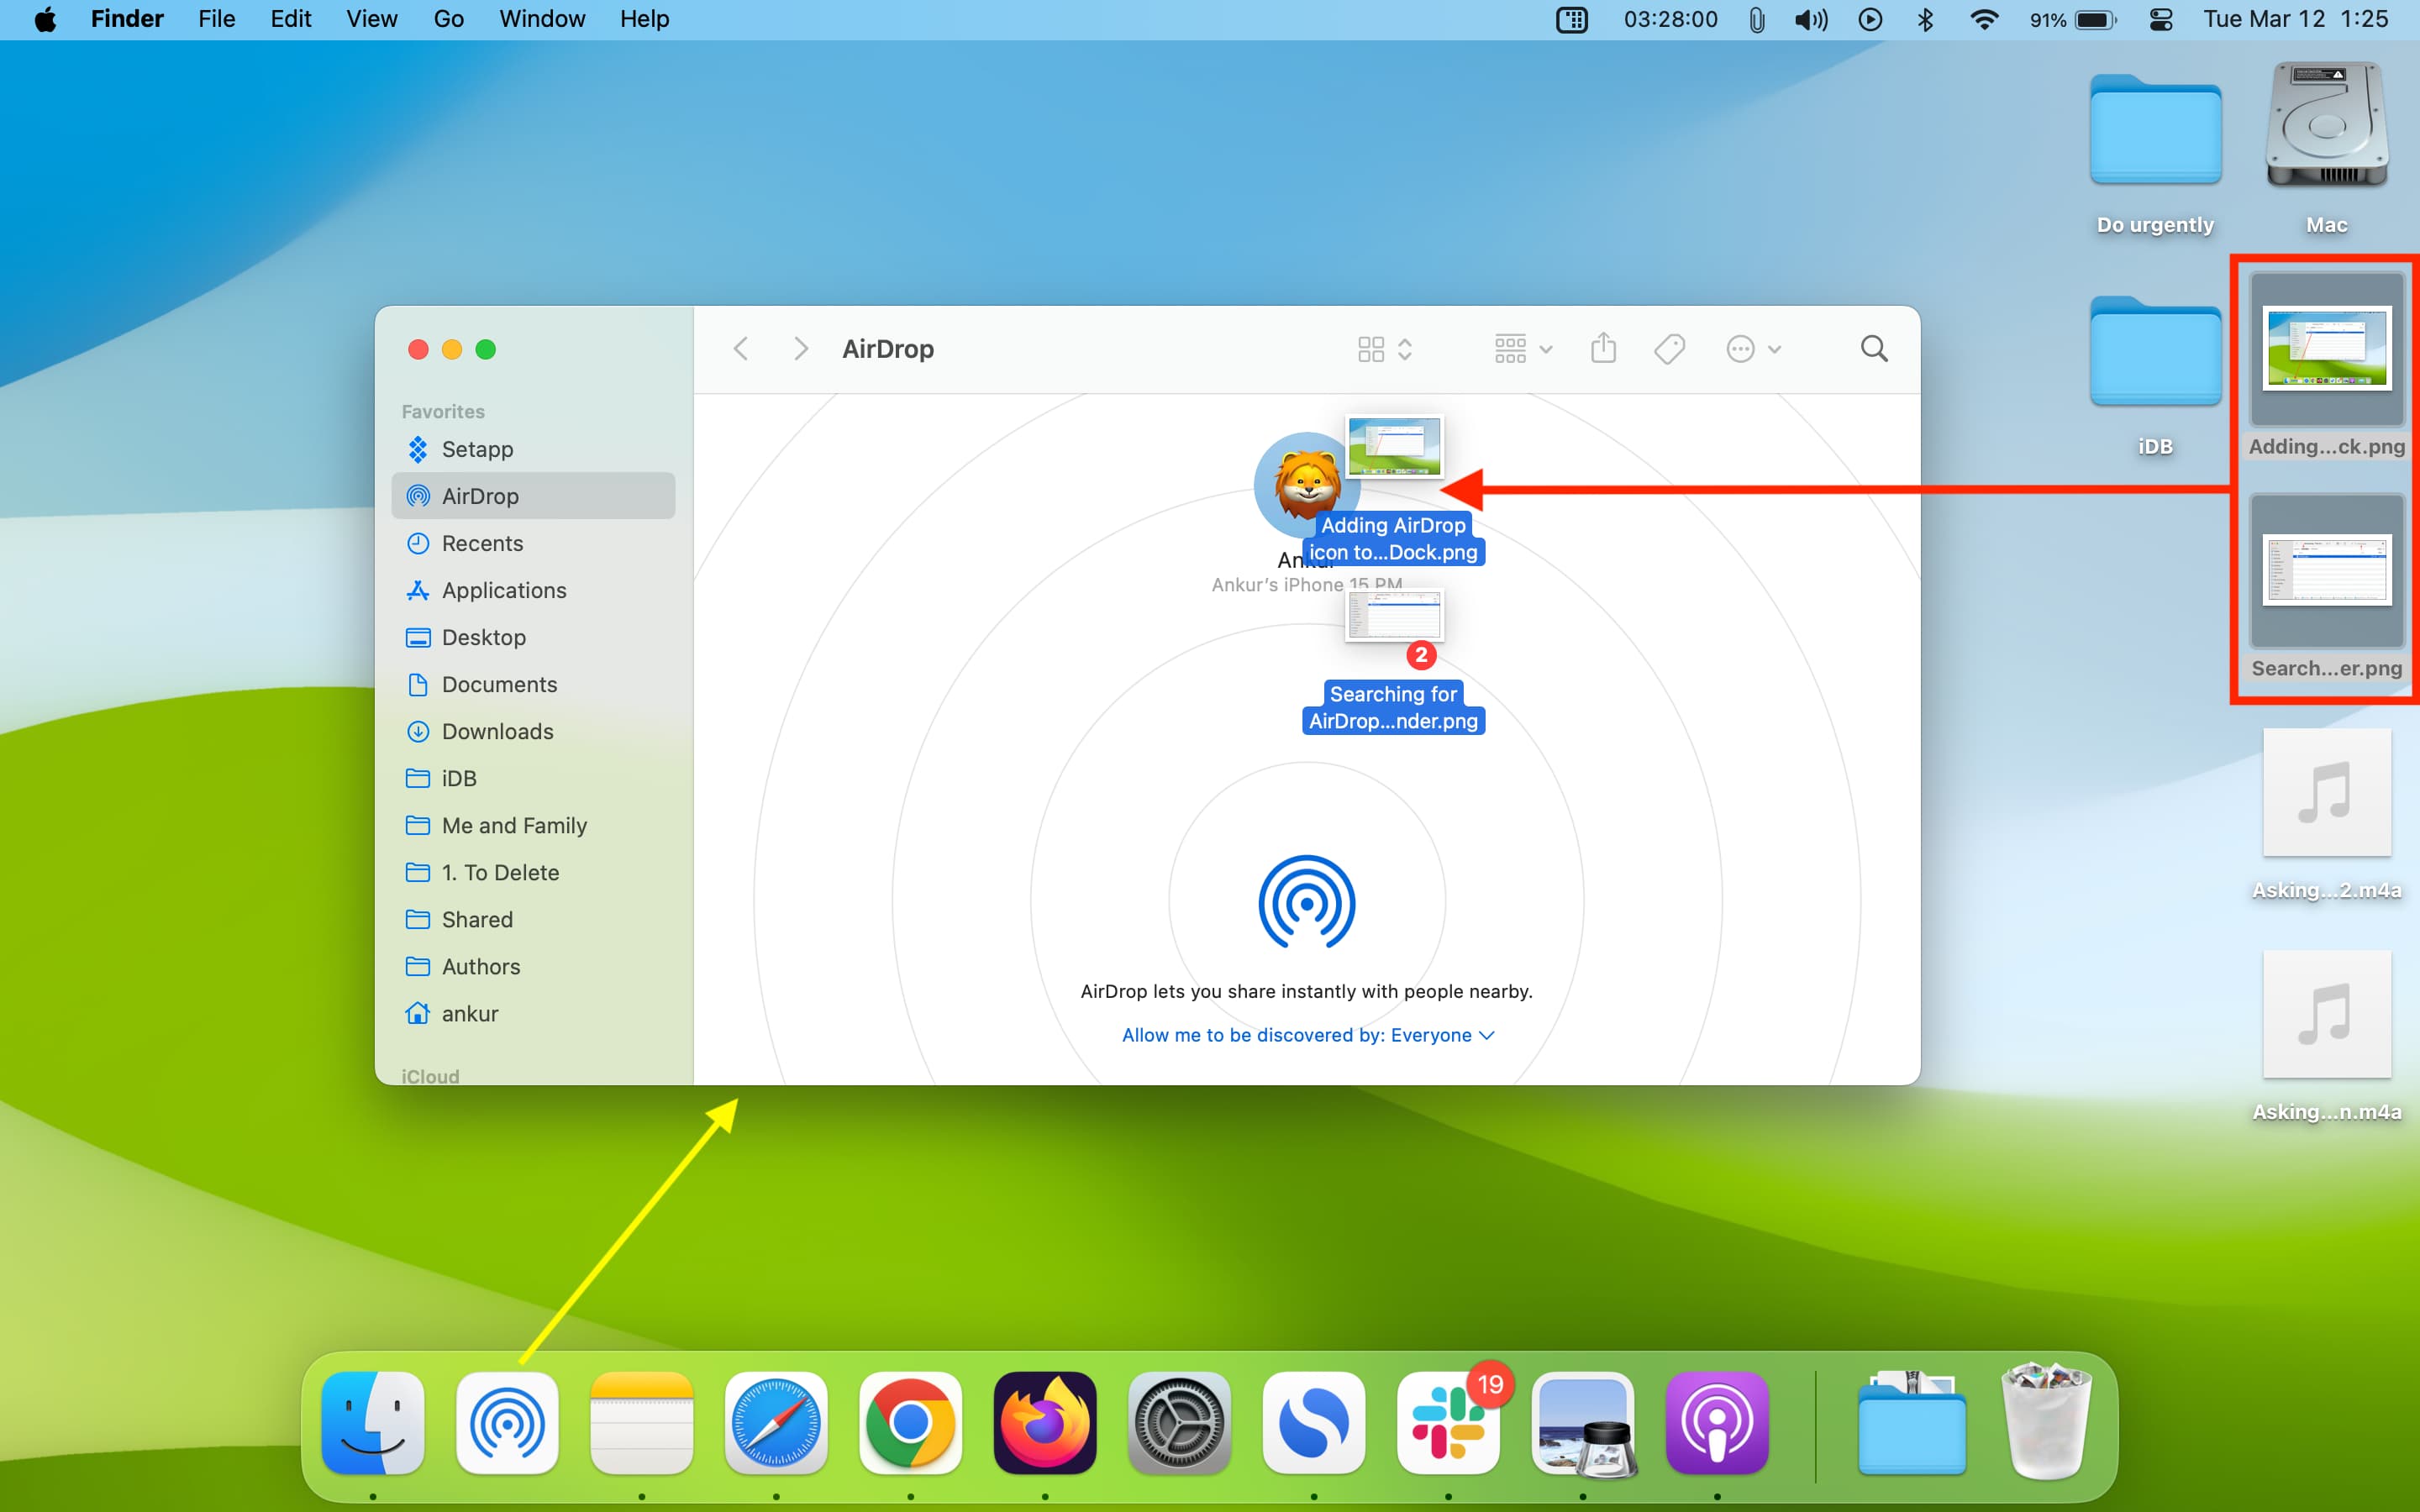
You can also adjust your Mac’s AirDrop visibility from here by clicking the “Allow me to be discovered by” option.
Someday down the line, if you no longer want the AirDrop icon on the Dock, you can remove it by right-clicking on it and selecting Options > Remove from Dock. Alternatively, you can drag the AirDrop icon away from the Dock and drop it on the desktop to remove it.
Other tips for Mac’s Dock: