
Google recently introduced a location-sharing feature in the mobile Google Maps app that’s somewhat similar in functionality to Apple’s Find My Friends app. On your iPhone, iPad, iPod touch, Google Maps allows you to share your location with others for up to 72 hours, choose who can see where you are, hide other people’s locations from a map and more.
In this step-by-step tutorial, you’ll learn how to share your real-time location on Google Maps with friends and family in case you’d like to let them know where you are and when you’ll get there.
About Location Sharing on Google Maps
First and foremost, location sharing requires the latest version of the Google Maps app.
It’s important to remember that the location-sharing feature works in the mobile Google Maps app, but not on desktop. On your computer, you can only see a list of friends when they share their location with you.
Location sharing requires that Google’s Location History feature be enabled.
Location History itself requires you to grant the Google Maps app continuous access to your location so set it to “Always” in Settings → Privacy → Location Services.

Here’s what you can do with location sharing on Google Maps:
- Share your location directly with anyone who uses a Google Account
- Share your location through a link with people that don’t have a Google Account
- Chose for how long your location will be shared with others
- Decide who can see where you are
- See where someone is
- Temporarily hide/show someone’s location from your map
- Stop sharing your location with one or more users
- Stop someone’s location from ever appearing on your map
People you share your location with can see the following across Google products:
- Your name
- Your photo
- Your current location, updated in real-time
Your shared location may include the following information:
- Where you’ve just been
- What you’re doing (like driving or walking)
- Your device’s battery life or GPS connections
- Your places (like home, work and destinations)
Here’s how to use the handy location-sharing feature on Google Maps.
How to share your location on Google Maps for iPhone and iPad
On your iPhone, iPad or iPod touch, you can share your real-time location with others, select who’s allowed to see where you are, choose for how long you’ll be sharing and more. Your location can be shared directly with people with a Google Account or via a link with folks without a Google Account.
1) Launch the Google Maps app.
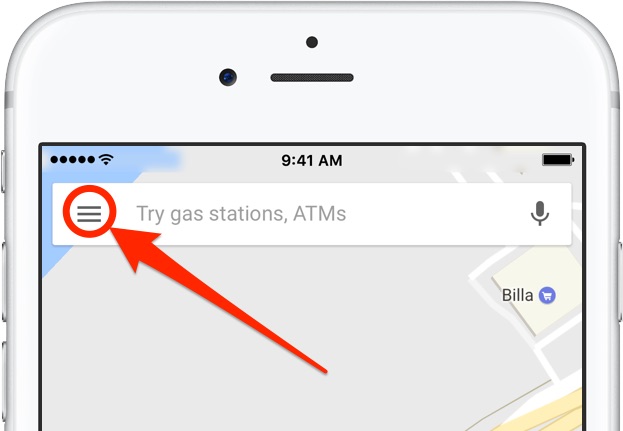
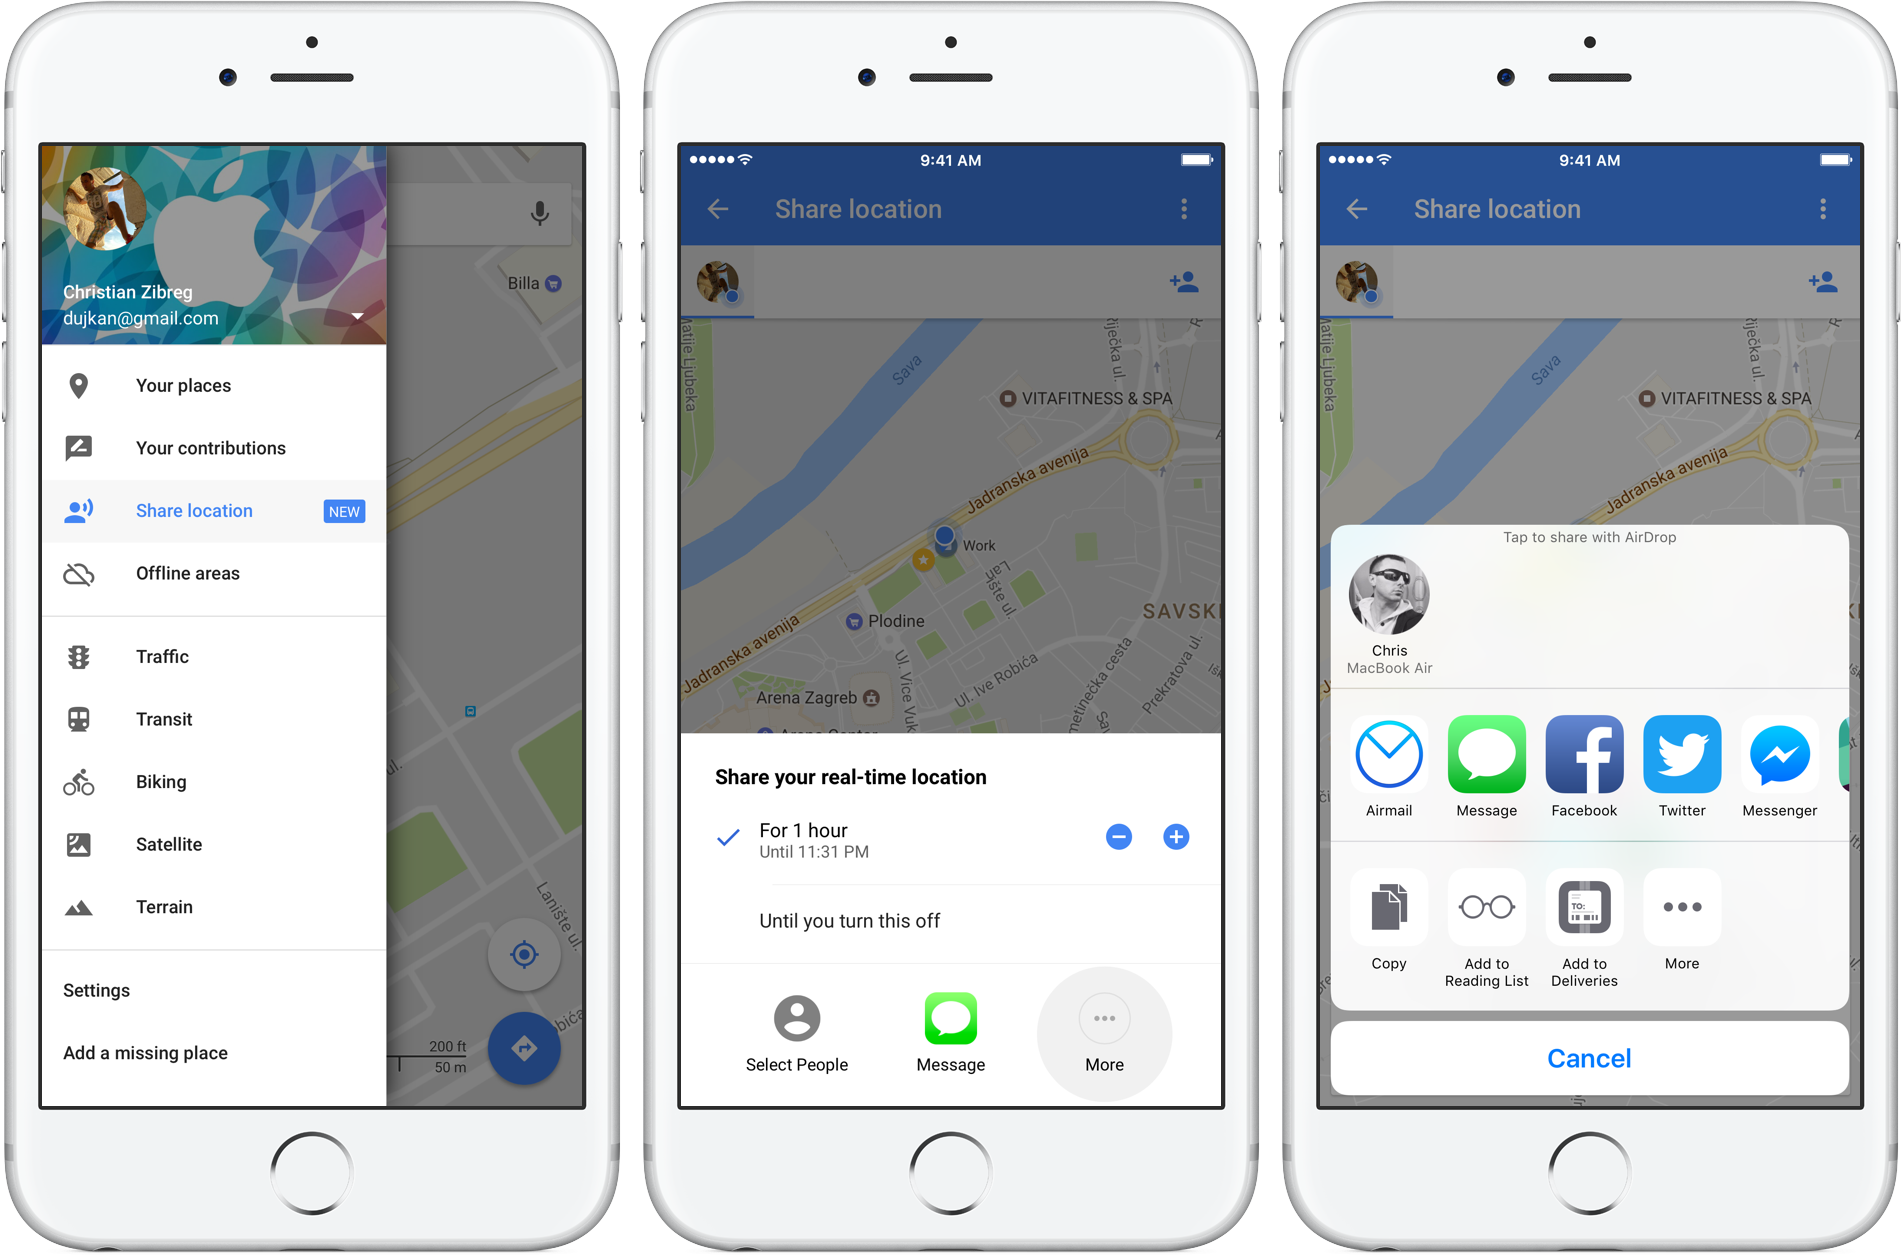
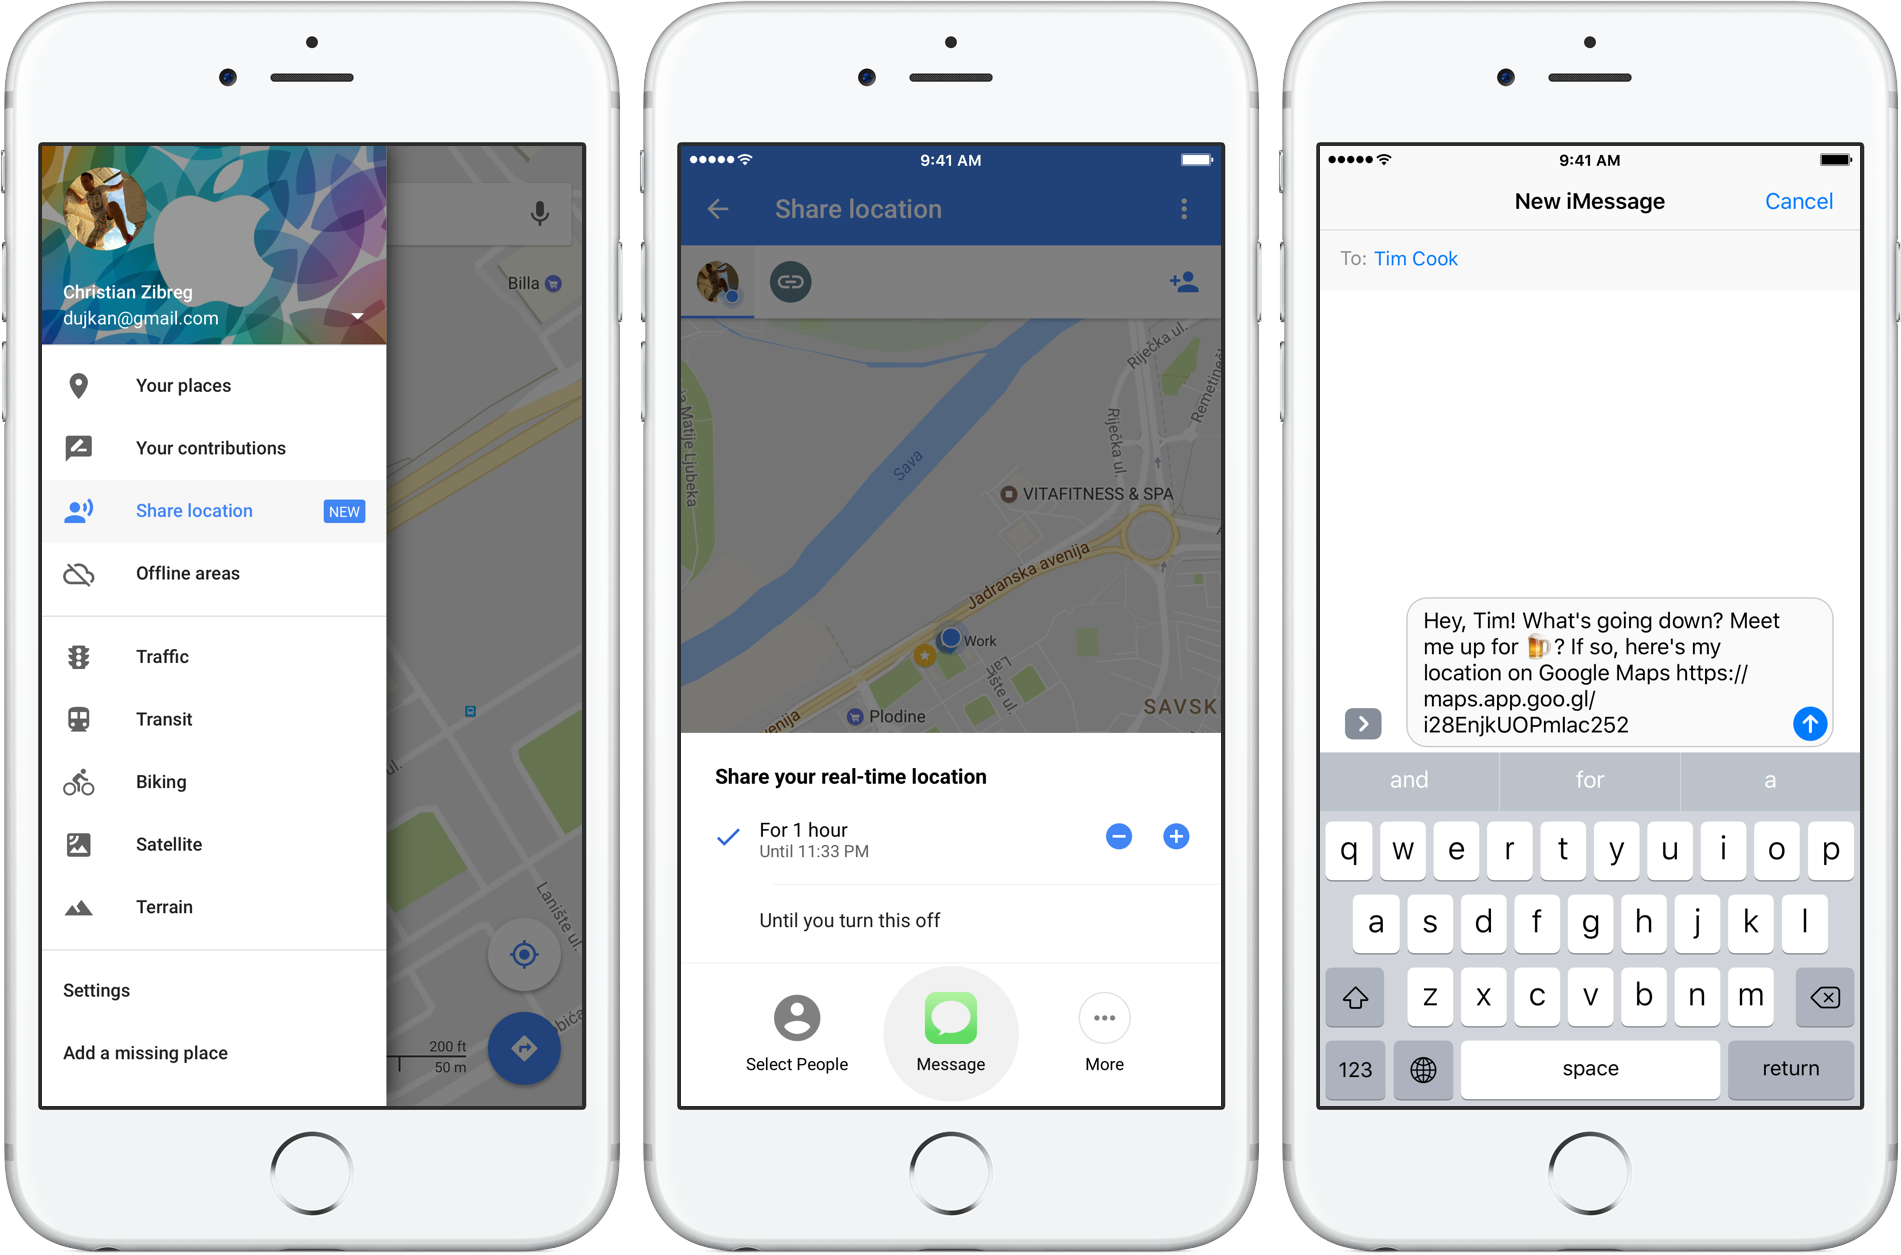
2) Tap the Menu icon in the app’s top-left corner to display options.
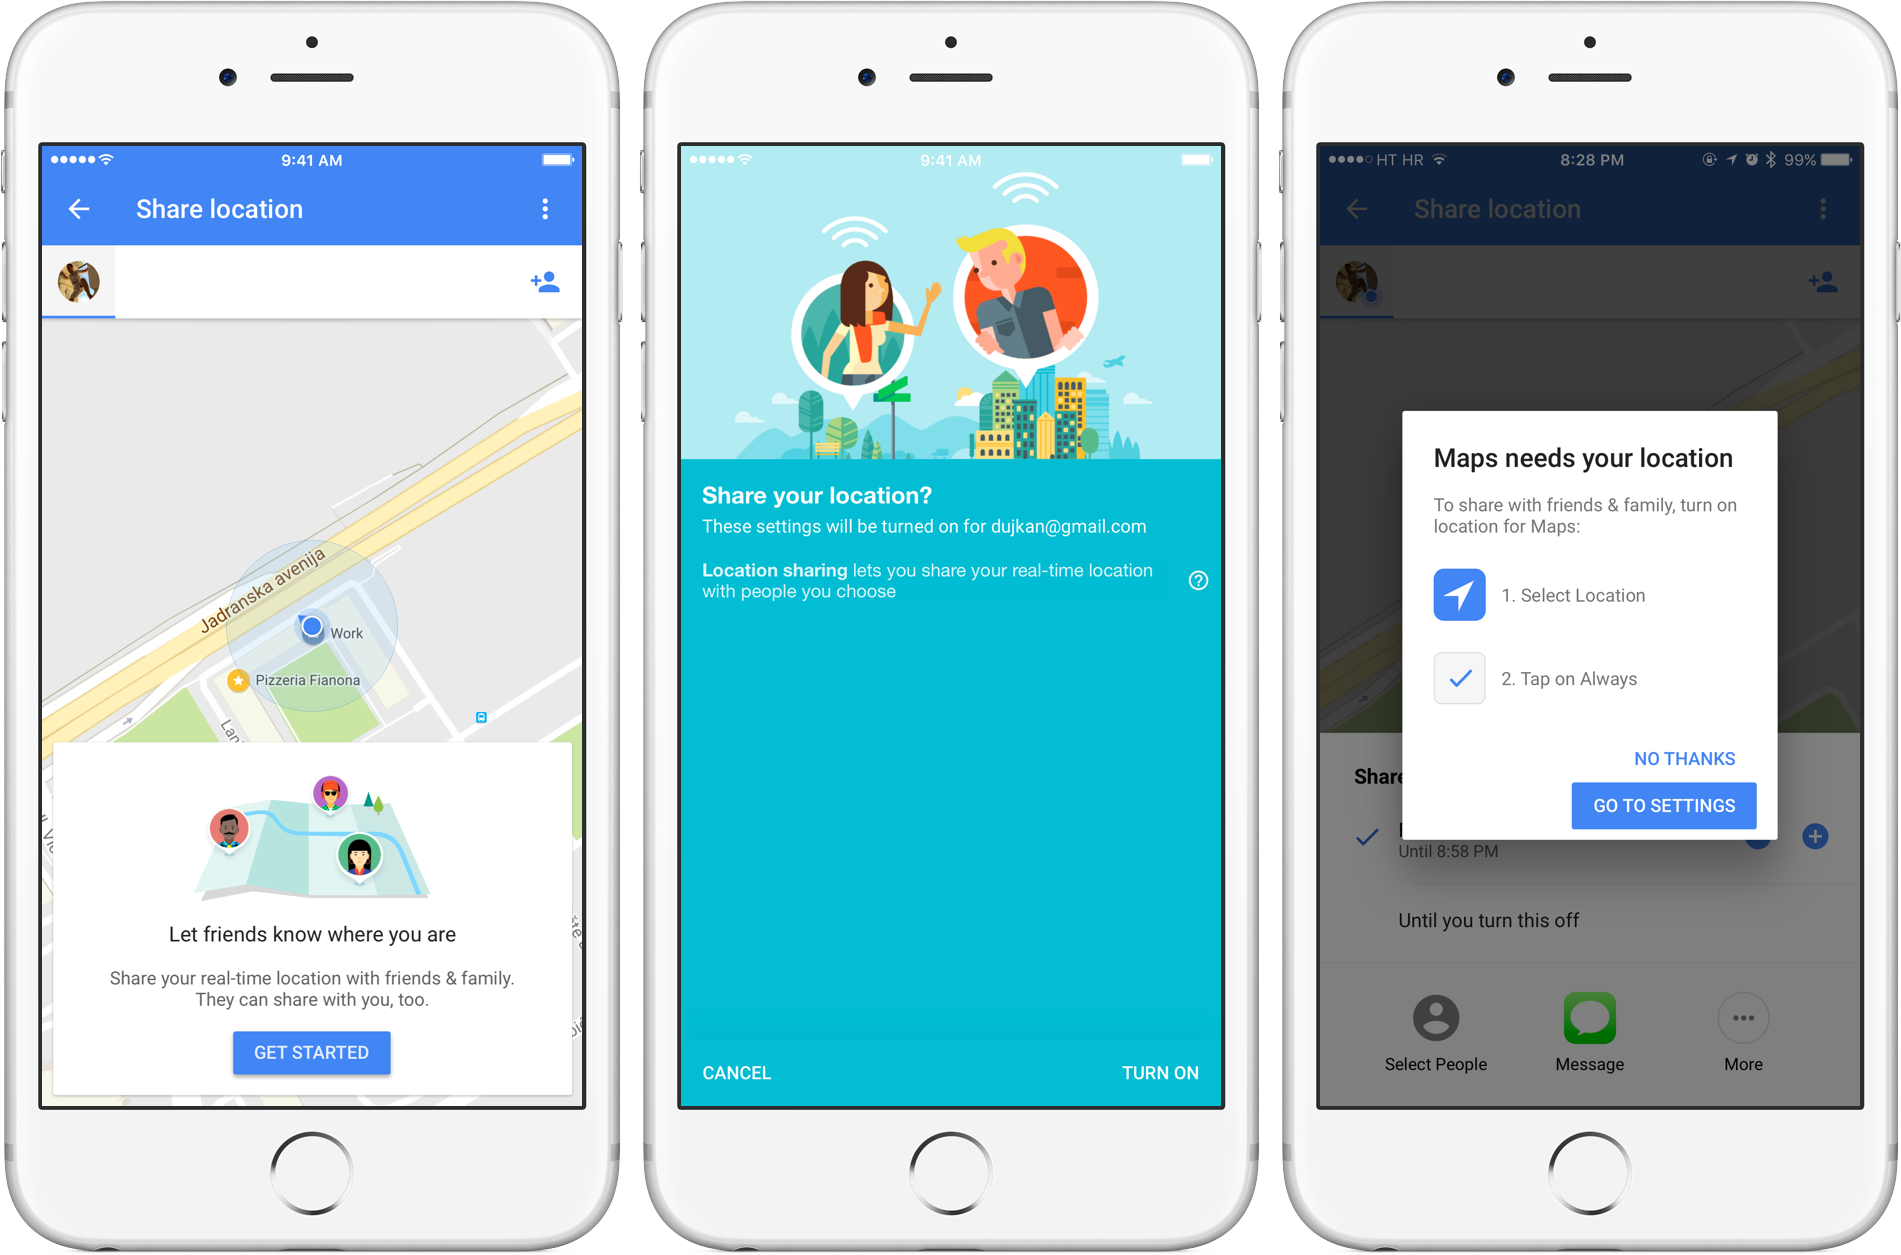
3) Choose Share Location from the side menu. The first time you share your location, a splash screen may appear. Simply tap Get Started to continue.
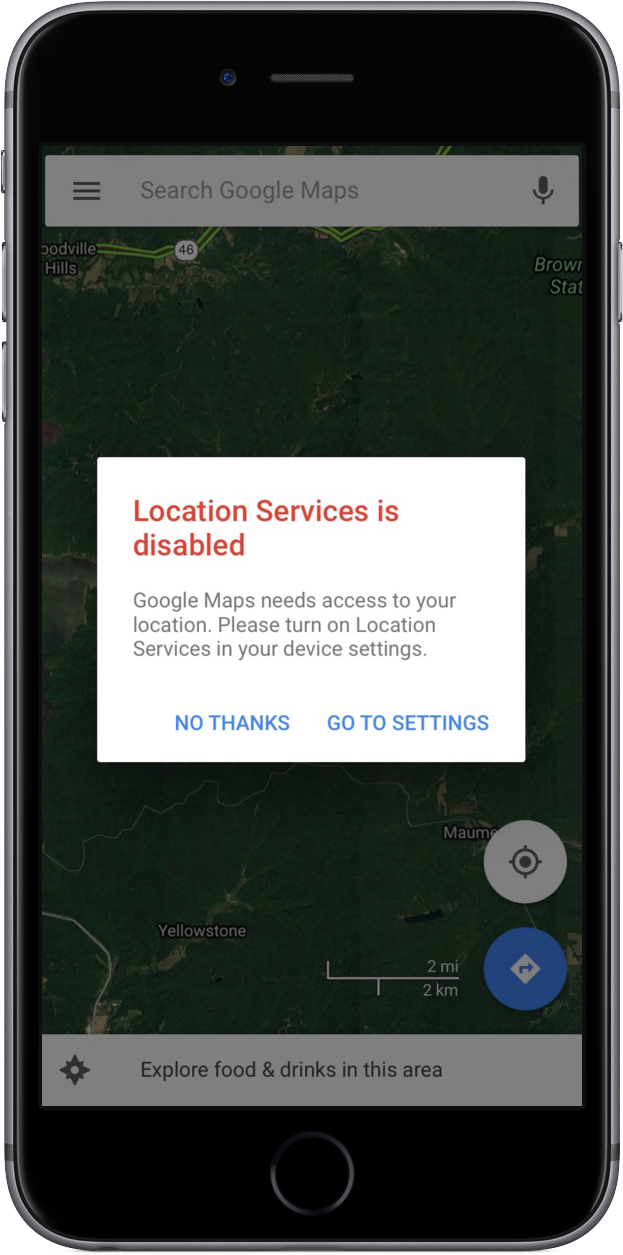
NOTE: You may be asked to turn on Google’s Location History feature and set iOS Location Services for the Google Maps app to “Always”.
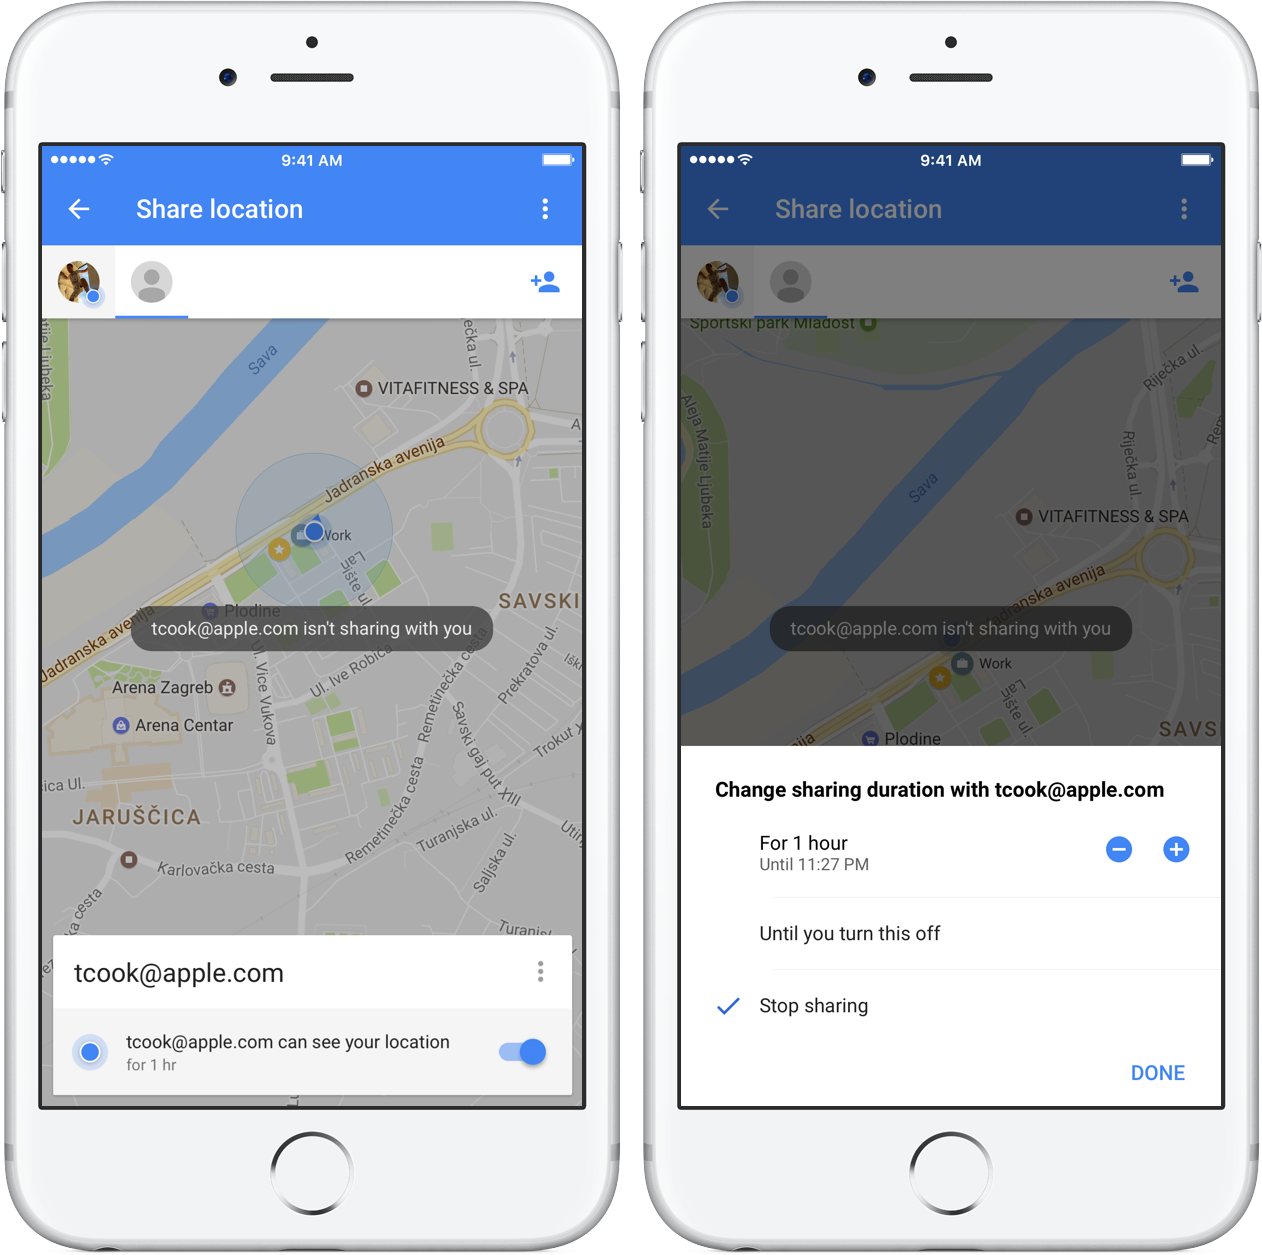
4) Define the duration for location sharing by tapping the blue + and – buttons.
You can share your location for up to 72 hours before it’s automatically turned off. If you’d like to share your location indefinitely, tap Until your turn this off but don’t forget to toggle this manually if you decide you no longer want others to see where you are.
5) Now choose how you’d like your location to be shared:
- Message—Send your location as a link via iMessage
- More—Choose your favorite app or service for sharing a location link, including email and services like Google+, Facebook, Twitter and more. If you’d like to share your location with a nearby Apple device, choose AirDrop.
I’m going to share my location with a fake Tim Cook account via iMessage.
Decide with whom you’d like to share your location with:
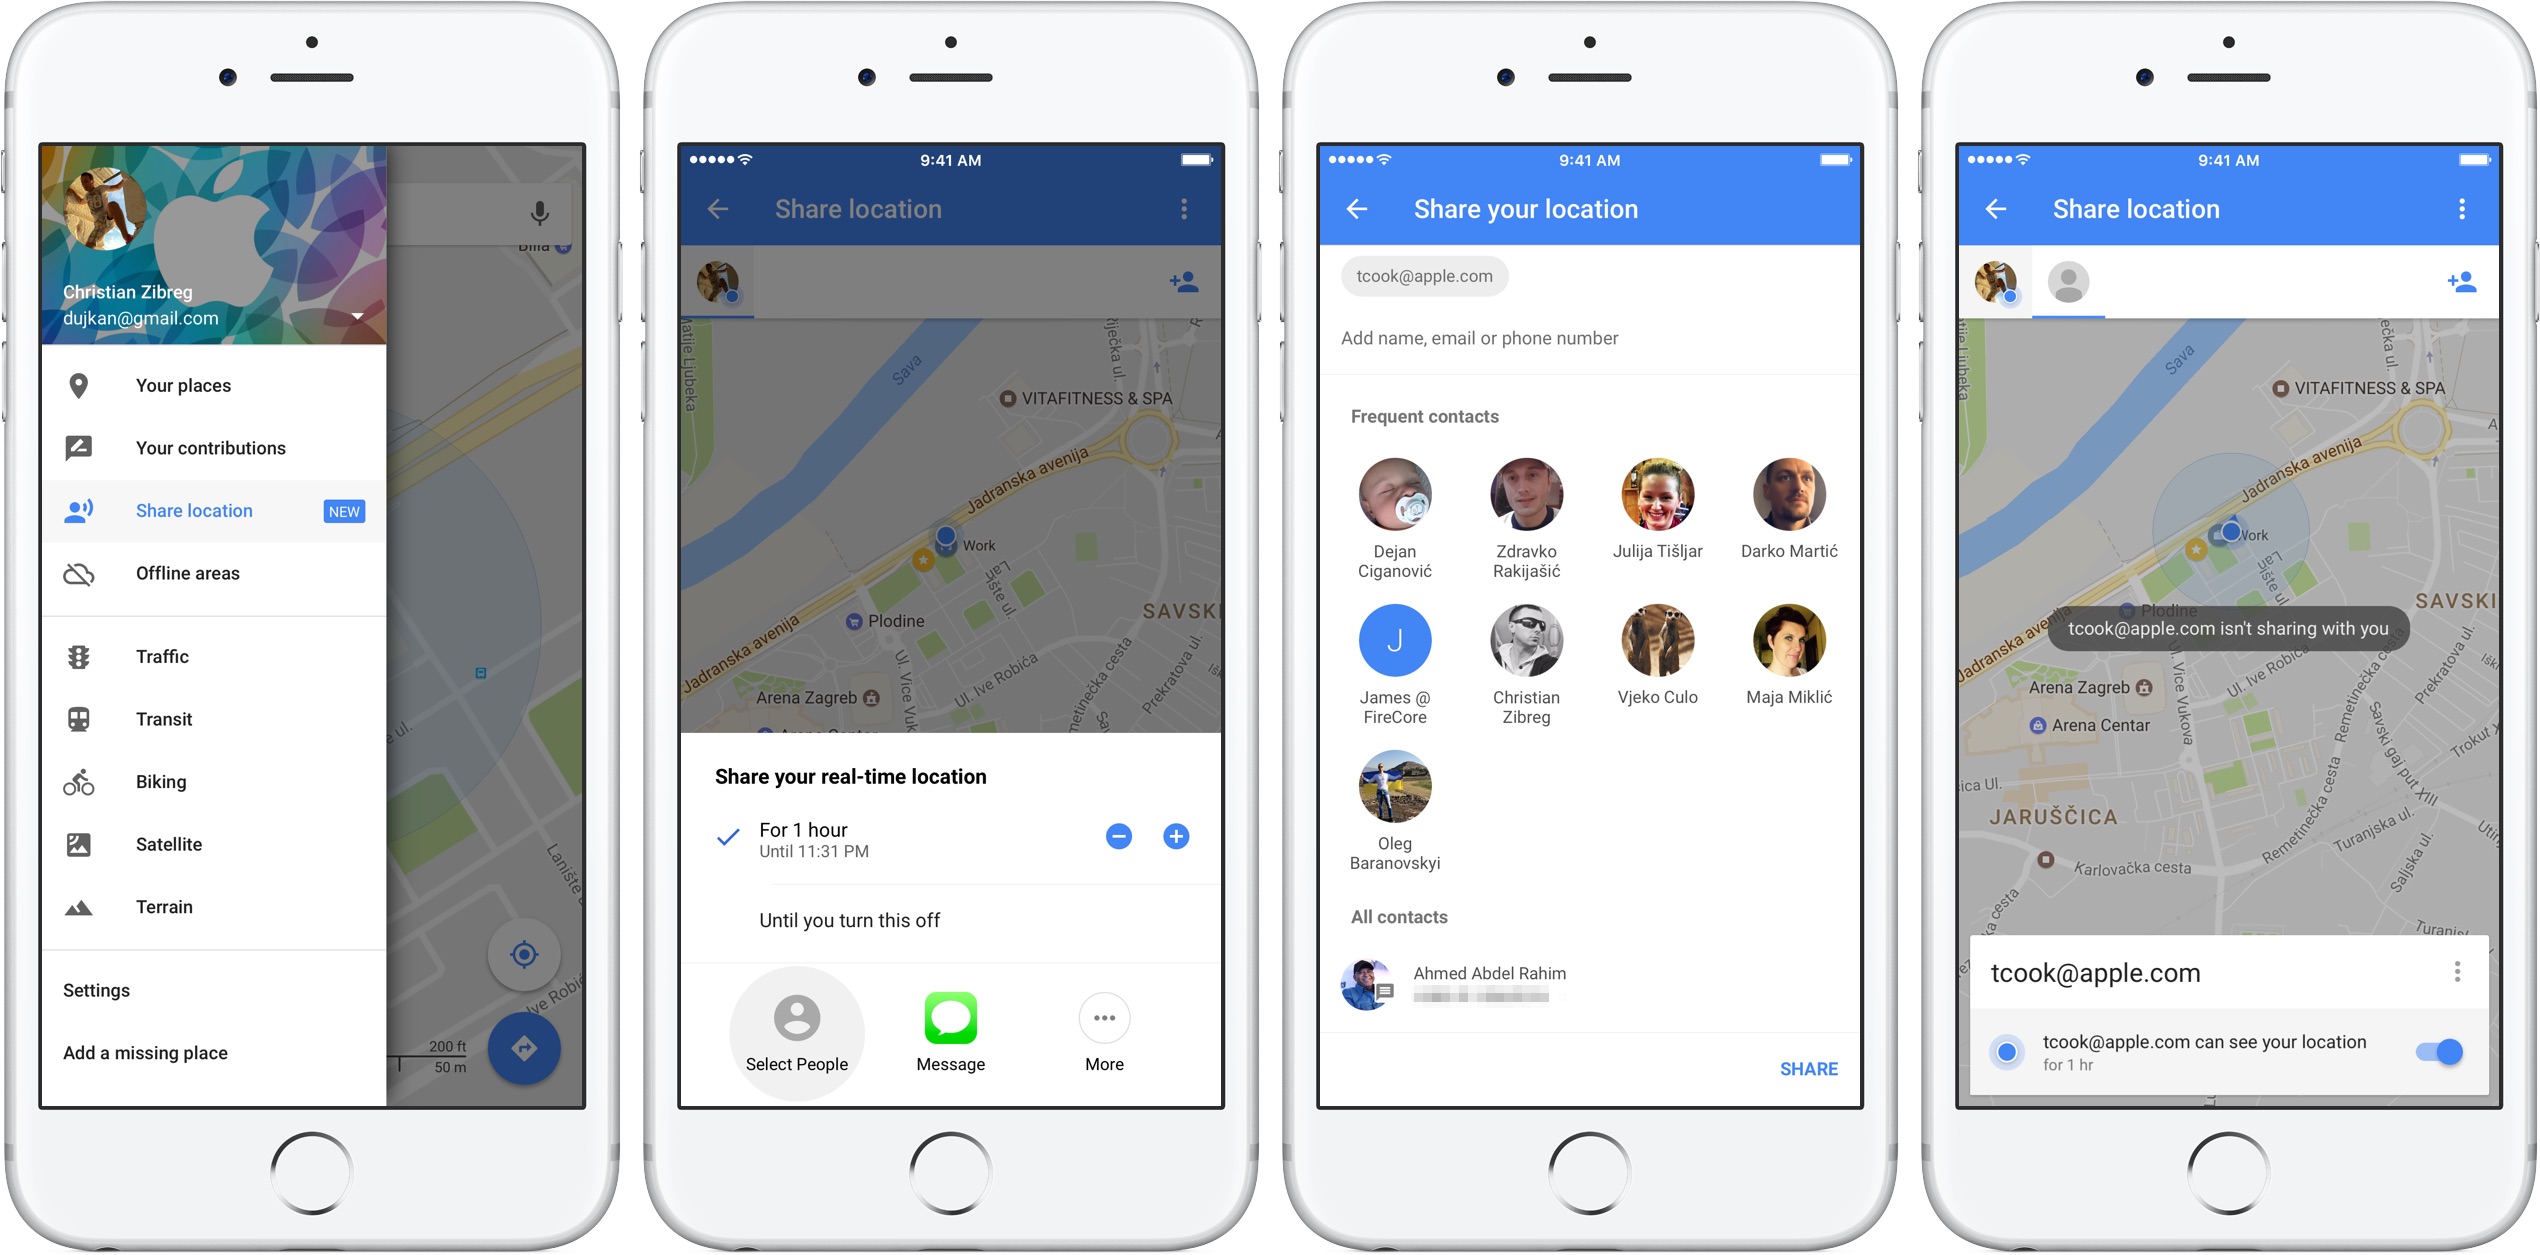
- People who have a Google Account—Tap Select People, then select a person you’d like to share your location with and tap Share. You may be asked to grant Google Maps access to Contacts. If you haven’t already, now’s a good time to add Gmail addresses of the people you’ll be sharing your location with to iOS’s Contacts app.
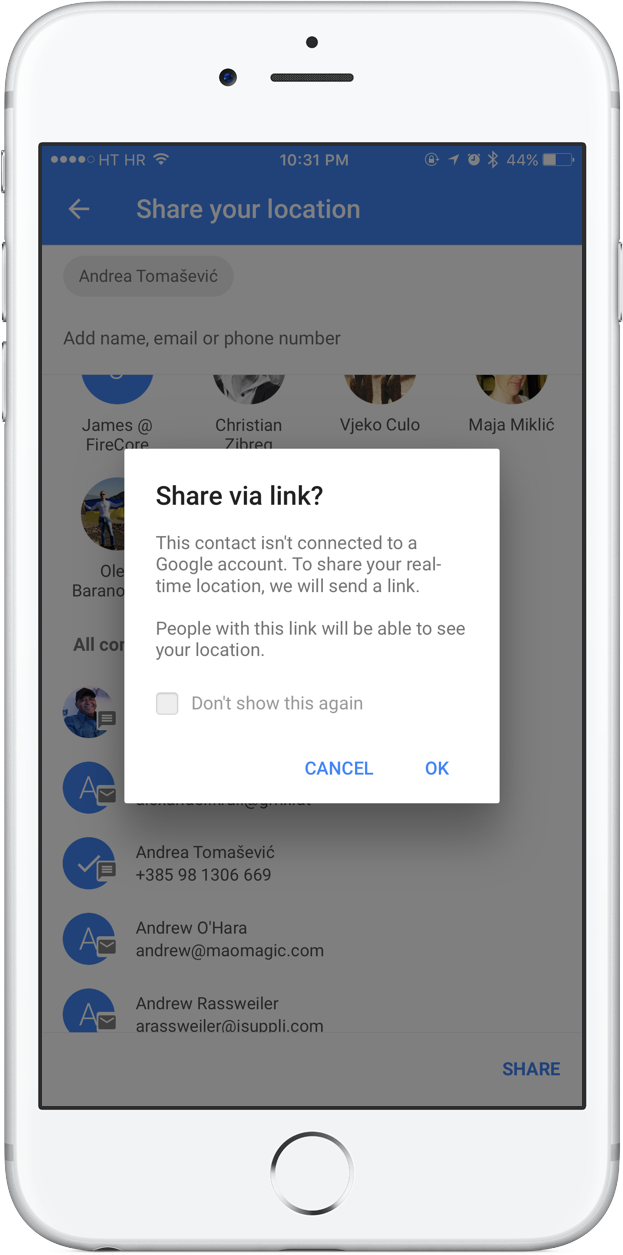
- People without a Google Account—For folks without a Google Account, select one of the available sharing methods such as Message or Mail to create a link they can open in the browser or the Google Maps app.
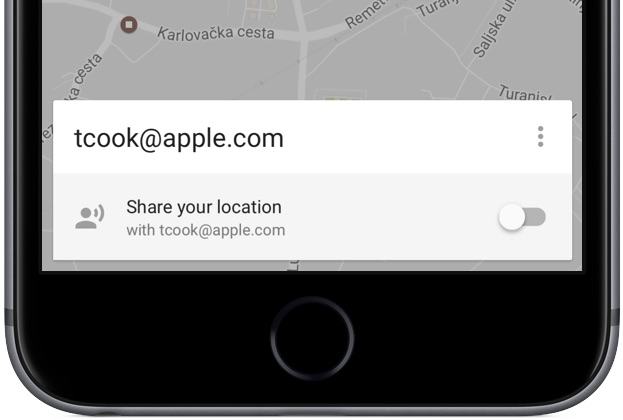
The person you chose will see that you shared your location with them.
Moreover, they will receive a notification on their Lock screen.
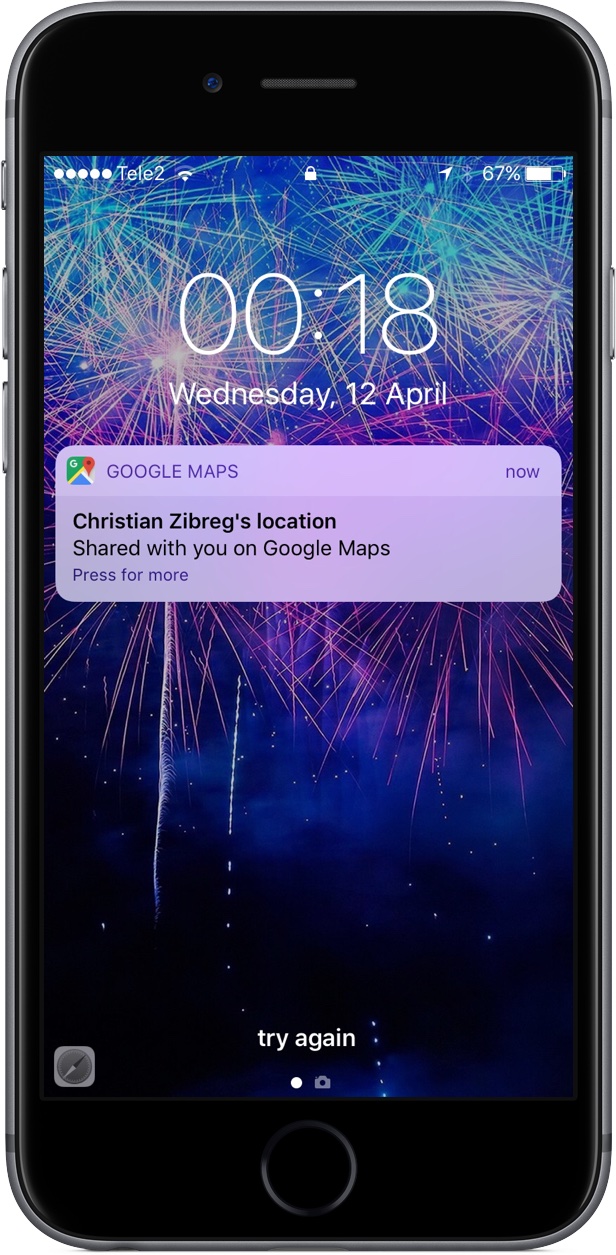
This is how my shared location would appear on Tim Cook’s iPhone.
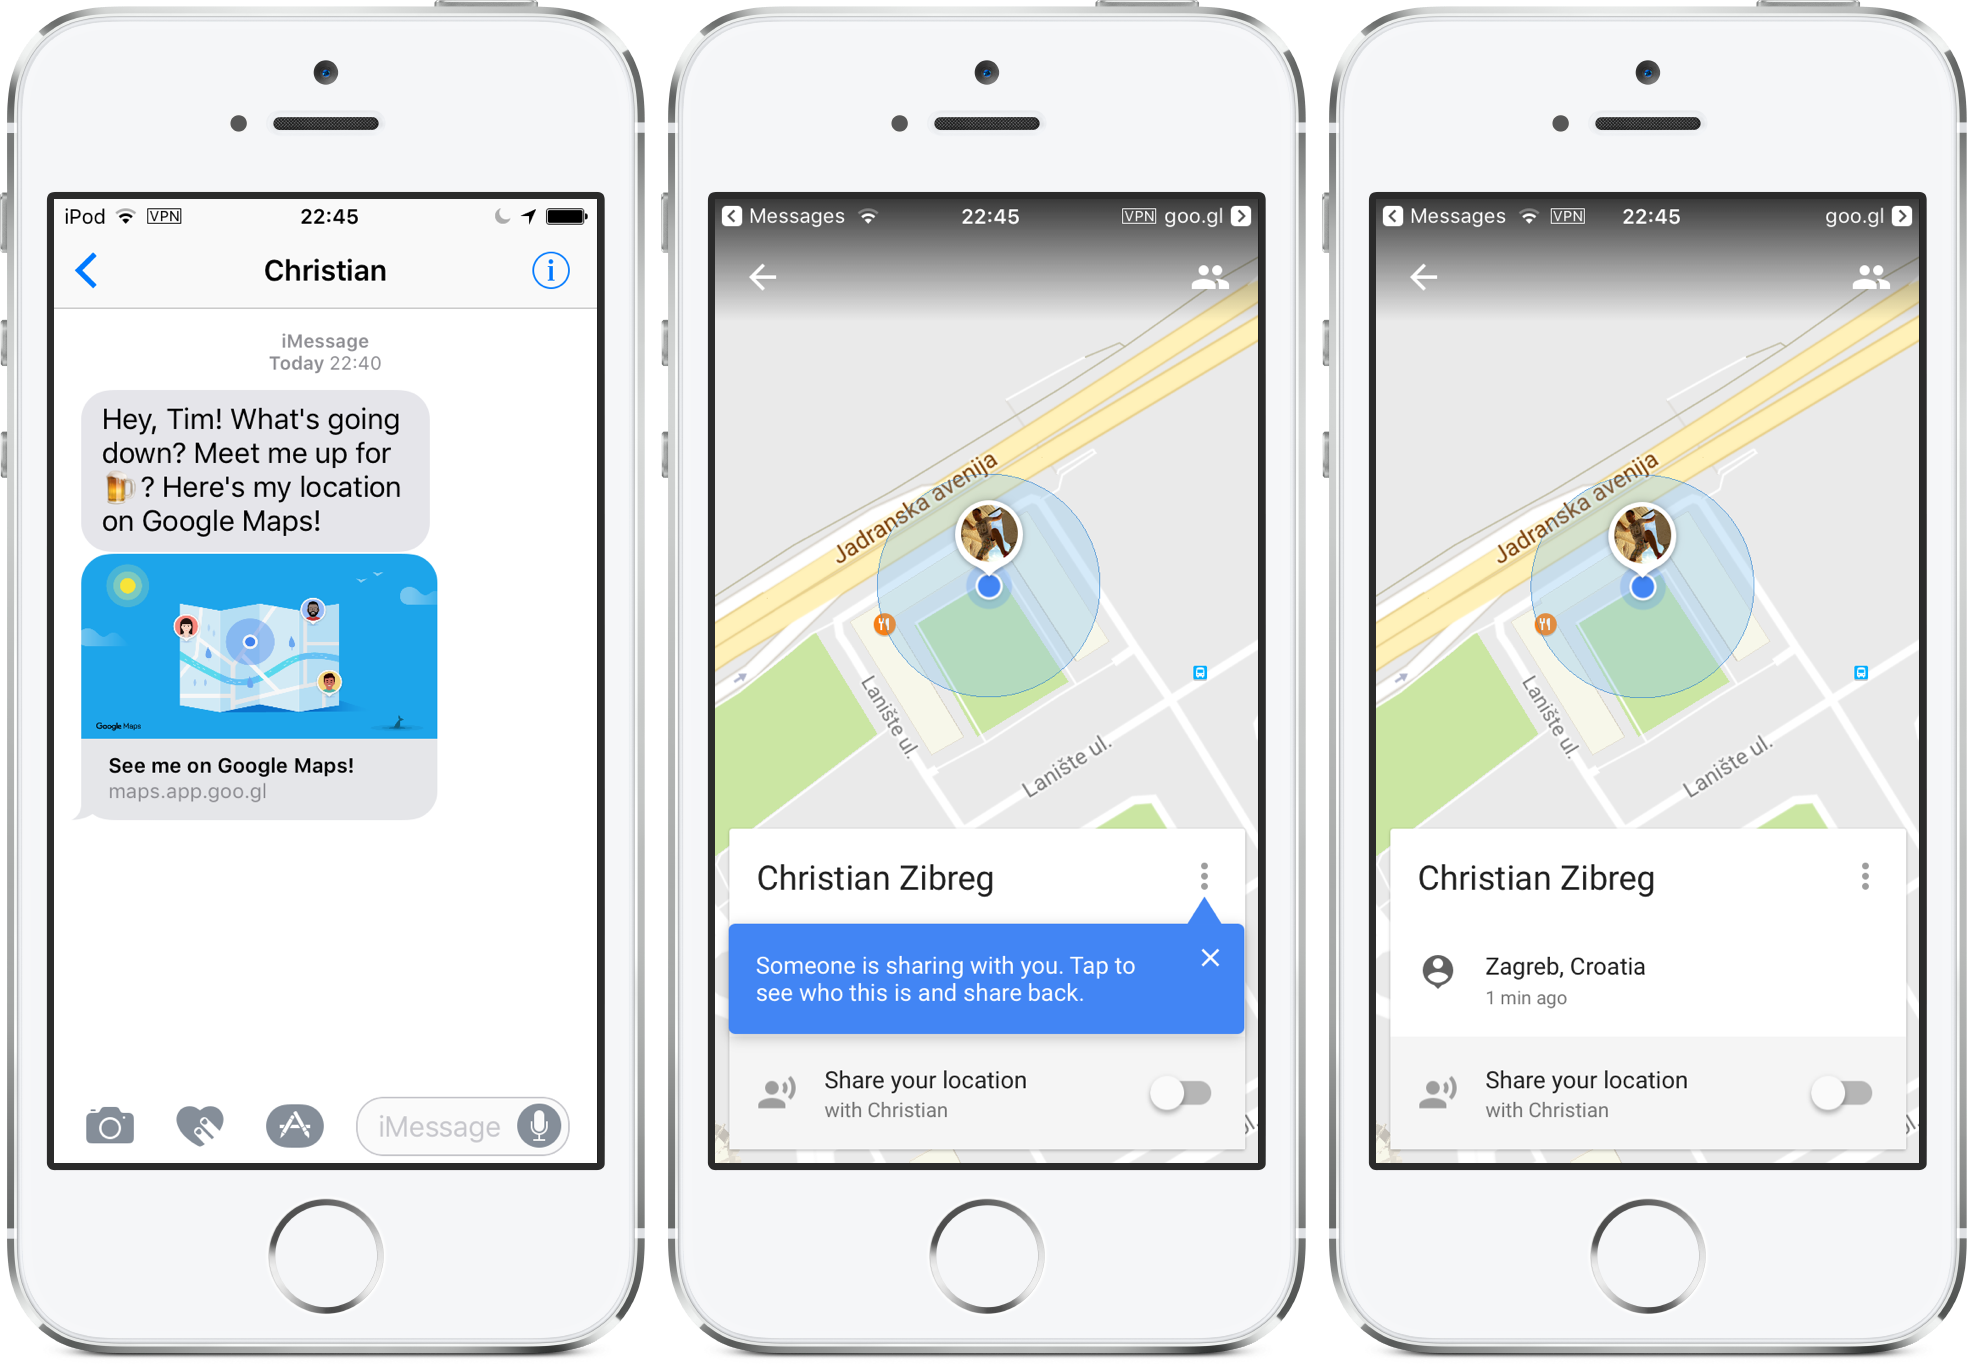
People you’re sharing with can optionally elect to share their location with you, too.
How to stop sharing your location
To stop sharing your location with someone, do the following:
1) Open the Google Maps app.
2) Tap the Menu icon in the app’s upper-right corner to display options.
3) Choose Share Location from the side menu.
4) Turn off the switch next to the person with whom you wanna stop sharing or tap the More icon in the people menu at the bottom, choose Stop sharing and tap Done.
If you’ve shared your location with a bunch of people and would like to stop sharing quickly, tap the More icon in the top-right corner (it looks like three vertically aligned dots) and choose Settings from the popup menu.
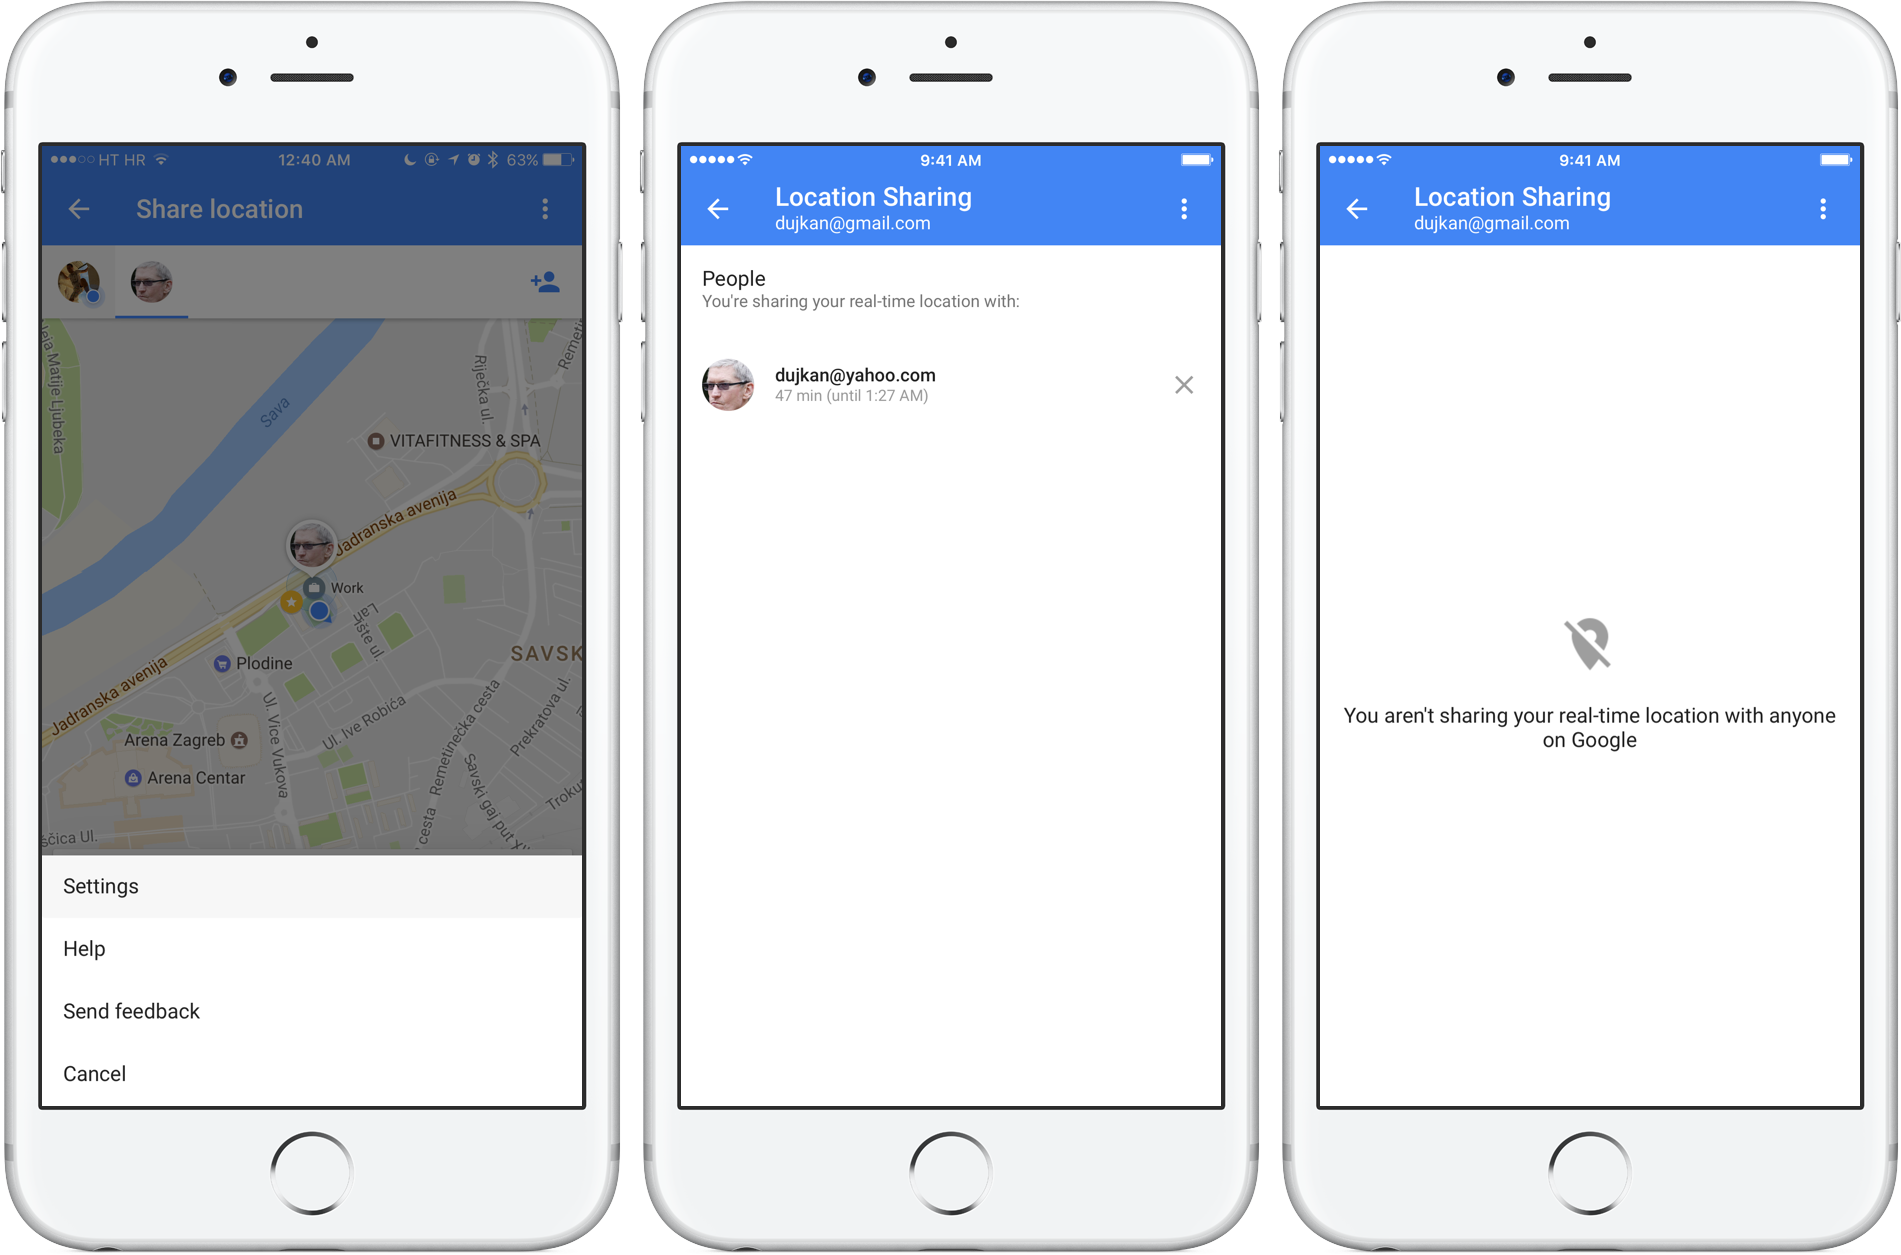
You’ll be greeted with the complete list of all the people you’re currently sharing your real-time location with. Tap “x” next to the person’s name to instantly stop sharing your location with them.
How to see where someone is
If someone shares their location with you, you’ll see their current location (updated in real-time) on a map on your computer and in the Google Maps app on iOS devices.
On desktop:
On your Mac, you can see the locations that people share with you but you cannot share yours. To share your own location, you need to use Google Maps for iOS.
1) Visit maps.google.com on your computer and click the Menu to display options.
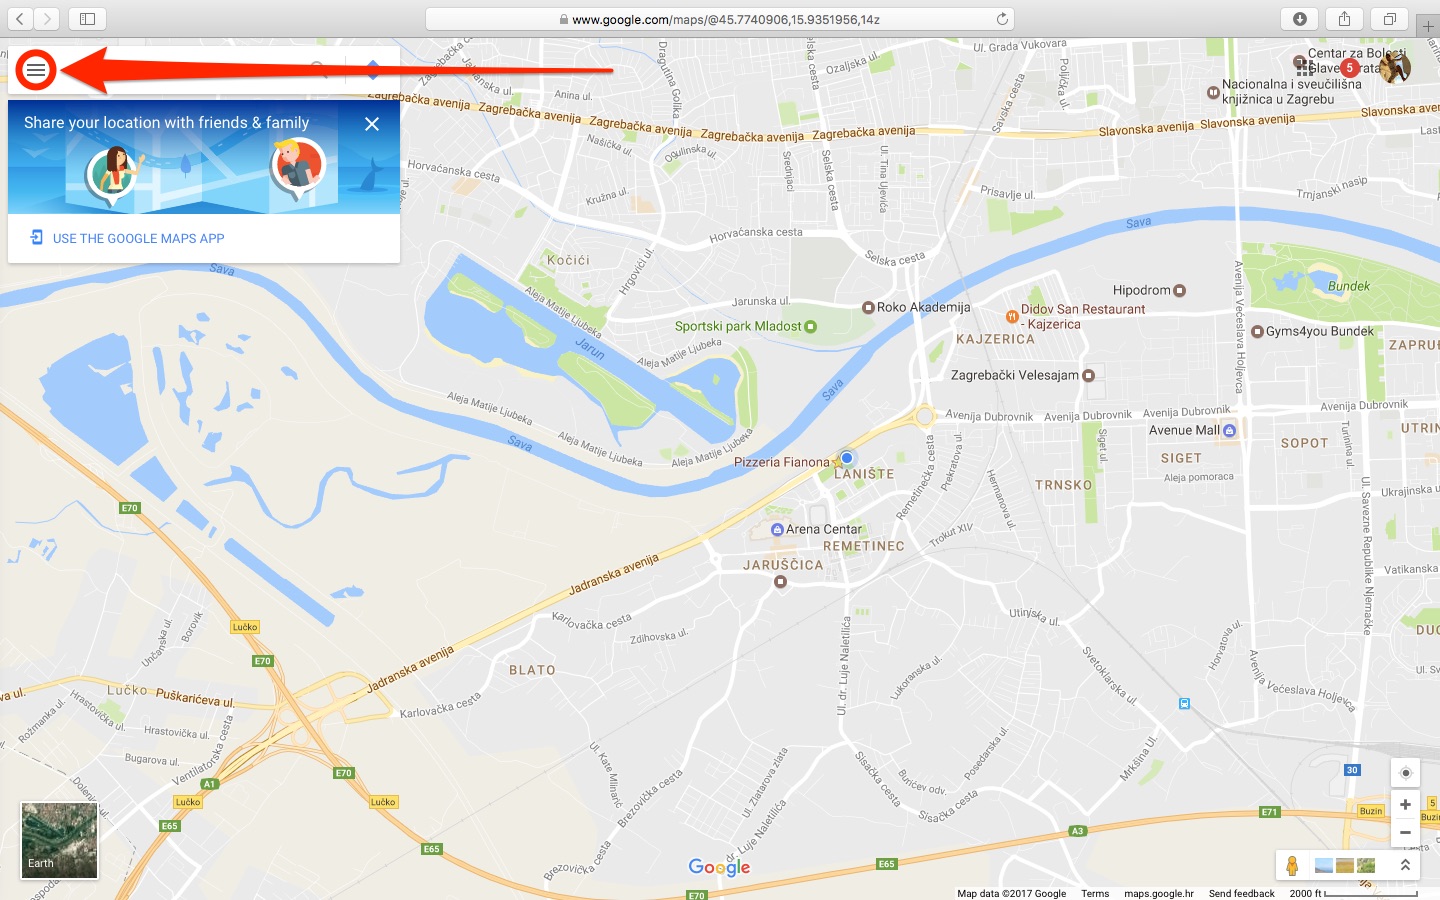
The button is located next to the search field in the upper-left corner.
2) Click Location sharing in the side menu.
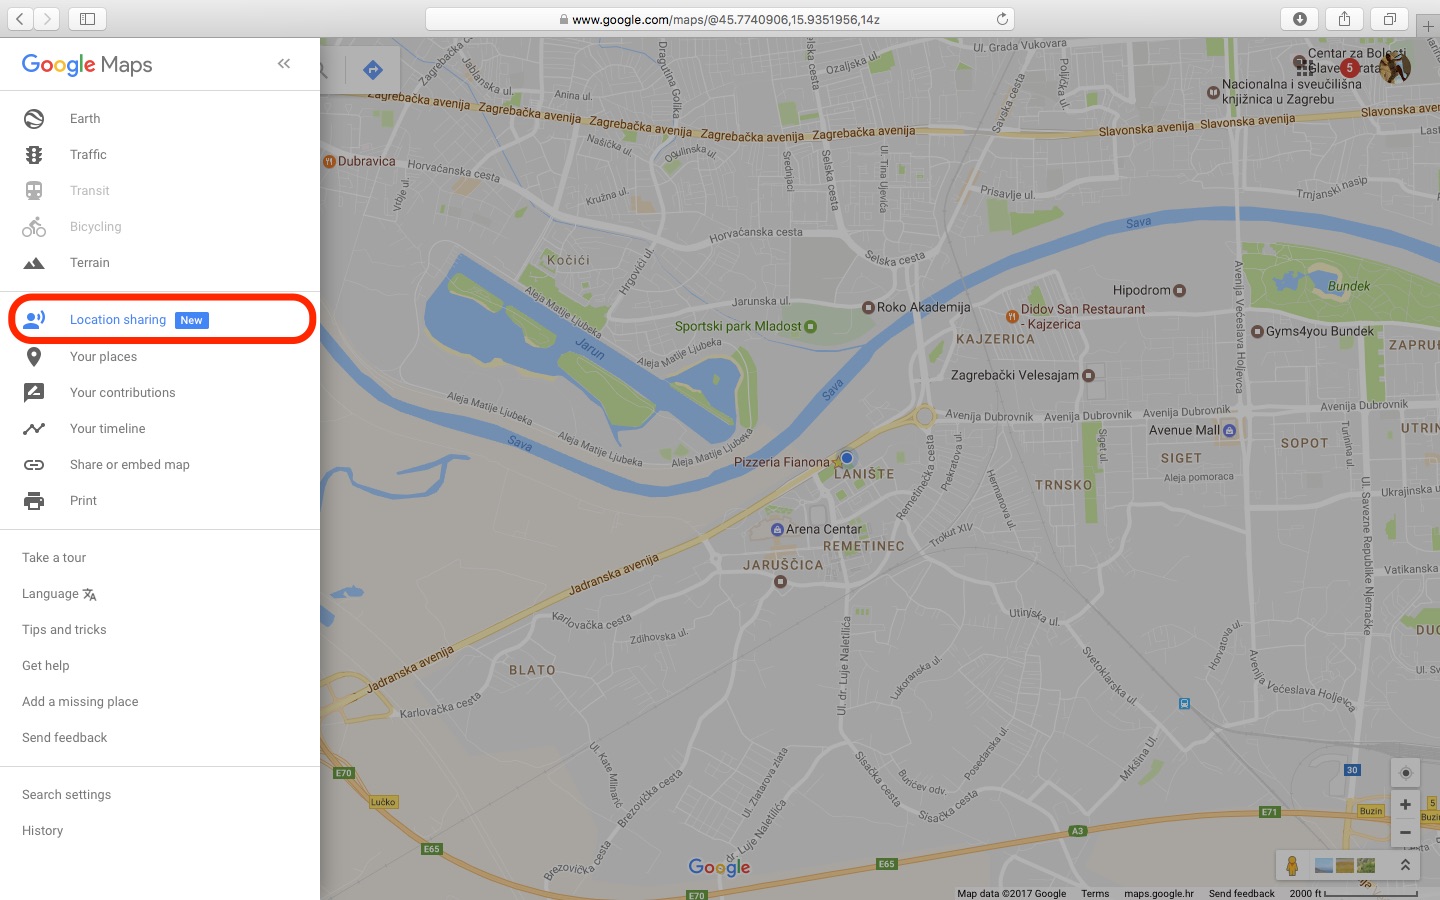
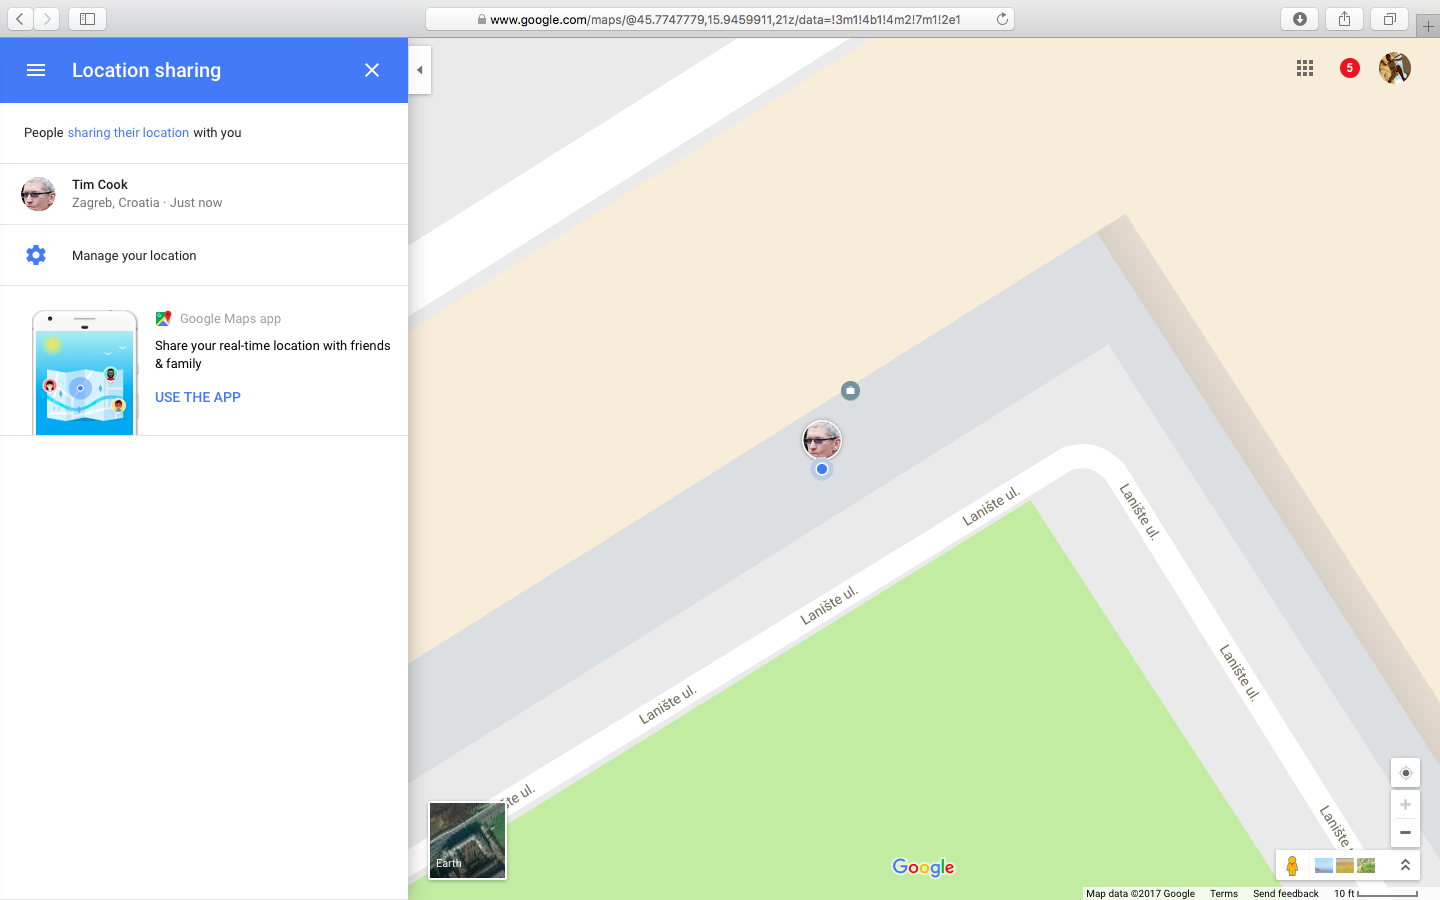
Up pops a list of friends that have chosen to share their real-time location with you.
On mobile:
On your iPhone, iPad or iPod touch, you can both share your own real-time location with others and see the locations of the people who have elected to share this information with you.
1) Open the Google Maps app.
2) Tap the Menu icon in the app’s upper-right corner to display options.
3) Choose Share Location from the side menu.
4) Tap a person’s icon at the top of the screen to see their location on the map.
TIP: To see the most recent location for a person, first tap their icon at the screen top.
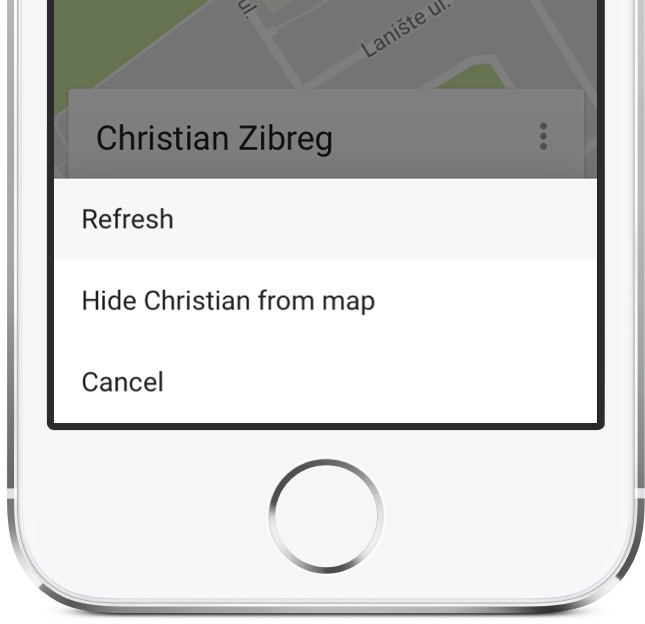
In the menu for that person that appears at the bottom, tap the More icon that looks like three vertically aligned dots, then select Refresh from the menu.
How to stop seeing someone’s location
To stop seeing someone’s location on a map, do the following:
1) Open the Google Maps app.
2) Tap the Menu icon in the app’s top-left corner to display options.
3) Select Share Location in the side menu.
4) Tap a person’s icon at the top of the interface.
5) Tap the More icon (it looks like three vertically aligned dots) in the top-right corner of the people menu at the bottom and choose Hide from map from the menu.

This will temporarily remove that person’s location from your map.
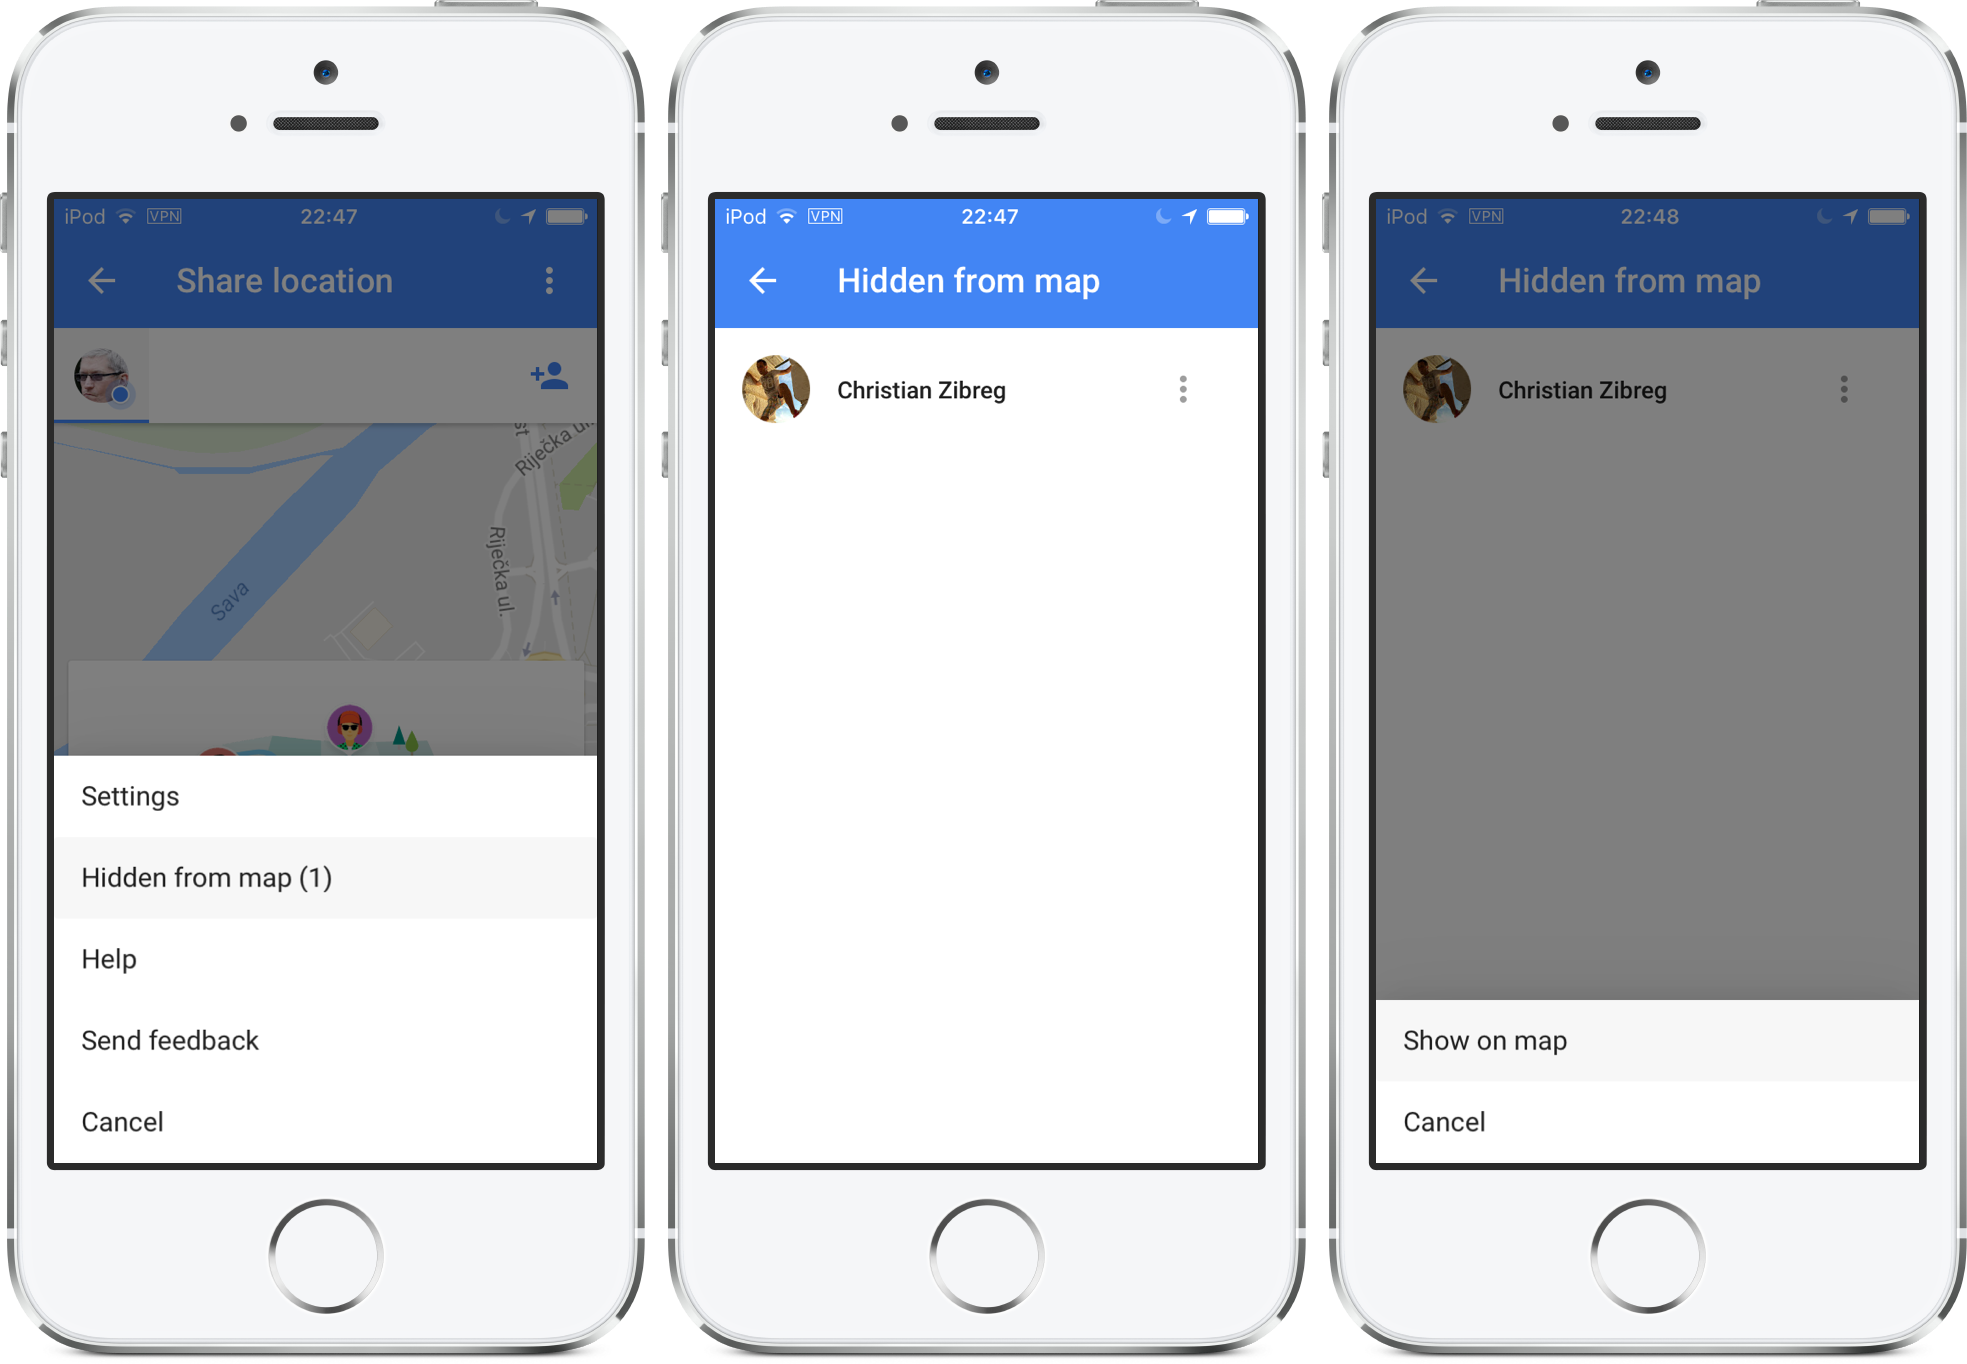
How to stop hiding someone
You can stop hiding a person if you’d like to see their location on a map again:
1) Open the Google Maps app.
2) Tap the Menu icon in the app’s top-left corner to display options.
3) Select Share Location in the side menu.
4) Tap the More icon in the top-right corner, then choose the Hidden from map option.
5) Tap the three dots next to a contact and choose Show on map from the menu.
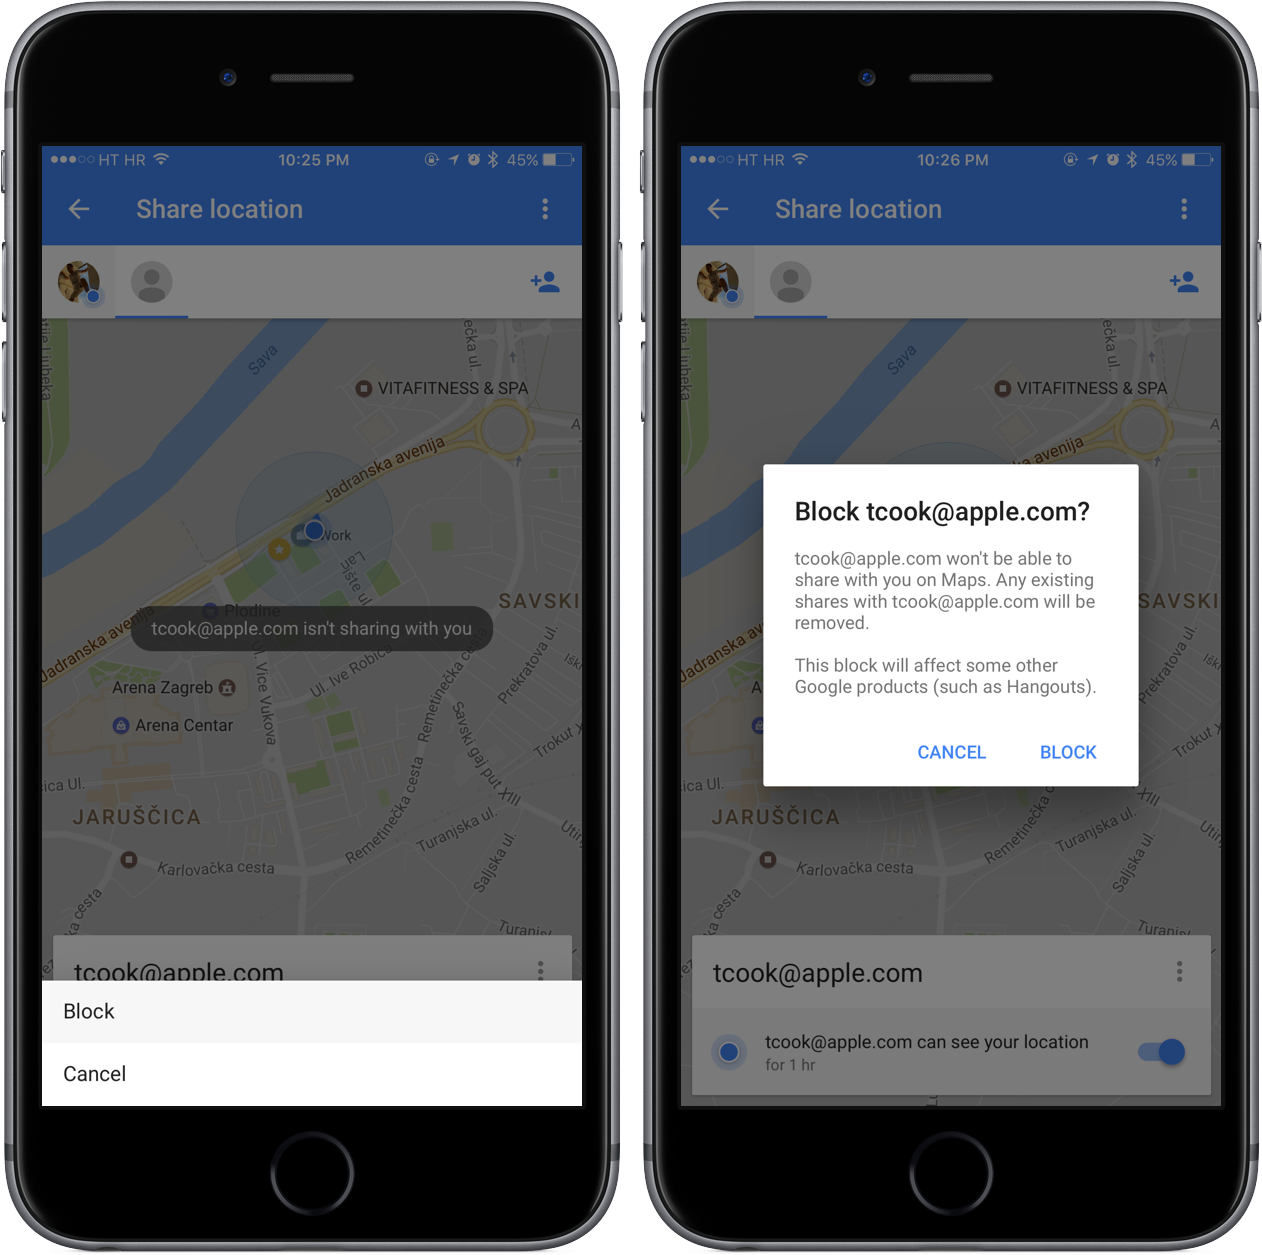
TIP: To stop someone’s location from ever appearing on your map, use blocking.
The Block action is available in Google+, Hangouts, YouTube or Google Photos. To view the Google Accounts you’ve blocked or unblock a user, visit the “Blocked users” section of My Account at myaccount.google.com/blocklist.
Related tutorials
Check out the following how-tos dealing with location services:
- Understanding Location Services built into your Mac
- Understanding Location Services built into your iPhone and iPad
- How to send locations from Google Maps for Mac to your iPhone and iPad
- Stopping iPhone and iPad from tracking your location
- Preventing kids from sharing their location on iPhone and iPad
- Keeping your iPhone from knowing where you’re going next
- Using Frequent Locations and Traffic Conditions features on iPhone and iPad
- 10 ways to increase privacy on iPhone and iPad
- Increasing privacy in Safari for iPhone and iPad
If you like this how-to, pass it along to your friends and support folks.