Smartphones have come a long way over the years. With advanced mobile technology we also have amazing and powerful apps. It’s the combination of these two that makes taking great photos with our phones possible. But when it comes to HDR photography, what do you do if you don’t own a camera or you left it at home? Why not use your iPhone for HDR?
We always have our phones with us these days. This means if you’re out and about and want to take a few photos, this is where your iPhone can give you amazing results when it comes to capturing and creating HDR photos.
After all, the iPhone is arguably the most popular camera in the world. Maybe the popular saying is correct: “The best camera is the one you have with you.”
In this post we will use a couple apps to create impressive HDR photos. We will first shoot photos on iPhone using an app called PureShot, and then we will edit these photos using Aurora HDR for Mac.
Here’s the general workflow we’re going to cover in this post:
- Introduction to HDR on the iPhone
- What is PureShot?
- Setting up the PureShot app
- Shooting exposure brackets with your iPhone
- Importing photos to your computer
- Editing your photos with Aurora HDR
MacPhun is running a temporary special offer on the Aurora HDR 2017 + Trey Ratcliff’s Compelte HDR Tutorail 3.0 for only $89. Use promo code idownloadblog at check out to get another $10 off!
Overview
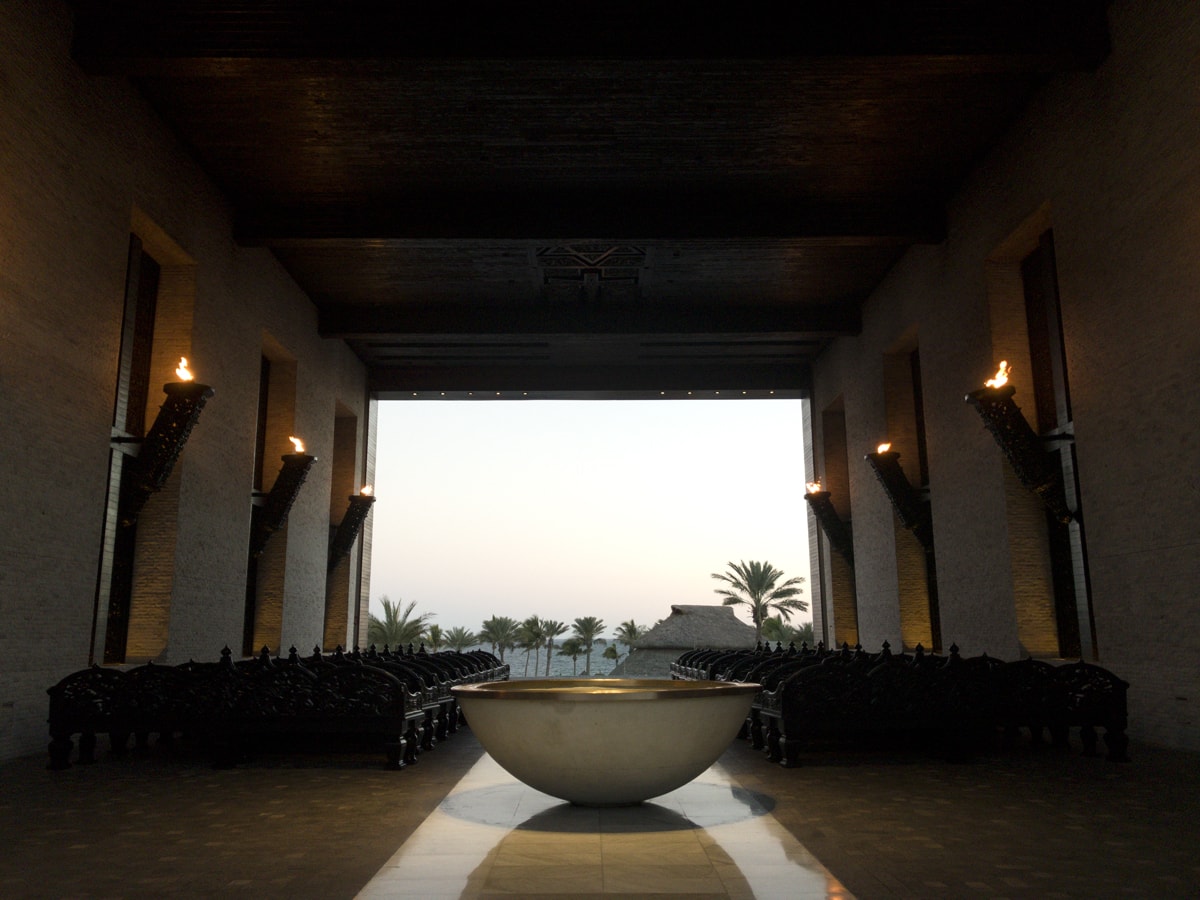
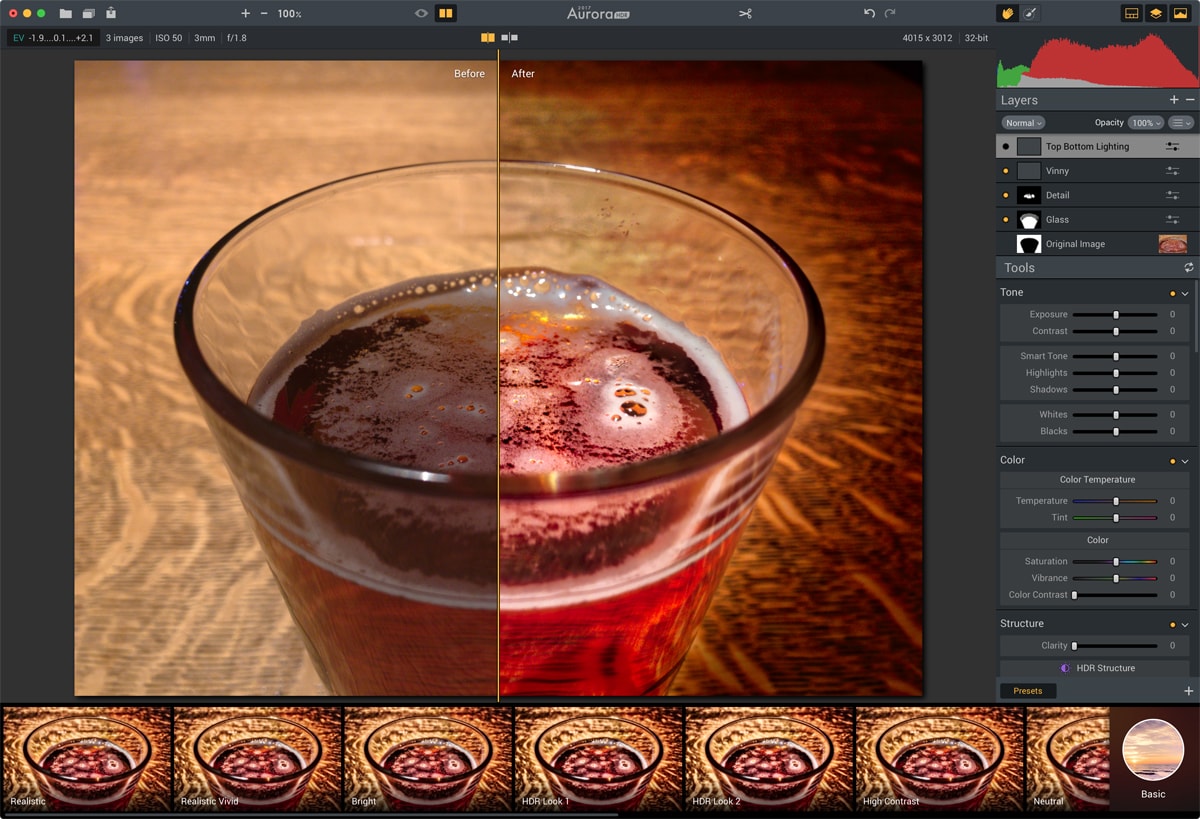
When you take a basic photo with your iPhone, it captures the photo set at one exposure and typically turns out a bit flat and looking a little blah (below).
But using a special app you can take three photos at different exposures (Dark, medium and light). This is called exposure bracketing.
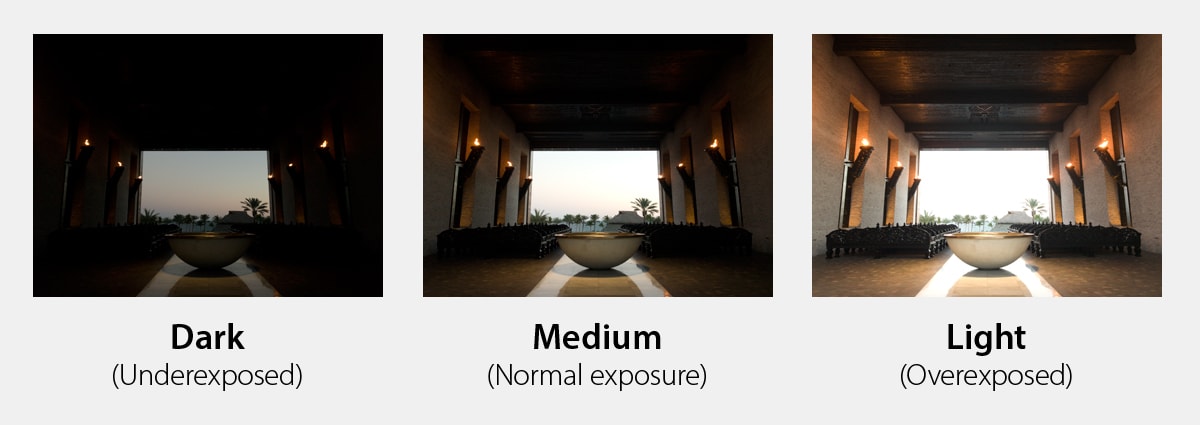
Using Aurora HDR, you can merge those photos together to create a stunning HDR photo.

Notice how the shadows are opened up, the crisp detail, the glow of color, and the overall image radiance. Notice the intensity of the flames on the torches have lit up the photo. As you can see, HDR helps bring back life into your photos.
Your iPhone’s HDR feature
As for the iPhone, there is an HDR option in the Camera app.
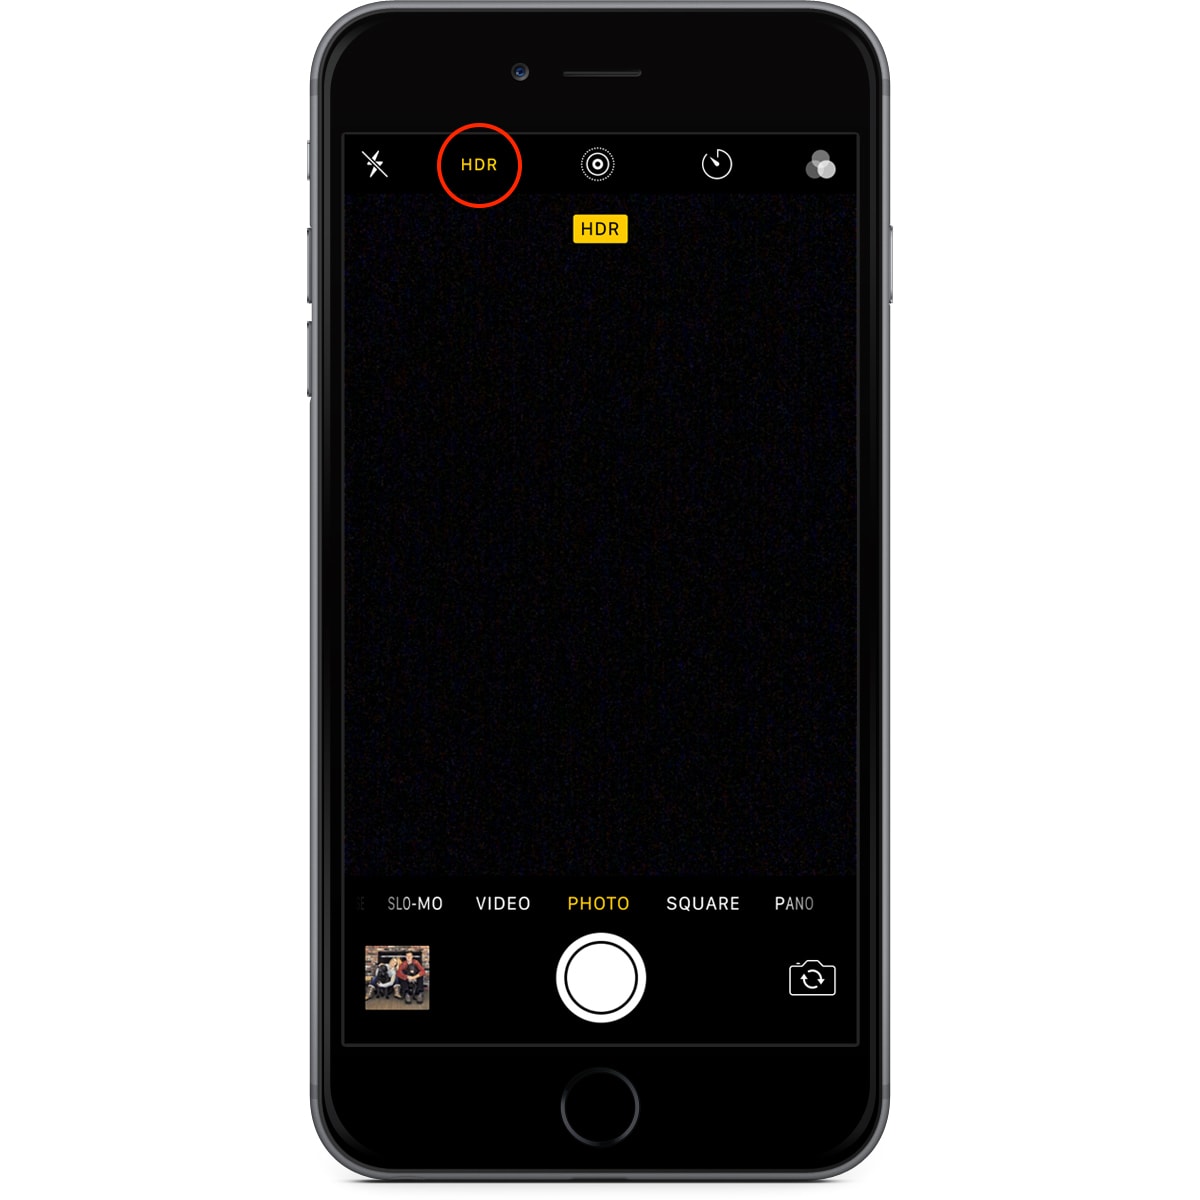
I have used that option a few times, but the HDR photos it produces aren’t impressive, at least not to the expectations most photographers may be looking for to create stunning HDR photos.
The limitation with the iPhone’s HDR is it doesn’t save the exposure brackets for post processing. The iPhone takes three exposures and merges them automatically.
The point of HDR is to take multiple photos at different exposures (exposure brackets) and bring them into your computer for editing using Aurora HDR to give you the desired outcome you’re looking for.
What is PureShot?
So the question I get a lot is, “because you don’t have a camera, how do you take multiple photos at different exposures with your iPhone?” The answer is, I use an app.
To turn your iPhone into a HDR powerhouse, download the app called PureShot ($2.99 on the App Store).
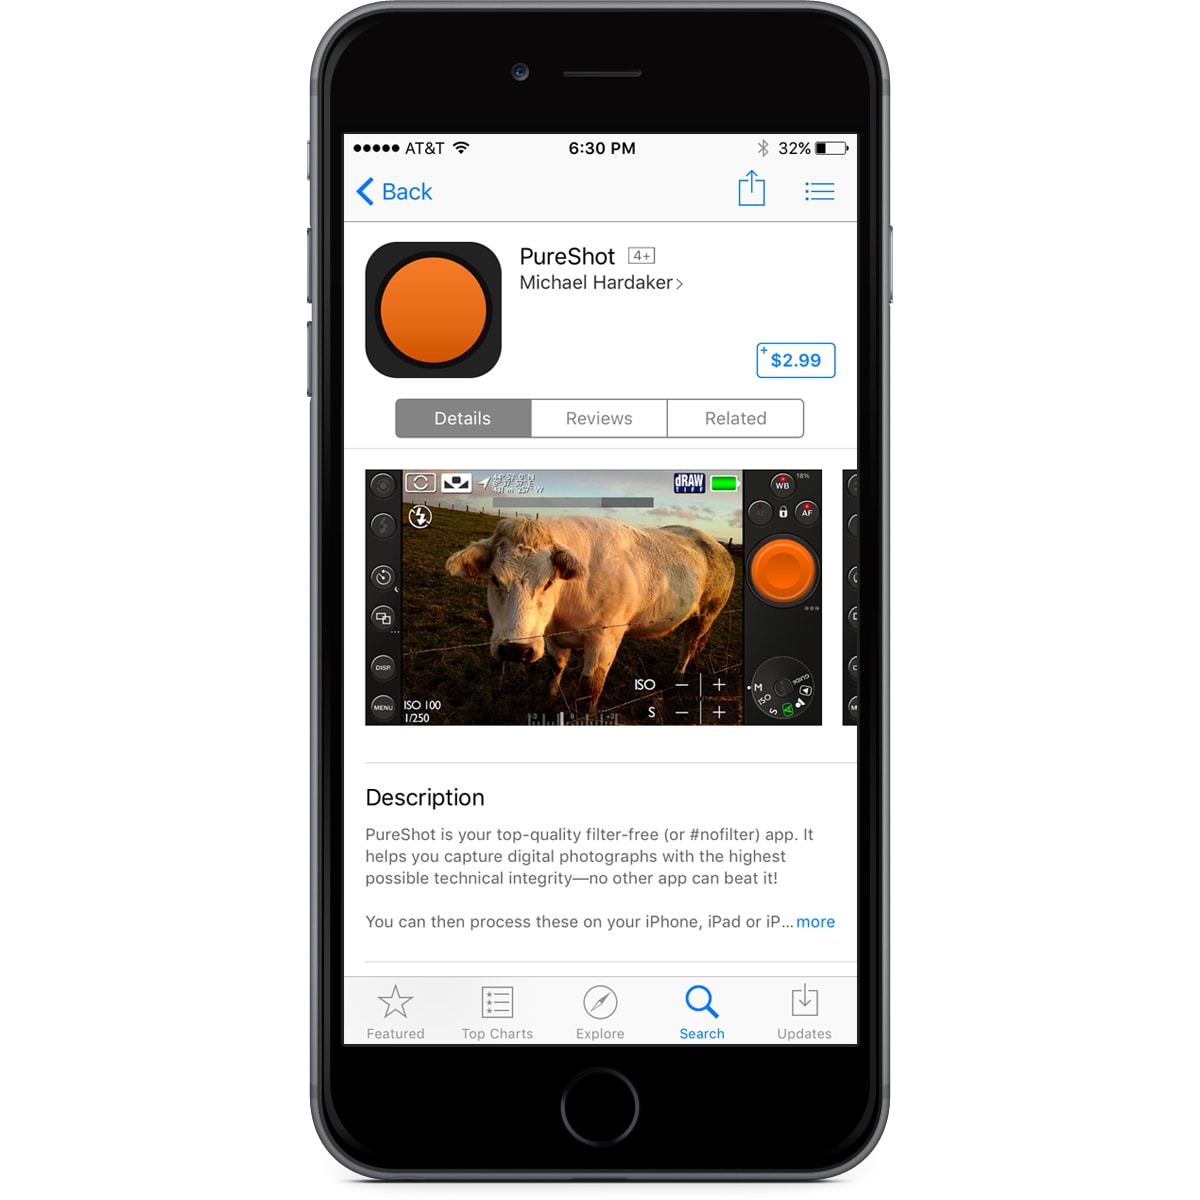
PureShot allows you to use your iPhone to take exposure brackets (three photos) that get saved into your camera roll, which you can import into your computer and edit using Aurora HDR.
Setting up the app
After downloading the app, you’ll want to change a few settings before you start taking photos, that way you’ll get the best quality results during the editing process using Aurora HDR.
Open the PureShot app and go through the introductory pop-up windows. You’ll first notice the interface of the app. It may seem a bit complicated with all the different buttons and graphics, but don’t be intimidated, you’re only going to change a few settings.
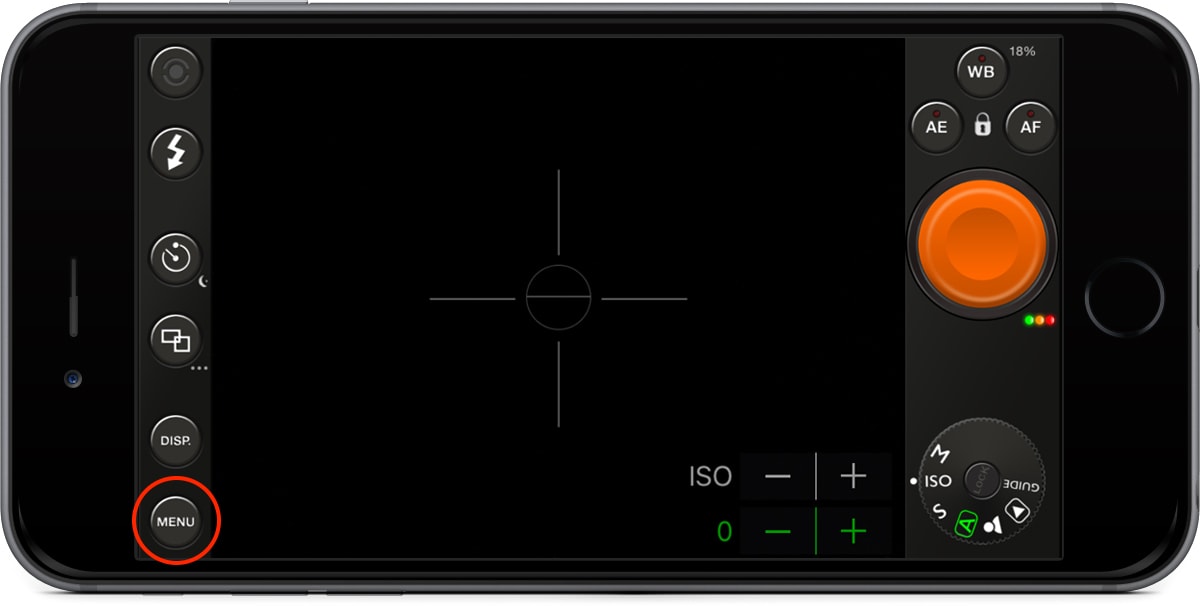
Step 1: Access settings.
Tap the Menu button to access the settings of PureShot.
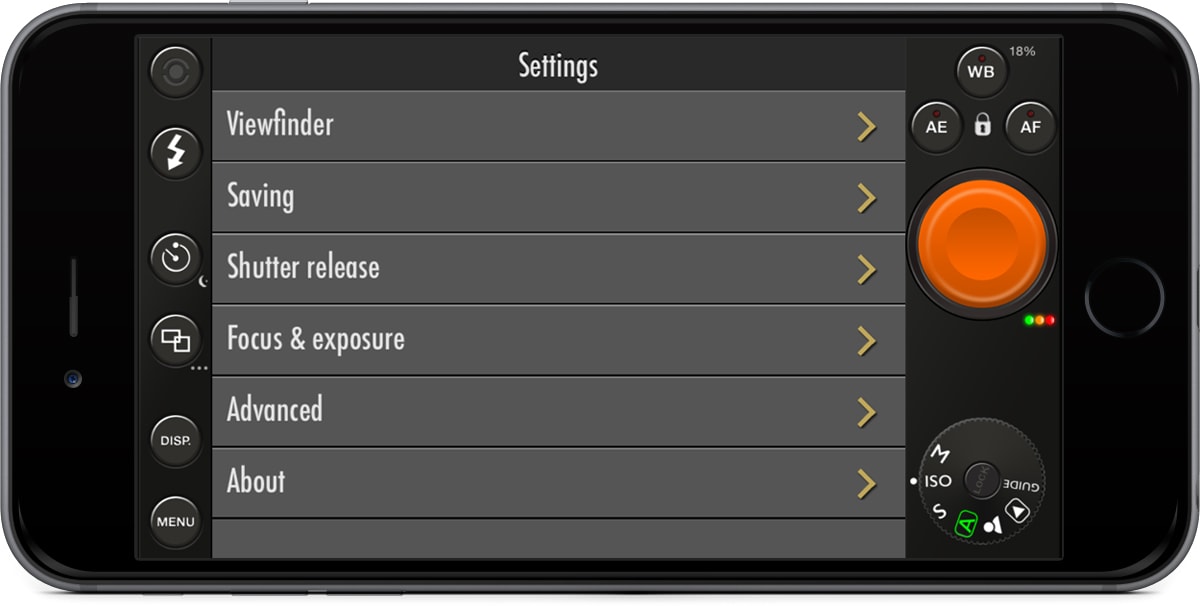
Here’s how the list of settings looks. You’re going to be changing a few of these so your iPhone can take the best quality photos possible.
Step 2: Set image quality.
Tap Saving > Image Quality > Camera RAW (DNG).
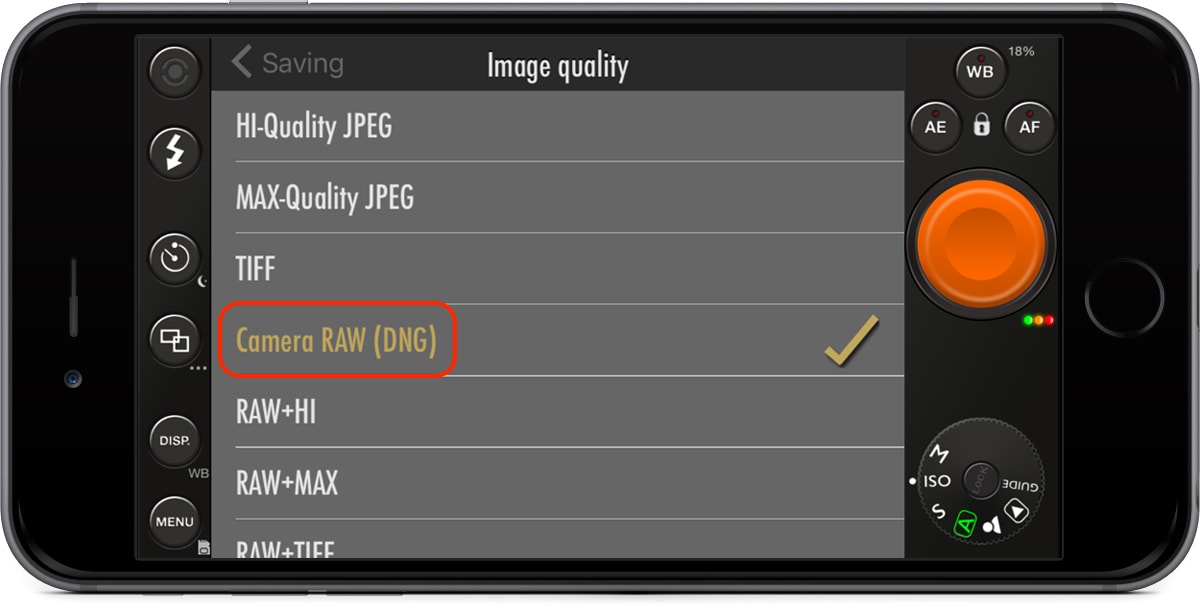
By default, the image quality is set to Hi-Quality JPEG. A JPEG photo is a compressed image format. Even though you can edit JPEG photos, some of the data is lost during the editing process.
We’re choosing RAW because it allows your iPhone to take the highest quality photo your camera sensor is capable of. It’s also beneficial for editing purposes as a RAW photo retains details in the highlights and shadows, and you won’t lose any data during editing. When it comes to editing, RAW is the best way to go.
Note: You need an iPhone that supports shooting in RAW, as this feature only works depending on the hardware of your iPhone.
Here are the compatible Apple devices for shooting in RAW: iPhone 7, iPhone 7 Plus, iPhone 6s, iPhone 6s Plus, iPhone SE, and the 9.7-inch iPad Pro.
If you have an older device than the ones listed above, you’ll want to choose TIFF. It’s not as good as RAW, but it’s the next best option. Be aware if you shoot in the TIFF format, the file size of each photo will range from 20 MB to 30 MB, which can fill up your iPhone quickly depending on your storage capacity.
Step 3: Set exposure bracketing.
Tap Menu for the main screen. Tap Menu again for Settings.
Tap Shutter release > Shutter fires > Bracket.
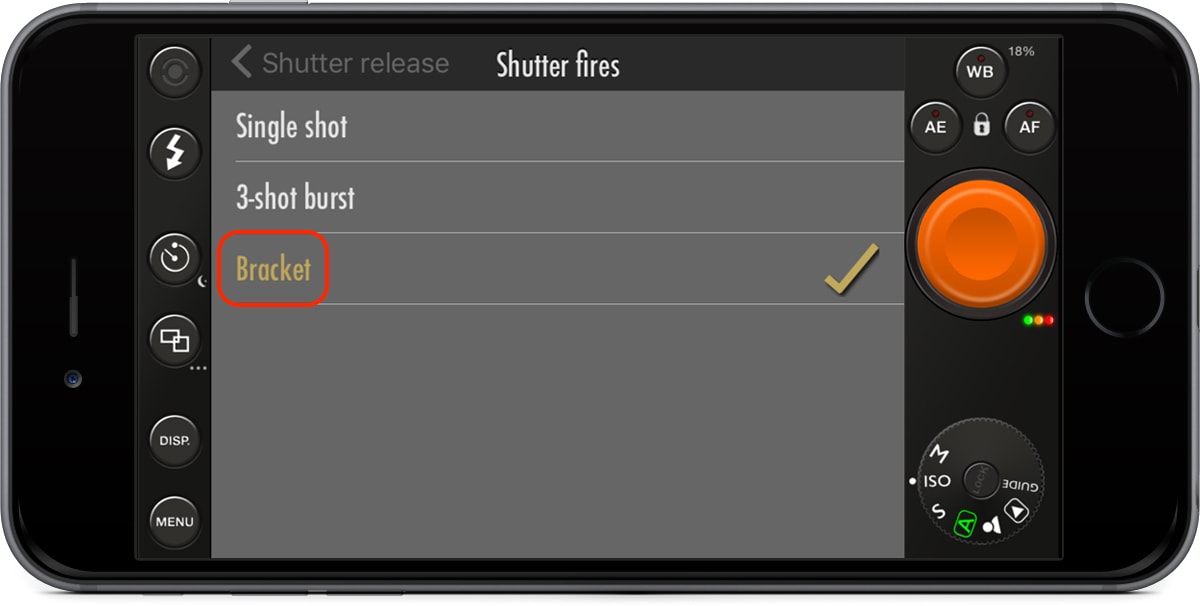
Choosing the bracket option allows your iPhone to take three different photos at different exposures (dark, medium and light). This is the main feature of the app that allows you to produce amazing HDR photos using Aurora HDR.
Step 4: Set exposure value.
This step is optional, but it’s useful to know when you want to take photos in different lighting conditions.
Tap Shutter release in upper left to go back a screen.
Tap Bracket mode bias > Tap 2 Ev.
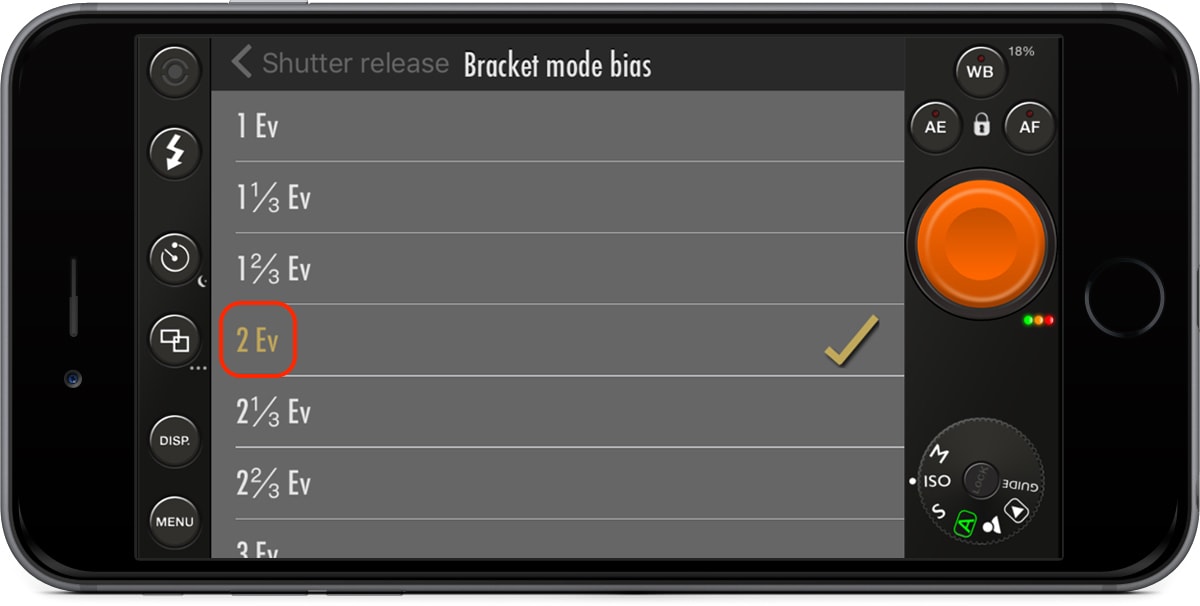
The “Ev” stands for exposure value. This setting lets you control the shutter speed of your iPhone’s camera. A low number captures less light, where as a high number captures more light. If you’re dealing with a low-light situation like a night shot, you might want to use 3 Ev. I use 2 Ev for most photos I take, as I find it works for most lighting conditions.
Step 5: Setting the remote.
This step is optional, but can be useful. When shooting bracketed photos, it’s important your iPhone be as still as possible. To accomplish this, I would suggest you set your phone on a stable surface or use a tripod. This will ensure your three bracketed photos are practically identical so when you import them, Aurora can align the photos perfectly. This will result in sharp and highly detailed HDR photos.
Tap Shutter release in upper left to go back a screen.
Tap Hardware shuttler release > Tap On.
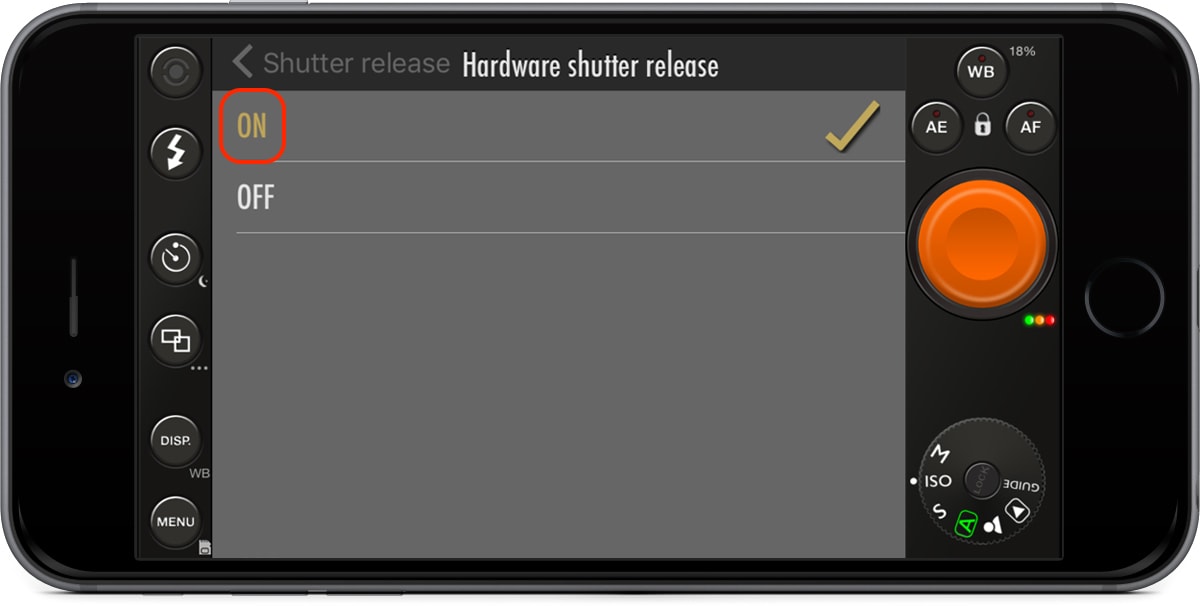
With this feature turned on, you can connect your headphones to your iPhone and press either of the volume buttons on your headphones to take your bracketed shots. You can also use a Bluetooth remote to take your shots wirelessly.
My tripod of choice is the MonoShot. Priced at only $59, it’s conveniently portable, lightweight, easy to setup, works with an iPhone case or not, and comes with a Bluetooth remote so you can take photos hands-free.
There are more settings as you saw while going through the app. Feel free to experiment with the other options, but the settings you changed is the basic foundation you need to take quality photos.
Shooting your brackets
Taking your three photos at different exposures is easy.
You can either:
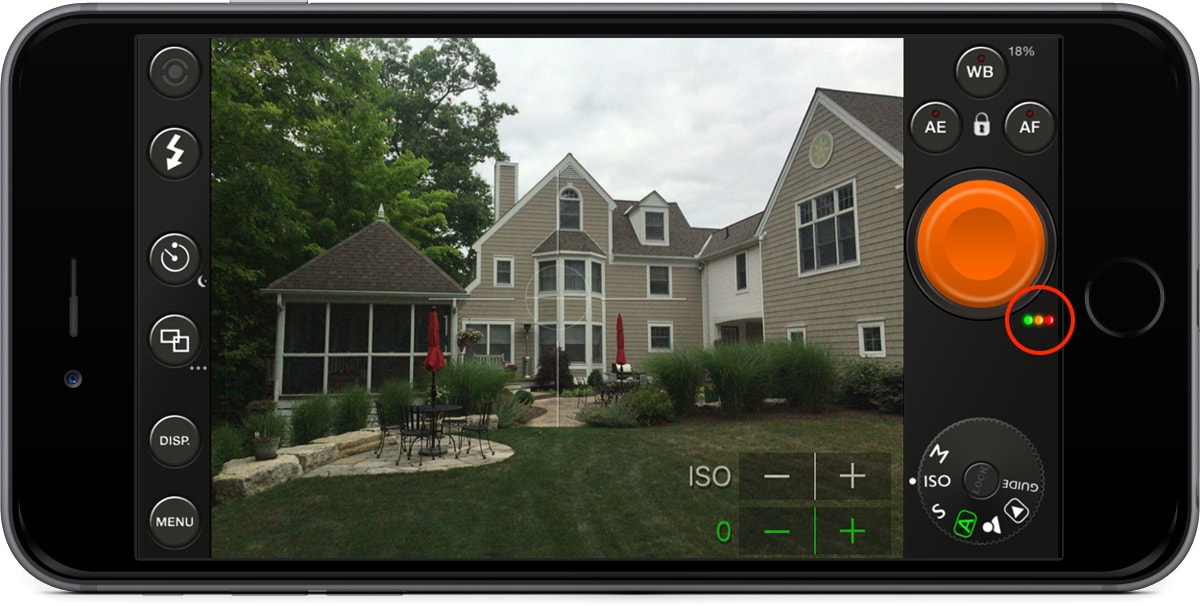
- Tap the orange circle button (below).
- Press either of the volume buttons on your headphones when connected to your iPhone.
- Use a Bluetooth remote as mentioned above.
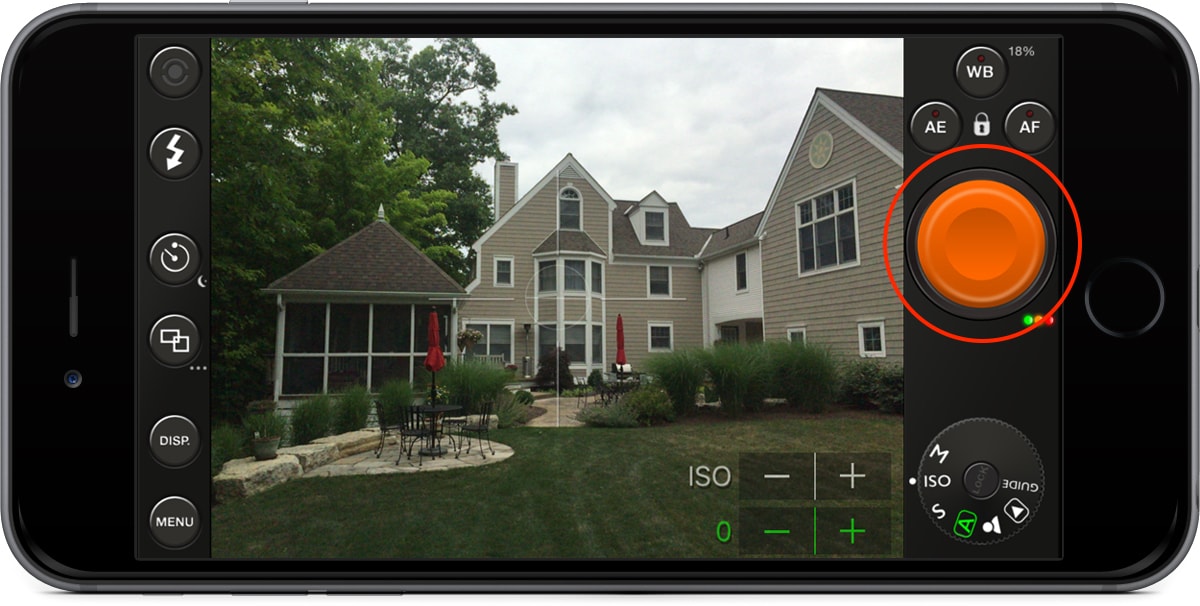
Note: The tiny green, orange and red lights (below) indicates you’re in bracket mode. If the lights are gray, bracket mode is turned off.
Accessing your bracketed photos
After you take a photo with PureShot, the three photos get saved to your Photo Library automatically.
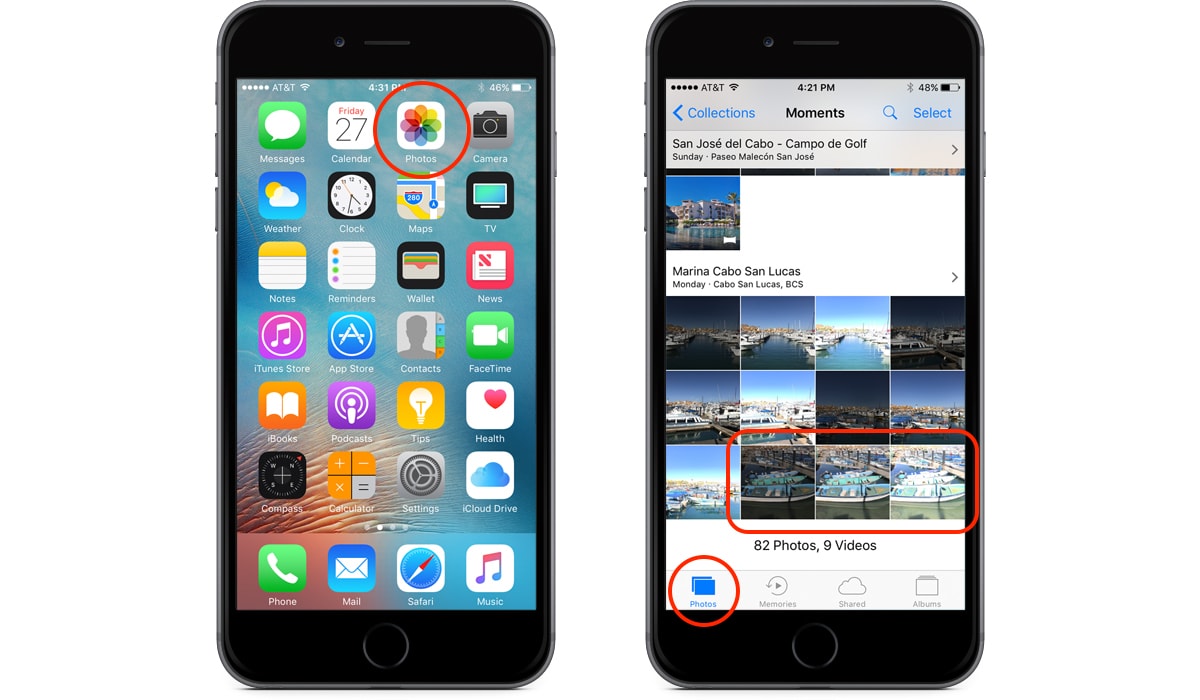
Open your Photos app > Tap the Photos button in the lower left (Your most recent photos will appear at the bottom).
Transfer photos to your computer
You can transfer your photos from your iPhone to your Mac in multiple ways. The way I would suggest, if you have a newer iPhone and Mac computer, is to wirelessly transfer them using a feature called AirDrop.
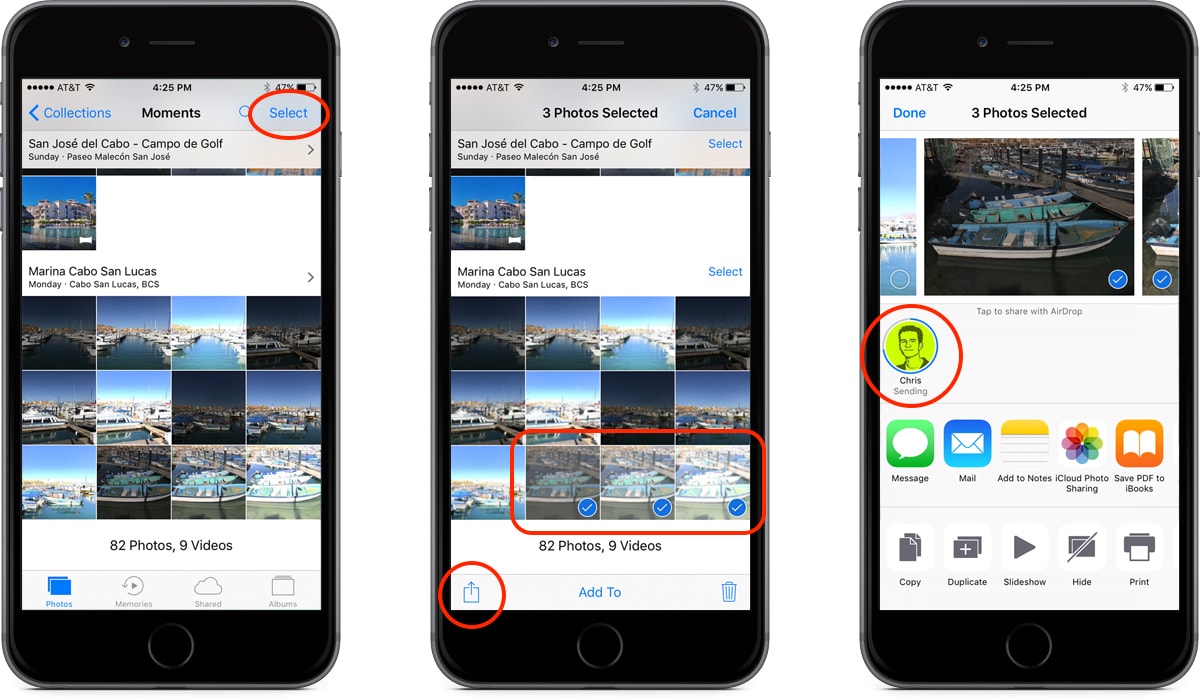
In the Photos app, tab Select > tap your photos to select them > tap the share button in the lower left > tap on your name in the AirDrop area.
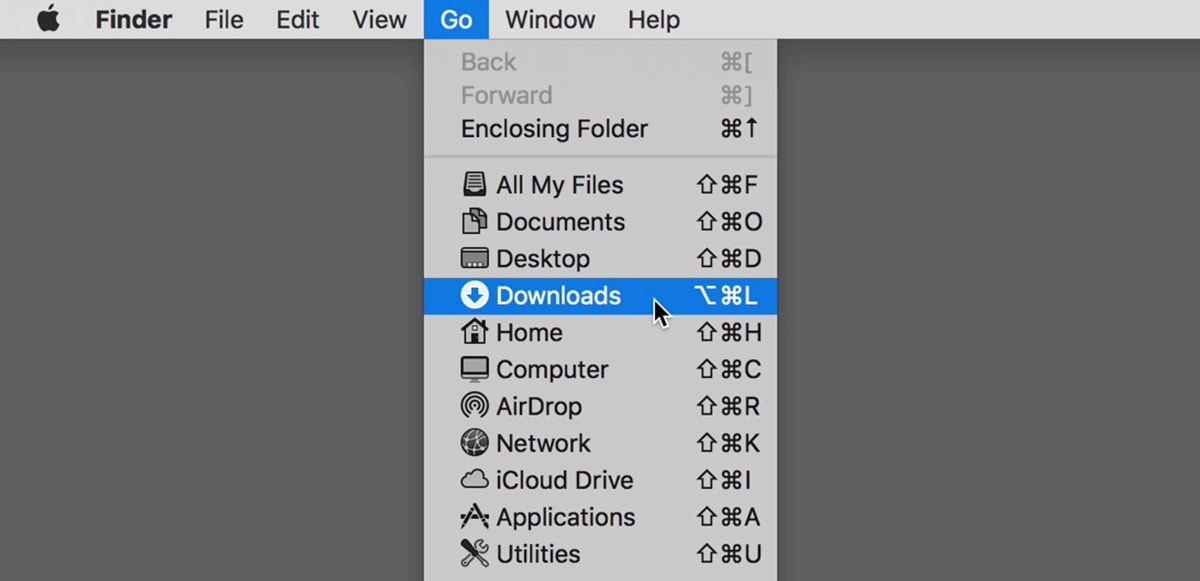
After your photos transfer to your computer, they are saved to your Downloads folder.
From the Finder menu bar, click Go > Downloads.
From here you can move them from your Downloads and put them on your Desktop, Documents folder, or anywhere else you want on your computer.
Editing with Aurora HDR
Now comes the fun part: Editing your photos using Aurora HDR, a $89 app with a free trial available.
The first thing you’ll want to do is add Aurora to your Dock to make importing your photos super easy.
Tap the F4 key at the top of your keyboard to bring up Launchpad.
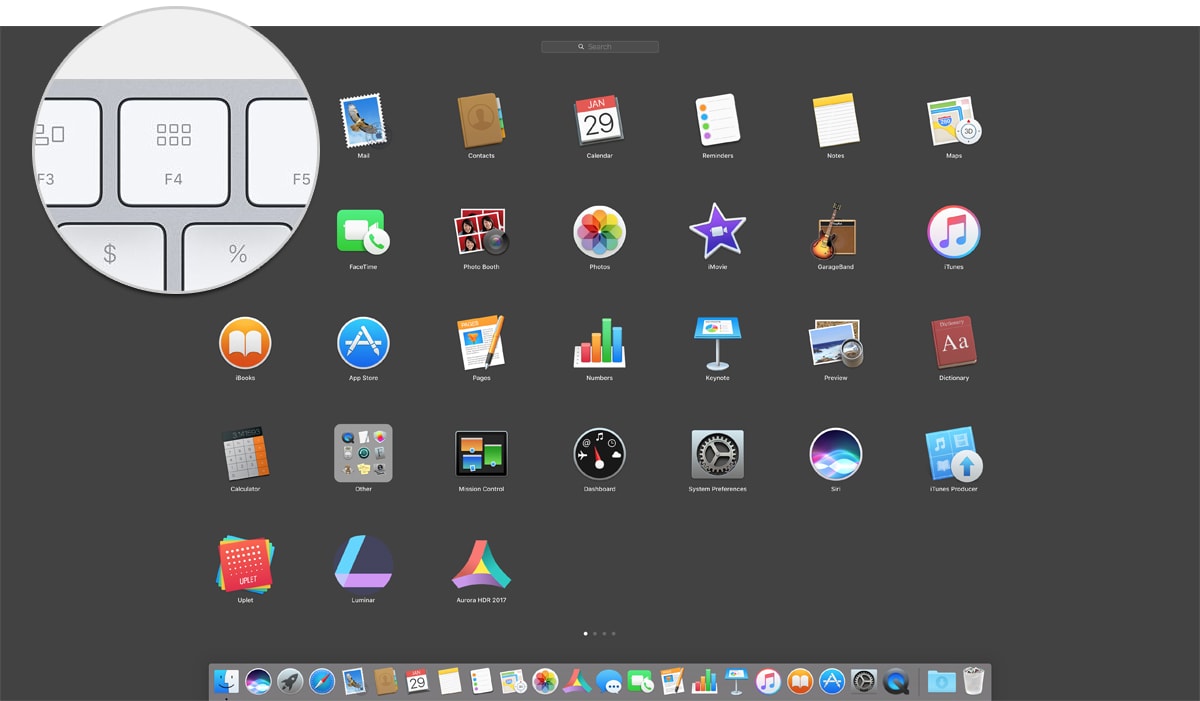
Find the Aurora app and drag it down to add it to your Dock.
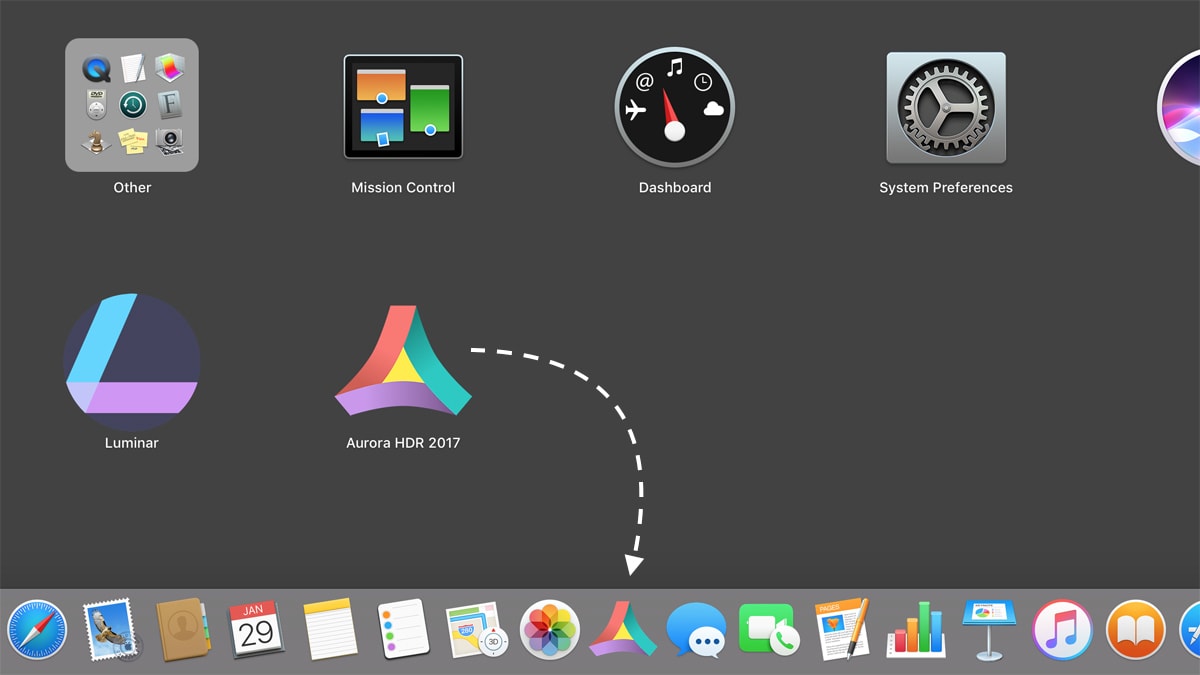
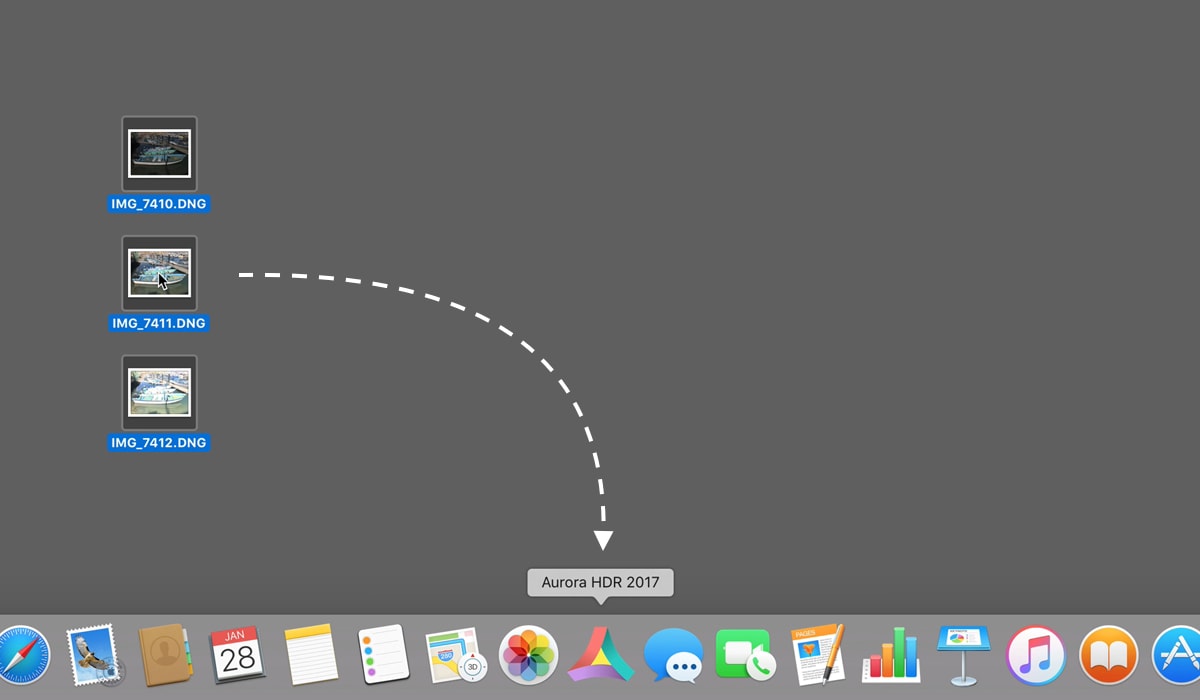
To start editing your photos, all you have to do is import them into Aurora. I find the easiest way to do this is to drag your three photos to the Aurora app in your Dock.
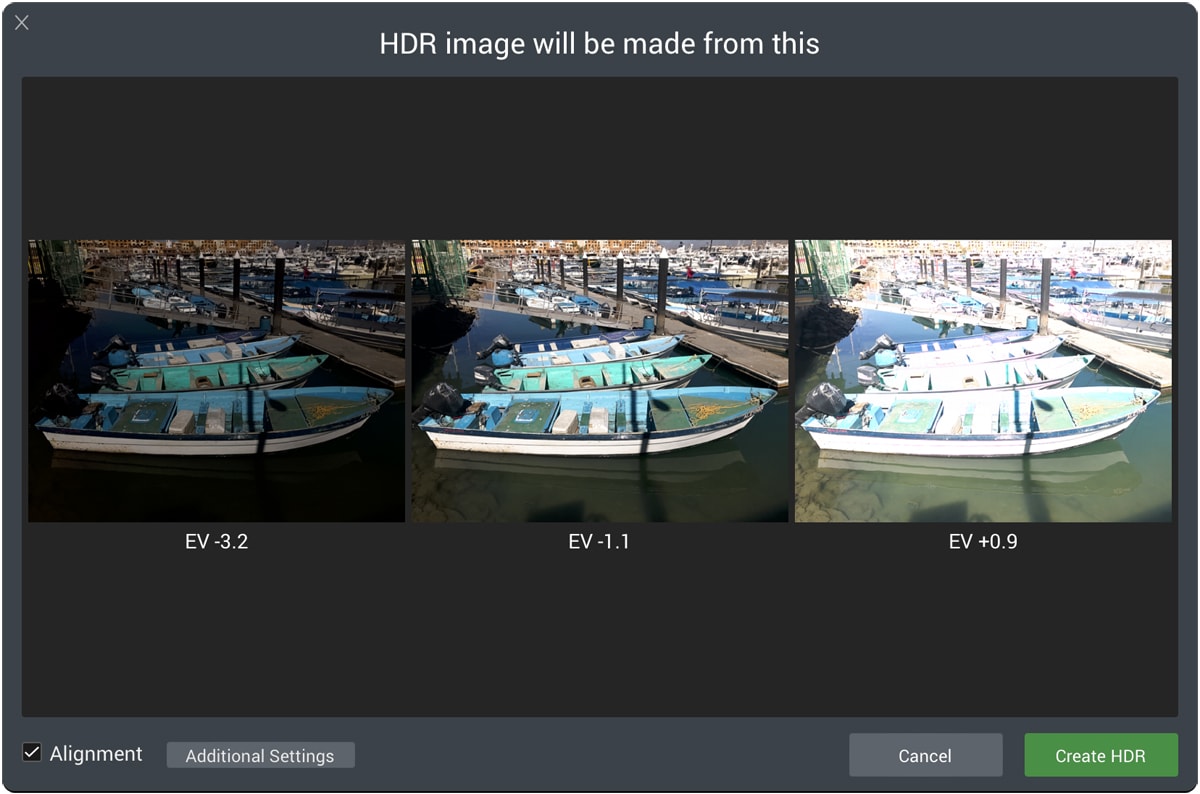
You will be presented with this import window. Click the box for “Alignment” if you were shooting handheld or if your tripod was unstable. Click Create HDR to merge your three photos.
Once Aurora merges your three photos, you can start getting creative and producing amazing photos.
You can apply quick HDR effects using the built-in presets. You can even fine-tune your photo using the powerful, easy-to-use adjustment tools. It only takes minutes to get fantastic results.
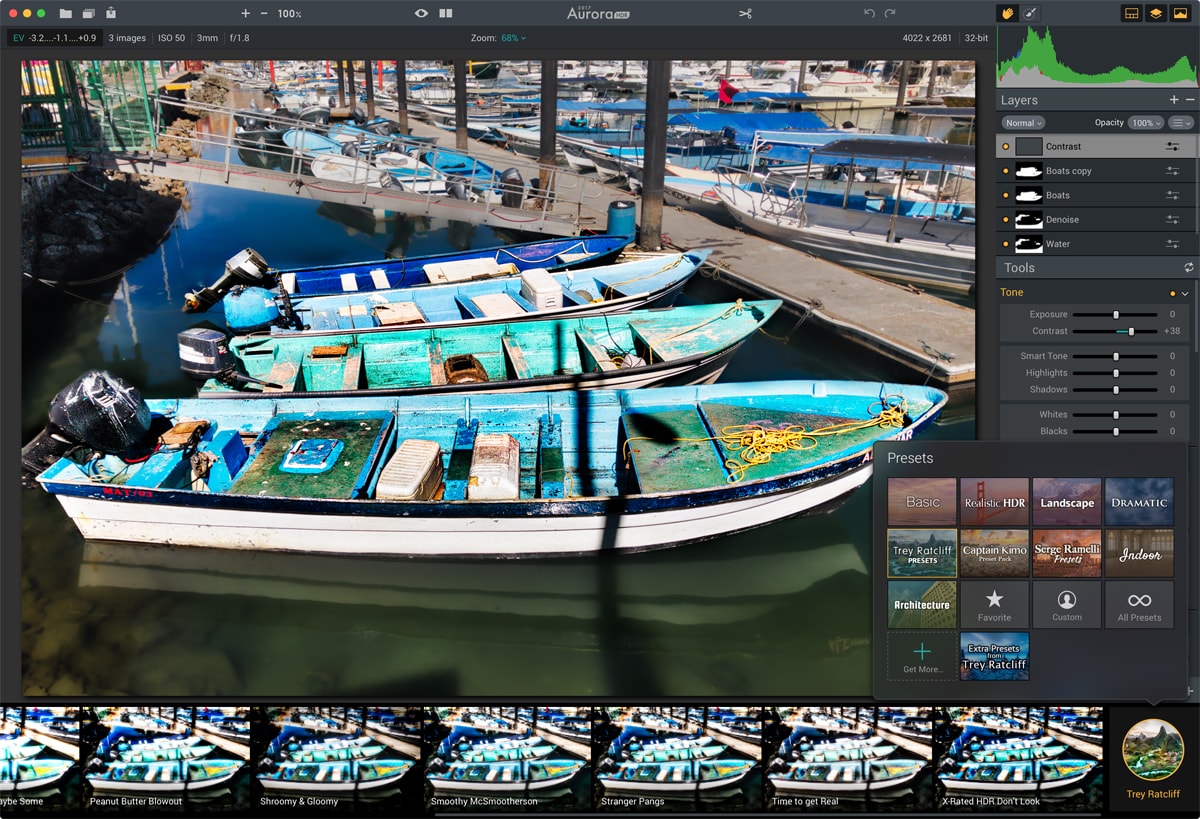
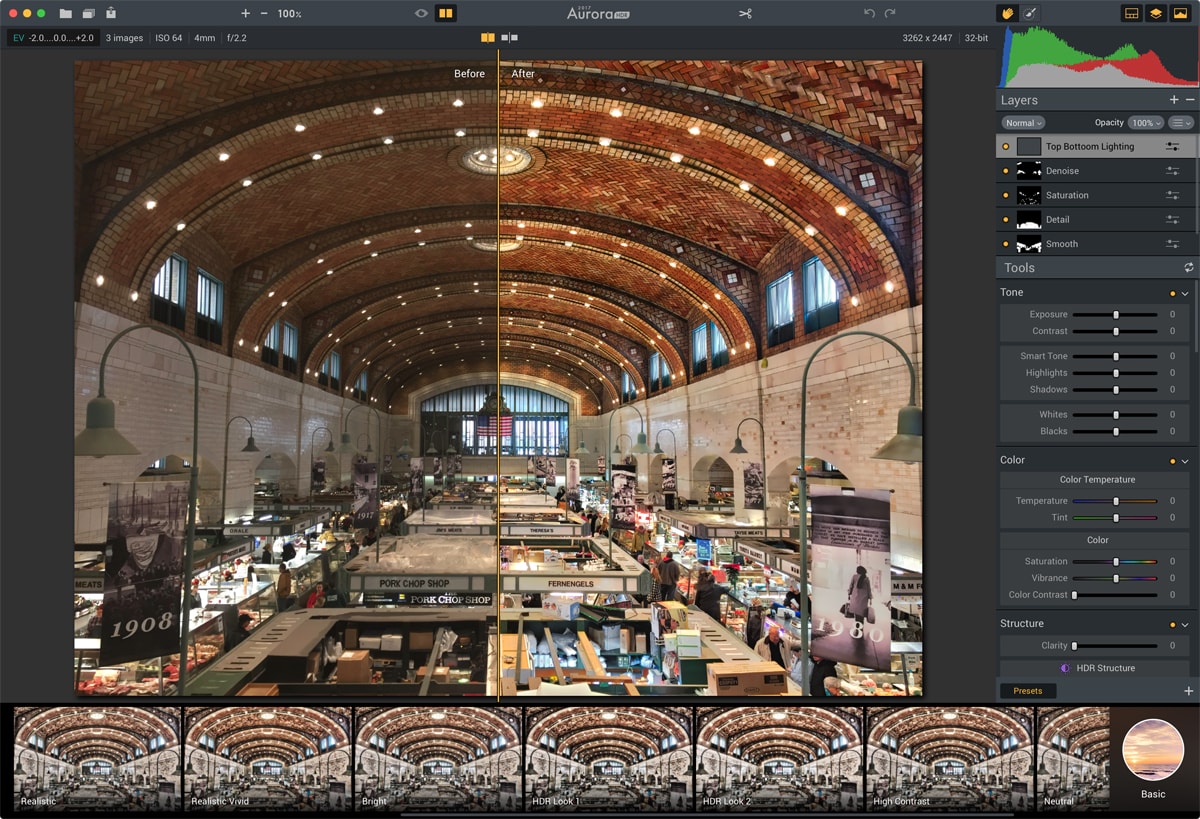
Here’s a few more HDR photos I have created using my iPhone and Aurora HDR. These examples showcase how your iPhone can help you create some eye-opening and jaw-dropping photos.

Conclusion
As you can see, even if you don’t own a camera or don’t have it with you, you can use your iPhone, the PureShot app, and Aurora HDR for editing to get stunning HDR photos.
Chris Woodman is an award-winning graphic designer, photographer, publisher, and educator. His genuine personality and natural ability to simplify the complex allow Chris to clearly and effectively communicate with any audience, regardless of learning style or technology experience. His passion for design and sharing his knowledge sparks inspiration in others.