This tutorial will guide you through the steps needed to successfully close your account on Skype the right way. As a bonus, we’ll show you how you can request a refund for your unused credits and unlink your accounts.
The old vs. new Skype deletion process
Microsoft purchased Skype for a hefty amount and made closing Skype accounts more convoluted than it needs to be. Understandably, no online provider would advertise the account deletion option front and center. With that in mind, permanently deleting a Skype account became a multi-step process. To do that, you had to remove payment methods, cancel any subscriptions you may have, unlink your Microsoft account from your Skype account, and more. Overall, several steps were involved, but it was possible, and our old tutorial covered all this.
However, now Microsoft has made all those steps obsolete, and now you can no longer unlink and delete your Skype account without deleting your Microsoft account. Yes! The entire Microsoft account.
Your one Google account lets you access Gmail, YouTube, Docs, Drive, Photos, Maps, Google Play, and so much more. Similarly, your one Microsoft account allows you to use Microsoft 365 (Office tools – Powerpoint, Word, Excel), Bing, Xbox, OneNote, To Do, Teams, One Drive, Skype, and more.
Thus deleting your Skype account means saying goodbye to all these services via that account.
In case you can’t afford to lose your access to the Microsoft services, you will have to ignore Skype. To take this one step further, you can go to your Skype settings and remove your profile picture, add a status that says you’re no longer active here, delete individual contacts, delete your phone number from the Skype account, etc.
If you’re comfortable in taking this big step, please follow along.
How to delete your Skype account
As mentioned above, deleting a Skype account means deleting your Microsoft account. Here’s how to do that.
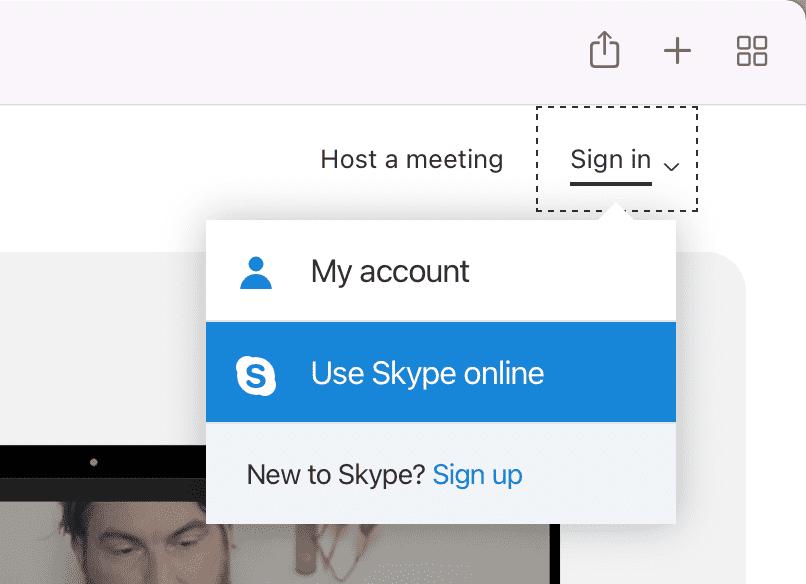
1) Go to Skype.com and click Sign in > Use Skype online.
2) Sign in using your Skype/Microsoft account.
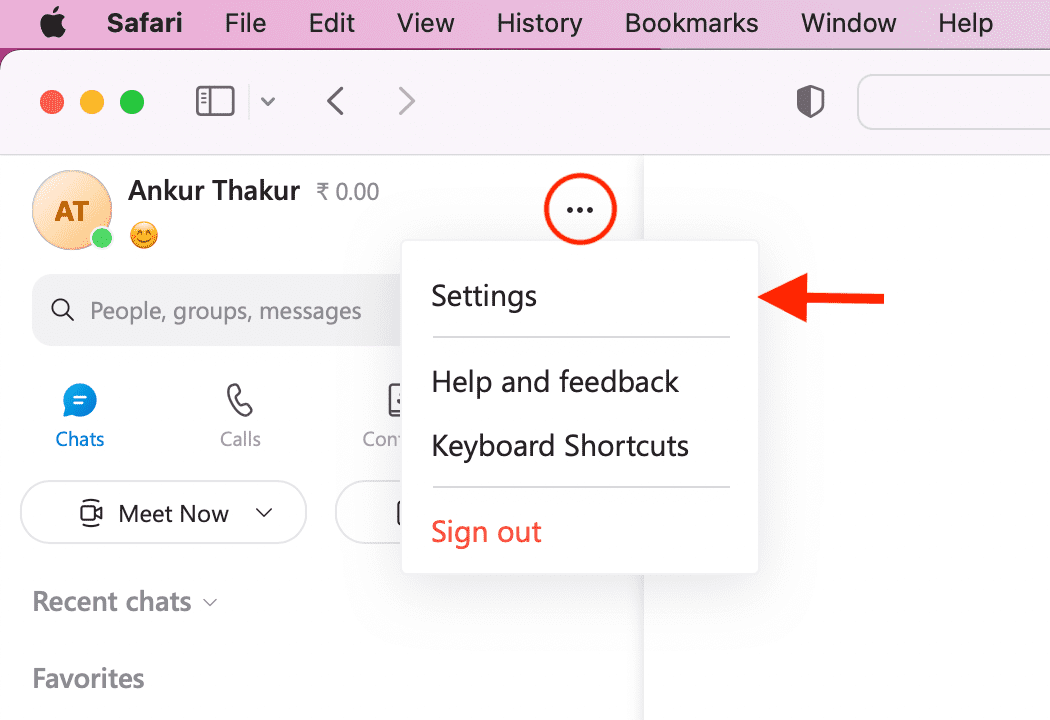
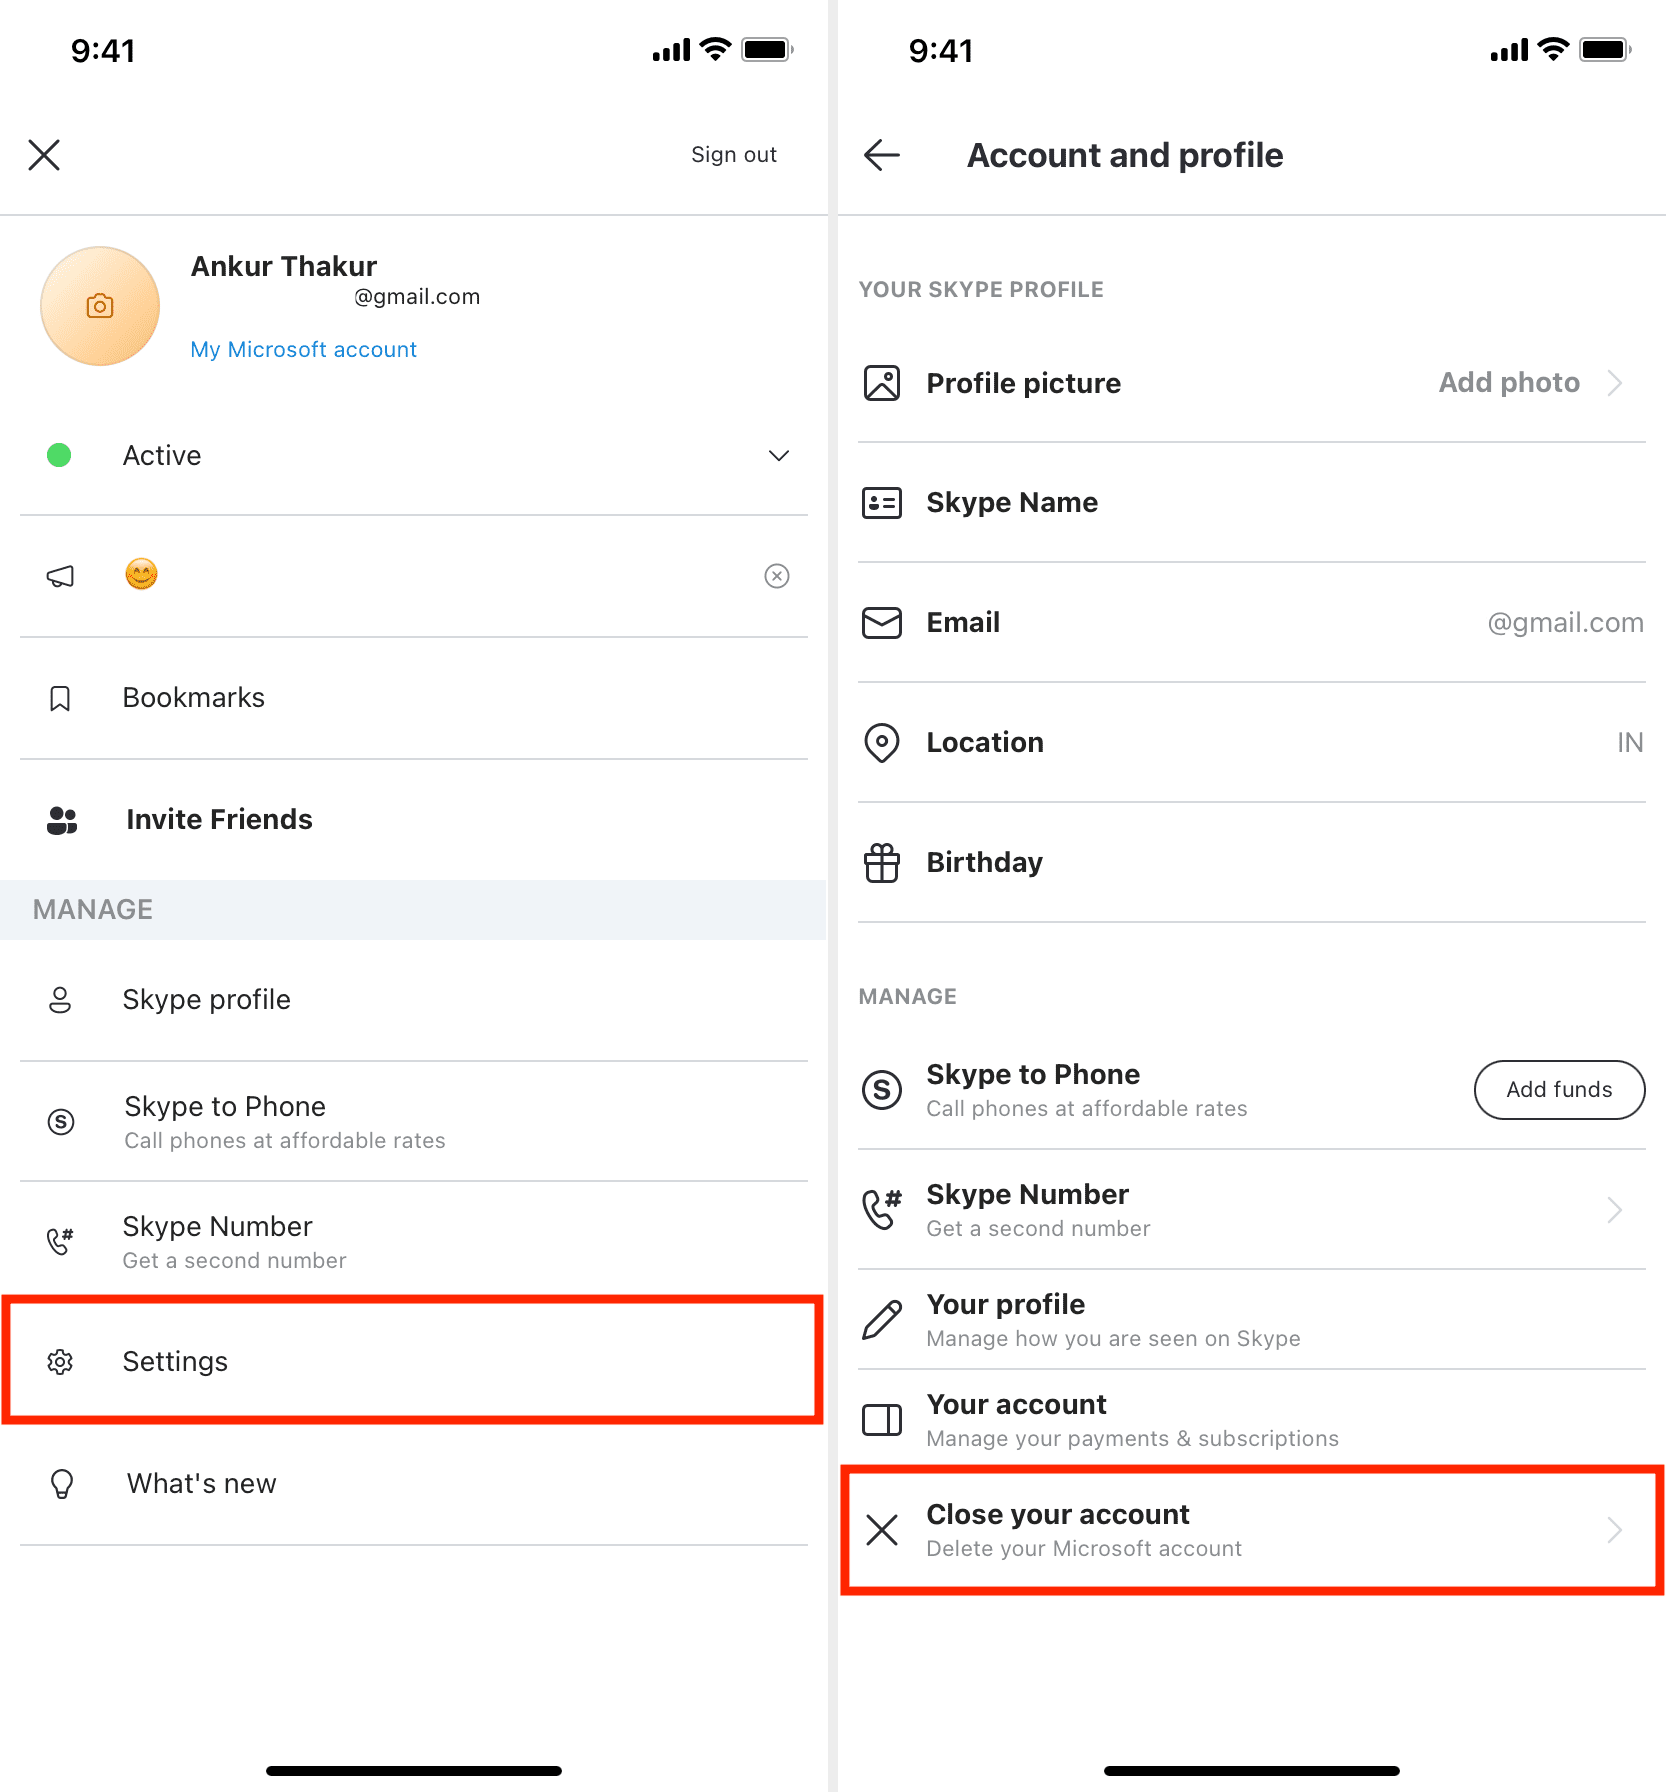
3) From the top left, click three dots next to your name and choose Settings.
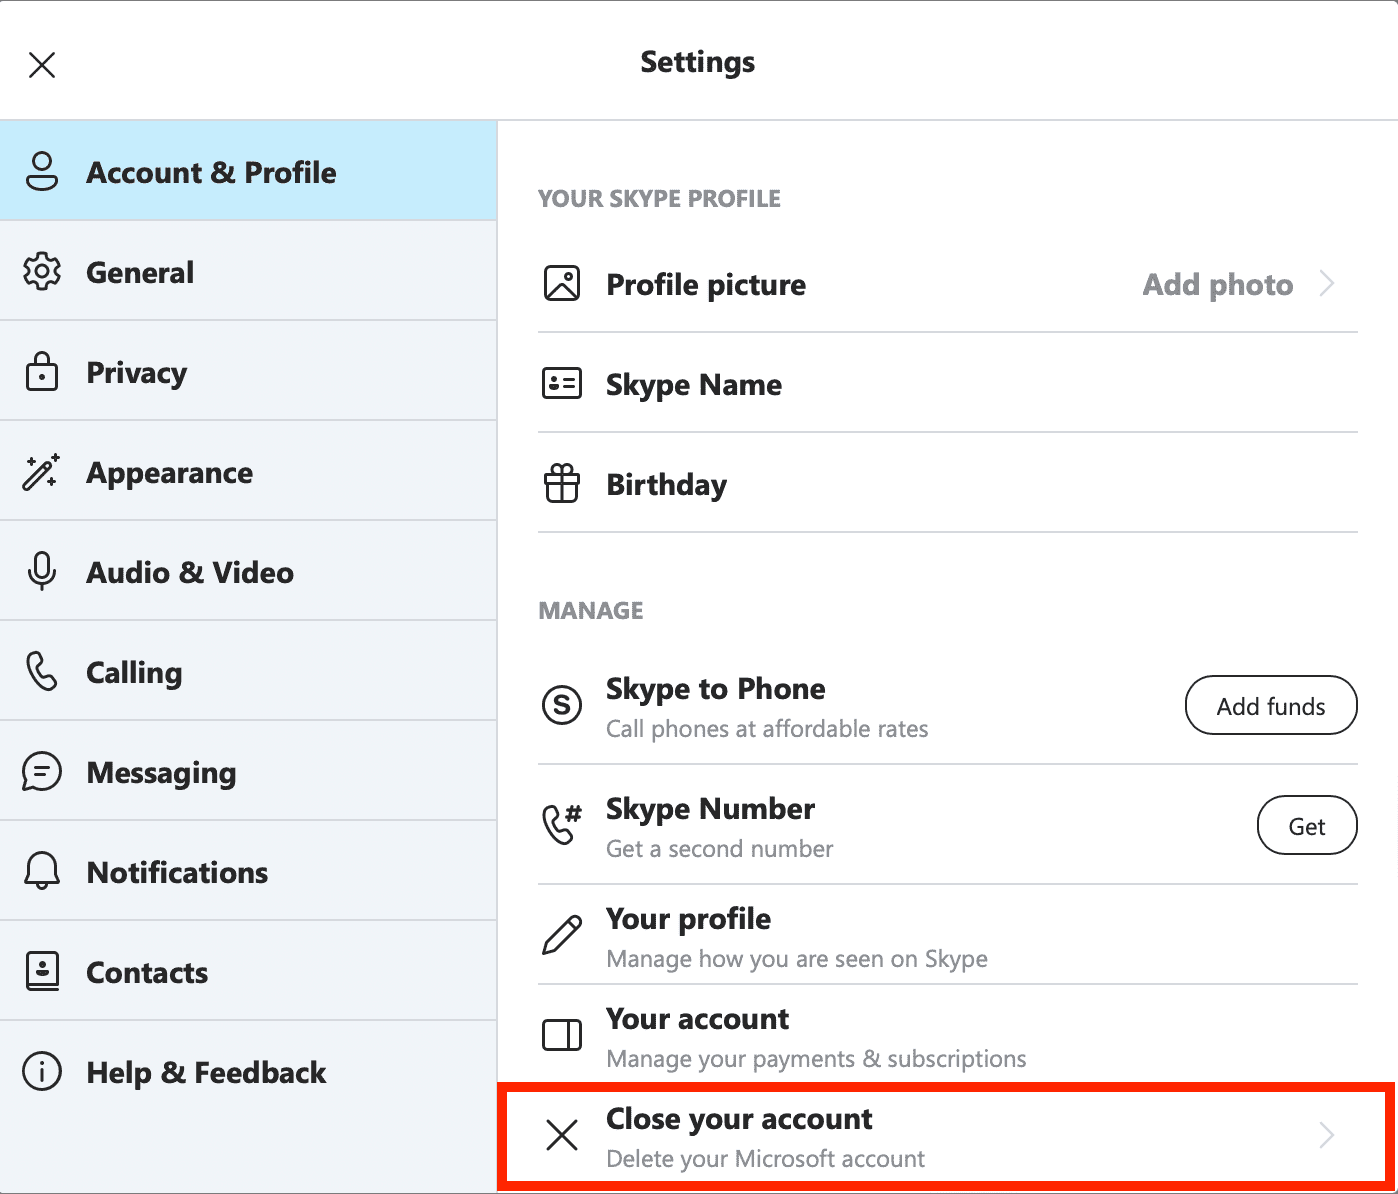
4) Under Account & Profile, click Close your account.
5) Click the account closure page link and sign in again if asked.
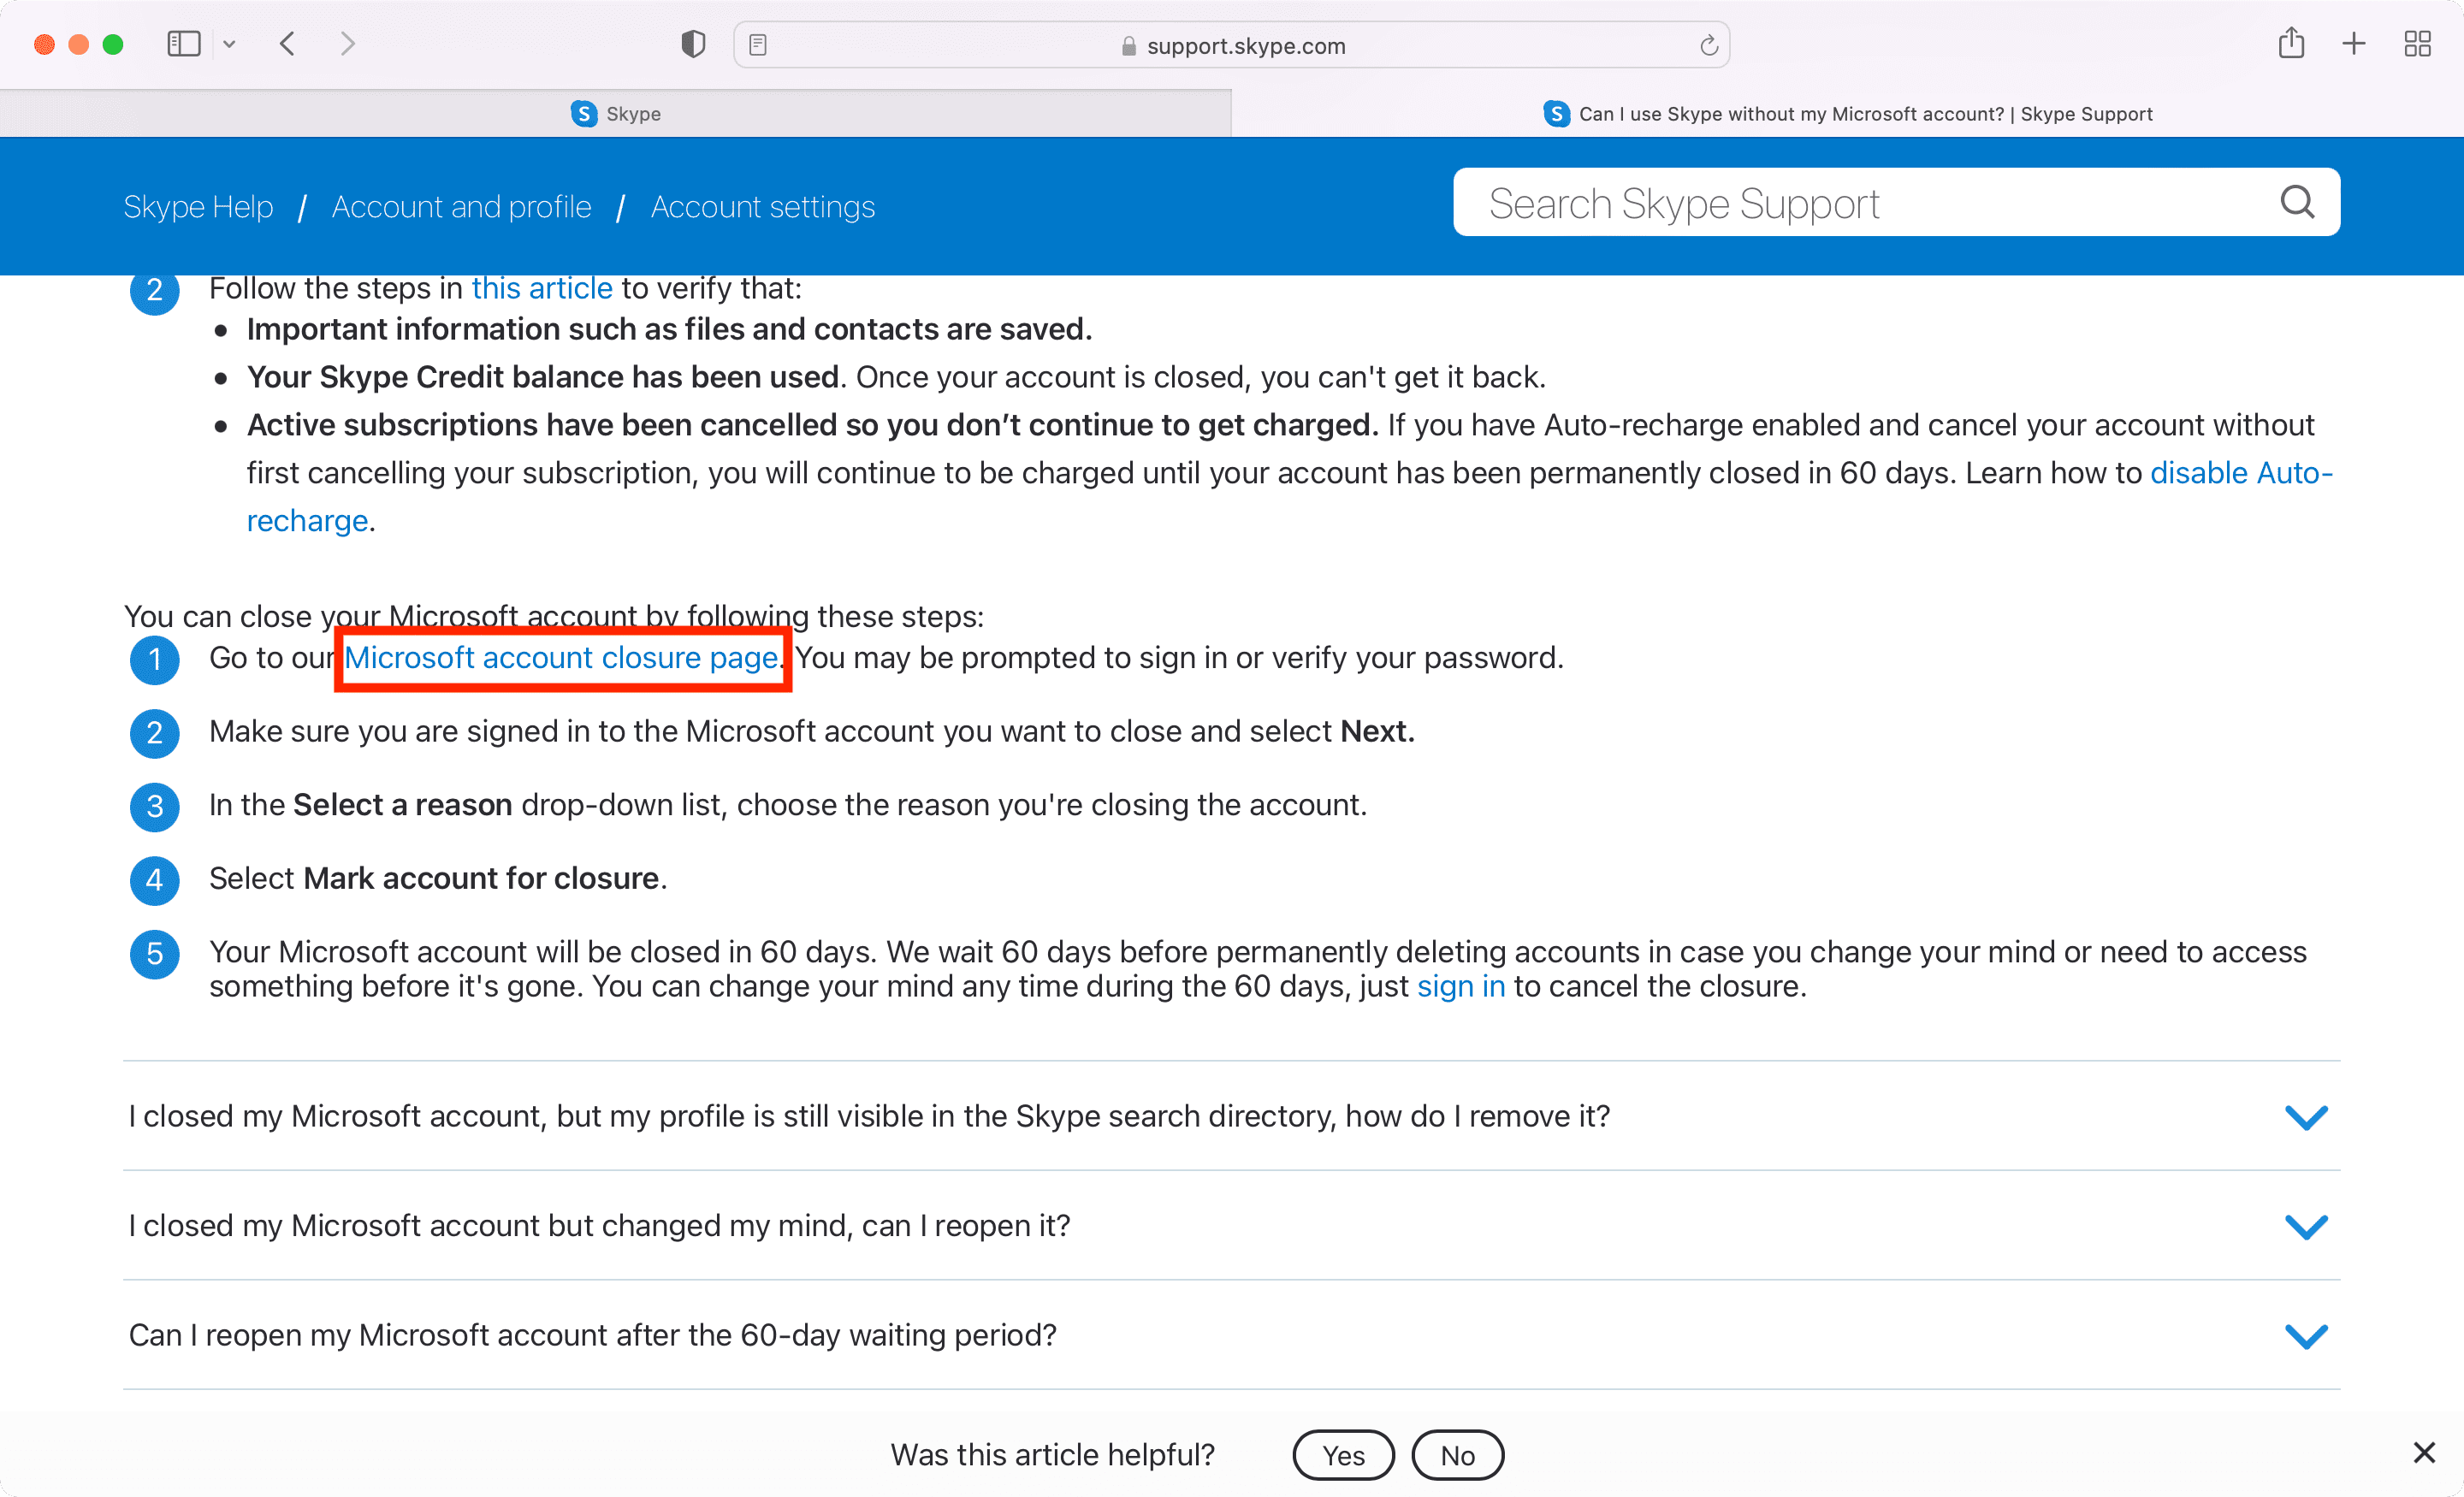
6) Read the contents of this page carefully. Microsoft gives you 60 days before it permanently closes your account by default. You can change it to 30 days to expedite the process. Finally, click Next, add a reason for closing your account, and submit your Skype/Microsoft account termination request.

You can also delete your Skype account using the Skype app on your smartphone or desktop. The steps are almost identical. For example, if you’re using the Skype iPhone app, tap your profile picture > Settings > Account & Profile > Close your account to delete your Skype account.
Old steps to unlink and delete your Skype account
Regrettably, there is no such thing as a magic button for closing a Skype account in one fell swoop.
“If you want to close your Skype account, you’ll need to contact us so we can close it for you,” explains Microsoft. Contacting Skype is the easy part. What’s crucial here are the three steps that must be taken before you kill your Skype account for good:
- Unlink a Microsoft account from your Skype account
- Cancel any active subscriptions and request a refund
- Cancel a Skype Number, if you have one
- Remove recurring payments by disabling the Auto-Renew feature
- Update your mood message
- Set your status to Offline or Invisible
- Sign out of Skype on all devices
- Remove personally identifiable details from your Skype profile
I’d wholeheartedly recommend that you use up any Skype credit you may have before you delete the account as you won’t be able to get these back after the account is closed.
Skype account vs. Microsoft account
If you signed up for Skype with a Microsoft account, closing your Skype account will also delete its linked Microsoft account. This might not be what you want because your Microsoft account is also your key to Outlook.com, Xbox Live, OneDrive, and other Microsoft services.
Therefore, people who did sign up for Skype with their Microsoft account should first unlink the accounts to ensure uninterrupted use of their Microsoft account after their Skype account is gone.
How to delete your Skype account
If you did not sign up for Skype with your Microsoft account, proceed to step 5.
1) Sign in to your Skype account at skype.com in a web browser.
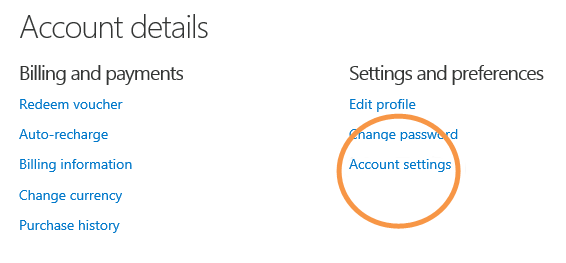
2) Go to your account settings: scroll down to the bottom of the webpage and click Account Settings under the Settings and Preferences heading.
3) Next to your Microsoft account, click the Unlink option.
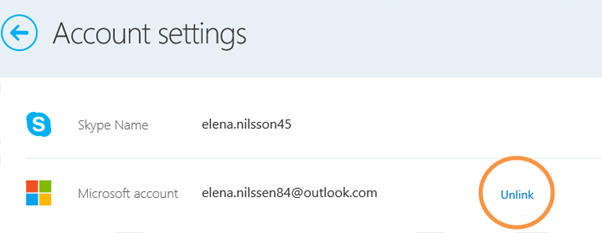
Tip: If the option reads Not linked rather than Unlink, your Skype account has not been linked to your Microsoft account. If that’s the case, you can safely proceed to step 5.
4) A confirmation message appears. Click Continue to confirm the action. Your Skype account should now be unlinked from your Microsoft account.
Tip: If your Skype name in the interface shows as live:[your email address without domain] or outlook:[your email address without domain], unlinking the accounts will cause you to lose all of your Skype contacts across Microsoft’s online properties like Outlook.com.
You can only unlink your accounts a limited number of times. Should you get a message saying you cannot unlink the two accounts, contact Skype Support using an online form.
Tip: Unlinking accounts may sign you out of your Skype account. If so, just sign in again at Skype.com to proceed with the account deletion process.
5) You will now have to cancel any Skype subscription or recurring payments. In your Skype account settings on the web, click the subscription you want to cancel in the blue bar on the left.

6) Click Cancel Subscription to continue.
7) Now click “Thanks but no thanks, I still want to cancel” to confirm subscription cancellation.
Tip: Now may be a good time to request a refund for any Skype subscriptions that you haven’t used. You can do this either in a live chat with Skype’s support staff or fill out the online Cancellation and Refund form.
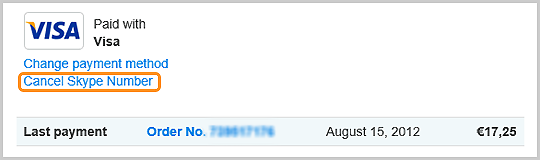
8) If you purchased a Skype Number where people can ring you, you should cancel it before closing the account: click Skype Number in the Manage Features section, then click Settings and finally hit the Cancel Skype Number option.
Your Skype Number subscription remains active until its expiry date, which is noted in the web interface. After it’s expired, Microsoft will reserve your Skype Number for 90 days.
“This means no one else but you can purchase this particular number during this period,” explains Microsoft. To renew your Skype Number subscription, click Skype Number in the Manage Features section, then Skype Number, and finally Reactivate Settings next to the number you’d like to reactivate.
Keep in mind that you cannot request a refund for a canceled Skype Number.
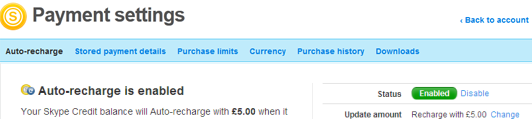
9) If you use recurring payments to have your Skype credit automatically topped up when the balance falls below a certain amount, disable the Auto-Recharge feature: in the Account Details section on the web click Billing & Payments, then hit Disable under the Auto-Recharge tab right next to Status.
Although both involve recurring payments, don’t confuse auto-recharging Skype Credit with having a Skype subscription.
10) Now that you’ve canceled your Skype subscriptions and removed recurring payments, contact Skype Customer Service and tell them you’d like to close your account.
The consequences of closing Skype account
Deleting the account permanently removes any data that was associated with it, including your Skype contacts, purchases, and chat history. Microsoft says that it might take up to 30 days for your name to disappear from the Skype directory after the account is closed.
After 30 days, no one will be able to find you on Skype. Your name will still appear in your friends’ contact lists unless they remove it, but they won’t be able to contact you.
If for whatever reason you’d like to prevent people from finding you on Skype before 30 days have passed, consider changing your profile picture and mood message, setting your status to Offline or Invisible, and removing other personal information from your Skype profile.
Removing your Skype profile information
To make it more difficult for others to find you in the Skype directory, remove your personal details from your Skype profile and perform other housekeeping actions detailed below.
Change your profile pic—To change a profile picture that identifies you on Skype, tap My Info on Skype for iOS, hit your profile picture, and select Remove Profile Picture.
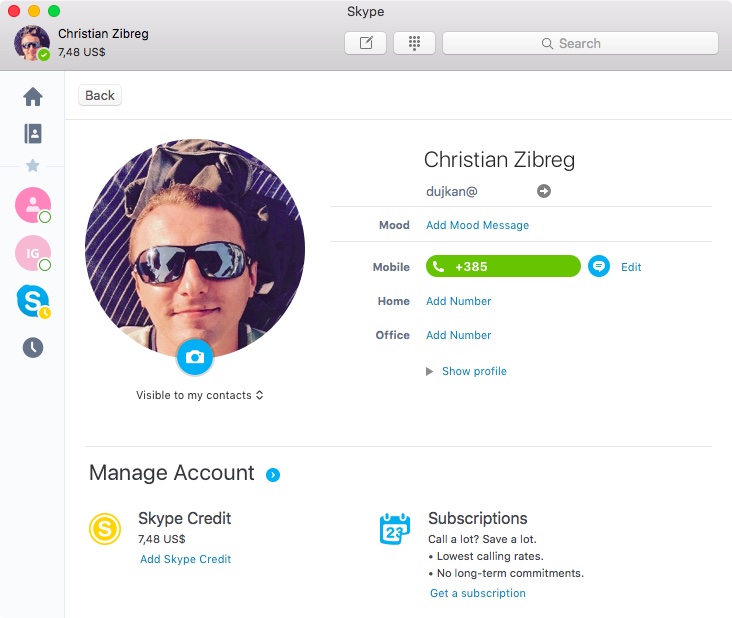
On Skype for Mac, simply click the camera icon on the profile picture preview and then browse for a different picture (try replacing it with a generic mugshot image).
Update your status: You should leave a polite status message on your Skype profile. This shall help your contacts realize you’re no longer active on the service. On Skype for iOS, tap the My Info tab or click your profile picture in Skype for Mac to update your details.
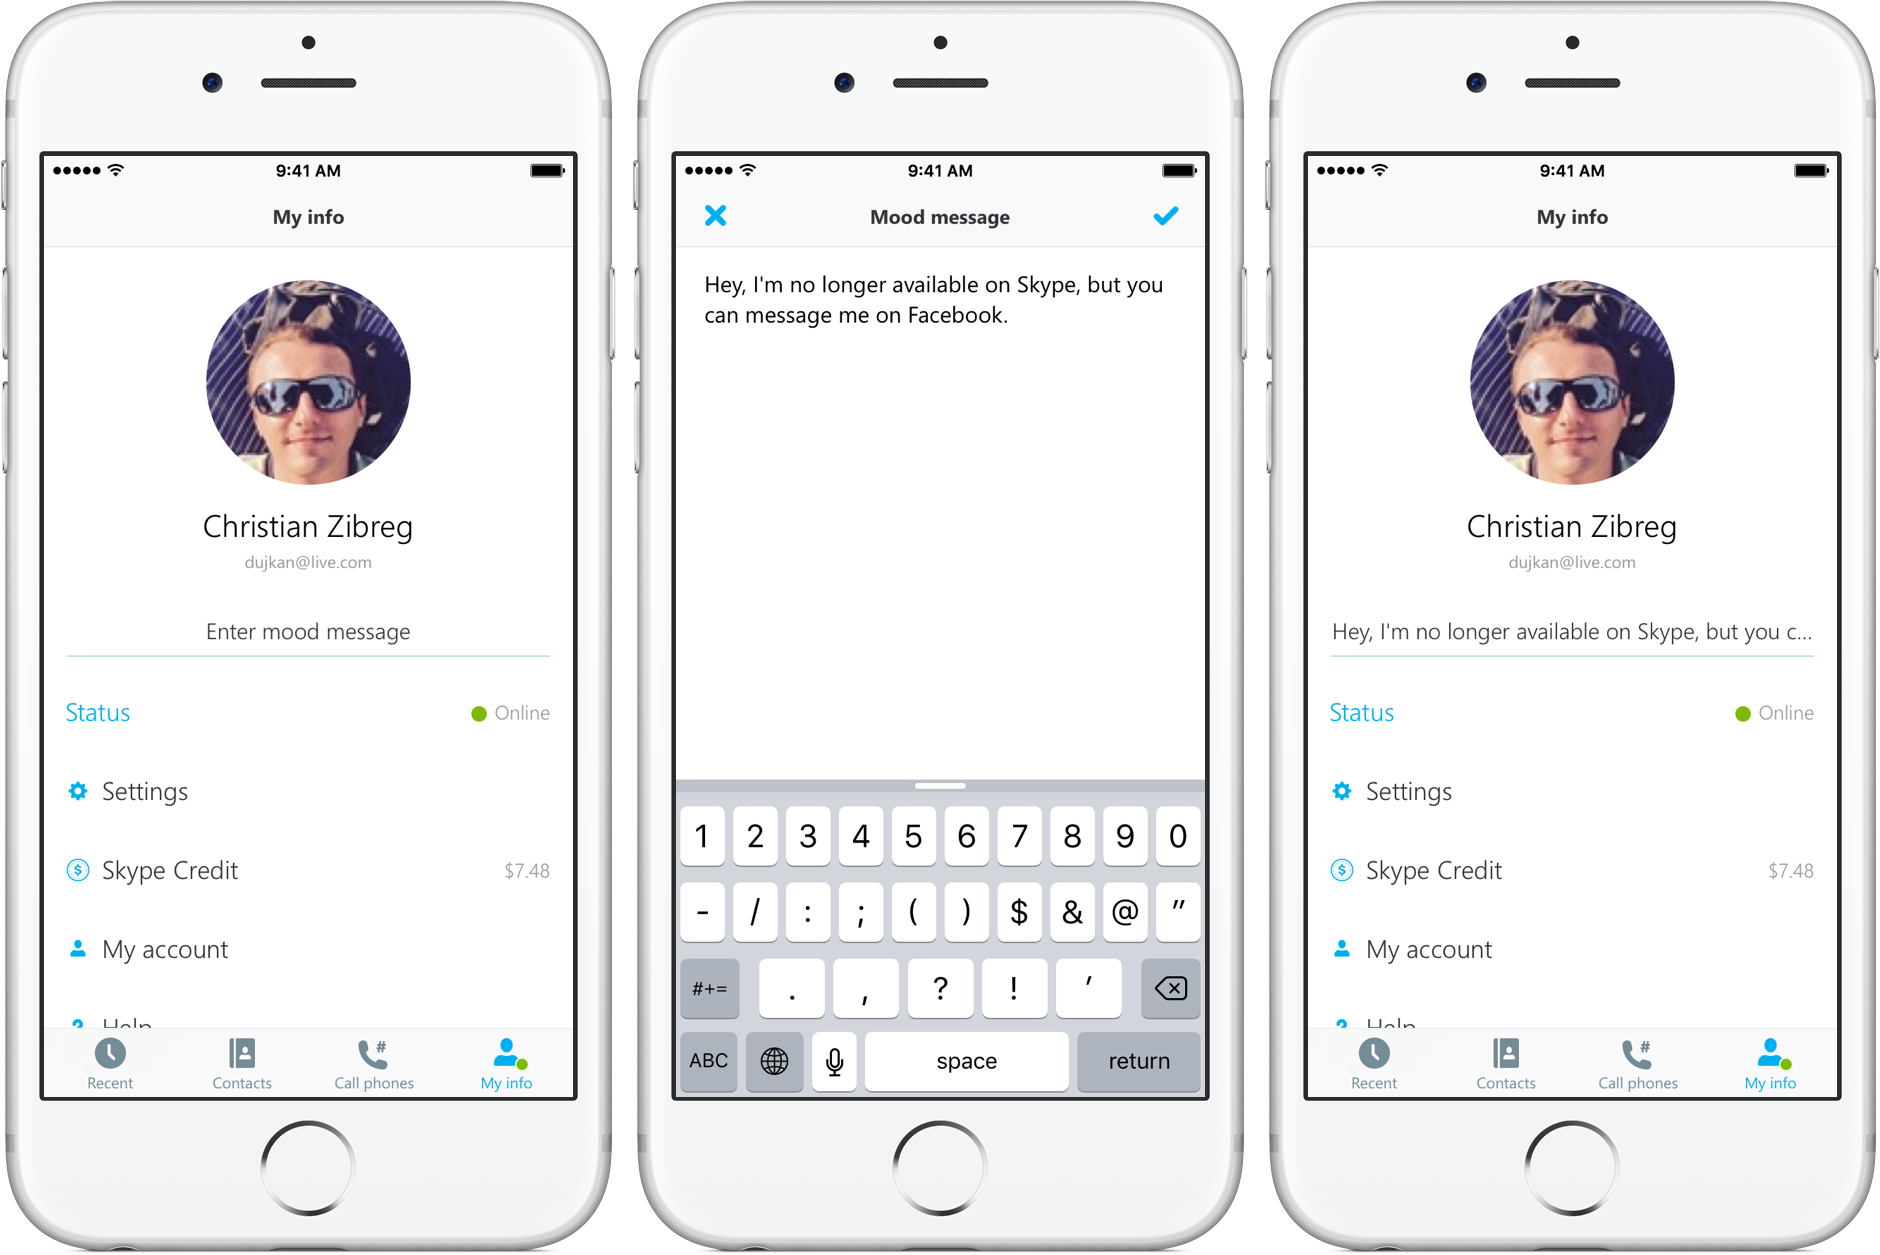
Now tap Enter Mood Message to update your status message on Skype.
Set your status to Offline or Invisible—This is a recommended step to ensure that people will no longer be able to see you on Skype. To get started, tap My Info → Status on Skype for iOS, or click File → Change Status on Skype for Mac.
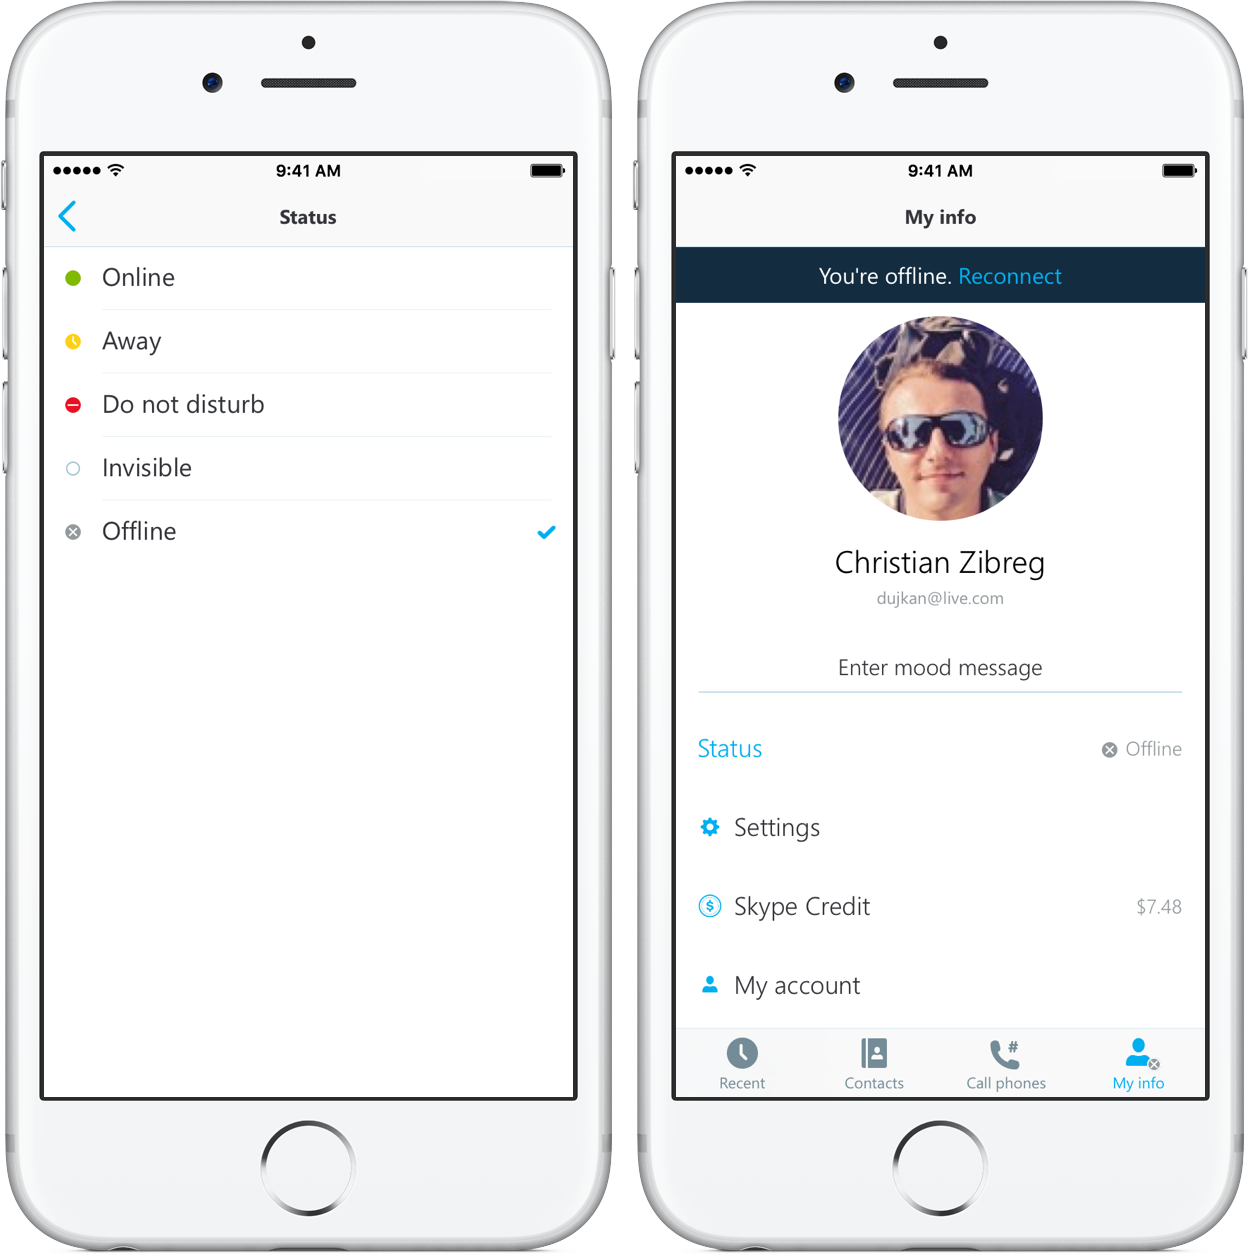
Then, set your status to Offline or Invisible.
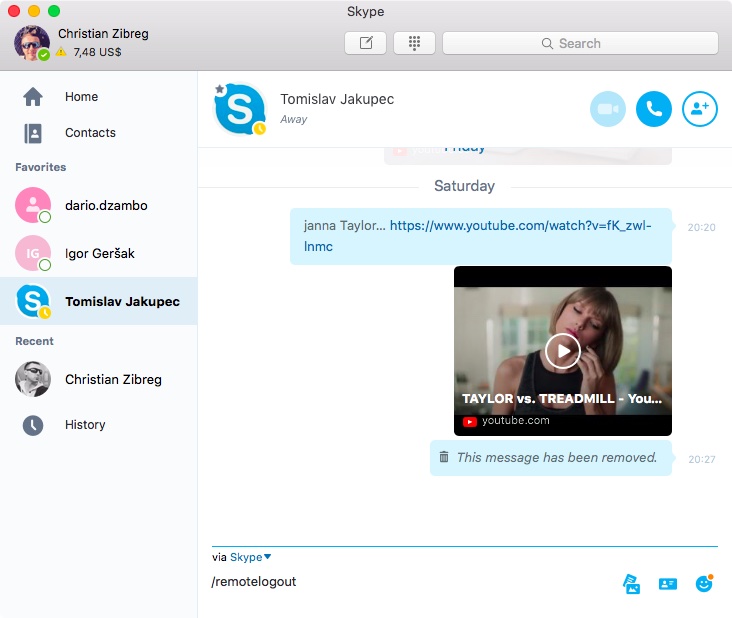
Sign out of Skype on all your devices—To sign yourself out of Skype on any other devices you might be using, type the chat command /remotelogout into the chat window on one of your Skype devices.
As the last step, don’t forget to sign out of Skype on the device you’re using now.

Removing other Skype profile details
Updating your other Skype profile details may be easier in the web interface.
Sign in to your account on skype.com, go to your profile, scroll to the bottom of the page and click Edit Profile under Settings and Preferences. Next, click Edit in the Personal Information and remove all identifiable information from the Personal Information and Contact Details sections.
![]()
I’d typically type some random characters in mandatory fields before clicking Save.
“You should leave your email address in your profile so that we can verify your account when closing,” cautions Microsoft. “After we have closed the account, we will remove your email address.”
Keep in mind that you cannot edit your Skype name.
Check out next: