In this tutorial, we show you two easy ways to temporarily keep your Mac from falling asleep, dimming the display, or showing a screensaver for as long as you need to.
When you’re away from your Mac for extended periods of time, depending on the settings you’ve set, it’s going to do one of four things:
- fall asleep,
- dim the display,
- show a screensaver, or
- do nothing at all.
If you like it when your Mac falls asleep when it’s convenient and not when it’s not convenient, then chances are you don’t have your Mac set to never fall asleep, but rather you live with annoyingly having to tap a key or touch the trackpad to wake it up when it idles for too long.
A temporary solution you can use all the time
If you don’t want to disable your Mac’s ability outright to fall asleep, dim the display, or show a screensaver, there are some great temporary options available that you can use to keep your Mac from falling asleep for as long as you need it to.
These options are great for anyone who usually likes their Mac to fall asleep when they walk away from their computer, but not so much when they know the Mac is going to be sitting idle for a long period of time and they want to keep track of something on the screen, such as the download progress of a large file that’s taking hours to complete, or the installation of a huge app that’s taking seemingly forever to install.
The two options available are either installing a free app by the name of Caffeine from the Mac App Store or running a simple Terminal command via the Terminal app built into your macOS operating system.
Caffeine is recommended for users who aren’t savvy with command-line interfaces and want a graphical user interface. In contrast, the Terminal command is recommended for more advanced users because it requires memorizing some commands.
They’re advantageous over keeping your Mac awake 100% of the time via your System Preferences settings because they’re better suited for a temporary situation.
The apps also make toggling the features on or off much more accessible than if you were to go and manually toggle the features on or off in System Preferences each and every time you want your Mac to stay awake or fall asleep again, so you’ll save yourself quite a few clicks and some time.
How to caffeinate your Mac with Amphetamine
If you’ve opted to install the free Amphetamine app from the Mac App Store, then you’re already on your way to caffeinating your Mac.
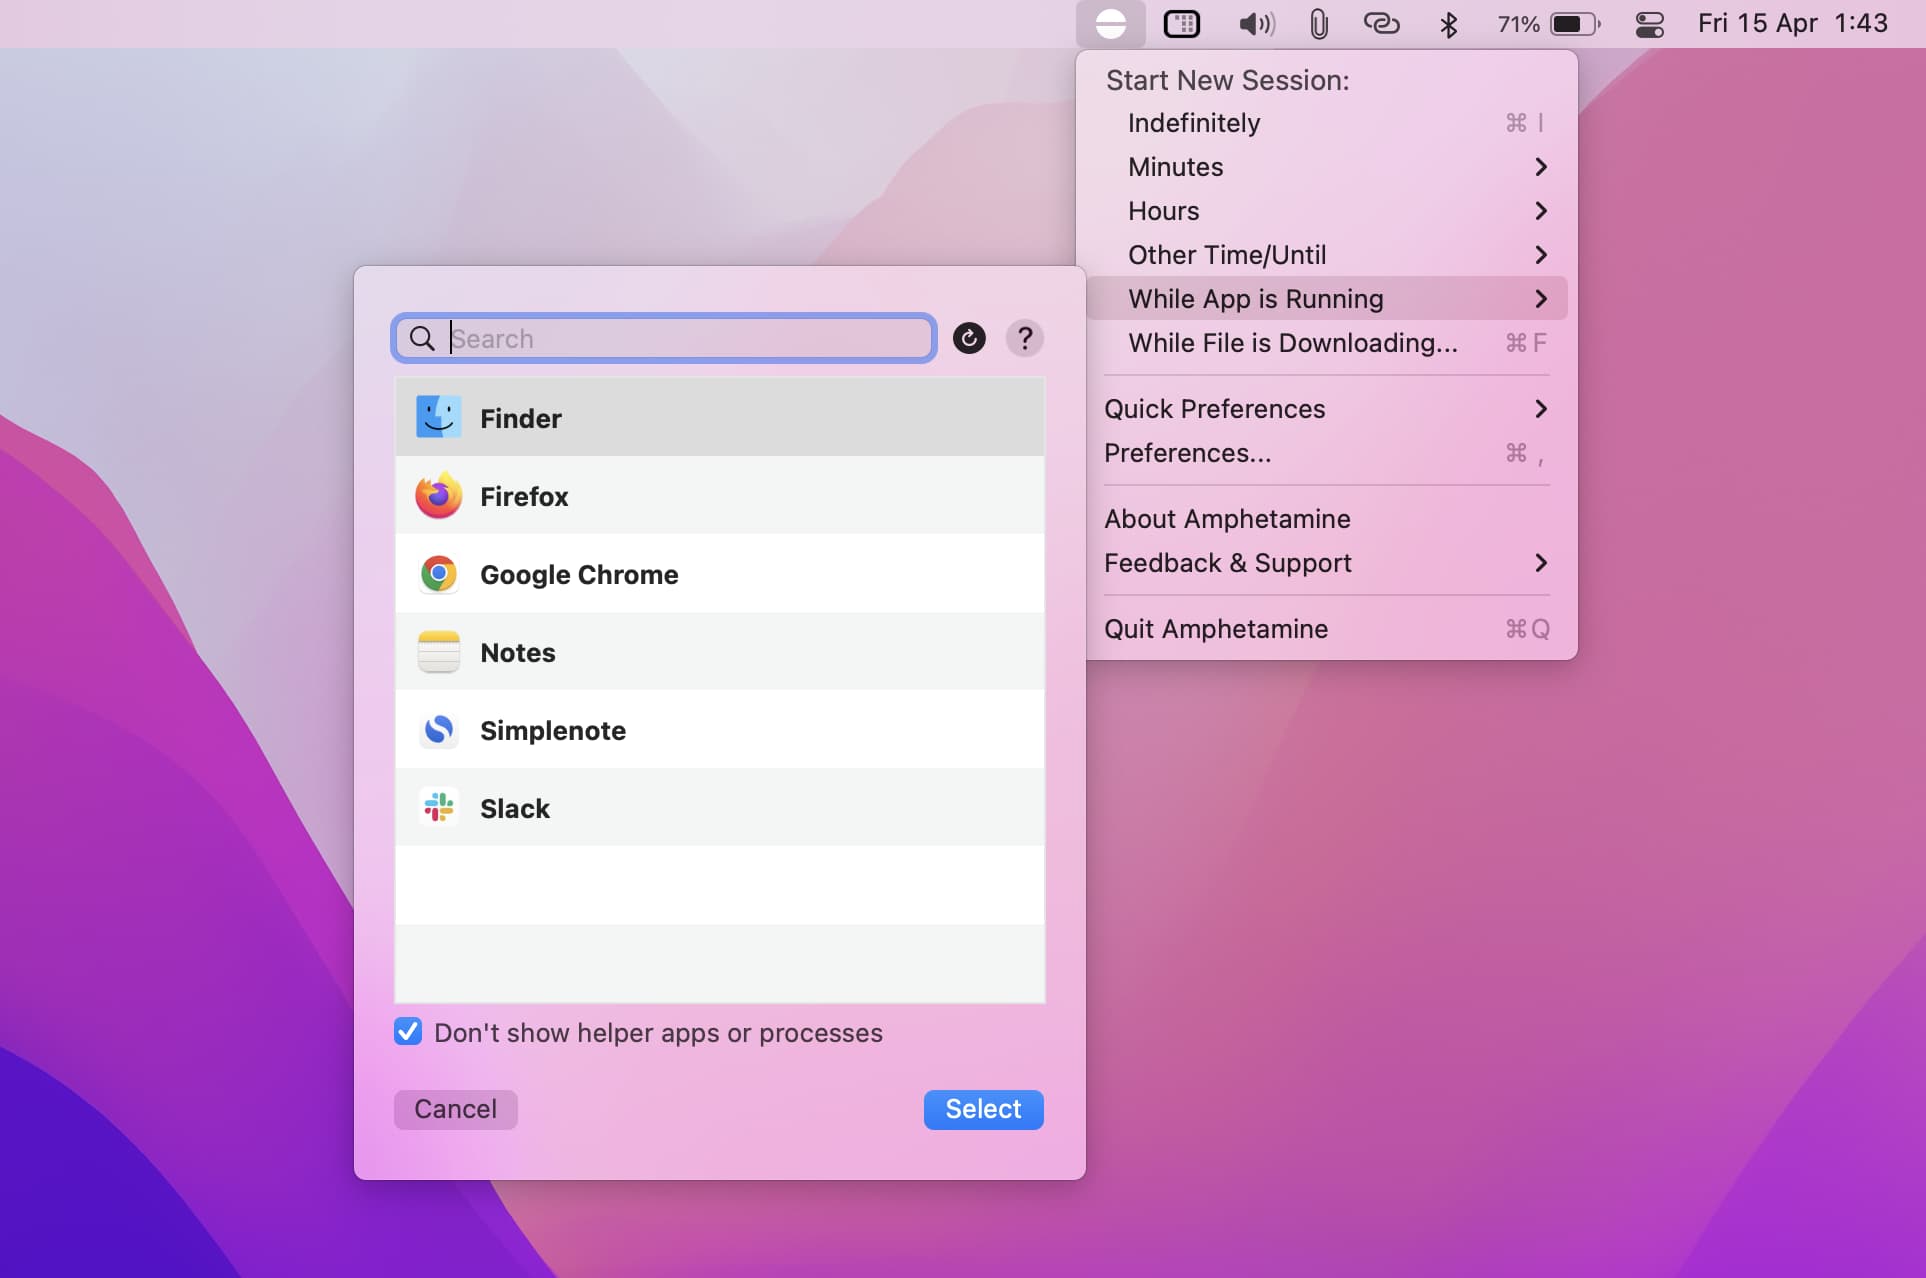
After installing the app and launching it, you’ll notice a new icon in your Menu Bar that looks like a pill. You can click on the Menu Bar icon to enable Amphetamine and click on it again to disable the app. The icon appears black when the app is turned on and appears grayed out when the app is turned off.
You have numerous activation time presets at your disposal and can create your own, too. Amphetamine can automatically kick in upon you connecting to a specific Wi-Fi network and will keep your hard drives and solid-state storage awake, too.
Easy enough, right? – Well, okay, command-line lovers, it’s your turn.
How to caffeinate your Mac with Terminal
Installing fancy software from the Mac App Store isn’t required; if you’re comfortable enough, you can just launch the Terminal app on your Mac and run a simple command. Believe it or not, the Caffeine app is cleverly named after a command that already exists in your Mac’s command-line interface.
To caffeinate your Mac via the Terminal app on your Mac, you can follow these steps:
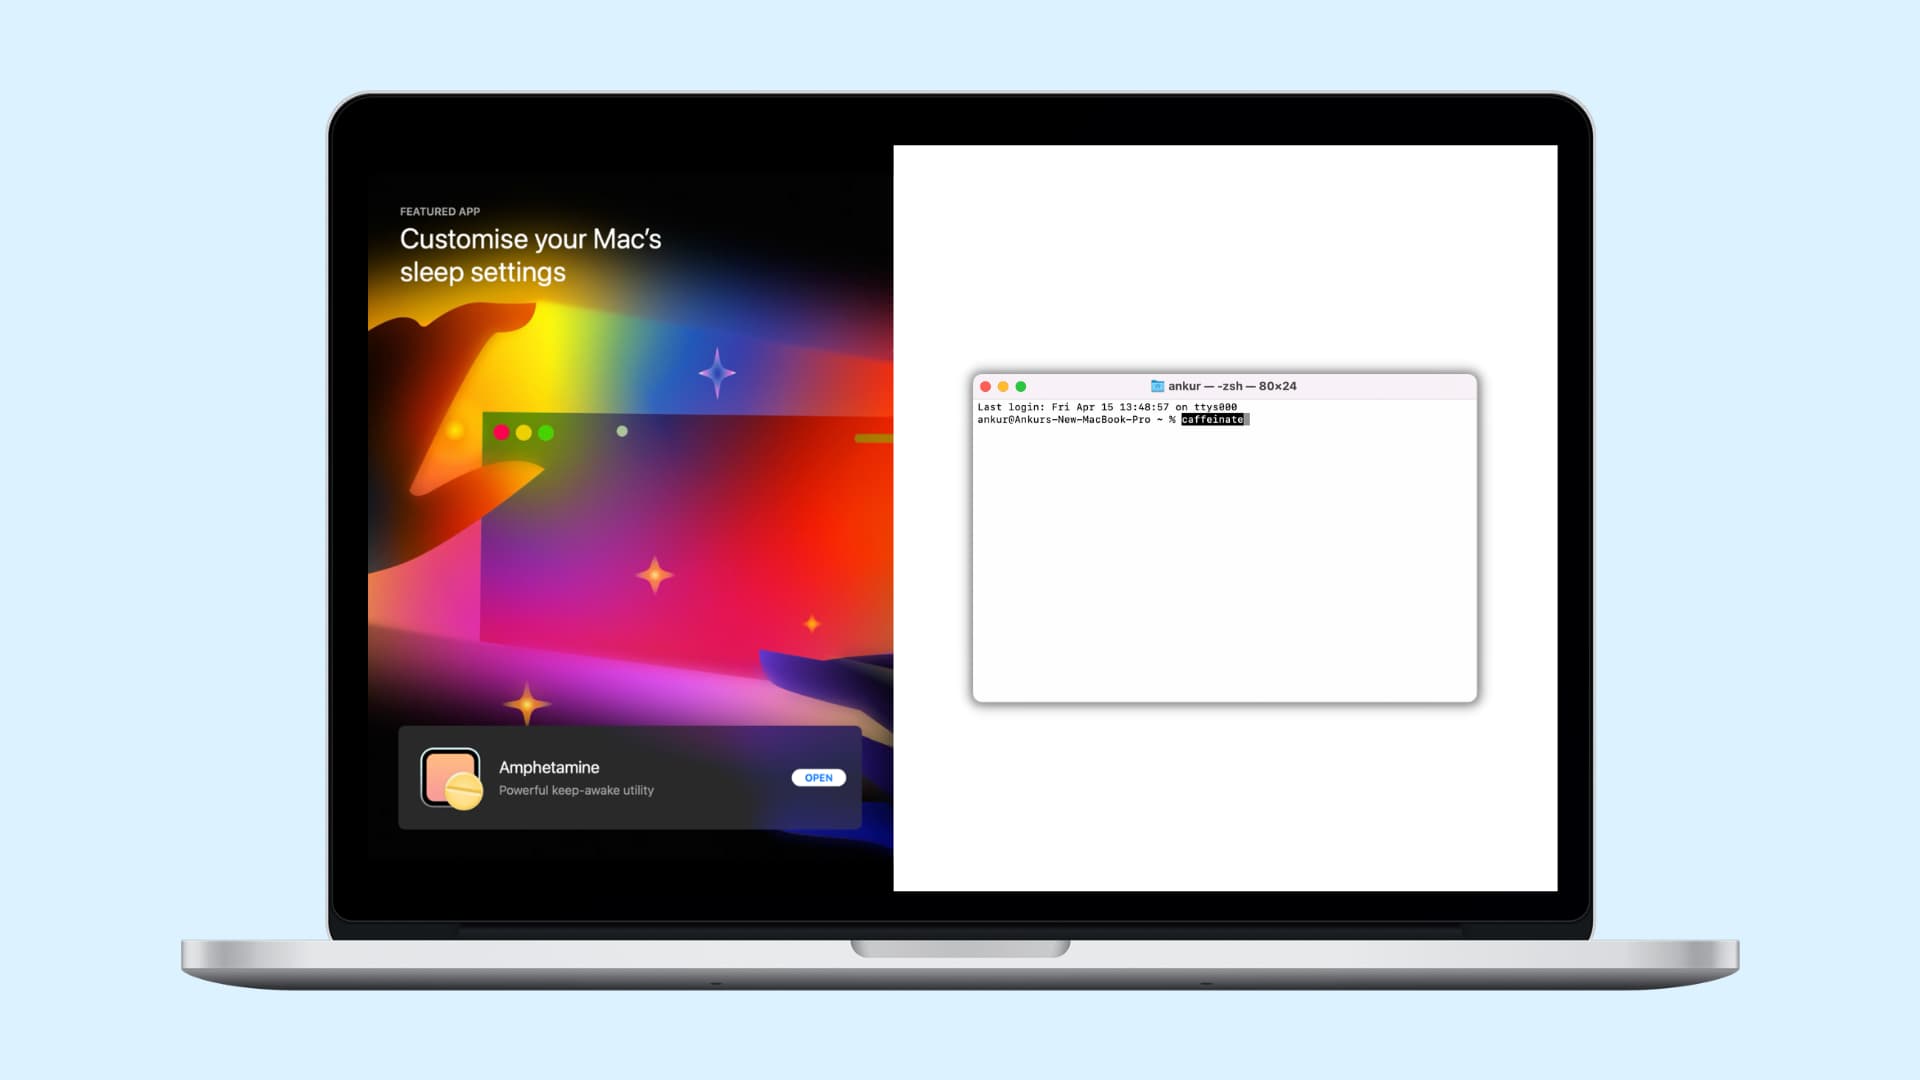
1) Launch the Terminal app on your Mac.
2) In the Terminal interface, type “caffeinate” without the quotes and then hit the Return key on your keyboard.

3) Congratulations, you are now in “Caffeinate” mode on your Mac.
Note: In this mode, your computer will not fall asleep, dim its display, or display a screensaver, and it won’t do so again until you end the caffeinated command.
To end the Caffeinate command, all you need to do is press Control + C on your keyboard while the Terminal is open.
The command demonstrated above enables the Caffeinate mode on your Mac for as long as you need until you disable it, but let’s say you wanted to enable Caffeinate mode for a certain period of time; is there a way to do that? Of course!
To key to making the Caffeinate mode on your Mac last for a specific duration of time is to add “-t [x amount of seconds]” to the command as you’re entering it into the Terminal app, as shown below:

In our example, pressing the Return key after the command above would turn Caffeinate mode on for 150,000 seconds. As we specified, we can either wait 150,000 seconds for Caffeinate to end automatically, or we can still press the Control + C shortcut to end the command before the time is up, as we did in our example above.
Prevent Mac from sleeping
Keeping your Mac awake is a super easy step, and you don’t even have to change your beloved System Preferences around to do it. You can either use a free Mac App Store app for the job or enable the feature from the Terminal app that’s already on your Mac.
This feature is particularly useful when you want to keep an eye on a download that might be taking a long time without your Mac falling asleep on you so you can keep an eye on the progress bar, and it might also be useful if you’re doing something like trying to draw a picture based off of an image you found on the internet without the screen going dark on you or showing a screensaver instead.
Check out next: