
As most of you all know, I’m a huge fan of Final Cut Pro X. It’s my video editing app of choice, and has been since it launched back in 2011.
Recently, I’ve been looking for ways to be more efficient with my video workflow. Some of this can be done in post during the edit, but a large part of that is done before and during the actual shoot.
Just recently, I added a new piece of equipment to my workflow—the Atomos Ninja Assassin. After using it, I can say that it is by far one of the best investments that one who’s serious about video can make. It also pairs nicely with my Final Cut Pro workflow…
Details…
Not only does the Ninja Assassin provide videographers with a gorgeous high resolution 7” display, but it allows you to capture 4K video directly to an intermediate video codec like ProRes 422 onto an SSD. That, in and of itself, makes the Ninja Assassin worthy of consideration, but there are several more pieces to the puzzle that makes this product a must have for videographers.
There is so much that I can break down and divulge about the Ninja Assassin, that I could write many words about it. But for this post in particular, I’m going to show you why it’s a beneficial device for Final Cut Pro X users. I’m going to show you how it can speed up your workflow, result in better performance, and improve overall fidelity of the finished product.
It all starts with ProRes
One of the primary benefits of the Ninja Assassin is that it can record video directly to ProRes 422. ProRes is, of course, the intermediate video codec used by Final Cut Pro X. When you optimize video in Final Cut Pro, you’re basically converting that footage from whatever Codec your camera uses to ProRes 422. Some cameras allow you to shoot directly to ProRes without any add-ons, but that feature is generally reserved for high-end cameras that cost a lot of coin.
Editing in ProRes has some performance advantages, although modern machines do very well with editing in other codecs like H.264 these days. You, will however, notice moderate performance gains when applying some effects and transitions to a ProRes clip versus something like H.264.
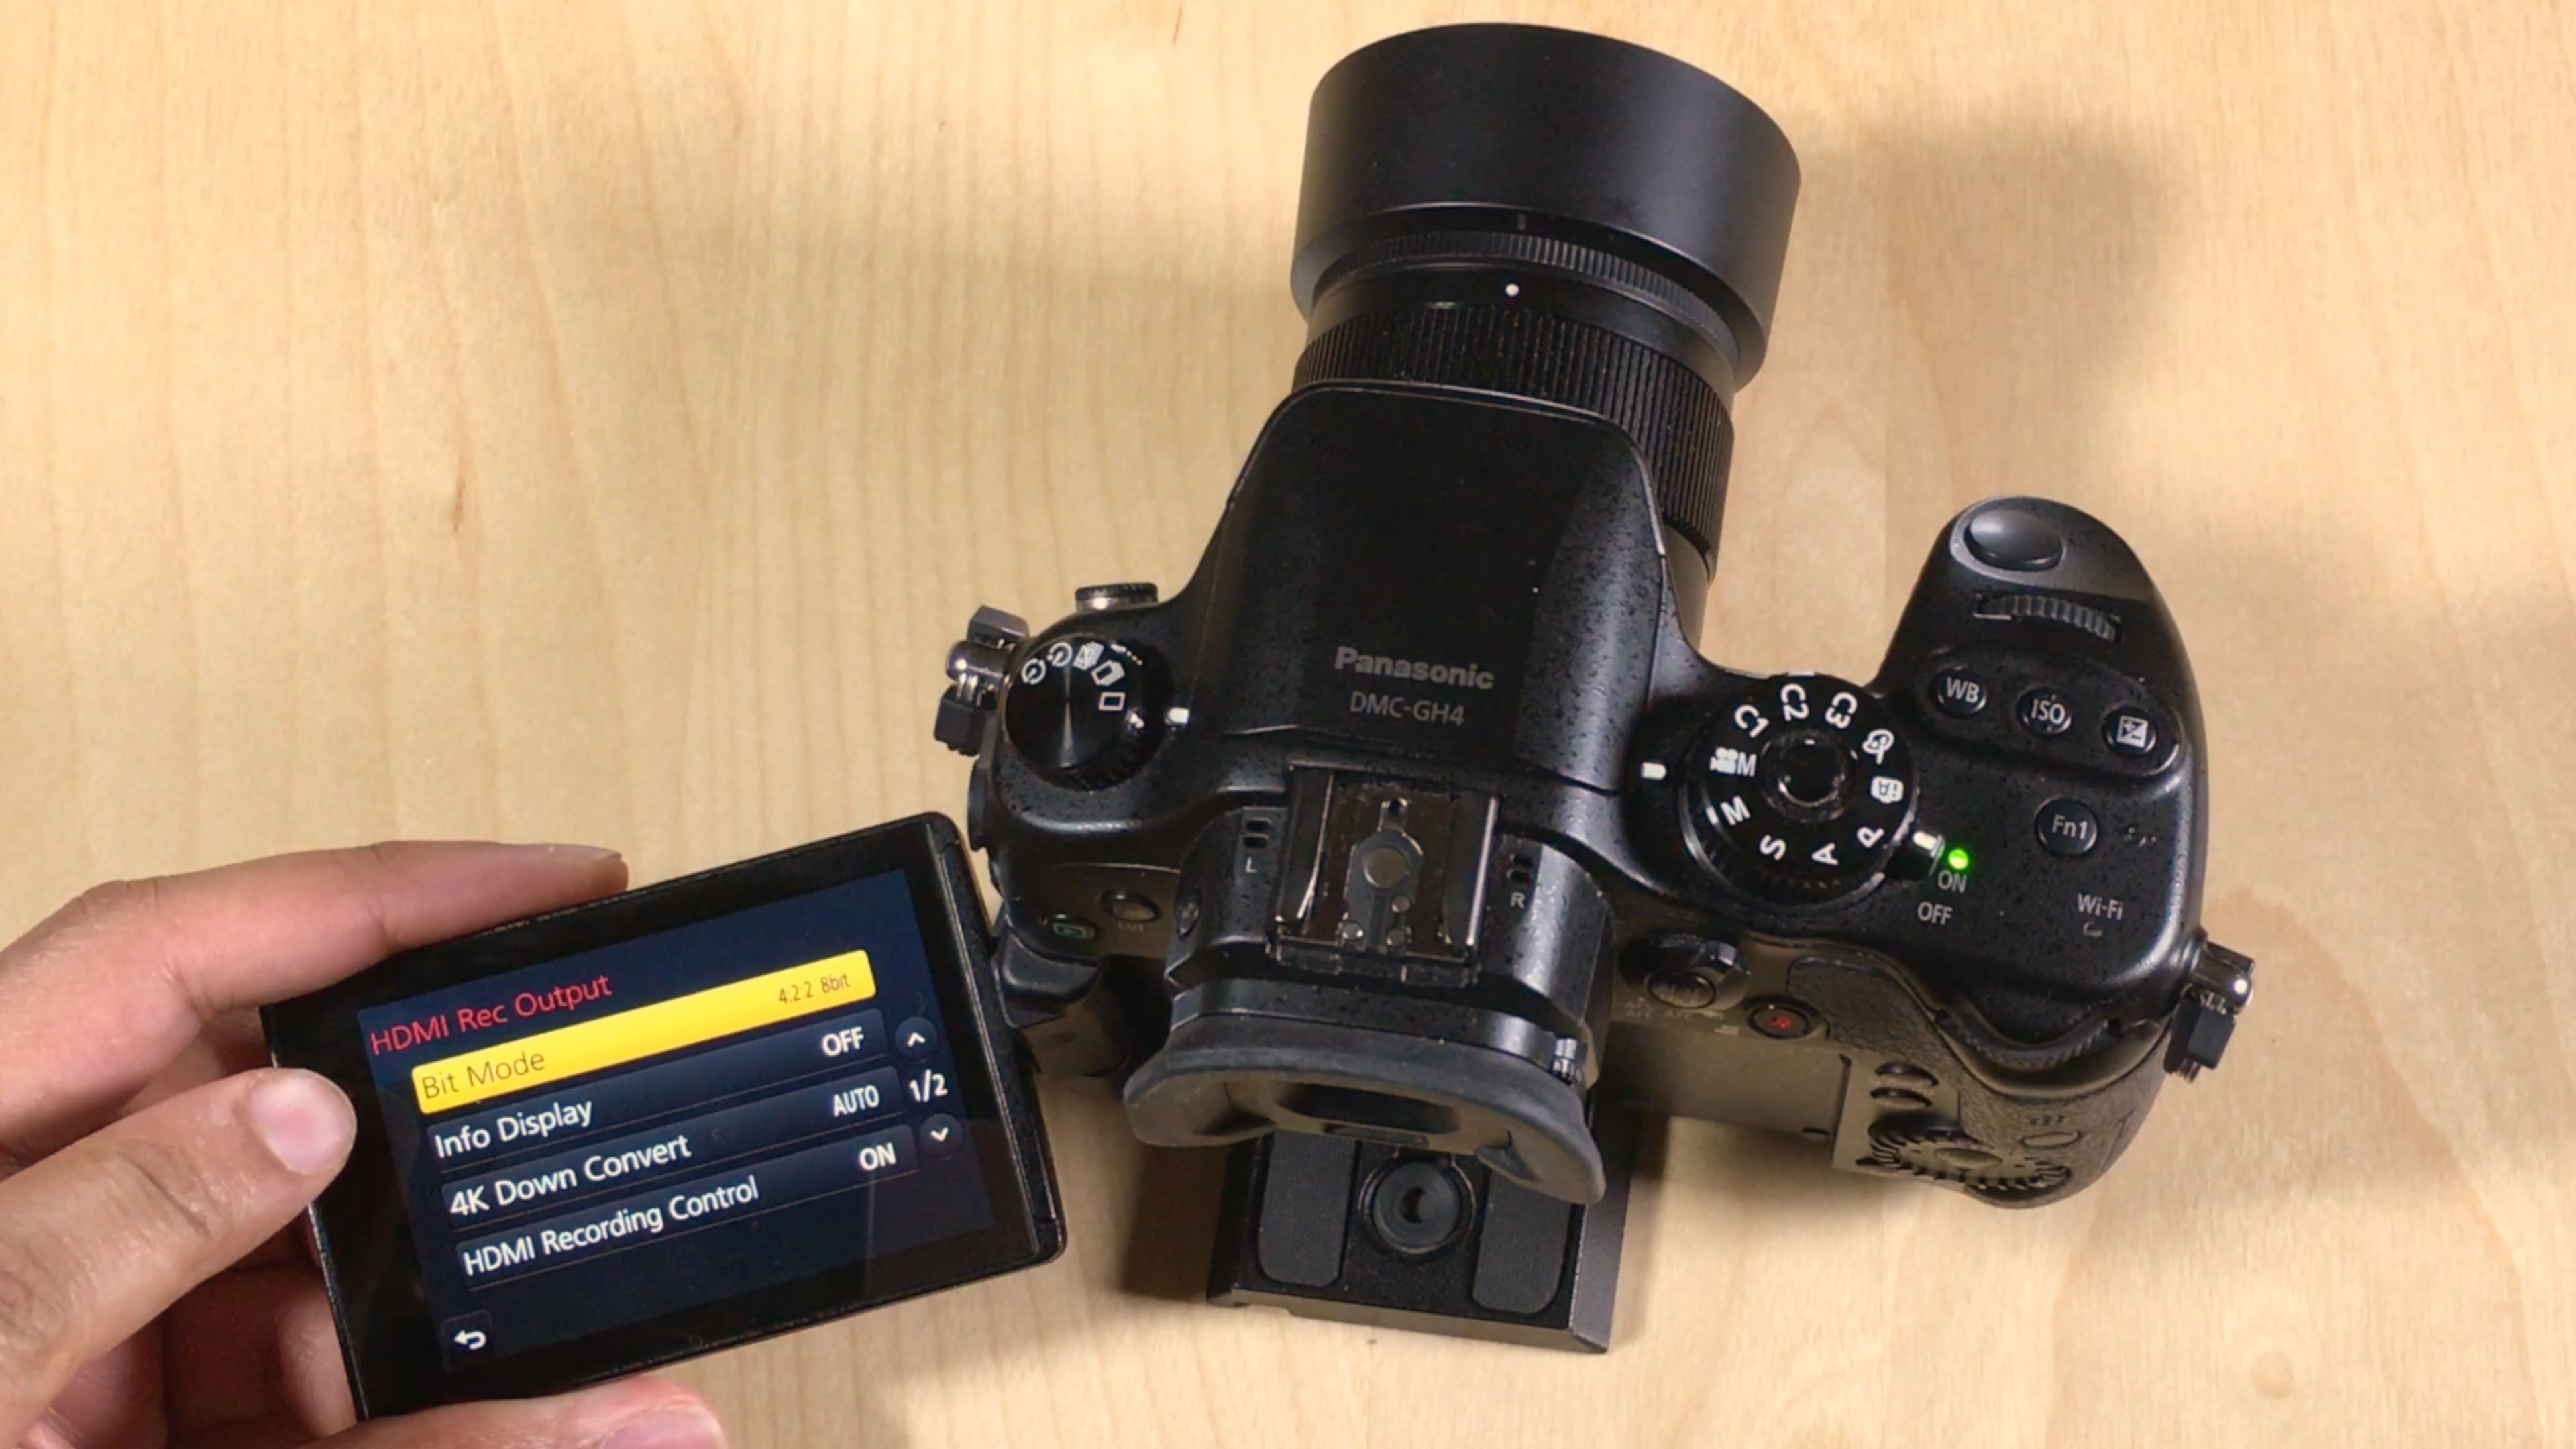
Another benefit is better image and color fidelity on the finished output. The Atomos Ninja Assassin lets users save 10-Bit ProRes 422 directly from the source via HDMI. In many cases, that trumps a camera’s internal storage capability. For example, my GH4 can only record 8-Bit natively, and that’s saved using a lesser codec.
Shooting directly to ProRes means that you no longer have to worry about optimizing the footage you shoot in post. It can mean better performance, and it can even result in better image quality for the final product, even after going through export compression, and additional compression when uploaded to YouTube.
The bottom line is there are a lot of variables involved here, and no one’s setup will be completely identical to another, but it’s always best to capture as much visual data as possible, and the Atomos Ninja Assassin, when paired together with the right camera, allows you to do just that.
It’s a 7” monitor, and more
Not only does the Atomos Ninja Assassin work as an excellent direct-to-ProRes recorder, it’s also a beautiful high definition monitor with touch screen controls. Because the monitor is 7”, it’s a much better device to view your in-progress footage on than any camera’s small built-in monitor.
The Ninja runs AtomOS, its operating system that features responsive touch input. I didn’t have to read any instructions to get started due to the intuitiveness of AtomOS. You don’t often associate camera menu systems with being easy to use, but AtomOS is actually a joy to use.
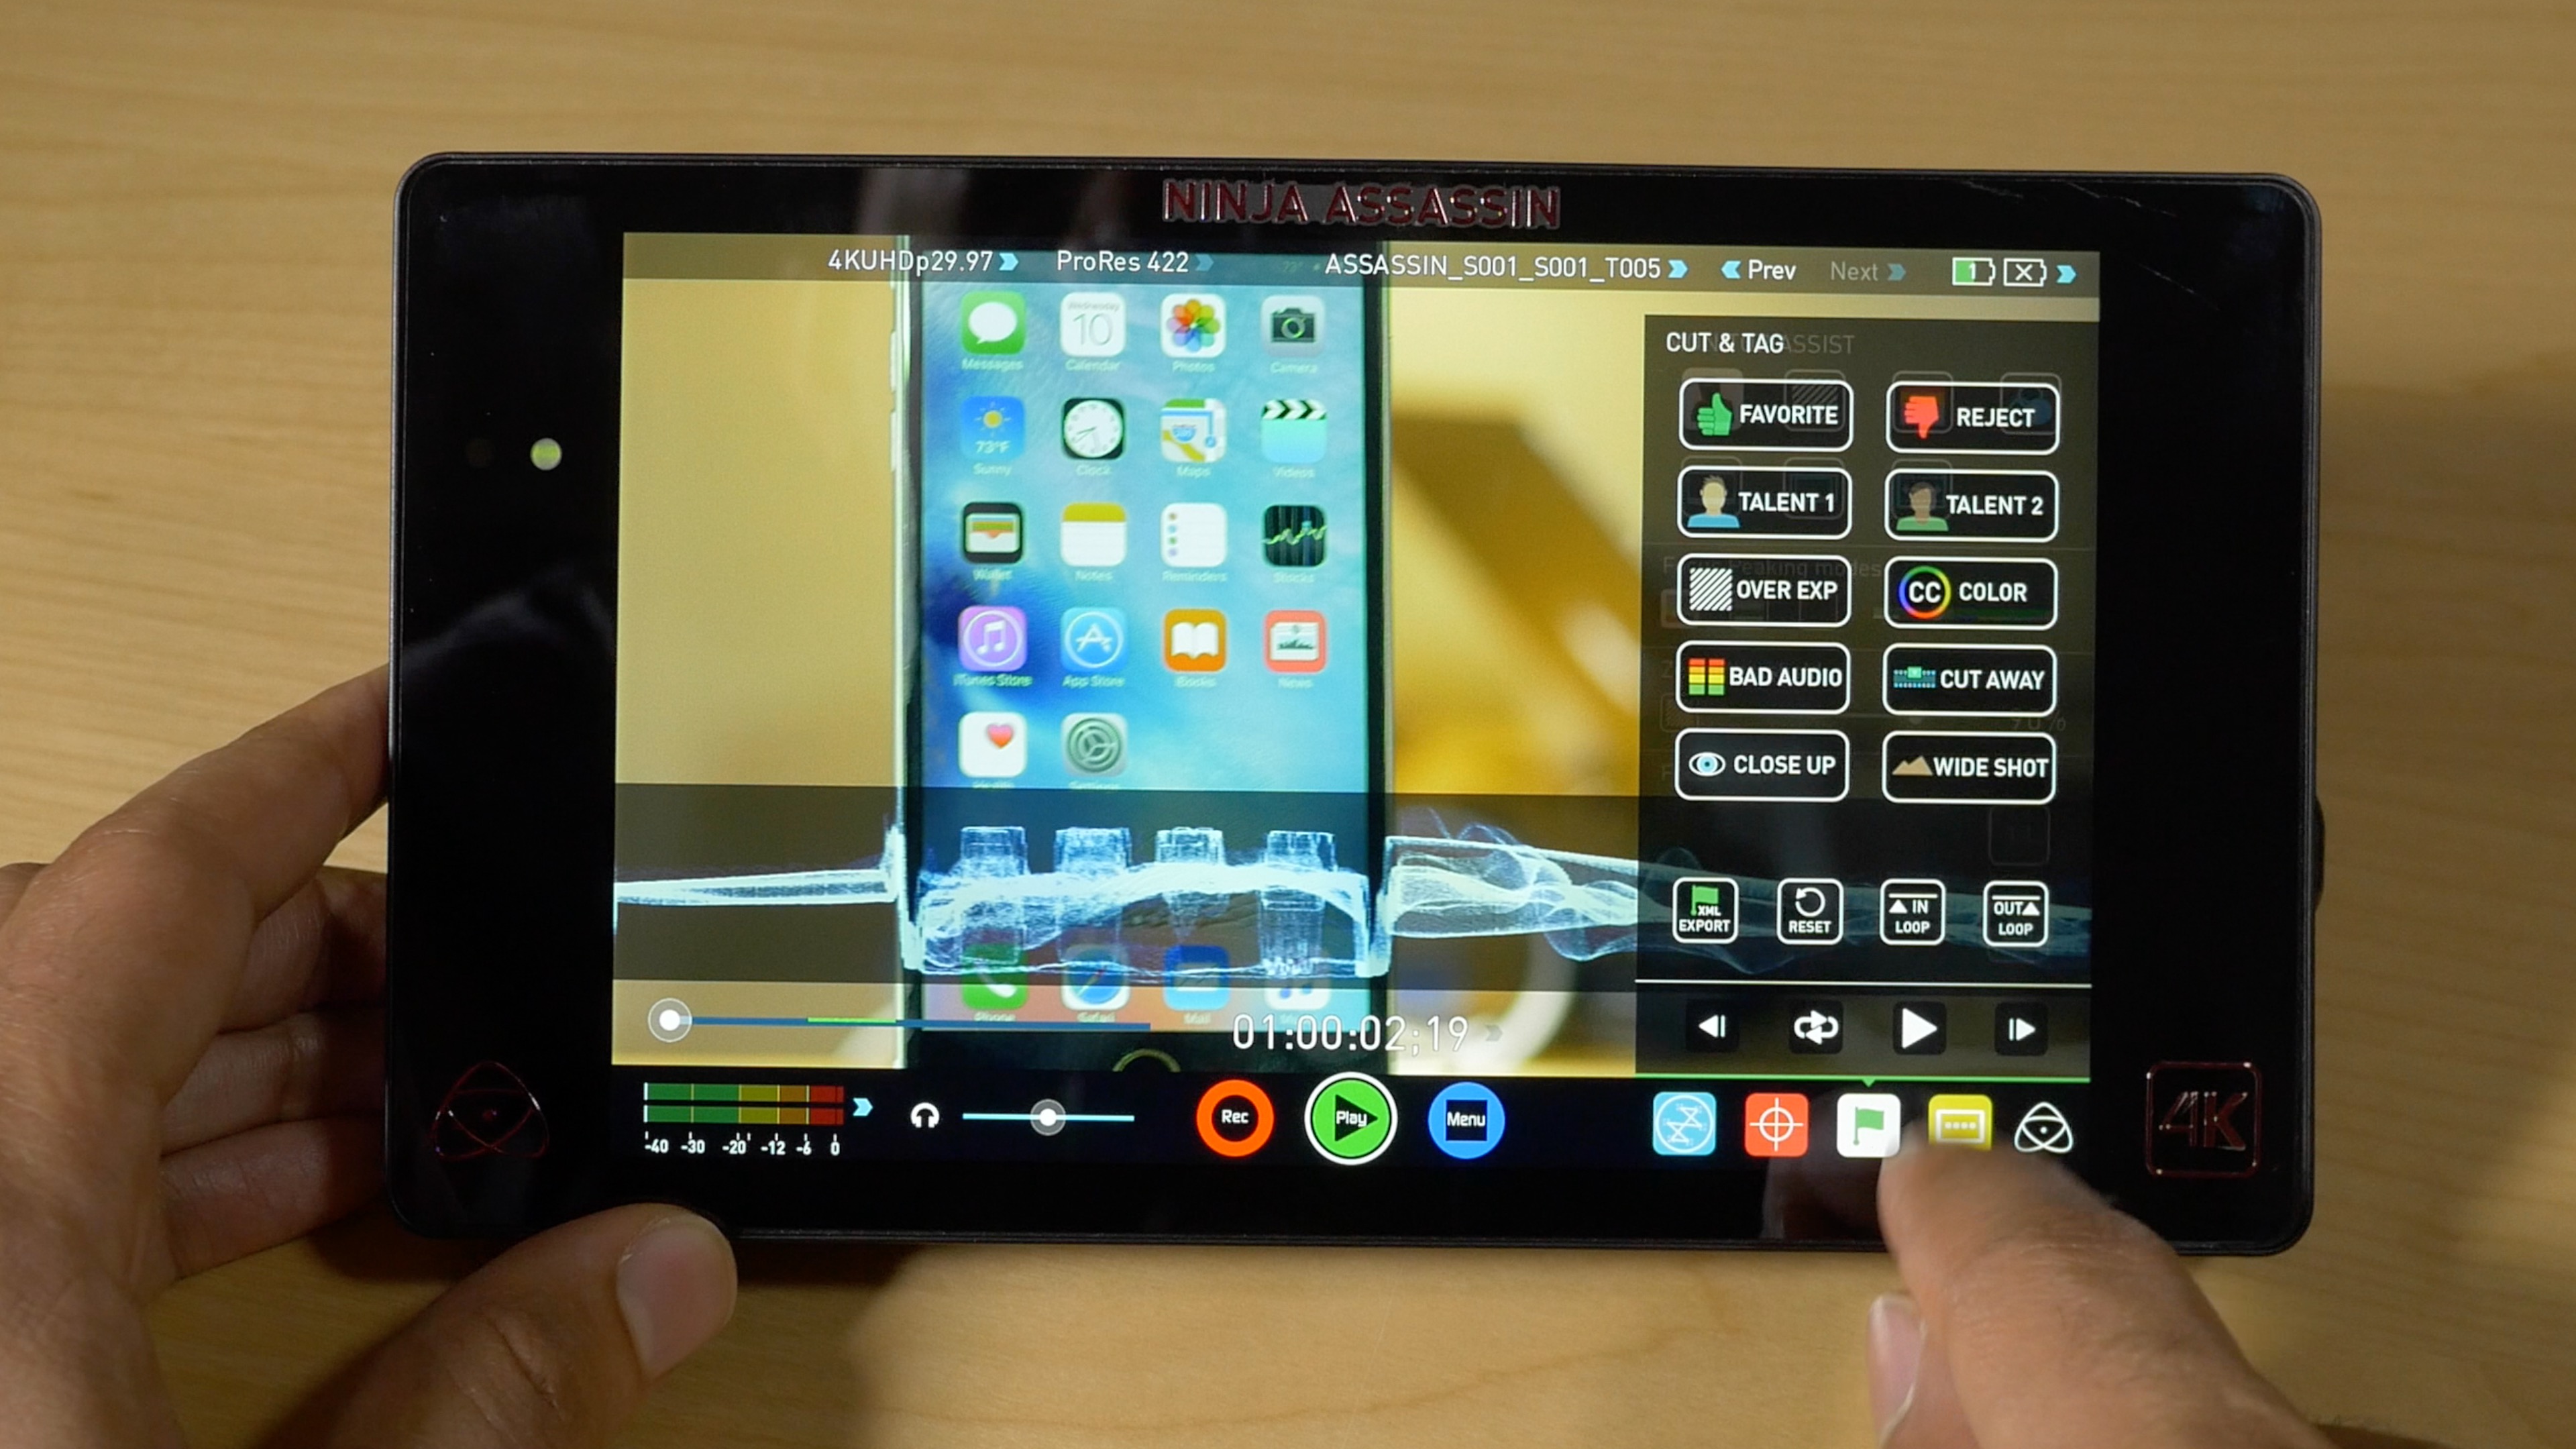
Because it works with Final Cut Pro X, you can even tag portions of your videos with keywords right from the Ninja itself, making it easier on your workflow in post. Once you’ve finished tagging, simply export the XML file and open it in Final Cut Pro X to see all of your tagged footage.
Another cool feature that I’ll briefly mention is the ability to load 3D LUTs and view the image on the monitor with a LUT applied, even if you’re shooting to a flat LOG profile. This makes it much easier to get exposure set right prior to recording, and it’s just a nicer way to view in-progress footage while still taking advantage of the extra dynamic range afforded by using a LOG profile.
The Price is right
At under 1K, you really can’t go wrong with the Atomos Ninja Assassin. Yes, $999 is still a lot of money, and yes, you will need to purchase a few additional things (like an SSD, batteries, and docking station) to get started, but it’s almost like you’re putting a supercharger on your camera. It’s breathed new life into my Panasonic GH4, and can probably do the same for a whole lot of different cameras out there. If you’re serious about your videography workflow, then you’ll likely conclude that $999 is a steal for all that the Ninja Assassin brings to the table.
Pros
+ Shoot to ProRes
+ 7” High Definition Touch Screen
+ Load 3D LUTS and view in real time
+ Tag footage with Keywords and export Final Cut Pro XML
+ Files aren’t broken up on long videos
+ Large SSDs provide better bang for buck
+ Features standard threads on top and bottom for mounting on rigs
Cons
– Requires accessories, which can inflate the price
– Rubber protective sheath is too loose-fitting
– Cost may still be prohibitive for some, especially after adding on accessories