The Apple Watch has built-in NFC, which stands for Near-Field Communication, for making wireless payments on the go. And in a typical Apple fashion, the watch doesn’t even have to be in the range of its paired iPhone, nor does it have to establish a network connection, to make the payment.
Before you can start making payments with a flick of your wrist, you’re going to need to set up Apple Pay on your Apple Watch. In this tutorial, I’m going to lay it all out for your and explain how to set up, manage and use Apple Pay with your Apple Watch.
Apple Pay on Apple Watch requires any iPhone from the iPhone 5 onward. Before you can take advantage of making contactless payments from your wrist, make sure you have the following:
- Apple Watch paired with your iPhone
- iOS 8.2 or later on your iPhone
- United States as your selected region
- Supported credit or debit card from a participating bank
You will also need to take care of the following:
- Set up a passcode on your Apple Watch
- Turn on Wrist Detection on Apple Watch
- Enable Bluetooth on your iPhone
- Connect to Wi-Fi or a cellular network on your iPhone
- Sign in with the same iCloud account on your iPhone and Apple Watch
Now that you’re all set, you’re ready to start exploring this tutorial.
How to set up Apple Pay on Apple Watch
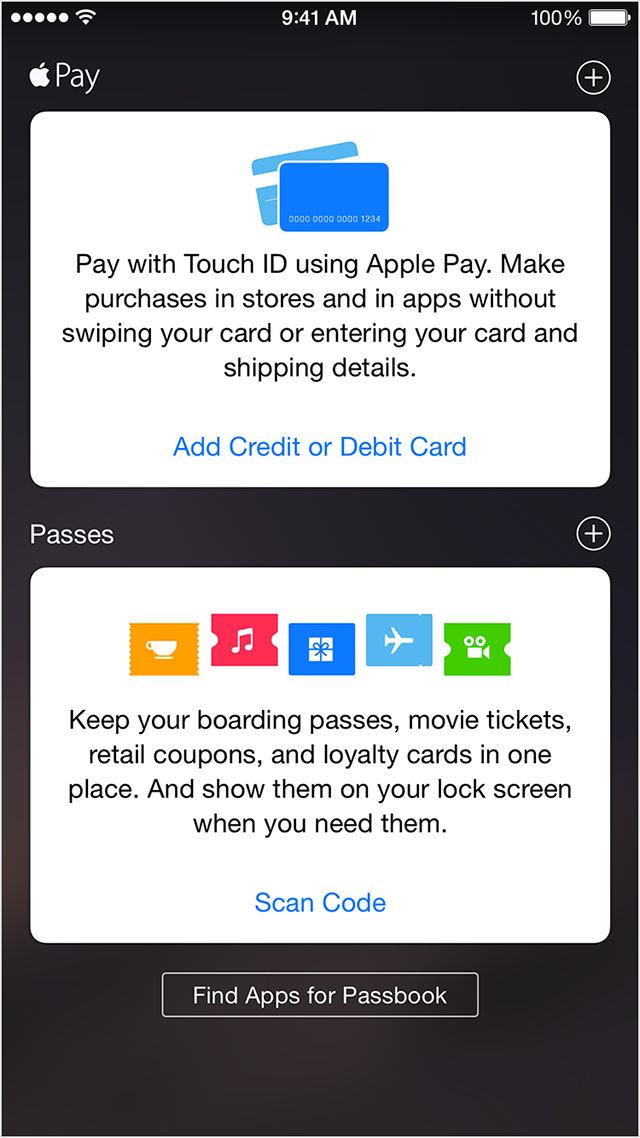
Before you can start paying from your wrist, Apple Pay must be set up on your Apple Watch so you’ll need to add payment cards to the device. This is the necessary step even if you’ve already set up Apple Pay on your iPhone or iPad.
Step 1: Unlock your Apple Watch
Step 2: Fire up the companion Apple Watch app on your iPhone and tap the My Watch tab at the bottom.
Step 3: Now tap the Passbook & Apple Pay option.
Step 4: Tap the Add Credit or Debit Card option and hit Next.
Step 5: If you don’t have a supported credit or debit card on file with iTunes, you’ll be asked to scan a new card for relevant information using your iPhone’s camera and fill in any additional information needed, including the card security code.
Otherwise, you’ll be asked to just enter the security code of the card you have currently on file with iTunes. If you don’t want to use this card, choose “Add a different credit or debit card.”
Step 6: Tap Next. Your newly added card will be listed as “Activating” until the verification process has been completed. This is done on your bank’s end and your bank can ask you to provide additional verification before it approves your card for Apple Pay.

You can also verify your card any time after you’ve added it to the Apple Watch app on iPhone. Just select it in the companion app, tap Enter Code and follow the instructions.
Tip: Use these steps to set up Apple Pay on your iPhone or iPad.
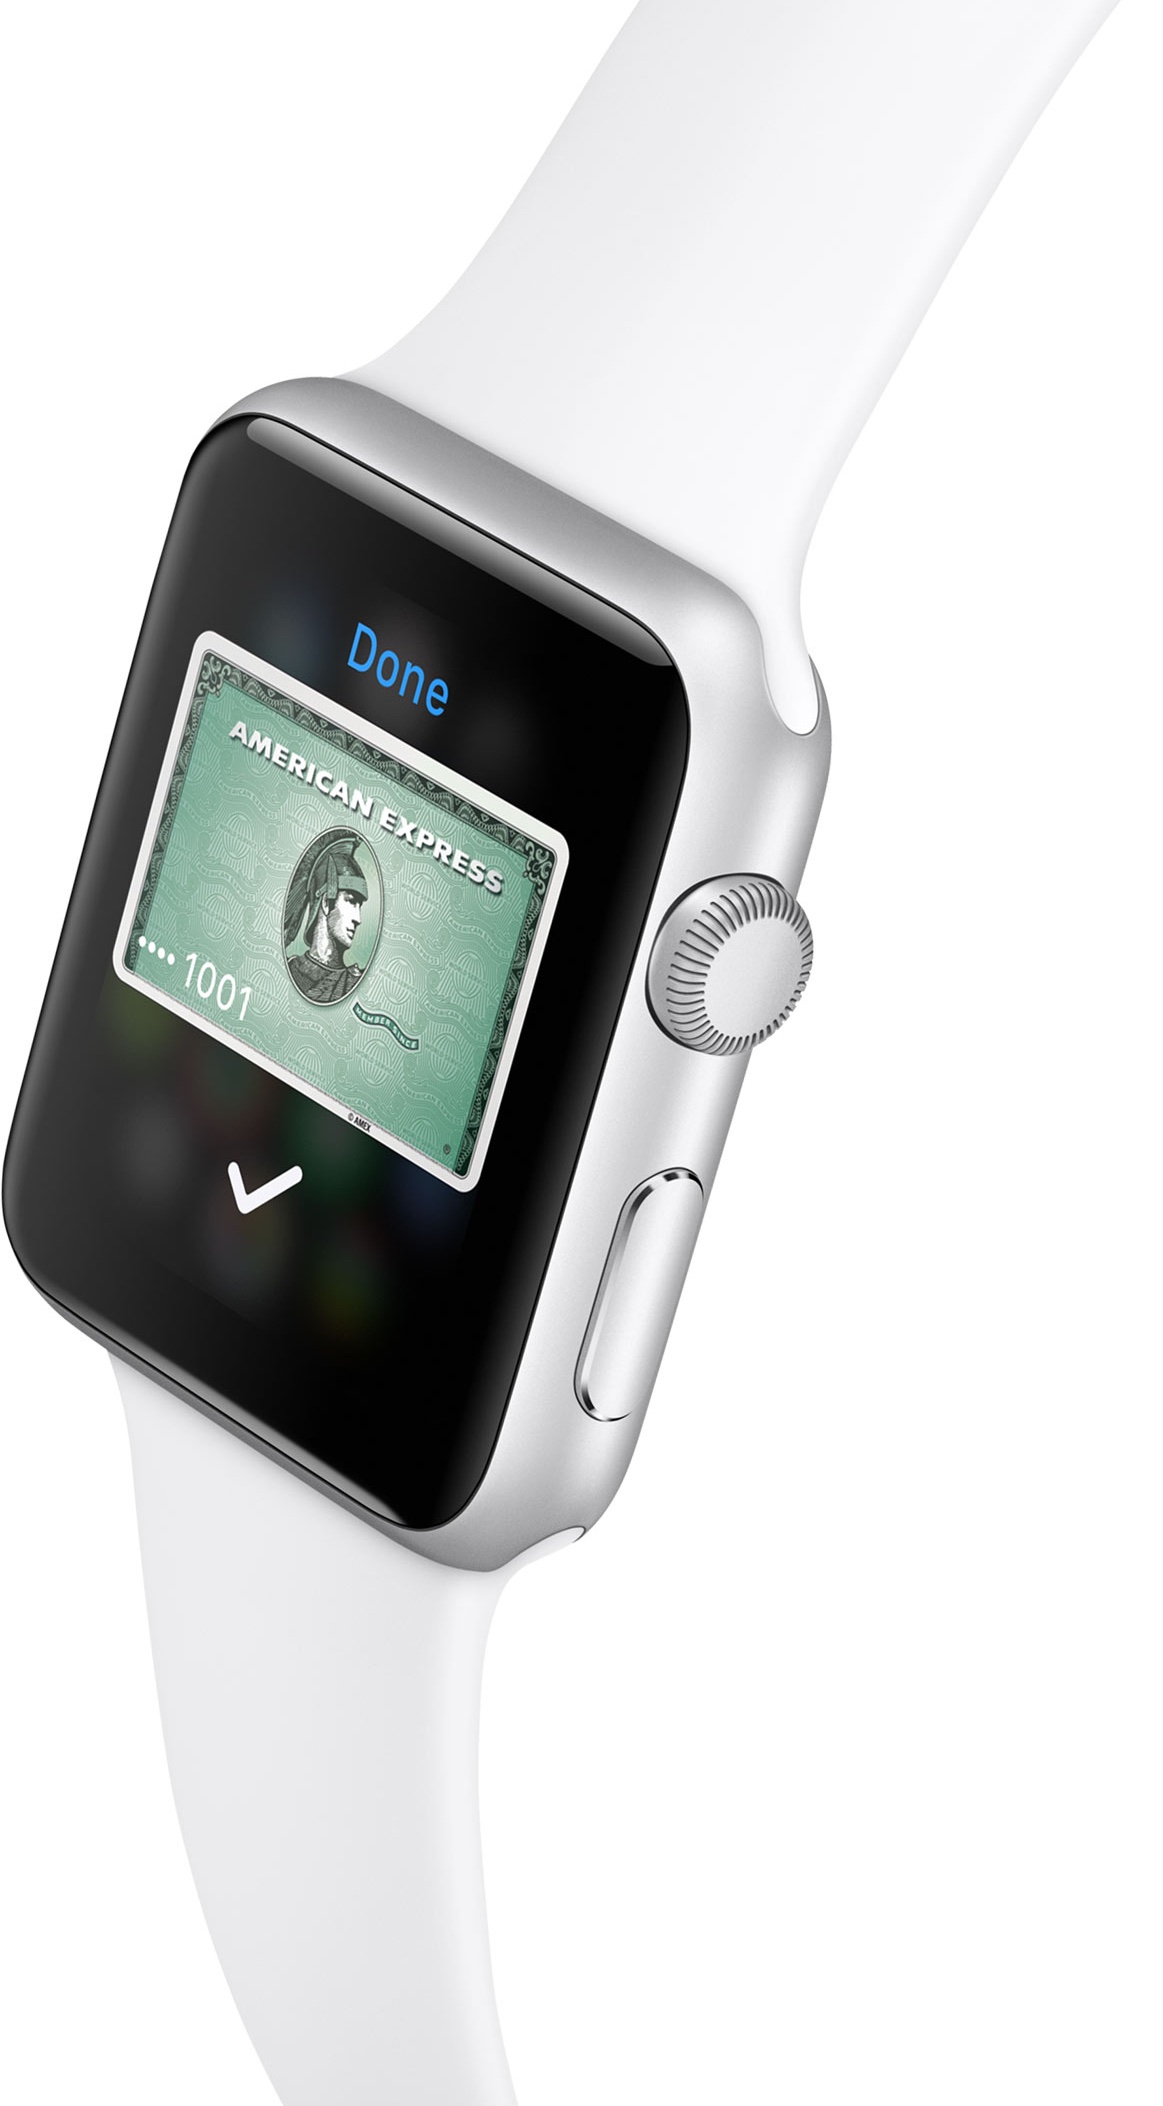
Step 7: Upon successfully verifying the card, tap Next and a notification pops up on your Apple Watch informing you that your card is ready for Apple Pay.
How to change your default card
To change your default card for Apple Pay, follow these simple steps.
Step 1: Open the Apple Watch companion app on your iPhone and navigate to the My Watch section by tapping the corresponding tab at the bottom.
Step 2: Now go to the Passbook & Apple Pay section.
Step 3: Hit the Default Card button and then tap a card you’d like to make your new default card for Apple Pay.
How to add another card
Step 1: Open the Apple Watch app on your iPhone and go to the My Watch section.
Step 2: Tap Passbook & Apple Pay.
Step 3: Hit the Add Credit or Debit Card option and follow the instructions.
How to remove a card
There are two ways to removing a credit or debit card associated with Apple Pay: using the Apple Watch itself or through the companion iPhone app.
To remove a card using the Apple Watch app on your iPhone:
Step 1: Open the Apple Watch companion app on your iPhone.
Step 2: Go to the My Watch section by tapping its tab at the bottom.
Step 3: Scroll down and hit the Passbook & Apple Pay option.

Step 4: Tap the card you wish to remove and then tap Remove.
To remove a card using the Apple Watch itself:
Step 1: First open Passbook on your watch by tapping its icon on the Home screen, or press and hold the Digital Crown to ask Siri to “open Passbook”.
Step 2: Swipe to the card you wish to remove and press firmly on the screen.
Step 3: Choose Delete.
How to use Apple Pay in stores
Follow these steps to pay with Apple Pay on your Apple Watch during checkout.
Step 1: Double-click the side button, right next to the Digital Crown.
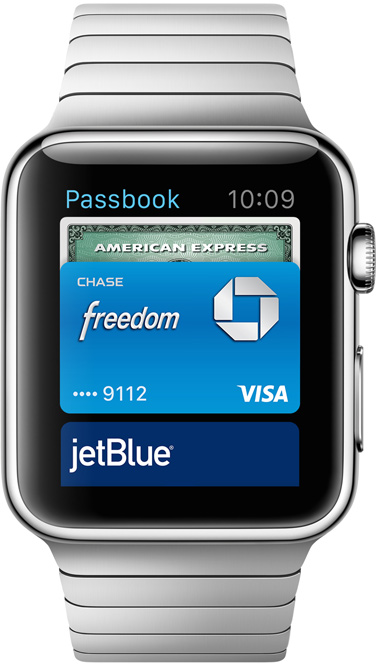
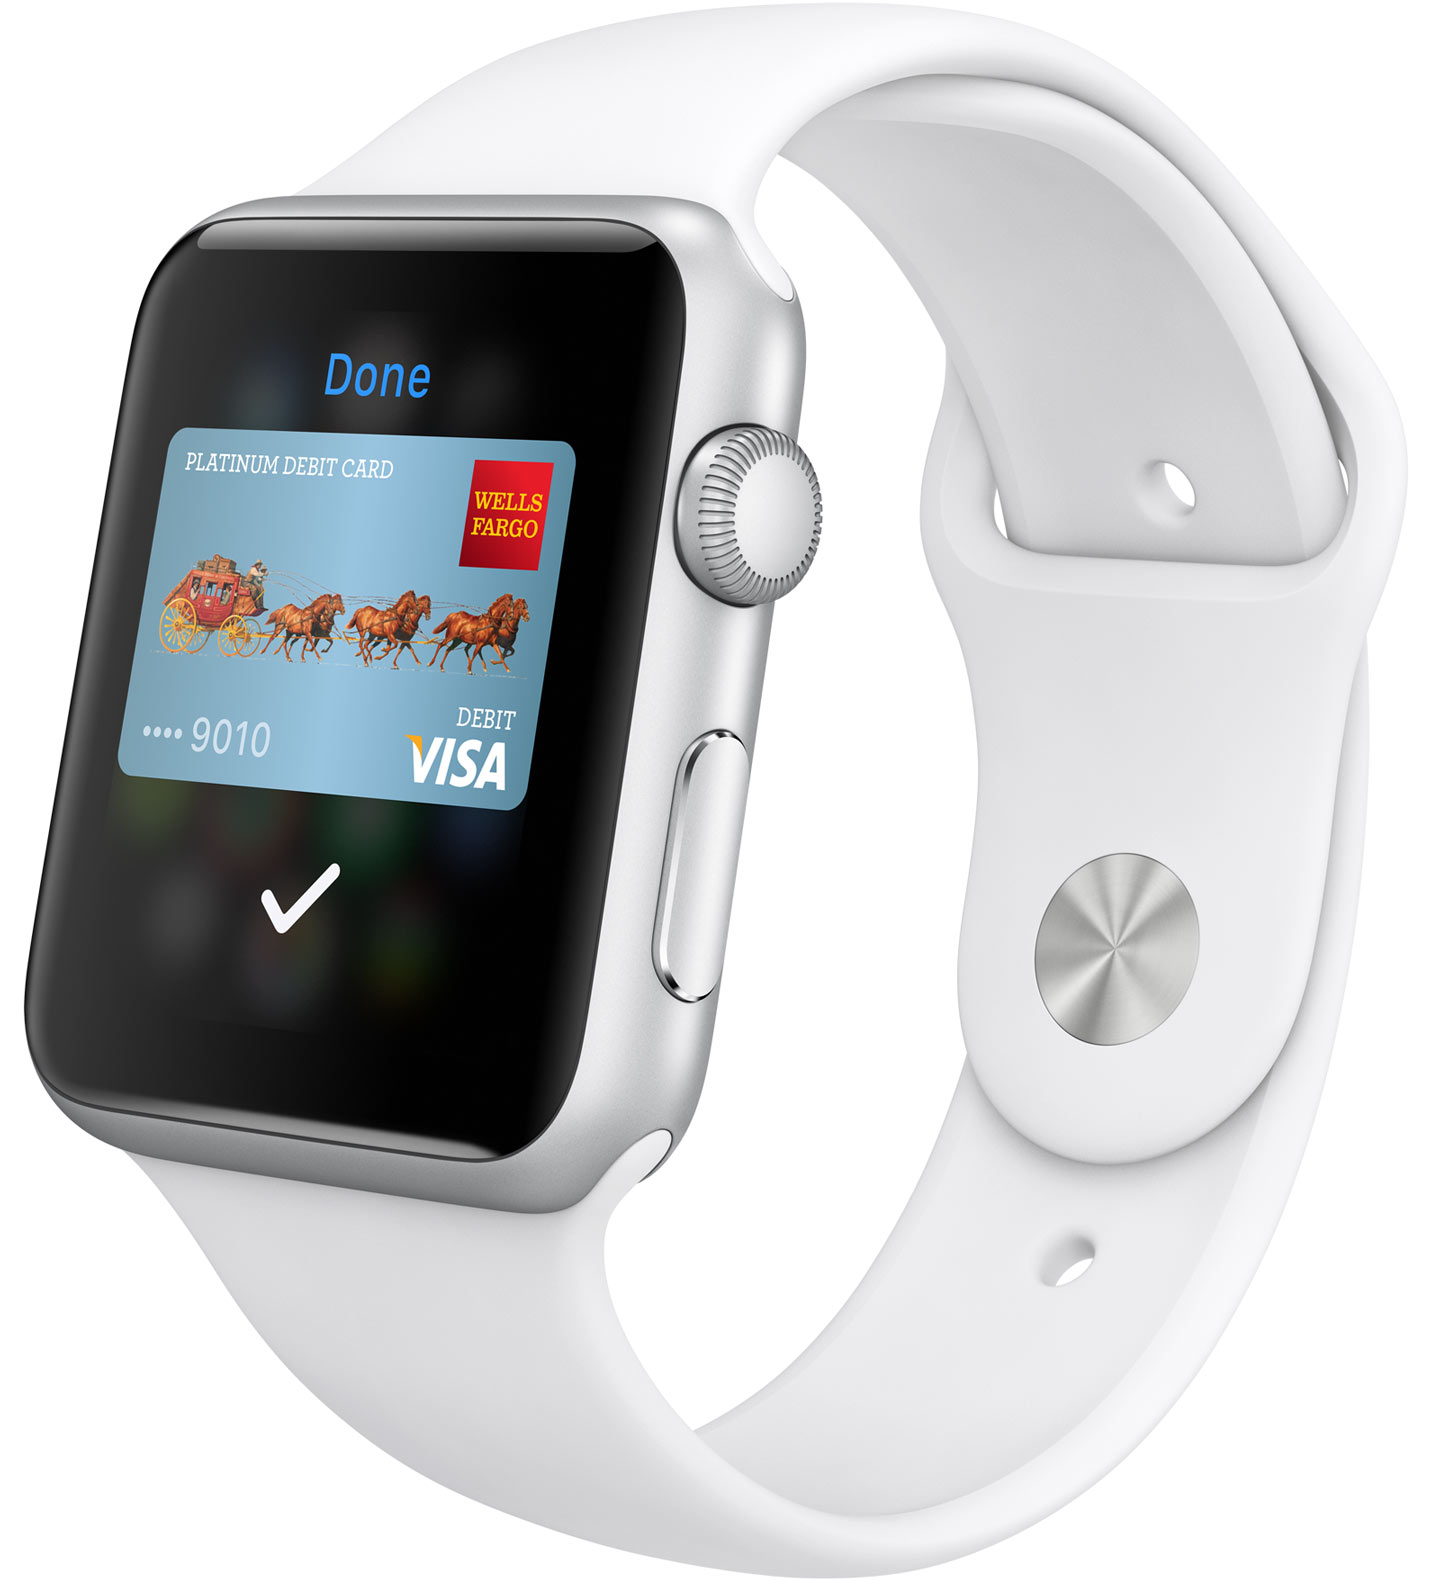
Step 2: Your default card will pop up. Or, switch to a different one by swiping.
Step 3: Once you have selected your desired card, Hold the face of your Apple Watch within a few centimeters of the contactless reader.
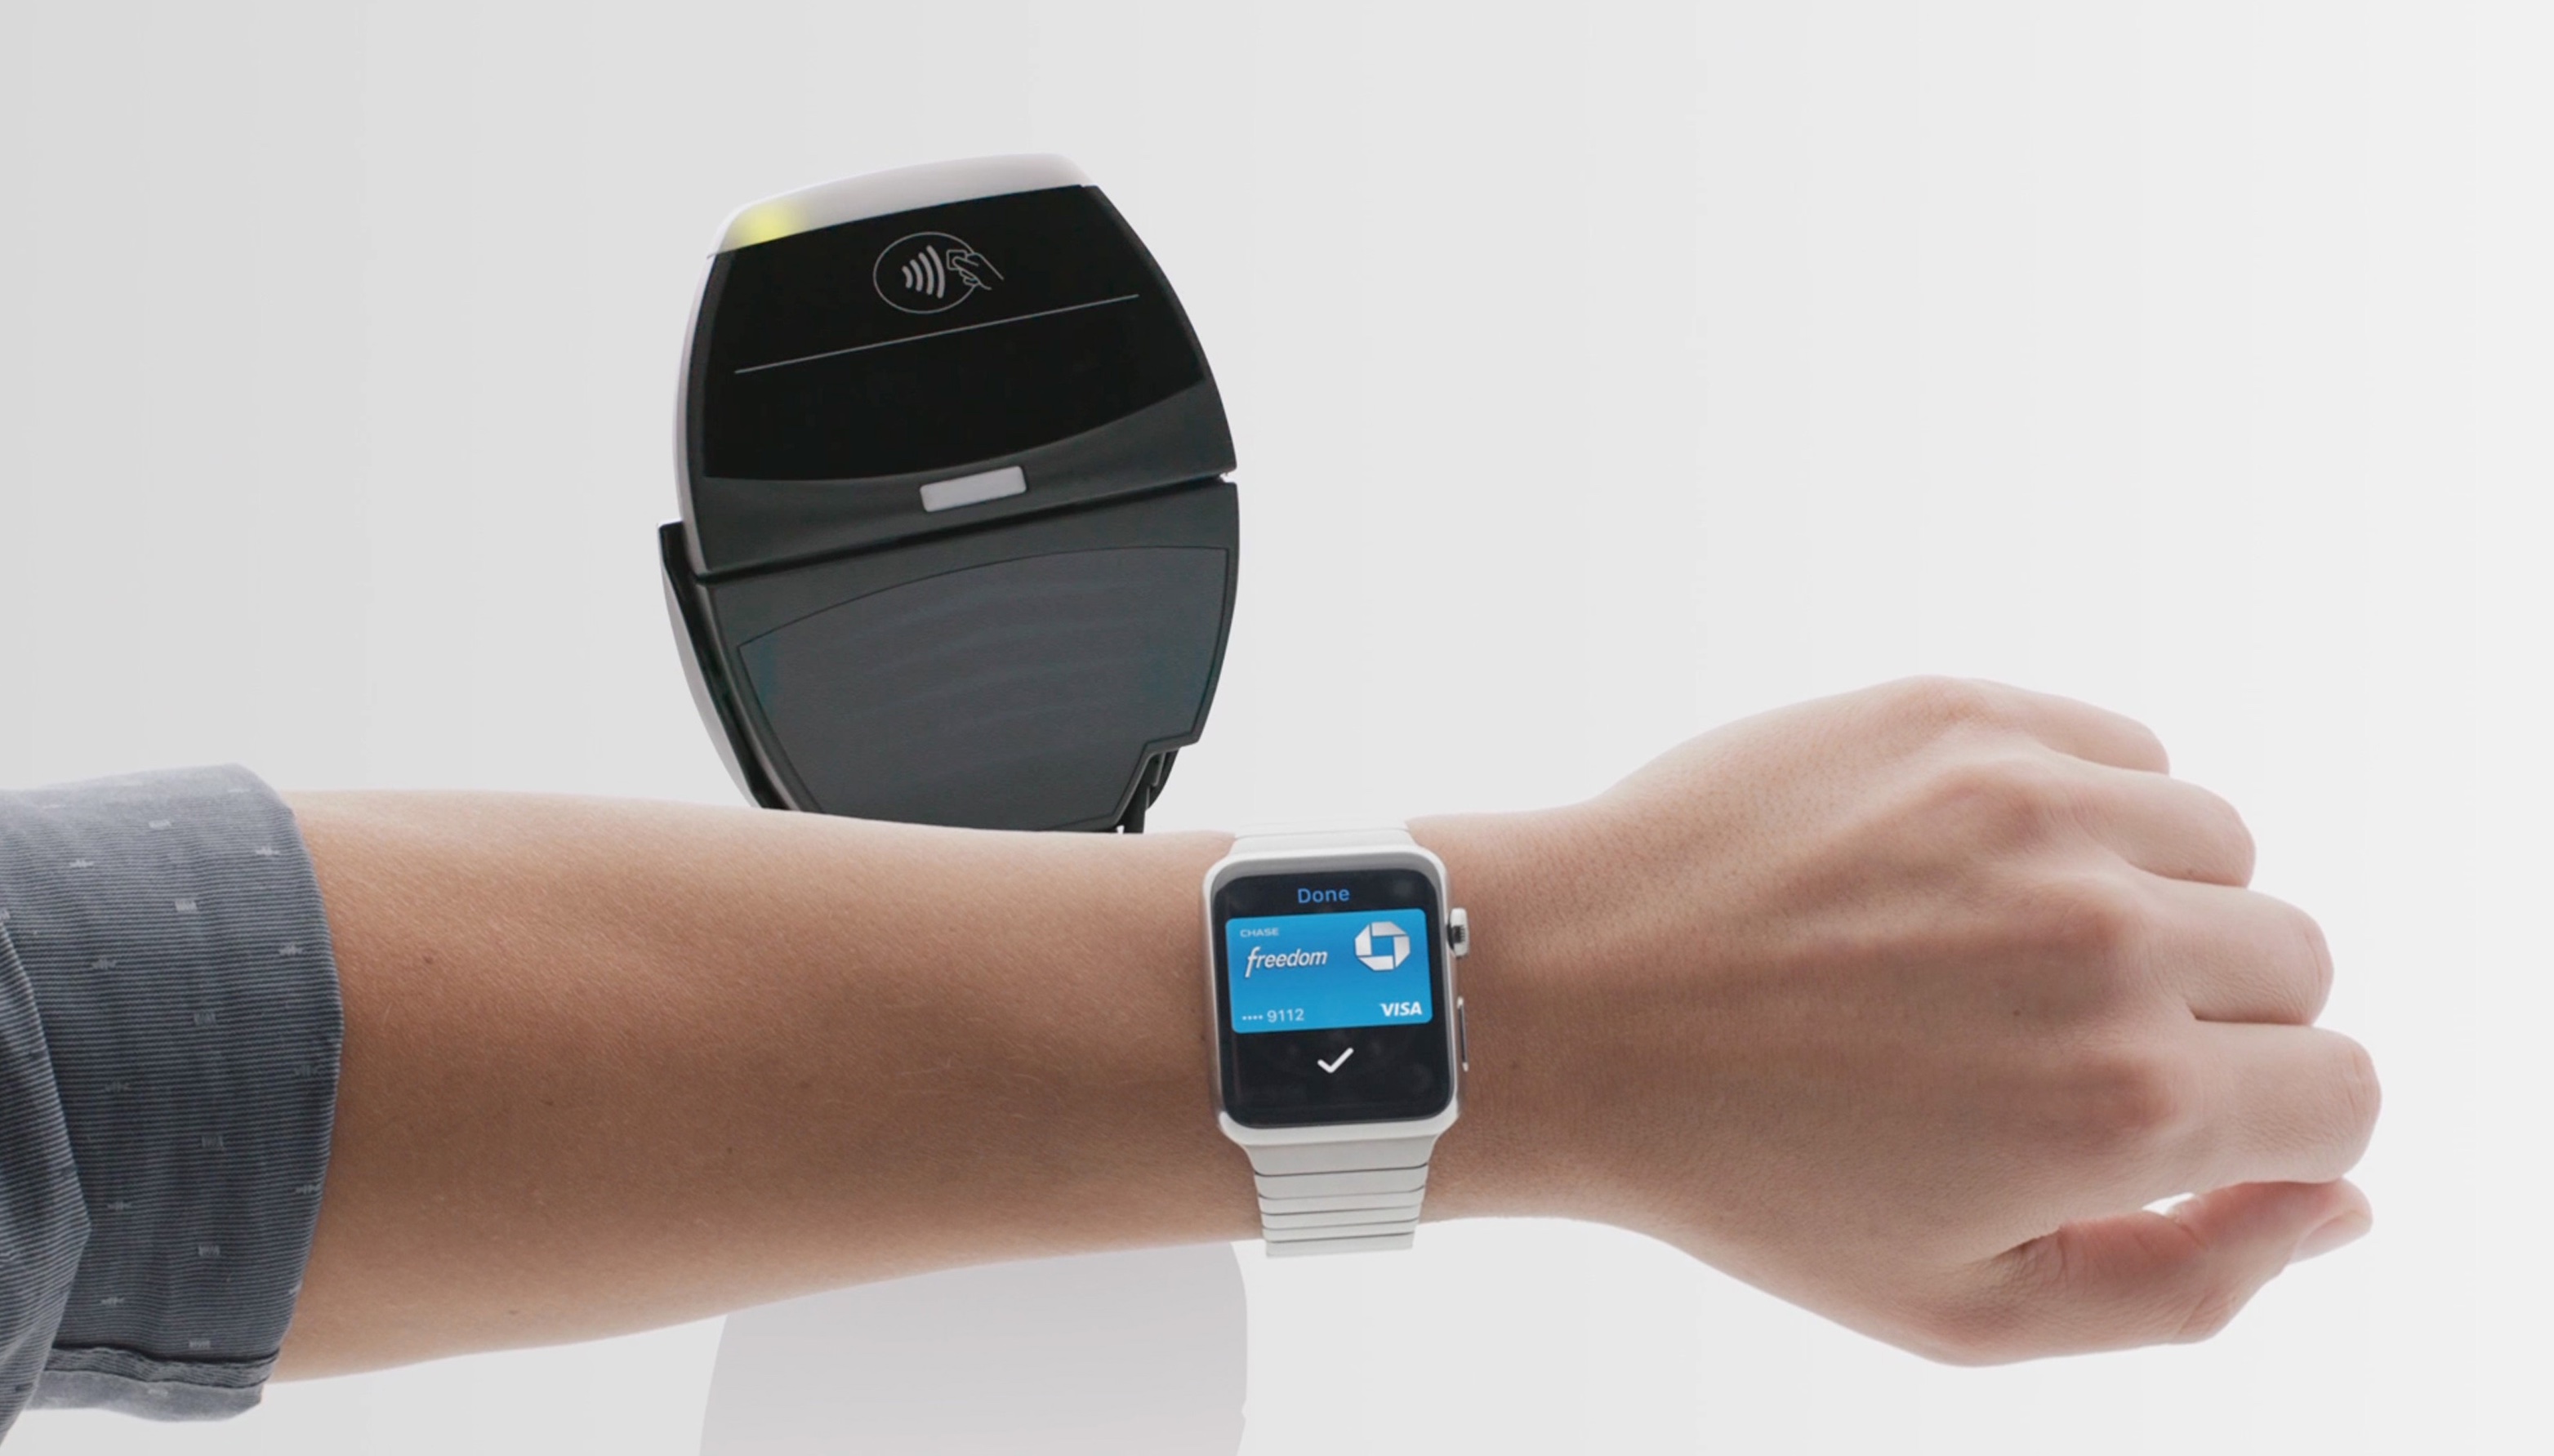
Step 4: You’ll feel a gentle pulse and hear a confirmation tone after the transaction completes.
Tip: Make sure to hold your Apple Watch near the reader.
To ensure that your retailer accepts Apple Pay, look for one of these pictograms on card readers and POS terminals at checkout.
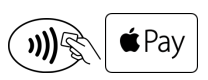
Tip: While Apple Pay is generally accepted at any point of sale which accepts contactless payments via NFC-enabled terminals, some retailers such as 7-Eleven, Jack in the Box, Home Depot, Rite Aid and CVS may choose to disable Apple Pay.
How to use loyalty and gift cards with Apple Pay
It’s possible to use your loyalty and gift cards when making a purchase with Apple Pay on Apple Watch, here’s how.
Step 1: Open Passbook on your iPhone and set up your loyalty and gift cards by choosing Scan Code.
Tip: Any changes made in Passbook for iPhone, like deleting or rearranging your loyalty and gift cards, will also reflect on your Apple Watch.
Step 2: At checkout, a notification for a card saved in Passbook will pop up on your Apple Watch.
Step 3: Tap the notification to open Passbook on the device.
Step 4: Turn the Digital Crown to scroll to the relevant card and tap it.
Step 5: The card information screen will be shown. Turn the Digital Crown to scroll down and show the barcode on your Apple Watch to the clerk.
How to disable Apple Pay if Apple Watch is lost or stolen
In case your Apple Watch is misplaced or stolen, you should immediately remove the ability to make payments using credit and debit cards on your wrist.
Step 1: Open a web browser on your Mac or Windows PC and sing in to iCloud.com.
Step 2: Now click the Settings icon. You’ll see a new screen listing all of your devices signed into this iCloud account under the My Devices section.
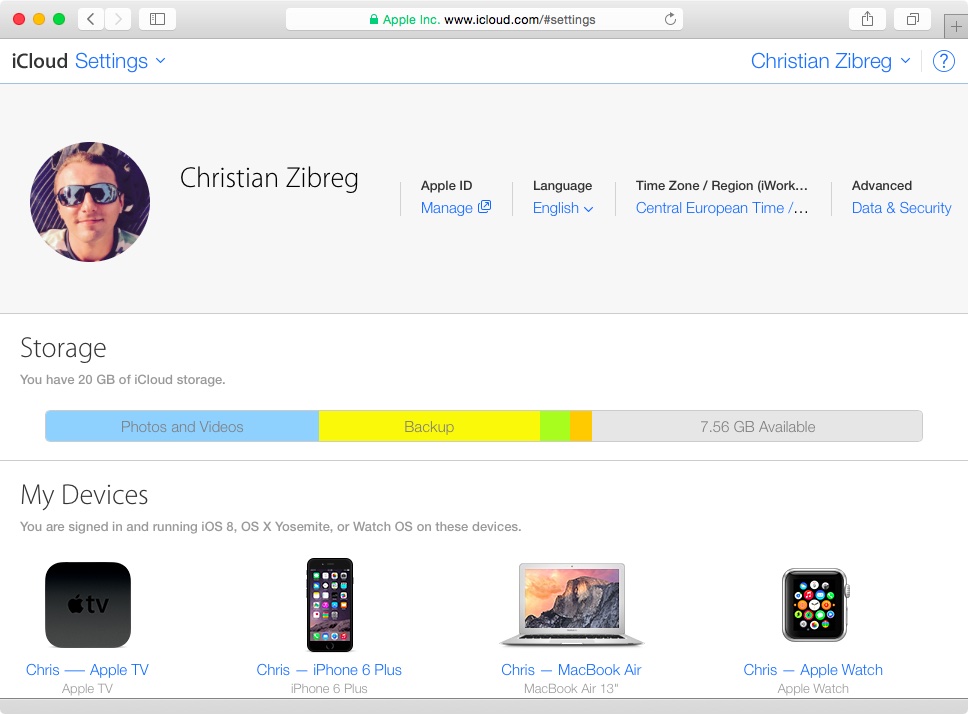
Step 3: Now click your Apple Watch and then Remove Device, as shown below.
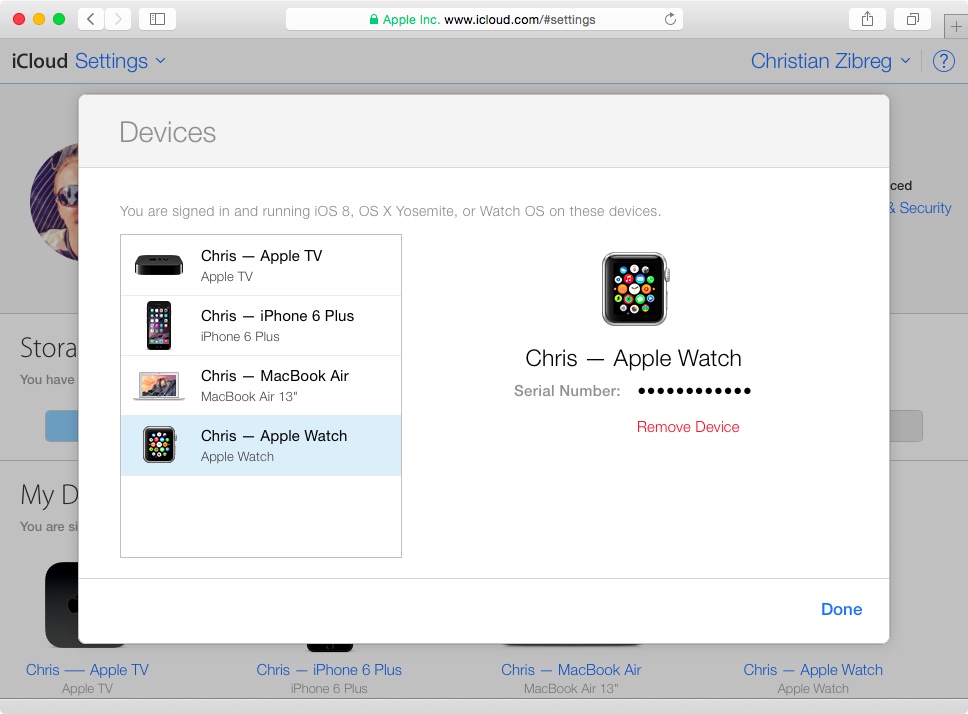
Step 4: A message will pop up saying that the selected device will reappear automatically should it connect to the Internet and you happen to be signed in to iCloud.

Step 5: Click Remove to confirm.
Tip: You can also call your bank or card issuer directly and ask them to suspend or remove your cards from Apple Pay.
Apple Pay FAQ
If you’re having trouble using Apple Pay on your Apple Watch or cannot set up the service on the device, you may find the following tips helpful.
Have you paired your device with a compatible iPhone?
Apple Pay for Apple Watch requires a paired iPhone (any iPhone from the iPhone 5 onward works with the device) with iOS 8.2 or later.
Learn how to pair an Apple Watch with an iPhone.
Did you select the United States as your region?
Although Apple Pay will extend to other markets, it’s currently limited to the United States. To select the United States as your region on your iPhone, open Settings and navigate to General > Language & Region > iPhone Language.
You will choose the region for your Apple Watch as part of the pairing and set up procedure in the Apple Watch companion app.
Are you signed into iCloud on your iPhone and Apple Watch?
Both your Apple Watch and iPhone must use the same iCloud account in order to use Apple Pay on your wrist. You can see what iCloud account you’re signed in to on your iPhone under the iCloud section of the Settings app.
You will sign in to iCloud on your Apple Watch as part of the pairing and set up procedure in the Apple Watch companion app.
If you sign out of iCloud, all credit and debit cards will be removed from the device.
Is your card/bank supported?
Many U.S. credit and debit cards can be used with Apple Pay, but not all credit card issuers and banks are supported. For detailed information about Apple Pay availability and current card issuers, check out Apple’s support document.
Is passcode enabled on Apple Watch?
Before you can use Apple Pay, a passcode must be set on your wearable device.
See why you should use passcode on your Apple Watch and follow these steps to lock and unlock Apple Watch. If you remove your Apple Watch passcode, all credit and debit cards will be removed from the device.
Is Wrist Detection turned on?
Apple Pay for Apple Watch requires that Wrist Detection be enabled.
Wrist Detection requires skin contact and alongside passcode represents an important security layer for Apple Pay on Apple Watch. To enable the feature, flip the Wrist Detection switch to ON under the My Watch > General section in the Apple Watch app on your iPhone.

If you turn off Wrist Detection, all credit and debit cards will be removed from your Apple Watch.
Did you unpair Apple Watch from iPhone?
If you unpair your Apple Watch from its connected iPhone, all credit and debit cards will be removed from your Apple Watch.
Issues adding a credit or debit card to Apple Pay?
If you’re still experiencing issues adding a credit or debit card to Apple Pay, it’s time to call your bank or credit card issuer directly because they’re “ready to help you with issues when adding credit or debit cards to your iPhone 6, iPhone 6 Plus, iPad Air 2, iPad mini 3 or Apple Watch,” according to Apple.
In addition to your bank who will help you resolve your issue, you can also contact AppleCare via email, chat or phone.
Should I choose Credit or Debit on the terminal?
In rare instances, paying with Apple Pay in a store may yield a message asking if you’d like to use Credit or Debit on the terminal. Apple recommends choosing Credit “to get the most consistent Apple Pay experience” as choosing Debit might not always work successfully with some older merchant payment terminals and backend systems.
How secure is Apple Pay?
Using Apple Pay with your Apple Watch is both convenient and secure because a) you don’t need to have your iPhone with you at all and; and b) Apple doesn’t store rich details of your transactions so merchants can’t tie back information to you.
Adding a credit or debit card to your Apple Watch creates a unique Device Account Number which gets encrypted and securely stored in the Secure Element, a dedicated chip in Apple Watch walled off from the rest of the system.
Neither Apple nor your device sends your actual credit or debit card numbers to merchants. Only your Device Account Number, along with a transaction-specific dynamic security code, is used to process the payment.
Merchants only receive information like name, email address, billing and shipping addresses you authorize to share to fulfill your order.
“Your card number and identity aren’t shared with the merchant, and your actual card numbers aren’t stored on your device or on Apple servers,” explains the company.
What about rewards from my card when using Apple Pay?
When you pay using Apple Pay, you will automatically earn any rewards provided by your credit or debit cards. “Just set up your participating cards on Apple Watch, and you’ll continue to get the same rewards, benefits and security,” notes Apple.
Also read:
- Seven cool things Apple Watch can do without its paired iPhone
- The many things Apple Watch can do on its own when connected to Wi-Fi
- How to set up and use Apple Pay with iPhone and iPad
- How to set up a passcode on your Apple Watch
- What to do if you forget your Apple Watch passcode
- Why you should be using a passcode on your Apple Watch
More about Apple Watch
To get the most out of your Apple wearable device, feel free to browse our archive containing a great selection of how-tos, tips, tutorials and other related articles:
Have a smart tip you want to share with fellow readers? Faced with a problem you couldn’t figure out on your own? Let us know at help@iDownloadBlog.com and we’ll do our best to feature your submission in future tips and tutorials.